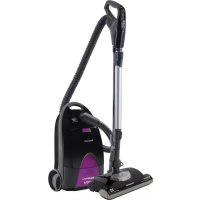
MCUL427 - Vacuum Cleaner PANASONIC - Free user manual and instructions
Find the device manual for free MCUL427 PANASONIC in PDF.

Download the instructions for your Vacuum Cleaner in PDF format for free! Find your manual MCUL427 - PANASONIC and take your electronic device back in hand. On this page are published all the documents necessary for the use of your device. MCUL427 by PANASONIC.
USER MANUAL MCUL427 PANASONIC
TO OUR VALUED CUSTOMER
We are very pleased to welcome you to the Panasonic family of products. Thank you for purchasing this product. Our intent is that you become one of our many satisfied customers.Proper assembly and safe use of your vacuum cleaner are your responsibilities. Your vacuumcleaner is intended only for household use. The vacuum cleaner should be stored in a dry,indoor area. Read the Operating Instructions carefully for important use and safetyinformation.Special care is required when vacuuming certain types of carpet or floor covering. Alwayscheck the carpet or floor covering manufacturer's recommended cleaning instructions beforevacuuming.
PLEASE PAY CLOSE ATTENTION TO ALL
Never vacuum damp or wet surfaces or liquids.DO NOT store vacuum cleaner outdoors.Replace worn or frayed power cord immediately.Unplug from outlet when not in use and before servicing.
1. Use your vacuum cleaner only as described in this manual. Use only with Panasonic
recommended attachments.
2. Disconnect electrical supply before servicing or cleaning out the brush area.
3. Do not leave vacuum cleaner when plugged in. Unplug from outlet when not in use
and before servicing.
4. To reduce the risk of electrical shock - Do not use outdoors or on wet surfaces.
5. Do not allow to be used as a toy. Close attention is necessary when used by or near
6. Do not use with a damaged cord or plug. If vacuum cleaner is not working as it
should, has been dropped, damaged, left outdoors, or dropped in water, return it to a Panasonic Service Center.
7. Do not pull or carry by cord, use cord as a handle, close a door on cord, or pull cord
around sharp edges or corners. Do not run vacuum cleaner over cord. Keep cord away from heated surfaces.
8. Do not unplug by pulling on cord. To unplug, grasp the plug, not the cord.
9. Do not handle plug or vacuum cleaner with wet hands.
10.Do not put any objects into openings.
11. Do not use with any opening blocked; keep free of dust, lint, hair, and anything that
may reduce air flow. 12.Keep hair, loose clothing, fingers, and all parts of body away from openings and moving parts. 13.Turn off all controls before unplugging. 14.Use extra care when cleaning on stairs. Do not put on chairs, tables, etc. Keep on floor. 15.Do not use vacuum cleaner to pick up flammable or combustible liquids (gasoline, cleaning fluid, perfumes, etc.), or use in areas where they may be present. The fumes from these substances can create a fire hazard or explosion. 16.Do not pick up anything that is burning or smoking, such as cigarettes, matches, or hot ashes. 17.Do not use vacuum cleaner without dust bin and/or filters in place. 18.Unplug before connecting air turbine (if applicable).
19. Hold plug when rewinding onto cord reel. DO NOT allow plug to whip when rewinding.
20.You are responsible for making sure that your vacuum cleaner is not used by anyone who is unable to operate it properly.
SAVE THESE INSTRUCTIONS
THIS VACUUM CLEANER IS INTENDED FOR HOUSEHOLD USE ONLY NOTE: Before you plug in your Panasonic vacuum cleaner, make sure that the voltage indicated on the rating plate located at the back of the vacuum cleaner is the same as your local electrical supply.
CAUTION Moving parts! To reduce the risk of personal injury, DO NOT touch the brush when vacuum cleaner is on. Contacting the brush while it is rotating can cut, bruise or cause other injuries. Always unplug from electrical outlet before servicing. Use caution when operating near children. NOTE: To reduce the risk of electrical shock, this vacuum cleaner has a polarized plug, one blade is wider than the other. This plug will fit in a polarized outlet only one way. If the plug does not fit fully in the outlet, reverse the plug. If it still does not fit, contact a qualified electrician to install the proper outlet. DO NOT CHANGE THE PLUG IN ANY WAY. Only use outlets near the floor. Power Cord WARNING Personal Injury and Product Damage Hazard
- DO NOT place hands or feet under the vacuum cleaner at any time.
- DO NOT plug in if switch is in ON position. Personal injury or property damage could result.
- The cord moves rapidly when rewinding. Keep children away and provide a clear path when rewinding the cord to prevent personal injury.
- DO NOT use outlets above coun- ters. Damage from cord to items in surrounding area could occur.
- Walls ➢ The dusting brush may be used on the following items:
- Walls FEATURES Note: Always clean tools before using. ➢ The air turbine may be used on the following items:
Performing the tasks in the following sections will keep your new Panasonic vacuum cleaneroperating at peak performance levels and will ensure these high levels for years to come.Check the BEFORE REQUESTING SERVICE section in this manual for recommendations onperforming some of these tasks to help solve various problems that may occur. WARNING Electrical Shock or Personal Injury Hazard Disconnect the electrical supply before servicing or cleaning the vacuum cleaner. Failure to do so could result in electrical shock or personal injury from vacuum cleaner suddenly starting. Emptying Dust Bin ➢ Always empty the dust bin when dirt level reaches the “MAX” line. ➢ Grasp the handle on the top of the dust bin.
➢ After the dust bin is empty of debris, firmly close the door. Make sure you hear a “click” sound to indicate that the door is fully latched. Door Latch Loquet du couvercle Seguro de la puerta Door Couvercle Puerta
➢ Place dust bin back into vacuum cleaner by inserting the bottom first and tilting back. ➢ Push forward and lower dust bin handle to lock dust bin in place.- 35 -
Slots Fentes Ranuras Tabs Languettes Lengüetas ➢ Place the vacuum cleaner in the upright position standing on the handle. This will minimize wheel interference when installing lower plate. ➢ Reinstall lower plate by (1) aligning tabs on front edge of lower plate with slots in the nozzle and (2) rotating to installed position. Four Screws Quatre vis Cuatro Tornillos ➢ Lay vacuum cleaner on the floor with the bottom up and nozzle flat. ➢ Install the four screws to the nozzle cover. ➢ Route nozzle hose to hose holder. Align nozzle hose bracket with retaining bracket on body and slide down unit it clicks into place. ➢ Return the vacuum cleaner to the upright position before plugging into an electrical outlet.- 47 -
Cleaning Exterior and Tools ➢ Turn off and unplug the vacuum cleaner. ➢ Clean exterior using a clean, soft cloth that has been dipped in a solution of mild liquid detergent and water and wrung dry. ➢ DO NOT drip water on the vacuum cleaner and wipe dry after cleaning. ➢ DO NOT clean tools in dishwasher or clothes washer. ➢ Crevice tool may be washed in warm soapy water, rinse and air dry. ➢ DO NOT use tools if they are wet.- 53 -
fuse. replace fuse at household service panel.
3. Tripped thermal protector. 3. Let cool 50 minutes.
4. ON/OFF not turned on. 4. Push ON/OFF switch to on.
4. Clogged hose. 4. Check for clogs.
5. Hole in hose. 5. Replace hose.
6. Broken/misplaced belt. 6. Replace/fix belt.
7. Hose not inserted fully. 7. Insert hose fully.
8. Motor protection system 8. Check for clogs.
9. Dirty filters. 9. Change/clean filters.
Air flow restricted 1. Tool use restricts air flow. 1. Check TOOLS. with attachment use. 2. New carpet fuzz clogged 2. Check REMOVING CLOGS Sound changes. air path. and clean hose.
PROBLEM POSSIBLE CAUSE POSSIBLE SOLUTION
BEFORE REQUESTING SERVICE
Review this chart to find do-it-yourself solutions for minor performance problems. Any service needed, other than those described in these Operating Instructions, should be performed by an authorized service representative. WARNING Electrical Shock or Personal Injury Hazard Disconnect the electrical supply before servicing or cleaning the vacuum cleaner. Failure to do so could result in electrical shock or personal injury from vacuum cleaner suddenly starting.- 55 - L’aspirateur ne 1. Il est débranché de la prise de 1. Brancher fermement; mettre fonctionne pas. courant. l’interrupteur à la position de marche (ON).
PROBLÈME CAUSE POSSIBLE SOLUTION POSSIBLE
Antes de pedir servicio Consulte este cuadro para encontrar soluciones que usted mismo puede realizar cuando tenga problemas menores de rendimiento. Cualquier servicio que necesita aparte de otros descritos en este manual tiene que ser hecho por un representante de servicio autorizado. ADVERTENCIA Peligro de choque eléctrico y lesión personal. Desconecte la aspiradora antes de darle servicio o limpiarla. De lo contrario podría producirse un choque eléctrico o causar lesión personal si la aspiradora arranca de repente.- 57 -- 58 - LIMITED WARRANTY (ONLY FOR U.S.A. AND PUERTO RICO) Panasonic Consumer Marketing Company of North America, Division of Panasonic Corporation of North America One Panasonic Way, Secaucus, New Jersey 07094 Panasonic Vacuum Cleaner Limited Warranty Limited Warranty Coverage (For USA and Puerto Rico Only) If your product does not work properly because of a defect in materials or workmanship, Panasonic Consumer Marketing Company of North America (referred to as “the warrantor”) will, for the length of the period indicated on the chart below, which starts with the date of original purchase (“warranty period”), at its option either (a) repair your product with new or refurbished parts, (b) replace it with a new or a refurbished equivalent value product, or (c) refund your purchase price. The decision to repair, replace or refund will be made by the warrantor. During the “Labor” warranty period there will be no charge for labor. During the “Parts” warranty period, there will be no charge for parts. This Limited Warranty Excludes both Labor and Parts for the following items which require normal replacement: Disposable Dust Bag, Filters, Belts, Light Bulbs, Agitator Brushes and Batteries (if supplied). This warranty only applies to products purchased and serviced in the United States or Puerto Rico. This warranty is extended only to the original purchaser of a new product which was not sold “as is”. Carry-In or Mail in Service: To find a service center please visit http://www.panasonic.com/help or call 1-800-211-PANA (7262). IF REPAIR IS NEEDED DURING THE WARRANTY PERIOD, THE PURCHASER WILL BE REQUIRED TO FURNISH A SALES RECEIPT/PROOF OF PURCHASE INDICATING DATE OF PURCHASE, AMOUNT PAID AND PLACE OF PURCHASE. CUSTOMER WILL BE CHARGED FOR THE REPAIR OF ANY UNIT RECEIVED WITHOUT SUCH PROOF OF PURCHASE. Limited Warranty Limits And Exclusions This warranty ONLY COVERS failures due to defects in materials or workmanship, and DOES NOT COVER normal wear and tear or cosmetic damage. The warranty ALSO DOES NOT COVER damages which occurred in shipment, or failures which are caused by products not supplied by the warrantor, or failures which result from accidents, misuse, abuse, neglect, mishandling, misapplication, alteration, faulty installation, set-up adjustments, misadjustment of consumer controls, improper maintenance, power line surge, lightning damage, modification, introduction of sand, humidity or liquids, commercial use such as hotel, office, restaurant, or other business or rental use of the product, or service by anyone other than a Factory Service Center or other Authorized Servicer, or damage that is attributable to acts of God. THERE ARE NO EXPRESS WARRANTIES EXCEPT AS LISTED UNDER “LIMITED WARRANTY COVERAGE”. Product or Part Name Parts Labor Vacuum Cleaner 1 yr. 1 yr.- 59 - THE WARRANTOR IS NOT LIABLE FOR INCIDENTAL OR CONSEQUENTIAL DAMAGES RESULTING FROM THE USE OF THIS PRODUCT, OR ARISING OUT OF ANY BREACH OF THIS WARRANTY. (As examples, this excludes damages for lost time, travel to and from the servicer, loss of or damage to media or images, data or other memory or recorded content. The items listed are not exclusive, but for illustration only.) ALL EXPRESS AND IMPLIED WARRANTIES, INCLUDING THE WARRANTY OF MERCHANTABILITY, ARE LIMITED TO THE PERIOD OF THE LIMITED WARRANTY. Some states do not allow the exclusion or limitation of incidental or consequential damages, or limitations on how long an implied warranty lasts, so the exclusions may not apply to you. This warranty gives you specific legal rights and you may also have other rights which vary from state to state. If a problem with this product develops during or after the warranty period, you may contact your dealer or service center. If the problem is not handled to your satisfaction, then write to: Consumer Affairs Department Panasonic Consumer Marketing Company 661 Independence Pkwy Chesapeake, VA 23320 PARTS AND SERVICE, WHICH ARE NOT COVERED BY THIS LIMITED WARRANTY, ARE YOUR RESPONSIBILITY. Customer Services Directory (United States and Puerto Rico) Obtain Product Information and Operating Assistance; locate your nearest Dealer or Service Center; purchase Parts and Accessories; or make Customer Service and Literature requests by visiting our Web Site at: http://www.panasonic.com/help or, contact us via the web at: http://www.panasonic.com/contactinfo You may also contact us directly at: 1-800-211-PANA (7262) Monday-Friday 9am-9pm, Saturday-Sunday 10am-7pm EST For hearing or speech impaired TTY users, TTY: 1-877-833-8855 Accessory Purchases (United States and Puerto Rico) Purchase Parts, Accessories and Instruction Books online for all Panasonic Products by visiting our Web Site at: http://www.pstc.panasonic.com Or, send your request by E-mail to: npcparts@us.panasonic.com You may also contact us directly at: 1-800-332-5368 (Phone) 1-800-237-9080 (Fax Only) (Monday-Friday 9am-9pm EST) Panasonic National Parts Center 20421 84th Avenue South, Kent, WA 98032 (We accept Visa, MasterCard, Discover Card, and American Express) For hearing or speech impaired TTY users, TTY: 1-866-605-1277- 60 - WARRANTY Panasonic Canada Inc. 5770, Ambler Drive, Mississauga (Ontario) L4W 2T3
PANASONIC PRODUCT – LIMITED WARRANTY
EXCHANGE PROGRAM Panasonic Canada Inc. warrants this product to be free from defects in material and workmanship under normal use and for a period as stated below from the date of original purchase agrees to, at its option either (a) repair your product with new or refurbished parts, (b) replace it with a new or a refurbished equivalent value product, or (c) refund your purchase price. The decision to repair, replace or refund will be made by Panasonic Canada Inc. Vacuum Cleaner One (1) year This warranty is given only to the original purchaser, or the person for whom it was purchased as a gift, of a Panasonicbrand product mentioned above sold by an authorized Panasonic dealer in Canada and purchased and used in Canada,which product was not sold “as is”, and which product was delivered to you in new condition in the original packaging. IN ORDER TO BE ELIGIBLE TO RECEIVE WARRANTY SERVICE HEREUNDER, A PURCHASE RECEIPT OROTHER PROOF OF DATE OF ORIGINAL PURCHASE, SHOWING AMOUNT PAID AND PLACE OF PURCHASE REQUIRED LIMITATIONS AND EXCLUSIONSThis warranty ONLY COVERS failures due to defects in materials or workmanship, and DOES NOT COVER normalwear and tear or cosmetic damage. The warranty ALSO DOES NOT COVER damages which occurred in shipment, orfailures which are caused by products not supplied by Panasonic Canada Inc., or failures which result from accidents, misuse, abuse, neglect, mishandling, misapplication, alteration, faulty installation, set-up adjustments, misadjustment of consumer controls, improper maintenance, power line surge, lightning damage, modification, introduction of sand, humidity or liquids, commercial use such as hotel, office, restaurant, or other business or rental use of the product, or service by anyone other than a Authorized Servicer, or damage that is attributable to acts of God. Parts such as disposable dust bags, filters, belts, light bulbs and agitator brushes are not covered by this warranty. THIS EXPRESS, LIMITED WARRANTY IS IN LIEU OF ALL OTHER WARRANTIES, EXPRESS OR IMPLIED,INCLUDING ANY IMPLIED WARRANTIES OF MERCHANTABILITY AND FITNESS FOR A PARTICULAR PURPOSE.IN NO EVENT WILL PANASONIC CANADA INC. BE LIABLE FOR ANY SPECIAL, INDIRECT OR CONSEQUENTIALDAMAGES RESULTING FROM THE USE OF THIS PRODUCT OR ARISING OUT OF ANY BREACH OF ANYEXPRESS OR IMPLIED WARRANTY. (As examples, this warranty excludes damages for lost time, travel to and fromthe Authorized Servicer, loss of or damage to media or images, data or other memory or recorded content. This list ofitems is not exhaustive, but for illustration only.) In certain instances, some jurisdictions do not allow the exclusion or limitation of incidental or consequential damages, or the exclusion of implied warranties, so the above limitations and exclusions may not be applicable. This warrantygives you specific legal rights and you may have other rights which vary depending on your province or territory. CONTACT INFORMATIONFor product information and operation assistance, please contact:Our Customer Care Centre:Telephone: 1-800-561-5505Fax #: (905) 238-2360 Email link: “Support ➞ contact us ➞ email” on www.panasonic.ca For defective product exchange within the warranty period, please contact the original dealer or our Customer CareCentre.- 61 - Panasonic Canada Inc. 5770, Ambler Drive, Mississauga (Ontario) L4W 2T3