Mix Power Deluxe 220130 - Hand blender NOVA - Free user manual and instructions
Find the device manual for free Mix Power Deluxe 220130 NOVA in PDF.


User questions about Mix Power Deluxe 220130 NOVA
0 question about this device. Answer the ones you know or ask your own.
Ask a new question about this device
Download the instructions for your Hand blender in PDF format for free! Find your manual Mix Power Deluxe 220130 - NOVA and take your electronic device back in hand. On this page are published all the documents necessary for the use of your device. Mix Power Deluxe 220130 by NOVA.
USER MANUAL Mix Power Deluxe 220130 NOVA
Congratulations with the purchase of this powerful and multifunctional NOVA mixer. You can use the mixer as:
- A hand blender to blend and puree ingredients.
- A hand mixer with a whisk to mix and beat ingredients.
- A universal mill to finely chop ingredients.
This mixer comes with a handy wall attachment and a mixing bowl.

Operation and controls
See figure 1.
The appliance includes the following:
1 Wall attachment
2 Mixing bowl with volume indication
3 Lid for the mixing bowl
4 Drive
5 W h i s k
6 Hand blender
7 Motor housing and handle
8 Turbo On/Off switch
9 On / Off switch
10 Speed regulator
11 Mill lid
12 Sealing lid for the mill
13 Chopping knives with rotating shaft
14 Mill container
15 Power cord and plug
Before using for the first time
1 Remove all packaging materials.
2 Clean the appliance (see 'Maintenance and cleaning').
Using the hand blender
See figure 2.
1 Place the hand blender on the motor housing and rotate it anticlockwise until it clicks into place.
2 Place the ingredients in the mixing bowl or in a dish. The dish must have edges that are high enough to prevent the ingredients from splashing. When using liquid ingredients fill mixing bowl for maximum 50% to prevent the ingredients from splashing.
3 Insert the plug into the plug socket.
4 Use the speed regulator to set the speed.
5 Dip the hand blender as deeply as possible into the mixing bowl or the dish, and then turn on the appliance using the On/Off switch. (Not the other way round as this may cause splashing.) For extra speed, you can use the turbo On/Off switch instead of the normal On/Off switch.
6 Move the hand blender up and down gently through the ingredients, but make sure that the blade will not be lifted above the surface of the ingredients. (Otherwise, splashing may occur.) The blender works very quickly. The ingredients will be blended within a few seconds. The longer the blender is turned on, the finer the ingredients will be blended.
7 Turn off the appliance once you have achieved the desired result.
8 Remove the plug from the plug socket.
9 Rotate the hand blender clockwise to remove it from the motor housing.
10 Clean the used parts before storing them (see 'Maintenance and cleaning').
Using the hand mixer
See figure 3.
1 Press the whisk into the drive so that it clicks into place.
2 Place the drive and the whisk on the motor housing and rotate it anticlockwise until it clicks into place.
3 Place the ingredients in the mixing bowl or in a dish. The dish must have edges that are high enough to prevent the ingredients from splashing. When using liquid ingredients fill mixing bowl for maximum 50% to prevent the ingredientst from splashing.
4 Insert the plug into the plug socket.
5 Use the speed regulator to set the speed. Start at a slow speed and increase the speed once the whisk is in the ingredients. This will prevent splashes.
6 Push the whisk into the ingredients and turn on the appliance using the On/Off switch. For extra speed, you can use the turbo On/Off switch instead of the normal On/Off switch.
7 Move the rotating whisk through the ingredients.
8 Turn off the appliance once you have achieved the desired result.
9 Remove the plug from the plug socket.
10 Rotate the driver clockwise to remove it from the motor housing.
11 Pull the whisk to remove it from the drive.
12 Clean the used parts before storing them (see 'Maintenance and cleaning').
Using the universal mill
See figure 4.
1 Place the mill's container on a stable surface.
2 Hold the chopping knives by the rotating shaft and place them in the middle of the container. Make sure the rotating shaft can easily rotate.
3 Place the ingredients in the container, but not above the MAX. indicator line.
Cut large pieces into smaller pieces before placing them in the container.
4 See figure 5. Place the sealing lid on the container so that the spout stop is next to the spout and slightly to the right of it. Rotate it anticlockwise until it clicks into place. Now the spout stop closes off the spout completely.
5 Place the drive on the motor housing and rotate it anticlockwise until it clicks into place.
6 Place the motor housing and the drive on the sealing lid so that the rotating shaft sits in the drive.
7 Insert the plug into the plug socket.
8 Use the speed regulator to set the speed and turn on the appliance using the On/Off switch. For extra speed, you can use the turbo On/Off switch instead of the normal On/Off switch. The mill works very quickly. The ingredients will be ground within a few seconds. The longer the mill is turned on, the finer the ingredients will be ground.
9 Add any liquid or oil through the holes in the sealing lid.
10 Turn off the appliance once you have achieved the desired result.
11 Remove the plug from the plug socket.
12 Remove the motor housing and the drive from the sealing lid.
13 Rotate the drive clockwise to remove it from the motor housing.
14 Rotate the sealing lid clockwise to remove it from the container.
15 Clean the used parts before storing them (see 'Maintenance and cleaning').

Tips for using the mill
Carrots
Maximum weight: 100 grams.
- Grate the carrots and cut them into 2 cm pieces.
- Processing time: 15 - 20 seconds.
Apples
Maximum weight: 100 grams.
- Peel the apples, remove the core and cut them into 2 cm pieces.
- Processing time: 15 - 20 seconds.
Cheese
Maximum weight: 30 grams.
- Cut the cheese into 2 cm pieces.
- Processing time: 15 - 20 seconds.
Hard-boiled eggs
Maximum: 2 eggs.
- Remove the shell and cut them into four equal pieces.
- Processing time: 5 - 10 seconds.
Meat (raw or cooked)
Maximum weight: 100 grams.
- Cut the meat into 2 cm pieces.
- Processing time: 15 - 20 seconds. Raw meat requires a slightly longer processing time than cooked meat.
Walnuts
Maximum weight: 50 grams.
- Cut the walnuts in two.
- Processing time: 10 - 15 seconds.
Onions
Maximum weight: 100 grams.
- Peel the onions and cut them into four equal pieces.
- Processing time: 10 - 15 seconds.
Parsley
Maximum weight: 100 grams.
- Make sure the parsley is dry.
- Processing time: 10 seconds.
Dough
Ingredients: 360 grams of flour, 100 grams of icing sugar and 4 eggs.
- Place the flour, the icing sugar and the eggs in the container.
- Processing time: 20 seconds at the highest speed (turbo).
Maintenance and cleaning

- Make sure the plug has been removed from the plug socket before cleaning the appliance.
Make sure no moisture gets into the motor housing. - Do not immerse the motor housing in water or in other liquids. If this does happen, do not use the appliance again. For safety reasons, dispose of the appliance.
- Only the accessories may be cleaned in a dishwasher, not the motor housing.
- Never use abrasive or aggressive cleaning products.
1 Clean the exterior of the motor housing with a soft, damp cloth.
2 Clean the accessories with warm soapy water.
3 Thoroughly clean the chopping knives, in particular, and make sure you remove all the food from them.
4 Dry the components thoroughly after they have been cleaned.

Safety
General information
- Read these instructions carefully and keep them for future reference.
- Only use this appliance in accordance with these instructions.
-
Only use this appliance for domestic purposes.
-
The use of this appliance by children or persons with a physical, sensory, mental or motor disability or persons who lack the necessary knowledge and experience may result in a dangerous situation. Persons responsible for their safety must give explicit instructions or supervise the use of the appliance.
- Make sure children do not play with the appliance.
- Repairs may only be carried out by a qualified service technician. Never try to repair the appliance yourself.
Heat and electricity
- Before use, verify that the mains voltage is the same as that indicated on the appliance's type plate.
- Always remove the plug from the plug socket when the appliance is not in use.
- Always remove the plug from the plug socket by pulling the plug, not the power cord.
- Do not use the appliance if the power cord or the appliance is damaged. For your own safety, return the appliance to our service department. A damaged power cord may only be replaced by our service department using the special tools required for the repair.
- Make sure the appliance and the power cord do not come into contact with heat sources, such as a hot hob or a naked flame.
- Make sure the motor housing, the power cord and the plug do not come into contact with water.
- Do not pick up the appliance if it falls into water. Remove the plug from the plug socket immediately. Do not use the appliance again.
During use
- The motor will become hot if the appliance is used continuously for a long time. If this happens, allow the motor to cool down before using the appliance again.
- Never use the appliance outdoors.
- Never use the appliance in a humid room.
- Place the mill on a flat, stable surface where it cannot fall.
- Never allow the power cord to hang over the edge of the draining board, worktop or table.
- Make sure your hands are dry before you touch the appliance, the power cord or the plug.
- Only turn on the mill once the chopping knives, the sealing lid and the drive have been attached.
- Only turn on the hand blender or the hand mixer once the blender or the whisk have been placed in the mixing bowl or a dish.
- Do not touch rotating or sharp components. These can cause serious injuries.
- Do not use the appliance to blend or mix hot ingredients.
- Switch off the appliance and remove the plug from the plug socket in the event of a malfunction during use and before cleaning the appliance, fitting or removing an accessory or storing the appliance after use.
- Never leave the appliance unattended when in use.
- Clean the appliance thoroughly after use (see 'Maintenance and cleaning').
U.K. WIRING INSTRUCTIONS
The wires in the mains lead are coloured in accordance with the following code:
As the colours of the wire in the mains lead of this appliance may not correspond with the colour markings identifying the terminals on your plug, proceed as follows:
- The wire which is coloured BLUE must be connected to the terminal which is marked with the letter N or coloured black.
- The wire which is coloured BROWN must be connected to the terminal which is marked with the letter L or coloured red.
- The wire which is coloured GREEN/YELLOW must be connected to the terminal which is marked with the letter E or (earth symbol) and is coloured GREEN or GREEN/YELLOW

The environment
Dispose of packaging material, such as plastic and boxes, in the appropriate waste containers.
If you wish to dispose of the appliance whilst it still works properly or can be easily repaired, ensure that the appliance is recycled.
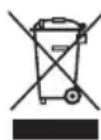
When the appliance reaches the end of its useful life, it should be disposed of in a responsible manner, thereby ensuring the reuse of the appliance or its parts. Do not dispose of the appliance with normal household waste, but hand it over to a recycling collection point. Contact your local authority for information about available disposal and collection systems in your area.
Applicable European guidelines:
2002/95/EC
2002/96/EC

WARNING: THIS APPLIANCE MUST BE EARTHED
With this appliance, if a 13A plug is used a 3A fuse should be fitted. If any other type of plug is used, a 15A fuse must be fitted either in the plug or at the distribution board.