916i cr - Phone DORO - Free user manual and instructions
Find the device manual for free 916i cr DORO in PDF.
Pick your language and provide your email: we'll send you a specifically translated version.
| Product type | Landline phone with digital answering machine |
| Dimensions (approx.) | 210 x 150 x 80 mm |
| Weight (approx.) | 500 g |
| Power supply | DC 9V / 300 mA (power adapter included) |
| Answering machine capacity | 40 minutes recording time |
| Phonebook | 99 names and numbers (14 characters for name, 22 digits for number) |
| Caller ID | Yes (subscription required) - call log |
| Hands-free | Yes, with built-in speaker and indicator light |
| Remote interrogation | Yes, with PIN code (default 0000) |
| Hearing aid compatibility | Yes, T position |
| Headset connection | Yes, jack socket at the back of the phone |
| Number of rings before answering machine | 2, 4 or TS (call saver) |
| Custom announcement | Yes, up to 60 seconds |
| Private mode | Yes, requires PIN code to listen to messages |
| Display | LCD screen with date, time, number of calls |
| Care and cleaning | Clean with a soft, dry cloth. Do not use abrasive products. |
| Safety | Unplug during thunderstorms. Use in accordance with the manual to avoid damage. |
| Warranty | 2 years (subject to presentation of receipt) |
Frequently Asked Questions - 916i cr DORO
How to set the date and time on the Doro 916i cr?
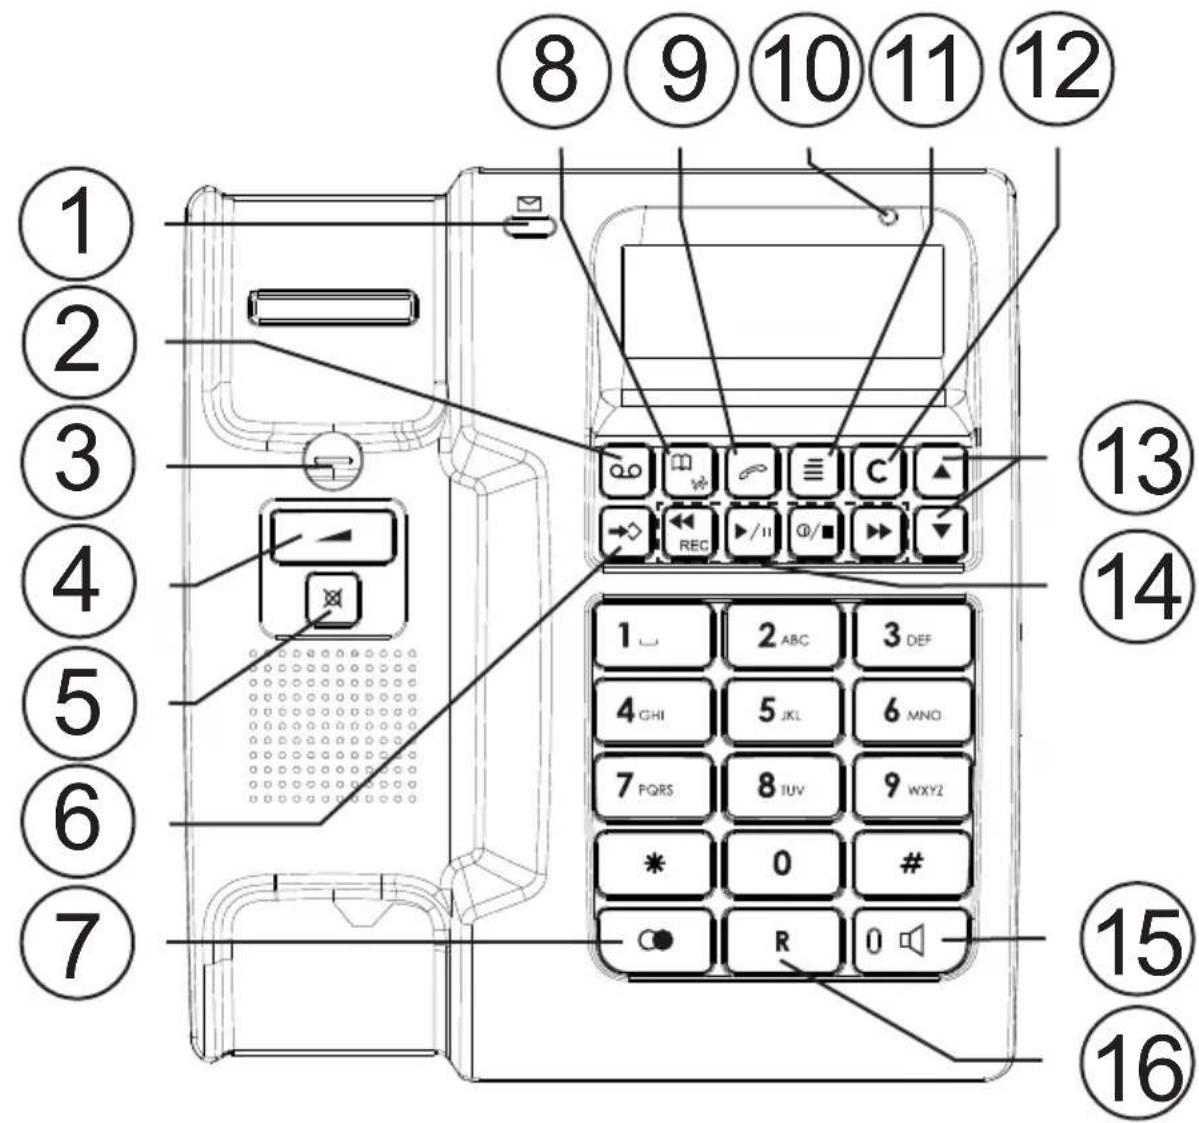
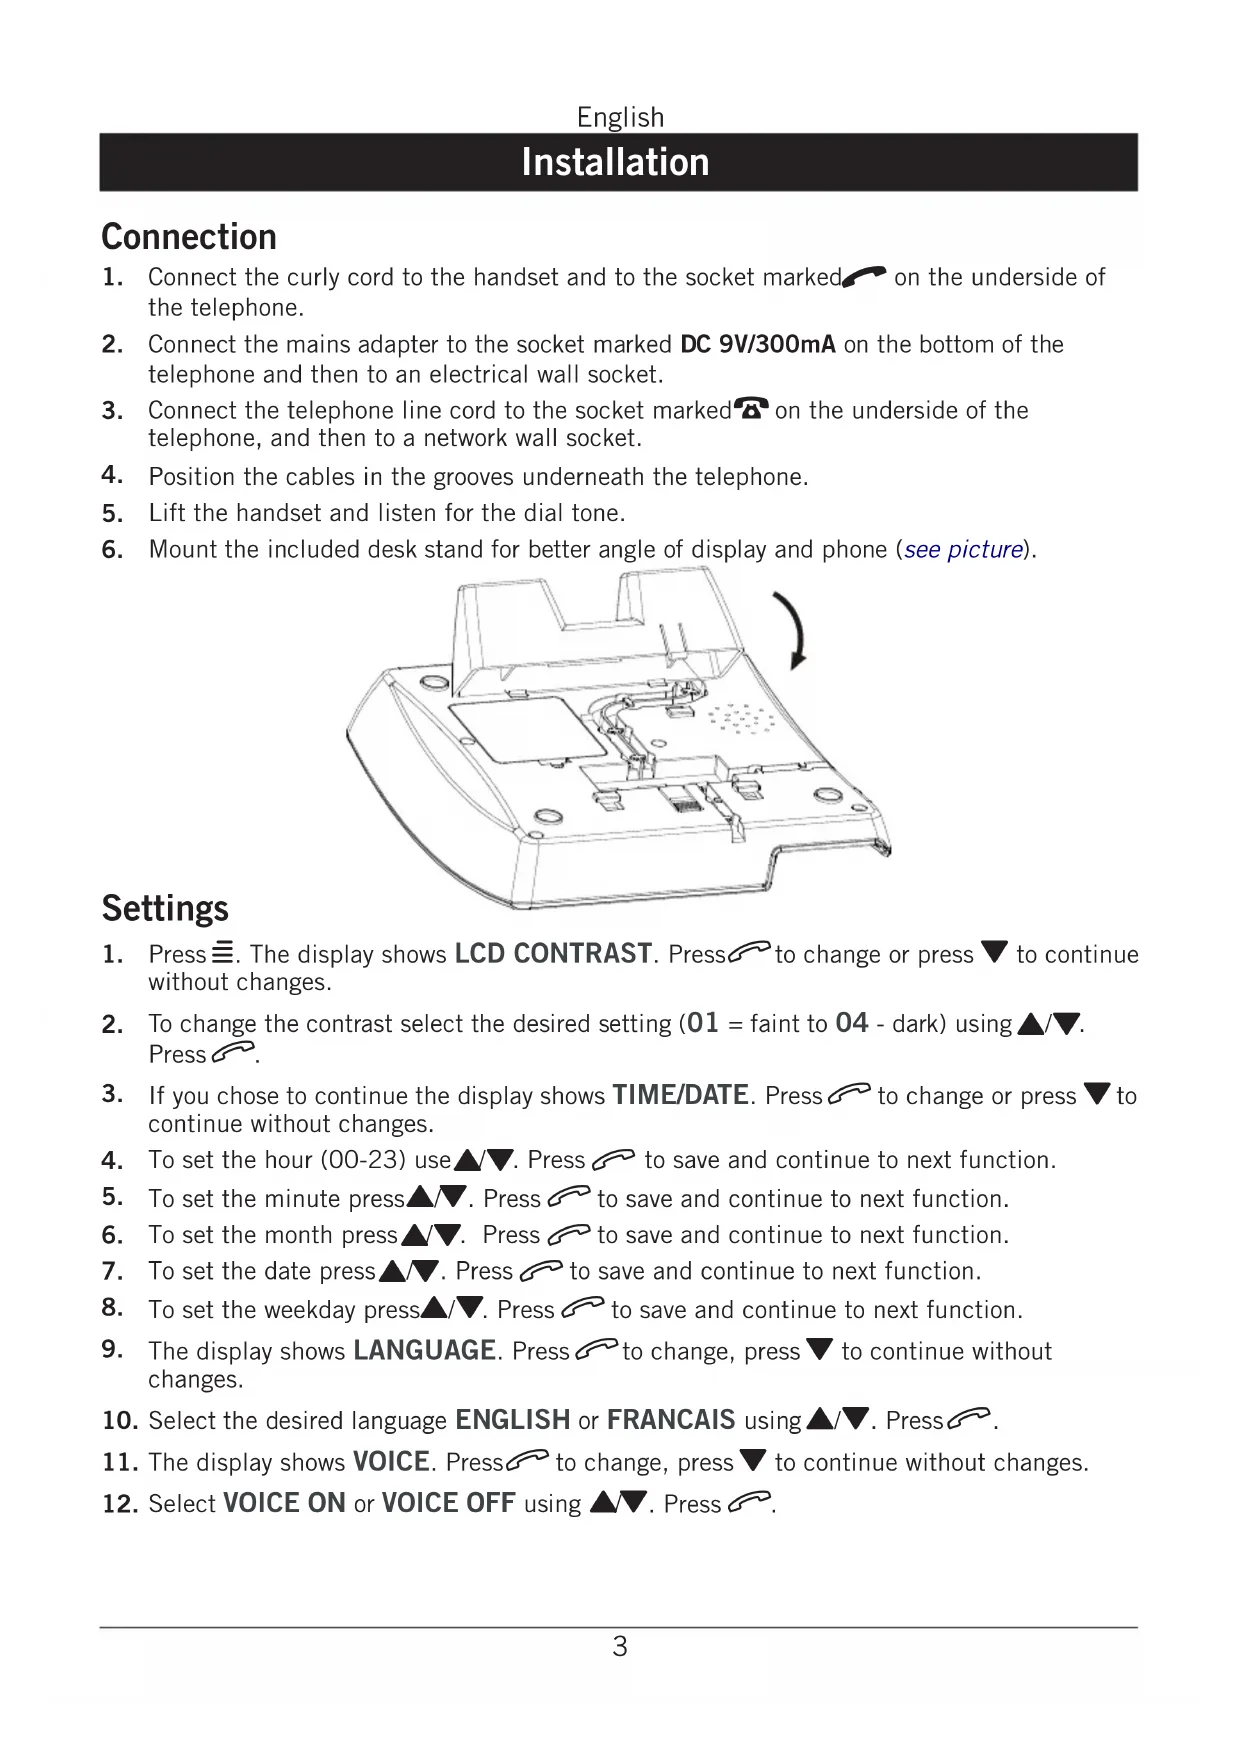
On standby, press ≡, select TIME/DATE with ▲/▼, then press . Set the hour, minutes, month, date and day with ▲/▼ and confirm with or .
How to record a custom greeting on the answering machine?
Press and hold the ◀◀ key until you hear a beep and the LED flashes. Speak 15-20 cm from the device, then release the key. The greeting is repeated automatically.
How to use caller ID?
Subscribe to the service with your operator. When receiving a call, the name/number is displayed if it is in the phonebook. Consult the call log by pressing until CALL LOG, then navigate with ▲/▼.
How to add a contact to the phonebook?
Press Ⓜ until PHONEBOOK, then press ➤. Dial the number (max 22 digits) and confirm with ➞. Enter the name (max 14 characters) using the numeric keys (see letter table).
How to access the answering machine remotely?
Call your number from a touch-tone phone. During the greeting, enter your PIN code (default 0000). After two beeps, dial the desired command (e.g., 1# for new messages, 2# for all).
How to activate hands-free mode?
Hang up the handset and press the hands-free key (LED on). Speak facing the phone. Use ▲/▼ to adjust volume. To return to private mode, pick up the handset.
How to record a telephone conversation?
During a call on the handset, press OO. REC. CONV. is displayed. To stop, press Ⓜ/■. Works only with the handset, not in hands-free or with headset.
How to delete all messages on the answering machine?
After listening to all messages, press C until you hear a beep. In private mode, first enter the PIN code (0000) then press .
What is the private mode for?
Private mode restricts access to voicemail: you must enter your PIN code to listen to messages. To activate it, go to settings via ≡, select PRIVATE MODE and choose ON.
What to do if the answering machine does not answer?
Check that the answering machine is on (key Ⓜ/■), that the telephone cable and power supply are properly connected. If the problem persists, contact customer service.
User questions about 916i cr DORO
0 question about this device. Answer the ones you know or ask your own.
Ask a new question about this device
No questions yet. Be the first to ask one.
Download the instructions for your Phone in PDF format for free! Find your manual 916i cr - DORO and take your electronic device back in hand. On this page are published all the documents necessary for the use of your device. 916i cr by DORO.
USER MANUAL 916i cr DORO
text_image
12:12 01/01 0462805000 1 2 ABC 3 DEF 4 GHI 5 JKL 6 MNO 7 PQRS 8 TUV 9 WXYZ * 0 # R916i cr