FM8800+ - Smartphone Fysic - Free user manual and instructions
Find the device manual for free FM8800+ Fysic in PDF.
| Product Type | Smartphone |
| Brand | Fysic |
| Model | FM8800+ |
| Dimensions | 105 x 55.5 x 15.5 mm |
| Weight | 95 g |
| Power Supply | Rechargeable battery, 230 V mains adapter |
| Frequency Bands | GSM 900 / DCS 1800 (dual band) |
| SAR (head/body) | 0.821 W/kg / 0.362 W/kg |
| Screen | Yes, not specified |
| Keyboard | Numeric with dedicated keys (on, off, menu, emergency, wheel) |
| Phone Memory | 100 contacts |
| SIM Card | Yes, slot under battery |
| Flashlight | Yes, integrated on the back, activation by long press on dedicated key |
| FM Radio | Yes, requires headset plugged in, station selection via wheel |
| Sound Amplifier | Yes, activates microphone for amplification to the earpiece |
| Emergency Number | Dedicated key, programmable, adjustable delay 3/5/8 seconds |
| Main Functions | Calls, SMS, phonebook, alarms, calculator, calendar, sound profiles, key lock |
| Warranty | 24 months |
| Package Contents | Phone, battery, adapter, headset, manual |
Frequently Asked Questions - FM8800+ Fysic
User questions about FM8800+ Fysic
0 question about this device. Answer the ones you know or ask your own.
Ask a new question about this device
Download the instructions for your Smartphone in PDF format for free! Find your manual FM8800+ - Fysic and take your electronic device back in hand. On this page are published all the documents necessary for the use of your device. FM8800+ by Fysic.
USER MANUAL FM8800+ Fysic
natural_image
Simple diagram of a device panel with an arrow pointing to a button (no text or symbols)3. BEDIENEN, ALGEMEEN
3.5 OK, TERUG of AFBREKEN:
10.4 Omgevingscondities:
Standby time: 70-130 hours
Talking time: 180-240 minutes
Display: 26 x 35mm
No SIM lock
BL-6C compatible Li-ion battery
Complies to:
EN 301 511, EN 301 489
EN 50360, EN 60950
natural_image
Front view of a smartphone with a blank screen and a small battery icon on the side (no visible text or symbols)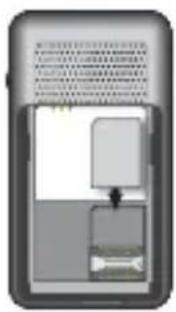
natural_image
Illustration of a smartphone with a screen and abstract internal components (no visible text or symbols)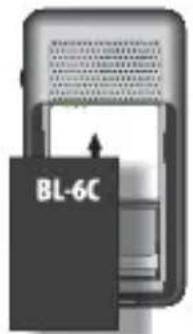
text_image
BL-6C
text_image
BL-6C
natural_image
Exterior view of a modern office building (no signage)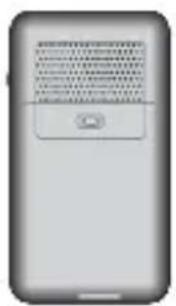
natural_image
Front view of a silver smartphone with a control panel and ventilation grille (no visible text or symbols)2.2 Chargement:
natural_image
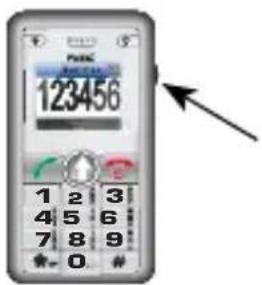
Diagram of a device panel with an arrow pointing to a button (no text or symbols)3. SERVIR, GENERAL
3.1 Activer/désactiver:
text_image
FUSIC 123456 1 2 ABC 3 DEF 4 5 J K L 6 M N O W Y Z 7 8 T U V 9 #
text_image
FR7 RADIO
Standby time: 70-130 hours
Talking time: 180-240 minutes
Display: 26 x 35mm
No SIM lock
BL-6C compatible Li-ion battery
Complies to:
EN 301 511, EN 301 489
EN 50360, EN 60950
Always check the website of Fysic for the latest updated version of this manual
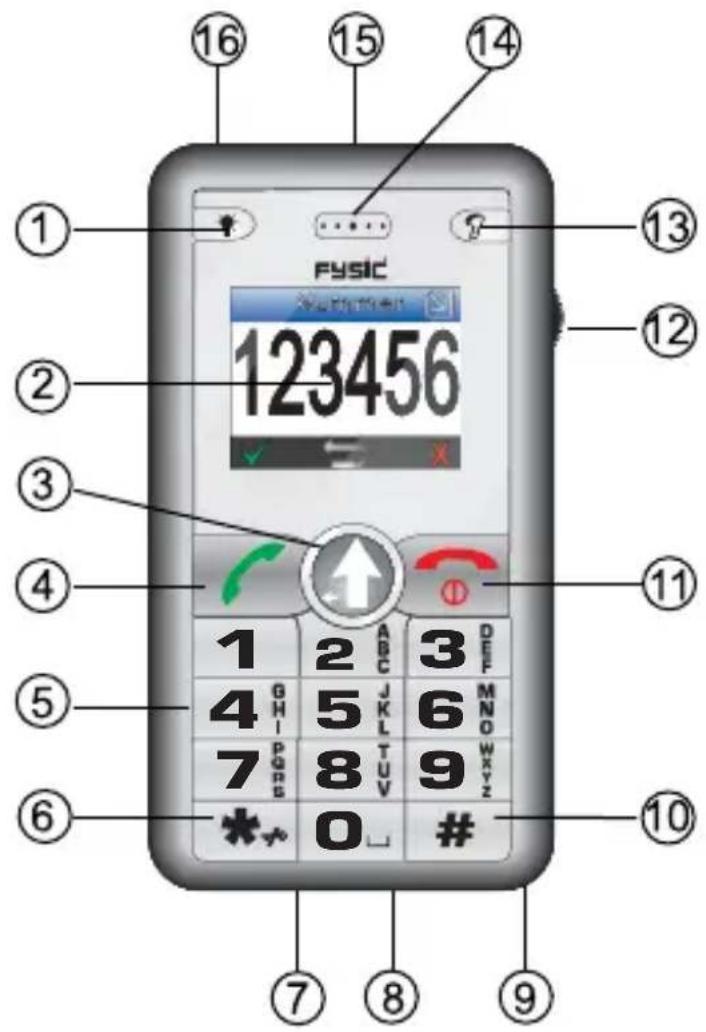
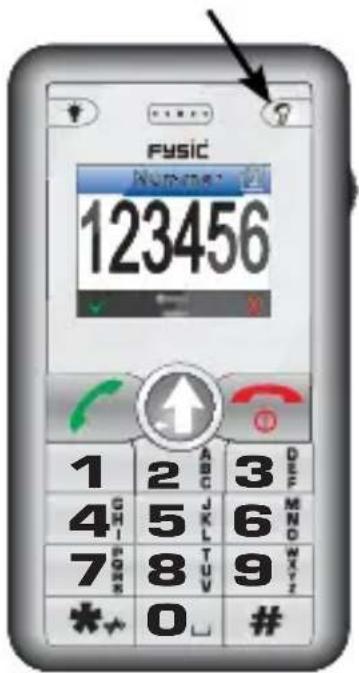
1 OVERVIEW
text_image
123456 FYSIC 1 2 3 4 5 6 7 0 1 2 ABC 3 DEF 4 GHI 5 JKL 6 MNO 7 PQRS 8 TUV 9 WXYZ # ① ② ③ ④ ⑤ ⑥ ⑦ ⑧ ⑨ ⑪ ⑫ ⑬ ⑭ ⑮ ⑯ ⑰ ⑱ ⑲ ⑳ ⑮ ⑯ ⑰ ⑱ ⑲ ⑳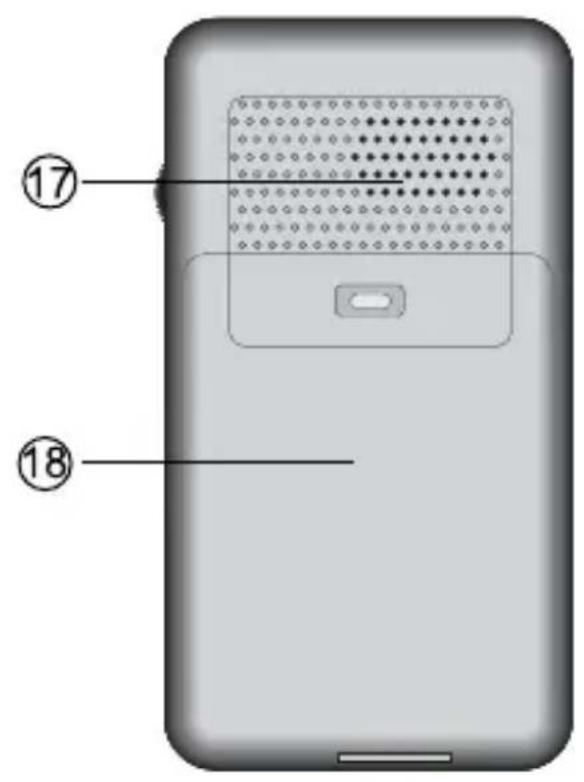
text_image
⑰ ⑱1: Hold key press to activate fl ashlight.
2: Display
3: Hold to open the menu screen.
also functions as delete or cancel-key when changing settings or programming
4: Phone ON key, for dialling numbers or taking incoming calls
also functions as OK-key when changing settings or programming
5: Keypad
6: Hold to lock keyboard
7: Power line input (underneath phone)
8: Connector for headset (underneath phone)
9: Gap for clip attachment (underneath phone)
10: Hold to change between ‘Standard’ and ‘Conference’ profi le settings. (please view chapter 9.7)
11: Phone OFF-key, to stop a conversation. Also used to cancel any action when changing settings or programming
12: Wheel for selection of memories or settings.
13: Press shortly to activate the radio function
Hold to activate the sound amplifier
14: Internal speaker
15: Flashlight
16: Emergency key, Hold for 2 seconds to dial the programmed emergency number (please view chapter 5.2 for information on programming emergency numbers.)
17: Built in speaker for ringer tones
18: Battery cover
2. PREPARATION & INSTALLATION
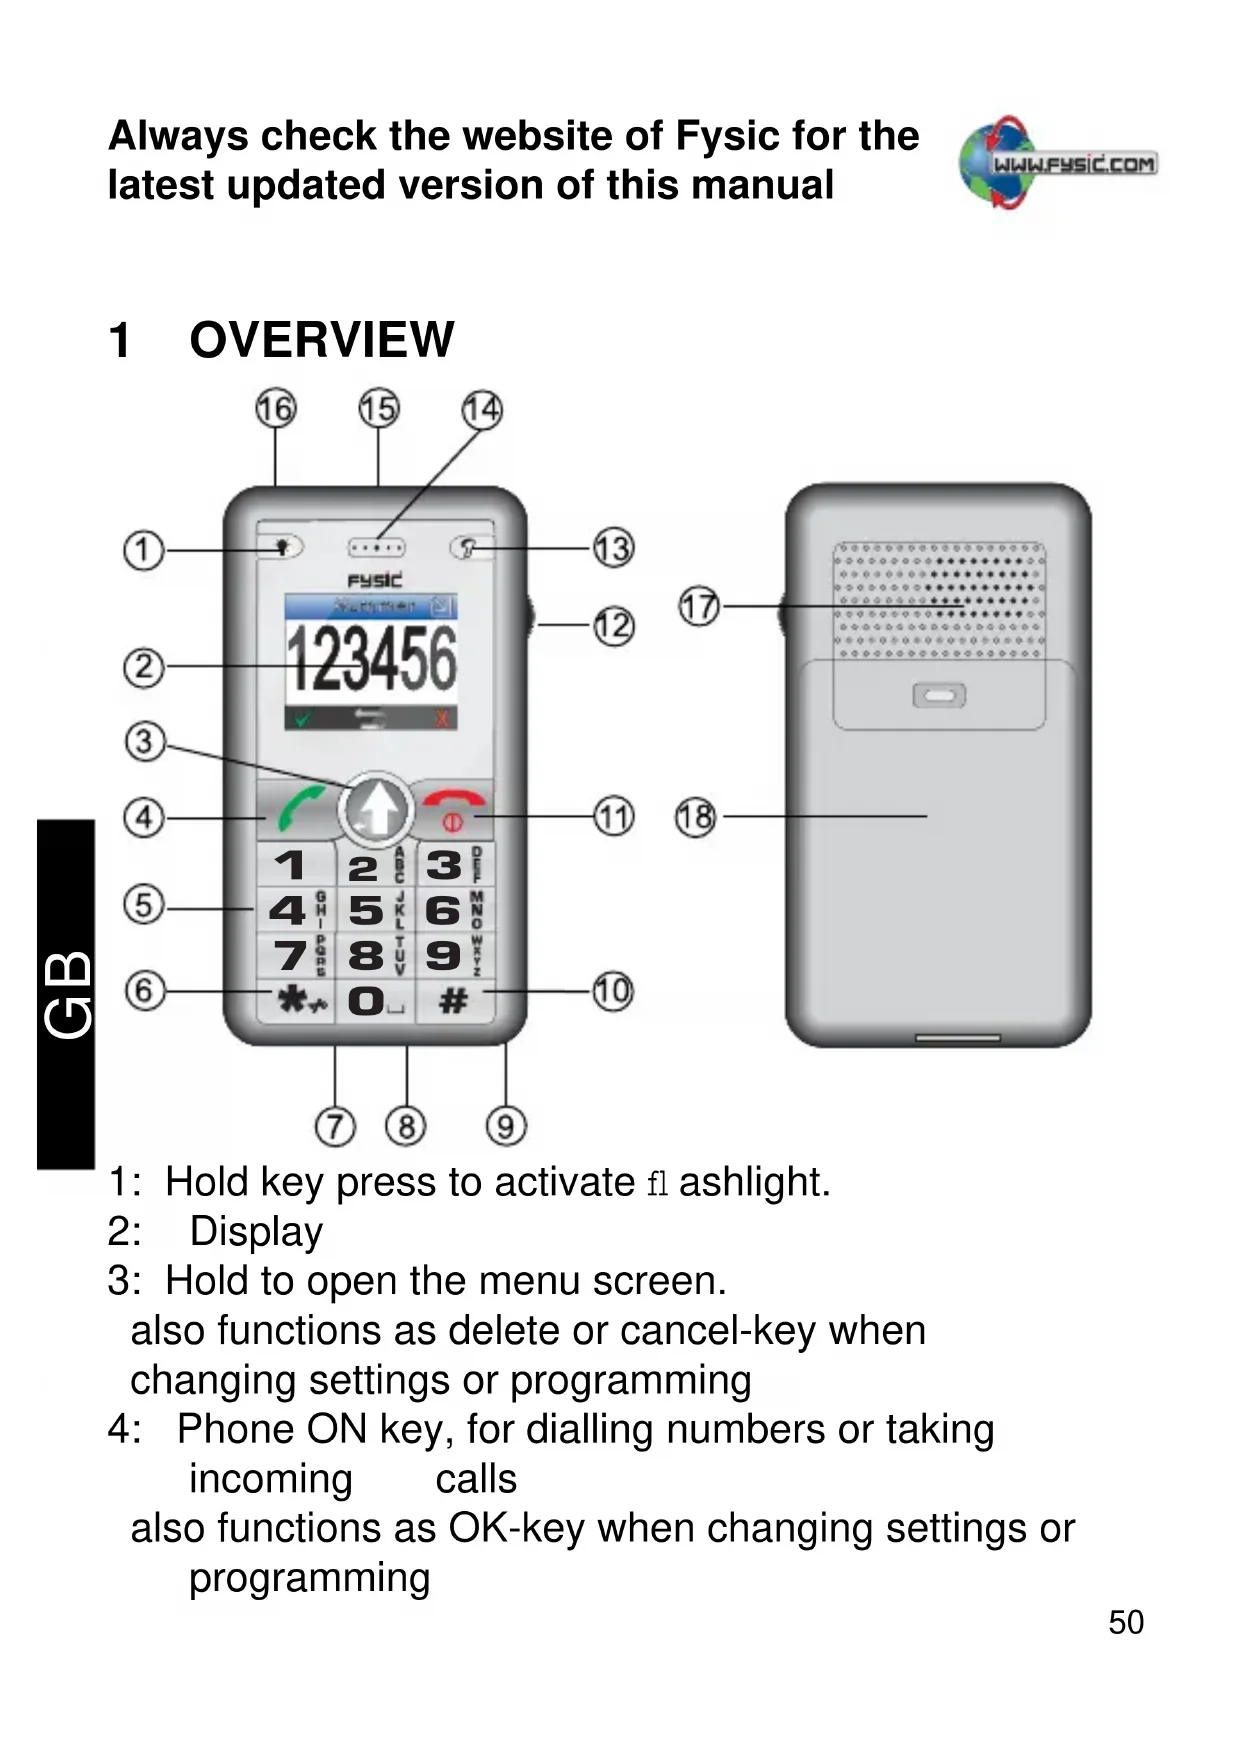
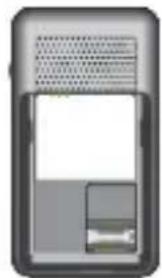
2.1 Placing the SIM-card and battery:
a. Slide the battery cover down and remove it from the phone.
b. Place the SIM card; attention: the SIM card only fits inside the socket when angled correctly. Do not force the card into place
c. place the battery; attention: the battery only fi ts inside the socket when angled correctly. Do not force the battery into place
d. Slide the battery cover back into place.
natural_image
Front view of a mobile phone with a blank screen and a small battery icon (no visible text or symbols)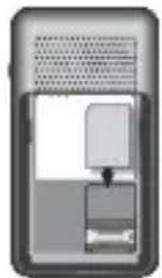
natural_image
Illustration of a handheld device with a button and ventilation grille (no text or symbols)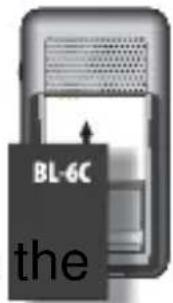
text_image
BL-6C the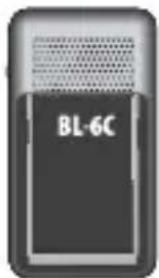
text_image
BL-6C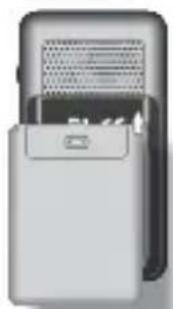
natural_image
Illustration of a gray rectangular device with a black handle and ventilation grille (no text or symbols visible)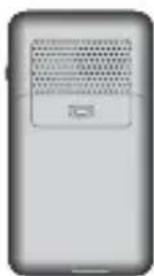
natural_image
Front view of a smartphone with a blank display panel (no visible text or symbols)2.2 Charging:
a. Plug the charger connector into the bottom of the phone
b. Plug the charger into the electrical outlet. Charge the phone for at least 15 hours before use.

natural_image
Simple diagram of a device with an arrow pointing to a button labeled 'User' (no text or symbols beyond basic labels)3. Basic Operation
3.1 Turn Your Device On / Off
Press and hold the phone off key for about 3 seconds to turn your device On/ Off.
3.2 PIN-code, PUK-code and telephonecode:
When the phone turns on, it is possible you are asked for a PIN-code. Enter the PIN-code of the SIM-card and confirm with the √ key.
You are allowed up to 3 attempts to enter the correct PIN-code. If 3 incorrect PIN-codes are entered, the SIM-card will be locked and can only be unlocked when a PUK-code is entered. This PUK-code should be noted in the documentation received together with the SIM-card.
If you have locked the phone itself with a TELEPHONE CODE as well, the phone code will be asked after the PIN-code. Please view chapter 9.9.

Press thekey to confirm the entered code.
3.3 Menu:
Programming the phone and changing settings is done using the menu.
Open the menu by pressing & holding the MENU key for 2 seconds.
3.4 Wheel:
The wheel on the right side of the phone can be pushed upward, downwards and can be pressed. Push up -and downwards on this wheel to navigate memories and settings.
Pressing the button is equeal to pressing the in several situations.
√ key
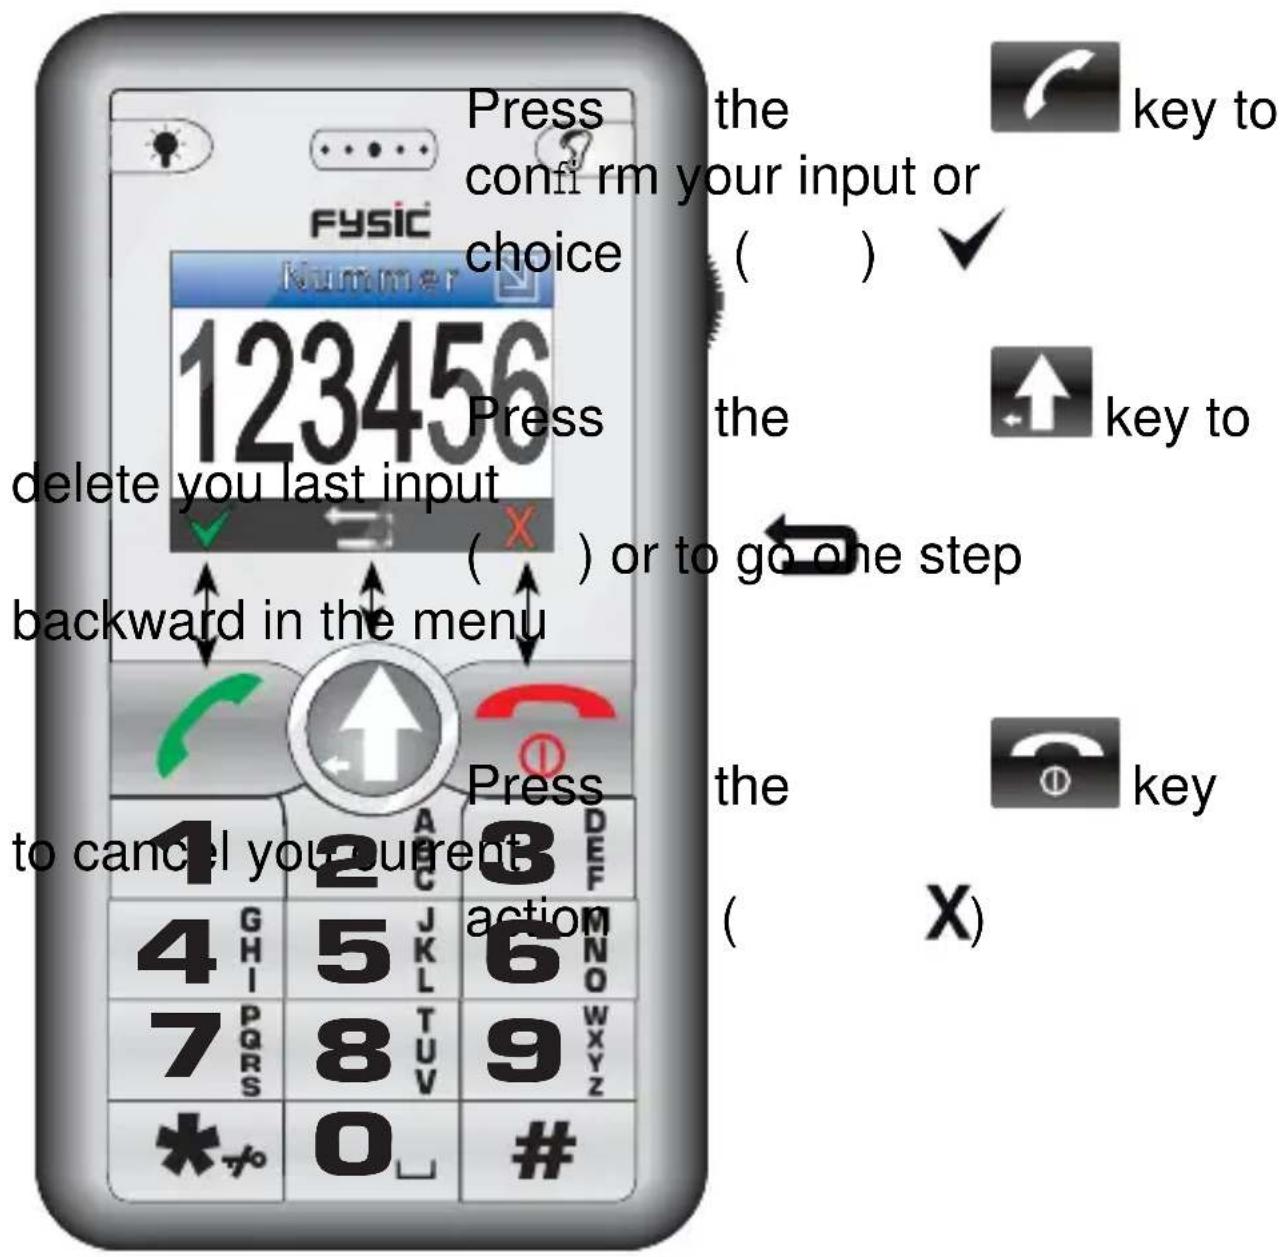
3.5 OK, BACK or CANCEL:
When changing the settings of various functions, the following symbols may appear on the bottom of your display; and. These symbols indicate the function of the keys directly below these symbols
text_image
Press conf i rm your input or choice 123456 Press delete you last input backward in the menu to cancel you current the key to key to or to go one step the key action ( X ) 0 #4 DIALLING
4.1 Dialling a number:
- Press number keys to enter the telephone number, and then press the phone ON key.
4.2 Answering incoming calls:
- Press the phone ON key to accept the call (press the phone OFF key to refuse the call)
4.3 Handsfree:
- Press √ the twice during a call to activate the handsfree-function
- Press √ the twice once more to deactivate the handsfree function.
4.4 Ending a call:
- Press the phone OFF key to end your current conversation.
4.5 Dial from memory:
- Use the wheel to choose the desired number
- Press √ key to confirm your selection.
4.6 Quickdial:
- Press the desired key 1x (2\~9) and press the phone ON key, the number will be dialled
5 Emergency Number
5.1 Introduction:
It is possible to program a phone number that will be dialled after the emergency button has been pressed for over 2 seconds.
This number can be any emergency number, but also personal numbers of family or friends.
5.2 Programming:
Select the option ‘Emergency Call’ and enter the telephone-number to be dialled in an emergency situation under the option ‘Emergency Number’. The option ‘Delay’ can be used to set the delay-time (3, 5 or 8 seconds) before the number will actually be dialled. During this delay time, the call can be aborted by pressing the phone OFF key.
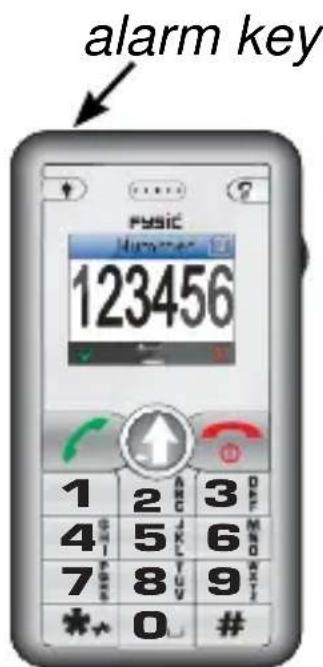
5.3 Using alarm function:
Press and hold the alarm button for 2 seconds. The display will now start a countdown according to the delay time set. For the call itself, you do need to hold the phone to your ear or use a headset.
text_image
alarm key 1234566 FLASHLIGHT
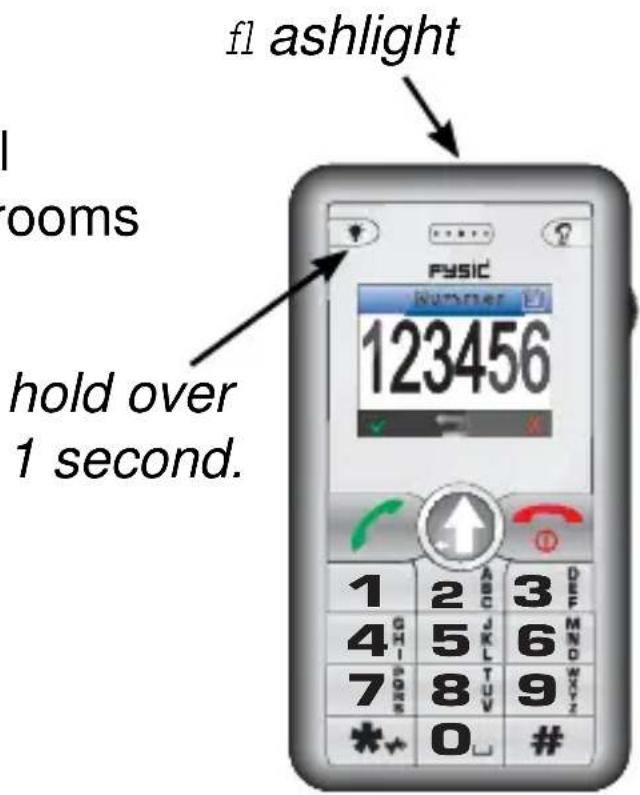
6.1 Introduction:
The FM-8800+ has a helpful fl ashlight to help light dark rooms when needed.
6.2 Turn on or off:
Press and hold the camera key for over 1 second to switch the light on or off.
text_image
f1 ashlight I rooms hold over 1 second. FYSIC 123456 1 2 ABC 3 DEF 4 G- 5 JKL 6 MNO 7 SHO 8 TUV 9 WYZ * - 0 #7 RADIO
- plug in an earphone shortly press
-
press the radio/amplifi er-key shortly, the radio function will be activated and can be listened to through the
-
Use the wheel to change the
-
Press the deactivate the radio function. change channel
earphon
radio
Please 1

key twice to
8 Amplifi er
8.1 Introduction:
The FM-8800+'s microphone can be used in conjunction with the earphone to amplify all sounds in your surroundings..
8.2 Usage:
- plug in an earphone
-
hold the radio/amplifi er-key for at least 1 second. The built-in microphone will be activated and can be listened to by using the attached earphones
-
Press the key to deactivate the amplifier
Hold over 1 sec.
text_image
FUSIC 123456 1 2 ABC 3 DEF 4 GHI 5 J K L 6 M N D 7 POK 8 T U V 9 W X Y Z * * 0 #8.3 Warnings:
- If the phone is held too closely to the earphones in this mode, the phone will echo (a high pitched, loud noise); please make sure the phone is placed or held at an optimal distance from the earphone.
- The microphone inside the telephone is very sensitive. Every touch of the telephone will be heard very loudly from the earphone. Please make sure the phone is placed in a stable position during the use of this function
- The volume cannot be set. If the volume of this function seems too loud for you, do not use this function to prevent any damage to your hearing.
9 Settings
9.1 Introduction:
Setting and programming your telephone is done by using a menu to select any options.
-
The menu is opened by holding the MENU key for two seconds
-
Use the wheel on the right side of the phone to choose the desired option.
text_image
123456
Press key to confirm your input or choice.

Press ← key to delete or correct any wrong input
Press X key the close the menu and return to the stand-by state of the telephone.
9.2 Phonebook:
Using this menu, you can program and save telephone numbers The telephone itself has up to 100 memories for name and number. The SIM-card often has a separate memory as well, the size of which is dependent of the SIM card.
Entry:
- Select 'Create' and press the √ key
- on 'Name entry', a name can be typed, press the key to confirm your entry
- Use the wheel to select 'Number entry' and input the number here; press the √ key to confi rm
-
Use the wheel to select ‘General’ and press the wheel. Here you can choose where to save the number:
-
For saving to your SIM-card: select 'SIM'
- For saving to the phone's memory: select ‘General’, ‘Family’,
'Offi ce', 'Friends', 'VIP' of 'Other'
Press the √ key.
-
Press the √ key to save the memory record.
-
Press the key to close the menu
Memory status:
On memory status, the amount of phonebook memories used and available will be shown.
For example:
SIM: 168/200
Telephone: 75/100
In the SIM-card 168 out of 200 of the available memories are in use. On the telephone 75 out of 100 memories are in use.
Using the option quick dial, a number from the phone book memory can be chosen to be dialled by quickdial keys 2 \~ 9. On dialling, only one of these keys and the phone ON key have to be pressed to choose the number set.
-
Select ‘Quickdial’ and press the √ key
-
Select the quickdial key by using the wheel (the blue blocks 1-8 represent the dialkeys 2 \~ 9) and use the key,
-
Press key again to confirm.
-
Use the wheel to select the desired telephone number and press the √key
-
Press the key to exit the menu.
Changing memories:
- Search for the memory to be changed
-
Press the wheel once.
-
Select 'Details/Edit'
- Press keythe
-
Select the Name-field or Number field by using the wheel.
-
Press the Wheel once
-
Use key to delete the old number or name, and use the keypad for a new entry.
-
Press √ keythe confi rm
-
Repeat from step 5 for further changes
-
Press the key when finished to save your changes.
Copy:
Using the copy option, you can copy the entire phone book memory to you SIM card, and vice versa.
If you want to copy a single memory entry, search for the memory to be copied and press the wheel.
Select the option ‘from phone book to SIM’ or ‘from SIM to phone book’.
Deleting a single memory:
- Search for the memory to be deleted
- Press the wheel once
-
Select the 'Delete' option
-
Press the key twice to delete the entry
Delete complete memory:
Selecting the option ‘Delete all’ will delete the entire memory.
Selecting either other option will only delete the entries located in the phone, or only the entries that are located on the SIM-card
Provider numbers:
On provider numbers, you can enter the number of you voicemail, as well as the customer service number of your provider.
9.3 Calling list:
In this menu you can view your history of called, incoming and missed calls.
9.4 SMS
In this menu, you can compose, send and receive short text messages.
Read SMS:
- Select the 'Read message' option and press the key
- Select the message by using the wheel and press the key, The message will display on the screen.
- Press the wheel to use various options, x for instance ‘call back, delete’
Creating a new SMS message:
-
Select 'Create message' and press the √ key
-
Type the message using the keypad and press the key when done.
-
Select ‘Send only’, ‘Save only’ or ‘Send and Save’ and press the √ key
-
On 'Send only':
- Press the √ key and enter the number or √ presence and choose a number from the phonebook memory.
- Preskey 3x the send your message (it is optional to send the same message to multiple contacts at the same time, select the option 'to multiple' and add more numbers)
on 'Save only':
- After the key is pressed, the type will be saved in the draftbox, so it can be sent or edited at a later point in time.
on 'Save and send':
- The message will both be sent, as described above, but will also be saved for editing and re-sending at a later point in time.
9.5 Alarm:
This menu gives you the option to set up to 3 different alarmtimes. You can choose to set this alarm once, daily or weekly .
9.6 Extra:
Using this menu, extra functions like a calendar and a calculator are found, as well as a converter for measurements, weight and currency. From this menu, provider-based services are also found.
9.7 Profi les:
This menu can be used to set ringtones and volume for different surroundings.kunt u beltonen voor.
For instance: You can set the phone to ring loudly when outside and vibrate during a meeting or conference.
The desired profi le has to be selected when changing your environment.
9.8 FM radio:
To use this function, an earphone has to be attached to the telephone.
Shortly press the radio/amplifi er key
Use the wheel to change the radio channel
(Manual or automatical, can be set through the menu).
If you are called during radio usage, the radio will stop. If you accept the call, the headset will automatically be used for the conversation.
9.9 Settings:
Phone:
Here you can set different display settings,
Set the time and date, save your own number for reference, or change key lock setting.
Key lock can be set to OFF, 30 sec
or 60 sec. On 30 sec and 60 sec the keyboard will automatically be locked when no buttons are pressed for the period of time set.
Setting emergency call:
Program the number to be used in case of an emergency here.
The delay between alarm activation and calling can also be set.
This mode will be activated by pressing and holding the emergency key on top of the phone for over 3 seconds.
Call:
Here you can set a variety of option.
I.e., to answer an incoming call with any key.
Or to auto-redial a number when it is busy.
These option can vary with the provider used.
Network:
These settings vary with the provider used.
Security:
as well as set a 2nd PIN-code if supported.
Use the Telephone-Code option allows you to set a separate PIN for the telephone.
10 USE SAFETY, CLEARING AND MAINTENANCE
10.1 Safe usage:
- Please do not use this mobile phone on locations where this is not permitted. (Hospitals, air planes, gas stations, etc.).
- Preferably avoid use of this phone on locations where other people will be bothered (movie theatre, performances, etc)
- Only use this telephone with the included headset when driving.
10.2 Small children:
- This telephone is not a toy; keep the phone out of the reach off small children.
- The battery contains toxic content. Prevent situation where children can remove the battery from the phone.
- The SIM-kaart is a small object, which might be a chocking hazard. Keep this out of reach from children.
10.3 Interference:
Near television sets, radio receivers and computers, this telephone can cause some noticeable interference. In these cases, move the phone further away from the device in question.
10.4 Conditions:
- This phone is a precision device. Never drop this telephone and store it in a safe location when you are not using it.
- This telephone is not water-proof. Avoid any contact with water.
- Avoid extremely high and extremely low temperatures. For instance, do not leave the telephone inside of a car standing in the sun unprotected.
10.5 Charger:
- Only use the provided charger. Using another charger will damage your telephone.
- First connect the charger with the telephone, then connect it to a power source. When the
phone has finished charging, unplug t adapter from the power source before removing the charging cable from the telephone. - Always remove the adapter from the power source after charging.
10.6 Pacemakers:
During stand-by and use, always keep a minimum distance of 6 inch between you Pacemaker and you phone.
10.7 Hearing-aids:
During the use of older hearing aids, interference may be heard.
10.8 Battery-pack:
- This telephone is operated by a rechargeable battery pack. If the working time of the telephone decreases considerably over time, the battery should be replaced.
-
Do not damage or take apart the battery. Immediately deposit defective or old batteries to your local chemical waste depot.
-
During a long-time lack of use, it is recommended to remove the battery from the device.
- To prevent short-circuit, it is not recommended to place the battery on any metal surface.
10.9 Maintenance:
Only clean the telephone with a soft, slightly moist cloth. Never use chafing or chemical cleaning methods.

11 DECLARATION OF CONFORMITE
This product complies with the essential requirements for Radio and Telecommunications Terminal Equipment 1999/5/EC.
Please refer to our website WWW.FYSIC.COM
12 GUARANTEE
You have a guarantee of 24 MONTHS after the date of purchase of this Telephone. We guarantee during this period the free repair of defects caused by material and construction faults. This at the importers discretion. It is only possible to claim to the guarantee when you enclose your purchase ticket with the FM-8800+.
HOW TO ACT: If you notice a defect, consult the manual first. If this manual gives you no definite answer, consult the Fysic Helpline on telephonenumber +31 (0)73 6411 355.
THE GUARANTEE EXPIRES: When used inexpert, faulty connections, leaking and faulty placed batteries, use of unoriginal parts or accessories, negligence and defects caused by fire, flood, stroke of lightning and natural disasters. With unqualified modifications or repairs by third persons. With incorrect transport without a suitable packing. If the device is not handed in with the correct filled in guarantee card and the purchase ticket.
NOT UNDER THIS GUARANTEE: cords, plugs and batteries. All further responsibilities, in particular subsequent damages, are excluded.
13 TECHNICAL DATA
Dual band: GSM 900 / DCS 1800
SAR: 0,821W/kg / 0,362W/kg
Weight: 95 gr
Dimension: 105 x 55,5 x 15,5 mm
Standby time: 70-130 hours
Talking time: 180-240 minutes
Display: 26 x 35mm
No SIM lock
BL-6C compatible Li-ion battery
Complies to:
EN 301 511, EN 301 489
EN 50360, EN 60950
14 INHOUDSOPGAVE
1 OVERZICHT 2
2. VOORBEREIDEN & INSTALLEREN
3.5 OK, TERUG of AFBREKEN
4 SNEL BELLEN
4.1 Nummer kiezen 8
6.1 Introduction.... 34
6.2 Activer/désactiver 34
7 RADIO 34
8 AMPLIFICATEUR DE SON
10.3 Interruption 45
2.1 Placing the SIM card and Battery 52
2.2 Charging 52
3. BASIC OPERATION
3.1 Turn Your Device On / Off 53
3.2 PIN-code, PUK-code and teleponecode 53
3.3 Menu 54
3.4 Wheel 54
3.5 OK, BACK or CANCEL ....55
4 DIALLING
4.1 Dialling a Number 56
4.2 Answering incoming calls 56
4.3 Handsfree 56
4.4 Ending a call 56
4.5 Dial from memory 56
4.6 Quickdial.... 56
5 EMERGENCY NUMBER
5.1 Introduction.... 57
5.2 Programming 57
5.3 Using Alarm Function 57
6 FLASHLIGHT
6.1 Introduction.... 58
6.2 Turn on or off 58
7 RADIO 58
8 AMPLIFIER
8.1 Introduction.... 59
8.2 Usage 59
8.3 Warnings 59
9 SETTINGS
9.1 Introduction.... 60
9.2 Phonebook 61
9.3 Calling List 64
9.4 SMS....64
9.5 Alarm 66
9.6 Extra 66
9.7 Profiles 66
9.8 FM radio 67
9.9 Settings 67
10 USE SAFETY, CLEARING AND MAINTENANCE
10.1 Safe Usage....68
10.2 Small Children 69
10.3 Interference 69
10.4 Conditions 69
10.5 Charger 70
10.6 Pacemakers 70
10.7 Hearing aids 70
10.8 Battery-pack 70
10.9 Maintenance 71
11 DECLARATION OF CONFORMITE 72
12 GUARANTEE 72
13 TECHNICAL DATA 73
14 CONTENTS....78

ServiceHelp

text_image
FYSIC®WWW.HESDO-SERVICE.NL INFO@HESDO-SERVICE.NL

+31 (0) 73 6411 355