SF1306 - Iron ALPINA - Free user manual and instructions
Find the device manual for free SF1306 ALPINA in PDF.
| Product type | Steam iron |
| Brand | Alpina |
| Model | SF1306 (also SF1305) |
| Power supply | 220-240 V ~ 50/60 Hz |
| Power | 1830-2200 W |
| Water tank capacity | 300 ml |
| Soleplate | With steam holes, non-stick coating (probable) |
| Steam function | Continuous steam, steam burst, vertical steam |
| Anti-drip system | Yes |
| Anti-scale filter | Yes, integrated |
| Self-cleaning | Yes, "Clean" function |
| Adjustable thermostat | Yes, dial with markings for synthetic, silk/wool, cotton/linen |
| Heating indicator | Yes, turns off when temperature is reached |
| Power cord | With protective ring, 3-pin grounded plug |
| Safety | Automatic shut-off not specified, non-slip base (probable) |
| Maintenance | Clean soleplate with damp cloth, use self-cleaning function 1 to 2 times per month |
| Warranty | 2 years against manufacturing defects |
Frequently Asked Questions - SF1306 ALPINA
User questions about SF1306 ALPINA
0 question about this device. Answer the ones you know or ask your own.
Ask a new question about this device
Download the instructions for your Iron in PDF format for free! Find your manual SF1306 - ALPINA and take your electronic device back in hand. On this page are published all the documents necessary for the use of your device. SF1306 by ALPINA.
USER MANUAL SF1306 ALPINA
EN SF-1305/SF-1306 Steam Iron Instruction for use
RU SF-1305/SF-1306 YTIO COTnpuBaTeJeM
RO SF-1305/SF-1306 Fier de calcat
HR SF-1305/SF-1306 Parno glacalo
EN: For your own safety read these instructions carefully before using the appliances.
- Spray organ
- Filler door
- Steam/Dry & Self-cleaning
- Spray button
- Shot-steam button
- Handle
- Cord bushing
- Supply cord
- Temperature control light
- Transparent water tank
- Thermostat knob
- Maximum filling level
- Plate with steam vents
- Water measure
FR
DESCRIPTIONS DES ÉLÉMENTS
Thank you for choosing this quality ALPINA home appliance. Your Alpina appliance comes with a 2 year warranty and will provide years of service if looked after properly. The ALPINA name brings you Quality, Reliability and Dependability. We hope you will continue to make ALPINA your first choice in home appliances.
IMPORTANT SAFEGUARDS
When using electrical appliances, basic safety precautions should be followed:
- Read all instructions carefully.
- Make sure the power supply corresponds to one on the rating label.
- To avoid electrical shock, do not immerse electrical parts in water or other liquid.
- Do not allow children to operate or play with the appliance.
- Unplug from outlet when not in use, or before putting on/taking off parts.
- Do not use with damaged electrical cord or plug.
- If damaged or malfunction occurs, refer to an authorized service center only.
- Do not place on or near hot surfaces.
- Never pull the appliance by the power cord.
- Do not use the appliance for other than intended household use.
READ THESE INSTRUCTIONS
For first time use, a slight emission of smoke and sounds made by the expanding plastics is quite normal and it stops after a short time. We also recommend passing the iron over an ordinary cloth before using it. Both temperature dial and most items of laundry have a marking which corresponds with this code:
| GARMENT LABEL FABRIC TYPE THERMOSTAT REGULATION | ||
| synthetic low temperature | ||
| silk - wool medium temperature | ||
| Cotton - linen high temperature | ||
| Fabric not to be ironed | ||
ANTI-CALC SYSTEM
A special resin filter inside the water reservoir softens the water and prevents scale build-up in the plate. The resin filter is permanent and does not need replacing. Please note:
Use tap water only. Distilled and/demineralised water makes the anti-calc system ineffective by altering its physicochemical characteristics. Do not use chemical additives, scented substances or decalcifiers. Failure to comply with the above-mentioned regulations leads to the loss of guarantee.
ANTI-DRIP SYSTEM
With the anti-drip system, you can perfectly iron even the most delicate fabrics. Always iron these fabrics at low temperatures. The plate may cool down to the point where no more steam comes out, but rather drops of boiling water that can leave marks or stains. In these cases, the Anti-drip system automatically activates to prevent vaporization, so that you can iron the most delicate fabrics without risk of spoiling or staining them.
AUTOMATIC SHUT OFF
The automatic shut off device trips after the iron has been left for approx. eight minutes in the upright position or unused for approx. twenty seconds in the horizontal position. The light comes on to indicate that shut off has tripped. As soon as you move the iron, the device turns off and the iron starts working again.
GENERAL INSTRUCTIONS
1.STEAM IRONING Filling the reservoir
2. Check that the plug is disconnected from the socket.
3. Move the steam selector (3) to "0".
4. Open the lid (2).
5. Raise the tip of the iron to help the water enter the opening without overflowing.
6. Slowly pour the water into the reservoir using the special measure (15) and taking care not to go over the maximum level (about 300ml) indicated by "MAX" on the reservoir.
7. Close the lid (2).
Selecting the temperature.
- Put the iron in a vertical position.
- Put the plug in the socket.
- Adjust the thermostat knob (11) according to the international symbol on the garment label [Fig. 3]. The plate temperature control light (9) indicates that the iron is heating up. Wait until the plate temperature control light goes off before ironing. Warning: during ironing, the plate temperature control light (9) comes on at intervals, indicating that the selected temperature is maintained. If you lower the thermostat temperature after ironing at a high temperature, do not start ironing until the plate temperature control light comes on again.
Selecting the steam.
The quantity of steam is regulated by the steam selector (3).
- Move the steam selector to a position between minimum and maximum depending on the quantity of steam required and the temperature selected [Fig. 1]. Warning: the iron gives off steam continuously only if you hold the iron horizontally. You can stop the continuous steam by placing the iron in a vertical position or by moving the steam selector to "0". As indicated on the thermostat knob (11) and in the initial table, you can only use steam at the highest temperatures. If the selected temperature is too low, water may drip onto the plate.
Selecting Shot-steam and steam when ironing vertically.
Press the shot-steam button (5) to generate a powerful burst of steam that can penetrate the fabrics and smooth the most difficult and tough creases. Wait for a few seconds before pressing again. By pressing the shot-steam button at intervals you can also iron vertically (curtains, hung garments, etc.). Warning: the shot-steam function can only be used at high temperatures. Stop the emission when the plate temperature control light (9) comes on, than start ironing again only after the light has gone off.
DRY IRONING
To iron w/o steam, follow the instructions in section "steam ironing", leaving the steam selector (3) on position "0".
Spray Function
Make sure that there is water in the reservoir. Press the spray button (4) slowly (for a dense spray) or quickly (for a vaporized spray). Warning: for delicate fabrics, we recommend moistening the fabric beforehand using the spray function (4), or putting a damp cloth between the iron and the fabric. To avoid staining, do not use the spray on silk or synthetic fabrics.
SELF-CLEANING
The self-cleaning feature cleans inside the plate, removing impurities. We recommend using it every 10-15days.
Directions:
- Fill the reservoir up to the maximum level indicated and set the steam selector
- Set the thermostat knob (11) to the maximum temperature and wait for the light (6) to turn off.
- Pull the plug out of the socket and hold the iron horizontally over the sink.
- Hold the cleanout button (12) setting until all the boiling water, steam, and impurities come out.
- When the soleplate has cooled down, you can clean it with a damp cloth.
USEFULL TIPS
- This iron is designed with anti-calcium filter and anti-drip system to prevent the water from licking to the soleplate when the iron is too cold.
- The surge steam provides an extra burst which ideal for removal of stubborn creases and wrinkles.
- This iron has a vertical steam system for hanging clothes, curtains, wall hangings etc.
ENGLISH
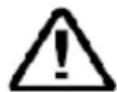
Warning:
This appliance is equipped with a grounded, Type G, 3-pin power supply cord. This is a safety feature. Do not attempt to defeat the safety purpose of this plug.

Danger of scalding:
Please use caution when using the steam iron. The steam emitted from this aperture can be very hot.
CLEANING AND MAINTENANCE
- Apply "self-cleaning" function to your iron once or twice a month or remove any scale or fluff.
- Hold the iron horizontally over the sink and set the steam knob to "clean" press the steam button. Let the water and steam escape until the anti-drip system cut off the steam.
- Unplugged the unit before cleaning and wipe with clean, soft damp cloth. Do not use any abrasive or scouring pads to clean the soleplate.
- Do not use vinegar or other descaling agents into the water tank.
- Store the iron in a safe and stable place.
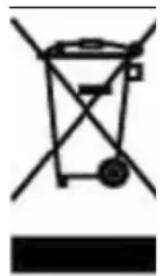
DISPOSAL OF YOUR OLD APPLIANCE
- When this crossed-out wheeled bin symbol is attached to a product it means the product is covered by the European Directive 2002/96/EC.
- All electrical and electronic products should be disposed of separately from the municipal waste stream via designated collection facilities appointed by the government or the local authorities.
- The correct disposal of your old appliance will help prevent potential negative consequences for the environment and human health.
- For more detailed information about disposal of your old appliance, please contact your city office, waste disposal service or the shop where you purchase the product.
SPECIFICATION
Model No :SF-1305/SF-1306
Voltage:220-240v 50 / 60Hz
Wattage:1830-2200W
Water tank capacity :300ml
GUARANTEE
This product is guaranteed for a period of 2 years from the date of purchase against defects in materials and workmanship. Under this guarantee the manufacturer undertakes to repair or replace any parts found to be defective, provided the product is brought back to the purchase address. This guarantee is only valid if the appliance has been used in accordance with the instructions, and that it has not been modified, repaired or interfered with by any unauthorized person, or damaged through misuse.
This guarantee does not cover wear and tear, or breakables such as ceramic items, etc. If the product fails to operate and needs to be returned, pack it carefully, enclosing your name and address and the reason for return and bring it to the address of purchase. If within the guarantee period, please also provide the guarantee card and proof of purchase.
E-mail Service Address:
info@swisselektro.com
LISEZ CES INSTRUCTIONS
BELANGRIJKE VEILIGHEIDSWAARSCHUWINGEN
Modelnr. :SF-1305/SF-1306
Voltage:220-240v 50 / 60Hz
Vermogen :1830-2200W
Water tank capacititeit :300ml
GARANTIE
E-postserviceaddress:
info@swisselektro.com
Kaere kunde,
Modelr. :SF-1305/SF-1306
Spending:220-240v 50 / 60Hz
Watt:1830-2200W
Vandtankindhold :300ml
GARANTI
MoelbNo.:SF-1305/SF-1306
HanpaJxHe:220-240B\~50/60Tc
Mouhoctb:1830-2200BT
06xem pe3epByapa DIA BOdbi:300Mn
TAPAHTN
Ha 3OT npOdyKT npEOCTabIeTc2- yx IeTHra rapaHTn, HauHHa C daTbI NOKyKn, KOtOPa paacnpocpaHaeTc Ha deEeKbMaTePnaIOB n KaueCTBO n3rOToBLeHn. IIO 3TOI rapaHTn npoIN3BOIDteJIb o6aYeTc npoIN3BeCTn peMOHT nII 3aMeHy IIO6oI DeTALN, KOTOPa OKaKeTcH HeNCpABHO npu YCIOBn, YTO npOdyKT 6ydt npedbAIEH No MeCTy NOKyKn. DaHHa rapaHTn DeICTBHeH pni UcNOBn, YTO npi6Op INCNoJB3OBaLCB C COOTBECTBn C INHCTpyKUmaH, He NODBepraLCN3MeHEHm, PemOH TY NII BCKpbITNILOIuCaAMn, He IMeIOUIMn HA TO COOTBeTCTBYIOUX NOLHOMOCh, IN He 6bl NOBpeJXDeH B pe3yIbTaTe HENpaBnIBHO 3KcnIyatauNN.
JaHHa rapaHTn He paocpoCTpaHReTc H N3HOC, cHn eCt NobpeXeHn PnactNKOBbIX DeTaJIe KOpnyca n T.n. Ecn npOyKT He pa6oTaET I NOJLeKHT BO3BpATy, AKKpaTHO yNaKyTe erO, YKaKNeTe CBOE mM, aDPEC n npuHHy BO3BpATA n DOCTABBe No MeCy Tn OOKynK. Ecn CpOK rapaHTn He nCTeK, pnploKHe TaKke rapaHTnHbI TaIOH n YeK O NOKyKe.
Adec 3JIeKTPoHNOI NOUbI:
info@swisselektro.com
Stimate Client,
Br. Modela :SF-1305/SF-1306
Napon:220-240v 50 / 60Hz
Snaga :1830- 2200W
Kapacitet spremnika za vodu :300 ml
JAMSTVO
Ovaj proizvod ima jamstvo u trajanju od 2 godine od datumu kupnje za ostecenja u materijalima i izvedbi. Pod ovim jamstvom proizvodač se obvezuje na popravak ili zamjenu ostecenih dijelova, omogucujuci da se proizvod vrati tamo gdje je kuplejen. Jamstvo je valjano samo ako je uredaj korišten u skladu s uputama te da不同程度 prepravljan, popravljan ili posredovan od neovlaštene osobe ili ostecen nepravlnom uporabom.
Ovo jamstvo nePokriva trosenje i habanje niti lomove poput keramickih dijelova, itd. Ako uredjne radi potrebno ga je vratiti, pažljivo ga zapakirajte, napišite svoje ime i adresu te razlog vraćanja i dostavite ga na adresu kupnje. Unutar razdoblja valjanosti jamstva takoder dostavite jamstvenu karticu i dokaz o kupnji.
Adresa usluge e-poste:
info@swisselektro.com
Vázéný zákazníku,
Model c.:SF-1305/SF-1306
Napěti:220-240v\~50/60Hz
Prikon:1830-2200W
Objem nadrzky na vodu :300 ml
ZÁRUKA
Model c.:SF-1305/SF-1306
Napatie:220-240v 50 / 60Hz
Prikon:1830-2200W
Modell szém :SF-1305/SF-1306