TR2547 - Beard trimmer TRISTAR - Free user manual and instructions
Find the device manual for free TR2547 TRISTAR in PDF.
| Type de produit | Product type |
| Marque | Brand |
| Modèle | Model |
| Alimentation | Power supply |
| Nombre de peignes inclus | Number of combs included |
| Longueur de coupe minimale | Minimum cutting length |
| Longueur de coupe maximale avec peigne | Maximum cutting length with comb |
| Longueurs des peignes | Comb lengths |
| Levier réglable | Adjustable lever |
| Type de lames | Blade type |
| Lames remplaçables | Replaceable blades |
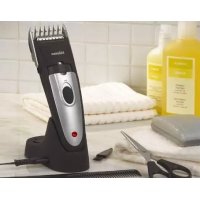
| Accessoires inclus | Included accessories |
| Utilisation | Usage |
| Entretien | Maintenance |
| Nettoyage | Cleaning |
| Sécurité | Safety |
| Sécurité | Safety |
| Sécurité | Safety |
Frequently Asked Questions - TR2547 TRISTAR
User questions about TR2547 TRISTAR
0 question about this device. Answer the ones you know or ask your own.
Ask a new question about this device
Download the instructions for your Beard trimmer in PDF format for free! Find your manual TR2547 - TRISTAR and take your electronic device back in hand. On this page are published all the documents necessary for the use of your device. TR2547 by TRISTAR.
USER MANUAL TR2547 TRISTAR
AND SAVE THESE INSTRUCTIONS
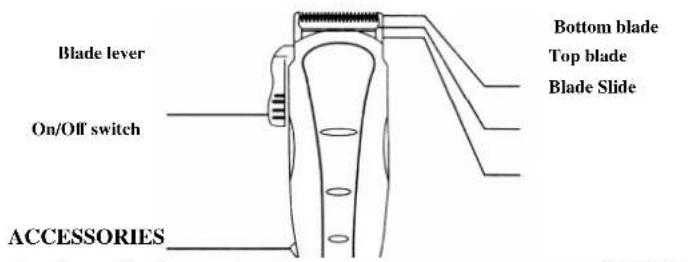
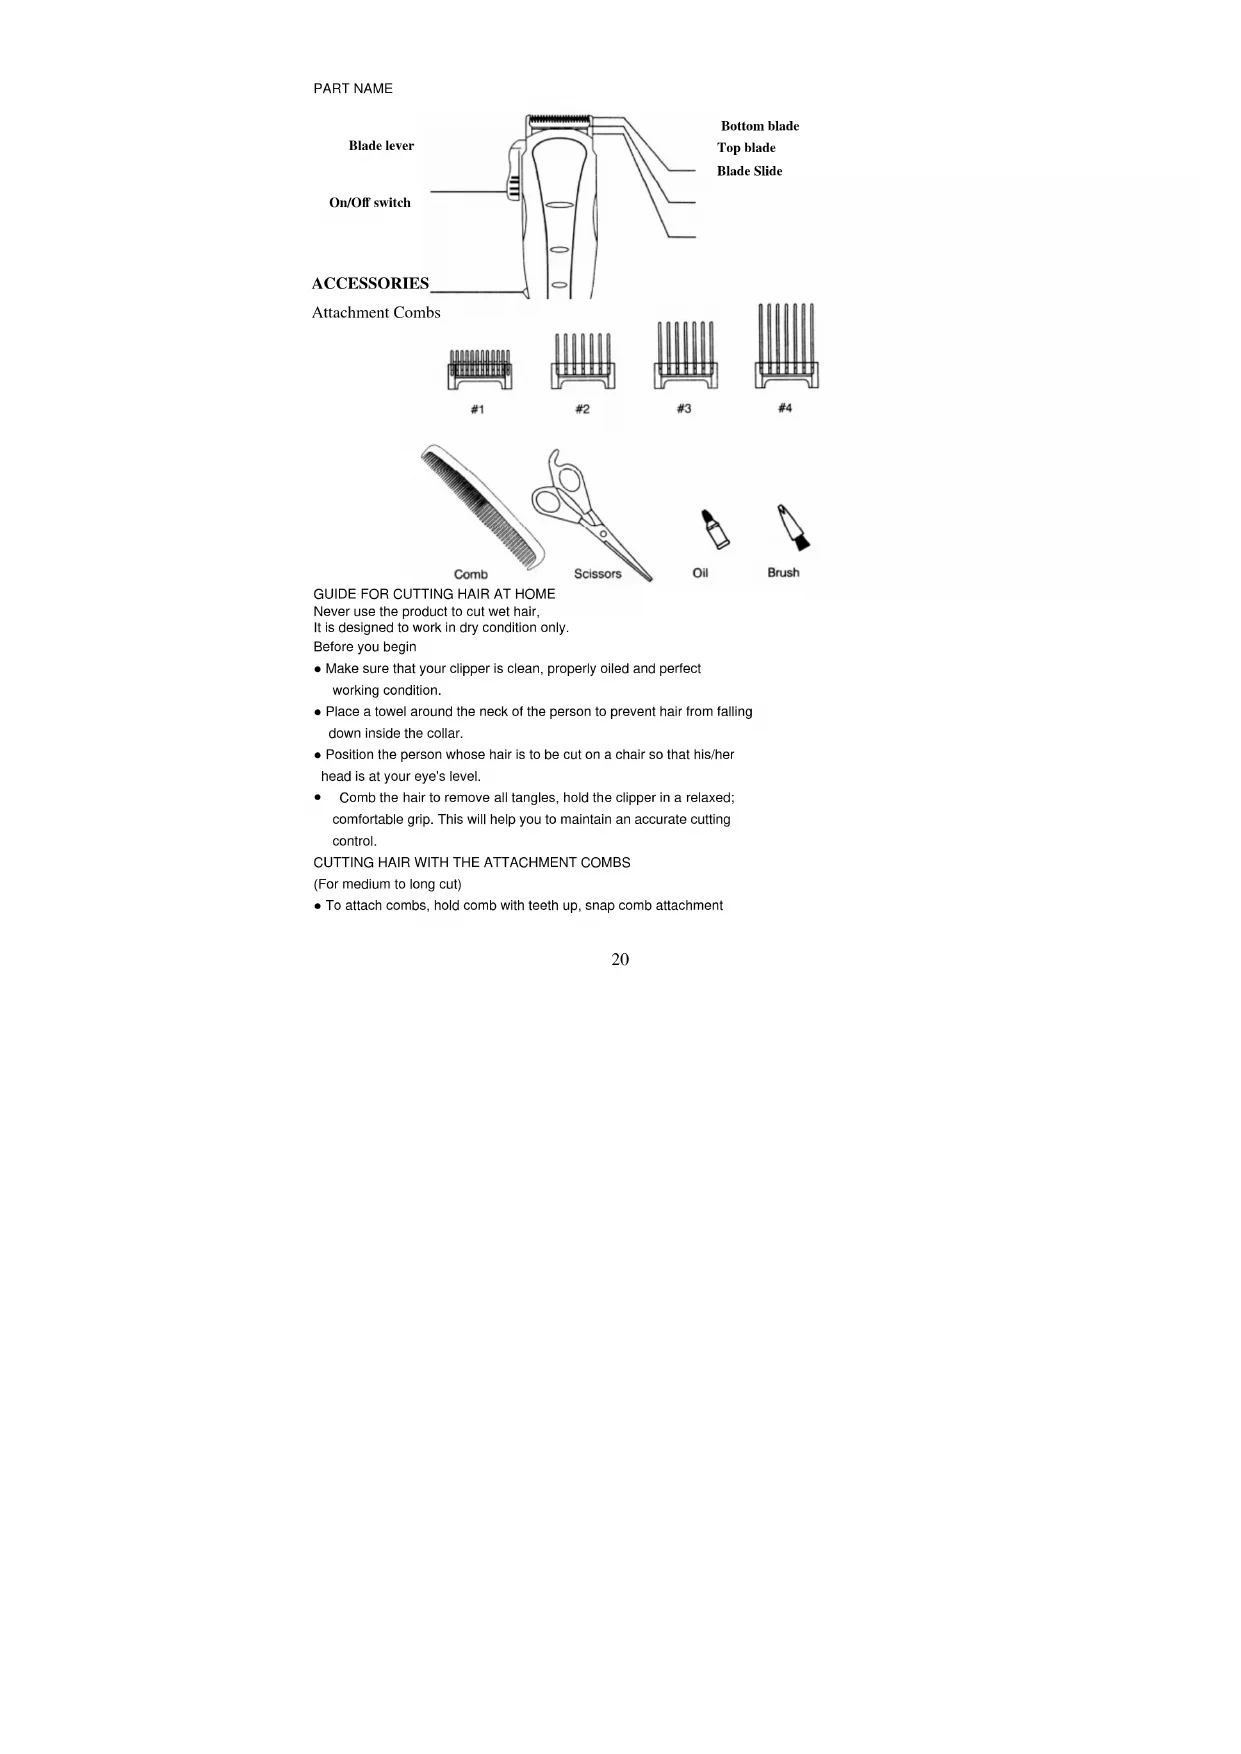
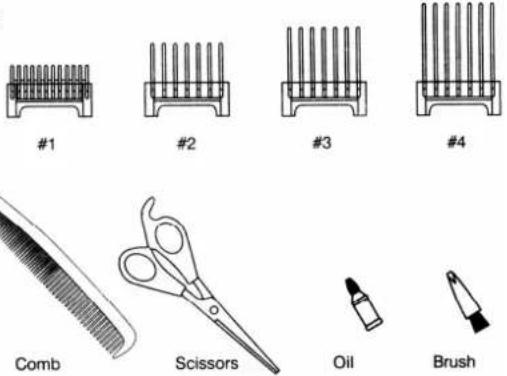
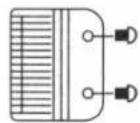
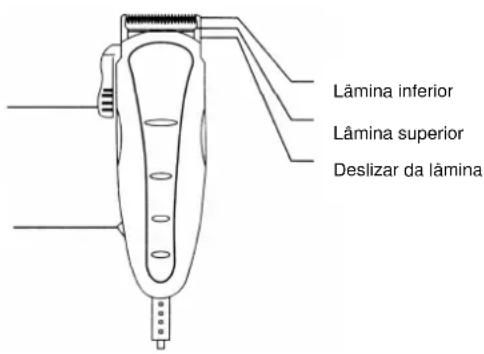
PART NAME
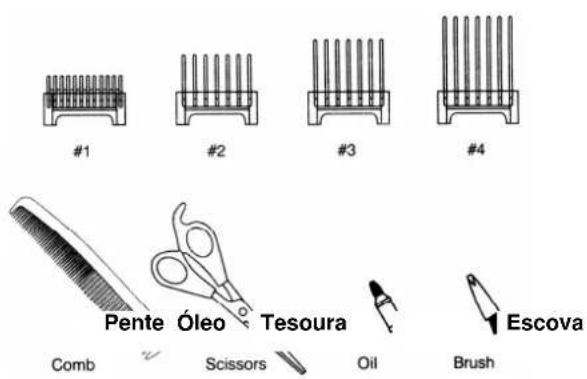
Attachment Combs
GUIDE FOR CUTTING HAIR AT HOME
Never use the product to cut wet hair.
It is designed to work in dry condition only.
Before you begin
- Make sure that your clipper is clean, properly oiled and perfect working condition.
- Place a towel around the neck of the person to prevent hair from falling down inside the collar.
- Position the person whose hair is to be cut on a chair so that his/her head is at your eye's level.
- Comb the hair to remove all tangles, hold the clipper in a relaxed; comfortable grip. This will help you to maintain an accurate cutting control.
CUTTING HAIR WITH THE ATTACHMENT COMBS
(For medium to long cut)
- To attach combs, hold comb with teeth up, snap comb attachment
firmly to the bottom of the clipper blade,
Attachment comb #1 --- leaves hair approx. Blending in length
Attachment comb #2 --- leaves hair approx. 1/4" in length
Attachment comb #3 --- leaves hair approx. 1/2" in length
Attachment comb #4 --- leaves hair approx. 3/4" in length
Special angle comb is available.
- At the beginning, cut only a small amount of hair until you become accustomed to the length each attachment comb leaves the hair.
It is suggested to try the longest attachment comb on the clipper first, then use the shorter one if the desired length is shorter.
For uniform cutting, never push or force the clipper through the hair at a fast rate. The clipper works most efficiently when it works at its own speed. - Start by combing the hair in its natural direction,
-
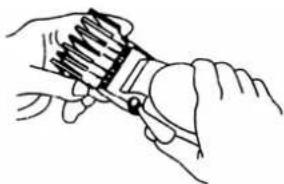
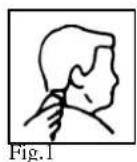
Place the largest, attachment comb onto your clipper and start by trimming the sides from the bottom upwards. Hold the clipper lightly against the hair with teeth of the attachment comb pointing up but flat against the head. Slowly lift the clipper up and outward through the hair, cutting only a small amount at a time.(Fig. 1)
-
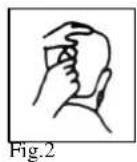
Repeat around sides and back of head.(Fig.2)
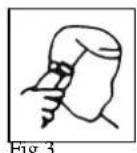
If you desire shorter hair, either change to a lower number attachment comb or apply more pressure and less lift away from head with the present attachment comb. - This entire procedure requires practice, and it is always better to leave too much hair the first few haircuts.(Fig.3)
For the top of the head, you will give a fairly short cut if
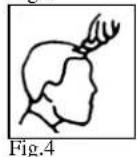
you use the #4 attachment comb. With the teeth flat against the head, slowly start trimming from the front to the back. Again, it is better to leave the hair longer the first few haircuts.(Fig.4)
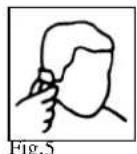
Outlining
- Outlining requires no attachment. Take the clipper and push the lever up to the close-cut position.
- Comb hair into the style. Position clipper between the side burns and the ear.(Fig. 5)
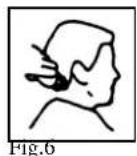
Make sure the corner edge of the blade is against the hairline. With the outline of the hair as your guide, slowly move the clipper over, around, and behind the ears.(Fig.6)
For the back of the neck and the sideburns, hold the clipper upside down, (see sketch), and holding it against the skin at the length desired, move downwards.
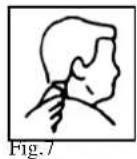
Short cuts to perfect flat tops, crew cuts.
Always cut from the back of the neck to the crown, using the longest attachment comb. Holding it flat against the head, slowly move the clipper up through the hair. Use the same technique for the sides, cutting from the bottom to the upper side of the head. (Fig.7)
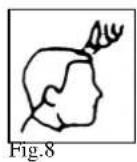
For the front to the crown, cut the hair against the direction in which it grows. Then even it up with the sides.(Fig.8)
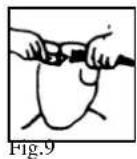
For a flat top, use a flat comb, not the attachment comb. Just cut hair on top of the head over it. To taper hair down to the neckline, use closer cutting attachment combs. Comb hair and check for uneven spots and outline sideburns and neckline.(Fig.9)
If a short tapered cut on the sides and back is desired, follow the diagram below:
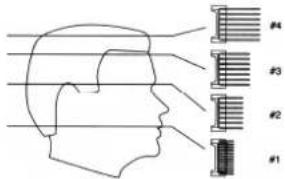
The four basic areas illustrated on the hair cutting guide are your "road map" to easy do-it-yourself hair cutting.
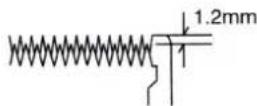
MAINTENANCE
- Your clippers were carefully examined to ensure that the blades were oiled and aligned before leaving our factory.
- Blades must be realigned if they have been removed for cleaning or replacement.
To realign the blades, simply match the upper and bottom blades teeth
up, point for point.
(End of top blade teeth)
should be approximately
1.2mm back from bottom blade.
Compare your clipper blades
with the sketch)
If blade alignment is incorrect, add a few drops of oil to the blades, turn clipper on for a few moments, turn off and unplug. Loosen screws slightly and adjust. Tighten screws after blade is aligned.
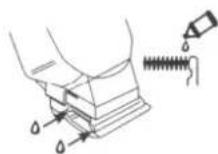
Oil
To maintain your clipper in peak condition, the blades should be oiled every few haircuts.
- Do not use hair oil, grease, oil mixed with kerosene or any solvent. As the solvent will evaporate and leave the thick oil which may slow down the blades motion.
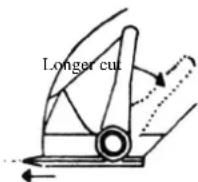
Adjustable lever
- The lever is conveniently located near your thumb (if you're right-handed) so it can easily be adjusted while the clipper is in your hand.
-
The lever adds versatility to your clipper by allowing you to gradually change the closeness of your cut without an attachment comb.
-
When the lever is in the uppermost position, the blades will give you the closest cut and leave the hair very short. Pushing the lever downward gradually increases the cutting length.
- In its lowest position, the lever will leave the hair approximately the same length as a #1 comb.
- The lever will also extend the use of your blades since a different cutting edge is used in each setting.
- In addition, if extremely heavy hair cutting has jammed the blades, it will help you remove hair that has become wedged between the two blades without removing the blades.
- While the clipper is running, rapidly move the lever from "close cut" to "longer cut" a couple of times. Doing this each time after you have finished using your clipper will help to keep the blades clear of cut hair. If your clipper stops cutting and this does not help, your cutting blades are dulled. Replace them with new blades.
Storage
- Keep the product in soft and ventilated place unreached by children.
IMPORTANT SAFEGUARDS
When using electrical appliances, especially when children are present, basic safety precautions should always be followed, including the following:
To reduce the risk of death or injury by electric shock:
- Unplug this appliance before cleaning.
- Do not place or store appliance where it can fall or be pulled into a tub or sink.
- Do not use while bathing or in a shower,
- Do not place in, or drop into, water or other liquid.
- Do not reach for an appliance that has fallen into water. Unplug immediately.
To reduce the risk of burns, electrocution, fire, or injury to persons:
- Use this appliance only for its intended use as described in this manual.
- Do not use attachments not recommended by the manufacturer.
- This appliance should never be left unattended when plugged in.
- Close supervision is necessary when this appliance is used by, on, or near children or invalids.
- Never operate this appliance if it has a damaged cord or plug, if it is not working properly.
-
Keep the cord away from heated surfaces.
-
Do not pull, twist, or wrap line cord around appliance.
- Never drop or insert any object into any opening on this appliance.
Before use, make certain blades are aligned properly. - Do not place appliance on any surface while it is operating.
- Do not use this appliance with a damaged or broken comb nor with teeth missing from the blades as injury may occur.
- Do not use outdoors or operate where aerosol (spray) products are being used or where oxygen is being administered.
Any other servicing should be performed by an authorized service representative. - If the supply cord is damaged it must be replaced by the manufacturer or its service agent or a similarly qualified person in order to avoid a hazard.
堂表
Espanol
APENAS PARA USO DOMÉSTICO
MANUAL DE INSTRUÇÉS
LEIA TODAS AS INSTRUÇÉS E GUARDE-AS ANTÉS DE UTILIZAR O APARELHO
NOME DAS PECAS
Manipulo da lamina
Interruptordeligarsdlsligar
ACESSORIOS
Pente
GUIA PARA CORTAR CABELO EM CASA
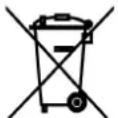
This appliance should not be put into the domestic garbage at the end of its useful life, but must be disposed of at a central point for recycling of electric and electronic domestic appliances. This symbol on appliance, instruction manual and packaging puts your attention to this important issue. The materials used in this appliance can be recycled. By recycling used domestic appliances you contribute an important push to the protection of our environment. Ask your local authorities for information regarding the point of recollection..
AVVERTENZA PER LA TUTELA DELL'AMBIENTE