TR2543 - Beard trimmer TRISTAR - Free user manual and instructions
Find the device manual for free TR2543 TRISTAR in PDF.
| Product Type | Rechargeable beard trimmer |
| Brand | TriStar |
| Model | TR2543 |
| Power source | Rechargeable battery (Li-Ion) or mains via adapter |
| Input voltage | 100-240 V ~ 50/60 Hz (mains adapter) |
| Charging time | 4 hours |
| Cordless runtime | Approximately 30 to 40 minutes |
| Cutting lengths | 7 positions from 4 to 20 mm (removable comb) |
| Blade type | Stainless steel blades |
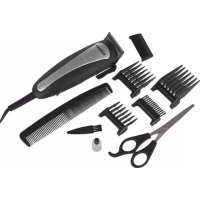
| Included accessories | Removable comb, haircut scissors, comb, cleaning brush, lubrication oil, charging station, mains adapter |
| Charge indicator | Charging indicator light |
| Use with cord | Possible by plugging the adapter directly into the trimmer |
| Length lock | Lock switch (Unlock/Lock) to secure the setting |
| Maintenance | Clean the blades with the brush, lubricate with the provided oil after each use |
| Blade cleaning | Disassemble the head, remove hairs with the brush, apply 2-3 drops of oil |
| Safety precautions | Do not use near water, unplug after use, do not expose to humidity, do not charge for more than 48h |
| Charging temperature | Between 0°C and 40°C |
| Housing material | ABS plastic |
| Weight | Approximately 200 g (estimate) |
| Warranty | 2 years (subject to manufacturer's conditions) |
Frequently Asked Questions - TR2543 TRISTAR
User questions about TR2543 TRISTAR
0 question about this device. Answer the ones you know or ask your own.
Ask a new question about this device
Download the instructions for your Beard trimmer in PDF format for free! Find your manual TR2543 - TRISTAR and take your electronic device back in hand. On this page are published all the documents necessary for the use of your device. TR2543 by TRISTAR.
USER MANUAL TR2543 TRISTAR
natural_image
Black and white hairbrush with a black handle and silver blade, displayed against a solid wall (no text or symbols visible)TR-2543
natural_image
Illustration of two figures in traditional attire, one standing and one seated, with no visible text or symbols.FIG. 1 FIG. 2
natural_image
Simple line drawing of a person standing under an arch with a triangular symbol above their head (no text or labels)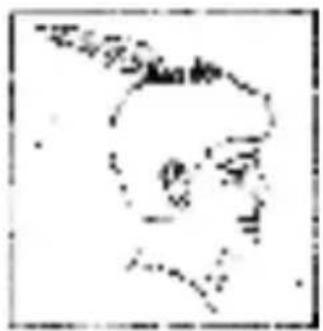
natural_image
Simple line drawing of a human head in profile (no text or symbols)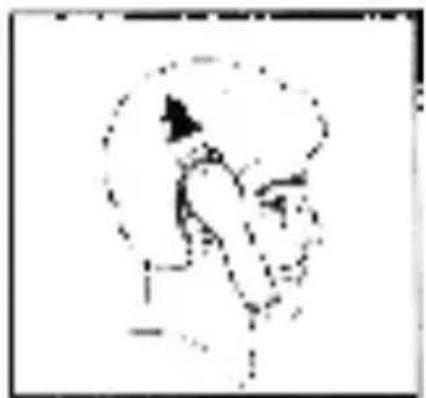
natural_image
Simple line drawing of a hand holding an object, enclosed in a circular frame (no text or symbols)FIG. 3 FIG. 4
natural_image
Pixelated illustration of a human head with abstract facial features (no text or symbols)FIG. 5 FIG. 6
natural_image
Simple line drawing of a stylized human head with a pointed hat (no text or symbols)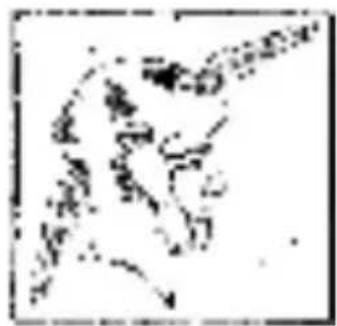
natural_image
Abstract black-and-white sketch of a human head and arm (no text or symbols)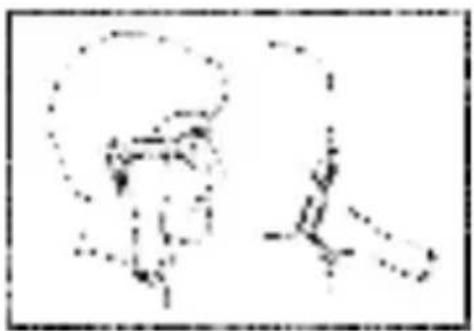
natural_image
Simple line drawing of a mechanical component with no text or symbolsFIG.7 FIG. 8
OPLAADBARE TONDEUSE TR-2543
GEBRUIKSAANWIJZING
Tristar tondeuse rechargeable TR-2543
Mode d'emploi
Avant l'utilisation
Tristar rechargeable haircutter TR-2543
Instructions for use
Before use
Please read these instructions attentively, They will give you important pieces of advice for the use, the security and the maintenance of the appliance Keep the instructions carefully end, should the situation arise, pass them on to further users.
The appliance must only be used for the intended purpose according to these instructions.
Observe the notes on safety regulations.
Eliminate the packaging properly.
Description
1 Clipperhead
2 ON/OFF switch
3 Charge indicationlamp
4 Chargingposition
5 Cutting length locking switch
6 1 comb attachment for 7 cutting lengths
7 Plug-in charger or direct mains operation
8 Scissors
9 Hairdressing comb
10 Cleaning brush
11 Lubricant oil
Important advice
Before using the clipper for the first time, remove the packaging material and check that the cutting length locking switch (5)
is switched to `Unlock". You will only be able to fit the comb attachment when the switch is in this position.
The hair clipper will have been checked carefully before despatch to make sure that the blades have been oiled.
Charging the battery
Check that the hair clipper has been switched off, i.e. the On/Off switch (2) must be in the "Off" position.
Place the hair clipper in the charging stand (4). Plug the plug-in charger (7) into a socket and connect it to the charger
stand. The battery will then start to charge and the charge indication lamp (3) will glow red.
After it has been charged for about 4 hours, the hair clipper will be able to operate in cordless mode far about 30-40 minutes. Take the hair clipper out of the charging stand and switch the On/Off switch to the "ON" position. Switch the appliance off again after you finish using it.
You can also charge the appliance without using the charging stand. Check that the appliance is switched off. Plug the plug-in charger (8) into a socket and connect it directly to the hair clipper. The battery will then start to charge, and the charge indication lamp (3) will glow red. After it has been charged for about 4 hours, the hair clipper will once again be ready for about 30-40 minutes of cordless operation. Disconnect the hair clipper from the socket and simply switch the On/Off switch to the "ON" position. Switch the appliance off again after you finish using it.
Mains operation
Check that the appliance has been switched off, i.e. the On/Off switch must be in the "Off" position. Plug the plug-in charger (7) into a socket and connect it directly to the hair clipper. Switch the appliance on, and you can then start cutting right away. Switch the appliance off again after you finish using it.
This option enables you to switch immediately to mains operation if the battery discharges unexpectedly, allowing you to finish a haircut.
Using the comb attachment
Hold the hair clipper back to front in your hand. Check that the cutting length locking switch (5) on the base of the hair clipper is in the "Unlock" position. Now slide the two guide rails on the comb attachment into the depressions in the casing of the clipper.
The comb attachment can be set to any of 7 lengths far cutting. You can read off the set length in mm on the attachment (4 to 20mm).
- To set the required length, first move the cutting length locking switch to "Unlock". Place your thumbs on the ribbed surface of the comb attachment and slide it backwards or forwards until you reach the cutting length you require.
Example: If the small arrow an the hair clipper paints to the arrow indicating 20mm, the set hair cutting length is 20mm, etc.
- Once you have set the required hair cutting length, you will have to slide the cuffing length locking switch to the "Lock" position to fix the comb attachment in this setting.
Use the some procedure each time you change the setting.
Tips for beginners
Practice makes perfect when it comes the haircuts.
Never move the hair clipper quickly through the hair for a standard cut. The appliance only works at its best if it is pushed gently.
Don't forget to comb through the hair at regular intervals, in order to remove the small hairs that have already been cut.
While you do this, check that you have been cutting the hair evenly.
It is better not to cut the hair too short at first, so that you can get used to the length of cut at each setting. We recommend that you begin with the longest length of cut (20 mm), and then select a shorter setting if required.
OPERATION
Preparation
We recommend that you wash the hair first and then cut it after it has been towel-dried.
Sit the person having the haircut in a chair, so that his or her head is at your eye level.
First of all, comb the hair so that it fells naturally.
Hold the hair clipper loosely in your hand, so that you always have the correct degree of control as you cut.
Cutting
Unlock the comb attachment by sliding the cutting length locking switch (6) to "Unlock". At first, set the length of cut to 20 mm.
Fix the cut length at this setting by moving the cutting length locking switch back to "Lock". This procedure must be repeated each time the length of cut is re-set.
Start by trimming the sides from the bottom upwards. Hold the clipper lightly against the hair with teeth of the attachment
comb pointing up but flat against the head. Slowly lift the clipper up and outward through the hair
(use a shorter length setting if necessary), cutting only a small amount at a time (Fig. 1).
Repeat around sides and back of head (Fig. 2)
If you want to cut the hair shorter, you have to set a shorter length of cut.
Alternatively, you could use the same setting and press more firmly, then lift the appliance out more slowly.
This entire procedure requires practice, and it is always better to leave too much hair the first few haircuts (Fig. 3).
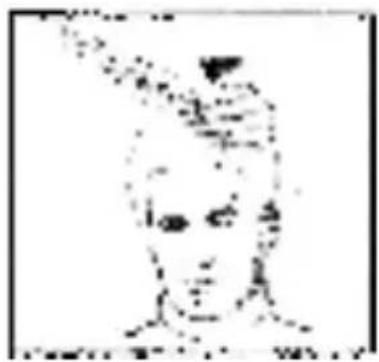
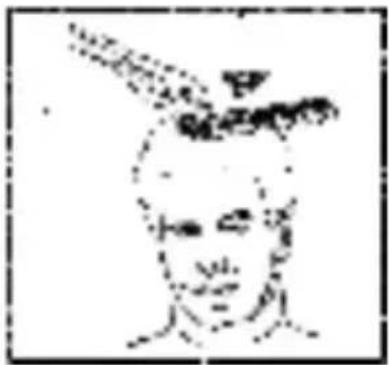
You can use the 10 or 1 2mm hair length setting to cut the top hair on the head quite short. Use the 4 or 7mm setting to cut crew cuts.
With the teeth flat against the head, slowly start trimming from the front to the back. Again, it is better to leave the hair longer the first few haircuts (Fig. 4).
Outlining
You do not need the comb attachment to finish off the cut. Remove the comb attachment from the appliance for this step.
Comb hair into the style. Position clipper between the side burns and the ear. Make sure the corner edge of the blade is against the hairline. With the outline of the hair as your guide. slowly move the clipper over. around, and behind the ears (Fig. 5).
For the back of the neck and the sideburns, hold the clipper upside down, (see sketch), and holding it against the skin at the length desired, move downwards.
Cleaning the blades
Hold the hair clipper slightly vertically in front of you, i.e. with the clipper blade at the front slightly upwards towards you
Press the blades backwards with your thumbs in order to remove the clipper blade from the casing (Fig. A).
The cutting head and the holder will come off the hair clipper.
Press the white block with the holder to open the clipper blades (Fig. B). Use the cleaning brush (10) to remove any hair remaining between the blades.
Then place 2 or 3 drops of oil between the blades for lubrication. Push the cutting head back on until it clicks properly into place.
Switch the appliance on for a couple of seconds so that the oil can be distributed evenly. Use the oil supplied for lubrication.
The clipper blades should be oiled regularly (or after each time they are used) to keep the appliance in good order.
Do not use hair oil, grease or any oil mixed with kerosene or other solvent. The solvent will evaporate, and will leave thick oil, which might then cause the blades to move more slowly.
Remains of greasiness from the hair itself may also lead to a less satisfactory cutting process. If this happens, open the clipper blades by pressing an the white block with the holder, then dip the blades briefly into pure petroleum. Dry the blades afterwards with a cloth.
Disposal
Disable unserviceable appliances immediately. Remove the mains plug and cut off the mains connection cable.
If possible, bring unservable appliances to an official waste collection point.
Safety regulations
Plug the hair dryer only in an outlet as mentioned on the rating plate.
An electric appliance is not a children's toy. Children are not aware of the hazards of electrical appliances.
Therefore close supervision is necessary when the appliance is used by children. Do not allow power cable to hang down within easy reach! Keep children away from packing material, e.g. plastic bags.
Since the lubricating oil contains petroleum, please keep the bottle of oil out of the reach of children .If oil has been swallowed, call a doctor irnmediately.
Do not use this appliance near the water contained in bathtubs, washbasins or other receptacles nor expose it to rain or other humidity.
The installation of a earth-leakage current protective device with a rated switching current offers you additional safety by ensuring that 30 ma will not be exceeded in the house installation. Let your installation electrician advise you. Danger also exists with appliances which have been switched off, this is why, after use, the plug should be removed from the mains.
Always switch off the appliance when it is not used.
Pull out the plug: in case of faults during use., before cleaning and maintenance., and after use.
Regularly check whether the wire is defective. In this case the appliance must not be put into operation (immediately pull the plug). Send it to the manufacturer for repair.
Never pull the plug by flex or with wet hands out of the socket.
Never carry nor pull the appliance by the flex.
Don't pull the flex over sharp edges. Don't wedge it.
Only use extension leads after having made sure that their condition is faultless.
Never place the appliance an a surface during operation.
Do not place the electrical cable next to fires or hot surfaces.
Don't use the appliance (immediately pull out the plug) if: the appliance or the easing is damaged.
he appliance must obviously have a leak. you suspect a defect after a fall or something similar.
In this case the appliance must be brought to the after-sales service place approved by the producer.
Use this appliance only for its intended use as described in this manual. Do not use attachments not recommended by the manufacturer.
Do not use the appliance if the comb attachment has been damaged or if the blades are broken, as this might cause injury.
Never drop or insert any object into any opening on this appliance.
Do not use outdoors or operate where aerosol (spray) products are being used or where oxygen is being administered.
Battery cell components may cause damage to the environment. Please do not throw defective batteries into the dustbin, but use special battery recycling arrangements to dispose of them.
Never charge the battery if the temperature is below TC or above 4TC.
Never charge the battery in direct sunlight or next to a radiator.
Never charge the battery continuously for longer than 48 hours under any circumstances.
Only trained personnel should repair electrical appliances. Unskilled repairs can cause considerable danger to the user.
If the connection cord is damaged, it must be replaced by the manufacturer, his after-sales service department or a similarly qualified person in order to avoid risks.
No warranty for any possible damage can be accepted if the appliance is used for improper purpose, wrongly operated or unprofessionally repaired. In such a case, any warranty claim is void.
PT
natural_image
Two abstract line-drawn diagrams showing a curved object with internal lines, possibly representing a biological or mechanical component (no text or symbols)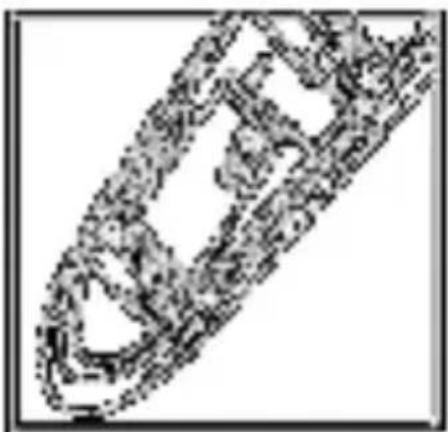
natural_image
Abstract geometric pattern with interlocking shapes (no text or symbols)
text_image
Scanned document with fragmented Chinese text and a small illustration of a pen-like object, possibly a pen or tool.natural_image
Symbol of a trash bin with crossed lines indicating no waste or discharge, and a solid black rectangle below (no text or labels)natural_image
Symbol of a trash bin crossed with a diagonal line, representing no waste or elimination (no text or labels)Guidelines for protection of the environment
natural_image
Symbol of a trash bin crossed with no text or labels
This appliance should not be put into the domestic garbage at the end of its useful life, but must be disposed of at a central point for recycling of electric and electronic domestic appliances. This symbol on appliance, instruction manual and packaging puts your attention to this important issue. The materials used in this appliance can be recycled. By recycling used domestic appliances you contribute an important push to the protection of our environment. Ask your local authorities for information
regarding the point of recollection..