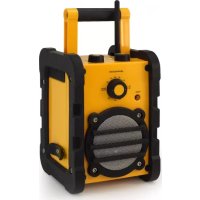
RD1560 - Radio AudioSonic - Free user manual and instructions
Find the device manual for free RD1560 AudioSonic in PDF.


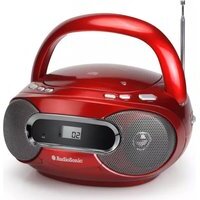
| Product type | Portable analog radio |
| Brand | AudioSonic |
| Model | RD1560 |
| Reception bands | AM (530-1600 kHz) and FM (88-108 MHz) |
| Output power | 1 x 8 W |
| Mains power supply | 230 V ~ 50 Hz |
| Battery power supply | 4 x 1.5 V type C/UM-2 batteries (not included) |
| Auxiliary input | AUX-IN socket (3.5 mm) |
| Dimensions (W x H x D) | 24.5 x 17.5 x 18.5 cm |
| Weight | Approximately 1 kg (estimated) |
| Housing material | Plastic |
| Antenna | Telescopic antenna for FM, integrated directional antenna for AM |
| Controls | On/Off and AM/FM selection button, volume knob, tuning knob |
| Power indicator | Yes |
| Cleaning | Soft, clean cloth, mild non-abrasive detergent. Do not use solvents. |
| Safety | Do not expose to water, naked flames, extreme temperatures, or vibrations. Do not obstruct ventilation openings. |
| Warranty | 24 months from date of purchase against defects in materials and workmanship. |
| Compliance | EC Directives 2006/95/EC, 2004/108/EC, and 93/68/EEC |
| Recycling | Do not dispose of with household waste. Take to a WEEE recycling center. |
| Included accessories | Mains power cord (fixed) |
Frequently Asked Questions - RD1560 AudioSonic
User questions about RD1560 AudioSonic
0 question about this device. Answer the ones you know or ask your own.
Ask a new question about this device
Download the instructions for your Radio in PDF format for free! Find your manual RD1560 - AudioSonic and take your electronic device back in hand. On this page are published all the documents necessary for the use of your device. RD1560 by AudioSonic.
USER MANUAL RD1560 AudioSonic
natural_image
Yellow portable radio device with black foam base and control knobs (no visible text or symbols)RD-1560

AudioSonic
Dear customer,
Congratulations and thank you for purchasing this high quality product.
Please read the instruction manual carefully so that you will be able to make the best possible use of the appliance. This manual includes all the necessary instructions and advice for using, cleaning and maintaining the appliance. If you follow these instructions you will be guaranteed off an excellent result, it saves you time and will avoid problems. We hope you will have a great deal of pleasure from using this appliance.
General safety instructions
- No naked flame sources, such as lighted candles, should be placed on the apparatus.
- Do not place the product in closed bookcases or racks without proper ventilation.
- Where the mains plug is used as the disconnect device, the disconnect device shall remain readily operable.
- The ventilation should not be impeded by covering the ventilation openings with items, such as newspapers, table-cloths, curtains, etc.
- It shall not be exposed to dripping or splashing and no objects filled with liquids, such as vases, shall be placed on the apparatus.
- Do not connect FM antenna to outside antenna.
- The unit should not be exposed to direct sunlight, very high or low temperature, moisture, vibrations or placed in a dusty environment.
- Do not use abrasive, benzene, thinner or other solvents to clean the surface of the unit. To clean, wipe it will mild non-abrasive detergent solution and clean soft cloth.
- Never attempt to insert wires, pins or other such objects into the vents or opening of the unit.
- Disconnect device warning: Main plug is used as the connection, so it should always remain ready operate.
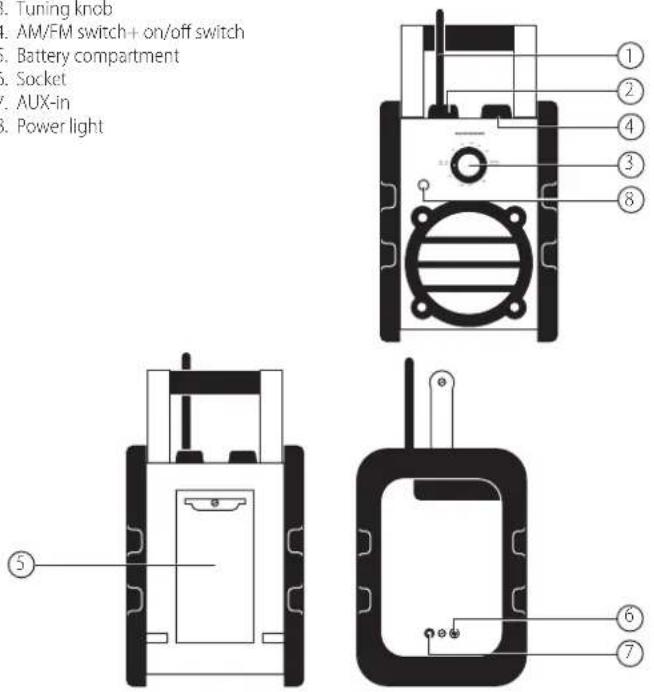
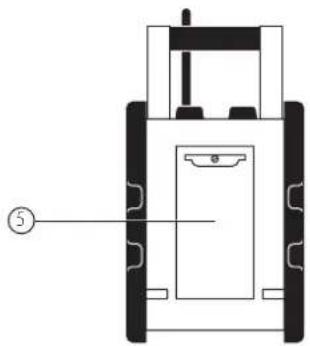
Parts descriPtion
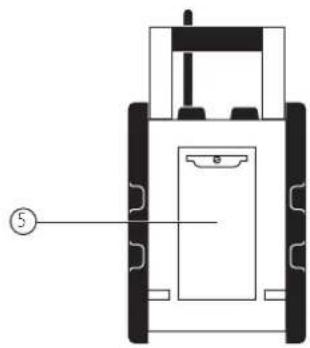
- Antenna
- Volume control
- Tuning knob
- AM/FM switch+ on/off switch
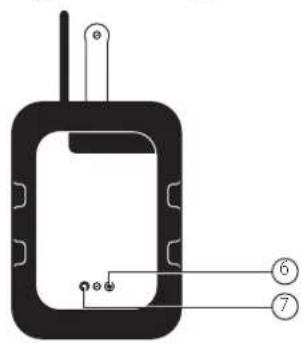
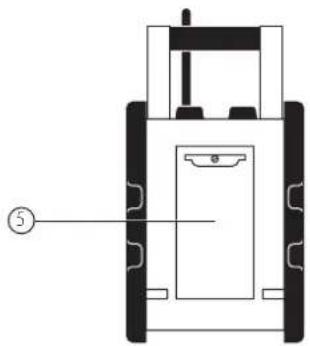
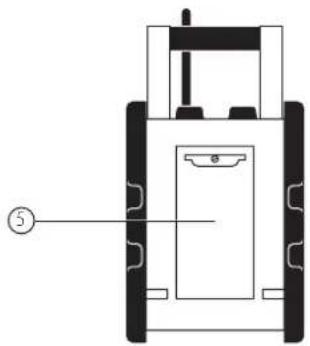
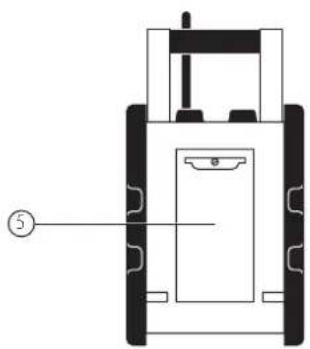
- Battery compartment
- Socket
- AUX-in
- Power light
BEFORE USE
• Take the appliance and accessories out the box.
Remove the stickers, protective foil or plastic from the device.
- Connect the power cable to the socket. Note: Make sure the voltage which is indicated on the device matches the local voltage before connecting the device. Voltage: 220-240V\~50Hz.
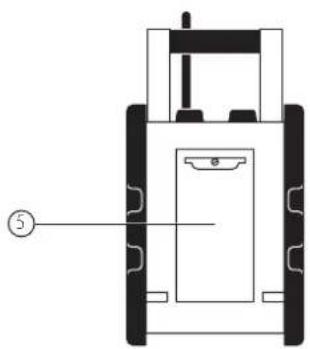
- The appliance can also use DC power by using 4 x 1.5V C/UM-2 type batteries into the battery compartment (6). Make certain that the positive and negative (+ and -) battery terminals are attached to the corresponding terminals on the plate in the battery compartment.
USE
- Switch the radio on and use the desired volume by using the volume control (2).
- Use the AM/FM switch+ on/off switch (4) to choose the AM or FM-band.
- Select the desired radio station by using the tuning knob (3)
- Switch the AM/FM switch+ on/off switch (4) in the 'off' position for switching of the radio.
Comments:
- AM-band uses an internal directional antenna. Turn the radio in the right direction for a good reception.
AUX-IN JACK
• To connect an external device on the radio, you can use the aux-in jack (7).
- Put the aux-in plug (not included) in the desired aux-in jack.
- Start the music on the external device and adjust the volume by using the volume control (2).
SPECIFICATIONS
Model no.: RD-1560
FM-frequency: 88 - 108 MHZ
AM-frequency: 530 - 1600 KHZ
Wattage: 1 x 8 W
AC supply: 230v 50Hz
DC supply: (4 x 1.5V C/UM-2 type)
Dimension: 24,5 x 17,5 x 18,5 cm
GUARANTEE
- This appliances is covered with a 24 month guarantee starting on the date of purchase (receipt).
- Damage caused by not following the instruction manual, will lead to a void of warranty, if this results in consequential damages Tristar will not be liable.
- Tristar will not be liable for material damage or personal injury caused by improper use or if the safety instruction are not properly executed.
- When the application should be repaired, make sure that this will de preformed by an authorized company.
• This appliance may not be amended or changed. - If problems arise during the 2 years from the date of purchase, which are covered by the factory warranty, you can go back to the point of purchase to replace it for a new one.
- Only material or manufacturing defects are included in this warranty.
- Tristar is not liable for damages occurred through:
- In case the appliance has fallen.
- In case the appliance has been technically changed by the owner or an other third party.
- In case of improper use of the appliance.
-
In case of normal wear of the appliance.
-
By executing repairs the original warranty period of 2 years will not be extended, nor the right to a complied new warranty. This warranty is only legal on European soil. This warranty does not overrule the European directive 1944/44CE.
- For questions or compliances please contact your retailer "point of purchase".
• Always keep your receipt, without this receipt you cannot claim any form of warranty what so ever. - If you wish to make a claim please return the entire machine in the original packaging to your dealer together with the receipt.
- Damage to accessories does not mean automatic free replacement of the whole appliances. In such cases please contact our hotline. Broken glass or breakage of plastic parts are always subject to a charge.
- Defects to consumables or parts subject to wearing, as well as cleaning, maintenance or the replacement of said parts are not covered by the guarantee and hence are to be paid!
• The guarantee lapses in case of unauthorized tampering.
• After the expiry of the guarantee repairs can be carried by the competent dealer or repair service against the payment of the ensuing costs.
ENVIRONMENT
Guidelines for protection of the environment
This appliance should not be put into the domestic garbage at the end of its durability, but must be offered at a central point for the recycling of electric and electronic domestic appliances. This symbol on the appliance, instruction manual and packaging puts your attention to this important issue. The materials used in this appliance can be recycled. By recycling
used domestic appliances you contribute an important push to the protection of our environment. Ask your local authorities for information regarding the point of recollection.
Packaging
The packaging is 100% recyclable, return the packaging separated.
Product
This device is equipped with a mark according to the European Directive 2002/96/FC on Waste Electrical and Electronic Equipment (WEEE). By ensuring that this product will be correctly processed into waste, it will help prevent possible negative consequences for the environment and human health.
EC declaration of conformity
This device is designed, manufactured and marketed in accordance with the safety objectives of the Low Voltage Directive "No 2006/95/EC, the protection requirements of the EMC Directive 2004/108/EC "Electromagnetic Compatibility" and the requirement of Directive 93/68/EEC.
Geachte klant,
natural_image
Technical diagram of a mechanical assembly with labeled component (no text or symbols present)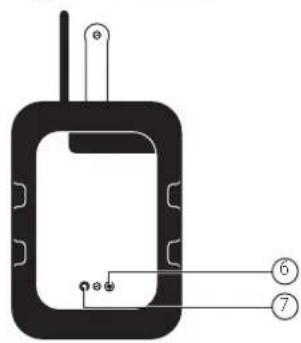
VOOR GEBRUIK
natural_image
Technical diagram of a mechanical assembly with labeled component (no text or symbols present)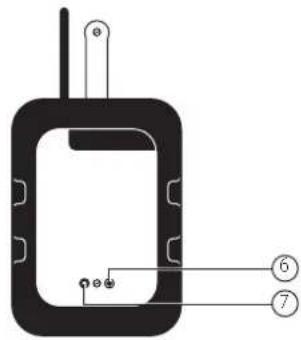
AVANT L'UTILISATION
natural_image
Technical line drawing of a mechanical assembly with labeled component (no text or symbols)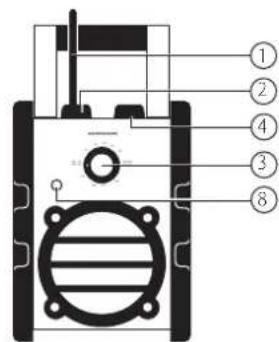
VOR INBETRIEBNAHME
natural_image
Technical line drawing of a mechanical assembly with no visible text or symbols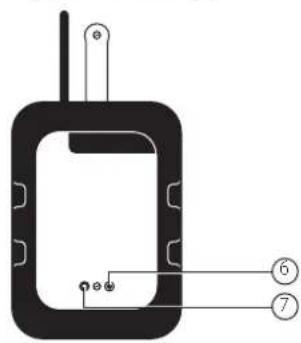
natural_image
Technical line drawing of a mechanical assembly with no visible text or symbols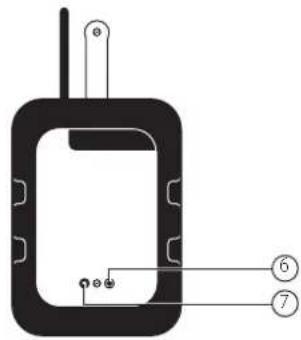
ANTES DE UTILIZAR
natural_image
Technical diagram of a mechanical assembly with labeled component (no text or symbols present)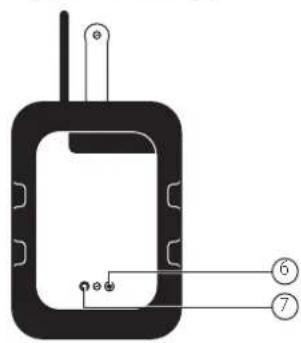
PRZED ROZPOCZĘCIEM UŻYTKOWANIA
Moc w watach: 1 x 8 W

natural_image
Technical line drawing of a mechanical assembly with no visible text or symbols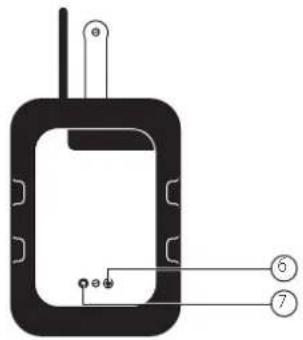
natural_image
Pure diagram of a device casing with labeled parts (no text or symbols)PRIMA DELL'UTILIZZO
natural_image
Technical diagram of a mechanical assembly with labeled component (no text or symbols present)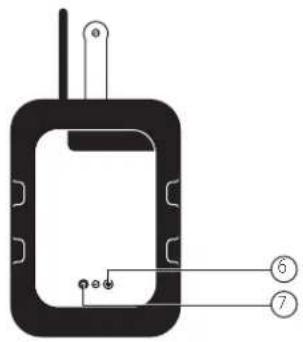
INNAN ANVÄNDNING
- AudioSonic
- Dear customer,
- General safety instructions
- Parts descriPtion
- BEFORE USE
- USE
- Comments:
- AUX-IN JACK
- SPECIFICATIONS
- GUARANTEE
- ENVIRONMENT
- Guidelines for protection of the environment
- Packaging
- Product
- EC declaration of conformity
- Geachte klant,
- VOOR GEBRUIK
- AVANT L'UTILISATION
- VOR INBETRIEBNAHME
- ANTES DE UTILIZAR
- PRZED ROZPOCZĘCIEM UŻYTKOWANIA
- PRIMA DELL'UTILIZZO
- INNAN ANVÄNDNING
Brand : AudioSonic
Model : RD1560
Category : Radio