P.I.L.O.T. PRO - Headphones MAD CATZ - Free user manual and instructions
Find the device manual for free P.I.L.O.T. PRO MAD CATZ in PDF.
| Product type | Wireless headset |
| Brand | Mad Catz |
| Model | P.I.L.O.T. PRO |
| Dimensions (L x W x H) | 202 x 216 x 90 mm |
| Weight | 345 g |
| Battery | Li-ion 930 mAh, charging via USB-C (DC 5V 500 mA) |
| Charging time | Approximately 2.5 hours |
| Bluetooth battery life (LED on) | Approximately 15 hours |
| Bluetooth battery life (LED off) | Approximately 60 hours |
| 2.4G battery life (LED on) | Approximately 13 hours |
| 2.4G battery life (LED off) | Approximately 40 hours |
| Connectivity | 2.4 GHz (wireless), Bluetooth 5.0 (or similar version), wired 3.5 mm |
| Wireless range | Up to 15 m (without obstacles) |
| Latency in 2.4G mode | < 35 ms |
| Speaker | 50 mm dynamic |
| Frequency response | 20 Hz - 20 kHz |
| Impedance | 24 Ω ± 15% |
| Sensitivity | 105 dB ± 3 dB (at 1 kHz) |
| Microphone | Detachable, omnidirectional, sensitivity -42 dB ± 3 dB |
| Lighting | RGB (multiple modes: flow, fixed colors, breathing) |
| Care and cleaning | Wipe with a soft, dry cloth. Do not use chemicals or abrasives. |
| Box contents | Headset, 2.4G transmitter, 3.5 mm audio cable (1 m), USB-C cable (1.2 m), detachable microphone, fabric ear cushions (x2), foam windscreen for microphone, user manual |
Frequently Asked Questions - P.I.L.O.T. PRO MAD CATZ
User questions about P.I.L.O.T. PRO MAD CATZ
0 question about this device. Answer the ones you know or ask your own.
Ask a new question about this device
Download the instructions for your Headphones in PDF format for free! Find your manual P.I.L.O.T. PRO - MAD CATZ and take your electronic device back in hand. On this page are published all the documents necessary for the use of your device. P.I.L.O.T. PRO by MAD CATZ.
USER MANUAL P.I.L.O.T. PRO MAD CATZ
WIRELESS RGB GAMING HEADSET
P.L.O.T. PRO
Quick Start Guide
WIRELESS RGB GAMING HEADSET
P.L.O.T. PRO
ENGLISH 01
FRANÇAIS 05
DEUTSCH 09
ESPANOL 13
PUCCKN 17
日本語 21
简体中文 25
繁體中文 29
What's in The Box
P.I.L.O.T. PRO Dongle x1
QSG x1
-
Headset x1
-
Cloth Ear Pad x1set
-
Detachable Mic x1
3.5mm Audio Cable x1
-
Type-C Cable x1
-
Mic sponge sleeve x1
Product Dimension

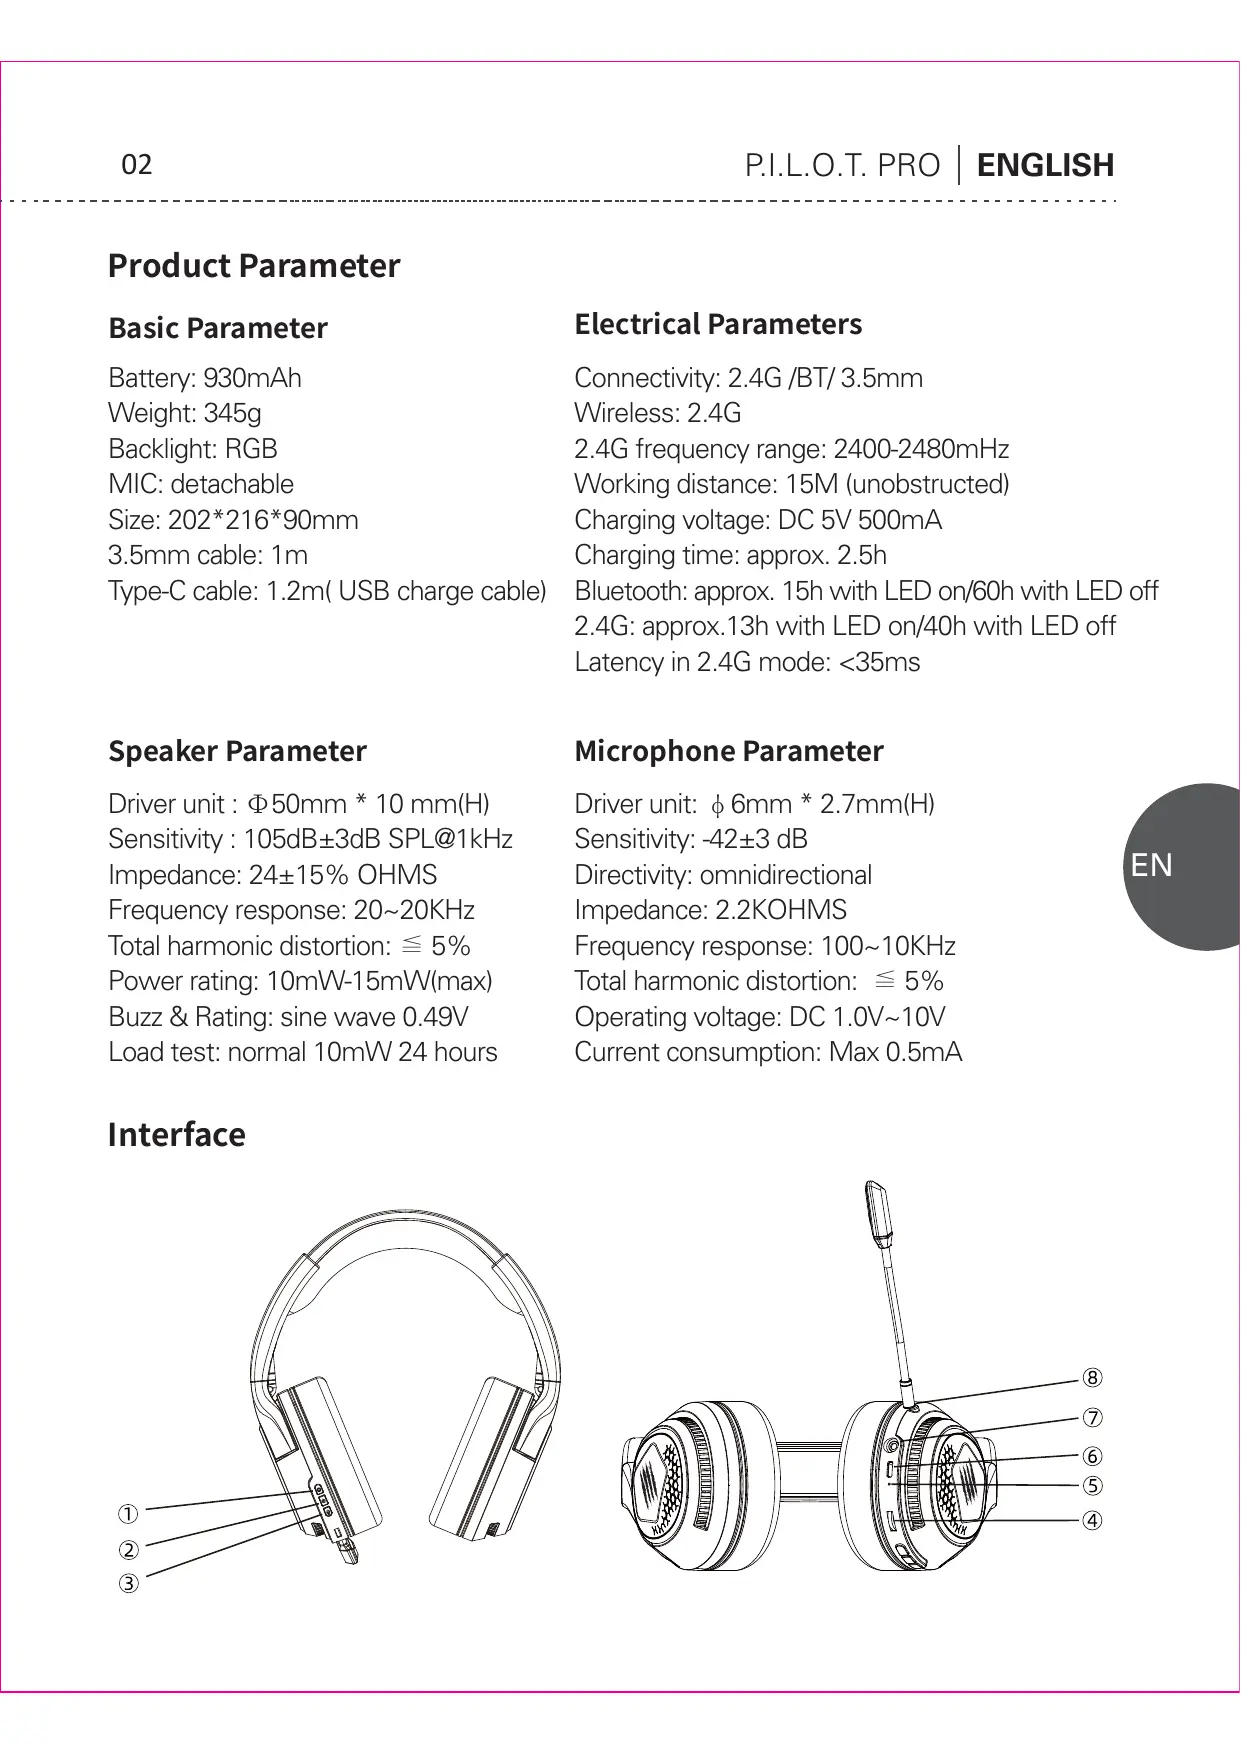
Product Parameter
Basic Parameter
Battery: 930mAh
Weight: 345g
Backlight: RGB
MIC: detachable
Size: 202^216^90mm
3.5mm cable: 1m
Type-C cable: 1.2m( USB charge cable)
Electrical Parameters
Connectivity: 2.4G /BT/ 3.5mm
Wireless: 2.4G
2.4G frequency range: 2400-2480mHz
Working distance: 15M (unobstructed)
Charging voltage: DC 5V 500mA
Charging time: approx. 2.5h
Bluetooth: approx. 15h with LED on/60h with LED off
2.4G: approx.13h with LED on/40h with LED off
Latency in 2.4G mode: <35ms
Speaker Parameter
Driver unit : Φ50mm * 10 mm(H)
Sensitivity : 105dB±3dB SPL@1kHz
Impedance: 24 ± 15 % OHMS
Frequency response: 20 20 kHz
Total harmonic distortion: ≤ 5%
Power rating: 10mW-15mW(max)
Buzz & Rating: sine wave 0.49V
Load test: normal 10mW 24 hours
Microphone Parameter
Driver unit: 6 ~mm * 2.7 ~mm (H)
Sensitivity: -42 ± 3 dB
Directivity: omnidirectional
Impedance: 2.2KOHMS
Frequency response: 100 10 kHz
Total harmonic distortion: ≤ 5%
Operating voltage: DC 1.0V~10V
Current consumption: Max 0.5mA
Interface
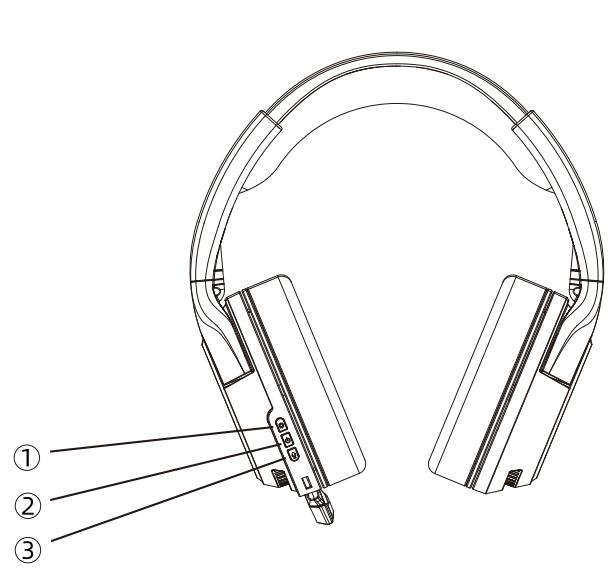
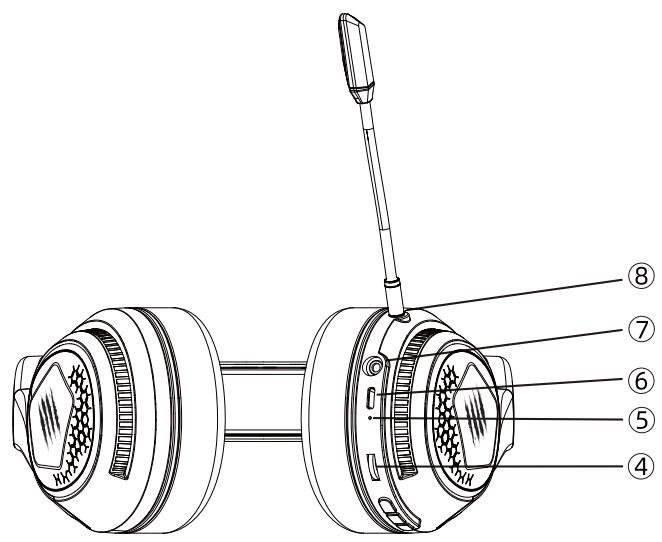

Function
① Lighting-Effect ② Power ③ MIC (switch between 2.4G/BT) ④ Volume
⑤ Indicator Light (power on/off and pairing) ⑥ Type-C Port(for charging only)
⑦ Audio Jack ⑧ MIC Jack
Pairing via 2.4G/BT
- Plug 2.4G dongle into device, turn on headset, and it will process pairing automatically.
- BT mode: press and hold MIC button for 3sec to enter BT pairing, when Indicator Light flashes in blue, search Mad Catz P.I.L.O.T. PRO in PC/phone and connect.
Audio cable
When 3.5mm audio cable is used to connect the headset and devices, no need to tap on the Power button.
Button function details
Power Button:
Press and hold the Power button for 3 seconds to turn on, you will hear a beep to confirm. Vice versa, press and hold the Power button for 3 seconds to turn off, and another beep will sound to confirm.
Tap to play/pause
Lighting-Effect Button:
Tap once to change the effect.
Default lighting loop setting: RGB Streaming, red, green, blue, purple, monochromatic breathing and LED off.
Microphone Button:
MIC is automatically on as default when the power is on.
Tap to turn the MIC on/off.
Double taps to turn MIC ENC on/off.
Press and hold for 3 seconds for Bluetooth mode. When the Indicator LED flashes in blue slowly, double press the Power button (blue LED flashes quicker) to enter Bluetooth pairing. When blue LED stops flashing and is constantly on, it means that the pairing is completed.
Press and hold for 3 seconds (green LED turns on) to switch back to 2.4G mode.
Volume Scroll Wheel:
Scroll up and down to turn the volume up and down.
Lower Battery Prompt:
When battery is running out, the headphone will beep once every 3sec. Please charge headphones immediately for better battery longevity.
LED Indicator:
- 2.4G Model: Green LED constantly on 2. BT Model: Blue LED constantly on
- Low Battery: Red LED flashes 4. Charging: Red LED constantly on
- Fully Charged: Green LED constantly on 6. BT Pairing: Blue LED flashes
Availability of Audio Output:
- Wired (3.5mm AUX)
- Wireless (2.4G)
- Wireless (Bluetooth)
How to Replace (PU/Cloth) Ear Pads
(1) Find the notches at the top and bottom of an earcup
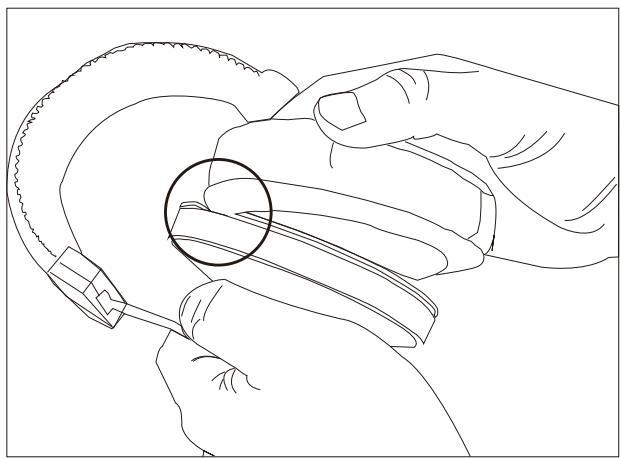
(2) Apply the lips of an ear pad from one notch to the other
(3) Make sure half of lips are in place
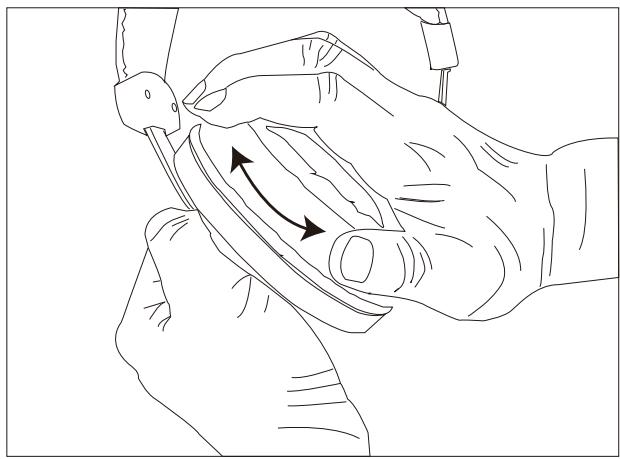
(4) Rotate clockwise or anti-clockwise gently, then the ear pad is installed successfully