
Passport Conference Series 2 - Audio System FENDER - Free user manual and instructions
Find the device manual for free Passport Conference Series 2 FENDER in PDF.
| Product Type | Portable audio system (sound reinforcement system) |
| Brand | Fender |
| Model | Passport Conference Series 2 |
| Dimensions (W x H x D) | 63.5 cm x 48.26 cm x 25.4 cm |
| Weight | 14.06 kg |
| Power required | 225 W |
| Output power | 175 W |
| Amplification type | Class D |
| Speakers | 2 woofers of 5.25" and 4 high-frequency drivers of 2.75" |
| Fuse | T4AH, 250 V |
| Power supply | Mains, voltage selector 100 V / 120 V - 220 V / 240 V |
| Main functions | Bluetooth, microphone/line inputs (XLR/Jack), stereo mini-jack input, headphone output, per-channel tone and volume controls, master volume, MIC/LINE selector |
| Number of channels | 4 channels (3 mono + 1 stereo 4/5) |
| Connectivity | Bluetooth, combo XLR/Jack 6.35 mm inputs, Jack 6.35 mm L/MONO and R inputs, stereo MiniJack input |
| LED indicators | Green (signal), yellow (near clipping), red (clipping) |
| Built-in protection | Protection against electrical issues and overheating, automatic restart |
| Transport | Suitcase style with latches, cable storage compartment |
| Maintenance and cleaning | Wipe with a dry cloth; do not use abrasive products |
| Safety | Use the same type fuse (T4AH, 250 V); voltage selector according to country; disconnect power before connection |
| General information | Warranty and registration at start.fender.com; specifications subject to change |
Frequently Asked Questions - Passport Conference Series 2 FENDER
User questions about Passport Conference Series 2 FENDER
0 question about this device. Answer the ones you know or ask your own.
Ask a new question about this device
Download the instructions for your Audio System in PDF format for free! Find your manual Passport Conference Series 2 - FENDER and take your electronic device back in hand. On this page are published all the documents necessary for the use of your device. Passport Conference Series 2 by FENDER.
USER MANUAL Passport Conference Series 2 FENDER
THIS DOCUMENT CONTAINS INFORMATION OF PROPRIETARY NATURE TO FENDER
MUSICAL INSTRUMENTS AND IS SUBMITTED TO YOU IN CONFIDENCE AND SHALL NOT
BE DISCLOSED OR TRANSMITTED TO OTHERS WITHOUT AUTHORIZATION FROM
FENDER MUSICAL INSTRUMENTS
| REVISIONS | |||
| REV. | DESCRIPTION | BY | DATE |
| A | PR 844 | J.O. | 11.1.19 |
DO NOT PRINT
THIS PAGE
NOTES: UNLESS OTHERWISE SPECIFIED.
- PRINT IN BLACK OR GRAYSCALE ONLY
- USE 80LB UNCOATED COVER STOCK FOR THE FRONT AND REAR COVER PAGES
- USE 20LB TEXT STOCK FOR INTERIOR PAGES
- NO BLEED PRINTING REQUIRED
- PAGE SIZE: 8 1/2 INCHES X 11 INCHES
- STAPLE BOUND
- SAMPLES OF FIRST PARTS MUST BE APPROVED BY FENDER R&D BEFORE STARTING PRODUCTION.QTY 3 UNLESS OTHERWISE SPECIFIED.
ANY PART SUPPLIED FOR USE
IN ANY FENDER PRODUCT
MUST CONFORM TO THE
EUROPEAN RoHS DIRECTIVE.
COPYRIGHT -8/29/2018
FENDER MUSICAL
INSTRUMENTS CORP.
PROJECT ENGINEER
DATE
PROJECT MANAGER
DATE
CHRIS BALDWIN
PRODUCT MANAGER
DATE
JASON BORDERS
REVISIONS
DESCRIPTION
PR 844
BY
DATE
J.O
11.1.19

TITLE
FENDER MUSICAL INSTRUMENTS CORP
RESEARCH & DEVELOPMENT CORONA, CALIFORNIA U.S.A
MANUAL OWNERS PASSPORT
CONference SERIES 2 US+5
SIZE
A
PART NUMBER
7718684000
REV
A
fender®
PASSPORT® CONFERENCE
SERIES 2
OWNER'S MANUAL
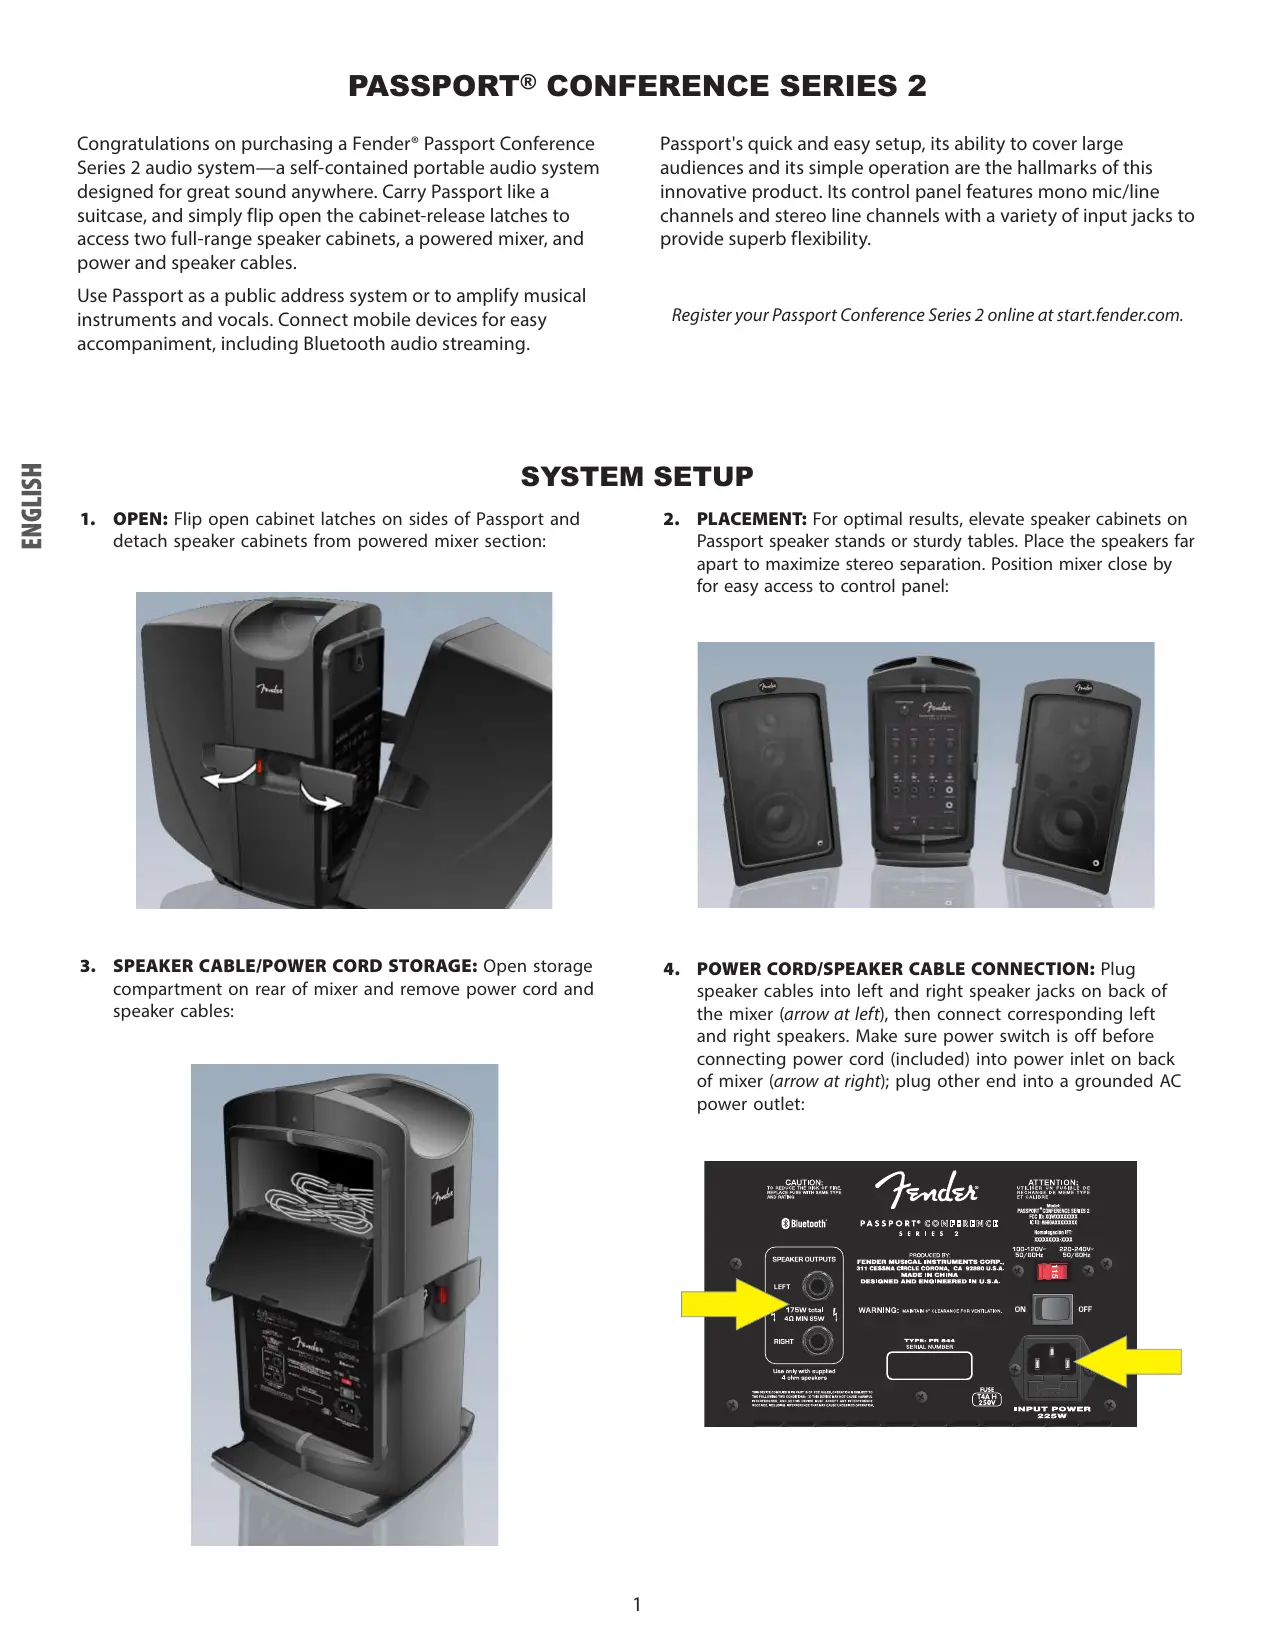
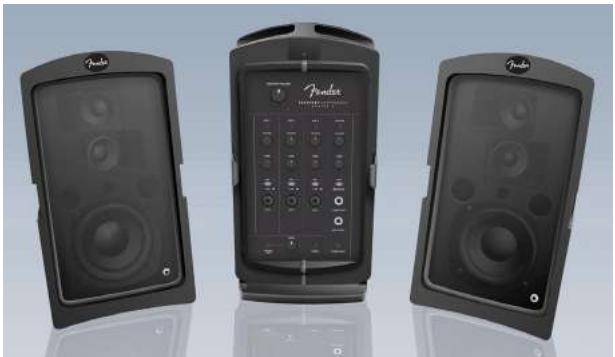
Congratulations on purchasing a Fender® Passport Conference Series 2 audio system—a self-contained portable audio system designed for great sound anywhere. Carry Passport like a suitcase, and simply flip open the cabinet-release latches to access two full-range speaker cabinets, a powered mixer, and power and speaker cables.
Use Passport as a public address system or to amplify musical instruments and vocals. Connect mobile devices for easy accompaniment, including Bluetooth audio streaming.
Passport's quick and easy setup, its ability to cover large audiences and its simple operation are the hallmarks of this innovative product. Its control panel features mono mic/line channels and stereo line channels with a variety of input jacks to provide superb flexibility.
Register your Passport Conference Series 2 online at start.fender.com.
SYSTEM SETUP
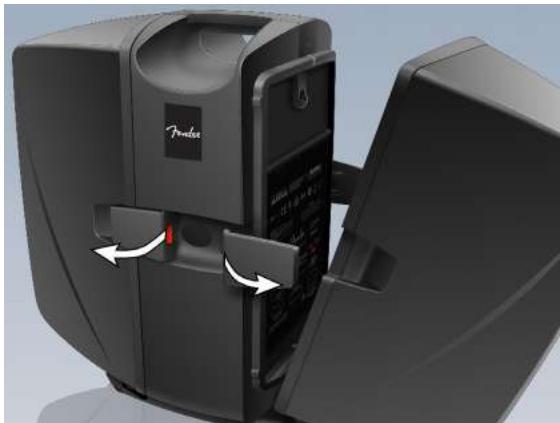
- OPEN: Flip open cabinet latches on sides of Passport and detach speaker cabinets from powered mixer section:
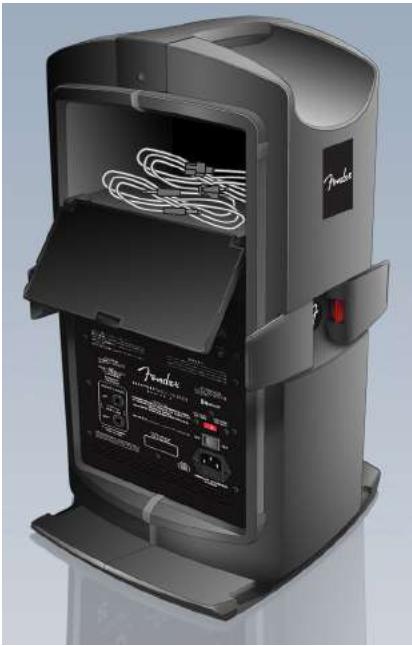
- SPEAKER CABLE/POWER CORD STORAGE: Open storage compartment on rear of mixer and remove power cord and speaker cables:
- PLACEMENT: For optimal results, elevate speaker cabinets on Passport speaker stands or sturdy tables. Place the speakers far apart to maximize stereo separation. Position mixer close by for easy access to control panel:
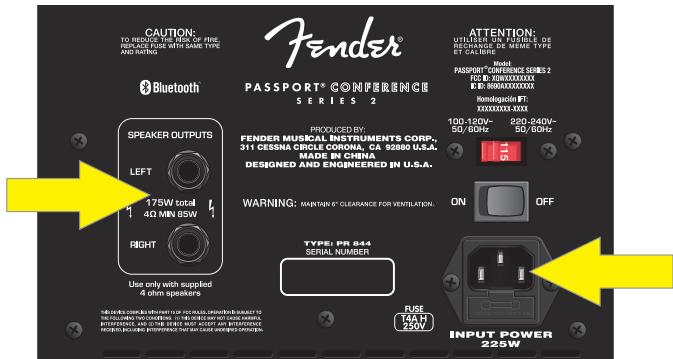
- POWER CORD/SPEAKER CABLE CONNECTION: Plug speaker cables into left and right speaker jacks on back of the mixer (arrow at left), then connect corresponding left and right speakers. Make sure power switch is off before connecting power cord (included) into power inlet on back of mixer (arrow at right); plug other end into a grounded AC power outlet:
- INPUTS: Connect microphones to channels 1, 2 and 3. Other mono sound sources such as instruments can be connected to any channel. Use channel 4/5 inputs for stereo/mono sound sources such as keyboards, other line-level audio sources, and mobile devices:

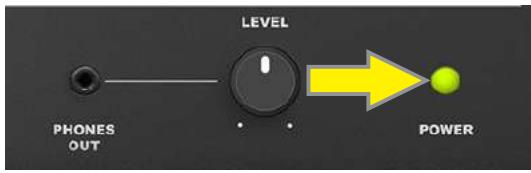
- POWER UP: Turn on all external equipment connected to Passport first, then turn Passport on. Power LED will illuminate green:
- SETTING LEVELS: Connect a microphone or other sound source and slowly turn up that channel's VOLUME control. LED above VOLUME control will illuminate green when signal is present. LED will illuminate yellow when signal is approaching clipping level; LED will illuminate red when clipping (distortion) occurs. For best performance, set VOLUME and TONE controls so that LED is green and occasionally yellow. If LED turns red, reduce VOLUME or TONE control settings. If LED is still turning red after adjusting VOLUME and TONE controls, press MIC/LINE button in:
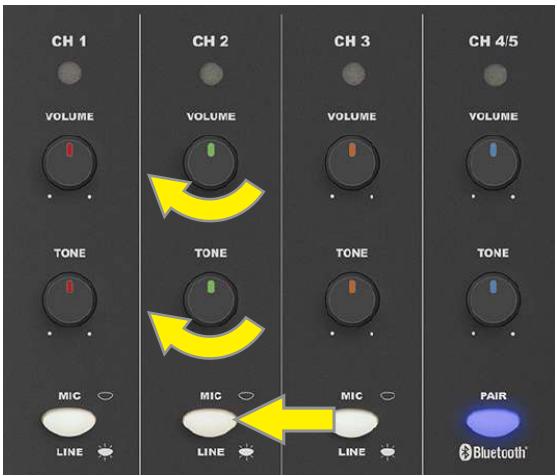
Set up each channel the same way. Use channel VOLUME knobs to adjust relative loudness of each channel until reaching preferred overall balance, then use MASTER VOLUME to adjust overall mix loudness.
- INITIAL VOLUME: Turn MASTER VOLUME knob and all channel VOLUME knobs fully counterclockwise to start:
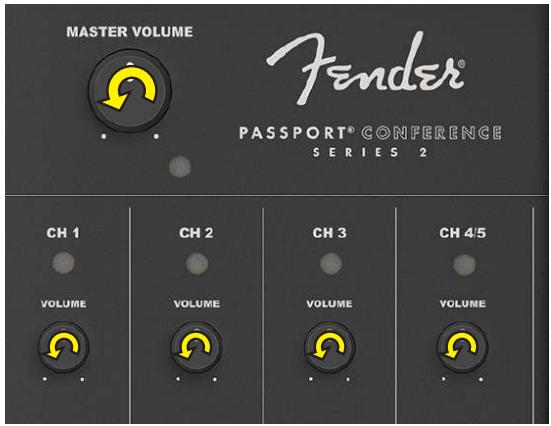
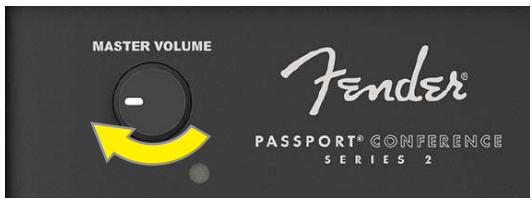
- SETTING MASTER VOLUME: Turn MASTER VOLUME up to 1/4 volume:
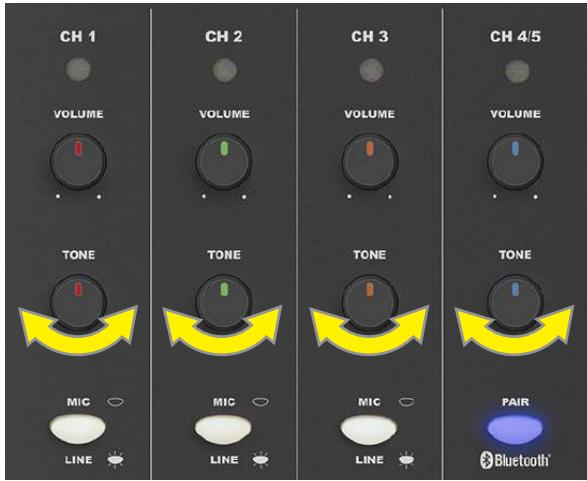
- SETTING TONE: Starting with each TONE control in the center-detented position (flat equalization), set each TONE control to preference for best clear and consistent sound coverage throughout the area:
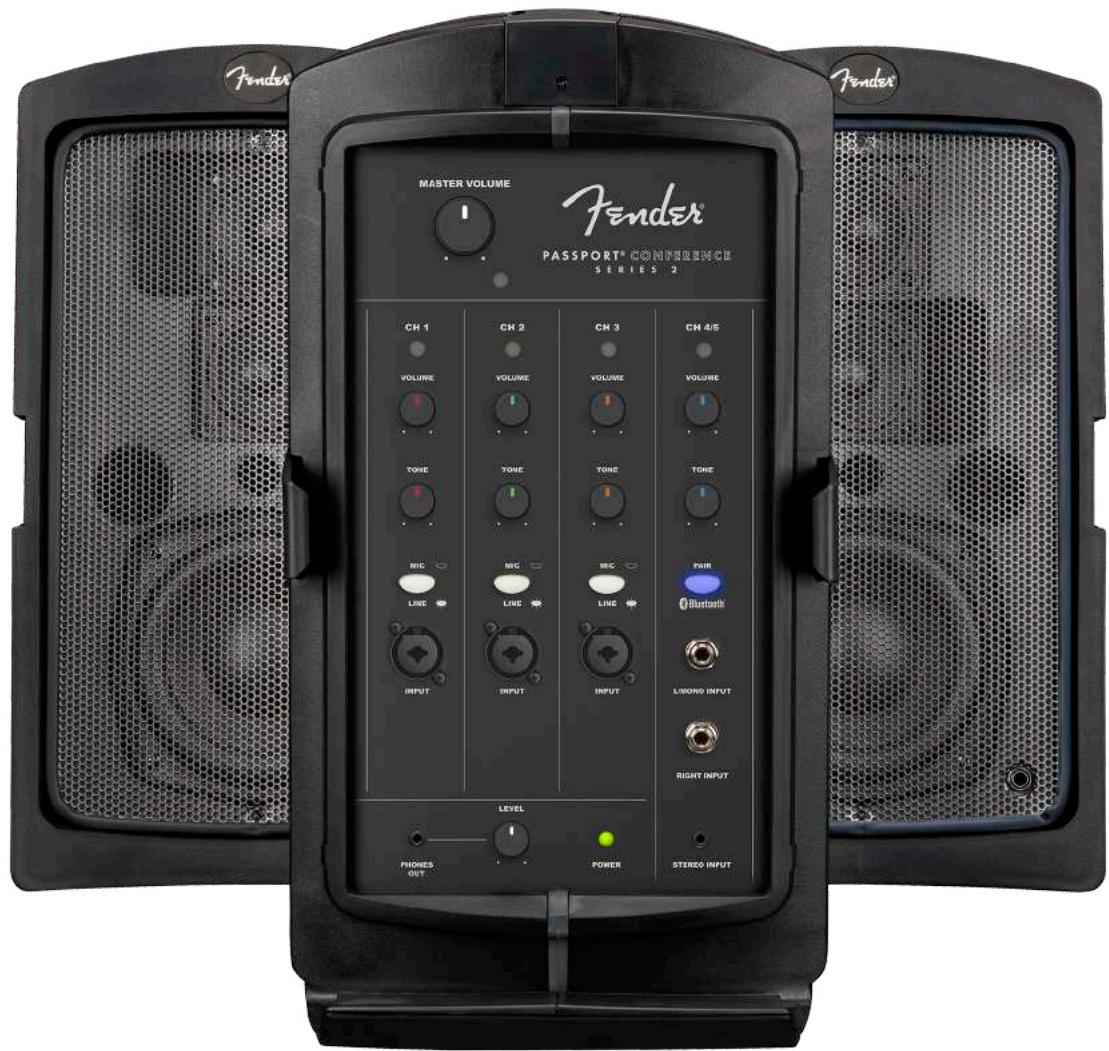
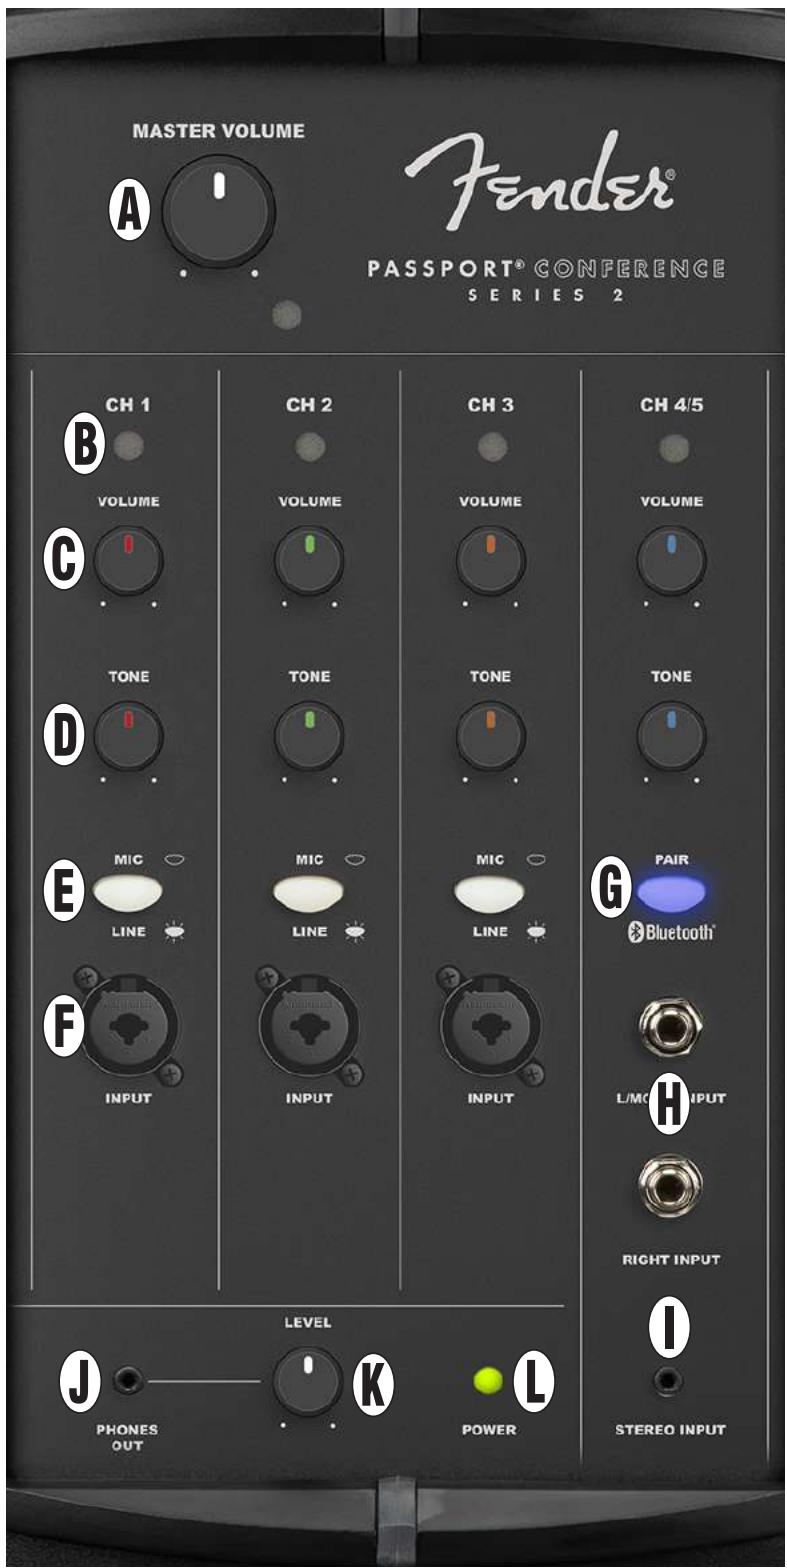
FRONT PANEL
A. MASTER VOLUME: Adjusts overall loudness. No sound is produced at full counterclockwise position.
B. SIGNAL/CLIP LED: Illuminates green when signal is present; yellow when signal level is -10dB away from clipping. Illuminates red during clipping (see step 9 under SYSTEM SETUP).
C. CHANNEL VOLUME: Adjusts individual channel loudness.
D. TONE: Adjusts individual channel tone, with "flat" frequency response at center-detented position.
E. MIC/LINE SWITCH: If signal source level is too high (see step 9 under SYSTEM SETUP), press in to reduce input sensitivity by 24dB.
F. MONO CHANNEL INPUT: XLR and 1/4'' input for microphones, instruments and other mono line-level sources for channels 1, 2 and 3.
G. PAIR BLUETOOTH: Press for Bluetooth pairing with external devices. When button is flashing blue, select "PASSPORT CONFERENCE" in external device Bluetooth menu. Button will stop flashing and illuminate blue continuously when connection is successful. Press and hold button to disconnect Bluetooth. For best sound quality, set volume control on external device (i.e., smart phone) to 75-100 percent of its maximum level.
H. 1 / 4'' LEFT (MONO)/RIGHT INPUT: Inputs for line-level stereo audio sources requiring separate 1 / 4'' jacks for each channel. Using stereo L/MONO jack by itself functions as mono channel; mono output will be heard from both speakers.
I. 1/8" STEREO INPUT: Input for mobile devices, computers and other line-level stereo audio sources with 1/8" connection.
J. HEADPHONE OUTPUT: Connect headphones and recording equipment here. Individual channel controls affect this output; MASTER VOLUME (A) does not.
K. LEVEL CONTROL: Adjusts HEADPHONE OUTPUT (J) signal level.
L. POWER LED: Illuminates green when system is on. Passport features internal protection measures that will shut down audio output in the event of electrical or thermal problems; Passport will automatically reset itself on resolution of such problems. If Passport does not reset automatically, check fuse in power cord socket on rear panel (P).
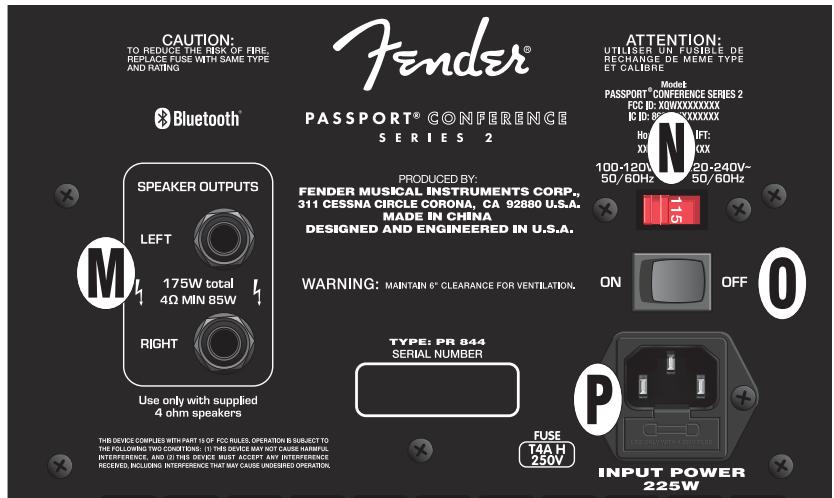
M. SPEAKER OUTPUTS: Connect Passport speaker cables (included) here.
N. VOLTAGE SELECTOR: Change the setting of this 100V/120V-220V/240V switch only when using Passport in a country that requires a different voltage setting.
O. POWER: Turns Passport on and off.
P. POWER CORD SOCKET/FUSE: Connect power cord (included) to this socket; plug other end into a grounded AC outlet in accordance with correct VOLTAGE SELECTOR (N) setting. To check/replace fuse, unplug power cord and pry fuse holder from POWER CORD SOCKET; replace fuse only with another of the same type and rating.
SPECIFICATIONS
C E
TYPE PR844
POWER REQUIREMENTS 225W
POWER OUTPUT 175W
FUSE T4A H, 250V
AMPLIFIER TYPE Class D
SPEAKERS Two 5.25^ woofers, four 2.75^ HF drivers
DIMENSIONS AND WEIGHT Width: 25^ (63.5 cm)
Height: 19^ (48.26 cm)
Depth: 10^ (25.4 cm)
Weight: 31 lbs. (14.06 kg)
Product specifications subject to change without notice.
PASSPORT® CONFERENCE SERIES 2
Peso: 31 lbs. (14,06 kg)
Passport® Conference Series 2
6942000000 (120V, 60Hz) NA
6942000900 (120V, 60Hz) DS
6942001900 (110V, 60Hz) TW
6942003900 (240V, 50Hz) AU
6942004900 (230V, 50Hz) UK
6942005900 (220V, 50Hz) ARG
6942006900 (230V, 50Hz) EU
6942007900 (100V, 50/60Hz) JP
6942008900 (220V, 50/60Hz) CN
6942009900 (220V, 60Hz) ROK
6942013900 (240V, 50Hz) MA
产品中有害物质的名称及含量
Fender® and Passport® are trademarks of FMIC.
Other trademarks are property of their respective owners.
Copyright © 2020. All rights reserved.
Brand : FENDER
Model : Passport Conference Series 2
Category : Audio System