
CURVE SYSTEM 18 - Powered speakers EDENWOOD - Free user manual and instructions
Find the device manual for free CURVE SYSTEM 18 EDENWOOD in PDF.

| Product Type | Powered speakers (passive/active sound system) |
| Brand | EDENWOOD |
| Model | CURVE SYSTEM 18 (ref. 970490) |
| Speakers (2 groups of 4) | 760 x 400 x 295 mm (each) |
| Subwoofer | 615 x 595 x 715 mm |
| Steel tripod (adjustable) | 1,100 - 1,870 mm |
| Power Supply | 230 V~, 50 Hz (Class I) |
| Amplifier Power | 500 W RMS per source line (1000 W RMS total) – 2800 W MAX |
| Fuse | Time-lag cylindrical Ø5x20 mm, T3.15 AL/250 V AC |
| Bass Frequency (Subwoofer) | 30 - 500 Hz (filter 80 Hz - 1 kHz) |
| Treble/Mid Frequency | 65 Hz - 20 kHz |
| Audio Gain | 6 - 12 dB |
| Audio Inputs | USB (MP3), Bluetooth 5.0, unbalanced RCA, AUX 3.5 mm, balanced XLR/TRS |
| Audio Outputs | Balanced XLR, TRS 1/4" (for source lines), Speakon (for additional passive subwoofer) |
| Bluetooth | Version 5.0, power 4.39 dBm, name EDENWOOD CURVE SYSTEM 18P, max range 15 m |
| USB | Port 5 V/500 mA, USB 2.0 compatible, formats MP3, SBC, AAC, WAV, FLAC, APE, WMA, F1A |
| Remote Control | 2 AAA batteries (not included), range 5 m, functions (mode, track, volume, EQ…) |
| Maintenance | Unplug before cleaning, dry soft cloth, no flammable detergents, do not immerse |
| Warranty | 2 years from purchase date (upon presentation of receipt) |
| Intended Use | Indoor domestic or commercial |
Frequently Asked Questions - CURVE SYSTEM 18 EDENWOOD
User questions about CURVE SYSTEM 18 EDENWOOD
0 question about this device. Answer the ones you know or ask your own.
Ask a new question about this device
Download the instructions for your Powered speakers in PDF format for free! Find your manual CURVE SYSTEM 18 - EDENWOOD and take your electronic device back in hand. On this page are published all the documents necessary for the use of your device. CURVE SYSTEM 18 by EDENWOOD.
USER MANUAL CURVE SYSTEM 18 EDENWOOD
CONDITION DE GARANTIE
EN This product is guaranteed against faults caused by defects in manufacturing or the materials used for a period of two years, starting from the date of purchase.* This warranty does not cover defects or damage caused by failure to install the device correctly, incorrect use of the product, or excessive wear and tear.
*proof of purchase required
GARANTIEVOORWAARDEN
Thank you for choosing this EDENWOOD product. EDENWOOD products are chosen, tested, and recommended by ELECTRO DEPOT, so you can be sure you are getting a top-quality, easy-to-use product that won't let you down.
We're confident your new device will be a pleasure to use every day!
Welcome to ELECTRO DEPOT.
Table of Contents
| A | Product overview | Parts Product overview Intended use Specifications Declaration of conformity |
| B | Product usage | Installation Connections Mains power supply and fuse Operation Remote control |
| C | Cleaning and maintenance | Cleaning and maintenance Troubleshooting Storage |
Parts
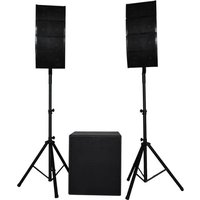
Main parts
A 8 x speakers - the line arrays are arranged as 2 sets of 4 speakers
(1) 2 × line array mounts
2 18 x screws - 2 of which are spare.
3 2xAllen keys
2x metal mounting brackets - for the line arrays. NOTE: The knob for the metal mounting bracket is packed with the screws.
C 2x speaker tripods
7 x line array cables - connects the speakers to one another (each cable is a 335 cm-long 1/4 TRS cable)
2 x line array cables - connects the 2 line arrays to the subwoofer/amplifier (each cable is a 6 m-long 14 TRS cable).
F Mains power cable
Subwoofer with a built-in amplifier. The speaker control system is found on the back of the unit.
H Handle
Rear view of subwoofer/amplifier
UNBALANCED RCA INPUT Connects the unit to a computer, mobile device, etc.
J MULTIMEDIA VOLUME Adjusts the input volume when using the USB, CONTROL Bluetooth or LINE IN modes.
K MEDIA PLAYER
Control panel for audio files played via USB, Bluetooth or LINE IN. (The LINE IN input is connected via the UNBALANCED RCA INPUT or AUX INPUT connectors).
① USB port
Plays MP3 files from a USB device.
② LCD screen
Displays the modes and playback information. If no source is connected (e.g. USB or Bluetooth), NO will be displayed.
3 MODE BUTTON
Press to switch between USB, Bluetooth and LINE IN modes.
(4)
In USB, Bluetooth or LINE IN mode:
(5)
- Press to skip to the previous track or file.
- Press and hold to decrease the volume, which ranges from V 00 to V 30.
In USB, Bluetooth or LINE IN mode:
- Press to skip to the next track or file.
- Press and hold to increase the volume, which ranges from V 00 to V 30.
6
In USB, Bluetooth or LINE IN mode, press repeatedly to select:
One - repeats a single file or track
- Rand - randomly plays the files or tracks
- All - plays all files or tracks in the order they are stored
- Fold - plays a specific file of track
(7)
In USB, Bluetooth or LINE IN mode:
- Plays or pauses the file/track.
SUBWOOFER FREQUENCY CONTROL KNOB
Sets the subwoofer cutoff frequency. Signals above the set cutoff frequency are gradually removed to prevent them from interfering with the speaker line arrays. (Frequency range: 80 Hz - 1 kHz)
M POWER LED INDICATOR
Lights up green when the subwoofer/amplifier is connected to a power source and the main power switch is in the ON position.
N PHASE BUTTON
Synchronises the subwoofer to obtain a more precise bass frequency response (press to select 0 or 180^ ).
0 LIMITLEDINDICATOR
Lights up red and flashes when the amplifier detects any subwoofer-affecting distortion. Reduce the volume when the indicator is lit.
P SUB VOLUME CONTROL
Adjusts the volume of the subwoofer and any additional subwoofer.
MASTER VOLUME CONTROL
Controls the volume of the subwoofer and line arrays.
| R AUX INPUT | Connects the unit to a computer, mobile device, etc., via a 3.5 mm unbalanced stereo input. |
| S BALANCED XLR/TRS INPUT | Connects the unit to an audio interface or mixer via a 1⁄4" XLR-TRS jack combo socket. WARNING! Only connect one input source at a time. |
| T BALANCED XLR OUTPUT | Connects additional speakers or subwooers. NOTE: This connection is only enabled if you use XLR or 1⁄4" TRS balanced inputs. |
| U SPEAKER OUTER (LEFT CH/RIGHT CH) | Connects the left and right line arrays to the subwoofer via the 2 x 6-metre 1⁄4" TRS cables (supplied). |
| V MAIN POWER SWITCH | Switches the power ON (I) or OFF (O). NOTE: Turn the switch OFF (O) when you are not using the unit for a prolonged period of time. |
| W AC SOCKET AND FUSE | Connects the unit to the main power source. The fuse protects the subwoofer/amplifier from a power surge/overload. |
| X Remote control | Controls playback functions in USB and Bluetooth mode only. |
| 1 MODE | Press to switch between USB and Bluetooth modes. |
| 2 ☑ ☐ ☐ | Selects the previous or next file. |
| 3 VOL- / VOL+ | Decreases (-) or increases (+) the volume from V 00 to V 30. |
| 4 0 - 9 | Selects the file or track number. NOTE: For numbers over 10, press -- or --- and then use the numeric keypad to enter the desired number. |
| 5 EQ | Selects the pre-set equalisation: Pop, Rock, Jazz, Classic and Country. |
| 6 ☑ ☐ ☐ | Selects the previous or next file/track. |
| 7 ☑ ☐ | Plays or pauses the file or track. |
| 8 --- / --- | Press to select a double-digit track number (10+). Press to select a triple-digit track number (100+). (Use the numeric keypad to enter the number.) |
Product overview
- Unpack and remove all labels from the unit. Please check that all the product's parts are included and intact. If the unit is damaged or faulty, do not use it and take it to your retailer or after-sales service centre.
- Keep all packaging out of the reach of children. There is a risk of accidents if children play with packaging materials.
Intended use
This product is intended for domestic or commercial indoor use.
Any other use may damage the product or cause injury.
Specifications
| Model: | 970490 – CURVE SYSTEM 18P |
| Company name or registered trademark, business registration number and manufacturer's address: | ELECTRO DEPOT /R.C.S. 433 744 539 1 route de Vendeville, 59155 Faches Thumesnil, FRANCE |
| Speakers – 2 sets of 4 speakers: (H x W x D) | 760 x 400 x 295 mm |
| Subwoofer: (H x W x D) | 615 x 595 x 715 mm |
| Subwoofer speaker: | 18" |
| Steel tripod (height adjustable): | 1,100-1,870 mm |
| Protection class: | Class I |
| Speaker | |
| Audio gain: | 6-12 dB |
| Operating frequency: | Bass: 30 - 500 Hz Treble & Alto: 65 Hz - 20 kHz |
| Line array elements: | Provide a mixture of sounds: Treble (high) Alto (medium) Subwoofer (low) |
| Input connectors: | • USB for MP3 files • Bluetooth • Unbalanced RCA input • Unbalanced AUX input • Balanced XLR input • Balanced 1⁄4" TRS input |
| Output connectors: | • Balanced XLR input • Balanced 1⁄4" TRS input (for the line arrays) • Speakon (for an additional passive subwoofer) |
| Fuse: | Cylindrical time-delay fuse - Ø 5 x 20 mm, type L5T, T3.15 AL/250 V AC |
| Amplifier power output: | 500 W (RMS) per line array (1000 W in total) - 2800 W MAX |
| USB | |
| Port: | 5 V, 500 mA/2.0 compatibility |
| Supported USB file formats: | MP3, SBC, AAC, WAV, FLAC, APE, WMA, F1A |
| Subwoofer | |
| Power supply: | 230 V ~, 300 kHz |
| Subwoofer crossover frequency: | 200 Hz |
| Bluetooth | |
| Bluetooth® version: | 5.0 |
| Maximum power transmitted via BT: | 4.39 dBm |
| Bluetooth name: | EDENWOOD CURVE SYSTEM 18P |
| BT frequency: | 2402 MHz~2480 MHz |
| Remote control | |
| Batteries: | 2 x 1.5 V AAA batteries (not supplied) |
| Operating range: | 5 metres |
A Product overview
Compatibility disclaimer
Wireless performance is dependent on your device's Bluetooth wireless technology. Please check with the manufacturer. ELECTRO DÉPÔT cannot be held responsible for any data loss or leaks resulting from the use of these devices.

Bluetooth®
Declaration of conformity
In this document, ELECTRO DÉPÔT declares that this unit complies with the essential requirements and other relevant provisions of Directive 2014/53/EU. The declaration of conformity can be viewed on the following website: http://www.electrodepot.fr/sav/ notices/
Installation
Before installing the product, please take the following factors into consideration when choosing a location for the speaker system.
Where do you want the sound to be projected for the best audio experience?
Where is the best place for the sound technician to check the speaker system?
Where will the subwoofer/amplifier be located for easy access to the control panel?
- Make sure the speaker system is placed in a dry, well-ventilated location on a stable surface that can support the weight of the system.

IMPORTANT!
- Before plugging in and switching on the speaker system, make sure that all the controls are turned off or set to the minimum level.
Assembling the speaker tripod
- Unscrew the knob located just above the 3 legs of the tripod until it is loose.
- Pull the 3 legs outwards, then tighten the knob to secure the legs into place.

NOTE: Extend the tripod legs as wide as possible as this will ensure that the speaker tripod is as stable as possible.
- Loosen the knob at the top of the speaker tripod until the telescopic pole extends from the base tube.
- Pull the telescopic pole upwards to extend it to the desired height.
- Secure the telescopic pole in place by inserting the metal pin through 1 pair of holes located on the telescopic pole. Then position the telescopic pole so that the metal pin rests on the same base in which the telescopic tube was stored.
- Tighten the knob to secure the telescopic pole in place.

WARNING! Take care when assembling the speakers as they are heavy. At least two people are required to mount the speakers onto the tripod.
Assembling the speakers
2 speaker line arrays are provided. Each set comprises 4 speakers that need to be assembled prior to being mounted on the tripod.
B Product usage
1 Place the 4 speakers on the ground with the back of the speakers facing upwards. Align the line array mount with the screw holes on the back of each speaker. Insert the 8 screws and tighten them with the Allen key.
Once assembled, connect the 3 line array cables in the indicated configuration.
Unscrew and remove the knob on the line array mount. Align the hole in the metal mounting bracket with the hole on the line array bracket. Insert and tighten the knob to secure the metal mounting bracket in place.
NOTE: Please insert the metal mounting bracket as shown in the diagram.
Unscrew the metal mounting bracket's knob anticlockwise and mount the line array onto the tripod. Turn the knob clockwise to secure it firmly in place.
Repeat the process to assemble the second line array.
Connections

IMPORTANT!
- Before adding or changing connections, make sure that all parts of the speaker system have been disconnected from the power supply and all the controls are off or set to the minimum level.
Connecting an audio source to the line arrays and adding a speaker
To increase the performance of your audio source unit (i.e. any 350-500 mV stereo device), connect the source unit with the subwoofer (equipped with a built-in amplifier) and the line arrays, in addition to an additional speaker (if desired).
- Connect the audio source unit to the BALANCED XLR/TRS INPUT connectors via an XLR or 14 TRS input (cables not provided).
- Connect the speaker line arrays to the SPEAKER OUTPUT (LEFT CH) and SPEAKER OUTPUT (RIGHT CH) connectors using the two 6m1/4 TRS cables provided.
- Connect an additional speaker to the BALANCED XLR OUTPUT connector.

NOTE: The XLR output connectors are only active when the XLR/TRS inputs are in use.
Connecting a mixer
3 To fine-tune the sound settings, connect a mixer to the speaker system.
- Connect the mixer to the BALANCED XLR/TRS INPUT connectors via a 1/4 XLR/TRS cable.
- As described above, connect the line arrays and an additional speaker, if desired.
B Product usage

NOTE: The XLR output connectors are only active when the XLR/TRS inputs are in use.
Option 1 - Connecting a phone, tablet, or iPod via an AUX INPUT connector

Any audio device with a 3.5 mm socket, such as a phone, tablet, or iPod, can be connected to the speaker system.
- Connect the device to the speaker system by plugging a 3.5mm jack cable into the AUX INPUT connector. Plug the other end of the cable into the device (e.g. phone, tablet etc.).
- As described above, connect the line arrays and an additional speaker, if desired.
Option 2 - Connecting a phone, tablet, or iPod via an UNBALANCED RCA INPUT

- Connect the device to the speaker system by plugging 2 × 3.5 ~mm jack cables into the UNBALANCED RCA INPUT connectors. Plug the other end of the cable into the device (e.g. phone, tablet etc.).
- As described above, connect the line arrays and an additional speaker, if desired.
Connecting a USB device for MP3 file playback
- Save your MP3 files onto a USB stick and then insert the USB stick into the speaker system. USB will automatically be displayed on the LCD screen and the unit will start to play any saved music.
- As described above, connect the line arrays and an additional speaker, if desired.
Pairing with a Bluetooth device
To connect this speaker system to a Bluetooth device, you must first pair the speaker system with the device.
-
Turn on the Bluetooth device:
-
Go to the device's settings.
- Enable the Bluetooth function.

NOTE: If your Bluetooth device was previously connected to another device, disconnect it before attempting to connect the device to the speaker system.
-
Turn on the subwoofer/amplifier by putting the MAIN POWER SWITCH in the ON position I. BLUE will flash on the screen to indicate that the speaker system has automatically entered pairing mode and is searching for a Bluetooth device. If the subwoofer/amplifier is already turned on and BLUE does not flash on the screen, press the MODE button until it does.
-
When the Bluetooth device displays the speaker system's Bluetooth name - EDENWOOD CURVE SYSTEM 18P - select this name and confirm the pairing process.
- BLUE will stop flashing when the devices have paired.

NOTE:
- Before connecting a Bluetooth device to this system, make sure you are familiar with the device's functions.
- If the system's Bluetooth name does not appear on your Bluetooth device, move the devices closer together. If that doesn't work, turn the devices off and back on again before restarting the pairing process.
- When pairing the devices, make sure they are less than 15 metres apart and there are no physical obstructions between them.
- Once paired, the devices should remember the connection and you shouldn't need to pair them again.
- Compatibility with all Bluetooth devices is not guaranteed.
- If the signal strength is weak, your Bluetooth receiver may disconnect. If no USB stick is connected, the system will automatically re-enter pairing mode. If a USB stick is connected, it will automatically start playing tracks from the USB. In this instance, remove the USB stick from the system to continue using the Bluetooth function.
Mains power supply and fuse

Warning!
- Select the correct voltage that corresponds to the power source (and fuse rating) before connecting the system to the power source.
- Only use the correct voltage, otherwise you risk damaging the system and/or injuring yourself and voiding the warranty.
- Before plugging in and switching on the speaker system, make sure that all the controls are turned off or set to the minimum level.
Connecting the speaker system to a power source
Once all your speaker system's connections have been set up, you can connect the subwoofer/ amplifier to the mains power supply.
- Connect one end of the power cable to the system's AC socket and the other end to the mains socket.
- Slide the MAIN POWER SWITCH to the I position. The POWER LED INICATOR will turn on.
B Product usage
Disconnecting the speaker system from a power source
- Slide the MAIN POWER SWITCH to the 0 position. The POWER LED INICATOR will turn off.
- Unplug the power cable from the system's AC socket and the mains socket.

NOTE: Always unplug the speaker system from the power supply when you are not planning to use it for a long period of time.
Replacing the fuse
Should your amplifier's output power exceed the speaker's load capacity, the fuse will blow and need to be replaced.

Warning!
-
When replacing the fuse, you must use the exact same type: a cylindrical time-delay fuse - 0.5 × 20 ~mm , type L5T, T3.15 AL/250 V AC.
-
The fuse is located beneath the subwoofer/amplifier's AC socket.
- Unplug the power cable from the subwoofer/amplifier.
- Insert a flathead screwdriver into the small notch and lift up the fuse cover.
- Insert the new fuse and close the cover.
Operation
Once you have set up the speaker system, you can either use the external audio source's controls (if available) or the MEDIA PLAYER panel and the system's sound settings on the back of the subwoofer/amplifier to play music and achieve an optimal sound. The remote control is a flexible way to remotely control music playback. To learn more about the various functions and how to use these commands, please refer to the table in the Product overview - Parts section of this manual.
Remote control
5 Inserting the battery
① Push the release clip on the battery compartment downwards and lift to remove the cover.
2 Insert 2 × 1.5 ~V AAA batteries (not supplied) the correct way around, by observing the polarity (+ and -) indicated on the battery compartment.
Place the furthest end of the cover in position on top of the battery compartment. Then press the nearest end of the cover until you hear it click firmly into place.
Operating the remote control
Point the remote control at the sensor from up to 5 metres away from the unit. The amplifier/ subwoofer's remote control sensor is located at the front of the system. The range may vary depending on the brightness of the room.

Warning!
- Make sure there are no obstacles between the remote control and the unit's infrared sensor.
- Do not expose the remote's infrared sensor to direct sunlight or any other strong lighting, such as a fluorescent light.
Cleaning and maintenance

WARNING! Always unplug the system before carrying out any cleaning operations.
- Clean the exterior with a soft, dry cloth.
- Do not use flammable or abrasive detergents (e.g. benzene or white spirit) to clean the unit.
- Never immerse the speakers, subwoofer or cables in water and do not allow any liquid to enter any part of the unit.
- Clean the tripods and metal mounting brackets with a slightly damp, soft cloth. Dry them thoroughly.
Troubleshooting
| Problem | Possible Cause | Solution |
| The subwoofer/amplifier is not working. | ·The plug is not properly inserted or plugged in. ·Check that the main power source fuse has not blown. | ·Check the power cable and make sure it is securely plugged into the mains socket. ·Check that the main power switch on the back of the unit is turned on and working properly. ·Replace the fuse. If it is still not working, try plugging the system into another mains socket. If the problem persists, take the unit to your nearest service centre. |
| There is no sound. | ·The speaker system connections are loose or not connected. ·The volume is too low. | ·Check all the connections are correct and firmly in place. ·Increase the speaker system's volume and check that the audio source is not set to mute or a low volume. |
| The remote control doesn’t work | · The batteries are dead. · You are too far away from the speaker system. · The speaker system is set to another mode. | · Change the remote control batteries, making sure the polarities (+/-) are correct. · Move the remote control within 5 metres of the speaker system and point it at the sensor on the front of the subwoofer/amplifier. · Press the MODE BUTTON several times to select the appropriate source. |
| The Bluetooth name cannot be found. | · The Bluetooth function may not be enabled on the Bluetooth device. · You are too far away from the speaker system. · Another Bluetooth pairing is preventing you from pairing your Bluetooth device with the speaker system. | · Make sure the Bluetooth function is enabled on your Bluetooth device. · Move the Bluetooth device within 15 metres of the speaker system. · Remove any existing Bluetooth pairing and try pairing the devices again. |
Storage
- Always unplug the unit from the mains before storing it.
- If you do not plan on using the unit for a long period of time, we recommend storing it in its original packaging in a cool, dry place, away from direct sunlight, dust and excessive dirt. Should you choose to store the product fully assembled, we recommend covering it to protect it from dust.
- Store the unit in a place out of the reach of children and pets.
- Use the original packaging, should you ever need to transport the product.
Bedankt!


- CONDITION DE GARANTIE
- GARANTIEVOORWAARDEN
- Table of Contents
- Parts
- Main parts
- Rear view of subwoofer/amplifier
- Product overview
- Intended use
- Specifications
- A Product overview
- Compatibility disclaimer
- Bluetooth®
- Declaration of conformity
- Installation
- IMPORTANT!
- Assembling the speaker tripod
- Assembling the speakers
- B Product usage
- Connections
- Connecting an audio source to the line arrays and adding a speaker
- Connecting a mixer
- Option 1 - Connecting a phone, tablet, or iPod via an AUX INPUT connector
- Option 2 - Connecting a phone, tablet, or iPod via an UNBALANCED RCA INPUT
- Connecting a USB device for MP3 file playback
- Pairing with a Bluetooth device
- NOTE:
- Mains power supply and fuse
- Warning!
- Connecting the speaker system to a power source
- Disconnecting the speaker system from a power source
- Replacing the fuse
- Operation
- Remote control
- Inserting the battery
- Operating the remote control
- Cleaning and maintenance
- WARNING! Always unplug the system before carrying out any cleaning operations.
- Troubleshooting
- Storage
- Bedankt!
Brand : EDENWOOD
Model : CURVE SYSTEM 18
Category : Powered speakers