USER MANUAL DC 7 B W566C HIGH ONE
This product is guaranteed for a period of 2 years from the date of purchase* against any failure resulting from a manufacturing or material defect. This warranty does not cover defects or damage resulting from incorrect installation, improper use or abnormal wear of the product.
*as shown on the sales receipt.
FR
CONDITION DE GARANTIE
Thank you for choosing this HIGHONE product.
Chosen, tested and recommended by ELECTRO DEPOT,
the products of the HIGHONE brand are easy to use,
reliable and of an impeccable standard.
Thanks to this appliance, you can be sure that each
use will bring you satisfaction.
Welcome to ELECTRO DEPOT.
Visit our website: www.electrodepot.fr www.electrodepot.be

Preview of the appliance
Description of the appliance

Using the appliance
Installation
Drying functions

Useful information
Periodical cleaning and maintenance
Malfunction display and solutions
Precautions
Technical Information
Product sheet
Description of the appliance
0
Tank
2
Power Cord
3
Drum
4
Lint filter
5
Control panel
6
Door
7
Air supply
8
Handle
9
Maintenance grille
Accessories
The following parts are optional depending on the model.
If your dryer has the following parts, install them according to the instructions below:

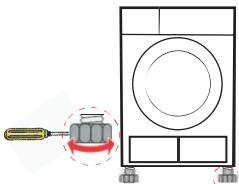
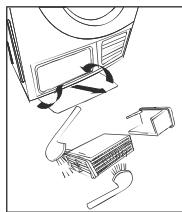
Hose holder (optional)
- Condensation drain hose (optional)
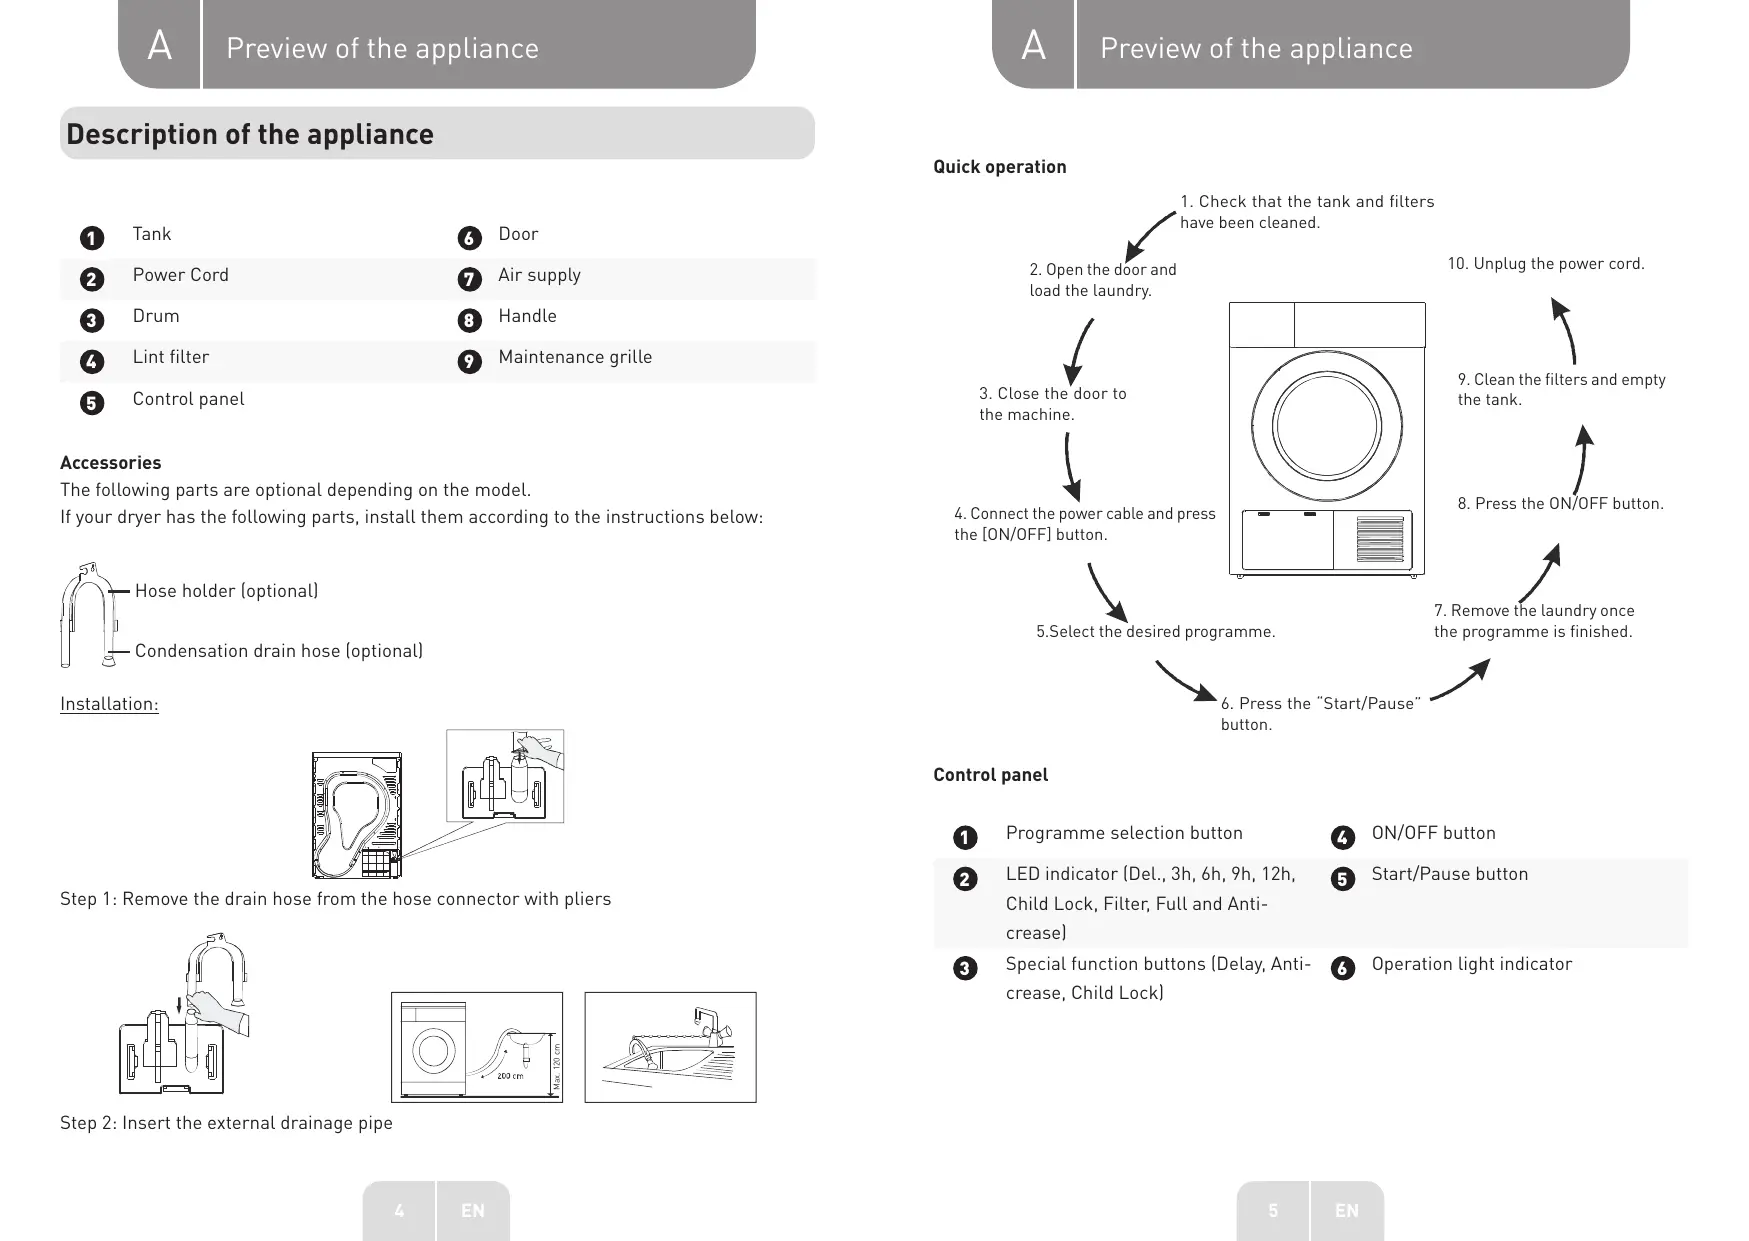
Installation:
Step 1: Remove the drain hose from the hose connector with pliers

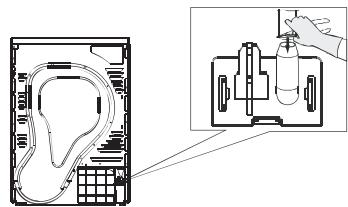
Step 2: Insert the external drainage pipe
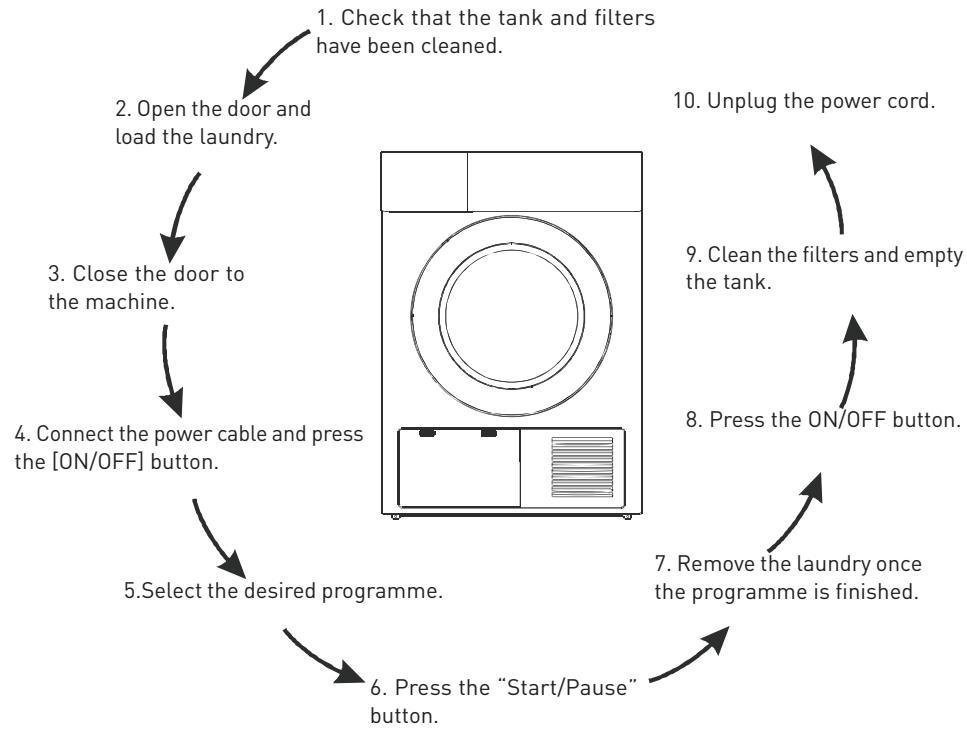
Quick operation
Control panel
1
Programme selection button
4
ON/OFF button
2
LED indicator (Del., 3h, 6h, 9h, 12h, Child Lock, Filter, Full and Anticreate)
5
Start/Pause button
3
Special function buttons {Delay, Anticrease, Child Lock}
6
Operation light indicator
Installation
Transporting
Use caution when moving the unit. Never grasp the appliance by its protruding parts. The appliance door cannot be used as a handle when delivered. If the dryer cannot be transported upright, it may be tilted at an angle of less than 30^ .
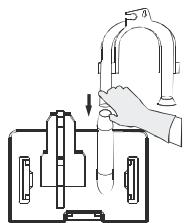
Installation location
- For practical reasons, we recommend that you install your dryer close to your washing machine.
- Your dryer should be installed in a clean place where dirt cannot accumulate. Air must be able to circulate freely around your appliance.
- Please do not block the air inlet at the front or the air intake grille at the back of the appliance.
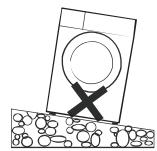
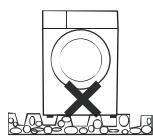
- To keep vibrations and noise to a minimum when the dryer is in operation, we recommend placing it on a solid, flat surface.
- Never remove the feet. Do not reduce the floor clearance space by placing mats, pieces of wood or the like underneath the appliance. This may contribute to increased heat and interfere with the proper functioning of your appliance.
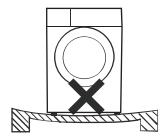
Levelling
When the dryer is in its permanent operating position, check that it is perfectly level using a spirit level. If necessary, adjust the feet using a tool.
Power supply connection
- Make sure that the voltage of the power supply is identical to the specified voltage of the dryer.
- Do not connect your appliance using a connecting plate, a universal plug or a universal socket.

CAUTION
- Do not touch your device for the first two hours after it has been transported (MDS80-CH05/B05 only). Before using the machine for the first time, please use a soft cloth to clean the inside of the drum.
a. Put some clean clothes in the drum.
b. Connect the plug, press [On/Off].
c. Select the [Refresh] program and press the [Start/Pause] button.
d. When the programme is finished, please follow the instructions in the section "Cleaning and periodic maintenance" (on page 16 of this manual) to clean the filter hatch.
- During the drying process, it is normal for the compressor and water pump to make noise (MDS80-. CH05/B05 only).
Recommendations
Before you start drying, make sure your clothes have been spun in the washing machine. High-speed spinning reduces drying time and saves energy.
- To ensure that your clothes dry evenly, sort your clothes according to the type of fabric and the correct drying programme.
Before drying, close zips, hooks or eyelets, button your clothes and fasten fabric belts, etc.
- Do not over-dry your clothes; excessive drying can wrinkle your clothes or cause them to shrink.
- Do not dry clothes containing rubber or similar elastic materials, such as raincoats, bicycle covers, etc.
- The door can only be opened when the dryer cycle is finished. Never open the door before the programme has finished. Hot surfaces and condensation can cause burns.
- Always clean the filter and empty the tank after use to avoid increased drying times and energy consumption.
- Please choose the appropriate programme when using the appliance for woollen garments to make the fabric fresher and softer.
Reference weights are as follows:

Coat made of several materials (approx. 800g )

Jacket (approx. 800g in cotton)

Jeans [approx. 800g ]

Duvet cover (approx. 900g in cotton)
| Sheet (approx. 600 g, in cotton) |
| Work clothes (tops and bottoms) (approx. 1,120 g, in cotton) |
| Pyjamas (approx. 200 g) |
| Shirts (approx. 300, in cotton) |
| Vest (approx. 180 g, in cotton) |
| Underwear (approx. 70 g, in cotton) |
| Socks (approx. 30g, blended material) |
Operation
Programme selection
- Press the ON/OFF button. As soon as the operation indicator light comes on, choose the programme you want using the programme selector button.
- Select the [Delayed start] or [Anti-crease] functions employ the machine's additional options.
Press the Pause button.
Starting the programme
The drum will start to rotate as soon as the programme starts and the operation indicator light will start to flash.

NOTE
Occasionally, the drum may stop for about 40 seconds during the drying process, but the operation indicator will still flash normally.
The dryer will automatically adjust the remaining time and continue to operate normally.
End of the programme
- The drum will stop spinning after the programme is finished, the operation indicator light will remain on and the alarm will sound. The "Filter" and "Full" LEDs help you remember to clean the filter and the tank. The dryer will start the [Anti-crease] function if the laundry is not removed in time (see page 19). Please press the [On/Off] button to turn off the unit and then remove the plug.
- Solve the problem by following the indications in the section "Malfunction indication and solutions", if an unexpected stop occurs during the drying process by following the information on the appliance (see page 24).
| Programme | Weight
(max.) | Application/Properties |
| Auto | Auto | Auto | 5.0 kg | To dry textiles of unknown material automatically. |
| For cotton and coloured textiles made of cotton or linen |
| Extra | 7.0 kg | To dry cotton clothes. Drying level: Very dry. |
| Cotton | Standard | 7.0 kg | To dry cotton clothes. Drying level: ready to fold |
| Special | 7.0 kg | To dry cotton clothes. Drying level: ready to iron. |
| Jeans special | Jeans special | 5.0 kg | To dry jeans or loungewear that were spun at high speed in the washing machine. |
| Blended textiles | Blended textiles | 3.5 kg | To dry clothes the material of which you cannot determine. |
| Sports | Sports | 3.0 kg | For drying sportswear, thin garments and polyester clothing that cannot be ironed. |
| Delicate | Delicate | 1.0 kg | To dry small quantities of baby clothes. |
| Baby care | Baby care | 1.0 kg | To dry small quantities of baby clothes. |
| Synthetics | For synthetic and blended fabrics or no-iron cotton fabrics. |
| Extra | 3.5 kg | To dry thick or multi-layered synthetic fabrics. Drying level: Very dry. |
| Standard | 3.5 kg | To dry fine no-iron synthetic fabrics such as easy-care shirts, table linen, baby clothes or socks. |
| Programme | Weight (max.) | Application/Properties |
| Cool | Cool | | Cools clothes without air for up to 10 minutes. |
| Refresh | Refresh | | Allows clothes that have been left in closed spaces for a very long time to be refreshed for a minimum of 20 minutes and up to a maximum of 150 minutes [in 10-minute increments]. |
| Fast 45' | Fast 45' | 0.6 kg | Dries up to 3 shirts in 45 minutes. |
| Hot 60' | Hot 60' | | Warms clothes with hot air for 60 minutes. |
| Hot 30' | Hot 30' | | Warms clothes with hot air for 30 minutes. |
Note:
This symbol refers to the energy efficiency test "standard cotton programme" which is the one that best corresponds to normal drying for cotton clothes at the indicated capacity.
- The above programmes are only recommendations, and users are free to choose the appropriate programme according to their personal habits. Thicker and multi-layered fabrics such as bed linen, jeans, jackets etc. are not easy to dry, so you can choose the Jeans programme and set the drying intensity level to its maximum.
- As it is difficult to dry non-homogeneous, thick and multi-layered fabrics, it is best to choose the appropriate drying time for them if parts of the garments are still wet at the end of the programme.
Drying function
Specific drying functions
- Drying procedure (delayed).
To delay the start of the programme by 3, 6, 9 or 12 hours.
When the delayed programme starts, the time starts to decrease and the indicator lights up.
Detailed procedure:
- Load your laundry and make sure the machine door is closed.
- Press ON/OFF, then turn the programme selector to select the desired programme.
3.If needed, you can select the [Anti-crease] function.
- Press the [Delayed start] button.
- Hold the [Delayed start] button to select the desired time.
- After pressing the [Start/Pause] button, the dryer switches to the operating mode. The drying cycle will start once the selected time has elapsed.
- If you press the [Start/Pause] button again, the delayed start function will paused. (8). To cancel the delayed start function, press the [On/Off] button.
2. [Anti-crease] function
At the end of the drying cycle, the duration of the anti-crease operation is either 30 minutes (default) or 120 minutes (selected by you).
The [Anti-crease] indicator will light up if you have selected the Anti-crease function. This function prevents your laundry from creasing. You can remove the laundry during the anti-crease phase. Except for the [Cold], [Refresh], [Hot 30' ] and [Hot 60' ] programmes, this function can be used for all programmes.
3. Instructions for the [Childproof] function
- This appliance is equipped with a special child lock to prevent children from inadvertently pressing the machine's buttons or mishandling the machine.
- While the dryer is running, press the [Anti-crease] and [Delay start] buttons simultaneously for three seconds to activate the Childproof function. When the Childproof function is activated, the indicator is lit and no buttons on the dryer work except for the [On/Off] button. During the start phase of the childproof function, the [Anti-crease] and [Delayed start] buttons can be pressed simultaneously for more than 3 seconds to deactivate the childproof function.
Periodical cleaning and maintenance
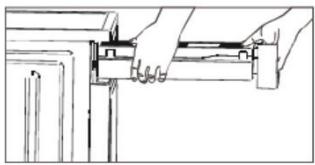
Emptying the water tank
1.Hold the water tank with both hands and pull toward yourself;
2. Tilt the water tank and pour the condensed water into a sink;
3. Replace the water tank.

CAUTION
- Empty the water tank after each use. The programme will pause and the "Full" indicator will light up if the water tank is full during the drying process. Once the tank is empty, the dryer can be restarted by pressing the [Start/Pause] button.
- Do not drink the condensed water.
- Do not use the dryer without the water tank.
Cleaning the lint hatch
- Open the hatch.
2.Remove the filter from the hatch.
3.Clean the filter hatch. Remove any lint trapped on the filter hatch.
- Replace the filter hatch.
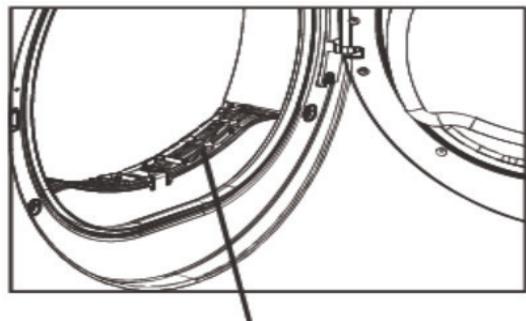
Filter hatch
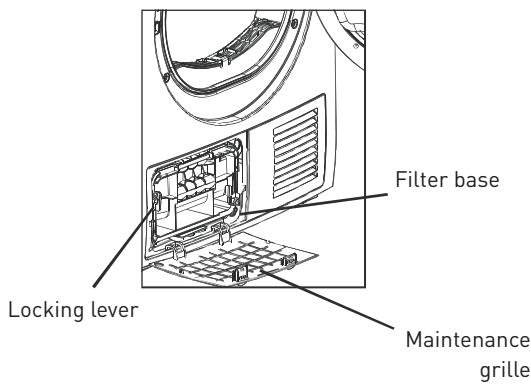
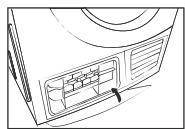
Clean the filter base
- Open the maintenance grille.
2.Unscrew the two locking levers towards each other.
3.Clean the entire filter base.
4.Insert the filter base again.
5.Screw the two locking levers back on.
6.Close the maintenance hatch until it clicks into place.

NOTE
- Lint accumulated on the filter prevents proper air circulation, which leads to longer drying times and higher energy consumption;
- Before cleaning, unplug the power cord!
- The dryer should never be operated without its filter!
- Clean the filter after each use to prevent residue from accumulating in the machine.
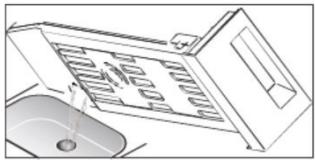
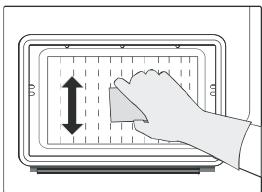
Cleaning the thermal condenser
When necessary (approximately every two months), remove lint from the thermal condenser with a sponge or soft brush.
Please wear gloves during this procedure.

NOTE
It is easier to remove lint by moistening it beforehand, for example with a laundry spray bottle.
Maintenance of the air condenser
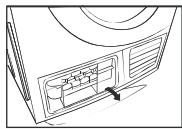
- Open the maintenance hatch completely.
- Screw both blocking levers toward each other.
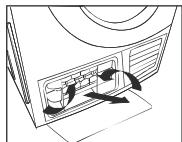
- Pull the condenser towards you to remove it.
- Clean the condenser well and let it drain completely.
6.Clean the seals.
7.Reinsert the condenser using the button.
8.Unscrew both blocking levers.
9.Close the maintenance hatch until it clicks into place. Clean the condenser about every 3 months if used frequently.
Take care not to damage the condenser!

CAUTION
- Clean with water only, do not use any objects with sharp edges. Never use the machine without the condenser!
- During the drying cycle, water may collect between the glass and the seal, this does not affect the operation of your dryer!
Malfunction display and solutions
| Display | Reason | Solutions |
| The tank is full | Empty the tank |
| The "Full" LED is permanently lit | Problem with the water pump or water level sensor | |
| Childproof +9 hours | Temperature sensor malfunction | Please contact your local customer service if the problem persists |
| Childproof +6 hours | Moisture sensor malfunction |
| Childproof +3 hours | Water heater malfunction | |
Precautions
| Problems | Solution |
| The power indicator light does not light up. | Check that the mains plug is connected.
Check the selected programme.
Check the condition of the fuses in your home. |
| The "Full" indicator is permanently lit. | Empty the condenser tank.
In case of failure, check the hose for the condensation outlet. |
| The dryer does not start. | Make sure you press the start button.
Check that door is closed.
Make sure you have selected a programme. |
| Water is leaking from the machine. | Make sure that the machine is correctly installed in a horizontal position. |
| The door opens by itself. | Push the door closed until you hear a “click”. |
| The humidity level in the room increases considerably. | Ventilate the room properly.
Clean the cooling grille.
Check that the condenser has been installed correctly. |
| Drying is not optimal or the drying time is too long. | Clean the filter and the condenser.
Empty the tank.
Check the water outlet.
The environment where the machine is installed is too small.
Check the humidity sensors.
Use a stronger drying programme. |

If you cannot solve the problem alone and need help:
- Press the ON/OFF button.
- Disconnect the mains plug and contact customer service.
Merci!
Specifications techniques
Fiche produit
Support detuyau [en option]