
HERESY II CHERRY X1 - Pregnant KLIPSCH - Free user manual and instructions
Find the device manual for free HERESY II CHERRY X1 KLIPSCH in PDF.
| Product Type | Passive acoustic speaker, three-way |
| Brand | Klipsch |
| Model | Heresy II Cherry X1 |
| Dimensions (H x W x D) | 52.1 x 39.4 x 33.0 cm |
| Weight | 18.6 kg (each) |
| Power | Passive, requires an external amplifier |
| Key Features | Klipsch horn technology, high efficiency, wide dynamic range, low distortion |
| Driver Configuration | 30 cm (12 inch) direct radiating woofer, horn-loaded compression midrange and tweeter |
| Impedance | 8 ohms (typical) |
| Sensitivity | 96 dB (1 W/1 m) |
| Frequency Response | 50 Hz – 20 kHz ± 3 dB |
| Power Handling | 100 W RMS (max 400 W peak) |
| Care and Cleaning | Wipe with a soft, dry cloth. Do not use abrasive or liquid cleaners. |
| Safety | Do not block vents. Do not expose to water or moisture. Repair by a professional only. |
| Spare Parts and Repairability | Contact an authorized Klipsch dealer. Unauthorized repair voids warranty. |
| Warranty (USA and Canada) | 5 years (mechanical parts), 2 years (electronic components) |
Frequently Asked Questions - HERESY II CHERRY X1 KLIPSCH
User questions about HERESY II CHERRY X1 KLIPSCH
0 question about this device. Answer the ones you know or ask your own.
Ask a new question about this device
Download the instructions for your Pregnant in PDF format for free! Find your manual HERESY II CHERRY X1 - KLIPSCH and take your electronic device back in hand. On this page are published all the documents necessary for the use of your device. HERESY II CHERRY X1 by KLIPSCH.
USER MANUAL HERESY II CHERRY X1 KLIPSCH
IMPORTANT SAFETY INSTRUCTIONS
- READ these instructions.
- KEEP these instructions.
- HEED all warnings.
- FOLLOW all instructions.
- DO NOT use this apparatus near water.
- CLEAN ONLY with dry cloth.
- DO NOT block any ventilation openings. Install in accordance with the manufacturer's instructions.
- Do NOT install near any heat sources such as radiators, heat registers, stoves, or other apparatus (including amplifiers) that produce heat.
- ONLY USE attachments/accessories specified by the manufacturer.
- USE only with a cart, stand, tripod, bracket, or table specified by the manufacturer, or sold with the apparatus.
When a cart is used, use caution when moving the cart/apparatus combination to avoid injury from tip-over.

- REFER all servicing to qualified service personnel. Servicing is required when the apparatus has been damaged in any way, such as power-supply cord or plug is damaged, liquid has been spilled or objects have fallen into the apparatus, the apparatus has been exposed to rain or moisture, does not operate normally, or has been dropped.

This symbol indicates that there are important operating and maintenance instructions in the literature accompanying this unit.
WARNING: To reduce the risk of fire or electrical shock, do not expose this apparatus to rain or moisture.
WARNING: No user-serviceable parts inside. Refer all servicing to qualified service personnel.
INSPECTION
We want your new speaker system to look as good as it did leaving the factory! Please check promptly for any transit damage. Carefully unpack your new speaker system and verify the components against the packing list. In extreme circumstances, items may have become damaged in transit. If any damage is discovered, notify the delivery service and dealer where the system was purchased. Make a request for inspection, and follow their instructions for evaluation. Be sure to keep the product's original shipping carton.
ABOUT YOUR KLIPSCH PURCHASE
Thank you for your purchase of Klipsch Heritage loudspeakers. After reading this manual and connecting your system, you will hear the result of over 60 years of stringent engineering and class-leading research and development. Like all Klipsch products, your loudspeakers feature Klipsch Horn-loaded Technology—the guiding design for the first Klipschorn® developed in 1946 and for every Klipsch product that has followed. Horn-loading allows your speakers to deliver very high sensitivity, wide dynamic range, low distortion, controlled dispersion and flat frequency response. This translates to unequaled power, detail and dynamics, the hallmarks of
"The Klipsch Sound." Please be sure to fill out the warranty card at the back of this manual or online at www.klipsch.com so we are better able to serve you. Again, thank you for choosing Klipsch and we hope that your speakers bring life to your music and movies for many years.
PAUL W. KLIPSCH
The Klipsch Heritage loudspeakers are the direct result of the engineering design genius of Paul W. Klipsch. The technology incorporated into these loudspeakers is as valid today as it was in 1946 when Paul started Klipsch and Associates with the launch of the Klipschorn®. The founder of our company has been lauded as a pioneer and visionary in the audio industry. Paul has had a remarkable career, the pinnacle of which was his induction into the Engineering and Science Hall of Fame in 1997. This honor puts him in such distinguished company as Thomas Edison, George Washington Carver and the Wright brothers, among others. Paul's life was filled with notable distinctions, including the 1994 dedication of the Klipsch Department of Electrical and Computer Engineering at New Mexico State University, Paul's alma mater. In 1978, Paul was awarded the prestigious Silver Medal by the Audio Engineering Society of America as well as being inducted into the Audio Hall of Fame. These are but a few of the achievements of a great audio engineer and an even greater man. Hi-Fidelity magazine said about Paul that he was, "the image of one who pushes toward the frontier and reestablished it wherever he arrives." The November 1986 issue of Audio magazine sums up Paul W. Klipsch and his influence on the industry, "... the Klipschorn along with its designer Paul Klipsch, are true legends in the field of high-fidelity sound. Nothing I could write would do complete justice to its description."
KLIPSCHORN
Paul Klipsch's design goal was to reproduce the dynamics and excitement of a live symphony orchestra performance in his living room. An engineering breakthrough when it was introduced, the Klipschorn remains one of the most highly praised loudspeakers in the world and is the only loudspeaker that has been in continuous production for over 60 years. The Klipschorn is a testament to design that stands the test of time. With extremely high sensitivity, this three-way, fully horn-loaded loudspeaker features a folded tri-hedral bass horn that utilizes the walls and corners of the listening room as part of its design. This combination of attributes enables it to span more than nine full octaves with dynamic, smooth, ultra low distortion sound.
LA SCALA II
The La Scala was developed as a more portable Klipschorn to serve as a public address speaker for the 1963 gubernatorial campaign of Winthrop Rockefeller. Like the Klipschorn, it displays extremely high sensitivity and is a fully horn-loaded, three-way speaker featuring a shorter, two-fold bass horn that can operate independently of listening room corners. As a result, the La Scala's only sonic compromise as compared to the Klipschorn is a slightly higher bass cutoff.
CORNWALL III
The Cornwall was introduced in 1959 as a larger full range alternative to the Heresy as a center channel speaker in a
three-speaker stereo array. It provides the full range bass response of the Klipschorn with sensitivity and output approaching the fully horn-loaded models. Like the Heresy, the Cornwall is a three-way design utilizing horn-loaded compression drivers for midrange and treble frequencies and a direct radiating 15-inch woofer for the low frequencies.
HERESY III
First introduced in 1957, the Heresy started life as a compact center channel speaker for the Klipschorn in three-speaker stereo arrays. The Heresy is a compact, three-way design that uses horn-loaded compression drivers for midrange and treble reproduction and a direct radiating 12-inch woofer for the low frequencies.
UNPACKING & ASSEMBLY
Heresy III and Cornwall III
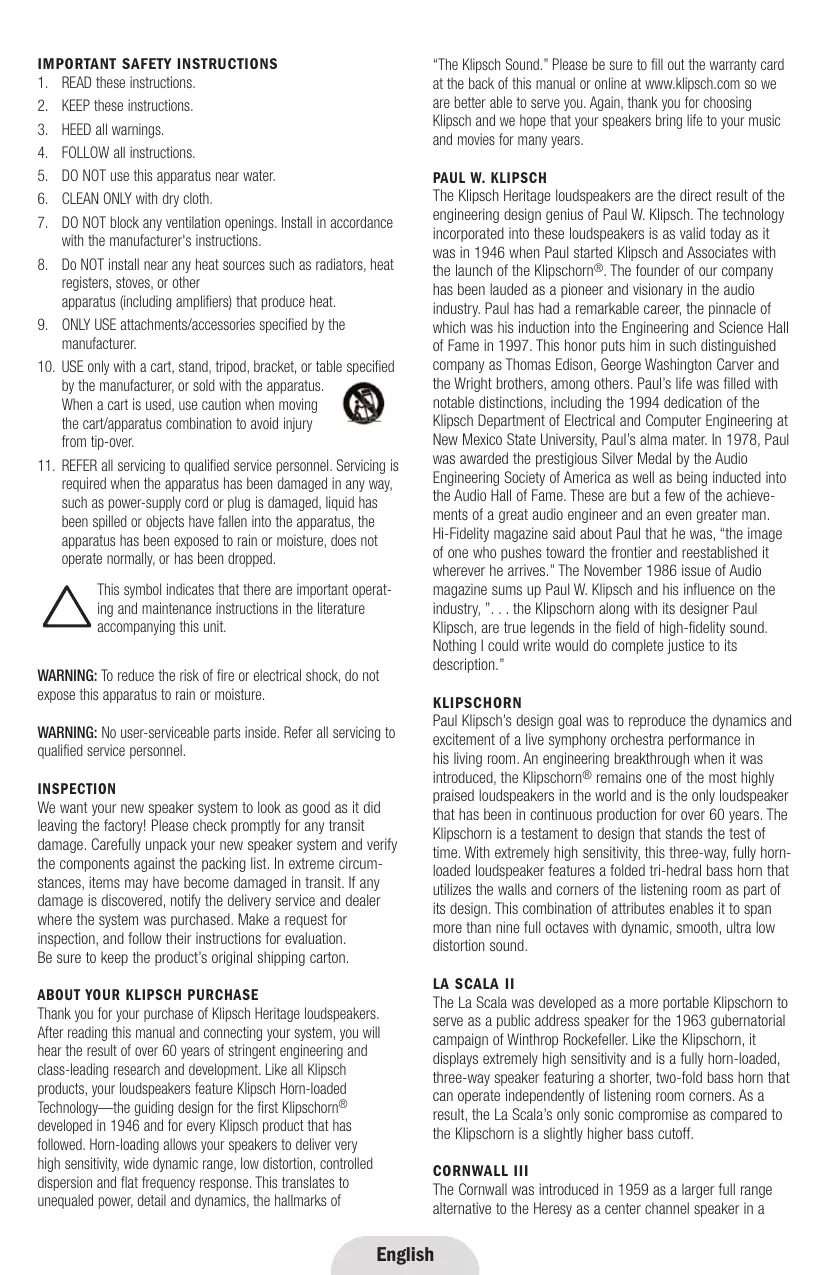
The Heresy III and Cornwall III models are large, heavy speakers. It is recommended that two people unpack and install these models. Open the top carton flaps, invert the carton and pull it up and off of the speaker. Remove the internal packing and save for future use.
Klipschorn and LaScala II
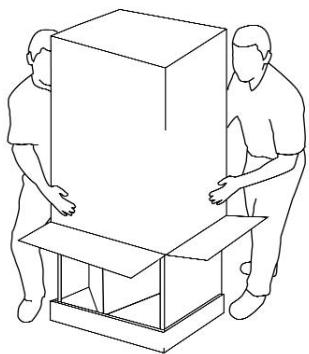
The Klipschorn and La Scala II low and high frequency cabinets are shipped in two separate cartons. These are large, heavy speakers. Unpacking and setup will require two people. The Klipschorn and LaScala II high and low frequency cabinets are matched by serial number for proper acoustic performance. Please take care to match upper and lower cabinet serial numbers when assembling these loudspeakers.
Klipschorn
Open the flaps of the larger low frequency carton labeled "Open This End", invert the carton and lift it off of the speaker cabinet and remove the inner packing. The top of the cabinet, with its three rubber spacers, should be facing up (See Figure 1). Slide the bass cabinet into the corner where it will be placed for a test fit and make note of any obstructions that interfere with a tight fit. Remove the cabinet from the corner to install the high frequency cabinet. Position the speaker near, but not tight into, the corner and remove the low frequency grille (two wing nuts) on the input panel side of the cabinet and set aside until the connection process is complete.
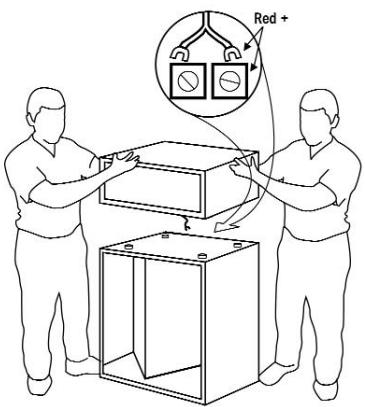
Open the top flaps of the smaller high frequency carton marked "Open This End" and remove the packing pad. Lift the high frequency cabinet out of the carton and set it on top of the low frequency cabinet. Align the three rubber bumpers on the top of the low frequency cabinet with the three recesses on the underside of the high frequency cabinet. Thread the high and mid frequency driver leads in the upper cabinet through the hole in the cabinet's lower panel. Connect the Green (+) tagged pair of wires to the pair of binding posts labeled "Tweeter Out." Take care to match the Red (+) and Black (-) binding posts with the Green (+) and Black (-) sleeves on the ends of these wires. Follow this same procedure to connect the Yellow tagged pair of wires to the pair of binding posts labeled "Mid Out." (See Figure 5.)
La Scala II
Open the flaps of the larger low frequency carton labeled "Open This End." Invert the carton, lift it off of the speaker cabinet and remove the inner packing. The top of the cabinet, with its three rubber spacers, should be facing up (See Figure 2).
For the La Scala II high frequency cabinet, open the top flaps of the smaller carton marked "Open This End," and remove the inner packing pad. The bottom of the cabinet should be facing up with the low frequency connection cable attached to it. Free this cable, invert the carton and lift it off the cabinet. With assistance, lift the high frequency cabinet off the floor and place it on top of the low frequency cabinet while placing the low frequency cable toward the rear and out the gap between the cabinets. Align the recesses on the bottom surface of the high frequency cabinet with the rubber bumpers on the top of the low frequency cabinet. Connect the low frequency cable to the two screw barrier strip on the rear of the low frequency cabinet. Be sure to observe proper polarity by connecting the wire with the Red Indicator to the terminal with the Red marking and the wire with the Black indicator to the other terminal.
PLACEMENT
Your Klipsch Heritage loudspeakers will perform well in a variety of locations but best results will be achieved using the following general guidelines:
- All: Place on a common wall 6 to 15 feet apart.
- La Scala, Cornwall, Heresy: Position them equidistant from the wall behind the speakers.
- Heresy: Equidistant height above the floor with the high frequency drivers at seated ear height if wall or cabinet mounted.
1

2
three-speaker stereo array. It provides the full range bass response of the Klipschorn with sensitivity and output approaching the fully horn-loaded models. Like the Heresy, the Cornwall is a three-way design utilizing horn-loaded compression drivers for midrange and treble frequencies and a direct radiating 15-inch woofer for the low frequencies.
HERESY III
First introduced in 1957, the Heresy started life as a compact center channel speaker for the Klipschorn in three-speaker stereo arrays. The Heresy is a compact, three-way design that uses horn-loaded compression drivers for midrange and treble reproduction and a direct radiating 12-inch woofer for the low frequencies.
UNPACKING & ASSEMBLY
Heresy III and Cornwall III
The Heresy III and Cornwall III models are large, heavy speakers. It is recommended that two people unpack and install these models. Open the top carton flaps, invert the carton and pull it up and off of the speaker. Remove the internal packing and save for future use.
Klipschorn and LaScala II
The Klipschorn and La Scala II low and high frequency cabinets are shipped in two separate cartons. These are large, heavy speakers. Unpacking and setup will require two people. The Klipschorn and LaScala II high and low frequency cabinets are matched by serial number for proper acoustic performance. Please take care to match upper and lower cabinet serial numbers when assembling these loudspeakers.

Klipschorn
Open the flaps of the larger low frequency carton labeled "Open This End", invert the carton and lift it off of the speaker cabinet and remove the inner packing. The top of the cabinet, with its three rubber spacers, should be facing up (See Figure 1). Slide the bass cabinet into the corner where it will be placed for a test fit and make note of any obstructions that interfere with a tight fit. Remove the cabinet from the corner to install the high frequency cabinet. There is a left and a right low frequency cabinet with respect to the input panel. This allows the speaker's binding posts to be oriented toward the electronics to minimize the length of speaker wire. In preparation for hookup, position the speaker near, but not tight into, the corner and remove the low frequency grille (two wing nuts) on the input panel side of the cabinet and set aside until the connection process is complete.
Open the top flaps of the smaller high frequency carton marked "Open This End" and remove the packing pad. Lift the high frequency cabinet out of the carton and set it on top of the low frequency cabinet. Align the three rubber bumpers on the top of the low frequency cabinet with the three recesses on the underside of the high frequency cabinet. Thread the high and mid frequency driver leads in the upper cabinet through the hole in the cabinet's lower panel. Connect the Green (+) tagged pair of wires to the pair of binding posts labeled "Tweeter Out." Take care to match the Red (+) and Black (-) binding posts with the Green (+) and Black (-) sleeves on the ends of these wires. Follow this same procedure to connect the Yellow tagged pair of wires to the pair of binding posts labeled "Mid Out." (See Figure 5.)
La Scala II
Open the flaps of the larger low frequency carton labeled "Open This End." Invert the carton, lift it off of the speaker cabinet and remove the inner packing. The top of the cabinet, with its three rubber spacers, should be facing up (See Figure 2).
For the La Scala II high frequency cabinet, open the top flaps of the smaller carton marked "Open This End," and remove the inner packing pad. The bottom of the cabinet should be facing up with the low frequency connection cable attached to it. Free this cable, invert the carton and lift it off the cabinet. With assistance, lift the high frequency cabinet off the floor and
place it on top of the low frequency cabinet while placing the low frequency cable toward the rear and out the gap between the cabinets. Align the recesses on the bottom surface of the high frequency cabinet with the rubber bumpers on the top of the low frequency cabinet. Connect the low frequency cable to the two screw barrier strip on the rear of the low frequency cabinet. Be sure to observe proper polarity by connecting the wire with the Red Indicator to the terminal with the Red marking and the wire with the Black indicator to the other terminal.
PLACEMENT
Your Klipsch Heritage loudspeakers will perform well in a variety of locations but best results will be achieved using the following general guidelines:
- All: Place on a common wall 6 to 15 feet apart.
- La Scala, Cornwall, Heresy: Position them equidistant from the wall behind the speakers.
- Heresy: Equidistant height above the floor with the high frequency drivers at seated ear height if wall or cabinet mounted.
- All: Angle speakers toward the listener and even with or forward of any adjacent obstructions.
- La Scala, Cornwall, Heresy: Placing them near a corner or wall provides the greatest amount of bass while moving the speakers away from room boundaries reduces bass energy.
- All: Asymmetrical placement of a pair of speakers from adjacent side walls can smooth room-induced bass unevenness.
- Experiment with the above guidelines to suit your taste and to compensate for your room's acoustic characteristics.
Klipschorn
Klipschorn speakers typically perform best when positioned in the corners on the long wall of a rectangular room. If the room is very narrow and long with corners farther apart than 18 to 20 feet, the stereo image may not be optimal. A room with a length to width ratio of 1.00 to .618 is preferred. In addition, Klipschorn loudspeakers seem to benefit from ceiling heights no lower than 8.5 feet. The Klipschorn requires corner placement because the walls of the room serve to complete the speaker's low frequency horn. To achieve full low frequency extension, the Klipschorn should fit tightly in a corner without baseboard or trim interference and the wall surfaces should extend at least 25 inches beyond the side grilles.
False Corners
If proper corners are not available in your listening room, false corners can be constructed to yield bass performance similar to a full corner and also allow for some adjustment of toe-in if desired. Start with a 2^× 4^ framework as shown in Figure 3. Klipsch recommends using standard 4 foot wide sheets of 3 / 4 plywood securely glued and nailed to the framework. The backside may be covered with a thinner material such as 3 / 16 masonite or 1 / 2 plywood. Paint to match wall color, or finish with a laminate or other material. (See Figure 3.) In the case of very wide spacing, a false corner can be employed on one of the Klipschorns to reduce the distance between speakers. Another solution to widely spaced Klipschorn loudspeakers in an audio only system is the addition of a center speaker such as the La Scala to create a three-speaker stereo array. Please contact Klipsch Technical Support at 1-800-554-7724
for connection details.
La Scala II
The La Scala II features a self-contained, front-firing, folded bass horn to permit placement out of the corner if required. However, because this model has less bass extension than the Klipschorn, the low-frequency acoustic reinforcement of corner placement may be optimal. The La Scala also offers full flexibility with regard to the amount of toe-in for the desired stereo image. Deep bass performance may also be augmented with a high performance Klipsch subwoofer.
Cornwall III
The Cornwall III offers the placement and toe-in flexibility of the La Scala with low frequency extension similar to the Klipschorn at a reduced output capability. As with the La Scala and Heresy, corner positioning yields the greatest amount of bass output while placements out of the corner or away from rear walls will yield less bass. Since room acoustics and personal taste vary we recommend experimenting with several locations to fine tune the speaker's performance. Self-stick rubber pads are supplied for attachment to the bottom of the riser for use on hard floors.
Heresy III
The Heresy III offers the greatest degree of placement flexibility of all of the Heritage models due to its relatively compact size. It delivers the same basic frequency range as the La Scala but at more modest output levels. Corner, floor placement will deliver the highest degree of low bass reinforcement and the slant riser base helps to compensate for the Heresy's short stature. This riser may be removed for shelf or cabinet placement. Self-stick rubber pads are supplied for attachment to the bottom of the cabinet to prevent scratching of shelves and hard surfaces.
CONNECTING YOUR LOUDSPEAKER
Caution: Turn your amplifier off before making any connections! (See Figure 4.)
- Your loudspeakers are equipped with positive (Red) and negative (Black) connection terminals, on the rear or side of the cabinet. These correspond to the positive and negative terminals on the appropriate channel (left, right, etc.) of your amplifier and will accommodate bare wire, spade lugs or banana plugs (See Figure 4).
- All speakers in your system must be connected in phase with the positive speaker terminal connected to the positive amplifier terminal. Repeat this for the negative speaker and amplifier terminals. Most speaker wire has distinguishing markings on the insulation of one of the conductors to assist in correct hookup.
- Use 16-gauge (AWG), two conductor, copper wire at a minimum and larger gauge wire for longer runs. The connection terminals on your loudspeaker will accommodate bare wire, spade terminals or banana type plugs.
- Caution: With all connection types take care that there is no contact between the positive and negative terminals at the speaker and amplifier. Damage to your equipment may result! (See Figure 4.)
Klipschorn: Connections are found on the input panel on the side of the low frequency cabinet. Two of the four pairs of binding posts are used to connect the speaker cables coming from your amplifier. They are labeled "HF IN" + and - / "LF IN" + and -. Both red (+) and both black (-) posts are connected with wire jumpers. Leave these jumpers in place for conventional single wire connection and use either pair of posts. Remove these jumpers for optional bi-wire connection. (See Figure 5.) Replace the side grille, removed earlier after completing all connections. Take care to route the speaker cable through the notch in the lower, rear corner of the grille as the speaker is slid into the corner. If the speaker cable comes from the side opposite the input panel, route it through the notch in that grille then in front of the tail board and onto the input panel.
Do not connect your amplifier directly to the midrange or tweeter driver leads or to the posts labeled "Mid Out" or "HF Out" as you may damage the speaker.
La Scala II: The two pairs of binding posts located on the rear of the loudspeaker are used to connect the speaker cables coming from your amplifier. These binding posts are labeled "HF IN" + and - / "LF IN" + and -." Both red (+) and black (-) posts connected with wire jumpers. Leave these jumpers in place for conventional single wire connection and use either pair of posts. Remove these jumpers for bi-wire connection. (See Figure 5.)
Cornwall III and Heresy III: The two pairs of binding posts located on the rear of the loudspeaker and are used to connect the speaker cables coming from your amplifier. These binding posts are labeled “HF+”, “HF-”, “LF+” and “LF-” and have both red (+) and black (-) posts connected with metal straps. Leave these straps in place for conventional single wire connection and use either pair of posts. Remove these straps for bi-wire connection (See Figure 4).
WARRANTY-U.S. AND CANADA ONLY
The Warranty below is valid only for sales to consumers in the United States or Canada.
KLIPSCH, L.L.C. ("KLIPSCH") warrants this product to be free from defects in materials and workmanship (subject to the terms set forth below) for a period of five (5) years from the date of purchase. During the Warranty period, KLIPSCH will repair or replace (at KLIPSCH's option) this product or any defective parts (excluding electronics and amplifiers). For products that have electronics or amplifiers, the Warranty on those parts is for a period of two (2) years from the date of purchase.
To obtain Warranty service, please contact the KLIPSCH authorized dealer from which you purchased this product. If your dealer is not equipped to perform the repair of your KLIPSCH product, it can be returned, freight paid, to KLIPSCH for repair. Please call KLIPSCH at 1-800-KLIPSCH for instructions. You will need to ship this product in either its original packaging or packaging affording an equal degree of protection.
Proof of purchase in the form of a bill of sale or receipted invoice, which is evidence that this product is within the Warranty period, must be presented or included to obtain Warranty service.
This Warranty is invalid if (a) the factory-applied serial number has been altered or removed from this product or (b) this product was not purchased from a KLIPSCH authorized dealer. You may call 1-800-KLIPSCH to confirm that you have an unaltered serial number and/or you purchased from a KLIPSCH authorized dealer.
This Warranty is only valid for the original purchaser and will automatically terminate prior to expiration if this product is sold or otherwise transferred to another party.
This Warranty does not cover cosmetic damage or damage due to misuse, abuse, negligence, acts of God, accident, commercial use or modification of, or to any part of, the product. This Warranty does not cover damage due to improper operation, maintenance or installation, or attempted repair by anyone other than KLIPSCH or a KLIPSCH dealer which is authorized to do KLIPSCH warranty work. Any unauthorized repairs will void this Warranty. This Warranty does not cover product sold AS IS or WITH ALL FAULTS.
REPAIRS OR REPLACEMENTS AS PROVIDED UNDER THIS WARRANTY ARE THE EXCLUSIVE REMEDY OF THE CONSUMER. KLIPSCH SHALL NOT BE LIABLE FOR ANY INCIDENTAL OR CONSEQUENTIAL DAMAGES FOR BREACH OF ANY EXPRESS OR IMPLIED WARRANTY ON THIS PRODUCT. EXCEPT TO THE EXTENT PROHIBITED BY LAW, THIS WARRANTY IS EXCLUSIVE AND IN LIEU OF ALL OTHER EXPRESS AND IMPLIED WARRANTYES WHATSOEVER, INCLUDING BUT NOT LIMITED TO, THE WARRANTY OF MERCHANTABILITY AND FITNESS FOR A PRACTICAL PURPOSE.
Some states do not allow the exclusion or limitation of incidental or consequential damages or implied warranties so the above exclusions may not apply to you. This Warranty gives you specific legal rights, and you may have other rights, which vary from state to state.
WARRANTY OUTSIDE THE UNITED STATES AND CANADA
The Warranty on this product if it is sold to a consumer outside of the United States or Canada shall comply with applicable law and shall be the sole responsibility of the distributor that supplied this product. To obtain any applicable warranty service, please contact the dealer from which you purchased this product, or the distributor that supplied this product.