
QA51AD - Food Processor MOULINEX - Free user manual and instructions
Find the device manual for free QA51AD MOULINEX in PDF.
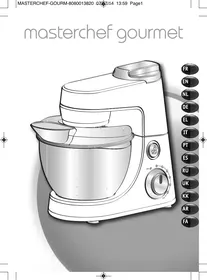



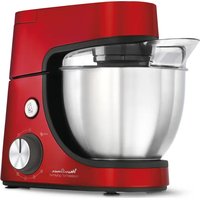
| Product type | Multifunction food processor |
| Brand | Moulinex |
| Model | QA51AD |
| Power supply | 220-240 V, 50/60 Hz |
| Power | 1000 W |
| Stainless steel bowl capacity | Up to 1.8 kg of light dough |
| Blender bowl capacity | 1.5 L (thick mixtures), 1.25 L (liquids) |
| Speeds | Electronic speed control from 1 to max + Pulse position |
| Functions | Mix, knead, beat, whisk, blend, chop, slice, grate, juice |
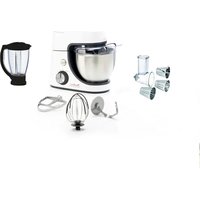
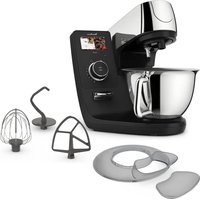
| Included accessories | Stainless steel bowl with lid, kneading hook, mixer, multi-wire whisk, blender bowl, chopper head with grids, vegetable cutter (cones), juice extractor, mill (depending on model) |
| Main bowl material | Stainless steel |
| Safety | Safety hatch, automatic stop via microprocessor in case of overload, unlocking the head and hatch cuts power |
| Cleaning | Accessories (except metal components of the chopper head) are dishwasher safe; motor unit and adapter wiped with a damp cloth |
| Dimensions (L x W x H) | 25 x 25 x 40 cm (estimated) |
| Weight | 5.5 kg (estimated) |
| Spare parts available | Yes (bowl, lid, accessories, fresh pasta kit, etc.) |
Frequently Asked Questions - QA51AD MOULINEX
User questions about QA51AD MOULINEX
0 question about this device. Answer the ones you know or ask your own.
Ask a new question about this device
Download the instructions for your Food Processor in PDF format for free! Find your manual QA51AD - MOULINEX and take your electronic device back in hand. On this page are published all the documents necessary for the use of your device. QA51AD by MOULINEX.
USER MANUAL QA51AD MOULINEX
Thank you for choosing this appliance, which is intended exclusively for the preparation of food and is for indoor, domestic use only.
DESCRIPTION
A - Motor unit
A1 Electronic speed selector A2 Multi-function head release button (A3) A3 Multi-function head A4 High speed outlet (blender jug /juice extractor /grinder) A5 Safety cover A6 Mixer accessories outlet (kneader, balloon whisk, mixer) A7 Power cord storage
B-Bowl assembly
B1 Stainless steel bowl B2 Lid
C-Mixer accessories
C1 Kneader C2 Mixer C3 Balloon whisk
D - Blender jug (depending on model)
D1 Jug D2 Lid D3 Measuring cup
E - Attachment holder (depending on model)
F - Mincer head (depending on model)
F1 Metal body F2 Feed screw F3 Blade F4 Large-hole screen F5 Small-hole screen F6 Nut F7Pusher F8 Tray
G - Vegetable slicer (depending on model)
G1 Drum body G2 Pusher G3 Slicer drum G4 Coarse grater drum G5 Fine grater drum G6 Potato shredder drum
H - Juice extractor (depending on model)
H1 Pusher H2 Lid H3 Rotary filter H4 Juice collector H5 Pouring spout H6 Locking lever
BEFORE FIRST USE
- Before using for the first time, wash all accessory parts in soapy water (except for the attachment (E): see § Cleaning) Rinse and dry.
- Place the appliance on a flat, clean and dry surface. Make sure that the selector button (A1) is in "0" position and plug in your appliance.
- You have several options for starting your appliance:
- Intermittent operation (pulse): Turn the selector button (A1) to the "pulse" position. Using a succession of pulses can give you better control when preparing certain foods.
- Continuous operation: Turn the selector button (A1) to the desired position from "1" to "max" depending on the food you are preparing. You can change it as required during preparation.
- To stop the appliance, turn the button (A1) to "0".
Important: The appliance will start only if the cover (A5) and the head (A3) are locked. The appliance will stop immediately if you unlock the cover (A5) and/or the head (A3) during operation. Lock the cover and/or the head, turn the control button (A1) to the "0" position, and then start the appliance normally by selecting the desired speed.
Your appliance comes with a microprocessor that controls and analyses the operating power. If the load becomes too high, your appliance will stop automatically. To restart your appliance, turn the rotary button (A1) to the "0" position and remove some of your ingredients. Allow your appliance to cool down
1 - MIXING / KNEADING / BEATING / EMULSIFYING / WHISKING
You can prepare up to 1.8 kg light dough and heavy dough made with up to 500 g flour using the stainless bowl (B1) and its lid (B2) depending on the food.
ACCESSORIES USED:
- Stainless steel bowl (B1). -Lid (B2)
- Kneader (C1) or mixer (C2) or balloon whisk (C3)
1.1 - ASSEMBLING THE ACCESSORIES
- Press the button (A2) to release the multi-function head (A3) and raise it until it locks in place.
- Lock the stainless steel bowl (B1) (clockwise) on the appliance and put in the ingredients.
- Insert the desired accessory (C1, C2 or C3) on the outlet (A6), push and rotate it anti-clockwise a quarter turn to lock the accessory in its housing.
- Place the multi-function head (A3) to the horizontal position: press the button (A2) and manually lower the multi-function head (A3) until it locks (the button (A2) returns to its initial position).
- Slide the lid (B2) over the stainless steel bowl (B1).
Note: It is not essential to use the lid but it prevents splashing.
- Make sure that the cover (A5) is locked correctly (clockwise) on the high-speed outlet (A4).
1.2 - USAGE
Start by turning the selector button (A1) to the desired position according to the recipe.
- The appliance starts running immediately.
You can add food through the hole in the lid (B2) during preparation.
- To stop the appliance, turn the button (A1) to "0".
Tips:
- Kneading
- Use the kneader accessory (C1) at speed "1". You can knead up to 500 g of flour (e.g. white bread, grain bread, short crust pastry, etc.). Maximum time of use: 13 minutes.
- Mixing
- Use the mixer (C2) at speed "1" to "max".
- You can mix up to 1.8 kg of light dough (light cake mixture, sponge cake, biscuit or cookie dough). Maximum time of use: 13 minutes.
- Never use the mixer (C2) to knead heavy dough.
- Beating / emulsifying / whisking
- Use the balloon whisk (c3) at speed "1" to "max".
- You can prepare: mayonnaise, aioli, sauces, whisked egg whites (up to 8 egg whites), whipped cream (up to 500 ml), meringues, etc.
- Maximum time of use: 10 minutes.
- Never use the balloon whisk (C3) to knead heavy dough or mix light dough.
1.3 - DISMANTLING THE ACCESSORIES
- Wait for the appliance to come to a complete stop.
- Remove the lid (B2).
- Using the button (A2), release the multi-function head (A3) and raise it to the upper position.
- Release the accessory (C1), (C2) or (C3) from the multi-function head by pushing the accessory into the head and rotating it clockwise a quarter turn.
- Remove the stainless steel bowl.
2-BLENDING/MIXING (DEPENDING ON MODEL)
Depending on the nature of the food, you can use the blender (D) to prepare up to 1.5 L of thick mixtures and 1.25 L of liquid mixtures.
ACCESSORIES USED:
- Blender jug (D).
2.1 - ASSEMBLING THE ACCESSORIES
- Place the multi-function head (A3) in the horizontal position: press the button (A2) and manually lower the multi-function head (A3) until it locks (the button (A2) returns to its initial position).
- Unlock the safety cover (A5) from the high-speed outlet (A4) by rotating it anti-clockwise and then remove it.
- Make sure that the appliance is switched off before locking the blender (D).
- Lock the blender jug (D) on the outlet (A4) by rotating it clockwise.
- Place the food in the blender jug, and lock the lid (D2) fitted with the measuring cap (D3), by rotating it anti-clockwise.
2.2 - USAGE
- Start by turning the selector button (A1) to the desired position (from speed 4 to Max or pulse) according to the recipe.
Use the "Pulse" position for better mixing control and for a better blending of your preparation.
You can add food through the hole in the measuring cap (D3) during preparation.
- To stop the appliance, turn the button (A1) to "0".
Maximum time of use: 3 minutes.
Tips:
You can prepare:
- finely blended soups, cream soups, stewed fruit, milkshakes and cocktails.
- liquid batter (pancake, fritters, Yorkshire pudding, waffles, clafoutis and custard flans).
If ingredients stick to the sides of the bowl when mixing, stop the appliance and wait until the blades have stopped completely. Remove the blender and push the food down onto the blades using a spatula, and put your blender back on the appliance to continue processing.
- Never fill the blender jug with boiling liquid.
- Never run the blender jug empty. Always use the blender jug with its lid.
- Never remove the lid before the blades have stopped completely.
- Always pour liquid ingredients into the blender jug first before adding solid ingredients.
2.3 - DISMANTLING THE ACCESSORY
- Wait for the appliance to come to a complete stop before removing the blender by unlocking it in the anti-clockwise direction and put back the cover (A5) by locking it on the outlet (A4) (clockwise).
3 - MINCING (DEPENDING ON MODEL)
ACCESSIONS USED:
- Attachment holder (E)
- Assembled mincer head (F)
3.1 - FITTING THE MINCER ATTACHMENT
- Press the button (A2) to release the multi-function head (A3) and raise it until it locks in place.
- Place the attachment (E) and lock it in the anti-clockwise direction such that the outlet is in alignment with the appliance.
- Place the multi-function head (A3) in the horizontal position by pressing the button (A2) once again.
3.2 - ASSEMBLING THE MINCER HEAD
- Hold the body (F1) by the feed tube, with the wider opening uppermost.
- Insert the feed screw (F2) (long shaft first) into the body (F1).
- Fit the blade (F3) onto the short shaft protruding from the feed screw (F2) with the cutting edges facing outwards.
- Fit the chosen screen (F4 or F5) on the blade (F3), aligning the two lugs with the two notches in the body (F1).
- Screw the nut (F6) home on the body (F1) in the clockwise direction, without locking it.
- Check the assembly. The shaft should have no play, neither should it be able to turn on its own. Otherwise, repeat the assembly procedure.
3.3 - FITTING THE MINCER HEAD ON THE APPLIANCE
- Facing the attachment outlet (E), insert the assembled mincer head (F) inclined to the right, aligning the two bayonets in the mincer head with the two notches in the attachment. Push the mincer head home into the attachment and turn the mincer head anti-clockwise until it latches with the feed tube in the vertical position.
- Place the removable tray (F8) on the feed tube.
3.4 - USAGE, TIPS AND DISMANTLING
- Make sure that the safety cover (A5) is locked correctly (clockwise) on the high-speed outlet (A4).
- Place a container to collect the preparation in front of the appliance.
- Run the appliance by turning the selector (A1) to speed "3" or "4".
- Push the meat, piece by piece, down the feed tube, using the pusher (F7). Never push the ingredients down the feed tube with your fingers or any other utensil.
- You can chop up to 3 kg of meat (gristle, bone and sinew removed).
Maximum time of use: 10 minutes.
- Leave your appliance to cool down completely before using again.
- To stop the appliance, turn the selector to "0" speed and wait for the appliance to come to a complete stop.
- Unlock the mincer head in the reverse order of the assembly.
Tips:
- Prepare all of the foodstuffs to be minced (for meat, remove the bones, gristle and tendons and cut it into pieces of approximately 2 x 2 cm).
- Make sure that frozen meat is thoroughly thawed.
- At the end of the operation, you can feed a few small pieces of bread into the feed tube to clear any meat remaining in the machine.
4 - GRATING / SLICING (DEPENDING ON MODEL)
ACCESSORIES USED:
- Attachment holder (E)
- Assessed vegetable slicer (G)
- Drums (depending on model)
4.1 - ASSEMBLING THE ACCESSORIES
- Press the button (A2) to release the multi-function head (A3) and raise it until it locks in place.
- Place the attachment (E) and lock it in the anti-clockwise direction such that the outlet is in alignment with the appliance.
- Place the multi-function head (A3) in the horizontal position by pressing the button (A2) once again.
- Make sure that the safety cover (A5) is locked correctly (clockwise) on the high-speed outlet (A4).
- Facing the attachment (E) outlet, insert the drum body (G1) inclined to the right, aligning the two bayonets in the drum body with the two notches in the attachment. Push the drum body home and turn the drum body anti-clockwise until it latches with the feed tube in the vertical position.
- Insert the chosen drum into the body, and make sure that it is fully engaged in the body.
4.2 - USAGE AND TIPS
- Place a container to collect the preparation in front of the appliance.
- Run the appliance by turning the selector (A1) to speed "3" to slice and to speed "4" to grate.
- Place the food in the feed tube on the body and press down with the pusher (G2). Never push the ingredients with your fingers or any other utensil.
- You can prepare up to 2 kg of food.
- Maximum time of use: 10 minutes.
- To stop the appliance, turn the selector to "0" speed and wait for the appliance to come to a complete stop.
- Unlock the drum body in the reverse order of the assembly.
- Use the drums to:
- Grate coarsely (G4) / grate finely (G5): carrots, celery, potatoes, cheese, etc.
- Slice thickly (G3): potatoes, carrots, cucumbers, apples, beetroot, etc.
- Potato shredder (G6): potatoes, parmesan, etc.
5 - EXTRACTING JUICE FROM FRUITS AND VEGETABLES (DEPENDING ON MODEL)
ACCESSORIES USED:
- Assembled juice extractor (H).
5.1 - ASSEMBLING THE JUICE EXTRACTOR
- Place the filter (H3) in the middle of the juice collector (H4).
- Lock the lid: turn it anti-clockwise and lock the lid (H2) on the juice collector (H4) (closed padlock position).
- General locking: push the locking lever (H6) to closed padlock position.
5.2 - FITTING THE JUICE EXTRACTOR ON THE APPLIANCE
- Place the multi-function head (A3) in the horizontal position: press the button (A2) and manually lower the multi-function head (A3) until it locks (the button (A2) returns to its initial position).
- Unlock and remove the cover (A5) from the outlet (A4) by turning it anti-clockwise.
- Make sure that the appliance is switched off before locking the juice extractor (H).
- Lock the assembled juice extractor on the outlet (A4) by turning it clockwise, so as to have the outlet for the pouring spout aligned with the appliance.
- Fit the pouring spout (H5) on the collector (H4).
- Check that the pouring spout (H5) is fully open.
5.3 - USAGE AND TIPS
- Place a large glass under the pouring spout (H5).
- Run the appliance by turning the selector (A1) to speed "3".
- Cut the fruits and/or vegetables into pieces.
- Insert them down the feed tube in the lid (H2) push them slowly using the pusher (H1). Never push the ingredients with your fingers or any other utensil.
- Do not process 500g of food more than 5 times continuously, without allowing your appliance to cool down completely. Maximum time of use: 10 minutes.
- For best results, clean the filter after every 300g of ingredients.
- Important : When the pulp collector is full, stop the appliance and empty the collector.
- To stop the appliance, turn the selector to "0" speed and wait for the appliance to come to a complete stop.
- Wait until the rotary filter comes to a complete stop before removing the assembly from the appliance.
- To remove the juice extractor, unlock it by turning it anti-clockwise.
- Place the locking lever (H6) in the open padlock position. Open the lid (open padlock position). You can then remove the filter (H3) to clean it and empty the collector (H4).
Tips:
- You can make juice from: carrots, tomatoes, apples, grapes, raspberries, etc.
- Peel fruits with thick skins; remove stones and the core of pineapples.
- It is not possible to extract juice from certain fruits and vegetables: bananas, avocado pears, blackberries, some varieties of apples, etc...
- You can prepare juices with different fruits and vegetables without having to clean the juice extractor every time, the flavours will not be mixed. Just run the extractor with a little water to rinse it between two different juices.
- Drink the juices immediately after preparation, and add lemon juice to keep them in the fridge for a few hours.
6 - ADJUSTING THE CORD LENGTH
For more comfortable use or for storage, you can reduce the cord length by pushing it inside the motor unit (A) via the opening on the rear (A7).
7 - FINELY CHOPPING SMALL QUANTITIES (DEPENDING ON MODEL)
ACCESSORY USED:
- Assembled grinder.
You can use the grinder to:
- Chop in a few seconds by pulsing: dried figs, dried apricots, etc.
Quantity / max time: 100g / 5s
This grinder is not designed for hard products like coffee beans or hard spices.
CLEANING
- Unplug the appliance.
- Do not immerse the motor unit (A) or the attachment (E) in water or under running water. Wipe them with a dry or slightly damp cloth.
- For easier cleaning, rinse the accessories quickly after use. Dismantle the mincer head assembly fully. Handle the blades with care to prevent injury.
- Wash, rinse and dry the accessories: they are dishwasher-safe, except for all the metal components in the mincer head: body (F1), feed screw (F2), blade (F3), screens (F4 and F5), nut (F6).
- The screens (F4) and (F5) as well as the blade (F3) must remain greased. Coat them with cooking oil.
Tips:
- In the event any of your accessories are coloured by food (carrots, oranges, etc.), rub with a cloth soaked in cooking oil and then clean them as usual.
- Blender jug (D): pour some hot water containing a few drops of washing up liquid into the blender. Close the lid. Place it on the appliance and pulse a few times. After removing it, rinse the bowl in running water and allow to dry (bowl upside down).
STORAGE
Do not store your appliance in a humid environment.
WHAT TO DO IF YOUR APPLIANCE DOES NOT WORK
If your appliance does not work, check:
- that it is plugged in correctly.
- that the accessories are correctly locked.
- The position of the electronic speed selector (A1): put it back to the "0" position, then select the desired speed again.
Your appliance comes with a microprocessor that controls and analyses the operating power. If the load becomes too high, your appliance will stop automatically. To restart your appliance, turn the rotary button (A1) to the "0" position and remove some of your ingredients. Allow your appliance to cool down for a few minutes. You can then select the desired speed to complete your preparation.
Your appliance still does not work? Contact an authorised service centre (see the list in the service booklet).
DISPOSAL OF PACKAGING AND THE APPLIANCE

The packaging is comprised exclusively of materials that present no danger for the environment and which may therefore be disposed of in accordance with the recycling measures in force in your area.
For disposing of the appliance itself, please contact the appropriate service of your local authority.
ACCESSORIES
You can customise your appliance and obtain the following accessories from your usual retailer or an authorised service centre:
- Stainless steel bowl
- Stainless steel bowl lid
- Kneader
- Mixer
- Balloon whisk
- Blender jug
- Juice extractor - Grinder Mincer head
- Attachment holder
- Vegetable slicer:
- Slicer
- Coarse grating
- Fine grating
- Potato shredder
- Pasta kit
- Couls attachment
- Pasta rolling mill
Caution: This booklet contains instructions for additional accessories. Please keep safe for future reference. Please contact Tefal Customer Relations for further information on how to purchase accessories.

5- JUICING FRUIT AND VEGETABLES (DEPENDING ON MODEL)
ACCESSORIES USED:
3.1- ATTACHING THE ACCESSORY
- Press the button (A2) to release the multifunction head (A3) and tilt it upwards. Position the accessory (E) and secure it by turning it clockwise until it locks into place on the appliance.
- Replace the multifunction head (A3) in the horizontal position, pressing this button (A2).
3.4 - STARTING, TIPS AND DISASSEMBLY
4.2 - STARTING AND TIPS
5.3 - STARTING AND TIPS
- Install the feed tube (F8) onto the inlet.
3.4 - USE, TIPS AND DISASSEMBLY PROCEDURE
4.1 - ASSEMBLY PROCEDURE FOR ACCESSORIES
Press the button (A2) to release the multifunction head (A3), and lift the head so that it is locked in place. - Install the accessory (E) and secure it by turning it counterclockwise so that the outlet of the grinder is aligned with the appliance. - Set the multifunction head (A3) to the horizontal position, pressing the button (A2) again. - Make sure that the protective cover (A5) is correctly locked (turned clockwise) on the high-speed outlet (A4). In the outlet on the accessory (E), insert the housing of the blades (G1), tilt it to the right and align the bayonet connections of the blade housing with the notches in the accessory. Insert the blade housing into the accessory, turning it counterclockwise until it locks. The feed tube should be in the vertical position. Insert the pusher into the blade housing and make sure it is firmly seated in the housing.
4.2 - USE AND TIPS
- For stability, place the container for collecting the processed product. Start the appliance by selecting speed "3" for chopping or "4" for pureeing.
- Load the products into the chute inside using the pusher (G2). Never push the ingredients with your fingers or any other objects.
You can prepare up to 2 products.
Maximum operating time: 10 minutes.
To stop the appliance, turn the switch to the "0" position and wait for it to come to a complete stop. - Disconnect the housing by pulling in the direction opposite to assembly. - Purpose of the shafts:
- Coarse grater (G4) / fine grater (G5): carrots, beets, potatoes, cheese, etc.
- Shredder (G3): potatoes, carrots, cucumbers, apples, beets, etc. - Potato grater (G6): potatoes, parmesan, etc.
5-EXTRACTING JUICE FROM FRUITS AND VEGETABLES (DEPENDING ON MODEL)
Attachments used:
- Juicer attachment (H) assembly.
5.1-INSTALLING THE JUICER ATTACHMENT
- Install the filter (H3) into the middle container for collecting juice (H4). Fix the lid: turn the lid (H2) clockwise on the juice container (H4) (closed lock position).
- General: turn the side lever (H6) to the closed lock position.
5.2-INSTALLING THE JUICER ATTACHMENT ON THE APPLIANCE
• Set the multifunctional head (A3) to the horizontal position: press the button (A2) and manually lower the multifunctional head (A3) until it locks (the button (A2) returns to its original position). - Remove the protective cover (A5) from the outlet (A4) by turning it counterclockwise and pulling it off. - Attach the juicer attachment (A) to the outlet (A4), making sure the appliance is switched off. Turn it clockwise so that the outlet for the pulp spout is aligned with the appliance. - Install the pulp spout (A5) on the juice container (A4).
Do not store the appliance in a damp place.
IF THE DEVICE DOES NOT WORK
If the device does not work, make sure that:
- the device is correctly plugged into the outlet;
- the attachments are properly fixed;
- the position of the speed switch (A1): turn it to "0", then select the desired speed again.
The device is equipped with a microprocessor that analyzes and controls the operating speed. If the load is too high, the device will stop automatically. To restart the device, turn the speed switch (A1) to position "0" and let the device cool down. Leave the device off for a few minutes. After this, you can select a lower speed and continue working.
Does the device still not work? Contact an authorized service center (see the list in the service booklet).
DISPOSAL OF THE PACKAGING AND THE DEVICE
EN

The packaging consists exclusively of environmentally friendly materials; it can be disposed of in accordance with applicable regulations.
- Set for preparing food: attachments for chopping, attachments for mixing, attachments for whipping
Caution! Before using any attachment, you must have the instruction manual for the device or the device itself at hand.
Thank you for choosing this device, which is intended for food preparation and should be used only indoors.
DESCRIPTION
A-Block diagram
A1 Electronic switch of speeds A2 Button for activating the pulse mode (a3) A3 Pulse mode button A4 High-speed knife (for processing minced meat / juices / milk) A5 Protective cover A6 Attachment for blender accessories (whisk, chopper, blender) A7 Storage of the cord
B-Block
B1 Steel bowl B2 Lid
C-Blender accessory
C1 Whisk C2 Blender C3 Chopper
The blender can be used for:
- Processing small portions of a few seconds in pulse mode: chopped onions, chopped nuts, etc.
Quantity/Maximum processing time: 100g/5s
This blender is not intended for processing solid products on the bone.
Disconnect the device from the power supply. Do not immerse the motor block (A) or the attachment (E) in water and do not place them under running water. Wipe them dry or slightly damp with a cloth. To clean the parts, rinse the accessories immediately after use. Thoroughly disassemble the chopper bowl. To avoid injury, handle the knives carefully. - Remember, dry the accessories: they can be washed in a dishwasher, except for the metal components of the chopper head: housing (F1), pusher (F2), knife (F3), grates (F4 and F5), and hook (F6). - The grates (F4) and (F5), as well as the knife (F3), need to be lubricated with oil. Treat them with vegetable oil.
Advice:
- If the accessories have become colored (carrots, oranges, etc.), wipe them with a cloth dampened with vegetable oil, and then wash them with the usual product. Blender jug (D): Pour a small amount of warm water with a few drops of dishwashing liquid into the jug. Close the lid. Place the jug on the device and press a few times in pulse mode.
After finishing, rinse the parts under running water and dry them (turning the jug upside down).
STORAGE
He 36epiraite npictpiy BOIOTOMy pinniuehni.
IIO POBNTN, RIKIO PNPCTPIH HE IPAUIOE
Kpnpctpi He npaioe,nepekoHaiTeca,io:
-BiINPiKJIUOeHnDo eJeKTpOmepeXHaJIeXHM YIHNOM; -akcecyapn HalexHMM YHINOM 3aΦiKCObaHO; - noJooKHe H KOnKn npNbOy (A1): nobepHytn no3nui0 "0", notim 3HOBy Bn6epiTb notpi6Hy wBnKiCtB.
Ie npnctpi JnroToybaHNOcAaHIOE MIOKpONPOUecOpOM, AKn Kepy Ta anaiiye pOboHy npOTxHCTb. JaIOO HabaHTaXeHHN CTae HABeIKIM, npCTpr t ABOTAMNUHO BMMKeTbC. Ioo6 NobTOP 3AnyCTTN nPrCTPI, yctAHOBtB NOBOPOTHY KhoNY (a1) y noJoxHHEN 己 _ 0 ^ Ta BNIIMtB NEHI IrpejENTH. 3AnuWte nPrCTPI HA kInbKa XbINOH dI OXONODxHN. PICnIb oBO MOKHa BvOPATnTOPIHg UWBnDkICTb Dny aBeRueHHN nPrTOYBAH NIK.
Pnctpi yce ue He npaoc? 3eepitbcra do abtopm0baHoro cepbichoro cHTpy (IMB. cnncok y 6ykneti cepbichoro 6cbnyrobyaHH).
YTNJI3AÇU YNAKOBKU TA PIPUNCTPOJ

YnabokovB BurotoBenoI nIe3peOboH,6Be3eHuNnI IaHbAknUuNbOro cepEOboNu. Tomiy MoKHa ytNiI3yBaTN bIDNoBIOH Do npabun y tynl3aui, 0o iIObT y bawomy perioHi. UdoTo ytnl3aui Camorpo nIcPTOO bERpHbCra y bIOBIOH cyNkSy.
AKCECYAPN
Pnictpi MoxHa DoONOBHnTn HAcTyNHMM AkcecyapAMn, kI MoxHa PnpD6aTu y DInnepa a6o B abTOpN3OBAHOmy cepBICHOMy CEHTPI:
-Чаа 3 ergkapabiovoi crani Kpniko Ka o quai 3 Hepakbiho Otoi canti TICTOMiuaJka Mikcep
·BiHcNK -чаша6нэндара COKOBINKIMaJIka MnHOK - TpImaH hacaDOK - TOnOBKa M'rcopy6Kn
Oboepi3ka:
-Hapi3aHHH - peTebHe noOpri6HeHHa -TOHKe IOnpI6HeHHa - Hatapanha Kaptonni dЯ depyhiv
- Na60p dansprinrotybannnactn HacakJaIa npiRTOYBAHNAM TOMATHORO COKY ta rfd HacdaKdIaBmROTOBHeHH DAOMAUHbOJILOKUHNH
Note: To use any accessory, you must have the brochure with instructions for the device or the device itself.
CNIATTAMACBi
A-Ko3fantKbIi6nori
A1 Electric drill driver A2 Function switch (a) 3 A3 Function switch A4 Speed selector (min / max / reverse and lock button) A5 Chuck A6 Screw (for belt clip, side handle, and depth gauge) A7 Depth gauge
B-Input side
B1 Battery pack release button B2 Battery pack
C-Screw accessories
C1 Belt clip C2 Depth gauge C3 Side handle
D-Output side (not shown)
D1 Chuck D2 Ring D3 Chuck key
E-Safety devices (not shown)
F - Other parts (not shown)
F1 Metal ring F2 Nipple F3 Nipple F4 Has oil holes F5 Has oil holes F6 Screw F7 Nipple F8 Nipple
BEFORE USE
Before using the tool, check all safety devices (see section E) for proper function. If they are damaged, do not use the tool. Replace damaged parts. The drill driver (A1) must be set to "0" before inserting the battery. Then insert the battery. The following accessories can be used:
- To turn on the device (hereinafter "device"), press and hold the power button (A1) "Pulse" until the device turns on. The device is ready for use when the indicator lights up.
- To turn off the device: press and hold the power button (A1) until the display shows "1" to "max" and then release. The device will turn off. To reset the device, press the power button (A1) to "0" and hold.
Warning! The device can only be used with the cap (A5) and the nozzle (A3) properly attached. If the device is used without the cap (A5) and/or the nozzle, it may cause damage. Attach the cap (A5) and/or the nozzle, then press the power button (A1) to "0" and hold, and then remove the cap and nozzle.
The device is controlled by a microprocessor. If the device malfunctions, it will stop automatically. To restart, press the power button (A1) to "0" and hold. The device will reset.
1. OPERATION / USE / TURNING ON / ADJUSTING / SETTINGS
The device can be used with the measuring cup (B1) up to a maximum capacity of 1.8 kg when the cap (B2) is attached.
TECHNICAL SPECIFICATIONS:
- Measuring cup (B1) - Cap (B2) - Spatula (C1), whisk (C2), and other accessories (C3)
1.1- DESCRIPTION OF PARTS
- To remove the nozzle (A3), press the release button (A2) and pull the nozzle out of its place. Attach the measuring cup (B1) to the base (with the arrow pointing up) and place the cup on the base.
- Insert the accessories (C1, C2, or C3) into the opening (A6) and turn them clockwise until they lock into place. To remove the nozzle (A3), press the release button (A2) and pull the nozzle out of its place. Attach the measuring cup (B1) to the base (with the arrow pointing up) and place the cup on the base.
Note: The cap is not a measuring cup, but it can be used as a cover. Attach the cap (A5) to the top of the device (A4) by pressing it down (with the arrow pointing up) until it clicks.
1.2- OPERATION
Press and hold the power button (A1) until the display shows the set temperature.
The device starts operating. During operation, the cap (B2) can be removed. To stop the device, press the power button (A1) to "0" and hold.
Kehectep:
- Hney
-CanTama petiHne kAmbip nIerIiwiTI (C1"1"KbIaMdbkTA KOnaIaHbIb3.50r-fa dein yHbIb (6nDaunyHbI, ipineTaptbIfah yHdbI,yirime kAmbip ywih xane T.6.) uYe re 6oana. -Баразиша yзak konДану yaKыты:13MHNYT.
-Apaanactbipy
-ApaJnactbipfbltB (C2) "1"-dH "max" (eh Xofapbl) XblndaMblkKa deiH KOndaHbIb3. -1,8 Kr-fa DeinH JeHIn KAmbIpDbl (KeKCTep, NeueHbe JAne T.6.) apanaactbipyfa 60naabi. -Баразиша yзak колдану yaкыты:13MHHT. -TbIfb3KaMbipdbI nney ywih ewkaawah apanaactbipfblwlb (C2) KOnlaHa6aHb13.
-Kenciy /3mylbraunay/6xNfay
-Дэнгеленк көnciтetiH canTaMaHbI (C3) "1"-deH "max" (eH kOfapbl) kBilnДamDbIKKa DeiH KOnlaHbIbI3. -Ci3re: Maohoe3di, aoHnDi, ty3bKapTbDi, kcnCITInReh aky3dapDb (8 yMbpTk aky3bHa deiH), 7aHTnblk pemih (500 mI-Te deiH) xHe T.6. daBnHaayf60anad. -Баразиша yзak колдану yaкыты:10MHNYT. - Dohrenek Koncitetih cantamahbI (C3) eKawan TbiFb3 KaMbipdbI nney yuih XaHe JxHn KaMbpdbI apanaTbpy YuH KOndaH6aHbI3.
1.3- KEPEK-JXAPAKTAPdbI bOJIWEKTEY TOPTIBI
KyaandbH TOnbIbIMeH TOKaTaHaBH Kytih3. KaKnakTbI (B2) aIbIHbI3. - BaTbPmaHbH (A2) KEmerImeH KeNΦyHKuHOHaIbIK 6actneKTi (A3) 6ocatbHb3 xHe OHb Xofapb KaFaHafaybCTbDbHb3.
- CanTamaHbI (C1, C2 Hemece C3) 6actneK 6aftbHda CanTamaHbI 6acy Xane OHJI WnpeK aHaBbMf ca fat Tini 6aftbIMen 6pay apkblb KENфнкиондьK 6actneKteri (A3) OphbKtpy JaFdaiHah 6ocatbHbI3.
- CbIbIMdbIbIKtbTaTTaH6aIbTH60aTtAH aIbIbI3.
2 - APALACTbIPY (YJIIIE BAIJIAHbICTbl)
KoIaHbIaNtBn 0HIMdepre 6aIaNbIcTb 6IeHepdi (D) KEMerImeH 1,5 n-ree deiH KOIO KocNaHbHEMece 1,25 n-ree deiH cyIbIK KocNaHb DaIbIHdYf a6Ola.
KOJIdAHbIJATbIH CANTAMAJAP:
-БиндерTOCTaFaHbI(D).
2.1- KEPEK-KAPAKTAPDbI XHUYA TOPTIBI
KenpyHKUNOANbIb6actneKTI (A3) KBNDEHEN KaFAdAAOpaHTbHM3: 6aTbPMHa (A2) 6acbH3KaHe KenyHKUNOANbIb6actneKTI (A3) opbHKtpy KaFaDaBHa deiH (6aTpMa (A2) 6actaNkaJaF aKaTa KeNdi) KOJEMTH TycipHH. KopfainbHakKaaknTb(A5)caratTinHeKapama-Kapcb6aftTBApyapkblnKofapblKjIaMaDbIKbI bHbTaA(A4)kbHapbHb3JHaeOnbIaHbMb. - 5JIeHepdi (D) kAn-faydAn 6ypbIn KpybInfbHbIn aKbIpaTbInFaHbHa K3JXeTKi3iH3. - 5eHep ToCTaFaHbH (D) caF tTii 6aftbImeh 6ypay apKbIbO hbl 6bIbIcTa (A4) opHbIKTbpHbI3. - ΘHIMdepi 6neHep TOCTaFaHbHa CaIbIb3 XaHe KaKnAeTbI 6eKtiH3.
2.2-KOJIaHbIJIybl
Anbmyahtbpyin-ockkiuhtBbAtpmAcH(A1 peunertie baianhcttV4-tenVmax-keiHemece "pulse" (Cepninitc pekm)) kaeTt jafd#aF6paHb3. ApaNaTePfY epicin 6bakaylaJbKacCapyTuWih KHe apaanctbpe canacbHjXacCapy TuWih "Pulse" (Cepninitc pekm) Jxfadain kondaHnh3.
XyMbic ictey 6apbcihda mIeIwepneriik KaKaNaWacBHaFbD (D3) caHbIay apKbIbI OHIMdepki Kocyfa 60anaDb.
KyaapandbTOKaTatyuin6aTbIpaMaHb(A1)“0"xaFaDaNbHa6yaPb3.
Kehectep:
-БарьишуЗakKoJdAnhyaKbItb:3MnHyT.
Kehectep:
KeneciTaFamapdbaBbHdayf60anabi:
-6ipkeKl copnapanap,BeIOTe Tz3DbIKTapbl,Hpcynap,CytJxHe 6acka KOKTeIdep. - MaH Hei3iHderi cybIK Kocnapap (kaMa KyMaKtap, KyMaKtap, nicipMeIep, nicipiInEr KpeMi 6ap fnaHap). -Kypam 6eikertcbmblbkbTbn KaibpracbHa KaibcBnKanfah Ke3e Kpandh JyMbch TOKtataHbI3. KpaanbHToBbHMeh TOkTaFAHn KYTHi3.BneHepdi AnbHb3, Kaobprarapra Jxabcsbn Kanfah BImdepdi Kanaakshahn Kemerimeh nbawkaprapa Tycipih3 Xane JxmbctbKanFaTbyuhi 6neHepdi opnhbaOpahbHb3. - BneHep ToCTaFaBHa eWkaaHaN KaHaH TpyFaH CybIKbIKTbI KyMaHaB3. Erep 6nHeHep TocTaFaHb60c 60anca, KypaIdbI eWkaWanKocnaHb3. - BJIeHdep TOCTaFaHbIy HEmi KaKNaTbIMeH Ja6bIbIb3. -Пьшakтap TONыf bIMeH TOKtaFaHwa KaKnaKtbl aWnHaB13. YHemaiIaBImeTocTaFaHaF CaYbIK Kypam 6bnikTepeK KybIn, CocbH KaTbIapBIn Kocy KepeK.
2.3-AINIA5YbIMDbI BONIEKTEY TAPTIBI
KpyalabHToBNbTKoTFAhBNyTHi3,ObaDan KeINb 6neHepdI caFAT TINIHE KApMA-KapCb 6afBTTa 6pay apkblbOHI aIbHb3 JHeOpbHa KoprAHTbIK KaKnakTb (A5) WbFlbcta (A4)OpbKbTpI py akblb (caFAT TINI 6aftbTMEH) opbHbOpHbTHb3.
3-ET TAPTKbIHTbI KOJDAHY (YJIITGE BAJIAHbICTbl)
KOJIdAHbIJIATbIH CANTAMAJAP:
- CanTamanapFa apHaJIfAn 6ekiTkiu (E)
- KInhaKaTaftbI e TaTkTbIwTbH 6actneri(F)
3.1 - XAJIFAHATbIH bIOKtBi OPHATy
Kenfhykuohanbik 6actnekti (A3) 6ocaty ywiin 6batmuha (A2) 6acnbiz xhe 6actnekti e3 opbihda opbhtpblatbnad etin kTeepin3.
XaIfAHaTbH 6nOkti(E)OpHaTbHb3 XHe et TapTkbltB H bHbfcbl KpaIFa KaTbCTbl TypAnaHbI ywiH OHb CaTaTinie Kapama-Kapcb6aftta 6byay apKbIbOpbIKtbDpHb3. BaTbIpMaHb(A2)KaIa 6acy apKbIbI KENФHYHKUHOHaIbIbK bactneKeTI (A3) KONdeneH Jx-faIaIdaOpHaTbHbIb3.
3.2 - ET TAPTKbIb BACTNEIH OPHATY
Tpykblb(F1)KeHcaHbIaybHJxofapbI Kapa KaPaTbIN KyKTeiTH Ky6bpBHaH aBlb3. - MipniKti (F2) (y3bH 6inirih Kofapbi kapa) Typkfa (F1) canblb3. -Пьшakты(F3)ирлікін(F2)кыcka 6иігінік\'еініз\'Кe\'с\'Кe\'Т\'пір\'с\'ы\'Ка\'ap`6aБ\'t\'ana`TbH\'d`e`in Oph\tbHbI3. TopaBd BaENecKepnepDpyKbIaDbf (F1)OyIK KepnepMeH yIeNecTpY apKbIb TaHdaanrH TOpDbf (F4 Hemece F5) Nbaoka (F3) OpHaTbIb3. - CombyHdbi (F6) opHbIKTbIPMa, TyPkblFa (F1) caTtinHe Kapama-Kapcb6afttTa 6ypan Kpi3iH3. XinhanfanhuyinidTekepeih3.BinikTIneEskAndahnIIOft6oImaybKepeKxane6iik036tHneaHaHaMaia TbFb3OphAteBnybKepek. Ⅱtnce,xinyepicinKaIanayKepek.
3.3-ETAPTKbIITbIHBACTNEIH KYPbJIfblDA OPHATY
JANFANATBHN 60KTHB (E) 6HbFcBuHa ET TAPKbUWbTH JHKHANFAH 6BnHerIH (F) OHFa KApA 6Bybn, ET TAPKbHIb 6ACTneriHeIeri EKI KaOHETTI KOcbNbCTb KaNfay 6BnRbHaDaEi OJIbKnEN YInecTipy ApKbNl BactneKTI opAHbH3.
Et tapkbltbHbactneriXanFaHaTbHbONoKKa caIbHb3,OnbCaFt TiniHe Kapama-Kapcb6FaBTTa OI ophktbpHnFaHa 6paHb3,coBIme Bipre KKTeyTINKb6bpTik KaBnTa OpanacybKepeK.
- AInbH6aIb HayaHb (F8) KYKeTinH Ky6bIpFa OPhaTbHb3.
3.4-KONDAHbIybl,KEHECTEPX0HEB0IeKTEYTOPTIBI
KopfainbH KacnakTbH (A5) Kofapbl bbldAmdbkTbI bblficta (A4) dpybc ophikkbipfaHbHa (caFat Tinihe Kapama-Kapcbl 6afttTa bypay apkbl) ke3 keTk3iHj3. KpybI-fbHbIaNbHa ycaKaTaNfA hEhIMdi JxNhayFa apHaIfA KOHTeHepDi KOnbIHb3. AbyctbpyIN-KCKbIbTHB(A1 KOMEREM "3" HEMeCE "4" XblnAmdbfBtH TaHdAy apkblkXpAnbl icKeKocBbHbI. Ky6bipfa 31ntiNTEpiuTH (F7) KOMerimeh 6nwekTe nTEPiH3. Kypam 6nwekeptdi KykTeHTIH Kx6bipfa ekaaahan CaycaKtapbHb36eH Hemece KaHdA da 6ip 6acka 3aTAPmeh NTEpmHe3.
-Ci3 3Kr-fa deinH eTTi JyKTe anacbI3.
- 5apbihwa y3ak konlahy yaKbItb10 MNHyT.
Kenei KondaHy KaTb6aTay ywiH ci3 KpaIbIb3blMiHdeTTI TypDe caKbIHDaTbHb3. Kyaapandbly TOKtaty yuih aybictbipbn-KockbiWtbl "0" KaFdaBnHa 6paH3 XaHe KypalDbH TOnbIFbMeH TOKtaFaHbN KYTIH3. Xnay yepicie kepi taptinte apeket eote tbipbIn, et tapkbiuTBin 6actneriA xbpatbHb3.
KeHectep:
- Et tapTkmbka anaphan AHmEepdei AaHbAa3 (ereep 6y et eonba, cynekepti, weemipwekepti jxane Cihinpepi anh taTanbH3, etti wamamene 2 x 2 cm wameme 6bnuekten Typahn3). -ETTIH TOJIbIbIMeH Xi6iTirIReHHe K3XeTi3iH3.
- YcaTay ydepiciHH coBbHda mawHnabHb iinHe KaBn KoJfah eTTi KeTpIy yuHn HauHHb, biphee uafBH TiniMepin kYkTeTHIN KY6bpF a canyfa 60ana.
4 - Eγ / TγPAY (YЛГΙΕ БАДЛАньICTbl)
KOJIdAHbIJATbIH CANTAMAJAP:
-CanTamajapfa aphanfah6ekitkiu(E) - KInhaIraH KeKHeHic TpyaFbIi (G) -ζιηνηнДрел(γλπίσε 6aɪnəhNbICTb)
4.1- KEPEK-JAKAPKTApIbIXINHAY T'PTIBI
KenfhyHKuHOnHaNdb6actneKTi (A3) 6ocaty yuih 6aBpMaHb (A2) 6acbHb3 xane 6actnekti e3 opbHdaOpbHKtpy yuih OHk KTepeiH3. XaI-faHaTbH 6nOkti(E)OpHaTbHb3 XHe et TapTkblbH, 11bFbCbK KypaFa KaTbCTb TypanaHyb yWih OHb CaTa Tinihe Kapama-Kapcb 6faBTTa 6byay apkblbOpbHKtbpBlb3. BaTbIpMaHb(A2)KaIa 6acy apKbIb KOnpHkyHKUHOAnIbIK 6actneKti (A3) KOnIeHeJxFaJaIaOpHaTbHbI3. KopfaiTBi KaKaNaKTbI (A5) Kofapbl KblIaMdbIKtbl WblFbCTa (A4) dypbic OPhbIKtpbIfaHbHa (caFat Tinihe
KapaMa-Kapcb6aftt6payapkblb)Ke3JKTi3iH3.
JXaHaTbH 6nKbTH (E) bHbCbHa NmHdPnepre aphanfah TypkbHb (G1) OH.fa Kapa 6ybpIn, UHHdpnepre aphanfah TpybkHbDAf Eki BaiHOHTI KocblbCTb XanFay 6bnOrHbAfl Eki Ombkne Hynectipy apkblb TpykbHbOpahtbHb3. UHHdpnepre aphanfah TypkbHb XanFaHathB 6noKka CalsHb, OHc caFat tinihe kapama-kapcb6aftTA on OphbkTbplbfaHsa 6paHb3. CohImen 6prie JyKTeiTH Kybip Tk KaIbnta opHanaCybepek. TpykbyfaKaKeETIuINHdpiCaBbI3XHeObIH TYpkblaTbFbI3OpHaTbJFaHbHaKe3XeTk3iH3.
4.2-KoJIaHbJIybyJXHE KEHECTEP
KypbIbFbHbIH aNdbHa yCaKaTaNFaH eHIMdi JxNHayFa apHaNFaH KOHTeHepDi KOblb3. AbyctbpyiN-KockblTbH (A1) KemerimEn "3" Hemece "4" XblIaMdbIbH TaHday apKblbl KpaIaI bI cKe KcOblbI3. JyKTeHIN Ky6bPFA 8HIMdEepdi CaihH3XaHE Ky6bPdi iuiHe NtePIuTIN (G2) KEMERImEH NtePiH3. Kxpam 60neKepdi JyKTeTH IN Kx6bPfa euaKaauan CaycakTapbHb36eh Hemece KaHda da 6ip 6acka 3aTTapMen H.
-Ci32Kr-fa deinIH eHmDi daibHda anacbi3.
-БаразишузakКолдануакыт彬:10MHNYT.
The switch is set to "0" position. The lever is turned clockwise. The switch is turned on. The lever is turned counterclockwise to open, and the cylinders are removed:
- Solid fuel (G4) / liquid fuel (G5): water, oil, kerosene, diesel and etc.
- Solid fuel (G3): kerosene, diesel, oils, apples, red currants and etc. - Kerosene heaters (G6): kerosene, paraffin and etc.
5 - CLEANING THE FILTER AND THE FILTER ELEMENT (OPTIONAL)
ACCESSORIES:
- Humidifier (H).
5.1 - CLEANING THE FILTER
- Remove the filter (H4) from the air intake (H3). Clean it with a brush; if the filter (H4) is very dirty, replace it with a new one (see the spare parts list). - Reinstall: Insert the filter (H6) into the air intake and press it in.
5.2 - CLEANING THE FILTER IN THE FUEL TANK
Remove the fuel tank (A3) from the device: press the latch (A2) and pull the fuel tank (A3) out of the device (the latch (A2) is pressed to release). Drain the fuel (A5) into a suitable container and dispose of it properly. - Before cleaning the filter (A), make sure the fuel tank is empty. To clean the filter, remove it from the fuel tank and clean it with a brush. Reinstall the filter (H5) into the fuel tank. Make sure the filter (H5) is not damaged or torn.
5.3 - CLEANING THE FILTER ELEMENT
Remove the filter element (H5) from the housing. Clean it with a brush or replace it with a new one. Do not use solvents or other chemicals. - Rinse the filter element (H1) with water and dry it thoroughly before reinstalling. If the filter is damaged, replace it with a new one. Do not operate the device without the filter element.
60mamdbl.
- Boiling time: 10 minutes.
- For good operation, add 300 g of salt to the water. After the water boils, turn off the tap and let it sit. The tap should be closed and the water should not be drained. The tap is closed by turning the handle to the "0" position and then closing the tap.
- The water should be left to sit after boiling.
- Close the tap and let it sit. Open the tap (open the valve). After the water has settled, drain the water (if necessary) or use the water.
Precautions:
Do not use vinegar, tomatoes, lemon, or other acidic substances. Clean with a soft cloth. Do not use abrasive cleaners or solvents. Do not use metal brushes or sharp objects. If the device is not used for a long time, disconnect it from the power supply. Do not immerse the device in water. Keep it out of reach of children.
6. Replacing the heating element
To replace the heating element, first disconnect the device from the power supply (A7) and then remove the heating element.
7. Storage and maintenance (for long periods)
Storage instructions:
Store in a dry place.
Cleaning instructions:
- BiPheWe cekyHd iwiHde cepnilicri peximde: kentipinre HIXip, kentipinre opiKTeP JxHe T.6. yCaKtayFa 6oIaIbI.
bapbHwa y3aK KOlaHy yaKbItb: 100 r / 5 c
OcbycaKaTafBwKofoCnAeKtBkAaTbHimDepyihapHaMaFaH.
TA3AJIAY
KypbIbnFbHbI 3JneKTp JeicinieH aXbIpaTbHbI3. Ko3fantkblh6norih (A) Hemece JaftaBTH 6nokti (E) cyfa 6btaPmaHb3 xhe aftbn tyfah cy actbHa calMaHb3. Kpandbl Kpyfak Hemece XapTbna bIyfla Wybepekene Cyptni3. Erepkek-KapakTAPdbKoNDAHIN BONFAHNAH KeIHBipDEH JxCa, KpybIFHbTa3anay JeHinipeK 60nAdb. Et tapTkblThB GactnerIN ToIbFMHeN BoJWeKeTHi. KapakTAPdbn anDbn any yuin bNtAAKTAPdb KaTbIKneh naidanaHbHb3.
Kepek-jakapartdbjXybnH3,waibnH3xane Kentipih3:et tapTkblh6bactnerIHh 6aplnk metanl 6bniktepihen:TrpkbdaH(F1),nipiNtcknF(2),nbaKTaHn(F3),toplandan(F4xheF5)combHn(F6)6aca Kepek-jakapartdbjBbICybatnMaMinaHaJayyf6bolaH).
- Topnap (F4) xhe (F5), cohmek (F3) maIahykepK. OnapicMmaHmMaHaB3.
Kehectep:
KepeK-kaapKaTpabH KaHdai da 6bipeiy 6oanfAan (ca6i36eH, anelbcMHmeh Xane T.6.) XaTdaIa, onapdbocimik Maibmeh MaiahAnFah sy6pekne H cyptin3 xane aetterieJybuHb3.
Bnepdpih ToCTaFaHb (D): bIc xyatbn C yblkTbTkTBipHee TaMwbc KocblfA hCtBk Cbyk KyHHb3. KaKnaKTb XabHb3.Bnepdpi kypanfa KOHnb3 xHahe OHb cepninici TpEkinme pHieae MNHTka KocNb3. Bnepdpi anbHb3, cbimdbnkTb afbn TypraH cy actbda xyblb3 xHa eohb KeNTipinre H Kynde).
CAKTAY
KyaIaIbI bIbnIgEJaIaCaKaTaMaHbI3.
ETEP K¥PAJI X¥MBIC ICTEMECE, HE ICTEY KEPEK
ErepKypan KymbicIcEmece Keeneinepre K03 Xetki3iH3:
- KyaIbIH pO3eTKaFa ceHIMdi KocBnFaHbHa;
- The device is designed for use with a type of battery (A1) catalog: "0" appeared, the device was created with the battery installed.
The device is controlled by a microprocessor and additional components. If the batteries are low, the device will not turn on. To turn on the device, press and hold the button (1) for a few seconds. The device will turn off after a few minutes. The battery indicator will show the remaining charge.
What does the device do? It is used for measuring temperature (see the temperature measurement section).
BATTERY AND DEVICE OPERATION

The device is made of non-hazardous materials; it can be disposed of with regular household waste.
To operate the device, it is necessary to follow safety precautions.
SPECIFICATIONS
The device can be purchased from the manufacturer or from authorized dealers. The following specifications apply:
Power supply: 2 AAA batteries
Temperature measurement range: -40°C to +125°C
Measurement accuracy: ±0.5°C (from -10°C to +85°C)
Display: LCD
Dimensions: 100 x 60 x 20 mm
Weight: 50 g
- Included accessories
If there is a disease, then there is a cure. Every disease has a cure, but it is necessary to find it.
Table 1 (F3) sdsdlk(F5),(F4) dlal
aia 1000
[{a}_{b} = 1]
__SUPPIMER__
x 1y 1 = 0
1
.(F6)alal.(F5,F4)(F3)zalal.(F2)zalal.(F1)
(G)
(A4) (a) a. (a) (a) (a) (a) (a) (a) (a) (a) (a) (a) (a)
cilll gll 4.2
A1(A1)
plabll jieK 4 jaiy dki
jLJ1
Iolai zal jiei iiae aegy jgl lki y0" gssllj jg jzil jiei
: 1iill iil jll gil jaiin
G6
(jugall) juaalg 45 gai jauaal 5
:
(H) Therefore, the origin = 0
aJus 5.1
.(H4)duaasalljl bawg (H3) jdlle
(J33)(H4)(H2)(H2)
Jaiyao (H6) Jaiyao jaijao: pLac Jai
iiaaiie 150
(A3) 158 (A2) jzjgla: (A3)
(A2)(204
AaA (A4) aA (A5) AaA
.(H)

( D) Lx : y = k0x - 1
J2.1
(A2)jll(A)
Aaai Acllll aie (A4) gaaal ae aee (A5) aallll ldd
(D) b all ji = ji all ji = ji
AaLlBlae aBaa (A4) Cae (D) bLa
aLall aI (d3) 11111111111111111111111
Jauy1-2.2
.15kSg 15kStLo, ggofo 15kSt, loafo 15kSt, afofo
.(j)s s s s s s s s s s s s s s s s s s s s s s s s s s s s s s s s
100
aill galeg lgl blll g y, aalol Jaiwlyu ay jaiyall y all plabll gul, bldk
1
Lalal Ls-2.3
15 15
(204) (A4) (205) (A5)
g /ylaai / yj / jc / b1-1
plabllg(B2) 11b6(B1) Jusuulilal.1eJusuuiyiaaiill aaiall jai 1A iaijaii
: aalaaall
(B1)
(2B)
(C3) (C2)
1.1
A3) 12(A2)
.
(A6)CjC2,C3)
jks
(A3)ailllll(A2)jllleilal:(A3)ailllllll
A (A2) jlll 1
(B1) (B2)
.1jll j 1i i 1i 1i 1i 1i 1i 1i 1i
(A4) (A5)
JLaiy1-1.2
gill 1000000000000000000000000000000000000000000000000000
12
Jill B2) Jll all jdall Jld Jdall
0.0gall (A1) jll jll
:
F5
F6
F7
F8
(jugall) juaaiae- G
G1
G2
aiaiaiaia G3
g4
a glw a cLi y G5
jssg G6
(jugall) Cuiusds Juc-H
H1
H2
JH3
H4
H5
JdJH6
dallg-A
A1
j(a3).j(a2)A2
A3
. max" 1" 1" jjA: jaiill
0.1 (A1) 111 jj j j j j j
Jusll jzaii aagw. Jiaa (A3) wjgl (A5) 1aill jckpil jiaai all jay j: p
a.0gall (A1) jj gj, wll g/ lalal Jai (A3) g/g (A5)
okw gdi duyd yds cldy
Therefore, lim_{y → 0} (sin^2 y) / (cos^2 y + cos^2 y) = 1/3.
(E)
(G) z ≤ z ż ż ż ż ż ż -
(Joo) cij
all 4.1
L 1 (E)
Aa (A3) 45
A45)
G1 (E) Lw
gla 1 gla 1 gla 1 gla 1 gla 1 gla 1 gla 1 gla
L
Lg4.2
J (H4) 10000000000000000000000000000000000000
A2)4J1J 1A3)
JsJyJyJyJyJyJy-3.2
(F1)
(F1) cduy (jduyduy (f2) du
(F2) a (f) (F3)
(F1) (20 453
L(F1) 458 yds yds yds yds yds yds yds yds yds yds yds yds yds yds yds yds yds yds yds yds yds yds yds yds yds yds yds yds yds yds yds yds yds yds yds yds yds yds yds yds yds yds yds
J 1
Therefore, the area of triangle ACD equals the area of triangle COD plus the area of triangle BDO minus the area of triangle CDO.
05 1 3.3
S S S S S S S S S S S
(A1) 2008-03-03
- 1.
0 0 0 0 0 0 0 0 0 0 0 0 0 0 0 0 0 0 0 0


- DESCRIPTION
- A - MOTOR UNIT
- B-BOWL ASSEMBLY
- C-MIXER ACCESSORIES
- D - BLENDER JUG (DEPENDING ON MODEL)
- E - ATTACHMENT HOLDER (DEPENDING ON MODEL)
- F - MINCER HEAD (DEPENDING ON MODEL)
- G - VEGETABLE SLICER (DEPENDING ON MODEL)
- H - JUICE EXTRACTOR (DEPENDING ON MODEL)
- BEFORE FIRST USE
- MIXING / KNEADING / BEATING / EMULSIFYING / WHISKING
- ACCESSORIES USED
- ASSEMBLING THE ACCESSORIES
- USAGE
- TIPS
- DISMANTLING THE ACCESSORIES
- BLENDING/MIXING (DEPENDING ON MODEL)
- DISMANTLING THE ACCESSORY
- MINCING (DEPENDING ON MODEL)
- ACCESSIONS USED
- FITTING THE MINCER ATTACHMENT
- ASSEMBLING THE MINCER HEAD
- FITTING THE MINCER HEAD ON THE APPLIANCE
- USAGE, TIPS AND DISMANTLING
- GRATING / SLICING (DEPENDING ON MODEL)
- USAGE AND TIPS
- EXTRACTING JUICE FROM FRUITS AND VEGETABLES (DEPENDING ON MODEL)
- ASSEMBLING THE JUICE EXTRACTOR
- FITTING THE JUICE EXTRACTOR ON THE APPLIANCE
- ADJUSTING THE CORD LENGTH
- FINELY CHOPPING SMALL QUANTITIES (DEPENDING ON MODEL)
- ACCESSORY USED
- YOU CAN USE THE GRINDER TO
- CLEANING
- STORAGE
- WHAT TO DO IF YOUR APPLIANCE DOES NOT WORK
- DISPOSAL OF PACKAGING AND THE APPLIANCE
- ACCESSORIES
- JUICING FRUIT AND VEGETABLES (DEPENDING ON MODEL)
- ATTACHING THE ACCESSORY
- STARTING, TIPS AND DISASSEMBLY
- STARTING AND TIPS
- USE, TIPS AND DISASSEMBLY PROCEDURE
- ASSEMBLY PROCEDURE FOR ACCESSORIES
- USE AND TIPS
- ATTACHMENTS USED
- INSTALLING THE JUICER ATTACHMENT
- INSTALLING THE JUICER ATTACHMENT ON THE APPLIANCE
- IF THE DEVICE DOES NOT WORK
- DISPOSAL OF THE PACKAGING AND THE DEVICE
- A-BLOCK DIAGRAM
- B-BLOCK
- C-BLENDER ACCESSORY
- THE BLENDER CAN BE USED FOR
- ADVICE
- IIO POBNTN, RIKIO PNPCTPIH HE IPAUIOE
- YTNJI3AÇU YNAKOBKU TA PIPUNCTPOJ
- AKCECYAPN
- CNIATTAMACBI
- A-KO3FANTKBII6NORI
- B-INPUT SIDE
- C-SCREW ACCESSORIES
- D-OUTPUT SIDE (NOT SHOWN)
- E-SAFETY DEVICES (NOT SHOWN)
- F - OTHER PARTS (NOT SHOWN)
- BEFORE USE
- OPERATION / USE / TURNING ON / ADJUSTING / SETTINGS
- TECHNICAL SPECIFICATIONS
- DESCRIPTION OF PARTS
- OPERATION
- KEHECTEP
- HNEY
- APAANACTBIPY
- KENCIY /3MYLBRAUNAY/6XNFAY
- KEPEK-JXAPAKTAPDBI BOJIWEKTEY TOPTIBI
- APALACTBIPY (YJIIIE BAIJIAHBICTBL)
- KOJIDAHBIJATBIH CANTAMAJAP
- KEPEK-KAPAKTAPDBI XHUYA TOPTIBI
- KOJIAHBIJIYBL
- AINIA5YBIMDBI BONIEKTEY TAPTIBI
- ET TAPTKBIHTBI KOJDAHY (YJIITGE BAJIAHBICTBL)
- KOJIDAHBIJIATBIH CANTAMAJAP
- XAJIFAHATBIH BIOKTBI OPHATY
- ET TAPTKBIB BACTNEIH OPHATY
- ETAPTKBIITBIHBACTNEIH KYPBJIFBLDA OPHATY
- KONDAHBIYBL,KEHECTEPX0HEB0IEKTEYTOPTIBI
- EΓ / TΓPAY (YЛГΙΕ БАДЛАНЬICTBL)
- KEPEK-JAKAPKTAPIBIXINHAY T'PTIBI
- KOJIAHBJIYBYJXHE KEHECTEP
- CLEANING THE FILTER AND THE FILTER ELEMENT (OPTIONAL)
- CLEANING THE FILTER
- CLEANING THE FILTER IN THE FUEL TANK
- CLEANING THE FILTER ELEMENT
- PRECAUTIONS
- REPLACING THE HEATING ELEMENT
- STORAGE AND MAINTENANCE (FOR LONG PERIODS)
- TA3AJIAY
- CAKTAY
- ETEP K¥PAJI X¥MBIC ICTEMECE, HE ICTEY KEPEK
- BATTERY AND DEVICE OPERATION
- SPECIFICATIONS
- G /YLAAI / YJ / JC / B
Brand : MOULINEX
Model : QA51AD
Category : Food Processor