
HL458 - Range hood SCHOLTES - Free user manual and instructions
Find the device manual for free HL458 SCHOLTES in PDF.
| Product type | Range hood |
| Brand | SCHOLTES |
| Model | HL458 |
| Installation type | Ceiling |
| Version | Recirculating (filtering) |
| Number of speeds | 4 (1 to 4) |
| Control | Touch sensor with LED indicator |
| Automatic switch-on function | Yes (temperature sensor > 70°C) |
| Filter saturation indicator | Yes (green flashing LED for grease filter, orange for charcoal filter) |
| Central lighting | Halogen 40 W max, GU10 |
| Side lighting | Yes, with intensity control (except neon models) |
| Grease filter type | Metallic, dishwasher safe |
| Charcoal filter type | Washable, replace every 3 years |
| Minimum distance – electric hob | 50 cm |
| Minimum distance – gas hob | 70 cm |
| Power supply | 220-240 V ~ 50 Hz |
| Safety functions | Automatic shut-off after 5 min at speed 4; mandatory disconnection before maintenance |
| Grease filter maintenance | Every month, by hand or dishwasher (gentle cycle) |
| Charcoal filter maintenance | Every 2 months, wash with hot water or dishwasher at 65°C, dry in oven at 100°C for 10 min |
| Spare parts | Halogen bulbs GU10 40W, neon TL5C 40W, grease and charcoal filters |
Frequently Asked Questions - HL458 SCHOLTES
User questions about HL458 SCHOLTES
0 question about this device. Answer the ones you know or ask your own.
Ask a new question about this device
Download the instructions for your Range hood in PDF format for free! Find your manual HL458 - SCHOLTES and take your electronic device back in hand. On this page are published all the documents necessary for the use of your device. HL458 by SCHOLTES.
USER MANUAL HL458 SCHOLTES
Cappa in stand-by: LED SPENTO
Dunstabzugshaube in Stand-by: LED
AUSGESCHALTET
Description of the appliance, 30
Control panel, 30
Operation, 32
Maintenance, 33
Cleaning, 33
Cleaning the grease filters, 33
Cleaning the carbon filter, 33
Mounting and changing the filter, 33
Replacing lamps, 34
Caution, 35
General safety, 35
Disposal, 35

EN
It is important to conserve this booklet for consultation at any moment. In the case of sale, cession or move, make sure it is together with the product.
Read the instructions carefully: there is important information about installation, use and safety.
Do not carry out electrical or mechanical variations on the product or on the discharge conduits.
! Your hood is ready to be used in the filtering version.
Installation
Electrical connection
The mains power supply must correspond to the rating indicated on the plate situated inside the hood. If provided with a plug connect the hood to a socket in compliance with current regulations and positioned in an accessible area. If it not fitted with a plug (direct mains connection) or if the plug is not located in an accessible area apply a bi-polar switch in accordance with standards which assures the complete disconnection of the mains under conditions relating to over-current category III, in accordance with installation instructions.
Warning: Before re-connecting the hood circuit to the mains supply and checking the efficient function, always check that the mains cable is correctly assembled.
The company declines any responsibility whenever these regulations are not respected.
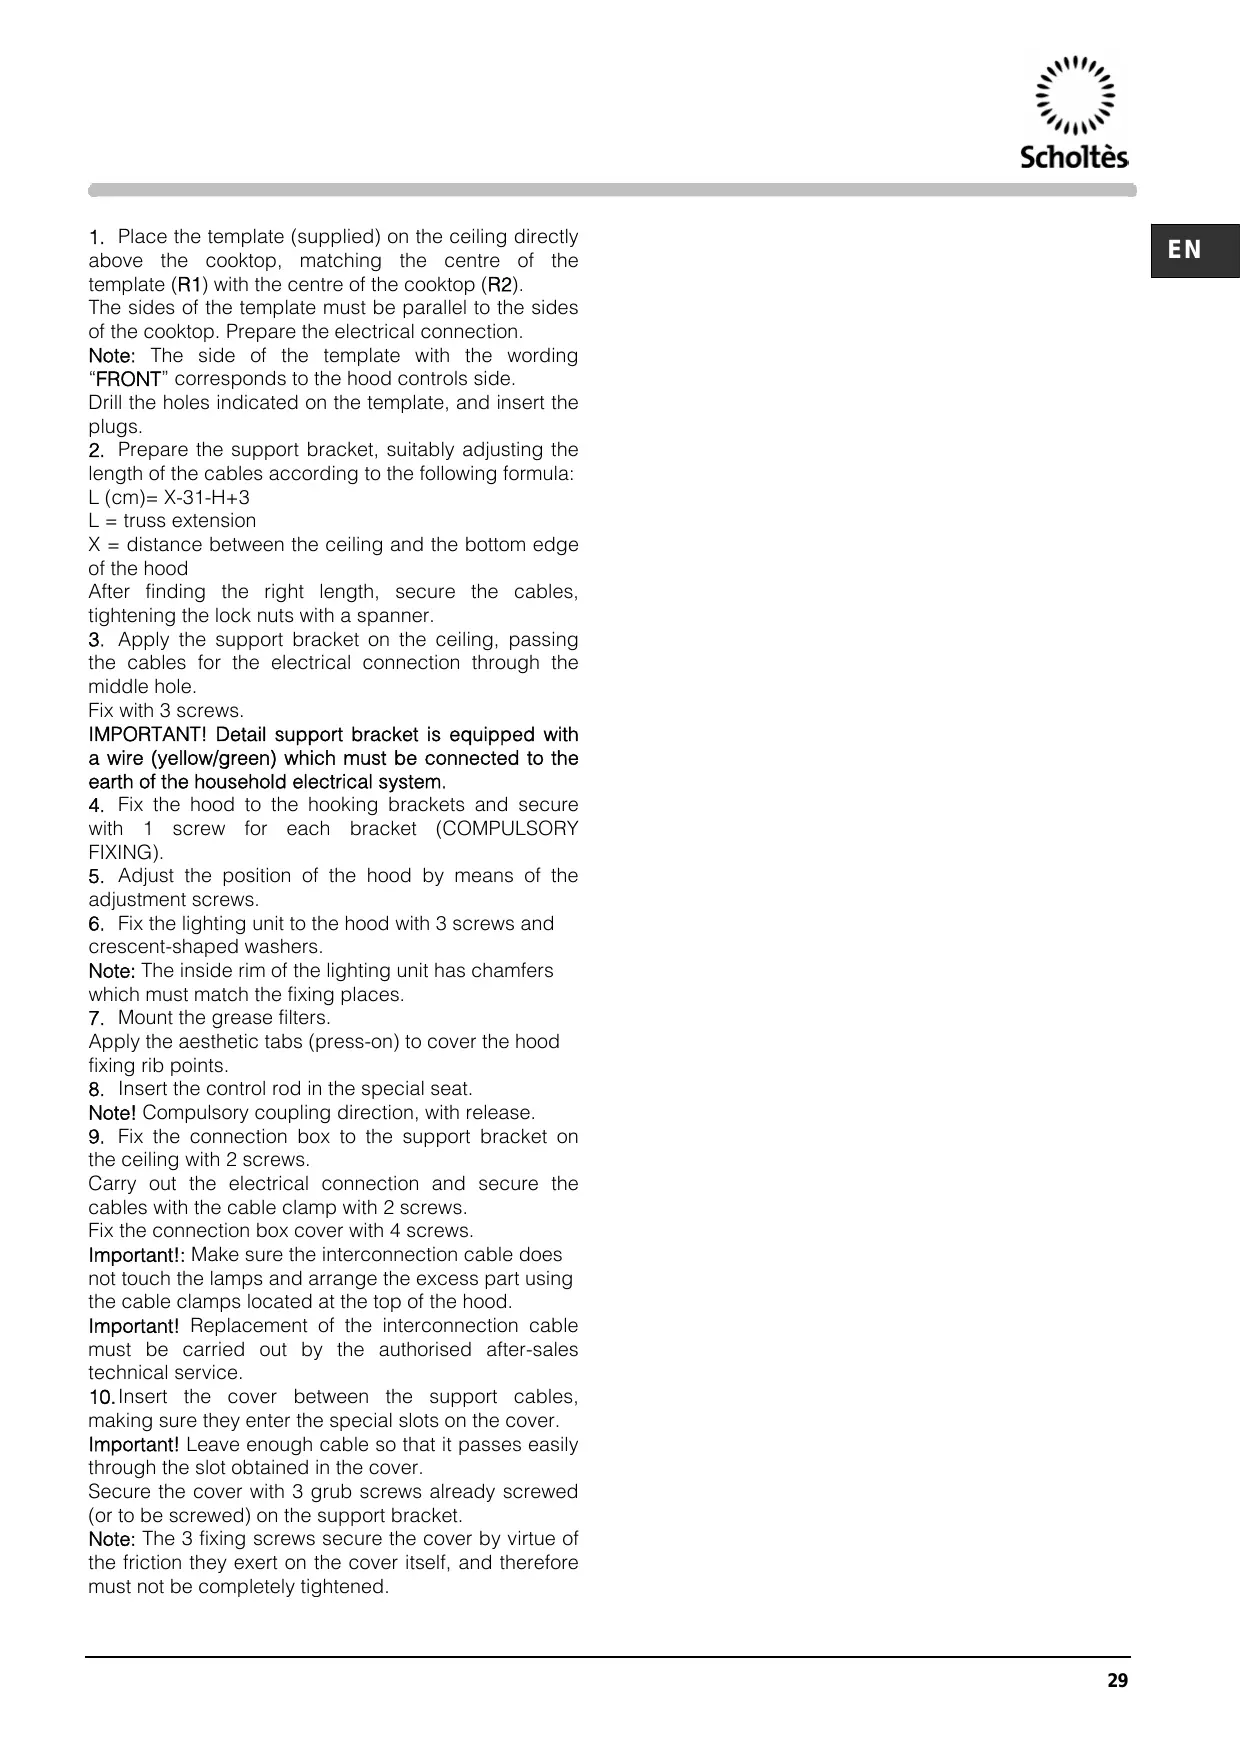
The minimum distance between the supporting surface for the cooking vessels on the hob and the lowest part of the range hood must be not less than 50cm from electric cookers and 70cm from gas or mixed cookers. If the instructions for installation for the gas hob specify a greater distance, this must be adhered to.
Expansion wall plugs are provided to secure the hood to most types of walls/ceilings. However, a qualified technician must verify suitability of the materials in accordance with the type of wall/ceiling. The wall/ceiling must be strong enough to take the weight of the hood. Do not tile, grout or silicone this appliance to the wall. Surface mounting only.

EN

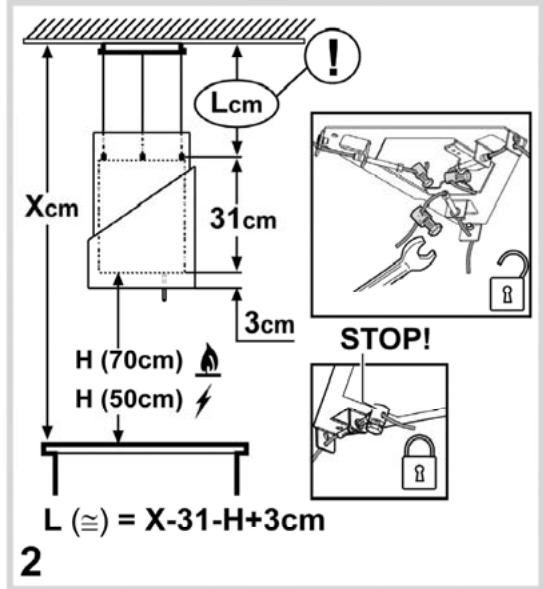
- Place the template (supplied) on the ceiling directly above the cooktop, matching the centre of the template (R1) with the centre of the cooktop (R2).
The sides of the template must be parallel to the sides of the cooktop. Prepare the electrical connection.
Note: The side of the template with the wording "FRONT" corresponds to the hood controls side.
Drill the holes indicated on the template, and insert the plugs.
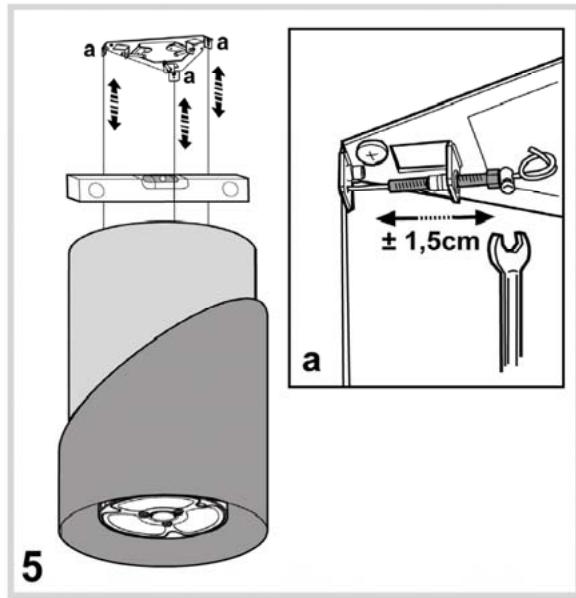
2. Prepare the support bracket, suitably adjusting the length of the cables according to the following formula:
L (cm) = X-31-H+3
L = truss extension
X = distance between the ceiling and the bottom edge of the hood
After finding the right length, secure the cables, tightening the lock nuts with a spanner.
- Apply the support bracket on the ceiling, passing the cables for the electrical connection through the middle hole.
Fix with 3 screws.
IMPORTANT! Detail support bracket is equipped with a wire (yellow/green) which must be connected to the earth of the household electrical system.
-
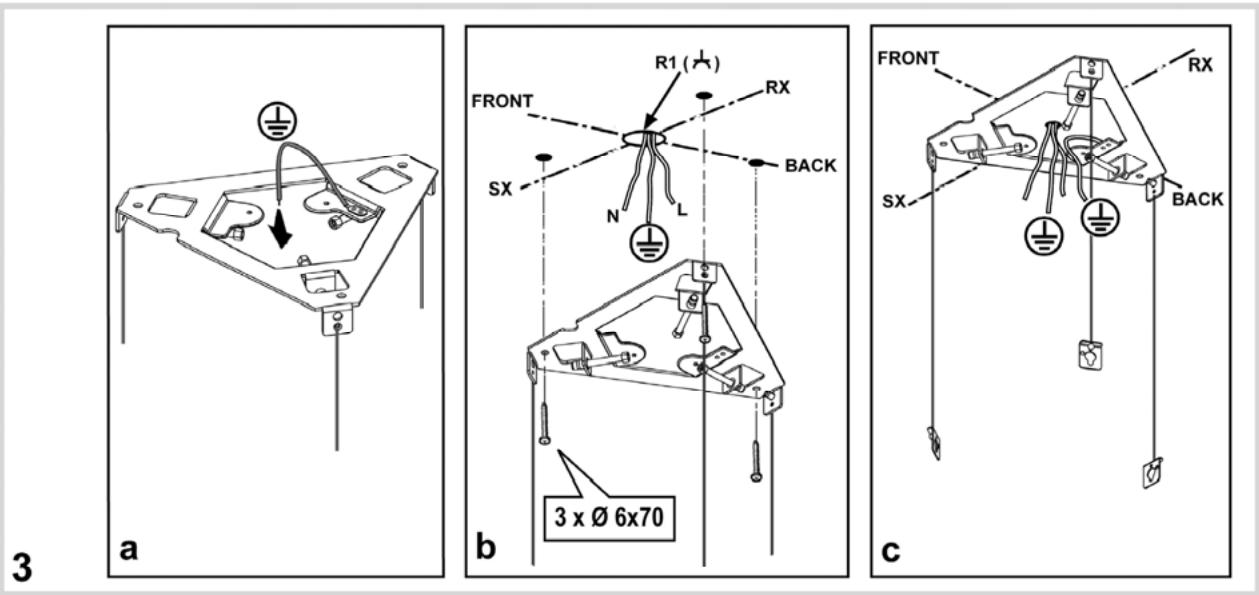
Fix the hood to the hooking brackets and secure with 1 screw for each bracket (COMPULSORY FIXING).
-
Adjust the position of the hood by means of the adjustment screws.
-
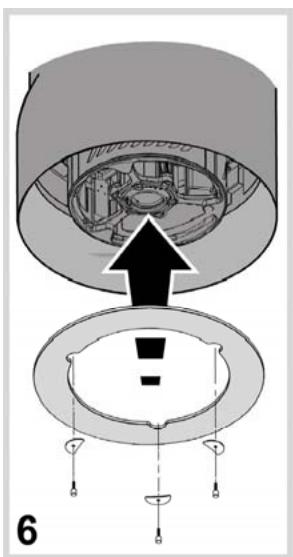
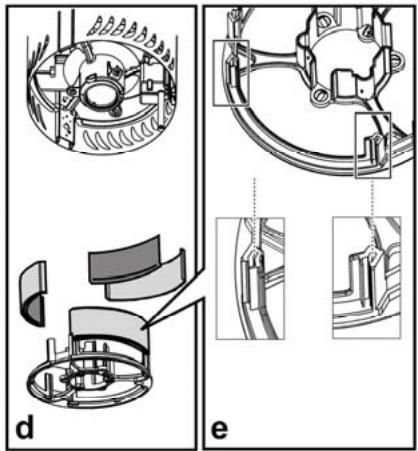
Fix the lighting unit to the hood with 3 screws and crescent-shaped washers.
Note: The inside rim of the lighting unit has chamfers which must match the fixing places.
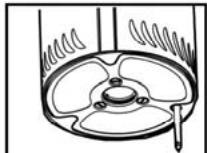
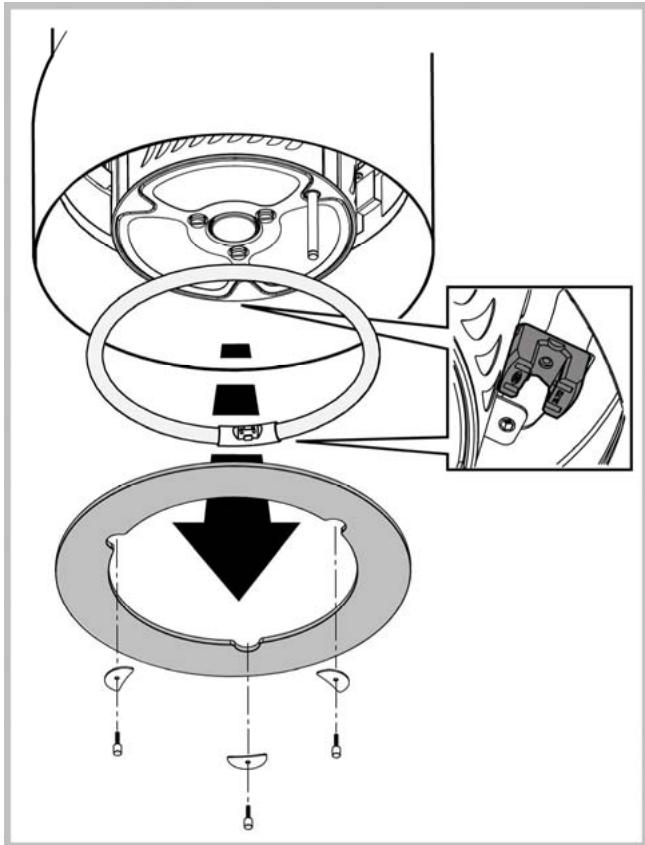
- Mount the grease filters.
Apply the aesthetic tabs (press-on) to cover the hood fixing rib points.
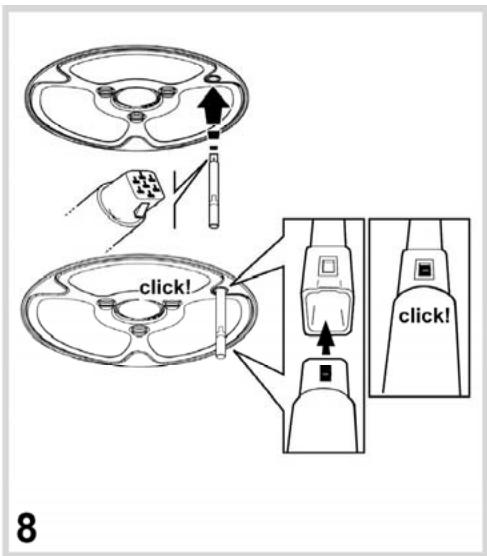
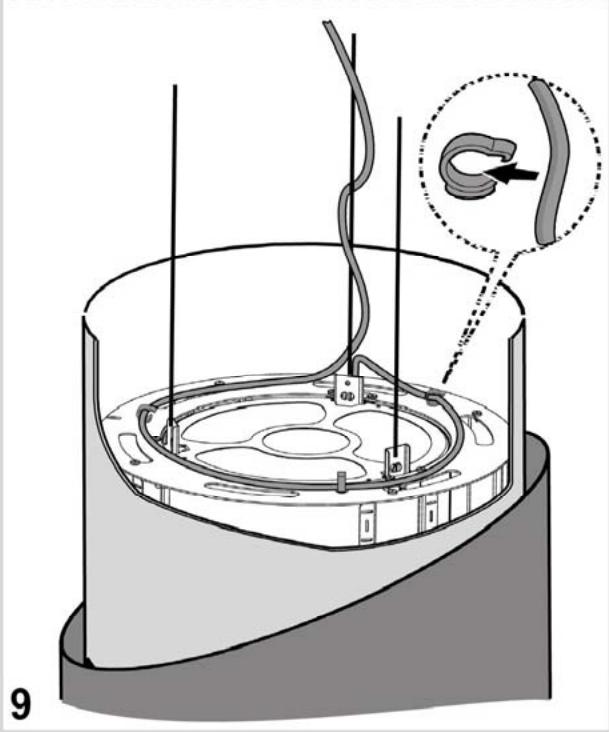
- Insert the control rod in the special seat.
Note! Compulsory coupling direction, with release.
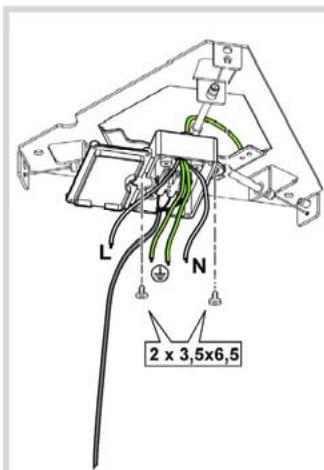
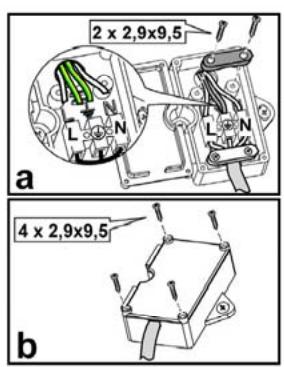
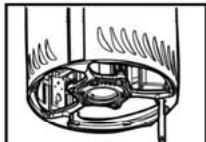
- Fix the connection box to the support bracket on the ceiling with 2 screws.
Carry out the electrical connection and secure the cables with the cable clamp with 2 screws.
Fix the connection box cover with 4 screws.
Important!: Make sure the interconnection cable does not touch the lamps and arrange the excess part using the cable clamps located at the top of the hood.
Important! Replacement of the interconnection cable must be carried out by the authorised after-sales technical service.
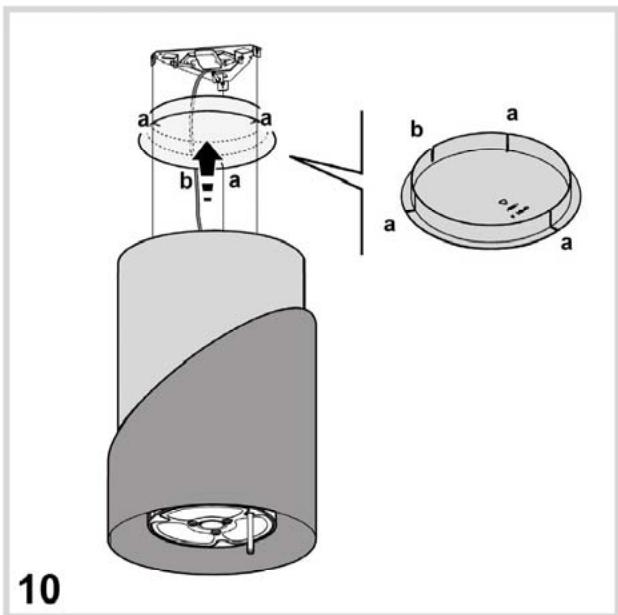
10.Insert the cover between the support cables, making sure they enter the special slots on the cover.
Important! Leave enough cable so that it passes easily through the slot obtained in the cover.
Secure the cover with 3 grub screws already screwed (or to be screwed) on the support bracket.
Note: The 3 fixing screws secure the cover by virtue of the friction they exert on the cover itself, and therefore must not be completely tightened.
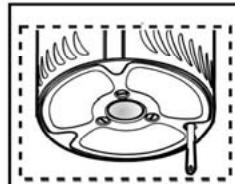
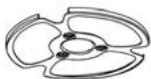
Description of the appliance
EN
Control panel
The hood is equipped with a "TOUCH SENSOR" device able to determine the control of the lights and the speed when the user touches the control bar. Read the instructions below carefully for this purpose.
Automatic switch-on function
The hood is equipped with a temperature sensor that starts the motor at the 1st suction speed (power) when the room temperature around the hood is higher than 70^ .
The user can, however, switch off or modify the suction speed (power). (See paragraph "Control of suction speed (power)").
Control of suction speed (power)
The selection of the suction speed (power) is cyclical, according to the speed sequences "stand-by - 1-2-3-4- Stand by -1-2-". so that at every touch of the UPPER PART of the control bar the suction speed (power) increases by a level and then to switches off (stand-by) if the control bar is touched again when the hood is at suction speed (power) 4.
It is possible to turn the hood off (standby) even when the hood is at any speed by pressing the UPPER PART of the control bar (for more than 3 seconds).
It is possible to determine what suction speed (power) the hood is in when the bar is equipped with a led that changes colour on the basis of the suction speed (power), as follows:
Hood in stand-by: LED OFF
1st suction speed (power) - led GREEN
2st suction speed (power) - led ORANGE (amber)
3st suction speed (power) - led RED
4st suction speed (power) - led RED (FLASHING)
Note: the 4^th aspiration speed (power) remains on for 5 minutes after which the aspiration motor positions itself
on the 2nd speed.
Touched once more, the suction motor switches off (Stand-by).
Need to wash the anti-fat filter: GREEN led FLASHING (read the instructions relative to "Reset and configuration of the filters saturation signal")
Need to wash or replace the carbon filters: ORANGE (amber) led FLASHING (read the instructions relative to "Reset and configuration of the filters saturation signal")
Control of the central light
The central light can be switched on and off by touching the LOWER PART of the control bar BRIEFLY.
Control of the lateral lights (when envisaged)
The lateral lights can be switched on and off by touching IN A PROLONGED MANNER the LOWER PART of the control lever.
The PROLONGED TOUCH allows, other than switching on and off, adjusting the intensity of the light emitted by the lamp.
Note: The functions of switching and off (and adjustment) alternate.
The light intensity regulation feature is not available for hoods with neon lights.
Reset and configuration of the filters saturation signal
Switch the hood on at any speed (see paragraph above "Selection of the suction speed (power)"
Reset anti-fat filter saturation signal (GREEN LED FLASHING on the control level)
First proceed with the maintenance of the filter as described in the corresponding paragraph.
Touch in a prolonged manner (more than 3 seconds) the UPPER PART of the control lever, the LED stops flashing to indicate that the reset of the signal has been carried out and the hood switches off.
Reset anti-fat filter saturation signal ORANGE (amber) LED FLASHING
First proceed with the maintenance of the filter as described in the corresponding paragraph.
Touch in a prolonged manner (more than 3 seconds) the UPPER PART of the control lever, the LED stops flashing to indicate that the reset of the signal has been carried out and the hood switches off.
Deactivating the carbon filter saturation signal (for special applications)
Switch the hood off (see paragraph above "Select the suction speed power")
Touch in a prolonged manner (more than 5 seconds) the UPPER PART of the control lever, the LED flashes in GREEN to indicate that the carbon filter saturation signal has been deactivated.
To reactivate the carbon filter saturation signal, repeat the operation. The LED flashes in ORANGE (amber).
Operation
EN
! We advise switching the hood on, at minimum power, before beginning to cook to favour the optimal expulsion of odours. In addition we advise turning it off every time 10/15 minutes after finishing cooking.
We advise frying under the hood only under constant supervision.
It is forbidden to cook flambe under the hood because there is the risk of causing a fire.
The best performance of the apparatus is obtained with external expulsion: we advise using the hood in this version if possible.
It is always necessary to isolate the hood from the power supply during cleaning and maintenance.
Therefore remove the plug.
We recommend carrying our maintenance regularly (about every 10 days) to ensure efficacious and constant performance of the hood.
Cleaning
The cooker hood should be cleaned regularly (at least with the same frequency with which you carry out maintenance of the fat filters) internally and externally. Clean using the cloth dampened with neutral liquid detergent. Do not use abrasive products. DO NOT USE ALCOHOL!
WARNING:
Failure to carry out the basic cleaning recommendations of the cooker hood and replacement of the filters may cause fire risks.
Therefore, we recommend oserving these instructions. The manufacturer declines all responsibility for any damage to the motor or any fire damage linked to inappropriate maintenance or failure to observe the above safety recommendations.
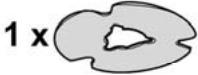
Cleaning the grease filters
Traps cooking grease particles.
This must be cleaned once a month using non aggressive detergents, either by hand or in the dishwasher, which must be set to a low temperature and a short cycle. When washed in a dishwasher, the grease filter may discolour slightly, but this does not affect its filtering capacity.
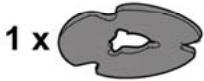
Cleaning the carbon filter
It absorbs unpleasant odours caused by cooking.
The charcoal filter can be washed once every two months using hot water and a suitable detergent, or in a dishwasher at 65^ C (if the dishwasher is used, select the full cycle function and leave dishes out).
Eliminate excess water without damaging the filter, then remove the mattress located inside the plastic frame and put it in the oven for 10 minutes at 100^ C to dry completely. Replace the mattress every 3 years and when the cloth is damaged.
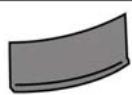
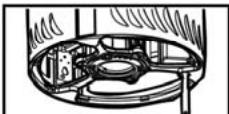
Mounting and changing the filter
The metal grease filter and the carbon filter are installed coupled at the bottom (extraction area).
To remove or refit them, proceed as follows:
a+c. turn the three screws 1/4 turn.
b + d + e remove the filter holder frame and the metal grease filter (and the carbon filter).
Proceed in reverse order to refit.
3x
a-b-c-d-e
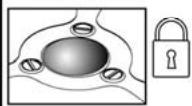
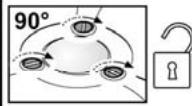
a


b
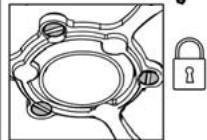
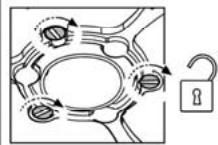
C
EN
Replacing lamps
Disconnect the hood from the electricity.
Warning! Prior to touching the light bulbs ensure they are cooled down.
Removing the bulb:
rotate anti-clockwise a quarter turn and take out.
Mounting the bulb:
insert the bulb in its seat so that its contacts enter the congruent seats on the bulb-holder, rotate clockwise for about a quarter turn.
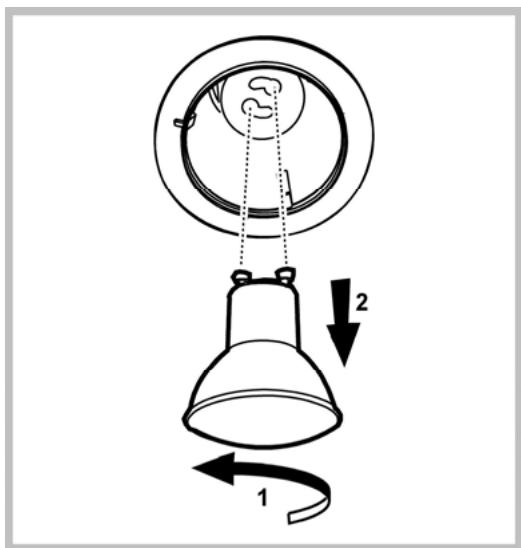
To replace the central lamp: use only 40W max 40^ D25 GU10.halogen lamps.
To replace the neon light:
Remove the light shield and the bulb to be replaced.
Only use max 40W bulbs (TL5C).
Mount the overhead light again.
General safety
Do not connect the appliance to the mains until the installation is fully complete.
Before any cleaning or maintenance operation, disconnect the hood from the mains by removing the plug or disconnecting the home mains switch.
The appliance is not intended for use by children or persons with impaired physical, sensorial or mental faculties, or if lacking in experience or know-how, unless they are under supervision or have been trained in the use of the appliance by a person responsible for their safety.
Children should be monitored to ensure that they do not play with the appliance.
Never use the hood without effectively mounted grating.
The hood must NEVER be used as a support surface unless specifically indicated.
The premises must be sufficiently ventilated, when the kitchen hood is used together with other gas combustion devices or other fuels.
The suctioned air must not be conveyed into a conduit used for the disposal of the fumes generated by appliances that combust gases or other fuels.
The flaming of foods beneath the hood itself is severely prohibited.
The use of exposed flames is detrimental to the filters and may cause a fire risk, and must therefore be avoided in all circumstances.
Any frying must be done with care in order to make sure that the oil does not overheat and burst into flames.
As regards the technical and safety measures to be adopted for fume discharging it is important to closely follow the relations provided by the competent authorities.
The hood must be regularly cleaned on both the inside and outside (AT LEAST ONCE A MONTH, it is in any event necessary to proceed in accordance with the maintenance instructions provided in this manual)..
Failure to follow the instructions as concerns hood and filter cleaning will lead to the risk of fires.
Do not use or leave the hood without the lamp correctly mounted because of the possible risk of electric shocks.
We decline any responsibility for any problems, damage or fires caused to the appliance as the result of the non-observation of the instructions included in this manual.
Disposal
- Disposing of the packaging material: keep to the local regulations so that the packaging can be re-used.
In case of anomalies apply to the authorized technical assistance service and require original spare parts.
The information and technical data are subject to change and the producer, in line with technical progress, maintains the right to make modifications that he considers necessary without prior notice.
This appliance is marked according to the European directive 2002/96/EC on Waste Electrical and Electronic Equipment (WEEE). By ensuring this product is disposed of correctly, you will help prevent potential negative consequences for the environment and human health, which could otherwise be caused by inappropriate waste handling of this product.

The symbol on the product, or on the documents accompanying the product, indicates that this appliance may not be treated as household waste. Instead it shall be handed over to the applicable collection point for the recycling of electrical and electronic equipment. Disposal must be carried out in accordance with local environmental regulations for waste disposal.
For more detailed information about treatment, recovery and recycling of this product, please contact your local city office, your household waste disposal service or the shop where you purchased the product.

Italiano

Deutsch

English

Français

Nederlandds
HL 458
Sommaire
Installation, 38
Installation, 38
L = extension de la structure de support
L = verlenging van rooster
Afzuigkap in stand-by: - LED UITGESCHAKELD
