
SOHG1620X - Range hood SCHOLTES - Free user manual and instructions
Find the device manual for free SOHG1620X SCHOLTES in PDF.

User questions about SOHG1620X SCHOLTES
0 question about this device. Answer the ones you know or ask your own.
Ask a new question about this device
Download the instructions for your Range hood in PDF format for free! Find your manual SOHG1620X - SCHOLTES and take your electronic device back in hand. On this page are published all the documents necessary for the use of your device. SOHG1620X by SCHOLTES.
USER MANUAL SOHG1620X SCHOLTES
Instruction manual/safety instruction - Cooker hood
After completing the installation of hood, the minimum distance must be 650~mm between the product and any electric cooker; and 750~mm between it and any gas ranges or cookers burning other fuels (Fig. 2).


For nearly a century SchoItès has been developing state of the art products to the service of each chef.
Because cooking is a passion, our technology offers you a wide range of options and invites you to explore your culinary creativity.
We hope you will enjoy using your new appliance and we thank you for your trust.
- SAFETY AND PRECAUTIONS
1.1 Children and vulnerable people safety
1.2 General safety
- INSTALLATION
2.1 Electrical connection
2.2 Filtering mode
2.3 Installation
4.1 Cleaning the outer surface
4.2 Cleaning the grease filters
4.3 Charcoal filters replacement
4.4 Replacing the lamps
5.PROBLEMS
6. CARE FOR THE ENVIRONMENT
Please note that safety information should be read with attention. The manufacturer is not responsible of any injuries or damages that are the result of incorrect installation or usage.
Important safety instructions read carefully and keep for future use.
1. SAFETY AND PRECAUTIONS
BEFORE THE INSTALLATION AND USE OF THE APPLIANCE, PLEASE READ THESE INSTRUCTIONS CAREFULLY. THE MANUFACTURER IS NOT RESPONSIBLE OF ANY INJURIES OR DAMAGES THAT ARE THE RESULT OF INCORRECT INSTALLATION OR USAGE. ALWAYS KEEP INSTRUCTIONS IN A SAFE AND ACCESSIBLE LOCATION FOR FUTURE REFERENCE.
1.1 Children and vulnerable people safety
This appliance can be used by children aged from 8 years and above and persons with reduced physical, sensory or mental capabilities or lack of experience and knowledge if they have been given supervision or instruction concerning use of the appliance in a safe way and understand the hazards involved.
Children shall not play with the appliance.
Cleaning and user maintenance shall not be made by children without supervision.
Caution : The accessible parts of this appliance may become hot when used with cooking appliances.
1.2 General safety
Check if the appliance gets any damage after unpacking it.
Do not connect the appliance if it has been damaged.
Only a licensed professional may install this appliance and replace the cable. Damages caused by incorrect connection is not covered under warranty.
The appliance and its accessible parts become hot during use. Care should be taken to avoid touching heating elements.
Always use gloves to remove or put in accessories or ovenware. Before carrying out any maintenance, disconnect the appliance from the power supply.
The appliance can be disconnected by using an accessible power outlet or by incorporating a switch in the fixed lines, in accordance with installation rules.
Ensure that the appliance is switched off before replacing the lamp to avoid the possibility of electric shock.
If the main power supply cable is damaged, it must be replaced by the manufacturer, its authorised service centre or similar qualified persons to avoid an electrical hazard.
Never use steam or high-pressure tools to clean your appliance (due to electrical safety considerations).
This appliance is intended to be used in household and similar applications such as: staff kitchen areas in shops, offices and other working environments; by clients in hotels, motels and other residential type environments; farm-houses; bed and breakfast type environments.
Do not use it for commercial or industrial purposes or for any other purpose than that for which it was designed.
Risk of asphyxiation
Regulations on the evacuation of air must be complied with. Air must not be sent into a duct used to evacuate fumes from appliances that use gas or other fuels (this does not apply to appliances that only emit air into the room).
The room must be suitably ventilated when the cooker hood is used at the same time as appliances that use gas or other fuels (this does not apply to appliances that only emit air into the room).
Risk of fire
Flambing food or turning on gas rings below the hood, unless they are covered by a pan is prohibited, since the flames could be sucked in and damage the appliance. Keep a constant watch on fryers used below the hood.
When heated to very high temperatures, oil and fat can catch fire.
Clean the appliance and replace filters at the recommended frequency.
Accumulated deposits of grease could cause a fire.
Using the hood above a solid fuel range (wood, coal, etc.) is prohibited.
If the hood is installed above a gas-fired appliance, leave at least 65~cm between the top of the hob and the underside of the hood. If the instructions for a hob installed below the hood specify a distance.
2. INSTALLATION
2.1 Electrical connection
This equipment must be connected to a grounding plant. Two types of electrical connection can be used:
- Using a standard plug to be connected to the power cable and inserted in a mains socket which must be accessible (so that the plug can be disconnected when servicing is carried out). Make sure that the plug is accessible also after the complete installation of the equipment.
- By means of a fixed mains connection, fitting a bipolar switch, which ensures the disconnection, with an opening distance of the contacts allowing a complete disconnection on the conditions of the overvoltage III category, according to installation regulations. The ground connection (yellow-green wire) must not be interrupted.
Refer to the rating plate inside the hood for the mains voltage and frequency ratings. If the power cable is damaged, it must be replaced by the manufacturer or by its service agent or a qualified person in order to avoid any risk.
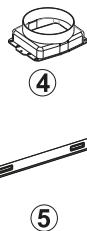
2.2 Filtration modes
This cooker hood can be employed as evacuation or recycling.
Evacuation: Kitchen smokes are driven outside through a flue joined to the exhaust pipe flue connector. This pipe must not under any circumstances be connected to cooker, boiler or burner exhaust pipes, etc.
Recycling: Smokes pass through the activated charcoal filter to be cleaned and recycled in the kitchen environment by means of holes from which the purified air will come out.
These holes must be free and communicating with the kitchen environment.
Charcoal filters should not be implemented when using evacuation installation .
2.3 Installation
Read the instruction manual before installing and/or using the hood.
The unit must be fitted at a distance of at least 65~cm from the cooking hob. If the mounting instructions of the gas cooker indicate a wider distance, respect it.
Respect all the air discharge regulations.
The air must not be discharged in a pipe used to discharge exhaust fumes produced by gas-fed equipment or fuel-fed equipment (this does not apply to filtering hoods).
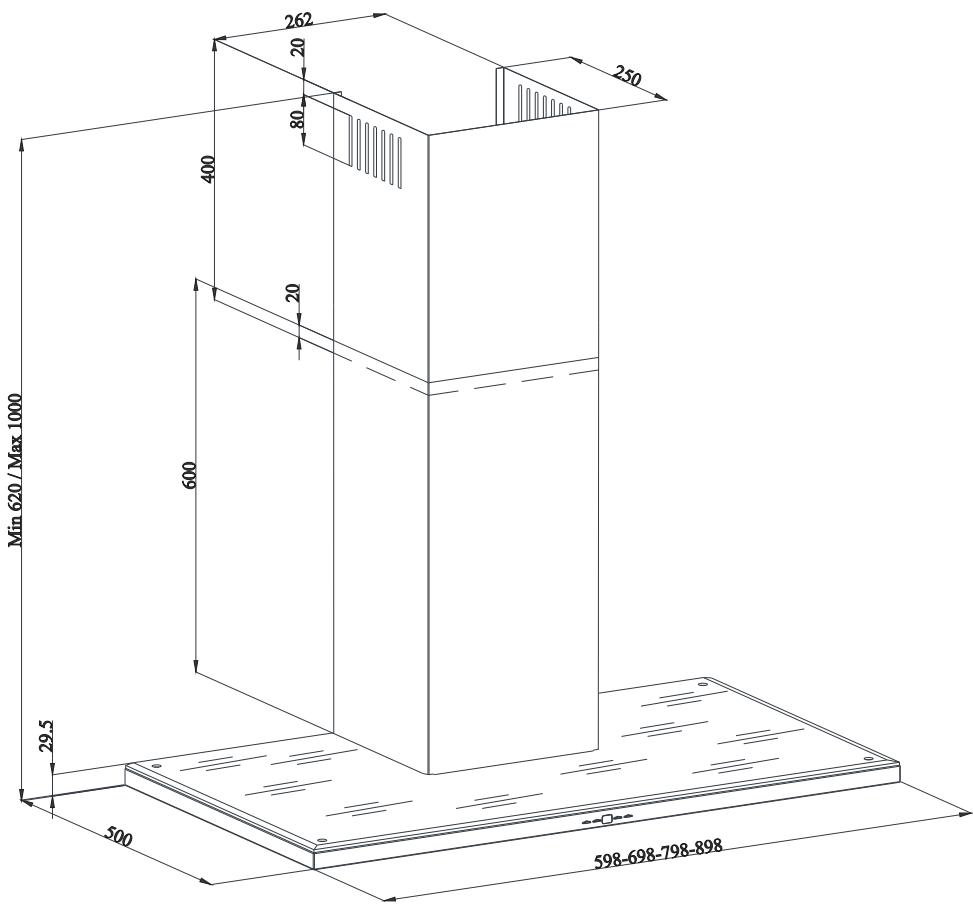
Fitting the hood (fig. 4)
- Assemble the cooker hood with the help of the assembly scheme.
-
Fix the assembly pattern on the wall, at the specified height (see the minimum and maximum distances intended for the worktop, in the assembly pattern). Perforate points A, B and C. (Fig. 4)
-
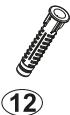
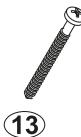
Insert 10mm wall plugs into the holes drilled as A, B, C and screw down the screws 5,5× 60 at the points A + B, in such a way as to remain 5mm space between the screw head and the wall. (Fig. 4)
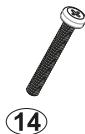
- Fix the hanging plate of the hood with the hood body thanks to screws M5x35 (Fig. 4).
- Hang it on the wall with the hanging plate of the cooker hood (Fig. 4). If needed adjust with M5x35 screws by tightening or loosening the screws.
- Tighten A + B fixing screw on the wall, and completely secure the product from its point C.
- Plug to evacuation hole if needed.
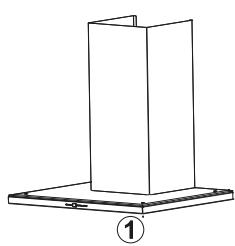
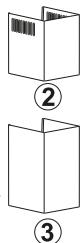
Fitting the chimney (fig. 5)
Note: The outer and inner sheet metal flues are assembled one within the other.
- The cooker hood is set in the midst, and then the flue connecting plate (3) is directly fixed to the wall, under the cover or points E and F are marked.
- Drill points E and F with 6mm drill bit, and insert 6mm and plastic dowels. Insert the flue connection plate with 3.9× 22 screws.
- Inner Flue use 1 screw to 2 pull upper left and screw onto the flue connection plate (3) from left and right. (Fig. 5)
- Fix the outer funnel on the hanging plate sliding it up. (fig. 5)
3. OPERATION
Your hood has 3 speeds and boost position. You can also use the remote control to activate your hood.
Control panel
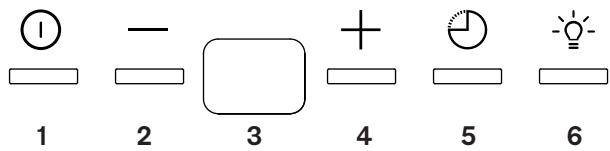
- On/off button
- Decrease speed
- Display
- Increase speed
- Delay stop: You can program your hood extinction by pressing on the touch timer. When timer button is pressed, a 15-minute timer function will be activated. display will give a signal once the timer starts and the motor will switch off automatically after 15 minutes.
- Light touch : to switch on and off the light. With a long press (>3s) you will activate the decorative leds which are located on the chimney.
Note : When the product is switched to maximum speed (booster) while it is operated, a “b” symbol shall be displayed on the screen. Product shall operate for 7 minutes in this mode and ‘b’ symbol shall flash on the screen during this period. After 7 minutes, product will automatically switch down to 3 speed.
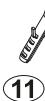
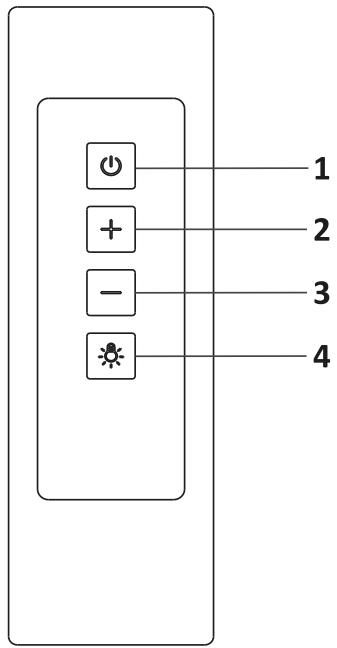
Remote control
- On/off touch
- Increase the speed
- Decrease the speed
- Light touch
4. MAINTENANCE
4.1 Cleaning the outer surface
The surface could be damaged due to aggressive and abrasive cleaning agents. Never use aggressive and abrasive cleaning agents.. To clean the outer surfaces on your hood, use soapy water and do not use scouring creams or scouring sponges.
4.2 Cleaning the grease filters
The grease filters can be placed in the dishwasher : Insert them in the dishwasher without tightening them or in an upright position.
Note: In case of washing in dishwasher, a slight change might occur in color. This has no effect on the function of the metal grease filter.
Filters should be cleaned when «C» signal appears on the Display or (due to usage) every 2 or 3 weeks. To delete «C» signal after the filters are cleaned and replaced, press and hold button more than 3 secs (when device is off). Letter «E» will appear on the display and it will switch to normal operation. If operation before deleting the «C» signal is required, active motor speed will appear for 1 sec when you press button and then the motor will resume running.
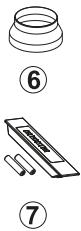
4.3 Charcoal filters replacement
This filter holds odors, it should be replaced after approximately 120 hours of use. It is available from your dealer or after sales service.
Remplace charcoal filter AF 100
- Place the carbon filter in its housing.
- Rotate the carbon filter clockwise and make sure that it is seated completely.
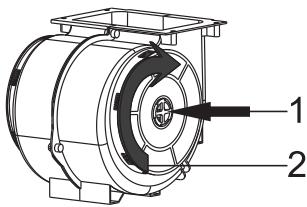
FIG 6
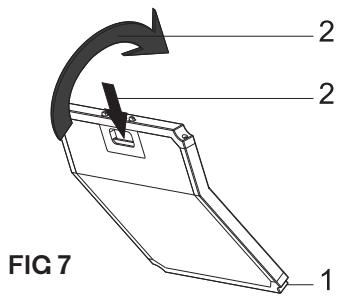
Remplace charcoal filter AF 500
- Place the lower part of the carbon filter in the engine housing
- Press the tab of the charcoal filter and pull it forward, and ensure that the tabs on the carbon filter are in contact and locked.
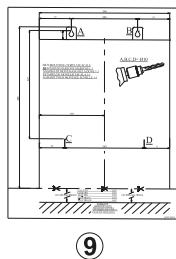
4.4 Replacing the lamps
Disconnect the electrical supply of the hood. Take out the metallic filter. Take off the lamp and replace it with a new one with the same nominal value.
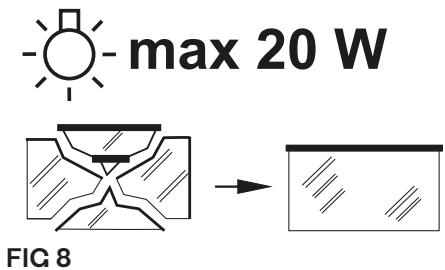

Caution: See the product declaration label for the rated power used. When replacing the lamps, the glass of the lamp can be broken and cause injury. Let the lamps cool down first because you can burn when they are still warm.
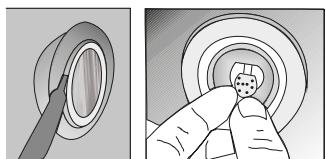
FIG 9
- Push the lamp to take it off.
- Separate the self-adhesive tape around the lamps and the body plate of each other.
- Before placing the new LED lamp, remove the protective film, and stick it.
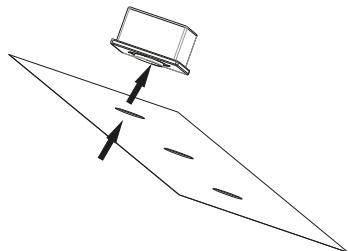
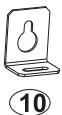
FIG 10:LED replacement
5.PROBLEMS
Technical data
| DEFECTS | SOLUTIONS |
| Illumination lamp does not operate | Make sure that the plug is plugged in, and that the fuses are intact. Check the bulbs. Make sure you unplugged the device before performing this check. Tighten the bulbs if they are loose; you can replace the bulbs if they still don’t work. |
| The device does not run in any way | Check to see if the hood is plugged in or if the plug is fit properly into the socket. Check the fuse, to which the appliance is connected, as well as the main fuse of your house. Is the outlet diameter of the appliance’s flue adequate? (min.120mm). Are the metal filters clean? Please check.. |
| If the device performance is not enough and it creates high noise while running | If you use the hood without flue, make sure that the carbon filters have been renewed. Be attentive to ventilate your kitchen adequately, in order to provide an airflow. If you are still not satisfied with the performance of the appliance, consult the authorized technical service. |
| Supply voltage | 220-240V 50Hz |
| Insulation Class of Motor | Classe F |
| Insulation Class | Classe I |
6. CARE FOR THE ENVIRONMENT
This appliance's packaging can be recycled. Recycle and contribute towards protecting the environment by disposing of packaging in local waste containers designed for this purpose. Your appliance also contains a lot of recyclable material.
This logo indicates that used appliances must not be mixed with other waste. Appliance recycling organised by your manufacturer is carried out under optimum conditions, in accordance with European Directive 2002/96/EC on the disposal of waste electrical and electronic equipment.
Contact your local authority or retailer for information on used appliance collection points close to your home.
Thank you for helping to protect the environment.
Information on the meaning of the conformity marking C E
The CE marking indicates that the product meets the main requirements of European Directives 2014/35 / CE (Low Voltage), 2014/30 / CE (Electromagnetic Compatibility), 2011/65 / EU (Reduction of the use of certain dangerous substances in EEE).
The warranty does not cover wearing parts of the product, nor problems or damage resulting from:
- Surface deterioration due to normal wear and tear of the product;
- Defects or deterioration due to contact of the product with liquids and due to corrosion caused by rust or the presence of insects;
- Any unauthorized incident, abuse, misuse, modification, disassembly or repair;
- Any improper maintenance operation, use not in accordance with the instructions concerning the product or connection to an incorrect voltage;
- Any use of accessories not supplied or not approved by the manufacturer.
- The warranty will be void if the product nameplate and / or serial number is removed.
