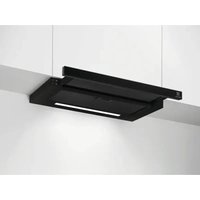
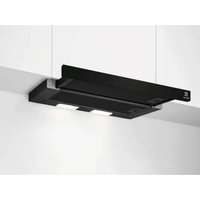
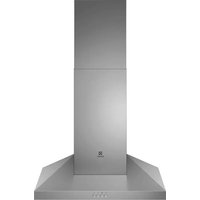
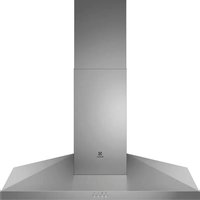
EFF90563OX - Basket ELECTROLUX - Free user manual and instructions
Find the device manual for free EFF90563OX ELECTROLUX in PDF.

 FR
FR
 BG
BG
 CS
CS
 DA
DA
 DE
DE
 EL
EL
 EN
EN
 ES
ES
 ET
ET
 FI
FI
 HU
HU
 IT
IT
 KK
KK
 LT
LT
 LV
LV
 MK
MK
 NL
NL
 NO
NO
 PL
PL
 PT
PT
 RO
RO
 RU
RU
 SK
SK
 SL
SL
 SQ
SQ
 SR
SR
 SV
SV
 TR
TR
 UK
UK
User questions about EFF90563OX ELECTROLUX
0 question about this device. Answer the ones you know or ask your own.
Ask a new question about this device
Download the instructions for your Basket in PDF format for free! Find your manual EFF90563OX - ELECTROLUX and take your electronic device back in hand. On this page are published all the documents necessary for the use of your device. EFF90563OX by ELECTROLUX.
USER MANUAL EFF90563OX ELECTROLUX
Thank you for choosing this Electrolux product. We have created it to give you impeccable performance for many years, with innovative technologies that help make life simpler – features you might not find on ordinary appliances. Please spend a few minutes reading to get the very best from it.
Visit our website to:

Get usage advice, brochures, trouble shooter, service information:
www.electrolux.com

Register your product for better service:
www.electrolux.com/productregistration

Buy Accessories, Consumables and Original spare parts for your appliance:
www.electrolux.com/shop
ENVIRONMENT CONCERNS
Recycle the materials with the symbol 📋. Put the packaging in applicable containers to recycle it. Help protect the environment and human health and to recycle waste of electrical and electronic appliances. Do not dispose appliances marked with the symbol 📋 with the household waste. Return the product to your local recycling facility or contact your municipal office department for household waste or the shop where you purchased this product.
CUSTOMER CARE AND SERVICE
We recommend the use of original spare parts.
When contacting Service, ensure that you have the following data available.
The information can be found on the rating plate. Model, PNC, Serial Number.
⚠ Warning / Caution-Safety information.
Subject to change without notice.
SAFETY INFORMATION
Before any cleaning or maintenance operation, disconnect hood from the mains by removing the plug or disconnecting the mains electrical supply. Always wear work gloves for all installation and maintenance operations. This appliance can be used by children aged from 8 years and above and persons with reduced physical, sensory or mental capabilities or lack of experience and knowledge if they have been given supervision or instruction concerning use of the appliance in a safe way and understand the hazards involved. Children shall not be allowed to tamper with the controls or play with the appliance. Cleaning and user maintenance shall not be made by children without supervision. The premises where the appliance is installed must be sufficiently ventilated, when the kitchen hood is used together with other gas
combustion devices or other fuels. The hood must be regularly cleaned on both the inside and outside (AT LEAST ONCE A MONTH). This must be completed in accordance with the maintenance instructions provided in this manual. Failure to follow the instructions provided in this user guide regarding the cleaning of the hood and filters will lead to the risk of fires. The flaming of foods beneath the hood itself is severely prohibited.
1.SAFETY INSTRUCTIONS
The use of exposed flames is detrimental to the filters and may cause a fire risk, and must therefore be avoided in all circumstances.
Any frying must be done with care in order to make sure that the oil does not overheat and ignite.
CAUTION: Accessible parts of the hood may become hot when used with cooking appliances.
For lamp replacement use only lamp type indicated in the Maintenance/Replacing lamps section of this manual.
WARNING! Do not connect the appliance to the mains until the installation is fully complete.
With regards to the technical and safety measures to be adopted for fume discharging it is important to closely follow the regulations provided by the local authorities.
The ducting system for this appliance must not be connected to any existing ventilation system which is being used for any other purpose such as discharging exhaust fumes from appliances burning gas or other fuels. Do not use or leave the hood without the lamp correctly mounted due to the possible risk of electric shocks.
Never use the hood without effectively mounted grids.
The hood must NEVER be used as a support surface unless specifically indicated.
Use only the fixing screws supplied with the product for installation or, if not supplied, purchase the correct screws type.
Use the correct length for the screws which are identified in the Installation Guide.
In case of doubt, consult an authorised service assistance centre or similar qualified person.
WARNING! Failure to install the screws or fixing device in accordance with these instructions may result in electrical hazards.
2.USE
The hood serves to aspirate the fumes and vapors resulting from cooking.
The attached installation manual indicates the version to be used depending on the model you have, the suction version with
external evacuation or filtering with internal recirculation.
3. INSTALLATION
The mains power supply must correspond to the rating indicated on the plate situated inside the hood. If provided with a plug connect the hood to a socket in compliance with current regulations and positioned in an accessible area, after installation. If it not fitted with a plug (direct mains connection) or if the plug is not located in an accessible area, after installation, apply a double pole switch in accordance with standards which assures the complete disconnection of the mains under conditions relating to over-current category III in accordance with installation instructions.
⚠ Warning! Before re-connecting the hood circuit to the mains supply and checking the efficient function, always check that the mains cable is correctly assembled.
The minimum distance between the supporting surface for the cooking equipment on the hob and the lowest part of the range hood must be not less than 50cm from electric cookers and 65cm from gas or mixed cookers. If the instructions for installation for the gas hob specify a greater distance, this must be adhered to.
4. MAINTENANCE
⚠️ ATTENTION! Before performing any maintenance operation, isolate the hood from the electrical supply by switching off at the connector and removing the connector fuse.
Or if the appliance has been connected through a plug and socket, then the plug must be removed from the socket. The cooker hood should be cleaned regularly (at least with the same frequency with which you carry out maintenance of the fat filters) internally and externally. Clean using the cloth dampened with neutral liquid detergent. Do not use abrasive products. DO NOT USE ALCOHOL!
Warning! Failure to carry out the basic cleaning recommendations of the cooker hood and replacement of the filters may cause fire risks. Therefore, we recommend observing these instructions.
The manufacturer declines all responsibility for any damage to the motor or any fire damage linked to inappropriate maintenance or failure to observe the above safety recommendations.
4.1 Grease filter - The grease filter must be cleaned once a month using non aggressive detergents, either by hand or in the dishwasher, which must be set to a low temperature and a short cycle. When washed in a dishwasher, the grease filter may discolour slightly, but this does not affect its filtering capacity.
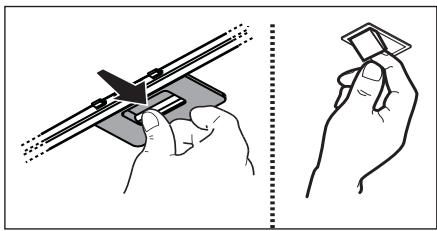
natural_image
Illustration showing two hands holding a tool, one with a pointed tip and the other holding a clip (no text or symbols present)4.2 NON-washable activated charcoal filter - The saturation of the charcoal filter occurs after more or less prolonged use, depending on the type of cooking and the regularity of cleaning of the grease filter. In any case it is necessary to replace the cartridge at least every four mounths. The charcoal filter may NOT be washed or regenerated.
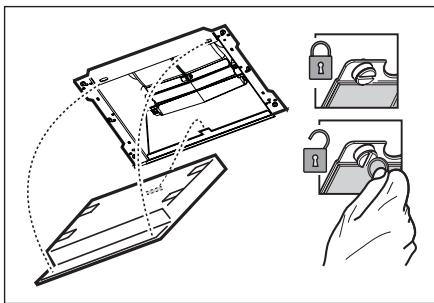
text_image
Diagram illustrating a door lock mechanism with labeled components and hand holding a lock5. CONTROLS
The hood is fitted with a control panel with aspiration speed selection control and a light switch to control cooking area lights. Use the high suction speed in cases of concentrated kitchen vapours. It is recommended that the cooker hood suction is switched on for 5 minutes prior to cooking and to leave in operation during cooking and for another 15 minutes approximately after terminating cooking.
The control switches are located on the unit's front panel:
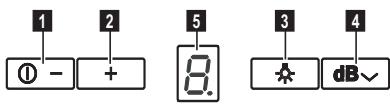
text_image
1 2 ① - + 5 8. 3 4 ★ dB✓1 Suction speed (power) ON-OFF/decrease key
2 Suction speed (power) 1 - 2 - 3 -4 Increase key. . Suction speeds (powers) 3 and 4 have a limited duration, respectively 10 and 5 minutes, after which suction speed (power) 2 is activated.
Note: The LED on the display flashes indicating speed timing.
3 Lighting ON/OFF key
4 "Breeze" function key (Environment ventilation) The hood switches on at low suction speed (power) for about one hour and then switches off.
5 Display
Filter saturation indicator
At regular intervals, the hood warns when the filters must be serviced.
Grease filter saturation indicator
The set speed and the letter "F" alternate on the display.
Carbon filter saturation indicator
The set speed and the letter "C" alternate on the display.
Reset of saturation indicator
In order to reset the saturation indicator, switch on the hood then press and hold button 1 for about 3 seconds.
Perform filter maintenance as recommended in this manual. In the event that both indicators of filter saturation “F” and “C” start flashing, proceed with the reset twice.
The saturation indicator of the charcoal filter is not normally active and if the hood is used in the recirculation mode, it must be activated manually the first time.
Activation of the charcoal filter saturation indicator:
Turn off the hood and simultaneously press buttons 2 and 3 for 3 seconds.
The letters “F” and “C” will flash on the display for 2 seconds, to indicate successful activation of the saturation indicator of the charcoal filter.
Deactivation of the charcoal filter saturation indicator:
Turn off the hood and simultaneously press the buttons 2 and 3 for 3 seconds. Only letter “F” will flash on the display for 2 seconds, to indicate successful deactivation of the saturation indicator of the charcoal filter.
Temperature Alarm
The hood is equipped with a temperature sensor which activates the motor at speed 3 in case the temperature in the display zone is too high.
The alarm condition is indicated by the display with the letter "t" flashing.
This condition remains as such until the temperature falls below the alarm threshold.
This mode can be quit by pressing key "2".
Every 30" the sensor checks the ambient temperature of the display zone.
5.1 Hob ^2 Hood
The hood is equipped with a function for wireless connection with the cooktop for automatic adjustment of the most suitable speed. Refer to the instruction manual of the cooktop to verify the presence and compatibility of this function.
In the case of first connection to the mains or abrupt disconnection from power supply (blackout), wait 1 minute to allow the hood to restore the connection with the cooktop.
6. LIGHTING
The hood is equipped with a lighting system based on LED technology.
The LEDs guarantee an optimum lighting, a duration up to 10 times as long as the traditional lamps and allow to save 90% electrical energy.

Caution! Do not look directly into the LED light.
To replace lights, contact authorised spare part center.
www.electrolux.com/productregistration

natural_image
Illustration showing two hand positions: one holding a tool, the other holding a card (no text or symbols present)text_image
Diagram illustrating a folding or locking mechanism with labeled parts and hand holding a lock5. BEDIENELEMENTE
natural_image
Illustration showing two hand positions: one holding a tool, the other holding a card (no text or symbols present)text_image
Diagram illustrating the installation of a device with lock and lock-in, showing hand positioning and assembly steps.5. COMMANDES
www.electrolux.com/productregistration

natural_image
Illustration of two hands using a tool to adjust or install a component, with no visible text or symbols.4.2 NIET wasbaar koolstofffilter
text_image
Diagram illustrating a device lock operation with labeled components and hand holding a lock5. BEDIENINGSELEMENTEN
natural_image
Illustration showing two hands holding a tool, one with a pointed tip and the other holding a small object (no text or symbols present)text_image
Diagram illustrating a device lock operation with labeled components and hand holding a lock5. MANDOS
www.electrolux.com/productregistration

natural_image
Illustration showing two hand positions: one holding a tool, the other holding a small object (no text or symbols present)text_image
Diagram illustrating a lock mechanism with labeled components and hand holding a key5. COMANDOS
www.electrolux.com/productregistration

natural_image
Illustration showing two hand positions: one holding a tool, the other holding a card (no text or symbols present)text_image
Diagram illustrating a lock mechanism with labeled components and hand holding a key5. COMANDI
www.electrolux.com/productregistration

natural_image
Illustration showing two hand positions: one holding a tool, the other holding a small object (no text or symbols present)text_image
Diagram illustrating a folding or locking mechanism with labeled parts and hand holding a key5. KOMMANDON
www.electrolux.com/productregistration

natural_image
Illustration showing two hand positions: one holding a tool, the other holding a paper (no text or symbols present)4.2 KKE vaskbart aktivt kullfilter
text_image
Diagram illustrating the step-by-step installation of a device with lock and padlock, showing hand holding key components.5. KONTROLLER
www.electrolux.com/productregistration

natural_image
Illustration showing two hand positions: one holding a tool with a blade, the other holding a small object (no text or symbols present)text_image
Diagram illustrating a door lock mechanism with labeled components and hand holding a lock5. OHJAIMET
www.electrolux.com/productregistration

natural_image
Illustration showing two hands holding a tool, one with a knife and the other holding a paper (no text or symbols present)text_image
Diagram illustrating a folding or locking mechanism with labeled components and hand holding a key5. BETJENING
natural_image
Illustration showing two hand positions: one holding a tool, the other holding a small object (no text or symbols present)text_image
Diagram illustrating the step-by-step installation of a device with lock and lock-in, showing hand holding keywww.electrolux.com/productregistration

natural_image
Illustration showing two hand positions: one holding a tool, the other holding a card (no text or symbols present)4.2 MITTEPESTAV aktiivsöefilter
text_image
Diagram illustrating a folding or locking mechanism with labeled components and hand holding a key5. JUHIKUD
www.electrolux.com/productregistration

natural_image
Illustration showing two hand positions: one holding a tool, the other holding a card (no text or symbols present)text_image
Diagram illustrating a folding or locking mechanism with labeled components and hand holding a key5. VADĪBAS ELEMENTI
natural_image
Illustration showing two hands holding a tool, one with a pointed tip and the other holding a small object (no text or symbols present)4.2 Neplaunamas aktyviosios anglies filtras
text_image
Diagram illustrating a folding or locking mechanism with labeled components and hand holding a key5. VALDYMAS
www.electrolux.com/productregistration

natural_image
Illustration showing two hand positions: one holding a tool, the other holding a small object (no text or symbols present)text_image
Diagram illustrating a folding or locking mechanism with labeled parts and hand holding a keynatural_image
Illustration showing two hands holding a tool, one with a pointed tip and the other holding a flat object (no text or symbols present)text_image
Diagram illustrating a device lock operation with hand holding a lock and lock switch, showing step-by-step assembly and lock mechanism.5. KEZELŐSZERVEK
natural_image
Illustration showing two hands holding a tool, one with a pointed tip and the other holding a small object (no text or symbols present)text_image
Diagram illustrating a lock mechanism with labeled components and hand holding a key5. PŘÍKAZY
www.electrolux.com/productregistration

natural_image
Illustration showing two hand positions: one holding a tool with a cutting edge, the other holding a small object (no text or symbols present)text_image
Diagram illustrating a folding or locking mechanism with labeled parts and hand holding a key5. OVLÁDAČE
www.electrolux.com/productregistration

Use the correct length for the screws which are identified in the Installation Guide.
natural_image
Illustration showing two hand positions: one holding a tool with a triangular ruler, the other holding a square object (no text or symbols present)4.2 Filtru cu carbon activ NElavabil
text_image
Diagram illustrating a folding or locking mechanism with labeled components and hand holding a key5. COMENZI
www.electrolux.com/productregistration

natural_image
Illustration showing two hand positions: one holding a tool, the other holding a card (no text or symbols present)text_image
Diagram illustrating a folding process with lock mechanism and hand holding key5. STEROWANIE
www.electrolux.com/productregistration

Kupovinu dodatne opreme, potrošnog materijala i originalnih rezervnih dijelova za vaš uređaj:
www.electrolux.com/shop
BRIGA ZA OKOLIŠ
Reciklirajte materijale sa simbolom 📋. Ambalažu za recikliranje odložite u prikladne spremnike.
Pomozite u zaštiti okoliša i ljudskog zdravlja, kao i u recikliranju otpada od električnih i elektroničkih uređaja. Uređaje označene simbolom ☒ ne bacajte zajedno s kućnim otpadom. Proizvod odnesite na lokalno reciklažno mjesto ili kontaktiraje nadležnu službu.
BRIGA O KUPCIMA I SERVIS
natural_image
Illustration showing two hand positions: one holding a tool, the other holding a small object (no text or symbols present)4.2 Aktivni karbonski filtar koji se NE može oprati.
Zasićenje karbonskog filtra se pojavljuje poslije manje-više produljene uporabe s obzirom na tip kuhinje i na urednost u čišćenju filtera za uklanjanje masnoće. U svakom slučaju je potrebno zamijeniti kartušu barem svaka četiri mjeseca.
text_image
Diagram illustrating the step-by-step installation of a device with lock and unlock components, including a hand holding a key.5. NAREDBI
natural_image
Illustration showing two hand positions: one using a tool to cut a component, the other holding a small object (no text or symbols present)4.2 Nepralni filter z aktivnim ogljem
text_image
Diagram illustrating a folding or locking mechanism with labeled components and hand holding a key5. UPRAVLJALNI GUMBI
com/productregistration

natural_image
Illustration showing two hands holding a tool, one with a pointed tip and the other holding a small object (no text or symbols present)text_image
Diagram illustrating a folding or locking mechanism with labeled parts and hand holding a key5. XEIPISTHPIA
natural_image
Illustration showing two hands holding a tool, one with a pointed tip and the other holding a square (no text or symbols)4.2 Yıkanamayan aktif karbon filtre
text_image
Diagram illustrating a device lock operation with labeled components and hand holding a lock5. KONTROLLER
www.electrolux.com/productregistration

Купете принадлежности, консумативи и оригинални резервни части за вашия уред:
www.electrolux.com/shop
ОПАЗВАНЕ НА ОКОЛНАТА СРЕДА
natural_image
Illustration showing two hand positions: one using a tool to cut a mechanical component, the other holding a small object (no text or symbols present)text_image
Diagram illustrating a folding or locking mechanism with labeled components and hand holding a key5. УПРАВЛЕНИЯ
www.electrolux.com/productregistration

natural_image
Illustration showing two hand positions: one holding a cutting tool and the other holding a flat object (no text or symbols)text_image
Diagram illustrating a device lock operation with hand holding a lock and lock switch, showing step-by-step assembly and lock mechanism.www.electrolux.com/productregistration

natural_image
Illustration showing two hand positions: one holding a tool, the other holding a small object (no text or symbols present)text_image
Diagram illustrating a door lock mechanism with hand holding a key, showing step-by-step assembly and lock state.5. КОНТРОЛИ
www.electrolux.com/productregistration

natural_image
Illustration showing two hand positions: one holding a tool with a blade, the other holding a small object (no text or symbols present)text_image
Diagram illustrating a device's internal structure and lock mechanism, showing hand positioning and lock state changes.5. KOMANDIMET
www.electrolux.com/productregistration

natural_image
Illustration showing two hand positions: one holding a tool, the other holding a small object (no text or symbols present)text_image
Diagram illustrating a folding process of a device with lock and padlock, showing step-by-step assembly and hand holding key.5. КОМАНДЕ
“C” “F” و “C” ” و “F” ” و “C” ”
text_image
Diagram illustrating a folding mechanism with lock and padlock components, showing step-by-step assembly and hand interaction.natural_image
Illustration of two hands holding a tool, one with a triangular handle and the other holding a square object (no text or symbols present)الاستعمال 2.
www.electrolux.com/productregistration