
TKG MG 1000 - Coffee machine KALORIK - Free user manual and instructions
Find the device manual for free TKG MG 1000 KALORIK in PDF.



| Product type | Coffee maker with integrated burr grinder |
| Brand | Kalorik |
| Model | TKG MG 1000 |
| Maximum capacity | 10 cups |
| Coffee type | Coffee beans or ground coffee |
| Grind settings | 5 fineness levels (from fine to coarse) |
| Aroma selection | Light, Medium, Strong |
| Programmable cup number | 2, 4, 6, 8 or 10 |
| Delayed programming | Yes, with built-in clock |
| Keep warm function | 2 hours, then automatic shut-off |
| Drip-stop system | Yes, automatic valve |
| Display | LCD with indicators (number of cups, aroma, timer, descaling, keep warm) |
| Filter type | Paper filter or permanent filter (depending on model) |
| Carafe material | Glass with handle |
| Hot plate | Yes, to keep coffee warm |
| Grinder cleaning | Every 2 weeks with the provided brush |
| Descaling | Every 70 cycles or depending on water hardness |
| Descaling indicator | Yes, indicator light |
| Automatic shut-off | After 2 hours in keep warm mode |
| Child safety | Not for use by children under 8 without supervision |
| Power | Electric, mains (appropriate voltage) |
| Included accessories | Small brush for cleaning the grinder |
| Maintenance | Clean removable parts with warm soapy water; not dishwasher safe |
| Repairability | Contact a qualified service center |
Frequently Asked Questions - TKG MG 1000 KALORIK
User questions about TKG MG 1000 KALORIK
0 question about this device. Answer the ones you know or ask your own.
Ask a new question about this device
Download the instructions for your Coffee machine in PDF format for free! Find your manual TKG MG 1000 - KALORIK and take your electronic device back in hand. On this page are published all the documents necessary for the use of your device. TKG MG 1000 by KALORIK.
USER MANUAL TKG MG 1000 KALORIK
Combi Coffee Maker / Grinding
- Control panel
- Grinding fineness selector
- Filter holder
- Release button for filter holder
- Coffee bean compartment
- Water tank lid
- Water level indicator of the water tank
- Glass jug water level indicator
- Hot plate
- Grinding compartment
- Small brush
- Steam hole
FR
- ON/OFF Switch
- Coffee powder mode selector switch
- Selector switch for number of cups
- AROMA button (Light/Medium/Strong)
- Programming button
- HOUR button
- MIN button
- LCD display
A. Indicator of number of cups
B. Aroma indicator
C. Timer indicator
D. Decalcification indicator
E. Keep warm indicator
FR
Please read these instructions carefully before using the appliance, and always follow the safety and operating instructions.
Important: This appliance can be used by children over 8 years old and people with reduced physical, sensory or mental capacities or with a lack of experience or knowledge if they have been given supervision or instructions concerning the safe use of the appliance and the risks involved. Children shall not play with the appliance.
Cleaning and user maintenance shall not be made by children unless they are older than 8 years and supervised. Never leave the appliance and its cord unsupervised and within reach of children less than 8 years old or irresponsible persons when it is plugged into the wall or when it is cooling down.
Check that your mains voltage corresponds to that stated on the appliance.
Never leave the appliance unsupervised when in use.
From time to time check the appliance for damages. Never use the appliance if cord or appliance shows any signs of damage. In that case, repairs should be made by a competent qualified electrician(*). Should the cord be damaged, it must be replaced by a competent qualified electrician(*) in order to avoid all danger.
- Only use the appliance for domestic purposes and in the way indicated in these instructions.
- Never immerse the appliance in water or any other liquid for any reason whatsoever. Never place it into the dishwasher.
- Never use the appliance near hot surfaces.
Before cleaning or storing the appliance, always unplug the appliance from the power supply and let it cool down.
Never use the appliance outside and always place it in a dry environment.
- Never use accessories that are not recommended by the producer. They could constitute a danger to the user and risk to damage the appliance.
- Never move the appliance by pulling the cord. Stand the appliance on a table or flat surface. Make sure the cord cannot

get caught in any way. Do not wind the cord around the appliance and do not bend it.
- Do not use your appliance if the carafe is cracked or broken. Use only the carafe delivered with your appliance. Attention: your carafe becomes hot during the use. Take it only by the handle.
- Never touch the hot parts of the appliance (be careful, also the warming plate is a hot part!), only touch the plastic parts and take the jug by the handle.
Make sure the appliance never comes into contact with inflammable materials such as curtains, textiles... when it is in use as they might catch fire. - When removing lime scale, only use special products for the removal of lime scale. Never use ammonia or any other substance that might damage your health.
Never use your coffee maker without water in it.
Important: never put the jug in a microwave oven to warm up the coffee. We will not take any responsibility if you do so.
Caution: the blades of the grinder are very sharp, pay attention not to get cut when manipulating them (cleaning).
Make sure your hands and/or any kind of utensil stay clear of the receptacle when the appliance is in use in order to avoid serious injuries.
You may use a scraper (to clean the blades) only when the appliance is unplugged. - Never touch the blade when the appliance is in use. Furthermore, never try to stop the movement of the blade in any way whatsoever.
Warning: potential injury from misuse.
Use the coffee grinder to grind roasted coffee beans only. Grinding other substances, such as nuts, spices or unroasted beans may dull the blade and cause poor grinding or injury. - Be careful not to get burnt by the steam escaping from the vent. Do not place cloths to cover the steam vent.
Never fill the water tank beyond the MAX level. Do not use your coffee maker in case of overflowing. - Never place the empty or almost empty glass jug on the warm plate when the coffee maker is in function, or on any other hot surface.
(*) Competent qualified electrician: after-sales department of the producer or importer or any person who is qualified, approved and competent to perform this kind of repairs in order to avoid all danger. In case of need you should return the appliance to this electrician.
FIELD OF APPLICATION/OF OPERATION
- Use the appliance for domestic purposes only and in the way indicated in these instructions.
- This appliance is intended to be used for domestic applications and similar applications such as:
Kitchen corners reserved for personnel in shops, offices and other professional environments.
Farms.
The use by clients of hotels, motels and other environments with a residential character.
Environments of the "bed and breakfast" type.
BEFORE THE FIRST USE
Remove all packaging, and check that no parts are damaged or missing. Read these instructions carefully!
Wash the removable parts in warm soapy water and dry thoroughly.
Wipe the appliance with a damp cloth.
When you use your appliance for the first time, pour fresh water into the water tank and switch on the appliance (without coffee).
Once all the water has passed through, switch the appliance off and let it cool down. When it is cold enough, repeat the process with fresh water. Repeat this process 3 times.
Your appliance can only be used/programmed when the LCD display is illuminated. If the display is not illuminated, press any key to illuminate the display and start using/ programming the appliance.
Caution: during use, hot steam may escape from the steam vent, stay away from this steam vent in order not to get burnt and never cover this steam vent.
SETTING THE CLOCK
Plug in your coffee maker. The LCD display will light up to indicate that you can set the clock.
- Then press the HOUR button to set the hours, and the MIN button to change the minutes.
- By each impulse on one of those buttons, the hour or minutes will increase by 1 unit but if you keep the pressure, the time will roll forward more quickly.
- When the clock is set, you can use your appliance.
- Later on you can adapt the time at any moment simply by pressing the HOUR and MIN buttons when the LCD display is lit.
Your appliance can be used with coffee beans or coffee powder.
The regular setting is for a use with coffee beans, but after each use your appliance will keep your last choice in its memory. If you unplug the appliance, the memory will be erased and the appliance will be on the regular setting again.
PREPARATION OF COFFEE WITH COFFEE BEANS
- Open the lid of the water tank.
- Pour the desired amount of water into the water tank. Make sure not to overfill by using the glass jug only to pour the water.
Attention: never fill the water tank with more water than for the number of cups you want, because your appliance will only stop when the water tank is empty.
- Close the lid of the water tank.
- Fill the coffee bean compartment completely with coffee beans and put the lid of the compartment correctly back in place.
- Choose the type of grinding you desire with the grinding fineness selector (5 choices from "fine" to "coarse").
- Check that your appliance is in the "coffee mill" mode and not in the "coffee powder" mode. To do so, check that the indicator lamp of the coffee powder mode selector switch is not lit.
- Choose the number of cups you desire with the selector for the number of cups (2, 4, 6, 8 or 10).
- Choose the type of coffee you desire with the aroma selector switch (Light = MILD / Middle = MEDIUM / Strong = STRONG).
- Remove the glass jug from the hotplate. Press the release button of the filter holder. Swing the filter holder, insert a paper filter or permanent filter (depending on the model) in the filter holder. Please note: fold the bottom and the side edges of the paper filter in such a way that it fits perfectly in the filter holder. Replace the filter holder, making sure it is placed correctly. Always put the filter holder back into place before putting the jug on the hotplate, otherwise the anti-drip system will disturb you when doing so.
- Never forget to close the lid of the jug before putting the jug on the hotplate.
- Switch on the coffee maker with the ON/OFF switch. The pilot light of the switch will be illuminated, indicating that your appliance works. Your appliance will first grind the necessary amount of coffee beans and then it will brew the coffee.
- When the coffee stops flowing, you will hear 3 beeps, the keep warm indicator lamp will start flashing and the appliance goes to the keep warm mode for 2 hours before it switches off automatically.
- When you remove the jug from the appliance, a non-drip valve will automatically operate to stop any drops of coffee dripping onto the hotplate. Replacement of the carafe automatically opens the non-drip valve and allows remaining coffee to filter through into the jug.
- Wait until the brewing process is finished and the filter has run empty before removing the jug.
PREPARATION OF COFFEE WITH COFFEE POWDER
- Open the lid of the water tank.
- Pour the desired amount of water into the water tank. Make sure not to overfill by using the glass jug only to pour the water.
Attention: never fill the water tank with more water than for the number of cups you want, because your appliance will only stop when the water tank is empty.
- Remove the glass jug from the hotplate. Press the release button of the filter holder. Swing the filter holder, insert a paper filter or permanent filter (depending on the model) in the filter holder and add the desired quantity of ground coffee (1 teaspoon per cup, approximately 6g). Please note: fold the bottom and the side edges of the paper filter in such a way that it fits perfectly in the filter holder. Replace the filter holder, making sure it is placed correctly. Always put the filter holder back into place before putting the jug on the hotplate, otherwise the anti-drip system will disturb you when doing so.
-
Never forget to close the lid of the jug before putting the jug on the hotplate.
-
Never forget to close the lid of the water tank before switching on your coffee maker.
- Check that your appliance is in the "coffee powder" mode and not in the "coffee mill" mode. To do so, check that the indicator lamp of the coffee powder mode selector switch is lit.
- Switch on the coffee maker with the ON/OFF switch. The pilot light of the switch will be illuminated, indicating that your appliance works.
- When the coffee stops flowing, you will hear 3 beeps, the keep warm indicator lamp will start flashing and the appliance goes to the keep warm mode for 2 hours before it switches off automatically.
- When you remove the jug from the appliance, a non-drip valve will automatically operate to stop any drops of coffee dripping onto the hotplate. Replacement of the carafe automatically opens the non-drip valve and allows remaining coffee to filter through into the jug.
- Wait until the brewing process is finished and the filter has run empty before removing the jug.
PROGRAMMING THE COFFEE MAKER
-
You can programme your coffee maker to brew fresh coffee at a preset time, both in the coffee powder mode and in the coffee mill mode.
To do so, proceed as follows: -
Make sure the coffee maker's clock is set to the right time.
- Press on the programming button until the timer symbol flashes.
Press the buttons for the hours and the minutes to set the desired brew time. -
When the brew time is set, and as the timer symbol is flashing, choose the coffee powder mode or the coffee mill mode.
-
If you choose the coffee mill mode (indicator lamp of the coffee powder mode selector switch off), select the number of cups and the desired aroma and confirm the programming by pressing the programming button. The timer symbol will then be steadily illuminated.
-
If you choose the coffee powder mode (indicator lamp of the coffee powder mode selector switch lit), confirm the time programming directly by pressing the programming button. The timer symbol will then be steadily illuminated.
-
Once the programming has been confirmed, the LCD display shows the actual time again. If you have chosen the coffee mill mode, the LCD display will show the number of cups and the aroma of the last use and not the ones of your programming once the clock mode is back. Do not worry as long as the timer symbol is lit, the programming is well registered.
Attention: if you do not confirm the programming or if you do not press any key within 7 seconds, the brew time will be saved in the memory but the coffee maker will not be in the programming mode.
- Pour the right amount of water into the water tank, put a filter into the filter holder and add coffee powder (into the filter) or coffee beans (into the coffee bean compartment) according to your programming choice. In both cases, the procedure is the same as for a manual use except that you do not have to press the ON/OFF switch.
- When your preset brew time is reached, the coffee maker will start its brew cycle in the same way as with the manual use.
- As with the regular brew cycle, an automatic two-hour keep-warm cycle will commence after your coffee maker has finished brewing. When the 2 hours are over, the coffee maker will automatically shut itself off.
- If you wish to delete a programming, press the programming button until the timer symbol goes out.
DECALCIFICATION AND CLEANING
Before cleaning or maintenance, turn off the appliance, unplug it and let it cool down.
- The cover of the coffee bean compartment, the filter holder, the carafe and carafe lid can be cleaned in a solution of warm water and mild liquid soap. Dry them well before putting them back in place.
- The coffee maker can be cleaned using a damp cloth. Never immerse the body of your coffee maker in water or any other liquid. Never use abrasive cleaning products or solvents.
Reassemble the different parts of the appliance correctly before storing it in a dry place.
- Decalcifying the coffee maker prolongs its life span. For decalcification only use products especially made for the decalcification of coffee makers.
- Never use a dishwasher to clean the jug. Just clean it in soapsuds.
CLEANING OF THE GRINDER
To maintain a good functioning of your appliance we advise you to clean the "grinder" every 2 weeks.
- Before cleaning the "grinder", first clean the appliance, then put a new filter in the filter holder, check if the filter holder is well in place and close the filter holder compartment again.
- Remove the lid of the grinding compartment. To do so, press with a fine object on the plastic part situated in the opening of the lid and slide the lid backwards.
- Clean the grinding compartment with the small brush and then put the lid correctly back in place.
If necessary, empty the ground coffee that has fallen into the filter.
DECALCIFICATION
Your appliance has to be descaled at least after each cycle of 70 uses. If you leave your appliance plugged in permanently, the decalcification indicator will flash when it is time to descale your appliance.
If the water in your region is hard, it may be necessary to descale your coffee maker more often.
Always clean the appliance before decalcifying it.
Make sure that the grinding function is not activated.
- For decalcification, only use products especially made for the decalcification of coffee makers and follow their instruction manual carefully.
- Place the carafe on the warming plate.
Plug in the coffee maker and then press the ON/OFF key.
- When the water tank has emptied, switch off the coffee maker and empty the carafe.
- Rinse the coffee maker two or three times by repeating the above process (with the water tank filled up to the maximum level) using cold water only.
Once the decalcification is terminated, and if the decalcification indicator is lit, press the selector switch to choose the number of cups and the aroma selector switch simultaneously and keep both buttons pressed until the decalcification indicator of the display disappears.
PRACTICAL HINTS
When you notice that the coffee making process is longer than it should be, it is probably time to decalcify the appliance. Do not wait until the situation gets worse. The decalcifying frequency depends on the amount of lime in the water and therefore can be different from family to family. Therefore it is important to pay attention to this. A good maintenance of your

appliance will prolong its lifespan. Guarantee claims will not be accepted for the replacement of a heating element full of scale.
PROTECTION OF THE ENVIRONMENT - DIRECTIVE 2012/19/EU
In order to preserve our environment and protect human health, the waste electrical and electronic equipment should be disposed of in accordance with specific rules with the
implication of both suppliers and users. For this reason, as indicated by the symbol on the rating label or on the packaging, your appliance should not be disposed of as unsorted municipal waste. The user has the right to bring it to a municipal collection point performing waste recovery by means of reuse, recycling or use for other applications in accordance with the directive.
The user manual is by simple request also available in electronic format from the after-sales service (see warranty card).
| Problem | Solution |
| The appliance does not work. | Make sure the voltage indicated on the appliance corresponds to the local mains voltage. |
| Make sure the appliance has been plugged in & switched on. | |
| Water leaks out of the appliance. | Check if the water tank is filled beyond the MAX level. |
| The appliance produces a lot of noise during working. | Make sure the water tank is not filled with hot water. |
| Make sure the appliance is standing steadily on a stable, flat surface. | |
| The appliance needs to be descaled (see chapter ‘Descaling’). | |
| Coffee grounds enter into the jug. | Or the jug has not been placed correctly under the grind & brew basket. |
| Or you removed the jug for more than 30 seconds during brewing. | |
| Brewing coffee takes longer than usual. | The appliance needs to be descaled (see chapter ‘Descaling’). |
| The coffee maker switches off before the water tank is empty. | The appliance needs to be descaled (see chapter ‘Descaling’). |
| Coffee grounds enter into the jug. | Or the jug has not been placed correctly under the grind & brew basket. |
| Or you removed the jug for more than 30 seconds during brewing. | |
| The coffee does not taste good. | Check if you leave the jug with coffee on the warm plate too long, especially if it only contains a small amount of coffee. |
| The coffee is not hot enough. | Check if the brewed coffee is too little. The coffee will warm longer if you brew more. |
| Make sure you place the jug properly on the warm plate. | |
| The jug is difficult to place in the appliance or remove from the appliance. | Make sure the lid of the jug & filter basket are in right position. |
| Tilt the jug a little to place or remove it. Be careful not to spill the hot coffee to avoid scalding. | |
| There is less coffee in the jug than expected. | Check if you have not placed the jug properly on the warm plate, so that the anti-drip valve prevents the coffee from flowing out of the filter. |
| The appliance needs to be descaled (see chapter ‘Descaling’). |

MODE D'EMPLOI
POUR VOTRE SECURITE
KOFFIE ZETTEN MET KOFFIEPOEDER
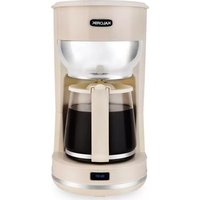
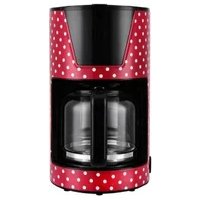
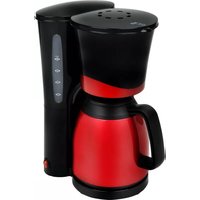
- Combi Coffee Maker / Grinding
- FR
- FIELD OF APPLICATION/OF OPERATION
- BEFORE THE FIRST USE
- SETTING THE CLOCK
- PREPARATION OF COFFEE WITH COFFEE BEANS
- Attention: never fill the water tank with more water than for the number of cups you want, because your appliance will only stop when the water tank is empty.
- PREPARATION OF COFFEE WITH COFFEE POWDER
- PROGRAMMING THE COFFEE MAKER
- Attention: if you do not confirm the programming or if you do not press any key within 7 seconds, the brew time will be saved in the memory but the coffee maker will not be in the programming mode.
- DECALCIFICATION AND CLEANING
- CLEANING OF THE GRINDER
- DECALCIFICATION
- PRACTICAL HINTS
- PROTECTION OF THE ENVIRONMENT - DIRECTIVE 2012/19/EU
- MODE D'EMPLOI
- POUR VOTRE SECURITE
- KOFFIE ZETTEN MET KOFFIEPOEDER
Brand : KALORIK
Model : TKG MG 1000
Category : Coffee machine