
GE73A - Microwaves SAMSUNG - Free user manual and instructions
Find the device manual for free GE73A SAMSUNG in PDF.
User questions about GE73A SAMSUNG
0 question about this device. Answer the ones you know or ask your own.
Ask a new question about this device
Download the instructions for your Microwaves in PDF format for free! Find your manual GE73A - SAMSUNG and take your electronic device back in hand. On this page are published all the documents necessary for the use of your device. GE73A by SAMSUNG.
USER MANUAL GE73A SAMSUNG
IpeDCTaBeTe CN Bb3MOXHOCTNTe
Благорам Ви захуваиму Тозиnpolyкт ha Samsung. 3a Да почпente no-ньнообслuyквае, ретисрраite npolykta си Ha
www.samsung.com/register
SAMSUNG
KAK CE IN3NOJ3BA TA3N KHJXKA C INHCTPYKLIM
Toky-uzo CTe cn KyuNlMnKpOBbJHOBaФyphA SAMSUNG. BaUInTe "VHCTpykUm 3a Co6ctBeHnka" cbIbpxat ZeHHa INHΦopMaunz 3a rotBeHe CBaUATA MKNpOBbJHOBaФyphA:
- Меркп no 6e3oNaChOCT
- PóJxOJaIπ npiHaJIeXHOCHTn I rOToBapCKn CbIOBe
- Poinje3Hn roTbapcKn cBBeTN
CbBETn3a rotBeHE
JIIEHDA HA CIMBOJNTE INIKOHNTE

PPEyPPEKDEHNE

BHIMAHNE
Puckobe Nn Hebe3oNa cha npakTnka, KoTo M0Ke Da NoBede Do TeKko HapaHyaBe Nn CmBpT Ha Niua.
PnCKOBe IIN HebeONaCha npakTnka, KOYTO MOKe Da DoBede No JIeKO HapAHaBaHe IIN NOBPeDa HA NmUySeCTBO.

IpeDynpexKdHne; onachOCT OT noXap

IpeDynpexkdeHne;ropea nOBbpxHOCT

PpeDynpexdene; eNeKtpnHeCTBO

PpeDynpexKdeneH; ekCnIO3INBeH MaTePnAa

HE ce onitbaite.

HE ninaTe.

HEpa3rno6raIte.

CleBaiTe n3pHNO yKa3aHnTa.

13BaTeIeIeNcEHa 3axpaHbAHeTO OKTaKaTa.

Ybepete ce,Ye ypeBt e 3a3eMeH,3a Da n36BerHeTe TOKOB ynap.

ObaTe Ce B cepBn3a 3a nOMO.

3a6eJekka
BAKHN HNCTPYKLUN 3A BE3ONACHOCT
ПОНЧETЕ BHIMATEЛно И ПАЗТЕ 3АБъДELЦСРAPВКИ.
YBepTe Ce, Ye Te3n npedna3Hm MepKn Ce
Cπa3BaT NO BcKaO BpeMe.
TOrBeHe/IIpeToJIaHe 15
HnBa Ha MOLUHOCT. 16
CnpaHe Ha rotBeHeto. 16
Hacpoika Ha BpeMeTo 3a roTbeHe. 16
U3no3BaHe Na yHKnIyTa 3a MOMeHTaHIO npTeONJIYe/rotBeHe.17
HactpoiK 3a MOMeHTaJIHo npTeOpJIHe/rotBeHe 17
I3noJI3BaHe Na cyHKUyraTa 3a aBTOMaTNUHO yCKopeHo pa3Mpa3RaHe..18
HactpoiK3a aBTOMaTHNo 6b30 pa3Mpa3BaHe 18
Пechени Гра.. 19
KombiniipaneHa MmKpoBbJHnI rpiJ 19
MhoroetanHO roTbeHe 20
I36op Ha npHaJdxKHOCTn. 20
I3KJIouBaHe Ha 3BykOBnCnHaJ. 21
3aKJIIOUBAHe 3a 6e3ONaCHOCT Ha BaIaTa MInKpOBbJIHOBa fypHa .........21
Yka3aTeI 3a roTbapckn cIIOBe 21
PbKOBOCTBO 3a roTbeHe 22
Kak da noctbnte, ako ce cblmhaBe nJIn mAte npo6JeM. 29
YKA3ATEJ3AБbP3N CπPABKIN
Ako mckaTe da croTBte xpaHa.
1.ПoctabeteхpaHATAвБфypHATA.ИЗбетeНиВОТHaMOUHOCT,KaTOHaTINCHETe6byToHaPowerLevel(HnBOHaMoUHOCT)EDINJIINIOBEYeIbTI.
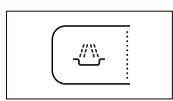
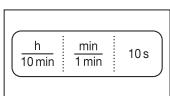
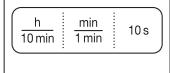
2.ИЗбете Врет氧Та Говен,КATOНATИСЧETe 6уTOHITe 10 min(10 MnH.),1 min(1 MmH.) 1U1 10s(10 cek.), KaKTo e HeOБхODIMO.
3. Hatnichete 6ytoHa Start (CTapT) () .
Pe3yntar:
TOTBeHETO 3anoHbA.
ФурнатиЗдава 3ВуКВСИгнал YETINПБТИ,KOraTO rOTBeHETO 3aBbPUsI.
Ako nckate da pa3mpa3nte xpaHa.
- NocTabete 3ampa3eHaTa xpaHa BbB fypHaTa. HaTncHe 6byToHa Rapid (6bp30) (串) eINH INI INOBeHe nTn CnpoEd Tnna XpaHa 3a pa3mpa3BaHe.
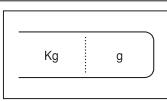
2.Изберете TerlOTO,катоHaTиСHTe 6уTOHITe kg (kr) n g (rp) KOJIKOTO e Heo6xOДМо. - Hatnichete 6yToHa Start (Ctapt) (念)


Ako nckaTe da no6abnte dobnHnHTeHa MNHyta.
Octabete xpaHATA BvB cyphata.
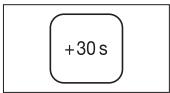
HaTnCHTe +30s eIN Hnn NIOBEe TbTN -3a BCEKn 30 cekyn, KOINTXKeNAeTe da noabite.
GE73A-BOL_DE68-04050B-04_BG.indd 12
Ako nckaTe da neyeTe xpaHa Ha rpnJ.
1.ПолгриTe Гиla до Heob6xOДммаТ Temпepатура, KaTO HATINCHETe 6byToHa Grill (PnU) (UJ), HAcTpoIka HaВрeme (10 min (10 mIn.) , 1 min (1 mIn.) n 10s(10ceK.) n 6byToHa Start (CTapT) (◇).

- IocTabete xpaHata Bbpxy ckapata BbB cyphnata. HATNCHEte 6yToHa Grill (Tpnl) (UN). N36epete BpeMeTO 3a rOTBeHe, KATO HATNCHEte 6yTOHInTe 10 min (10 MmH.), 1 min (1 MmH.) n 10 s (10 cek.).
- HatncheTe 6yToHa Start (CTapr) () .

ПИHAДLEЖHOCTN
B 3aBnCmOCT OT MoJeIa, KOIT OTE 3aKynIIN, NOnyUaBaTe HraKoJIKO npHaIeXHcOCTN, KOIT MOrAT Da CE I3NoI3BaT NO paZInHn HaHN.
- POKOB npbcteh, 3a NOCTaBHe B cHTbpa Ha cyphHata.
Bpemeto cnoKo3Ba BnHa, KOrato He nI3No13BaTe MmKpOBbIHOBata pfpyHa.

KAK PABOTI EDHA MINKPOBJIHOBA OFPHA
MnKpOBbJHInTe ca BnCOKOcEctOTHn eNeKtpOMaHnTHn BbJIHn; OCBO6OxJaBaHaTata eHeprna Daba Bb3MOXHOCT 3a rOTBeHe nI npetOpIIHe Ha xpaHa 6e3 npomHa Ha fopMaTa nIIN cBeta. MoXete Da n3nO13BaTe MmKpOBbJHOBaTa cn dpyHa 3a:
Pa3mpa3raBaHe
MOMeHTaJIHo npeToTJIaHe/rotBeHe
TOTBeHe
PnHnH Na roTBeHe.
- Cb3daabaHnte O MaHHTPOHa MmKpOBbJIHn Ce pa3PiocTpaHЯBat paBHOMepHO npi BbPteHeTo Ha xpaHaTa BbPxy BbPTaata Ce nOCTaKa. 3aTOBa XpaHaTa Ce rOTBn paBHOpHNo.
- Мкровьлнite ce abcopbupat ot xpaHATA do nb6OuHa OT OKOLO 1 nH (2,5 cm). CJIeT TOBa roTBHeTe IpoDbIxkaba, KaTO TOnJIiHaTa ce pa3CeBbA B xpaHata.
- BpemeHaTa 3a roTBeHe CE npOMEHrB CbOTBETCTBnE C nI3IJI3BaHnCbI N CBOYCTBaTa Ha xpaHata:
KolnuectBOu nIbTHOCT
CbIbpxKaHHe Ha BOna
- Haayala TempeaTpya (OT XlaaninHnK nIn He)
Tbкato cHTbPbT ha xpaHATA ce ROTBn OT pa3ceBaHaTAt OToJIHnA, rotBeHETo npOdbIaXaba DOpN KORATO CTe IMBaDmIn XpaHATAOT fpyHATA. 3aToBA TpRbBa da Ce cna3BaT NOcOeHNTe BpeCNTte N B Ta3n6poUpa BpeMeHa 3a npeCTo, 3a da CE rapaHTnpa:
PaBHomepHo roTbeHe Ha xpaHaTa TOHOb LcHTbpa
- Edha n cbsa TempepaTpa B CyaIaTa XpaHa


ПЮВЕРКА ДAJIN BALIATA ФУРHA PABOTN ПРавиЛно
CneBdaaata npocTa npoueypa Bn daBa Bb3MOXHOCT da npOBepnte daan paobotn bauata fpyHa npabuHNO pree cIaIOTo Bpeme. OTbOpete bPaTHcKaT, kaTO hATNCHETe TOLEMN 6yTOH B DOHNH DECEH TbJH Na KOMaHDoHO TaNo.
Пьрв поставе Куна с Ворады вьрху вьртуцата с поства. След това 3атовете вразчкata.
- Hatnche 6ytoHa Power Level (Hnbo Ha MouchoT) n3aaiTe BpemTo Ha 4-5 MInTu C Hatackae Ha 6ytoHa 1 min (1 mN) CbOTBeTHnB 6poiPiTu.

- Hatnche 6yToHa Start (CTapT) () .
Pezynat:
Moxete da n36bpaate n3mexdy HnBaTa Ha MOUHOCT NO-DOny.
HINBA HA MOUHOCT
| Ниво на мошист | Мошист | |
| МИКРОВьЛHOВА ΦУРHA | ГРИЛ | |
| ВИСΚΟΚΟ | 750 W | - |
| СРЕДно ВИСΚΟΚΟ | 600 W | - |
| СРЕДно | 450 W | - |
| СРЕДно НИСΚΟ | 300 W | - |
| РAZМРАЗЯBAHЕ(ББ) | 180 W | - |
| НИСΚΟ / ПОДДыРЖАЕ HA TОПЛЮ | 100 W | - |
| ГРИЛ | - | 1100 W |
| КOMБИ I (ББ-и) | 600 W | 1100 W |
| KOMБИ II (ББ-и) | 450 W | 1100 W |
| KOMБИ III (ББ-и) | 300 W | 1100 W |
Ako n36epete no-BnCOKHOHBO Ha MOuHocT, Tp6Ba Da ce HamaJIIN BPEMeTO 3a rOTBeHe.
Ako n36epeTe NO-HNCKO HnBO Ha MOUHOCT, Tp8Ba Da ce yBENuBPEMeTO 3a rOTBeHe.
CINPAHE HA FOTBEHETO
Mожete Да сипраTe roТBEнeto NO BCЯКО Врeme, 3a Дa поверяВаTe xpaHata.
- 3a da cnpete BpeMeHHO; OTBopete BpaTnKata.
Pezynta: TOTBENETO Cnnpa. 3a da noDHOBnTe
TOTBEHETO,3aTbOpTe BpatnUkKaTIN
HATMCHETOTHOBO6yTOHa Start (Ctapr) (口)

- 3a da cnpete HaTbJHo; HaTmChTe 6yToHa Stop (CtOn) (⑦).
Pe3yntar: TOTBeHToCnIPA.
Ako XeJaeTe Da OTMeHInTe HAcTpoiKnTe
Ha rotBeHe, HATnCHeTe 6yToHa Stop (Cton) () OTHOBO.
Mozhe Ta OTMHeHTe BcKa HAcTPOKn N InpEn 3aOpBaHe, KaTo npocTo HaTNCHe6bTOHa Stop (CtOn) ().
HACTPOIKA HA BPEMETO 3A FOTBEHE
Moxete da ybeiHnite BpeMeTo ha rotBeHe, KaTo hAtncHeTe 6yToHa +30 s no BeHbK 3a BCEkN 30 cekyn, KOITpIbBa da ce doabAyt.
-
HataHcHe 6yToHa +30 s no BeHbX 3a BCEK 30 cekyni, KOIT TpIbBa da ce doabayt.
-
HatncheTe 6yToHa Start (CTapT) () .


N3ПОЛЗВАЕ HA ФУнКЦЯТА 3A MOMEHTAJHOPPETONЛЯНЕ/ГOTBEHE
Пи рункша Instant Reheat (Митновенприюне) Врето за rotbehе ce 3адaba abTomatucho.
Moxete da hactponite 6poa ha npocinnte, kato hataichete noxdxogia 6ytoh 3a MmHOBHeo npetopnlahe Heo6xoDmna 6poi TbTu.
Hai-hanped noctabete xpaHata B ceHTbpa Ha Bbptraata Ce noctabka n 3aTbopetBpattkata.
HaTmChTe 6yToHa Instant Reheat/Cook (MmHOBeNo npetOpIaHe/rotBeHe), KOITo NcKATE, Heo6xoJIMn8 6poi PtBtN.
Pezyntar: HATNCHEte 6byToHa Start (CTapr) () , 3a da 3anOHTe rotBeHeTo. Korato 3aBbPsH:
1)Фунатаиздама 3БУКЧETИРипьTN.
2) KpaHnIaT HaNOMHraUc CnHAn 3ByuN 3 nbTu. (no BEdNbJ HA BCaKa MmHyTa)
3) Ha dinçnPée ce nOKa3Ba OTHOBO TEKyUTo Bpeme.
Hanpimep: HaTnchete 6yToHa Drinks (Hanitkn) BeNbK, 3a da npTeonJIte eHa haua Kape. Bx. oIe noIpo6HocTn 3a cnpaBka TabIucaTa Ha cIeBaUaTa CTpaHInu.
V3non3BaIe caMo cBIOBe, KOInTo ca nOxOJaU 3a MmKpOBbHOBa OpyHa.
HACTPOIKN 3A MOMEHTAJIHO IPETONJIHE/TOTBEHE
B cneBaata TaTabnca ca daeHn 6 nporpaM 3a abTomatHNO npetOnIHe n rotBeHe, KOJIueCTBa, BpeMeHa 3a npctOJn CbOTBEHn npenOpBkn.
Ko6n (peXIM MKNPOBbJIHn I rPnI) 600 W (3XoJHa MOUHOCT)

V36epete noJxOJaIooT HNOBa HA MOUHOCT, KATO HAITNCHEe 6yTOHa Combi (KoM6n) OTHOBO, JOKaTO He CE NOKaXe CbOTBETHOTO HNOBa HMOUHOCTTa.
He moke da ce 3aanda temnepatypata Ha rpnna.
- 3aaiTe BpemTo 3a rotBeHe, KaTo HauChete6ytoHnTe 10 min (10 mH.), 1 min (1 mH.) n
10 s (10cek.). MaKcImaJIHOTo BpeMe 3a rOtBeHe e 60 MInHyTn.
- HatncheTe 6yToHa Start (CTapT) (公)
PezyntaT:
3aOuBa KOM6bHnPaHOTo rotBeHe. Korato 3aBbpln.
1)Фурнаиздама 3ВУК YeТиРи ПБТИ.
2) KpaHnIaT HanomHraUc CunHaI 3ByuN 3 nTn (no BeDhbX Ha MHyTa).
3) Ha dinçnPJIe CE nOKa3Ba OTHOBO TEKyUTo BpeMe.
MaKcImaJIHaTa MmKpOBbJIHOBa MoUHOCr 3a KOM6HnPaH MmKpOBbJIHOB peXIM I rplI e 600 W.


MHOFOETANHO TOTBEHE
MikpoBbJHOBaTa Bn cypHa MoKe Da ce npGpaMnpa 3a npNroTBxaPaHa Na Do TPN CTeNEH.
Hanpimep: KeJaTe pa3Mpa3BaHe Ha xpaHa n roTBeHe, 6e3 da Tpr6Ba Da n3KnOuBaTe HAcTpoiKnTe Ha cyPhaTa cIed BCEKN etan. Taka moKeTe da pa3Mpa3Nte n croTBnTe 500 rp. p6a Ha tpr etana:
Pa3mpa3raBaHe
TOTBeHeI
FOTBeHe II
MожеJa3aДaВаTe MEXdIy DBy-ИТPnEtanHOrToBHe. Ako 3aДaJIeTe TpIeTaNHO,ПьВИЯrEt an TpIe6BaJa e pa3MaPa3BaHa. He haTnCKaIte 6byToHa (◇),doKaTO He cTe 3aДaJIINФинIHЯ etan.
- HataChete 6yToHa Rapid (BbP3o) (串) BeHbX uIN IOBeHe nTn.

- 3aaiTe TERIoto, Kato HATINCHete 6yToHa kg (kr) n g (rp) cBoTBETHnA 6pOiPiTn (500 rp. B npImepa)

- HATUCHETe 6yToHa Power Level (HnBO Ha MouHocT).
PexIM Ha MInKpOBoBbJHn (I):
aKoE HeO6xOIMo,Im6epeTe HnBOTO Ha MOUHOC,TaKo HAtMCHETE OTHOB 6yTOHa Power Level(HuBO HaMOUHOC) eINH INI NOBEHe PtTn.(600W Bnpimepa)
- 3aДэнTe BpemTo 3a rOTBeH,KaTO HaTnCHeTe 6byToHnTe 10 min (10 mN),1 min (1 Mn) n 10s(10ceK)(4MHnyTNBpIMepa).
- HatncheTe 6yToHa Grill (Pn).
PekimHa prnil (II):
- 3aaiTe BpemTo 3a roTbeHe, KaTo HaTuChete 6yToHInTe 10 min (10 MnH), 1 min (1 MmH) n 10 s (10 cek) CbOTBETHnIbPoiPiBtN (5 MNHTu B npimepa).
(MakcmaHTo BpeMe 3a rpnI e 60 MNHyTuN.)
- HatncheTe 6yToHa Start (CTapT) () .
Pe3yntar:
TpTe peKIMa [pa3Mpa3BaHe n roTBeH(e,II)] ce 3bupat eINH cJeN dpYr. CnpeJ peKIMbT ha pa3Mpa3BaHe,

KoITo CTe N36pAln, FpyHATA N3dAba CnHrHa Na NIOBUNHaTBApeMa Hpa3Mpa3BaHe, 3a Da BN HAnOMH Da O6bPHeTe xpaHata. FpyHATA N3dAba 3BykOB CnHrHa YeTnpIbTNI, KORA TOFTOBEHETO 3ABpUIN.
KpaHnHT HAnOMHnIc nHnI 3ByuN 3 nbTn (No BeHbX Ha MHyTa).
Ha nCnJIe Ce nOKa3Ba OTHOBo TEkyIoo To BpeMe.
I3BOP HA IPNHADJIEXKHOCTN
I3nO3BaIe CbIOBe, IOnXoJUa 3a MmKpOBbIHOBa fpyHa. He n3NoJI3BaIe PIIaCTMaOCBn CbIOBe, YHIN, XApTHeH YuAa, KbpNt N T. H.
Ako Jeelaete Da n36peTe KOMbHnpaHna peKIM Ha rotBeHe (rpln IMKPOBbJHn), IN3IOJI3BaIte cAmO 6e3OpaCHn 3a MMKpOBBJHOba N oBkHOBeHaФyHNA.
3aNoobey Noopbo6Hoctn 3a NoDxOoJusIte rTOBAPCKn CBDoBe n npM6Opn Bxk.Yka3aTeNa 3a rTOBAPCKn CBDoBe h CTp.21-22.

N3KJIIOUOBAHE HA 3BYKOBNA CnHAAJ
MoxKeTe Da n3KIIIOuBaTe 3ByKOBnCINHaN, KOraTo MCKaTe.
- Hattichete 6byToHInTe Stop (CtoN) n Start (CTapr) (心) eHOBpeMeHHO.
Pe3yntat: ΦypHaTa He n3daBa 3ByKOB CnHaN pIn BCAKO HATNCKaHe Ha 6yToHa.


- 3aДаВКЛЮЧИТЕобраTHОЗББHEHETO,HaTиСHTe6byToHITe Stop (CtON) (念) n Start (Ctapt) (念) eHOBPemEHHO.
Pesynta:
ФурнатоТНОВ pa60TN CbC 3ByKOBIN CnTHaJI.

3AKJIIOUBAHE 3A B3OINACHOCT HA BALIATA MKNPOBBJHOBA ΦΥPHA
Baata MmKPOBbJHOBA fpyHa e Cha6dHa cbc CneuaHn HnporpaMa
"Be3oNaChOCT 3a Deuata", KOTo nO3B0JIyBa cyphata da 6bJe
"3akIIOHeHa", Taka Ye DeIaTa IIN Dpyr He3aIO3HaT C He Ja He MoKe Ja BkIOuOBaT CnyaHIO.
BcNk nIpeChn 3eJIeHcyu Tp8Ba da ce roTbT, KaTO ce n3NoJ3Ba bJIHaTa MOUHOCT Ha MmKPOBbIHOBata cypHa (750 W).
XpaHata m3o6u He e crotbeHa.
- PpabuHIO JI CTe HAcTPOUJIN TaIMepa N/WJN HaTINCHAN6byToHa(1)?
- 3aTbOpeHa JIe BpaTuKhKaTa?
He cTe IIN ppeTOBAPIN IN eNEKTPnueckata BepuIg n CTe IN3rOpIN INpeDna3nTEJN, IN IN CTe INPHyNDIN INPEKbCBAua da IN3KInOHy?
XpaHaTa e nn npeneueHa, nn HeDoneueHa.
VAŽNE SIGURNOSNE UPUTE
POMNO PROČITAJE I SPREMITE ZABUDUĆU UPOTREBU.
Pepdunpeybahe; ctpya

IpeynpeyBahe; ekCJIO3INBeMATEpjuan

HE obuayaje.

HE donipajte.

HE packjionybajte.

EknilnHTHO cneTe rnyaTcBata.

I3BaandeTo npnKnyOKOT 3a Hanojybahe OJ SInHnot ITeKepe.

Поберете дали мшинна e 3a3eMjHeа 3apani ИЗБЕНУВАБе Ha eЛЕКТРИЕн удар.

Повникajte Ге CBVCHNOT Четарза помош.

3a6eJeuKa
BAXHN BE3BEdHOCHN INHCTPYKcIN
ПОНТAJTE BHIMATEJIHO И 3AчУBAJTE ГуNTBOTO 3A KOPINCTEBE NOДИHA.
IotpyuTe ce noctoJano da rncsJeTe OBne Mepkn 3a 6e36eHocT.
PpeJa 3aOnuHete Ja ja KOpNCHTe neUkaTa, npoHTajTe n cIeTe rN cIeHNTE NHCTpyKcnn.

IPEyIPEyBAHcamoФункциja 3a MMKpo6paHOBn)

PNEpyPENEyBAHbE: Ako BpataTaNnIeNt 3a 3aTbopaBe ce OwTeHn, Neykata He TpeBa da ce yNtpe6yBa cde Odoeka He ce NoppaBn oD CTpHa Na KBaJIINKUBAHO JInCe.

PNEpyPENEYBAHbE: Pn3uHoe e nIaTa KOn He CE KOMTeHTHn Da BpWAt CepBnC NIn NoppaKa CO OTCTpaHyBaHe Ha KaNakOT KOJ OBO3MOxUBa 3aHTnTa OD MKNpO6paHObAta eHeprNiJa.

IPEyPDEYBAHe: TeuHcTte N OCTaHaTaTa XpaHa He Cmeat Da Ce 3aRpeBaat BO 3aTBoPeHN CaIOBn 3a Da He DoJne Do EKcNlO3nJa.

OBoj ypei e HameHET 3a KOpNCTeHbe cAmo Bo DOMaKInHCTBa.
2


PNEyPENEYBAHbE: Oo3Bolena e ynoTpe6a Ha pepHaTa oN cTpaHa Na deca 6e3 Hnd3op eINHCTBeHO BO CJIyaj KOra Ce daJeHn COOdBETn INCTpyKUIM 3a JeTeTO da MOKe da ja KaOpIcTN pePNaTa Ha 6e36eHn HauH N I DOKOLky ja pa3bnpa onaCHOCTa oN HePpABuInHa yNoTpe6a.
PPEyPDEyBAHbE: Oboj ypeJ moKe da ro KOpIcTat Deca Ha Bo3pact o8 n NobeKe rOuHn IInuCa CO HamaJIeHN cIN3NcK, CETINH INIM MeHTaJIHc CnOCo6HOCTn, HeIOBOJIHO NCKUChn INIM OByeHn IInuCa, DOKOLky NCTITE Ce NaIgJIeDyBaAT INIM CE DaIaT INCTpyKcIMn 3a KOpIcTeHe Ha ypeOT Ha 6e36eDen HauHn INM CE ObJacHa TMOKHnTE ONaCHOCTn. DeLata He TpeBa Da cN INrpaaT Co ypeOT. YIcTeHbEtO IN ODPxKyBaHbEtO ON CTpHa Ha KOpIcHKnOT He TpeBa Da r GO BpUaT Deca, OCBeH aKO Ce Ha BO3pact o8 rOOnHn INI NobeKe IN Ce HAnrJIeDyBaAaT.
KopncTeTe caIOBn NCKnyuHb HO HameHETN 3a ynoTpe6a BO MMkpO6paHOBn NeKN.
Kora 3aRpeBaTe xpaHa BO pIaCTnUH NJI XapTneH IN KECN, BHNMaBajTe Da He DojJe Do naiJeHe.
MikpoobanOBaTa neUka e HameHeTa 3a 3aIpeBaBeHa xpaHa nPiJaLoUc. CyuHBe xpaHa nnOblNeKa n 3aIpeBaBeHa NaIOJIoRn 3a TOnJIeBe, TOnJIInHKn, CyHrEpN, BnaXn aAluSTa N CInuHO MoKe Ja IpeDn3BnKa pN3NK OJ IOBpeDn, PAnJIe He nn IooKap.
Ako n36yBHe yad, nCKnycheTe ro ypeoT nnn npeKHeTe r HanojyBaHeto N octaBeTe ja BpaTaTa 3aTBOpHa 3a da Ce n3rache PnAmeHOT.
PNEyPENyBAHbE:3aRpeBaHeTo Ha TeuHOCTN BO NeYkata MoKe Da IOBeJe Do 3aIoUHeTo BpneHe, 3aTOa BHIMAbaje KORA paKyBaTe CO caIOT.
PNEyPENEYBAHbE: CodpxnHaTa Ha
UINuNbata N TeTnukte Co XpaHa 3a Deca Tpe6a
da Ce PpOMeuaat NIn IpOTpeCat N da Ce PpOBepi
TempePaTypa TpeD yNtpe6aTa, 3a HekoJ da He ce
n3rOpN.
Jajca co Jywna n TBpdo BapeHn jajca He Tpe6a da ce 3arpeBaat BO MInkpo6paHObata NeUka, bIeJKN MOKe Da eKcPNOIdnpaaT, Dypu N aKO neUkata NOBeKe He e BkIyueHa.
★ Ynctete ja neykaTa peoBHO n OTCTpaHete rN CNTe OCTaTOU OXpaHa.


HeodjxBaHcTo Ha neKaTa BO YnCTa COcto6a MoKe Da ja OHTeTn IOBpUnHaTa N da Ro paCnPe ypeDt Nn Da IpeDn3BnKa HecaKaHn OnPChN CNTyaU.
OBoj ypei He e HameHET 3a INCTaJIpaHe BO BOzILA OJ TINOT Ha KOM6N, KapaBaHN I CInuHO.
Upeot He e Hamehet 3a ynpotpe6a od ctpaHa Ha liuza (Bknyybajkn Deua) Co HamaIeHn Fm3nukn, CETNIHN IIN MEHTaJIHn CNOcoBHOCtN, HeIOBOJHO NCKYCNI INObUeHNI LIuca, OCBEN DOKOLKy ICTITE He CE NaIgIeYBaat IINI He IM Ce DaJeHIn IHCTpyKUnoD CTpHa Ha LiueTo ODROBOPHO 3a HNBHATA 6e36eHNoCT.
★ДeucaTATEpe6aJaCEHaIgIeIyBaAaT3aJaHeCINrpaaTco ypeIoT.
Ako Ka6eIOT 3a HanojyBaHBe e OuTeTEn, ToJ Mopa Da Ce 3aMeHN OJ CTpaHa Ha IpnI3BOiNTeIOT, CepBnCEpot NIN DpyrN KBaJIncPyBaHIn NLIca CO ZeJ Da CE N36ErHAT HeCaKaHn CnTyauCn.
PPEyPDEyBAHbE: TeuHOCTnTE nINN octaHaTata XpaHa He CMeat Da ce 3aRpeBaat BO 3aTBOpEHn CaIOBn 3a Da He DoJNe Do EKcPiO3NiJa;
UpeoT He Tpe6a da ce YnCTN IOp Mna3 BOJa.
Obaa neka Tpe6a da ce noctabn BO COoDbetHa Hacoka n BucnHa KOn Ke OBO3MOxKat JIeSeH npuctan Do BHaTpeShOCTa N DeJOT 3a ynpabyBaHe.
★Пре徳да ja уnotpeби-te neчka-ta 3a npВ пТ,пechката Треба да рабOTи CO BOДA BO pOK OД 10 мнHyтNi, п поэда се користN.
Ako neukkata co3daBa chyden 3Byk, MmPnc Ha 3aapanelno nIin nCnyuTa yad, BeDnauN3BaTe Te Iprnknyokot 3a HanojyBaHe n ObaPatete Ce do Hajbniicknot cepBnceH ueTap.
MmKpO6paHOBaTa NeUka TpeBa Da ce nocTaBn Ha NaUnH Ha KOJ pNkJyUOKOT Ke bIe IocTaNen.
Minkpo6paHObata neUka e HameHeTa 3a KopncTeHbe eINHCTBeHO Ha pa6OTHa Maca BO KyjHa n Taa He CMEe Da Ce NOCTaByBa BO OPMaH.
A I P E D Y N P E D Y B A H E
(cam0 fynkuija ha pepna) - n360pHo
PNEUPTPEYBAHbE: Kora ypeoT paobTu BO KOMbHnpan Pexm, DeaTa MOKe da ja yNtpe6yBaat NeKaTa cAmO pOd NaI3Op Ha BO3pacEn 3apaNi TempepaTypa Ta Koja ce ocNo6OyuBa.
3a Bpeme Ha yIopTe6bata anapaTOT ce 3aRpeBa. BHIMabajTe HeKoJ Da He DojNe BO KOHTAKT CO 3aRpeAHTE DeIOBn BO NeKhata.


PPEyPDEyBAHbE: OocTaNHTe DeNoBIMoKe Da ce 3aIpeat 3a Bpeme Ha ynoTe6aTa. He Do3BOJyBaJTe NM Ha MaJIte Deca Da 6nDaT Bo6n3Ha.
UpeodT He TpeBa Da Ce YnCTn Co napea.
PPEyPENEYBAHbE: Ncknyte ro ypeoT Ppe3aMeHaTa Ha CBETnIkaTa 3a Da ce N36eHc MoXHOCTa OJ eJIeKTPuHc Hyaap.
PPEyPENEYBAHbE: YpeoT n HeOBnTe DOCTaHn DeJOBn MOKe Ja ce 3aIpeaT 3a BpeMe Ha ynoTppeBaTa. BnImaBajTe HeKoJ Da He DojDe BO KOHTaKT CO 3aPeaHnTE DeJOBn. DeLaTaHa BO3pact NOMaJa Od 8 rOdiHn He TpeBa Ja 6iDaT Bo 6JIi3InHa,OCBeH PoN NoCtOjaH Na3Op.
Oboj ypeJ moKeJa ro KOpIcTaT Deca Ha BO3pact OJ 8 n NobeKe rOuHn iLiua Co HamaJIeHn fU3NcK, CetUHn iLI MeHTaJIHn CNoC6HocTn, HeIOBOJHO NCKyChn iLIi ObUyeHn Liuca, IOKoJky NCTInTe Ce NaIgIeNyBaat iLIi IM Ce DaIaT INCTpyKUm 3a KOpIcTeHe Ha ypeIoT Ha Be3BeDeH NaUH N IM Ce Objachat MoXHnTe OnaCHocTn. Deuata He TpeBa da cN irpaat Co ypeIoT. YIcTeHbTo N ODpxkYBaHbTo OJ CTpaHa Ha KOpINCHIKOT He TpeBa Da Ro BpHaT Deca 6e3 COODBETeH HAn3Op.
He ynotpe6ybajte jaKn abpa3nBHN cpeICTBa nIIN OCTpn METaJIHn XNIu 3a YInCTeHb He Na CTAKJTO Od BpataHa NeYkata KOI MOKe Da rO OHTeTaN da npINOHeCat Toa Da Ce CKPNI.
Tempepatpata Ha doctanHte noBpHmH MoKe da 6nE BnCoka npa paYBaHe co ypeIoT.
Bpata nIi NaBpeHnHa TIOBpHnHa MoKe Da ce 3aqrpee pni paKyBaHe co ypeIoT.
UybajTe ro ypeoTn HeroBnOt Ka6eI nOdaJIeKy OJdoPaT Ha neCa NOMaJIn OJ 8 rOuHn.
UpeiTe He ce npeBnEHN da 6nDaT KOHTPOJIIPAH OJ NaBOpEshN TajMepu INI ONJIHN CNTeMn 3a DaJIeMHcKa KOHTpOJa.
Oboj npo3b0d cna ra Bo Tpyna 2 Klaca B ISM onpema. Deonnuijata 3a rpynata 2 ja onpaKa ueIATA ISM onpema kaj koja paNIO-phipeKBeHTHaTa eHepnja hamephO ce reHepnpa N/INN KOpnstu BO fOpMa Ha eJeleKTpOMaTHeTHO 3paueHe 3apaN TpeTMaH Ma MatepnjAInTe, KaKO u EDM u onpemata 3a eJeleKTpUH No3aBapyBaHe. Bo onpemaT oN Klaca B cna ra onpema koja e nOrOHa 3a KopncTeHbe BO DOMaKnHCTBaTA N INHCTNTUcInTe KOI CE dIpeKTHO NOB3aHN Ha eJeleKTpUHa MpeXa co Hn3OK HApOH Co KoJa Ce CNaDbYBaAT 3rpaInTe 3apaN KOpNCTeHBe BO DOMaKnHCTBaTA.


HNCHTAJINPAHbE HA MINKPOBPAHOBATA NEEKA
IocTaBete ja neUkata Ha pamHa NOBpUnHa Ha BnOcunHa od 85 cm od noIoT. NOBpUnHaTa Tpe6a Da e DOBoJHo UBPCTa 3a da ja n3dpxN TeKInHaTa Ha neUkata.
- Kora ja noctabvbaTe neykata, octaBeTe COODBeTeH pnoCTOp 3a BeHTnlaunja od HajMaIky 10 cm (4 nHn) oD3aDi n od cTpaHnte n 20 cm (8 nHn) odrope.

- OTeTaHete ja am6aJaXkata od BHaTpeUHocTa Ha neYkata.
- Пoctabete Г Кржнnot npctehи плоча.Tpobepete dani chinjata ce Bptn cno6oHNO. (cAmO MOneJ CO BrtTnBa pNoa)
- Мнробанова точka Трава за се постам тakaда приklуокот бидегостанен.
Ako Ka6eIOT 3a HanoJyBaHbe e OoTTeH, Toj Mopa Da Ce 3aMeHn OJ CTpaHa Ha IpON3BOJNTeIOT, CepBnCEpot NJIpyrK BcALINΦKUyBaHn LInCa co ZeJ Da Ce N36eHnat HecaKaHN cITyaCm. 3a Ba7a 6e36eHnocT, pRiknyeTe rO Ka6eIOT BO COoDBeTeH AC pRikLyuOK co 3a3emjyBaHbe.
He noctabvajte ja MMkp6paHOBaTa neyka
BO TOnJa N BJaXHa OKOJIInHa KaKo Ha npimep BO 6n3Ha Ha 7nOpet nIi paJiaTop.
CneuФнkaUNTe 3a HanojYBaHbe Ha NeukKaTa Tpe6a Da ce NOHTyBaAT N CECOJ PPOJOnKInTeJIeH Ka6eTpe6a Da rN 3aIOBOUYBa IVCTIte CTaNdApDN KOn Baxkat 3a Ka6eIOT KOJ CE INCnOpaUyBa CO NeukKaTa. Ipei npBOTO KOpNCTeHBe Ha MmKpO6paHOVBaTa NeUKa N3bPnUWeTe ja BHaTpeUHOCTa N BpaTata 3a 3aTBOPaHBe CO BIAxHа KpNa.
ЧИСТЕНБЕHA MИКPOБPAHOBATA ПЕЧKA
CneiHnTe DeIOBn OJ MmKpO6paHObAta NeUka TpeBa da ce YnCTaT peOBHO 3a Da He Ce TaIoxKaT OCTaTOuN OJ MACOTNI IN XpHa:
BhatpeuHInTe HnBaDBoPeuHInTe NOBpUHHN
BpaatauIwaapKeTe
- Плочаи Кружнип ростени (само морел со врлова плоча)
CEKOTAII pOBePeTe daJII shAPKInTe OD BpaTaTaCe YnCTNI DaJIIN BpaTATA e Do6po 3aTBOpEHa.
HeodpxyBaheTo Ha neUkata Bo Yncta cocto6a MoKe da ja OwTeTn IOBpUnHaTa n Da ro paCnpe UpeIOT INI Da IpeIN3BnKa HeCaKaHn OnaChN CNTyaun.
HMKOTAU He OTCTpaHyBajTe FO KanaKOT OJ peKaTa.ДOKOLky peKaTa He paBOTn I TpeBaJa ce cepBcNupa nIi Ce COMHeBaTe BO HeUTo:
- Ncknyte ja od HanojyBaHe
- ObpaTeCe do HajobnCKNOT cepBuceH ueHTap
Ako cakate da ja cklaanda paTe neykaTa npBpeMeHO, OndepeTe cyBO, YNCTO MecTo.
Прична : ПраВта и Влага Т можат Неноволно да вида на работнichte DeLOBN OДпechкata.
Mikpo6paHOBaTa neka He e HameHeTa 3a KOMepuJaHa yNtpeBa.


CBeTnIkaTa He Tpe6a Da Ce MeHyBa Ond CtpaHa Ha KopnCSHnCi 3apaDi 6e36eHocn PpruHn. Be MoJIme o6paTe Ce BO Haj6JIncKnOT OBlaCTe H cHTap 3a rpnJa 3a KopnCSHnCi Ha Samsung n IIO6apajTe KBAInΦnKyBaH INXKeHep Da ja Ja 3aMeHN CBETnIkaTa.
| ПЕДУПЕДУBAHBе | A | A | A | A |
| Вршеньeto модіфікаціи и поравікін на уретот e дозьolyно само на oblaстен персан. | ✓ | ✓ | ✓ | ✓ |
| He 3агревajte ч Turkoc'tи и дура урана возатовени садови с фунckцилajta за мінковрбанови. | ✓ | ✓ | ✓ | ✓ |
| Заради ваяа 66366dност, Неможte д корисп'te уретдза чістене co BODA CO BIVSOK priNTNOSOK IINI napea. | ✓ | ✓ | ✓ | ✓ |
| Hemojte д ro Исталирate oobj урет: bo 6blniznaHa na rpejno телo, заразимь mateригал; на влaxхо, масно яллпьв место, на место ИЗLOЖЕНО на дірект ha coCHVEBA CBETLINAHa вODA ялл Ha MecTe Kaide shTO ce можни IMCTekуbaHa ha rac; Na негамн рiodлora. | ✓ | ✓ | ✓ | ✓ |
| Оobj урет мора дда coиde coodbetno zaemjen BO corlanschoct co лokалнite и националип rapавILA. | ✓ | ✓ | ✓ | ✓ |
| Рedingвно вршete otst相对较ва bene наcithe cunstаціи кабу прав илі BODA odnpriKnykOKT ha hanojiyaBahe i doignihne ToUKN Co nomoш Ha cyBa Kpna. | ✓ | ✓ | ✓ | ✓ |
| Кабелot 3a haboJyBaBe He trpeba da ce bileue, пекумерно д ce витka ялл дca ce stabaat{TseuKi preeMetn Brz Hero. | ✓ | ✓ | ✓ | ✓ |
| Во сfluaj на istekуве hy rac (kaoko nponaH, LP rac, ith.), vedhaш пrobeterte ja cooba堵塞doignpaBE Na prinknyokot 3a habojuBaHbe. | ✓ | ✓ | ✓ | ✓ |
| He doignajuTE ro prinknyokot 3a haboJyBaHbe co mokpri paze. | ✓ | ✓ | ✓ | ✓ |
| He nckluybajte ro ypeodot pnekyu badebe ha npinkluyokot 3a Hanojybahe dokeka ypeodot ce kopnstn. | ✓ | ✓ | ✓ | ✓ |
| Hemojte da rni stabate Balaite pncstn iin naibopeuhi cunctahni, dokolky bo ypeodot habne3at naibopeuhi cunctahni kako Boda, n3badet e ro npinkluyokot 3a hanojybahe i obopatete ce do ho jcbncknot cepbcenh cehtap. | ✓ | ✓ | ✓ | ✓ |
| Hemojte da bpiuite pnekymepno npitincskahe iin ydipauhe ha ypeodot. | ✓ | ✓ | ✓ | ✓ |
| Hemojte da ja noctabvbatne peckata bp3 kprilmbi enelmehtn kaco Iaababo iin ctaekleni enelmehtn. | ✓ | ✓ | ||
| Pni chstehe Ha ypeodot He kopnicetete behen, pa3peybuay, ankoxxo1, cnctaun ha napea iin cnctaun co BOCOK npitincok. | ✓ | ✓ | ✓ | ✓ |
| Iporjxketce se hanohot ha hanojybaheTo, dpkebenzjeta tna ctpyjata da bndat nctn kako onhe od cneulmikacnnte ha npo3b0d0t. | ✓ | ✓ | ✓ | |
| Pninkluykot 3a hanojybahe zupcSTO BMETHeTe RO BO SUDNIO tsekerp. He yonotpebajte adanTep co nobekpe npinkluyn mecta, npdoJnKteTEN Kabel iin nelektprinien TpaHcFopmatop. | ✓ | ✓ | ✓ | |
| He ro zaakuybajte ka6eNOT 3a hanojybahe Ha metalni npedmetn, BMETHeTe ro kabelot 3a hanojybahe nomery npedmetnte iin 3ad nekkatata. | ✓ | ✓ | ✓ | |
| He ylotpebajte ouTeteh npinkluyok 3a hanojybahe, ouTeteh kabel 3a hanojybahe iin uTKeRcp co paillereHn OTBPO. Kora npinkluyokot iin kabelot 3a hanojybahe Ke ce ouTettn, obpatete ce do ho jcbncknot cepbcenh cehtap. | ✓ | ✓ | ✓ | ✓ |
| He cinnybajte iin npckajte BODa dinpeKTHO Ha neykata. | ✓ | ✓ | ||
| He ctabaje npedmetn ha neykata, BO hezniHata BHATpeHocH iin HA hezniHata bprata. | ✓ | ✓ | ✓ | |
| Hemojte da npckate ncaparlnbiv materijai n kako INCEKTUZIDI Ha noBpuHHATA od nekkatata. | ✓ | ✓ |

| A BHIMAHNE | ||||
| Koprustete caobni nckluynbo hamehetn 3a ylotreba BO Minkpoblanov nechkn; HE yotrebyaje metaHn caobni Teupeinha co 3a lataHn i cpebeni delobni, paxen, bnuLshki n cI. Otstpanette rni BPVKITE od xaptneHn I pnaCTHn Kece. PrvnHa: EneKTPNHO npashtnebe nll mckpn Mocke da npedzblkaat otletetybahe na pekhata. | ||||
| He cyuIe Tce BcsHUni NII oBLeKa BO Mnkpo6paHOBa Tce Hua. | ||||
| Koprustete nokpatkn BemHb 3a nomal KOLmHn Ha xpaHa 3a da cnpeHn npertpeBaHBe n ropeHe ha xpaHata. | ||||
| He ro notogyBaJte kabelot nll prnklyukot 3a hanojyBaHBe BO Boda n drkjete ro kabelot 3a hanojyBaHBe ndoJIeKy od toIplHa. |
| Jajua co Луча и Т趟do варени ща не треся за сазграват bo мікробановatable пechka, бідійки може ду ekслpondираат, дурі и akо пech凱да nobіke He e bінчүні; Исто takâ, He загав差别херметунулі піні Вачу'mиралунишінь, тergл, садови, орееву-co Луча, дімати и сlyn. | |||
| HePokpvabajte ng OTBOPRITe 3a BeHTINlauNiJa co Kpna ilni BECHNIz. Tne moze da ce 3anapat od TOPTNIOT BOZdYx Koj n3JIeRGyBa OD BHTATPEHNOCTa Na peKATA. IcStO taka, peKATA mОже DA ce pIperpee i ABTOMATCKI DA ce NsKluyn, a Ke ocTaHecNkUHEna cE doDeka He CE n3IaDi NOBOJHO. | |||
| CekorauynTope6bajte pakovani prin Baadenhe Ha caD od peKATA 3a Da He doBoiNETe N3rGOpHNIz. | |||
| ПомецAJte ng TeuHocHTe prin 3a rgPebAHBJeto ilni no 3aBpUByBaHe Na 3a rgPebAHBJeto i OCTabete rO caDt O CO TchHOCTHn Hajmanky 20 cekyndn IO 3a rgPebAHBJeto 3a Da cIpreHInTe pReBPrBaBe. | |||
| Hemojte DA prnofate npemHory 6bIncykko korga ja OTbopate Bpatata 3a Da He doBoiNETe N3rGOpHNIz OD Jezhkinot Bo3dYx ilni napeata koja n3JIeRGyBa. | |||
| H YeNToP6bajte ja MinkpobpaHOBata nechka korga e npa3Ha. МікробанOBATA nechka ABTOMATCSkI Ke ce NsKluyn 3a 30 MInHyTN 3aparod 6be3bEdnHosn prinHn. Bi npenopaYbAme noctoJHo DA CTabateча co BOda BO peKATA 3a ancoPbIrpaHBe Na MinkpobpaHOBata eHeprija DOKOLky MinkpobpaHOBATA nechka clyujHNo ce AKTINBIPA. | |||
| Инстамрajte ja nechkata BO corlachocST co CNoBodHnOT npocstop koj e HabeDen BO oBA yUnatCTBO. (IognepdHete ro delnot 3a Истамрahe Na MinkpobpaHOBata nechka.) | |||
| Виимав差别при ріnknyУваньeto Ha ocTaHATITE eJeKtrpnuHniUpedni BO shTEKeR BO 6bIsinHa Na nechkata. |
MEPKN 3A N3BEGHYBAHBe HA MOXHO N3JIOKYBAHBe HA INPEKUMEPHA MKNPO6PAHOBA EHEPTNUJA.(CAMO ΦYHKUNJA 3A MKNPO6PAHOBI)
HepnipxkyBaHTo KOH CNeHNITE 636eHNOCN MePK MoKe Da DOBepe Do UTeTHO I3IOKByBaHe Ha MInKpO6paHOBa EheprNiJa.
(a)Пднкави колноctи He yonTpse6yBaJte ja neKhkaTc o TbOpeHa Bpata, He paCnYBaJte rI 6e36eHocHInTe 6paBv (UapKInTe Od BpataTa)И He cTabaTe HnITo BO OTbOpInTe Od 6e36eHocHInTe 6paBv.
(b) HE noctabyyajte npdmetybpaataHa neykata n npdHnOt den Hne do3BOnyajte da ima xpaHa uIIN Tanor Ha denOT 3a 3aTbopaHe. BpaTAtu n nobpunHaTa 3a 3aTbopaHe oDpxkyajte rnuCTN co 6brnuehe Nocne cekoja yonTppeBa, npBO Co BlaXkHa, a NOTOA CO MEKa, cyBa kPna.
(c) HE ynoTpe6ybaTe ja neKata ako e ouTetHe cdoeka He ce nonpabn Od cTpaHa Ha KBAINiFkYBaH cepBIncep ObyeH od npOIsbOIOIeOT. Mhory e EaXho BpTaAta Ha neKata da ce 3aTbOpaNpABuHNo H da HEMA oUdTyBaHa Ha:
(1)BpaTata(NCKpMbByBaBe)
(2)шаркinteODврата(ckpшениллалбави)
(3) BpaTataи NOBpUnHaTa 3a 3aTBopaHbE
(d) Пechкata He Tpe6a Да ce пиларува Или NonpaBa OД НIKоJ Дуг OСвен OД CTpaHa Na KBaIIMФИКУВан СерВисер обухен OД РОИЗБODITENOT.
Samsung Ke HanlaTn DOnonHnTeHa Cyma 3a 3aMeHa Ha ranahtepnja NIN nonpaBka Ha K03MeTNKn DepeKT, DOKOkIky OwTeYBaHTo Ha ypeIoT N/ INN OwTeYBaHTo NIN rgeHTo Ha ranahtepnjaTa 6NIO npedn3BnKaHO od cTpHa Ha KopncnKOT. Bo Obaa klay3yna cnafa:
(a)Влалбнота,ИЗграваи скршени врета,paчka,надворшни п loча ил коHTролна п loча.
(b) Ckpuhen nIin OTCTpaHET caI, npCTeHN 3a HacoUyBaHe, cNojHnca nIin peuETka 3a neHeBe.
Oboj ypeynotpe6ybajte ro einnctBeHO 3a hAmehetata fynkuja KaKo ITOe OnIIuaHO BO OBA yNAcTCTBO. PnpdyneYBaHbATA n BaxhHTe 6be3dHocn MepKn BO OBA yNAcTCTBO He ng onpaKaat CITE OKONHOCTN cITTuAun KOn MoKe da HactaHt. Buaa
OIOROBOPHOCT e Ia NOCTaIyBaTe pa3ymHO n Da BHNMaBaTe pIN INHCTaIIMpaHbETO, ODPXyBaHbETo N yIOTpeBaTa Ha BaIIMOT ypeI.
- Bndejkn cneHnnte hanaTCTBnja 3a kopncTehe onpaKaat paanuHN moJI, KapaKTepnCTNKe H Baauata MnkpoBaHOba neka MoKAT Manky da ce pAnkyBaAT oN OHme OnnlaHn BO OBA yNaTCTBO nMOXHO e HekO INpeDnypeyBaHa da He bIaT peLeBaHTn. DOKoKy IMate npaaHbA IIN OndpeDeHr PrrKin, o6pTaTe ce do Haj6bnckNtO cepBcEN CEHTap IIN no6apajte NOMU INHΦOpMaun npeky INHTepHET od www.samsung.com.
- Obaa Mnkpo6paHOBa neka ce ynoTpe6yBa 3a 3arpeBaHe Ha xpaHa. Taa e HAMeHeta cAmo 3a DomaUHa ynoTpe6a. He 3arpeBaJTe NIKAKOB BnHa TEKCTNl IINI nepHuNbA POJIHn CO 3Pnla, KOI MOkAt Da Ce 3anaIaT I Na IpeDn3BnKaat Nokap. POni3BoDnTeJOT He MoKeJa Ce CMeTa KAKO OndroBOpEn 3a OlTeTyBaHa IpeDn3BnKaHn OD HeCooDbETHa INI HnpePaBnHa yNoTpe6a Ha ypeDToT.
HeOpjxByaHToHa neKaTa BO YnCTa COcto6a MoKe da ja oUTeTINOBpUnHaTa I Da rO paCIne ypeDcT NIM MoKe da npeDn3BnKaHEcaKaHN ONaChn CnTyauuN.

ПРавилно ДЕПОнИРАБЕ HA OBOJ ПОИЗВОД (OTПАДHA ELEKТРИЧА И ELEKТРОHСКА ONPEMA)
TOrBeHb/IOdrpeBaHe 15
Hinboa Ha jaunha 16
IpeKHyBaHe Ha roTbeHbTo. 16
PpnilarodyBaHe Ha BpeMeTo Ha rotBeHe 16
YnOTopeBaHaФyHKuJata3a6p3oNoIrpEBAHe/rotBeHe. 17
IocTaByBaHe Ha 6p3o nOdrpeBaHe/rotBeHe 17
YIOTpe6aHaФyHKJiJaTa3aABTomATcKO 6p30 Odmp3HyBaHe.18
IocTaByBaHe Ha 6p3o ABToMaTcKO OdMp3HyBaHe 18
Pecheneckapa 19
Kombiniipahe ha Minkpo6paHOBu ngpeja.. 19
Tobbe Bo noBeke 20
I36op Ha doaTou.. 20
UcknyuBaBe Ha 3BvHnOT CnHaJI. 21
Бeзб endocho 3aknyBaHe Na MmKpo6paHOBaTa neka.21
Bodn3a onpema 3a roTbeHe. 21
Bodny 3a roTbeHe 22
LTo da Hapabte aKo ce comHeBaTe nIIMaTe np6Jem 29
Texnukn cpeuufkauzn 30
KPATKO YIATCTBO
Dokolky cakate da nprirotbte xpaHa.
- CstabeTe ja xpaHaTao Bo neHkaTa.
I36epete ro HnBOTo Ha jaHnHa co npITncHyBaHe Ha
KoNHTeO 3a Power Level (HnBO Ha jaHnHa) eHaA
JIN NOBeKe NaTn.
2.Изберете ГВБЕМETОHa rotBeHbe CO npNTICHYBaHBe Ha KONHnHaTa 10 min (10 MmHyTu), 1 min(1 MmHyTa) mIn 10 s(10 cekyHn) cnopeD notpe6bte.
3.ПиТиСHTe ro KOnHcTo 3a Start (AknBnPaHbE) (公)
Pesytar: TOTBeHbETO 3aIOHy
IeukataKe npoIm3Bebe 3ByueHcHnA 费TnpaTN Kora roTBeHbETo Ke 3aBpHn.
Ako cakaTe da oMp3HeTe xpaHa.
- Ctabete ja 3amp3HaTata XpHa BO neKkata. PInTNCHETe ro KOnHcTe Rapid (Bp3o) ( ) eHaIIN NOBeKe NaTn BO 3aBnCHOCT OJ TmNOT Ha XpaHATA ITO Tpe6a Da ce Odmp3He.
2.ИЗберета jaTekинота co npintncHybaHe Ha KONИнБаТа kgиспордnotpe6nte.


3.ПиТиСнeTe ro KOnчeTo 3a Start (AктИВираБe) (公)


Ako cakate da doaade Te dononHnTeHa MNHyta.
Octabete ja xpañata BO neykata.
ПпншETe +30s eнши nIN NOBEKe nATn 3a ceKoI dOJIHInTeJIHn 30 cekyHn KOn cakate da rIdoJaTe.
Ako cakaTe da nCneyeTe xpaHa.
- 3arpejte ro rpejauot Ha cakaHaTa TEMnepatypa, co npriTmCHyBaHHe Ha KONJETO 3a Grill (rpejaU) KONHbAta 3a Bpeme 10 min (10 MInHyTu), 1 min (1 MInHyTa) u 10 s (10 cekyHdN) u KONHTO 3a Start (AktBnpahe) () .

- CstabeTe ja xpaHaTa ha peSeTkata BO neKata. IpnTnCHete ro KOnHeTo 3a Grill (Ppejau) (UJ). N36epTe ro Bpemeto Ha rotBeHbe co npITnCHyBaHbE Ha KOnHbTa 10 min (10 MInHyt), 1 min (1 MInHyTa) n 10 s (10 cekyHdN).
3.ПиТиСHTe ro KOnHcTo 3a Start (AknBnpaHb) (公)

OoATOLU
Bo 3aBnCHOCT OJ MOJeIOT KOJ CTE FO KUINne, Bn Ce IcNOpaYBaat HEKOLKY DoaToOu KOn MoKe Da FIn YNtpeBte Ha NOBeKe HauHHN.
- Kpyxhen npcten, koj ce noctaByBa BO cpeHnHaTa Ha neHKata.
Hameha: KpyxHnOt npCTeH ja noDpKBya nloyata.
- BpTnBa nloa, Koja ce NoCTaByBa Ha npCTeHOT npI wTO ueHTapOT ce noklonyBa co cnojHncaTa.
Hameha: Плоча петсава ралвна Повшина за Гтбе; Та може Лесно на сизвади пичпсьe.

- Pewetka 3a neuehe, Koja ce noctabyBa Ha nloyata.
HamaHa: MeTaHaTapeeIeTKa ce ynoTpe6yBa 3a neeHeN KOMbHnpuHo rotBeHe.

HE ynoTpe6yBaJte ja MmKpO6paHOBaTa neUka 6e3 KpyXeH npCTeH nIIOuA.
12


ПЕЧКА
- BPATA
- OTBOPN 3A BEHTNIALJNA
3.「PPEJAH
4.OCBETJYBAHbE - EKPAH
-
LJIAPKIN HA BPATATA
-
BPTJNBA JIOUCA
8.CNOJHINLA - KPYXKEH INPCTEH
10.CNΓPYHOCHN BHATPEUHNI OTBOPN - KOHTPOJIHA JIJOVA

KOHTPOJHA IIOYA
- EKPAH
- I350P H A ΦYHKLIJATA 3A ABTOMATCKO EP30 OJMP3HYBAHBe
- I35BOP HA ΦYHKJUJA 3A BFP0 I0DIPREBAHbE/ITOTBEHbE
- KONTHE 3A PEXKIM HA MIVKOPOBAHOBI
- KOINHE 3A PEXKIM 3A IENEHEB
-
KONTHE 3A IIOCTABYBAHbE HA BPEME
-
KONTHA 3A 3ANIPAHbE/OTKAKYBAHbE
- 1350P H A T E K I H A
- KONTHE 3A NIOCTABYBAHBE HA YACOBHIVKOT
- KOINTE 3A KOMBUNHINPAH PEXKIM
- KOJIYE +30s (+30 cekyHnD)
- KONTHE 3A AKTMBINAHE
- KOIHTE 3A 3AUITEYBAHBE EHEPIMJA


NIOCTABYBAHcE HA BPEMETO
BaWata MmKpOpaHOBa NeUka NImA BrpaDen YacOBnIK. Kora HanojyBaHeto e BKJyHeNo, Ha ekpaHOT aBOMatCKN Ke ce npikaxe "0", "88:88" nIi "12:00".
Be moJIime noCTaBeTe ro MOMeHTaJIHOTo BpeMe. BpeMeTo MOKe da 6uJe npIkaKaHo BO 24-ycobEn nIIN 12-ycobEn foPmAt. YacOBHnKOT Mopa da ro noCTaBITE:
Kora npBnat ja INHCTaIpaTe BaauTa MInKpObaHOBa neKa
- По пекин На наюуbaheTo
He 3a6opabajte da ro HameCTHte YacOBHNOT npn ppeMHN OJ JeTHO BO 3mCKO PecMeTyBaHc He BpemTo I o6paTHO.
Функида за abTOMATСКО заштEDУBAне на eHepriva
Ako He n36bepete Hnty eHa cyHKuJa DoeKa ypeDoJ ja NoCTaByBa
HnIc Ce HoFa BO COcToj6aTa Ha npVBpeMeHO npEKNHyBaHe,
dyHKuJaTe Ke 6nIe OTkaxKaHa N IO 25 MNHTyKe ce npKakke
YacOBHnKOT.
Jaamata Ha neKata Ke ce NCKJyHn IIO 5 MNHyTN DOKOLKy BpaTaTa e OTBOpeHa.
- 3a da ce npikaque BpeMeTo BO...
24-yaocobenФoopmat
12-achobenФopmat
PnTtncHete ro KOnHTo 3a Clock (YacOBHnK)
edHaI NII dBaIaN.
2.Пoctabete Г acobite CO nOMOu HA KONHTo h MInHYTnte CO nOMOu Ha KONHTo min.
- Kora Ke ce npikakaKe TOHOTo BpeMe, NOBTOPO npTINCHeTe ro KOnHTe 3a Clock (HaCOBnK) 3a Da ro aKTINBnPaTe YacOBHNkOT.
Pe3yntar: BpemTo ce npkaXya ceKoraa Kora He ja KopnCTnte MmKpO6paHOBaTa neKa.
KAKO PABOTI MUKPOBPAHOBATA IIEYKA
MinkpobanBHTe ce eEekTpomarHETn 6paHO BCO BnCOKa fpeKBeHnja;
ocnoedeHata eheprnja OBO3MOxyBa roTBeHe nIIN pOrrpeBaHe Ha
xpanata be3 npomeHa Ha HeJ3nHata cOpMa IIn Soja.
Moxete da ja KopnCTte MinkpobanOBa Tneka 3a:
- OДмрзHyBaHbe
- Bp30 noɪrpeBaHb/roTBeHb
- TOTBeHe
ПиИнцИн На Г罗ТВеHe.
- МкробановITE reHepuapHи OД Магнгпон ce pacnpeIeIyBaAT pamHOMepHO CO BpTeHeTO Ha xpaHata noCTaBeHa Na IIOUaT. Ha OObJ haHIn xpaHata ce roTbN pamHOMepHO HaceKaIDE.
- Мкробановite ce ancopbupaat od xpaHata doДлбочинд okokoly 1MH(2,5cm).TOTbeHetoNToTO npdoJxgyBa co pacnpednyBaHe HaTOnJIINHa TBOBHTpeuHocTa Ha xpaHata.
- BpemTo Ha rotBeHe CE MeHyBa BO 3aBnCHOCT OJ CaIOT KOJ CE KOpNCTN IN KapaKTePncTnKInTe Ha XpaHata:
KoJIuHecTBoIgCTnHa
CopjxHa Ha Boda
- NohetHa TEmnepaTypa (dani e 3amp3HaTa UIn He)
Bnnejkn zentpahnnoT den Ha xpaHATA ce roTbn npeky paCnpeDeyBaHbe HA TOPIINHATA,ROTEHeTO npOdoNkBya N NO BaDeHeTo Ha xpaHATA OJ NeKkata. BpeMeTo HA cTOeHe Ha xpaHATA Ha3NaHcEO BO peCNTte INI BO OBA yNaTCTBO MOpA da ce NoHTyBa 3a da ce o6e36dAn:
- PamHomepha 3rotBeHOCT Ha xpaHata N BO cpeMUnHOT deN
-ПоднakВa TempepaTypaHa ZeJaTa xpaHa

YnTope6yBaJte IdoTaTOOI NIOoDNH 3a MMKpObaNOBaTa neKa; He yToTepe6yBaJte PnactuHcAodBn, YHHIN, XApTneHn YaShN, KpN, IN Cn.
Ako cakaTe aJaNtOpe6yBate KOM6HnIpaHO rotBeHe (rpeJau NMIkpO6paHOBV), KOpNCTeTe cMoC aDObN HAMeHTn 3a MNIkpO6paHOBV NeKu.
3a noHaTaMoUHn HnΦopMaUm OKoLy COODBeTHIne TaOBo n np6Op, nOrIeHHeTe rO BoDyOT 3a ONpema 3a rotBeHe Ha cTpaHua 21-22.
NCKJNUYUBAHBEHA3BUYHNOCTIHAJI
3ByHnOT CnHaI MoXeTe Da ro NCKnyuHTe BO cekoe BpeMe.
- IVCTOBPemeHo npNTncHete rKoONHbTa 3a Stop (3aInpaHe) () n Start (AkTNbpaHe) () .
Pezyntat:пechkata Hemaда EMTuBa 3ByuHc nHaJI npi ceKoe npITnChyBaHe Ha KOnHe.
3^x = - 2 + 22
- 3a BknyBaHae Ha 3BvHnOT CnHnJ, NOBTOPO npNTUCHETe Tn NCTOBpeMeHO KONHbTa 3a Stop (3aHpaBe) () n Start (AKnBpuHae) (公)
Pe3ynta: PteKata NOBTOPO Ke eMNTyBa 3ByHn CnHaJN.
Bodu 3a roTBeHe Ha CBex 3eNeHuyk
YIOTpeBeTe COOJBETeH CTaKJIeN OOrHOOTnOpEn CaD co KaIaN. IOnaJTe 30-45 ml aHa Boda (2-3 laXnU) 3a cekon 250 g ocBEN aKO he CE npenopaYBa dpyra KOLmHuHa Na BODa - norgJeHete TaBena. TOTBeTe NOKPHeO Co MNIMMaJIHo BpeMe - norgJeHete TaBena. PpOJOnJKeTe CO rOToBHeTc NO tOpeBa. PpOMeJaTe eHaau 3a BpeMe eEHaau No rOToBHeTc. IOnaJTe CoI, 3aYIN INI PyTe pO rOToBHeTc. IOnkpJTe IOnoEka CToI 3 MInHyTN.
Cobet: IceheTe ro CBexNt 3eJIeHcyK Ha eJHaKBr npuHba. IomaiIte napHba ce roTbat no6py.
CbeXnOT 3eJIeHcyK ce roTbI npi nOJHa MmKpO6paHOBA MOkHOCT (750 W).
CBeTnIkaTa He pa6OtN.
CBeTInkata He Tpe6a Da ce MeHyBa OD CTpaHa Ha KopnChiu 3apaNb6e3eDCHOnPiuHn. Be MoIIMe o6paTeTe Ce BO Haj6bncknOTOBlaCTeHZeHTap 3a GrpKa 3a KopnChiu Ha Samsung n NobapajTe KBaIINPkyBau INHeKeHep Da ja 3aMeHN CBeTInkata.
600 W in Žar, 450 W in Žar ter 300 W in Žar.
Posoda, primerna za pripravo hrane z mikrovalovi in zarom
St. kode: DE68-04050B-04


Microwave Oven
Owner's Instructions & Cooking Guide
Please be advised that the Samsung warranty does NOT cover service calls to explain product operation, correct improper installation, or perform normal cleaning or maintenance.

100% Recycled Paper
This manual is made with 100% recycled paper.
GE73A
imagine the possibilities
Thank you for purchasing this Samsung product. To receive more complete service, please register your product at
www.samsung.com/register
SAMSUNG
IMPORTANT SAFETY INSTRUCTIONS
READ CAREFULLY AND KEEP FOR FUTURE REFERENCE.
Make sure that these safety precautions are obeyed at all times.
Before using the oven, confirm that the following instructions are followed.

WARNING (Microwave function only)

WARNING: If the door or door seals are damaged, the oven must not be operated until it has been repaired by a competent person.

WARNING: It is hazardous for anyone other than a competent person to carry out any service or repair operation that involves the removal of a cover which gives protection against exposure to microwave energy.

WARNING: Liquids and other foods must not be heated in sealed containers since they are liable to explode.

This appliance is intended to be used in household only.


WARNING: Only allow children to use the oven without supervision when adequate instructions have been given so that the child is able to use the oven in a safe way and understands the hazards of improper use.
WARNING: This appliance can be used by children aged from 8 years and above and persons with reduced physical, sensory or mental capabilities or lack of experience and knowledge if they have been given supervision or instruction concerning use of the appliance in a safe way and understand the hazards involved. Children shall not play with the appliance. Cleaning and user maintenance shall not be made by children unless they are aged from 8 years and above and supervised.
Only use utensils that are suitable for use in microwave ovens.
- When heating food in plasitic or paper containers, keep an eye on the oven due to the possibility of ignitions.
The microwave oven is intended for heating food and beverages. Drying of food or clothing and heating of warming pads, slippers, sponges, damp cloth and similar may lead to risk of injury, ignition or fire.
If smoke is emitted, switch off or unplug the appliance and keep the door closed in order to stifle any flames.
WARNING: Microwave heating of beverages can result in delayed eruptive boiling, therefore care must be taken when handling the container.
WARNING: The contents of feeding bottles and baby food jars shall be stirred or shaken and the temperature checked before consumption, in order to avoid burns.
- Eggs in their shell and whole hard-boiled eggs should not be heated in microwave ovens since they may explode, even after microwave heating has ended.
The oven should be cleaned regularly and any food deposits removed.


Failure to maintain the oven in a clean conditioin could lead to deterioration of the surface that could adversely affect the life of the appliance and possibly result in a hazardous situation.
The appliance is not intended for installing in road vehicles, caravans and similar vehicles etc.
This appliance is not intended for use by persons (including children) with reduced physical, sensory or mental capabilities, or lack of experience and knowledge, unless they have been given supervision or instruction concerning use of the appliance by a person responsible for their safety.
Children should be supervised to ensure that they do not play with the appliance.
If the supply cord is damaged, it must be replaced by the manufacturer, its service agent or similarly qualified persons in order to avoid a hazard.
WARNING: Liquids or other foods must not be heated in sealed containers since they are liable to explode;
The appliance should not be cleaned with a water jet.
This oven should be positioned proper direction and height permitting easy access to cavity and control area.
Before using the oven first time, oven should be operated with the water during 10 minute and then used.
If the oven generates a strange noise, a burning smell, or smoke is emitted, unplug the power plug immediately and contact your nearest service center.
The microwave oven has to be positioned so that plug is accessible.
The microwave oven is intended to be used on the counter or counter top use only, the microwave oven shall not be placed in a cabinet.
WARNING (Oven function only) - Optional
WARNING: When the appliance is operated in the combination mode, children should only use the oven under adult supervision due to the temperatures generated.
During use the appliance becomes hot. Care should be taken to avoid touching heating elements inside the oven.


WARNING: Accessible parts may become hot during use. Young children should be kept away.
A steam cleaner is not to be used.
WARNING: Ensure that the appliance is switched off before replacing the lamp to avoid the possibility of electric shock.
WARNING: The appliance and its accessible parts become hot during use. Care should be taken to avoid touching heating elements. Children less than 8 years of age shall be kept away unless continuously supervised.
This appliance can be used by children aged from 8 years and above and persons with reduced physical, sensory or mental capabilities or lack of experience and knowledge if they have been given supervision or instruction concerning use of the appliance in a safe way and understand the hazards involved. Children shall not play with the appliance. Cleaning and user maintenance shall not be made by children without supervision.
Do not use harsh abrasive cleaners or sharp metal scrapers to clean the oven door glass since they can scratch the surface, which may result in shattering of the glass.
The temperature of accessible surfaces may be high when the appliance is operating.
The door or the outer surface may get hot when the appliance is operating.
- Keep the appliance and its cord out of reach of children less than 8 years.
Appliances are not intended to be operated by means of an external timer or separate remote-control system.
This product is a Group 2 Class B ISM equipment. The definition of group 2 which contains all ISM equipment in which radiofrequency energy is intentionally generated and/or used in the form of electromagnetic radiation for the treatment of material, and EDM and arc welding equipment.
For Class B equipment is equipment suitable for use in domestic establishments and in establishments directly connected to a low voltage power supply network which supplies buildings used for domestic purposes.


Place the oven on a flat level surface 85 ~cm above the floor. The surface should be strong enough to safety bear the weight of the oven.
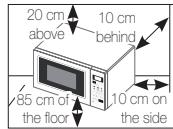
- When you install your oven, make sure there is adequate ventilation for your oven by leaving at least 10 ~cm (4 inch of space behind and, on the oven and 20 ~cm (8 inches) or
2.Remove all packing materials inside the oven.
3.Install the roller ring and turntable. Check that the turntable rotates freely. (Turntable type model only) - This microwave oven has to be positioned so that plug is accessible.
If the supply cord is damaged, it must be replaced by the manufacturer, its service agent or similarly qualified persons in order to avoid a hazard. For your personal safety, plug the cable into a proper AC earthed socket. - Do not install the microwave oven in hot or damp surroundings like next to a traditional
oven or radiator. The power supply specifications of the oven must be respected and any extension cable used must be of the same standard as the power cable supplied with the oven. Wipe the interior and the door seal with a damp cloth before using your microwave oven for the first time.
The following parts of your microwave oven should be cleaned regularly to prevent grease and food particles from building up:
- Inside and outside surfaces
- Door and door seals
- Turntable and Roller rings (Turntable type model only)
ALWAYS ensure that the door seals are clean and the door closes properly.
Failure to maintain the oven in a clean condition could lead to deterioration of the surface that could adversely affect the life of the appliance and possibly result in a hazardous situation.
- Clean the outside surfaces with a soft cloth and warm, soapy water. Rinse and dry.


- Remove any splashes or stains on the inside surfaces of oven with a soapy cloth. Rinse and dry.
- To loosen hardened food particles and remove smells, place a cup of diluted lemon juice in the oven and heat for ten minutes at maximum power.
-
Wash the dishwasher-safe plate whenever necessary.
DO NOT spill water in the vents. NEVER use any abrasive products or chemical solvents. Take particular care when cleaning the door seals to ensure that no particles: -
Accumulate
- Prevent the door from closing correctly
Clean the microwave oven cavity right after each use with a mild detergent solution, but let the microwave oven cool down before cleaning in order to avoid injury.
When cleaning the upper part inside the cavity, it will be convenient to turn heater downward by 45^ and clean it.
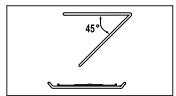
(Swing heater model only)
STORING AND REPAIRING YOUR MICROWAVE OVEN
A few simple precautions should be taken when storing or having your microwave oven serviced.
The oven must not be used if the door or door seals are damaged:
- Broken hinge
Deteriorated seals
Distorted or bent oven casing
Only a qualified microwave service technician should perform repair
NEVER remove the outer casing from the oven. If the oven is faulty and needs servicing or you are in doubt about its condition:
- Unplug it from the wall socket
- Contact the nearest after-sales service centre
If you wish to store your oven away temporarily, choose a dry, dustfree place.
Reason : Dust and damp may adversely affect the working parts in the oven.


This microwave oven is not intended for commercial use.
The Light bulb should not be replaced in person for safety reasons. Please contact nearest authorised Samsung customer care, to arrange for a qualified engineer to replace the bulb.

WARNING
| Only qualified staff should be allowed to modify or repair the appliance. | ✓ | ✓ | ✓ | ✓ |
| Do not heat liquids and other food in sealed containers for microwave function. | ✓ | ✓ | ✓ | ✓ |
| For your safety, do not use high-pressure water cleaners or steam jet cleaners. | ✓ | ✓ | ✓ | ✓ |
| Do not install this appliance; near heater, inflammable material; in a humid, oily or dusty location, in a location exposed to direct sunlight and water or where gas may leak; on un level ground. | ✓ | ✓ | ✓ | ✓ |
| This appliance must be properly grounded in accordance with local and national codes. | ✓ | ✓ | ✓ | ✓ |
| Remove all foreign substances such as dust or water from the power plug terminals and contact points using a dry cloth on a regular basis. | ✓ | ✓ | ✓ | ✓ |
| Do not pull or excessively bend or place heavy objecton the power cord. | ✓ | ✓ | ✓ | ✓ |
| In the event of a gas leak (such as propane gas, LP gas, etc.), ventilate immediately without touching the power plug. | ✓ | ✓ | ✓ | ✓ |
| Do not touch the power plug with wet hands. | ✓ | ✓ | ✓ | ✓ |
| Do not turn the appliance off by unplugging the power plug while an operation is in progress. | ✓ | ✓ | ✓ | ✓ |
| Do not insert fingers or foreign substances, If any foreign substance such as water has entered the appliance, unplug the power plug and contact your nearest service centre. | ✓ | ✓ | ✓ | ✓ |
| Do not apply excessive pressure or impact to the appliance. | ✓ | ✓ | ✓ | ✓ |
| Do not place the oven over a fragile object such as a sink or glass object. | ✓ | ✓ | ||
| Do not use benzene, thinner, alcohol, steam cleaner or high pressure cleaner to clean the appliance. | ✓ | ✓ | ✓ | ✓ |
| Ensure that the power voltage, frequency and current are the same as those of the product specifications. | ✓ | ✓ | ✓ | |
| Plug the power plug into the wall socket firmly. Do not use a multiple plug adapter, an extension cord or an electric transformer. | ✓ | ✓ | ✓ | |
| Do not hook the power cord on a metal object, insert the power cord between the objects or behind the oven. | ✓ | ✓ | ✓ | |
| Do not use a damaged power plug, damaged power cord or loose wall socket. When the power plug or power cord is damaged, contact your nearest service centre. | ✓ | ✓ | ✓ | ✓ |
| Do not pour or directly spray water onto the oven. | ✓ | ✓ | ||
| Do not place objects on the oven, inside or on the door of the oven. | ✓ | ✓ | ✓ | |
| Do not spray volatile material such as insecticide onto the surface of the oven. | ✓ | ✓ | ||
| Do not store flammable materials in the oven. Take special care when heating dishes or drinks that contain alcohol as alcohol vapours may contact a hot part of the oven. | ✓ | ✓ | ✓ | |
| Keep children away from the door when opening or closing it as they may bump themselves on the door or catch their fingers in the door. | ✓ | ✓ | ✓ | ✓ |


WARNING: Microwave heating of beverages can result in delayed eruptive boiling, therefore care must be taken when handling the container; To prevent this situation ALWAYS allow a standing time of at least 20 seconds after the oven has been switched off so that the temperature can equalize. Stir during heating, if necessary, and ALWAYS stir after heating. In the event of scalding, follow these FIRST AID instructions:
- Immerse the scalded area in cold water for at least 10 minutes.
Cover with a clean, dry dressing. - Do not apply any creams, oils or lotions.

CAUTION

#

Only use utensils that are suitable for use in microwave ovens; DO NOT use any metallic containers, Dinnerware with gold or silver trimmings, Skewers, forks, etc. Remove wire twist ties from paper or plastic bags. Reason: Electric arcing or sparking may occur and may damage the oven.
Do not use your microwave oven to dry papers or clothes.
Use shorter times for smaller amounts of food to prevent overheating and burning food.
Do not immerse the power cable or power plug in water and keep the power cable away from heat.
Eggs in their shell and whole hard-boiled eggs should not be heated in microwave ovens since they may explode, even after microwave heating has ended; Also do not heat airtight or vacuum-sealed bottles, jars, containers, nuts inshells, tomatoes etc.
Do not cover the ventilation slots with cloth or paper. They may catch fire as hot air escapes from the oven. The oven may also overheat and switch itself off automatically, and will remain off until it cools sufficiently.


Always use oven mitts when removing a dish from the oven to avoid unintentional burns.
Stir liquids halfway during heating or after heating ends and allow the liquid stand at least 20 seconds after heating to prevent eruptive boiling.
Stand at arms length from the oven when opening the door to avoid getting scalded by escaping hot air or steam.
Do not operate the microwave oven when it is empty. The microwave oven will automatically shut down for 30 minutes for safety purposes. We recommend placing a glass of water inside the oven at all times to absorb microwave energy in case the microwave oven is started accidentally.
Install the oven in compliance with the clearances stated in this manual. (See installing your microwave oven.)
Take care when connecting other electrical appliances to sockets near the oven.
PRECAUTIONS TO AVOID POSSIBLE EXPOSURE TO EXCESSIVE MICROWAVE ENERGY. (MICROWAVE FUNCTION ONLY)
Failure to observe the following safety precautions may result in harmful exposure to microwave energy.
(a) Under no circumstances should any attempt be made to operate the oven with the door open or to tamper with the safety interlocks (door latches) or to insert anything into the safety interlock holes.
(b) Do NOT place any object between the oven door and front face or allow food or cleaner residues to accumulate on sealing surfaces. Ensure that the door and door sealing surfaces are kept clean by wiping after use first with a damp cloth and then with a soft dry cloth.
(c) Do NOT operate the oven if it is damaged until it has been repaired by a qualified microwave service technician trained by the manufacturer. It is particularly important that the oven door closes properly and that there is no damage to the:
(1) door (bent)
(2) door hinges (broken or loose)
(3) door seals and sealing surfaces
(d) The oven should not be adjusted or repaired by anyone other than a properly qualified microwave service technician trained by the manufacturer.
Samsung will charge a repair fee for replacing an accessory or repairing a cosmetic defect if the damage to the unit and/or damage to or loss of the accessory was caused by the customer. Items this stipulation covers include:
(a) A Dented, Scratched, or Broken Door, Handle, Out-Panel, or Control Panel.
(b) A Broken or missing Tray, Guide Roller, Coupler, or Wire Rack.
-
Use this appliance only for its intended purpose as described in this instruction manual.Warnings and Important Safety Instructions in this manual do not cover all possible conditions and situations that may occur. It is your responsibility to use common sense, caution, and care when installing, maintaining, and operating your appliance.
-
Because these following operating instructions cover various models, the characteristics of your microwave oven may differ slightly from those described in this manual and not all warning signs may be applicable. If you have any questions or concerns, contact your nearest service centre or find help and information online at www.samsung.com.
- This microwave oven is supposed for heating food. It is intended for domestic home-use only. Do not heat any type of textiles or cushions filled with grains, which could cause burns and fire. The manufacturer cannot be held liable for damage caused by improper or incorrect use of the appliance.
- Failure to maintain the oven in a clean condition could lead to deterioration of the surface that could adversely affect the life of the appliance and possible result in a hazardous situation.

CORRECT DISPOSAL OF THIS PRODUCT (WASTE ELECTRICAL & ELECTRONIC EQUIPMENT)
(Applicable in countries with separate collection systems)
This marking on the product, accessories or literature indicates that the product and its electronic accessories (e.g. charger, headset, USB cable) should not be disposed of with other household waste at the end of their working life. To prevent possible harm to the environment or human health from uncontrolled waste disposal, please separate these items from other types of waste and recycle them responsibly to promote the sustainable reuse of material resources.
Household users should contact either the retailer where they purchased this product, or their local government office, for details of where and how they can take these items for environmentally safe recycling.
Business users should contact their supplier and check the terms and conditions of the purchase contract. This product and its electronic accessories should not be mixed with other commercial wastes for disposal.


CONTENTS
Quick look-up guide 11
Accessories 12
Oven 13
Control panel. 13
Setting the time 14
How a microwave oven works. 14
Checking that your oven is operating correctly. 15
Setting the energy save mode 15
Cooking/Reheating 15
Power levels 16
Stopping the cooking 16
Adjusting the cooking time. 16
Using the instant reheat/cook feature 17
Instantreheat/cook settings. 17
Using the auto rapid defrost feature 18
Auto rapid defrost settings. 18
Grilling 19
Combining microwaves and the grill 19
Multistage cooking 20
Choosing the accessories. 20
Switching the beeper off 21
Safety-locking your microwave oven 21
Cookware guide 21
Cooking guide 22
What to do if you are in doubt or have a problem. 29
Technical specifications 30
QUICK LOOK-UP GUIDE
If you want to cook some food.
- Place the food in the oven. Select the power level by pressing the Power Level button once or more times.
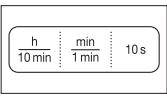
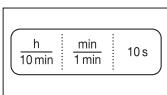
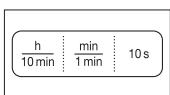
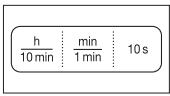
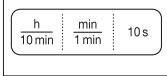
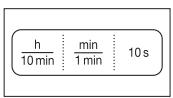
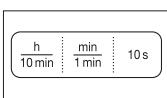
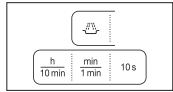
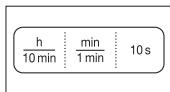
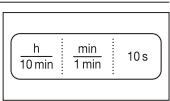
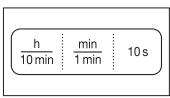
- Select the cooking time by pressing the 10 min, 1 min or 10 s button as required.
- Press the Start (◇) button.
Result: Cooking starts. The oven beeps four times when cooking is over.

If you want to defrost some food.
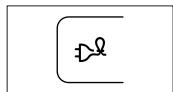
- Place the frozen food in the oven. Press the Rapid ( *) button once or more times according to the type of food to be defrosted.

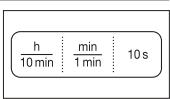
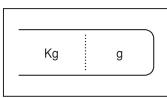
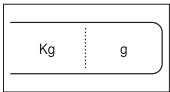
- Select the weight by pressing the kg and g buttons as required.
- Press the Start (◇) button.

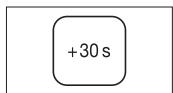
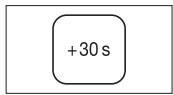
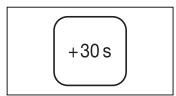
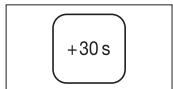
If you want to add an extra minute.
Leave the food in the oven. Press +30s once or more times for each extra 30 seconds that you wish to add.


If you want to grill some food.
- Preheat the grill to the required temperature, by pressing the Grill (UJ), time setting (10 min, 1 min and 10 s) and Start (◇) button.

- Place the food on the rack in the oven. Press the Grill (UN) button. Select the cooking time by pressing the 10 min, 1 min and 10 s buttons.
- Press the Start (◇) button.

ACCESSORIES
Depending on the model that you have purchased, you are supplied with several accessories that can be used in a variety of ways.
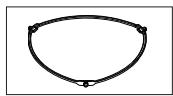
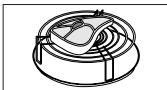
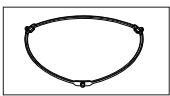
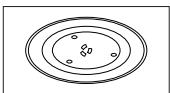
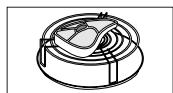
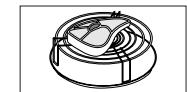
- Roller ring, to be placed in the centre of the oven.
Purpose: The roller ring supports the turntable.
- Turntable, to be placed on the roller ring with the centre fitting to the coupler.
Purpose: The turntable serves as the main cooking surface; it can be easily removed for cleaning.
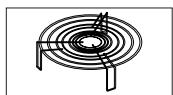
- Grill rack, to be placed on the turntable.
Purpose: The metal rack can be used in grill and combination cooking.
DO NOT operate the microwave oven without the roller ring and turntable.
12


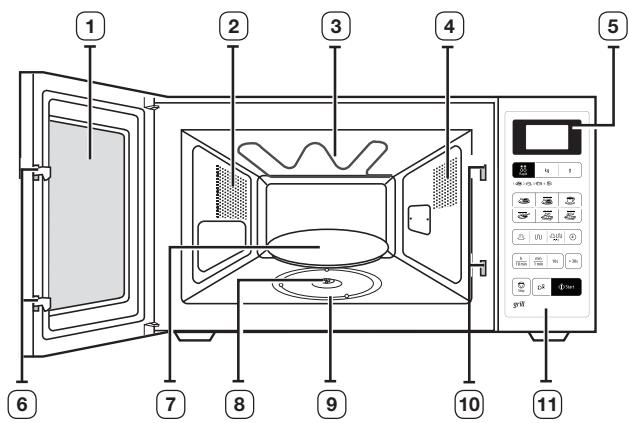
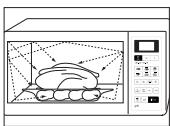
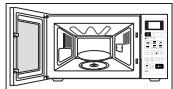
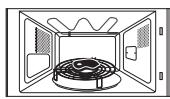
OVEN
- DOOR
- VENTILATION HOLES
- GRILL
- LIGHT
- DISPLAY
-
DOOR LATCHES
-
TURNTABLE
- COUPLER
- ROLLER RING
- SAFETY INTERLOCK HOLES
- CONTROL PANEL
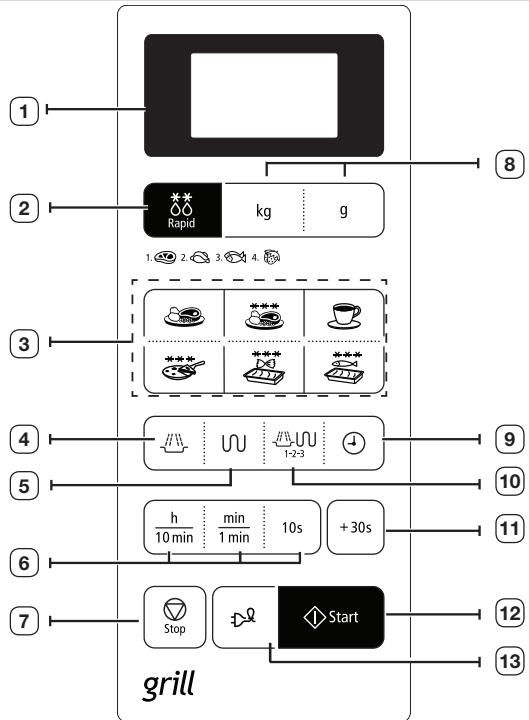
CONTROL PANEL
- DISPLAY
- AUTO RAPID DEFROST FEATURE SELECTION
- INSTANT REHEAT/COOK FEATURE SELECTION
- MICROWAVE MODE BUTTON
- GRILL MODE BUTTON
-
TIME SETTING BUTTON
-
STOP/CANCEL BUTTON
- WEIGHT SELECTION
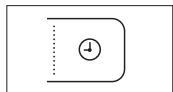
- CLOCK SETTING BUTTON
10.COMBI MODE BUTTON - +30s BUTTON
- START BUTTON
- ENERGY SAVE BUTTON


SETTING THE TIME
Your microwave oven has an inbuilt clock. When power is supplied, ".0", "88:88" or "12:00" is automatically displayed on the display.
Please set the current time. The time can be displayed in either the 24- hour or 12-hour notation. You must set the clock:
- When you first install your microwave oven
After a power failure
Do not forget to reset the clock when you switch to and from summer and winter time.
Auto energy saving function
If you do not select any function when appliance is in the middle of setting or operating with temporary stop condition, function is canceled and clock will be displayed after 25 minutes.
Oven Lamp will be turned off after 5 minutes with door open condition.
- To display the time in the...
24-hour notation
12-hour notation
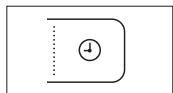
Press the Clock button once or twice.
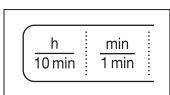
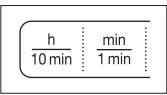
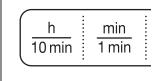
- Set the hour with the h button and the minutes with the min button.
- When the right time is displayed, press the Clock button again to start the clock.
Result : The time is displayed whenever you are not using the microwave oven.
Microwaves are high-frequency electromagnetic waves; the energy released enables food to be cooked or reheated without changing either the form or the colour.
You can use your microwave oven to:
Defrost
- Instant Reheat/Cook
Cook
Cooking Principle.
- The microwaves generated by the magnetron are distributed uniformly as the food rotates on the turntable. The food is thus cooked evenly.
- The microwaves are absorbed by the food up to a depth of about 1 inch (2.5 cm). Cooking then continues as the heat is dissipated within the food.
- Cooking times vary according to the recipient used and the properties of the food:
Quantity and density
Water content
- Initial temperature (refrigerated or not)
As the centre of the food is cooked by heat dissipation, cooking continues even when you have taken the food out of the oven. Standing times specified in recipes and in this booklet must therefore be respected to ensure:
Even cooking of the food right to the centre
The same temperature throughout the food


CHECKING THAT YOUR OVEN IS OPERATING CORRECTLY
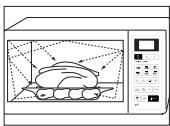
The following simple procedure enables you to check that your oven is working correctly at all times. Open the oven door by pushing the large button in the bottom right-hand corner of the control panel. First, place a bowl of water on the turntable. Then, close the door.
- Press the Power Level button and set the time to 4-5 minutes by pressing the 1 min button the appropriate number of times.
- Press the Start (◇) button.
Result: The oven heats the water for 4 to 5 minutes. The water should then be boiling.

The oven must be plugged into an appropriate wall socket. The turntable must be in position in the oven. If a power level other than the maximum is used, the water takes longer to boil.
SETTING THE ENERGY SAVE MODE
The oven has an Energy save mode. This facility saves electricity when the oven is not in use.
- press the Energy Save button.
- To remove Energy save mode, open the door and then display shows current time. The oven is ready for use.
COOKING/REHEATING
The following procedure explains how to cook or reheat food. ALWAYS check your cooking settings before leaving the oven unattended. First, place the food in the centre of the turntable. Then, close the door.
- Press the Power Level button.
Result : The 750 W (maximum cooking power) indications are displayed:
Select the appropriate power level by pressing the Power Level button again until the corresponding wattage is displayed. Refer to the power level table on the next page.
- Set the cooking time by pressing the 10 min, 1 min and 10 s button.
- Press the Start (◇) button.
Result: The oven light comes on and the turntable starts rotating.
1) Cooking starts and when it has finished the oven beeps four times.
2) The end reminder signal will beep 3 times (once every minute).
3) The current time is displayed again.
Never switch the microwave oven on when it is empty.h


POWER LEVELS
You can choose among the power levels below.
| Power level | Output | |
| MWO | GRILL | |
| HIGH | 750 W | - |
| MEDIUM HIGH | 600 W | - |
| MEDIUM | 450 W | - |
| MEDIUM LOW | 300 W | - |
| DEFROST (♂) | 180 W | - |
| LOW / KEEP WARM | 100 W | - |
| GRILL | - | 1100 W |
| COMBI I (♀,un) | 600 W | 1100 W |
| COMBI II (♂,un) | 450 W | 1100 W |
| COMBI III (♀,un) | 300 W | 1100 W |
If you select higher power level, the cooking time must be decreased.
If you select lower power level, the cooking time must be increased.
STOPPING THE COOKING
You can stop cooking at any time to check the food.
- To stop temporarily; Open the door.
Result: Cooking stops. To resume cooking, close the door and press Start (◇) again.
- To stop completely; Press the Stop ( ) button.
Result: The cooking st
If you wish to cancel the cooking settings, press the Stop (⊗) but

You can cancel any setting before starting cooking by simply pressing Stop () button.
ADJUSTING THE COOKING TIME
You can increase the cooking time by pressing the +30 s button once for each 30 seconds to be added.
- Press the +30 s button once for each 30 seconds to be added.
- Press the Start (◇) button.


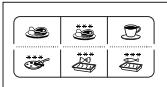
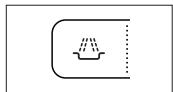
USING THE INSTANT REHEAT/COOK FEATURE
With the Instant Reheat feature, the cooking time is set automatically. You can adjust the number of servings by pressing the appropriate In Reheat button the required number of times.
First, place the food in the centre of the turntable and close the door.
Press the Instant Reheat/Cook button which you want the required number of times.
Result: Press Start (◇) button to start cooking. When it has finished:
1) The oven beeps four times.
2) The end reminder signal will beep 3 times. (once every minute)
3) The current time is displayed again.
Example: Press the Drinks button once times to reheat one cups of coffee. Refer to the table on the next page for further details.
Use only recipients that are microwave-safe.
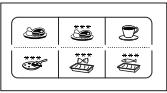
INSTANT REHEAT/COOK SETTINGS
The following table presents 6 Auto Reheat/Cook Programmes, quantities, standing times and appropriate recommendations.
| Food/Button | Serving Size | Standing Time | Recommendations |
| Ready Meals (chilled) | 300-350 g | 3 min. | Put on a ceramic plate and cover with microwave cling film. This programme is suitable for meals consisting of 3 components (e.g. meat with sauce, vegetables and a side dish like potatoes, rice or pasta). |
| 400-450 g | |||
| Drinks (Coffee, milk, tea, water with room temperature) | 150 ml | 1-2 min. | Pour in to a ceramic cup and reheat uncovered. Place cup (150 ml) or mug (250 ml) in the centre of turntable, Stir carefully before and after standing time. |
| (1 cup) | |||
| 250 ml | |||
| (1 mug) |
| Food/Button | Serving Size | Standing Time | Recommendations |
| Frozen Ready Meals (frozen) | 300-350 g | 4 min. | Take frozen ready meal and check if dish is suitable for microwave. Pierce film of ready meal. Put the frozen ready meal in the centre. This programme is suitable for frozen ready meals consisting of 3 components (e.g. meat with sauce, vegetables and a side dish like potatoes, rice or pasta). |
| 400-450 g | |||
| Frozen Fish Gratin (frozen) | 200 g | 2-3 min. | Put the frozen fish gratin into a suitable sized glass pyrex dish. Put the dish on the rack. This programme is suitable for frozen ready products consisting o fish fillets topped with vegetables and sauce. |
| 400 g | |||
| Frozen Mini Quich/Pizza (frozen) | 150 g | - | Put the frozen mini-quiches or mini-pizzas evenly on the rack. |
| (4-6 pcs) | |||
| 250 g | |||
| (7-9 pcs) | |||
| Frozen Pasta Gratin (frozen) | 200 g | 2-3 min. | Put the frozen pasta gratin into a suitable sized glass pyrex dish. Put the dish on the rack. This programme is suitable for frozen pasta gratin such as lasagne, cannelloni or macaroni. |
| 400 g |


USING THE AUTO RAPID DEFROST FEATURE
The Auto Rapid Defrost feature enables you to defrost meat, poultry, fish. The defrost time and power level are set automatically.
You simply select the programme and the weight.
Use only dishes that are microwave-safe.
First, place the frozen food in the centre of the turntable and close the door.
- Select the type of food that you are cooking by pressing the Rapid Defrost (空) button one or more times. (Refer to the table on the opposite page for further details)

- Select the food weight by pressing the kg and g button. It is possible to set up to a maximum of 1500 g.
- Press the Start (◇) button.
Result :
Defrosting begins.
The oven beeps halfway through defrosting to remind you to turn the food over.
- Press Start (◇) button again to finish defrosting.
You can also defrost food manually. To do so, select the microwave cooking/reheating function with a power level of 180 W. Refer to the section entitled "Cooking/Reheating" on page 15 for further details.
AUTO RAPID DEFROST SETTINGS
The following table presents the various Auto Rapid Defrost programmes, quantities, standing times and appropriate recommendations. Remove all kinds of package material before defrosting. Place meat, poultry, fish and fruit/berry on a ceramic plate.
| Code | Food | Portion | Standing time | Recommendations |
| 1 | Meat | 200-1500 g | 20-90 min. | Shield the edges with aluminium foil. Turn the meat over, when the oven beeps. This programme is suitable for beef, lamb, pork, steaks, chops, minced meat. |
| 2 | Poultry | 200-1500 g | 20-90 min. | Shield the leg and wing tips with aluminium foil. Turn the poultry over, when the oven beeps. This programme is suitable for whole chicken as well as for chicken portions. |
| 3 | Fish | 200-1500 g | 20-80 min. | Shield the tail of a whole fish with aluminium foil. Turn the fish over, when the oven beeps. This programme is suitable for whole fishes as well as for fish fillets. |
| 4 | Fruit/ Berry | 100-600 g | 5-20 min. | Spread fruits evenly into a flat glass dish. This programme is suitable for all kind of fruits. |
Select the Manual Defrosting function with a power level of 180 W if you want to defrost food manually. For further details on manual defrosting and defrosting time, refer to the page 26-27.
GRILLING
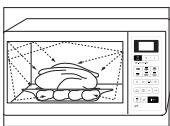
The grill enables you to heat and brown food quickly, without using microwaves. To this aim, a grill rack is supplied with your microwave oven.
- Preheat the grill to the required temperature, by pressing the Grill, time setting (10 min, 1 min and 10 s) and Start button.
- Open the door and place the food on the rack.
- Place the food on the rack in the oven. Press the Grill button. Select the cooking time by pressing the 10 min, 1 min and 10 s buttons. (The maximun grilling time is 60 minute.)
- Press the Start (◇) button.
Result: The oven light comes on and the turntable starts rotating.
1) Cooking starts and when it has finished the oven beeps four times.
2) The end reminder signal will beep 3 times (once every minute).
3) The current time is displayed again.
Do not worry if the heater turns off and on while grilling. This system is designed to prevent overheating of the oven.
Always use oven gloves when touching the dishes in the oven, as they will be very hot.
COMBINING MICROWAVES AND THE GRILL
You can also combine microwave cooking with the grill, to cook quickly and brown at the same time.
ALWAYS use microwave-safe and oven-proof cookware. Glass or ceramic dishes are ideal as they allow the microwaves to penetrate the food evenly.
ALWAYS use oven gloves when touching the recipients in the oven, as they will be very hot.
- Open the oven door. Place the food on the rack and the rack on the turntable. Close the door.
- Press the Combi button.
Result : The following indications are displayed:
Combi (microwave and grill mode) 600 W (out power)
Select the appropriate power level by pressing the Combi button again until the corresponding power level is displayed.
You cannot set the temperature of the grill.
- Set the cooking time by pressing the 10 min, 1 min and 10 s buttons. The maximum cooking time is 60 minutes.
- Press the Start (◇) button.
Result: Combination cooking starts. When it has finished.
1) The oven beeps four times.
2) The end reminder signal will beep 3 times (once every minute).
3) The current time is displayed again.
The maximum microwave power for the combined microwave and grill mode is 600 W.

- Press the Grill button. The grill mode (II):

- Set the cooking time by pressing the 10 min, 1 min and 10 s buttons the appropriate number of times (5 minutes in the example). (The maximun grilling time is 60 minutes.)
- Press the Start (◇) button.
Result :
The three modes [defrosting and cooking (I, II)] are selected one after the other. According to the defrosting mode that you have chosen, the oven may beep halfway through defrosting to remind you to turn the food over. When cooking is over, the oven beeps four times.
- The end reminder signal will beep 3 times (once every minute).
The current time is displayed again.
CHOOSING THE ACCESSORIES
Use microwave-safe recipients; do not use plastic containers, dishes, paper cups, towels, etc.
If you wish to select the combined cooking mode (grill and microwave), use only dishes that are microwave-safe and oven-proof.
For further details on suitable cookware and utensils, refer to the Cookware Guide on page 21-22.

SWITCHING THE BEEPER OFF
You can switch the beeper off whenever you want.
- Press the Stop (⊗) and Start (◇) buttons at the same time.
Result: The oven will not beep each time you press a button.


- To switch the beeper back on, press the Stop (☑) and Start (◇) buttons again at the same time.
Result: The oven operates with the beeper on again.


Your microwave oven is fitted with a special Child Safety programme, which enables the oven to be "locked" so that children or anyone unfamiliar with it cannot operate it accidentally. The oven can be locked at any time.
- Press the Stop (☑) and Clock buttons at the same time.
Result : The oven is locked (no functions can be selected).

- To unlock the oven, press the Stop (⊗) and Clock buttons again at the same time.
Result : The oven can be used normally.
COOKWARE GUIDE
To cook food in the microwave oven, the microwaves must be able to penetrate the food, without being reflected or absorbed by the dish used.
Care must therefore be taken when choosing the cookware. If the cookware is marked microwave-safe, you do not need to worry.
The following table lists various types of cookware and indicates whether and how they should be used in a microwave oven.
| Cookware | Microwave-safe | Comments |
| Aluminum foil | ✓× | Can be used in small quantities to protect areas against overcooking. Arcing can occur if the foil is too close to the oven wall or if too much foil is used. |
| Browning plate | ✓ | Do not preheat for more than eight minutes. |
| China and earthenware | ✓ | Porcelain, pottery, glazed earthenware and bone china are usually suitable, unless decorated with a metal trim. |
| Disposable polyester cardboard dishes | ✓ | Some frozen foods are packaged in these dishes. |
| Fast-food packaging | ||
| • Polystyrene cups containers | ✓ | Can be used to warm food. Overheating may cause the polystyrene to melt. |
| • Paper bags or newspaper | × | May catch fire. |
| • Recycled paper or metal trims | × | May cause arcing. |
| Glassware | ||
| • Oven-to-table ware | ✓ | Can be used, unless decorated with a metal trim. |
| • Fine glassware | ✓ | Can be used to warm foods or liquids. Delicate glass may break or crack if heated suddenly. |

| Cookware | Microwave-safe | Comments |
| • Glass jars | ✓ | Must remove the lid. Suitable for warming only. |
| Metal | ||
| • Dishes | × | May cause arcing or fire. |
| • Freezer bag twist ties | × | |
| Paper | ||
| • Plates, cups, napkins and Kitchen paper | ✓ | For short cooking times and warming. Also to absorb excess moisture. |
| • Recycled paper | × | May cause arcing. |
| Plastic | ||
| • Containers | ✓ | Particularly if heat-resistant thermoplastic. Some other plastics may warp or discolour at high temperatures. Do not use Melamine plastic. |
| • Cling film | ✓ | Can be used to retain moisture. Should not touch the food. Take care when removing the film as hot steam will escape. |
| • Freezer bags | ✓× | Only if boilable or oven-proof. Should not be airtight. Prick with a fork, if necessary. |
| Wax or grease-proof paper | ✓ | Can be used to retain moisture and prevent spattering. |
:Recommended
X : Use caution
X :Unsafe
COOKING GUIDE
MICROWAVES
Microwave energy actually penetrates food, attracted and absorbed by its water, fat and sugar content.
The microwaves cause the molecules in the food to move rapidly. The rapid movement of these molecules creates friction and the resulting heat cooks the food.
COOKING
Cookware for microwave cooking:
Cookware must allow microwave energy to pass through it for maximum efficiency. Microwaves are reflected by metal, such as stainless steel, aluminium and copper, but they can penetrate through ceramic, glass, porcelain and plastic as well as paper and wood. So food must never be cooked in metal containers.
Food suitable for microwave cooking:
Many kinds of food are suitable for microwave cooking, including fresh or frozen vegetables, fruit, pasta, rice, grains, beans, fish, and meat. Sauces, custard, soups, steamed puddings, preserves, and chutneys can also be cooked in a microwave oven. Generally speaking, microwave cooking is ideal for any food that would normally be prepared on a hob. Melting butter or chocolate, for example (see the chapter with tips, techniques and hints).
Covering during cooking
To cover the food during cooking is very important, as the evaporated water rises as steam and contributes to cooking process. Food can be covered in different ways: e.g. with a ceramic plate, plastic cover or microwave suitable cling film.
Standing times
After cooking is over food the standing time is important to allow the temperature to even out within the food.


Cooking Guide for frozen vegetables
Use a suitable glass pyrex bowl with lid. Cook covered for the minimum time - see table. Continue cooking to get the result you prefer.
Stir twice during cooking and once after cooking. Add salt, herbs or butter after cooking. Cover during standing time.
| Food | Portion | Power | Time (min.) | Standing time (min.) | Instructions |
| Spinach | 150 g | 600 W | 5½-6½ | 2-3 | Add 15 ml (1 tbsp.) cold water. |
| Broccoli | 300 g | 600 W | 10-11 | 2-3 | Add 15 ml (1 tbsp.) cold water. |
| Peas | 300 g | 600 W | 8-9 | 2-3 | Add 15 ml (1 tbsp.) cold water. |
| Green Beans | 300 g | 600 W | 10-11 | 2-3 | Add 15 ml (1 tbsp.) cold water. |
| Mixed Vegetables (carrots/peas/corn) | 300 g | 600 W | 9-10 | 2-3 | Add 15 ml (1 tbsp.) cold water. |
| Mixed Vegetables (chinese style) | 300 g | 600 W | 8½-9½ | 2-3 | Add 15 ml (1 tbsp.) cold water. |
Cooking Guide for fresh vegetables
Use a suitable glass pyrex bowl with lid. Add 30-45 ml cold water (2-3 tbsp.) for every 250 g unless another water quantity is recommended - see table. Cook covered for the minimum time - see table. Continue cooking to get the result you prefer. Stir once during and once after cooking. Add salt, herbs or butter after cooking. Cover during a standing time of 3 minutes.
Hint: Cut the fresh vegetables into even sized pieces. The smaller they are cut, the quicker they will cook.
All fresh vegetables should be cooked using full microwave power (750 W).
| Food | Portion | Time (min.) | Standing time (min.) | Instructions |
| Broccoli | 250 g | 5-5½ | 3 | Prepare even sized florets. Arrange the stems to the centre. |
| 500 g | 8½-9 | |||
| Brussels Sprouts | 250 g | 6½-7½ | 3 | Add 60-75 ml (5-6 tbsp.) water. |
| Carrots | 250 g | 5-6 | 3 | Cut carrots into even sized slices. |
| Cauliflower | 250 g | 5½-6 | 3 | Prepare even sized florets. Cut big florets into halves. Arrange stems to the centre. |
| 500 g | 9½-10 | |||
| Courgettes | 250 g | 4-4½ | 3 | Cut courgettes into slices. Add 30 ml (2 tbsp.) water or a knob of butter. Cook until just tender. |
| Egg Plants | 250 g | 4½-5 | 3 | Cut egg plants into small slices and sprinkle with 1 tablespoon lemon juice. |
| Leeks | 250 g | 5-5½ | 3 | Cut leeks into thick slices. |
| Mushrooms | 125 g | 1½-2 | 3 | Prepare small whole or sliced mushrooms. Do not add any water. Sprinkle with lemon juice. Spice with salt and pepper. Drain before serving. |
| 250 g | 3½-4 | |||
| Onions | 250 g | 5-6 | 3 | Cut onions into slices or halves. Add only 15 ml (1 tbsp.) water. |
| Pepper | 250 g | 4½-5 | 3 | Cut pepper into small slices. |
| Potatoes | 250 g | 5-6 | 3 | Weigh the peeled potatoes and cut them into similar sized halves or quarters. |
| 500 g | 9-10 | |||
| Turnip Cabbage | 250 g | 5-5½ | 3 | Cut turnip cabbage into small cubes. |
Cooking Guide for rice and pasta
Rice:
Use a large glass pyrex bowl with lid - rice doubles in volume during cooking. Cook covered.
After the cooking time is over, stir before standing time and salt or add herbs and butter.
Remark: the rice may not have absorbed all water after the cooking time is finished.
Pasta :
Use a large glass pyrex bowl. Add boiling water, a pinch of salt and stir well. Cook uncovered.
Stir occasionally during and after cooking. Cover during standing time and drain thoroughly afterwards.
| Food | Portion | Power | Time (min.) | Standing time (min.) | Instructions |
| White Rice (parboiled) | 250 g | 750 W | 17-18 | 5 | Add 500 ml cold water. |
| Brown Rice (parboiled) | 250 g | 750 W | 22-23 | 5 | Add 500 ml cold water. |
| Brown rice | 250 g | 750 W | 22-23 | 10 | Add 600 ml cold water. |
| Mixed Rice (rice + wild rice) | 250 g | 750 W | 18-19 | 5 | Add 500 ml cold water. |
| Mixed Corn (rice + grain) | 250 g | 750 W | 19-20 | 5 | Add 400 ml cold water. |
| Pasta | 250 g | 750 W | 11-12 | 5 | Add 1000 ml hot water. |
REHEATING
Your microwave oven will reheat food in a fraction of the time that conventional ovens hobs normally take.
Use the power levels and reheating times in the following chart as a guide. The times in the chart consider liquids with a room temperature of about +18 to +20^ or a chilled food with a temperature of about +5 to +7^ .
Arranging and covering
Avoid reheating large items such as joint of meat - they tend to overcook and dry out before the centre is piping hot. Reheating small pieces will be more successful.
Power levels and stirring
Some foods can be reheated using 750 W power while others should be reheated using 600 W, 450 W or even 300 W.
- Check the tables for guidance. In general, it is better to reheat food using a lower power level, if the food is delicate, in large quantities, or if it is likely to heat up very quickly (mince pies, for example).
Stir well or turn food over during reheating for best results. When possible, stir again before serving.
Take particular care when heating liquids and baby foods. To prevent eruptive boiling of liquids and possible scalding, stir before, during and after heating. Keep them in the microwave oven during standing time. We recommend putting a plastic spoon or glass stick into the liquids. Avoid overheating (and therefore spoiling) the food.
It is preferable to underestimate cooking time and add extra heating time, if necessary.
Heating and standing times
When reheating food for the first time, it is helpful to make a note of the time taken - for future reference.
Always make sure that the reheated food is piping hot throughout.
Allow food to stand for a short time after reheating - to let the temperature even out.
The recommended standing time after reheating is 2-4 minutes, unless another time is recommended in the chart.
Take particular care when heating liquids and baby food. See also the chapter with the safety precautions.

REHEATING LIQUIDS
Always allow a standing time of at least 20 seconds after the oven has been switched off to allow the temperature to even out. Stir during heating, if necessary, and ALWAYS stir after heating. To prevent eruptive boiling and possible scalding, you should put a spoon or glass stick into the beverages and stir before, during and after heating.
REHEATING BABY FOOD
BABY FOOD: Empty into a deep ceramic plate. Cover with plastic lid. Stir well after reheating! Let stand for 2-3 minutes before serving. Stir again and check the temperature. Recommended serving temperature: between 30 - 40^
BABY MILK: Pour milk into a sterilised glass bottle. Reheat uncovered. Never heat a baby's bottle with teat on, as the bottle may explode if overheated. Shake well before standing time and again before serving! Always carefully check the temperature of baby milk or food before giving it to the baby. Recommended serving temperature: ca. 37^ .
REMARK:
Baby food particularly needs to be checked carefully before serving to prevent burns.
Use the power levels and times in the next table as a guide lines for reheating.
Reheating liquids and food
Use the power levels and times in this table as a guide lines for reheating.
| Food | Portion | Power | Time (min.) | Standing time (min.) | Instructions |
| Drinks (coffee, tea and water) | 150 ml (1 cup) | 750 W | 1½-2 | 1-2 | Pour in to a ceramic cup and reheat uncovered. Place cup 150 ml or mug 250 ml in the centre of turntable, Stir carefully before and after standing time. |
| 250 ml (1 mug) | 2-2½ | ||||
| Soup (chilled) | 250 g | 750 W | 3-3½ | 2-3 | Pour into a deep ceramic plate. Cover with plastic lid. Stir well after reheating. Stir again before serving. |
| 450 g | 4-4½ | ||||
| Stew (chilled) | 350 g | 600 W | 5-6 | 2-3 | Put stew in a deep ceramic plate. Cover with plastic lid. Stir occasionally during reheating and again before standing and serving. |
| Pasta with sauce (chilled) | 350 g | 600 W | 4-5 | 3 | Put pasta (e.g. spaghetti or egg noodles) on a flat ceramic plate. Cover with microwave cling film. Stir before serving. |
| Filled pasta with sauce (chilled) | 350 g | 600 W | 4½-5½ | 3 | Put filled pasta (e.g. ravioli, tortellini) in a deep ceramic plate. Cover with plastic lid. Stir occasionally during reheating and again before standing and serving. |
| Plated meal (chilled) | 300 g | 600 W | 5-6 | 3 | Plate a meal of 2-3 chilled components on a ceramic dish. Cover with microwave cling-film. |
| 400 g | 6½ -7½ |

| Food | Portion | Power | Time (min.) | Standing time (min.) | Instructions |
| Frozen ready meal | 300 g | 600 W | 11½-12½ | 4 | Put microwave proof dish with frozen ready meal (-18 °C) on the turntable. Pierce film or cover with microwave cling film. After reheating stand for 4 minutes. |
| 400 g | 13-14 |
Reheating baby food and milk
| Food | Portion | Power | Time | Standing time (min.) | Instructions |
| Baby food (vegetables + meat) | 190 g | 600 W | 30 sec. | 2-3 | Empty into ceramic deep plate. Cook covered. Stir after cooking time. Stand for 2-3 minutes. Before serving, stir well and check the temperature carefully. |
| Baby porridge (grain + milk + fruit) | 190 g | 600 W | 20 sec. | 2-3 | Empty into ceramic deep plate. Cook covered. Stir after cooking time. Stand for 2-3 minutes. Before serving, stir well and check the temperature carefully. |
| Baby milk | 100 ml 200 ml | 300 W | 30-40 sec. 1 min. to 1 min. 10 sec. | 2-3 | Stir or shake well and pour into a sterilized glass bottle. Place into the centre of turn-table. Cook uncovered. Shake well and stand for at least 3 minutes. Before serving, shake well and check the temperature carefully. |
DEFROSTING
Microwaves are an excellent way of defrosting frozen food. Microwaves gently defrost frozen food in a short period of time. This can be of great advantage, if unexpected guests suddenly show up.
Frozen poultry must be thoroughly thawed before cooking. Remove any metal ties and take it out of any wrapping to allow thawed liquid to drain away.
Put the frozen food on a dish without cover. Turn over half way, drain off any liquid and remove any giblets as soon as possible.
Check the food occasionally to make sure that it does not feel warm.
If smaller and thinner parts of the frozen food start to warm up, they can be shield by wrapping very small strips of aluminium foil around them during defrosting.
Should poultry start to warm up on the outer surface, stop thawing and allow it to stand for 20 minutes before continuing.
Leave the fish, meat and poultry to stand in order to complete defrosting.
The standing time for complete defrosting will vary depending on the quantity defrosted. Please refer to the table below.
Hint:
Flat food defrosts better than thick and smaller quantities need less time than bigger ones. Remember this hint while freezing and defrosting food.
For defrosting of frozen food with a temperature of about -18 to -20^ , use the following table as a guide.


All frozen food should be defrosted using defrosting power level (180 W).
| Food | Portion | Time (min.) | Standing time (min.) | Instructions |
| Meat | ||||
| Minced beef | 500 g | 10-12 | 5-20 | Place the meat on a flat ceramic plate. Shield thinner edges with aluminium foil. Turn over after half of defrosting time! |
| Pork steaks | 250 g | 6-8 | ||
| Poultry | ||||
| Chicken pieces | 500 g | 12-14 | 15-40 | First, put chicken pieces first skin-side down, whole chicken first breast-side-down on a flat ceramic plate. Shield the thinner parts like wings and ends with aluminium foil. Turn over after half of defrosting time! |
| Whole chicken | (2 pcs) | 25-28 | ||
| Fish | ||||
| Fish fillets | 250 g | 6-7 | 5-20 | Put frozen fish in the middle of a flat ceramic plate. Arrange the thinner parts under the thicker parts. Shield narrow ends with aluminium foil. Turn over after half of defrosting time! |
| (2 pcs) | 11-13 | |||
| 400 g | ||||
| (4 pcs) | ||||
| Fruits | ||||
| Berries | 250 g | 6-7 | 5-10 | Distribute fruits on a flat, round glass dish (with a large diameter). |
| Bread | ||||
| Bread rolls (each ca. 50 g) | 2 pcs | 1½-2 | 5-10 | Arrange rolls in a circle or bread horizontally on kitchen paper in the middle of turntable. Turn over after half of defrosting time! |
| Toast/Sandwich | 4 pcs | 3-4 | ||
| German bread (wheat + rye flour) | 250 g | 4-5 | ||
| 500 g | 8-10 |
GRILL
The grill-heating elements are located underneath the ceiling of the cavity. They operates while the door is closed and the turntable is rotating. The turntable's rotation makes the food brown more evenly. Preheating the grill for 2-3 minutes will make the food brown more quickly.
Cookware for grilling:
Should be flameproof and may include metal. Do not use any type of plastic cookware, as it can melt.
Food suitable for grilling:
Chops, sausages, steaks, hamburgers, bacon and gammon rashers, thin fish portions, sandwiches and all kinds of toast with toppings.
Important remark:
Whenever the grill only mode is used, make sure that the grill-heating element is under the ceiling in the horizontal position and not on the back-wall in the vertical position. Please remember that food must be placed on the high rack, unless another instruction is recommended.
MICROWAVE + GRILL
This cooking mode combines the radiant heat that is coming from the grill with the speed of microwave cooking. It operates only while the door is closed and the turntable is rotating. Due to the rotation of the turntable, the food browns evenly.
Three combination modes are available with this model:
600 W + Grill, 450 W + Grill and 300 W + Grill.
Cookware for cooking with microwave + grill
Please use cookware that microwaves can pass through. Cookware should be flameproof. Do not use metal cookware with combination mode. Do not use any type of plastic cookware, as it can melt.
Food suitable for microwave + grill cooking:
Food suitable for combination mode cooking include all kinds of cooked food which need reheating and browning (e.g. baked pasta), as well as foods which require a short cooking time to brown the top of the food. Also, this mode can be used for thick food portions that benefit from a browned and crispy top (e.g. chicken pieces, turning them over half way through cooking). Please refer to the grill table for further details.
Important remark:
Whenever the combination mode (microwave + grill) is used, make sure that the grill heating element is under the ceiling in the horizontal position and not on the back-wall in the vertical position. The food should be placed on the high rack, unless another instruction is recommended. Otherwise it has to be placed directly on the turntable. Please refer to the instructions in the following chart. The food must be turned over, if it is to be browned on both sides.


Grill guide
Preheat the heater with the grill-function for 2-3 minutes before grilling food. Use the power levels and times in this table as guide lines for grilling. Use oven gloves when taking out food.
| Fresh food | Portion | Preheat time (min) | Cooking mode | 1stside time (min.) | 2ndsidetime (min.) |
| Toast slices | 4 pcs(4 x 25 g) | 3 | Grill only | 6-7 | 5-6 |
| Instructions | |||||
| Put the toast slices side by side on the rack. | |||||
| Bread rolls(already baked) | 2-4 pieces | 3 | Grill only | 3-4 | 2-3 |
| Instructions | |||||
| Put bread rolls first with the bottom side up in a circle directly on the rack. | |||||
| Grilled tomatoes | 250 g(2 pcs) | 3 | 300 W +Grill | 5½-6½ | - |
| Instructions | |||||
| Cut tomatoes into halves. Put salt, pepper and some cheese on top. Arrange in a circle in a flat glass pyrex dish. Place dish on the rack. | |||||
| Toast hawaii | 2 pcs(300 g) | 3 | 300 W +Grill | 7-9 | - |
| Instruction | |||||
| Toast the bread slices first. Put the toast with topping (ham, pineapple, cheese slices) side by side on the rack. After cooking stand for 2-3 minutes. | |||||
| Chicken wings(chilled) | 400-500 g(6 pcs) | 3 | 300 W +Grill | 12-14 | 11-13 |
| Instruction | |||||
| Prepare chicken pieces such as chicken wings or drumsticks with oil and spices. Put them in a circle on the rack with the bones to the middle. After grilling stand for 2-3 minutes. | |||||
| Baked potatoes | 500 g | 3 | 450 W +Grill | 10-12 | - |
| Instruction | |||||
| Cut potatoes into halves and put in a circle on the rack with the cut side to the grill. Brush cut side with olive oil and spices. After grilling stand for 3 minutes. | |||||
| Fresh food | Portion | Preheat time (min) | Cooking mode | 1stside time (min.) | 2ndsidetime (min.) |
| Frozen pasta | 400 g | - | 600 W + Grill | 16-18 | - |
| Instruction | |||||
| Put the frozen pasta (-18°C), e.g. lasagne, tortellini or caneloni in a suitable sized glass pyrex dish and set on rack. | |||||
| Frozen fish gratin | 400 g | - | 450 W + Grill | 20-22 | - |
| Instruction | |||||
| Put the frozen fish gratin (-18°C) in a suitable sized glass pyrex dish and set on rack. | |||||
| Frozen pizza snacks | 250 g(8 pcs) | - | 300 W + Grill | 10-12 | - |
| Instruction | |||||
| Put the frozen pizza snacks (-18°C) or mini quiches in a circle on the rack. | |||||
| Frozen streusel cake | 200-250 g(1-2 pcs) | - | 300 W + Grill | 4-6 | - |
| Instruction | |||||
| Put the frozen cake pieces (-18°C) side by side on rack. After defrosting stand for 5 minutes. | |||||


SPECIAL HINTS
MELTING BUTTER
Put 50g butter into a small deep glass dish. Cover with plastic lid. Heat for 30-40 seconds using 750~W , until butter is melted.
MELTING CHOCOLATE
Put 100g chocolate into a small deep glass dish.
Heat for 3-5 minutes, using 450W until chocolate is melted.
Stir once or twice during melting. Use oven gloves while taking out!
MELTING CRYSTALLIZED HONEY
Put 20 g crystallized honey into a small deep glass dish.
Heat for 20-30 seconds using 300W until honey is melted.
MELTING GELATINE
Lay dry gelatine sheets (10 g) for 5 minutes into cold water.
Put drained gelatine into a small glass pyrex bowl.
Heat for 1 minute using 300W
Stir after melting.
COOKING GLAZE/ICING (FOR CAKE AND GATEAUX)
Mix instant glaze (approximately 14g ) with 40g sugar and 250ml cold water.
Cook uncovered in a glass pyrex bowl for 3 12 to 4 12 minutes using 750 W, until glaze/icing is transparent. Stir twice during cooking.
COOKING JAM
Put 600 g fruits (for example mixed berries) in a suitable sized glass pyrex bowl with lid. Add 300 g preserving sugar and stir well.
Cook covered for 10-12 minutes using 750~W
Stir several times during cooking. Empty directly into small jam glasses with twist-off lids. Stand on lid for 5 minutes.
COOKING PUDDING
Mix pudding powder with sugar and milk (500 ml) by following the manufacturers instructions and stir well. Use a suitable sized glass pyrex bowl with lid. Cook covered for 6 12 to 7 12 minutes using 750 W.
Stir several times well during cooking.
BROWNING ALMOND SLICES
Spread 30g sliced almonds evenly on a medium sized ceramic plate.
Stir several times during browning for 312 to 412 minutes using 600 W.
Let it stand for 2-3 minutes in the oven. Use oven gloves while taking out!


WHAT TO DO IF YOU ARE IN DOUBT OR HAVE A
PROBLEM
If you have any of the problems listed below try the solutions given.
This is normal.
- Condensation inside the oven.
Air flow around the door and outer casing.
Light reflection around the door and outer casing. - Steam escaping from around the door or vents.
The oven does not start when you press the ( ) button.
Is the door completely closed?
The food is not cooked at all.
- Have you set the timer correctly and/or pressed the () button?
Is the door closed? - Have you overloaded the electric circuit and caused a fuse to blow or a breaker to be triggered?
The food is either overcooked or undercooked.
Was the appropriate cooking length set for the type of food?
Was an appropriate power level chosen?
Sparking and cracking occur inside the oven (arcing).
- Have you used a dish with metal trimmings?
- Have you left a fork or other metal utensil inside the oven?
- Is aluminum foil too close to the inside walls?
The light bulb is not working.
- The Light bulb should not be replaced in person for safety reasons. Please contact nearest authorised Samsung customer care, to arrange for a qualified engineer to replace the bulb.
The oven causes interference with radios or televisions.
- Slight interference may be observed on televisions or radios when the oven is operating. This is normal. To solve this problem, install the oven away from televisions, radios and aerials.
- If interference is detected by the oven's microprocessor, the display may be reset. To solve this problem, disconnect the power plug and reconnect it. Reset the time.


Smoke and bad smell when initial operating.
- It's a temporary condition by new component heating. Smoke and smell will disappear completely after 10 minutes operation. To remove smell more quickly, please operate microwave oven with putting lemon formation or lemon juice in the cabinet.
If the above guidelines do not enable you to solve the problem, then contact your local SAMSUNG customer service centre. Please have the following information read;
- The model and serial numbers, normally printed on the rear of the oven
- Your warranty details
A clear description of the problem
Then contact your local dealer or SAMSUNG aftersales service.
TECHNICAL SPECIFICATIONS
SAMSUNG strives to improve its products at all times. Both the design specifications and these user instructions are thus subject to change without notice.
| Model | GE73A |
| Power source | 230 V ~ 50 Hz |
| Power consumption | |
| Microwave | 1150 W |
| Grill | 1100 W |
| Combined mode | 2250 W |
| Output power | 100 W / 750 W (IEC-705) |
| Operating frequency | 2450 MHz |
| Magnetron | OM75S(31) |
| Cooling method | Cooling fan motor |
| Dimensions (W x H x D) | |
| Outside | 489 x 275 x 367 mm |
| Oven cavity | 330 x 211 x 309 mm |
| Volume | 20 liter |
| Weight | |
| Net | 12.5 kg approx |


SAMSUNG
QUESTIONS OR COMMENTS
| COUNTRY | CALL | OR VISIT US ONLINE AT |
| BOSNIA | 051 133 1999 | www.samsung.com |
| BULGARIA | 07001 33 11, share cost tariff | www.samsung.com/bg |
| CROATIA | 062 - SAMSUNG (062 726 786) | www.samsung.com/hr |
| CZECH | 800 - SAMSUNG (800-726786) | www.samsung.com |
| HUNGARY | 06-80-SAMSUNG (726-7864) | http://www.samsung.com/hu |
| MONTENEGRO | 020 405 888 | www.samsung.com |
| POLAND | 0 801-172-678* lub +48 22 607-93-33 ** [HHP] 0 801-672-678* lub +48 22 607-93-33** (*callkosity koszt polaczenia jak za 1 impuls wedlug taryfy operatoria)** (koszt polaczenia wedlug taryfy operatoria) | www.samsung.com/pl |
| ROMANIA | 08008 SAMSUNG (08008 726 7864)TOLL FREE No. | www.samsung.com/ro |
| SERBIA | 011 321 6899 | www.samsung.com/rs |
| SLOVAKIA | 0800 - SAMSUNG (0800-726 786) | www.samsung.com |
| LITHUANIA | 8-800-77777 | www.samsung.com/lt |
| LATvia | 8000-7267 | www.samsung.com/lv |
| ESTONIA | 800-7267 | www.samsung.com/ee |
| SLOVENIA | 080 - MYSAMSUNG ( 080 69 726 7864) | www.samsung.com/si |
Code No.: DE68-04050B-04