
BOTVAC D5 - Robot vacuum NEATO - Free user manual and instructions
Find the device manual for free BOTVAC D5 NEATO in PDF.
User questions about BOTVAC D5 NEATO
0 question about this device. Answer the ones you know or ask your own.
Ask a new question about this device
Download the instructions for your Robot vacuum in PDF format for free! Find your manual BOTVAC D5 - NEATO and take your electronic device back in hand. On this page are published all the documents necessary for the use of your device. BOTVAC D5 by NEATO.
USER MANUAL BOTVAC D5 NEATO
Congratulations on your new home robot! Neato can't wait to start vacuuming - so you don't have to. This guide introduces you to Neato's features and gives you some important pointers to set up and maintain your robot.
And don't forget to register your Neato at www.neatorobotics.com to activate your Warranty and get product updates and special offers.
Leave the vacuuming to Neato. What will you do with your free time?
PRÉSENTATION DE NEATO
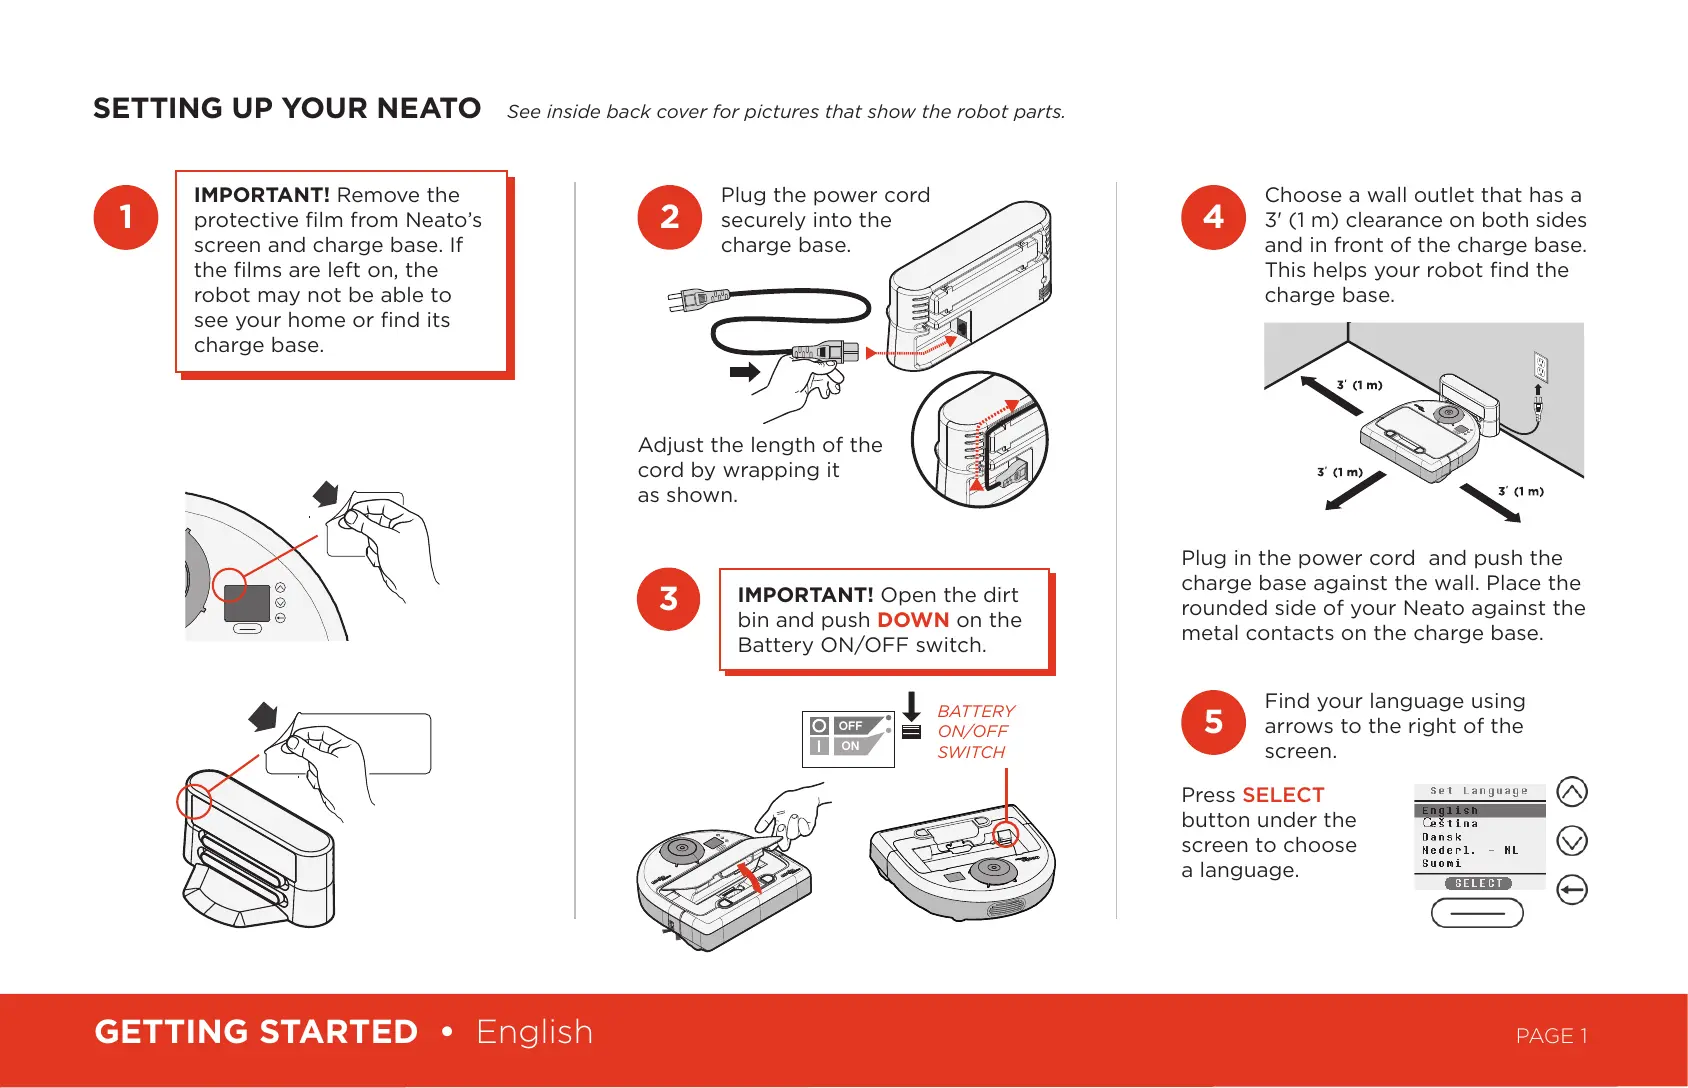
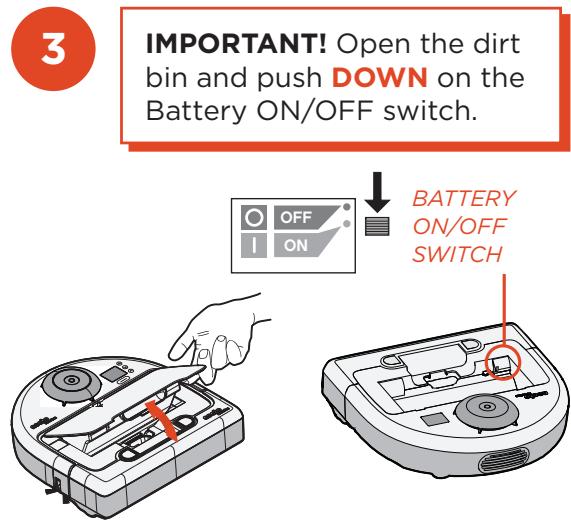
SETTING UP YOUR NEATO
See inside back cover for pictures that show the robot parts.

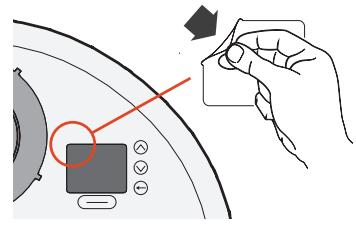
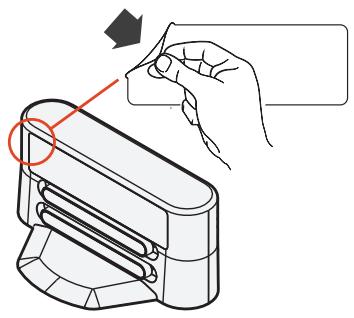
IMPORTANT! Remove the protective film from Neato's screen and charge base. If the films are left on, the robot may not be able to see your home or find its charge base.

Choose a wall outlet that has a 3^ (1 m) clearance on both sides and in front of the charge base. This helps your robot find the charge base.
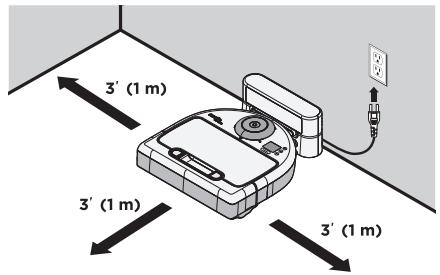
Plug in the power cord and push the charge base against the wall. Place the rounded side of your Neato against the metal contacts on the charge base.
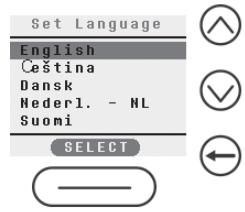
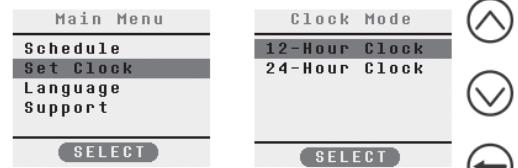
Find your language using arrows to the right of the screen.
Press SELECT
button under the screen to choose a language.
CHARGING AND OPTIMIZING THE BATTERY
- Before using, charge your Neato overnight - about 12 hours.
IMPORTANT! To get the most from your battery, charge it and discharge it completely two to three times.
Always put your Neato back on its charge base when you are finished cleaning.
Status Lights
SOLID GREEN
Fully charged and ready to clean.
BLINKING GREEN
Charging, battery not fully charged, can clean.
BLINKING AMBER
Charging, can't clean yet.
SOLID AMBER
Error, see message on screen.
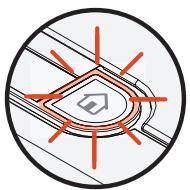
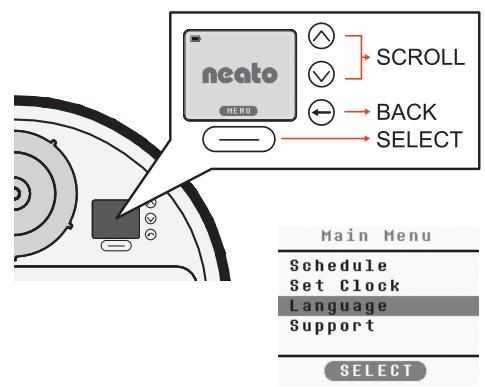
- Wake up Neato by pressing the button. It may take a few seconds to wake up.
From the home screen, press the SELECT button to get to the MENU.
Clock
- Select Set Clock and follow screens to set the time.
Schedule
- Select Schedule.
- Choose Set or Change and follow the screens to schedule cleaning.

MAKING YOUR HOME NEATO FRIENDLY
- Clear the area of small items like toys and clothing-furniture is OK. Tie up wires, curtains and other low-hanging items.
- To keep your robot out of places you don't want it to go, set down boundary markers included in the package. You can cut them to fit.
- IMPORTANT! Keep your robot away from liquids and wet areas. Move or cover pet bowls and plant trays.
- Keep your Neato inside the house. It was not designed for outdoor cleaning or freezing temperatures.
- Be aware that shiny surfaces and black floors might confuse your robot.
USING YOUR NEATO
Wake Up
- Press the button to "wake up" your Neato.
Start Cleaning
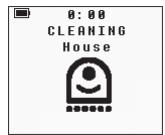
• CLEAN House -
Press the button to clean your house.
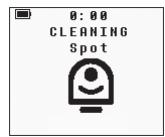
- CLEAN Spot -
Press the button to clean a 4 ^ (1.2 m) x 6' (1.8 m) square in front of your Neato.
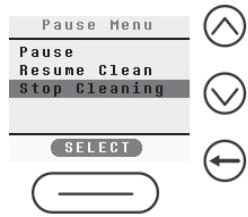
Pause Cleaning
Press or button.
Stop Cleaning
Press or button.
- Press the arrows to highlight Stop Cleaning.
- Press SELECT using button under the screen on the PAUSE Menu or RESUME Menu.
Sleep
Hold the button down for 5 seconds to put your Neato to "sleep".
MAINTAINING YOUR NEATO
IMPORTANT! Your robot needs regular maintenance to operate reliably.
Dirt Bin and Filters
After each use, empty the dirt bin and clean the filter and airways/ openings.
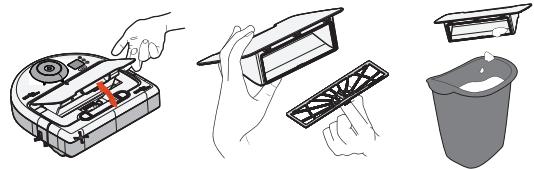
- Replace the filter in the dirt bin every one to two months.
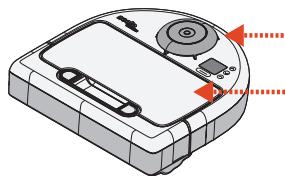
Sensors
- Use a dry cotton swab to clean the two drop sensor windows on the bottom of the robot.
Clean the top of the robot and the area around the laser top with a damp cotton cloth.
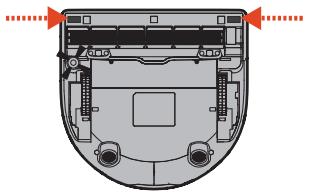
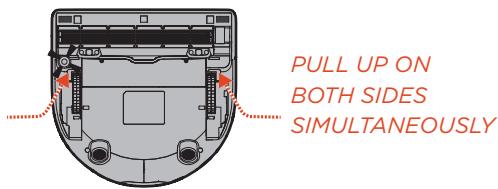
Brushes
- Remove the guard over the brush by pulling up on both sides.
- Remove hair and dirt from the brush and brush ends.
- Replace the brush and the guard over the brush.
REGISTERING YOUR ROBOT AND GETTING HELP
Visit www.neatorobotics.com
- Register your Neato to stay up to date on software releases and special offers.
Find more helpful information, including frequently asked questions, and tips and tricks for optimal operation.
WARRANTY
Visit www.neatorobotics.com
for warranty information.