MWG 778U - MWG 779H - Microwaves CLATRONIC - Free user manual and instructions
Find the device manual for free MWG 778U - MWG 779H CLATRONIC in PDF.
User questions about MWG 778U - MWG 779H CLATRONIC
0 question about this device. Answer the ones you know or ask your own.
Ask a new question about this device
Download the instructions for your Microwaves in PDF format for free! Find your manual MWG 778U - MWG 779H - CLATRONIC and take your electronic device back in hand. On this page are published all the documents necessary for the use of your device. MWG 778U - MWG 779H by CLATRONIC.
USER MANUAL MWG 778U - MWG 779H CLATRONIC
- Do not remove any installed parts from inside the oven or anything from the inside of the door!
The foils on the inside of the door must not be removed!
UWAGA:
NOT REMOVE THIS COVER.

CAUTION: HOT SURFACE
Übersetzung:
Warning-
Mikrowellenenergie
NOT REMOVE THIS COVER.

CAUTION: HOT SURFACE
Vertaling:
Waarschuwing
Microgolfenergie
NOT REMOVE THIS COVER.

CAUTION: HOT SURFACE
Traduction:
Avertissement -
Instructions d-installation
NOT REMOVE THIS COVER.

CAUTION: HOT SURFACE
Tradução
Aviso
NOT REMOVE THIS COVER.

CAUTION: HOT SURFACE
Traduzione:
Avviso!
Energia del microonde:
General Safety Guidelines 74
Important safety information! 74
Information Plates and Symbols on the Product 75
Location of controls 75
Switches on the control panel 75
Intended use 76
Information on grill and combi operation 76
Suitable microwave tableware 76
Operation of the device 76
First-time use 76
Using the device 77
Operating instructions 77
Heating. 77
Cooking 78
Quick start. 79
Grilling 79
Convection 79
Combinations of microwave, grill and convection 80
Auto functions 80
Defrosting 81
Gradual cooking 81
Special functions 81
Cleaning 82
Troubleshooting 82
Technical specifications. 83
General Safety Guidelines
Before using this device, carefully read this user manual and keep it together with the Warranty Certificate, cashier receipt and if possible, the original package inclusive its interior packing. If you hand on the device to any third person, include the user manual as well.
- Use the device for private and its intended purpose only. The device is not intended for commercial use.
- Do not use the device outdoors. Protect it from heat, direct sunlight, humidity (do not immerse into liquids under any circumstances) and sharp edges. Do not use the device with wet hands. If the device gets wet, unplug it immediately.
- Always switch off and unplug the device (pull the plug, not the cable) when you do not use the device, or when you attach accessories, during cleaning or malfunctioning.
- Do not leave the device unattended during operation. Always switch off the device when leaving the room. Unplug the device.
- Regularly check the device and cable for signs of damage. Do not continue to operate the device in case of damage.
- Do not repair the device by yourself. Please contact authorized personnel. In order to avoid hazards, a damaged mains cable must be replaced with an equivalent cable by the manufacturer, our customer service or any other qualified specialist.
- Do only use original parts.
- Please observe the following "Special safety instructions".
Children and disabled persons
- For the safety of your children, keep any packing parts (plastic bags, cartilage, Styrofoam etc.) out of their reach.
Warning!
Don't let small children play with foils for danger of suffocation!
- This device is not intended for use by persons (including children) with reduced physical, sensory or mental capabilities, or lack of experience and/or knowledge unless they have been given supervision or instructions concerning the use of the device by a person responsible for their safety.
- Supervise children to ensure they do not play with the device.
Symbols in this user manual
Important notes for your safety are marked distinctively. Pay absolute attention to them to avoid accidents and damage to the device:
Warning:
Wards of dangers for your health and indicates potential risks of injury.
Caution:
Indicates potential dangers for the device or other objects.
i Note:
Highlights tips and information for you.
Important safety information!
Please read carefully and keep for future reference.
Warning:
Do not heat cushions or pillows filled with grains, cherry pits or gel in the microwave oven. DANGER OF FIRE!!!
- When the door or the door seals are damaged, the microwave oven must not be used until it has been repaired by a qualified specialist.
Please do not repair the device yourself, but have it repaired by an authorised specialist. Carrying out maintenance or repair work which involves removal of the cover that protects the surroundings from microwave radiation is dangerous unless carried out by an expert.
Do not heat liquids in closed containers. Danger of explosion!
- Do not place your microwave in a cupboard. Please ensure that there is a minimum ventilation gap of 10cm from cupboards, walls etc. on all sides of the machine.
Children and frail individuals may only use the oven without supervision if they have been instructed in its use in such a way that they are able to use the device safely and understand the dangers of incorrect operation.
If the device is operated using combined mode children may use the device only when supervised by adults due to the temperatures that are produced.
The microwave oven is not suitable for warming/heating up living animals.
- Only suitable tableware should be used such as: glass, porcelain, ceramics, heat-resistant plastic or special microwave tableware.
Warning:
If food is being heated or cooked in combustible materials, such as plastic or paper containers, the microwave oven should be checked frequently due to the risk of fire.
If smoke is produced, turn the device off and remove the plug. Keep the door closed in order to suffocate any flames.
The contents of babies' bottles and jars of baby food must be stirred or shaken and the temperature checked before use. There is a danger of burns.
- Use pot cloths or oven gloves to remove containers. RISK OF BURNS!
▶ Food with a shell or skin, such as eggs, sausages, sealed jars etc. must not be heated up in the microwave as they may explode even when heating by the microwaves is finished.
Delay in boiling:
During boiling, particularly during the reheating of liquids (water), it may happen that the boiling temperature has been reached but the typical bubbles have not yet started to rise. The liquid does not boil evenly. When the vessel is removed this so-called delay in boiling may result in the sudden formation of bubbles when the vessel is knocked, causing the water to boil over. There is a serious danger of burns! In order to achieve even boiling, please place a glass rod or similar item, but nothing metallic, in the vessel.
- Any dirt on the door frame/door seal and neighbouring parts must be carefully cleaned with a damp cloth.
- Clean the microwave oven regularly and remove any food residues from the interior.
- If the machine is not clean the surface may be damaged, affecting its serviceable life and possibly resulting in hazardous situations.
- Please do not operate the device with an external timer or a separate remote control system.
Information Plates and Symbols on the Product
On the top of the microwave there is a hazard symbol with the following text:
WARNING-
MICROWAVE ENERGY-DO
NOT REMOVE THIS COVER.

CAUTION: HOT SURFACE
During operation the temperature of the exposed surface may be very hot. Danger of burns!
On the back of the microwave there is an information plate with the following text:
WARNING
- MICROWAVE AND HIGH VOLTAGE INSIDE. BE SURE NOT TO REMOVE THE ENCLOSURE.
-
THIS APPLIANCE IS EQUIPPED WITH A GROUNDED PLUG FOR YOUR PROTECTION AGAINST POSSIBLE SHOCK HAZARDS AND SHOULD BE CONNECTED TO A PROPERLY GROUNDED OUTLET.
-
THIS DEVICE IS TO BE SERVICED ONLY BY PROPERLY QUALIFIED SERVICE PERSONNEL.
- DISCONNECT POWER PLUG BEFORE SERVICING. REMOVAL OF THE ENCLOSURE WITH PRODUCT ENERGIZED COULD EXPOSE SERVICEMEN TO HAZARDOUS HIGH VOLTAGE POTENTIAL.
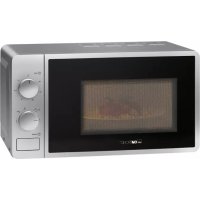
Location of controls
Picture A
1 Control Panel
6 Turntable ring
2 Door opener
7 Enamelled metal plate
3Griller
8 Door latch
4 Drive shaft
9 Viewing window
5 Lower heating element
Not shown.: Pizza stone
Picture B: Symbols on the control panel
1 Microwave
5 Child-proof lock activated
2 Convection
6 Auto function
3 Grill
7 Temperature indicator
4 Defrost
Switches on the control panel
MICROWAVE
Microwave:
Select power setting of the microwave
DOUBLE GRILL/COMBI.
Grill:
For roasting and scalloping
Grill/Combi:
Grill, microwave and convection operate in turns
CONVECTION
Convection:
Convection without microwave operation; select a temperature.
W.T./TIME DEFROST
Defrosting by weight or time
CLOCK/PRE-SET
Clock:
In combination with the turning knob for setting the clock or a starting time
STOP/CLEAR
Stop:
Press once to stop cooking.
Delete:
Press twice to delete function.
Lock:
Press and hold the STOP/CLEAR button for 3 seconds in order to lock (child-proof lock) or unlock the control panel
START/+30Sec./CONFIRM
Starting the function
Quick start of the microwave (always +30 seconds at 100% power)
Prolonging the cooking time by 30 seconds during operation (except when defrosting or using auto function)
Confirming a setting
TIMER WEIGHT AUTO MENU
Turning knob for setting the clock, cooking time, temperature, combi modes, auto functions or weight settings
Intended use
This device is intended for
heating and cooking firm or liquid food
- scalloping and roasting firm food
It is intended for this purpose only and may only be used for such.
It may only be used as described in this user manual.
You must not use this device for commercial purposes.
Every other use is not intended and may cause damage or even injuries.
Clatronic International GmbH is not responsible for damage resulting from non-intended use.
Information on grill and combi operation
- Use heat-resistant tableware only, as radiation heat develops during grill and combi operation.
- When operating in grill mode only, you may also use metal or aluminum tableware, but not during normal or combined microwave operation (see table "Suitable microwave tableware").
- Do not place anything on the top of the enclosure. It will become hot. Always keep the ventilation slots unblocked.
- Use the grill to place the food closer to the heating element.
Suitable microwave tableware
- The most suitable material to be used in a microwave is transparent and allows the microwave radiation to heat the food evenly.
- Round/oval bowls and plates are more suitable than square ones, as the food might boil over at the corners.
Caution:
Risk of explosion by sealed tableware.
Open closed containers before cooking or heating.
Pierce protective plastic foil several times using a fork.
- Microwave radiation cannot penetrate metal; therefore do not use metal containers or plates.
Caution:
Do not use paper bowls made of recycled material, as these might contain small amounts of metal which might cause flying sparks or fire.
The table below is intended to help you choose suitable tableware:
| Material | Suitable for | |||
| Micro-wave | Grill | Con-vection | Combi-nation* | |
| Heat-resistant glass container | yes | yes | yes | yes |
| Non heat-resistant glass container | no | no | no | no |
| Heat-resistant ceramic container/plate | yes | yes | yes | yes |
| Plastic containers suitable for microwaves | yes | no | no | no |
| Kitchen paper | yes | no | no | no |
| Supplied enamelled plate | yes | yes | yes | yes |
| Material | Suitable for | |||
| Micro-wave | Grill | Con-vection | Combi-nation* | |
| Metal or aluminium ovenware | no | yes | yes | no |
| Grill | no | yes | yes | no |
| Aluminum foil or aluminum foil containers | no | yes | yes | no |
*) Combination of microwave with grill/convection or of grill with convection
Operation of the device
- A signal tone sounds when first turning the turning knob.
- Your selection by pressing buttons is confirmed by a signal tone. If not, you did not press properly.
- If you set a program but do not press the START/+30SEC./ CONFIRM button within 5 minutes, the setting will be canceled. The display will then show the current time again.
- When starting a program (except during pre-heating), the remaining operating time will be displayed. The countdown runs.
- 5 signal tones will indicate the end of the program.
First-time use
Installation Instructions
Install the appliance with the back of the appliance facing the wall.
- In order to avoid interference with the operation of other devices, do not place your device near other electronic devices.
Preparation
- Remove all accessories found in the cooking chamber and unpack them.
- Position the turntable ring in such a way that it slots into the recesses and lies straight.
- Place the supplied metal plate onto the turntable ring.
- Check the device for visible damage, especially in the area at and around the door. It is imperative not to use the device in case of any damage.
- Remove protective sheets that might be attached to the enclosure.
- Connect the plug to a properly installed isolated ground receptacle 230V,50Hz
Caution:
Do not remove mounted parts from the cooking chamber or inside of the door!
i Note:
If there are manufacturing or oil remains on the enclosure or heating element, smoke or odor might occur during the beginning operation.
This is normal and will cease after repeated use.
We strongly recommend proceeding as follows:
- Turn on the grill mode and let the device operate several times without food to be cooked.
Ensure sufficient ventilation.
Setting the clock:
i Note:
During the first setting a signal tone will sound and the display will show "0:00".
- Press the CLOCK/PRE-SET button once or repeatedly in order to toggle between 24 hour and 12 hour display mode.
- Use the turning knob to set the desired hour.
- Press the CLOCK/PRE-SET button to confirm your settings.
- Use the turning knob to set the desired minutes.
- Press the CLOCK/PRE-SET button again to activate the new time. The delimiter symbol “:” of the digital time will be flashing on the display.
Using the device
Important information on the operation of microwaves
- Your device operates with microwave radiation which heats water particles in food very quickly. There is no heat radiation and therefore hardly any browning.
- Use this device to heat food only.
The device is not suitable for deep-frying. - Heat 1-2 servings at a time. Otherwise the device will not work efficiently.
- Microwaves provide full power instantly. Pre-heating is therefore not necessary.
- Never operate the device empty during microwave operation.
- The microwave is not a replacement for your common stove. It is mainly intended for:
defrosting deep-frozen/frozen food
cooking dishes
Operating instructions
- Put the food to be heated in suitable tableware.
- Open the door and place the container on the centre of the metal plate. Close the door. (For safety reasons, the device can only operate when the door is properly closed.)
- Press the MICROWAVE button once/repeatedly to select the desired power setting. After pressing the button once you may also use the turning knob.
| Power setting on the display as selected in % | Power in Watt (approx.) | Application |
| P100 | 900 | Quick heating |
| P80 | 720 | Cooking |
| P50 | 450 | Simmering |
| P30 | 270 | Defrosting frozen goods |
| P10 | 90 | Melting butter etc. |
- Press the START/+30SEC./CONFIRM button to confirm your settings.
- Use the turning knob to set the desired cooking time between 5 seconds and 95 minutes.
- Press the START/+30SEC./CONFIRM button to start operation. The cooking time depends on the quantity and texture of the food. After a few times trying you will quickly learn to estimate the cooking time.
i Note:
Each time pressing the START/+30SEC./CONFIRM button will prolong the operating time by 30 seconds.
Cooking in a microwave is much faster than on a stove. If you are not sure, set a shorter cooking time and continue operation if necessary.
After the cooking time has elapsed the device will turn off and 5 signal tones will sound. Take the food from the device.
Pause or stop cooking
- If you wish to pause the cooking operation, press the STOP/CLEAR button once and open the door.
- If you wish to continue the cooking operation, close the door and press the START/+30SEC./CONFIRM button.
- If you wish to completely stop operation, press the STOP/CLEAR button twice.
Heating
Warming and heating are special characteristics of microwaves. Refrigerated liquids and foods can be easily warmed up to room or eating temperature without having to use a lot of pots.
The heating times in the following table are for reference only, as the time depends very much on the original temperature and the texture of the food. It is therefore recommended to check once in a while whether the food is hot enough.
Heating table
| Edibles/food | Quan-tity | Power setting | Time approx. min. | Cover |
| Liquids | ||||
| Water, 1 cup | 150 g | P 100 | 0.5 - 1 | no |
| Water, 0.5 l | 500 g | P 100 | 3.5 - 5 | no |
| Water, 0.75 l | 750 g | P 100 | 5 - 7 | no |
| Coffee, 1 cup | 150 g | P 100 | 0.5 - 1 | no |
| Milk, 1 cup | 150 g | P 100 | 0.5 - 1 | no |
| Tip: Put a glass stick into the container to avoid superheating; stir well before drinking. | ||||
| Plated meals | ||||
| Cutlet + potatoes and vegetables | 450 g | P 100 | 2.5 - 3.5 | yes |
| Goulash with noodles | 450 g | P 100 | 2 - 2.5 | yes |
| Meat + lump + sauce | 450 g | P 100 | 2.5 - 3.5 | yes |
| Tip: Slightly moisten before cooking; stir occasionally. | ||||
| Meat | ||||
| Cutlet, breaded | 200 g | P 100 | 1 - 2 | no |
| Meatballs, 4 pieces | 500 g | P 100 | 3 - 4 | no |
| Joint | 250 g | P 100 | 2 - 3 | no |
| Tip: Coat with oil for the breading or crust not to soften. | ||||
| Poultry | ||||
| 1/2 chicken | 450 g | P 100 | 3.5 - 5 | no |
| Chicken fricassee | 400 g | P 100 | 3 - 4.5 | yes |
| Tip: Coat with oil; stir occasionally. | ||||
| Side dish | ||||
| Noodles, rice, 1 serving2 servings | 150 g | P 100 | 1 - 2 | yes |
| 300 g | P 100 | 2.5 – 3.5 | yes | |
| Potatoes | 500 g | P 100 | 3 - 4 | yes |
| Tip: Slightly moisten prior to cooking. | ||||
| Soups / sauce | ||||
| Broth, 1 plate | 250 g | P 100 | 1 – 1.5 | yes |
| Soup with solids | 250 g | P 100 | 1.5 - 2 | yes |
| Sauce | 250 g | P 100 | 1 - 2 | yes |
| Infant food | ||||
| Milk | 100 ml | P 50 | 0.5 - 1 | no |
| Mash | 200 g | P 50 | 1 – 1.5 | no |
| Tip: Thoroughly shake or stir. Check temperature! | ||||
Cooking
Hands-on cooking tips
Follow the guidelines given in the cooking table and recipe. Monitor the cooking process if you do not yet have as much experience.
You may open the door of the device at any time. The device will turn off automatically.
It will only continue operation when the door is closed and the START/+30SEC./CONFIRM button pressed again.
Refrigerated food needs a longer cooking time than that with room temperature.
The chunkier the food, the longer the cooking time. Meat cut in bigger pieces, for example, requires longer cooking than meat of the same quantity cut into strips. It is recommended cooking larger amounts of food at maximum power and having it simmer at medium power for a more evenly cooking.
Lower foodstuffs cook faster than higher ones; therefore distribute the food as low as possible. Place thinner parts such as chicken legs or fish files in the center or leave them overlapping.
Smaller amounts cook faster than bigger ones. The following rule of thumb applies:
Double amount = almost double time
Half amount = half time
If you cannot find the exact cooking time for a dish, you may apply the following rule:
Per 100 g approx. 1 minute cooking
All foods that you cover on a common stove should be covered in the microwave as well.
A cover will prevent the food from running dry. An upside-down plate, greaseproof paper or microwave cooking foil are all suitable as covers. Cook food that should be getting a crust without cover.
Cooking Table
| Edibles/food | Quantity | Power setting | Time ap- prox. min | Cover |
| Vegetables | ||||
| Eggplant | 500 g | P 80 | 7 - 10 | yes |
| Cauliflower | 500 g | P 80 | 8 - 11 | yes |
| Broccoli | 500 g | P 80 | 6 - 9 | yes |
| Chicory | 500 g | P 80 | 6 - 7 | yes |
| Peas | 500 g | P 80 | 6 - 7 | yes |
| Fennel | 500 g | P 80 | 8 - 11 | yes |
| Green beans | 300 g | P 80 | 13 - 15 | yes |
| Potatoes | 500 g | P 80 | 9 - 12 | yes |
| Stem turnip | 500 g | P 80 | 8 - 10 | yes |
| Leek | 500 g | P 80 | 7 - 9 | yes |
| Corn on the cob | 250 g | P 80 | 7 - 9 | yes |
| Carrot | 500 g | P 80 | 8 - 10 | yes |
| Pepper | 500 g | P 80 | 6 - 9 | yes |
| Brussels sprouts | 300 g | P 80 | 7 - 10 | yes |
| Asparagus | 300 g | P 80 | 6 - 9 | yes |
| Tomatoes | 500 g | P 80 | 6 - 7 | yes |
| Zucchini | 500 g | P 80 | 9 - 10 | yes |
| Tip: Cut vegetables into small pieces and cook with 2-3 spoons of liquid; stir occasionally. Simmer 3-5 minutes; add seasoning just before eating. | ||||
| Fruits | ||||
| Stewed apple or pear | 500 g | P 80 | 5 - 8 | yes |
| Plum butter | 250 g | P 80 | 4 - 6 | no |
| Stewed rhubarb | 250 g | P 80 | 5 - 8 | yes |
| Roast apple, 4 pieces | 500 g | P 80 | 7 - 9 | yes |
| Tip: Add 125 ml of water; lemon juice will prevent the fruits from discoloring; simmer 3-5 minutes. | ||||
| Meat*) | ||||
| Meat with sauce | 400 g | P 80 | 10 - 12 | yes |
| Goulash, veal strips | 500 g | P 80 | 10 - 15 | yes |
| Beef roulades | 250 g | P 80 | 7 - 8 | yes |
| Tip: Stir occasionally; rest for 3-5 minutes. | ||||
| Poultry*) | ||||
| Chicken fricassee | 250 g | P 80 | 6 - 7 | yes |
| Chicken soup | 200 g | P 80 | 5 - 6 | yes |
| Tip: Stir occasionally; rest 3-5 minutes. | ||||
| Fish | ||||
| Fish filet | 300 g | P 80 | 7 - 8 | yes |
| 400 g | P 80 | 8 - 9 | yes | |
| Tip: Tum over after half the time has elapsed; simmer 3-5 minutes. | ||||
| Defrosting and cooking vegetables | ||||
| Red cabbage with apple | 450 g | P 80 | 14 -16 | yes |
| Spinach leaves | 300 g | P 80 | 11 - 13 | yes |
| Cauliflower | 200 g | P 80 | 7 - 9 | yes |
| String beans | 200 g | P 80 | 8 - 10 | yes |
| Broccoli | 300 g | P 80 | 8 - 9 | yes |
| Peas | 300 g | P 80 | 7 - 8 | yes |
| Stem turnip | 300 g | P 80 | 13 - 15 | yes |
| Leek | 200 g | P 80 | 10 - 11 | yes |
| Corn | 200 g | P 80 | 4 - 6 | yes |
| Carrots | 200 g | P 80 | 5 - 6 | yes |
| Brussels spout | 300 g | P 80 | 7 - 8 | yes |
| Spinach | 450 g | P 80 | 12 - 13 | yes |
| 600 g | P 80 | 15 - 17 | yes | |
| Tip: Cook with 1-2 spoons of liquid; stir occasionally or carefully cut. Simmer 2-3 minutes; add seasoning just before eating. | ||||
| Soups / stew *) | ||||
| Stew | 500 g | P 80 | 13 - 15 | yes |
| Soup with solids | 300 g | P 80 | 7 - 8 | yes |
| Crème soup | 500 g | P 80 | 13 - 15 | yes |
| Tip: Stir occasionally; simmer 3-5 minutes. | ||||
*) Ready-made food
Quick start
You wish to heat food or drinks shortly at the highest power setting? There are two possibilities:
- Quick-start the microwave by directly pressing the START/+30SEC./CONFIRM button. The cooking process will start immediately, whereas each time pressing the button will prolong the cooking time by 30 seconds.
Or:
2. Turn the turning knob towards the left. A signal tone sounds and the display will show "95:00". Set the time by turning the knob left or right. Press the START/+30SEC./CONFIRM button to start operation.
The power setting of the microwave is thereby 100% .
Grilling
You can select between three grill variants:
G-1 top quartz grill only
G-2 top quartz grill and lower heating element
G-3 lower heating element only
Use of grill
Place the grill onto the supplied metal plate. Use suitable heat-resistant tableware or directly put the food onto the grill.
When using in G-1 mode preheating is not necessary, since the quartz grill generates direct radiant heat.
Proceed as follows for roasting and scalloping:
- Select the required grill mode by pressing the DOUBLE GRILL/COMBI. button once/repeatedly. After pressing once, you can also use the knob.
- Press the START/+30SEC./CONFIRM button to confirm your settings.
-
Use the turning knob to set the desired roasting time between 5 seconds and 95 minutes.
-
Press the START/+30SEC./CONFIRM button to start.
i Note:
After half of the time has elapsed, signal tones will alert you to turn the food over.
After the full time has elapsed, the appliance switches off and 5 beeps sound. You may then remove the food.
| Edibles/food | Quantity | Time ap-prox. min. | Cover |
| Scalloping toast with cheese | 2-3 slices | 3-4 | no |
| Scalloping soups, e.g. onion soup | 2-3 cups | 10-15 | no |
Using the pizza stone
- Remove the metal plate and place the pizza stone directly onto the turntable ring.
- For best results when preparing your pizza we recommend that you preheat the pizza stone in G-3 mode for around 5 minutes.
- After placing the pizza on the stone, continue in G-2 mode. Follow the timing guidelines in your recipe.
- For best results with deep frozen pizza, use Automatic program A-9.
Convection
Convection enables you to cook food as in a traditional oven. The microwave is not active. The heat is generated through a quartz grill and the top heating element. We recommend preheating the oven to the correct temperature before placing food inside.
i Note:
The fans which blow heat from the top grills into the cooking chamber only switch on if the set temperature has been reached. This effective process enables the oven to heat up very quickly. If the set temperature has been reached in the cooking chamber, the convection fan is then only activated at intervals according to the same principle.
Convection mode with pre-heating
- Select the required temperature between 140^ und 230^ by pressing the CONVECTION button once/repeatedly. You can also use the knob after pressing once.
- Press the START/+30SEC./CONFIRM button to confirm your settings.
- Press the START/+30SEC./CONFIRM button a second time to start pre-heating.
i Note:
For each settable temperature (140^, 150^, 160^, 170^, 180^, 190^, 200^, 210^, 220^, 230^) there is an indicator. e.g. 200^ = seventh bar.
- During pre-heating operation this display will be flashing. The increasing bars on the display will be indicating the preheating process.
i Note:
-
Two signal tones will sound when the desired temperature is reached. The pre-heating temperature will be flashing.
-
Open the door and place the food in the device.
- Use the turning knob to set the desired cooking time between 5 seconds and 95 minutes.
i Note:
You may not set the cooking time when the temperature has not yet been reached or when the door is closed.
If you do not set the cooking time within 5 minutes, the convection mode will be canceled. 5 signal tones will sound and the device will return to its original operation mode. The display will show the current time.
- Press the START/+30SEC./CONFIRM button to start operation.
After the time has elapsed the device will turn off and 5 signal tones will sound. Take the food from the device.
Convection mode without pre-heating
- Place the food in the device.
- Select the required temperature between 140^ and 230^ by pressing the CONVECTION button once/repeatedly. You can also use the knob after pressing once.
- Press the START/+30SEC./CONFIRM button to confirm your settings.
- Use the turning knob to set the desired cooking time between 5 seconds and 95 minutes.
- Press the START/+30SEC./CONFIRM button to start operation.
i Note:
The bars on the display will also in this case indicate the temperature reached. It will be flashing during the heating phase.
After the time has elapsed the device will turn off and 5 signal tones will sound. Take the food from the device.
Combinations of microwave, grill and convection
When using these settings, the
- Microwave
Top Quartz grill
Lower heating element
Convection
will operate in turn in the following combinations:
| Display | Micro-wave | Top Quartz grill | Top heating element | Lower heating element | Convection |
| C-1 | 24% | 76% | — | 76% | — |
| C-2 | 73% | — | — | — | 27% |
| C-3 | 52% | — | — | — | 48% |
- Press the DOUBLE GRILL/COMBI. button once/repeatedly to select the desired combi setting. After pressing the button once you may also use the turning knob.
-
Press the START/+30SEC./CONFIRM button to confirm your settings.
-
Use the turning knob to set the desired cooking time between 5 seconds and 95 minutes.
- Press the START/+30SEC./CONFIRM button to start operation.
After the time has elapsed the device will turn off and 5 signal tones will sound. Take the food from the device.
Tips for combi operation
When cooking food with the combined setting of microwave-grill, you should adhere to the following:
The cooking time for big and thick food items, such as roast pork, is respectively longer than for small, lower food. Nevertheless, when roasting, the opposite rule applies. The closer the food is to the grill, the faster it will become brown. I.e., when preparing big joints during combi operation, the roasting time is possibly shorter than for smaller joints.
Auto functions
Use the auto functions to cook certain amounts of foods automatically. Proceed as follows:
- Turn the turning knob clockwise and select the desired auto function. Choose one of the settings given in the table below.
| Code | Function | Display / weight in gram | Power setting |
| A-1 | Heating | 150 | Microwave 100% |
| 250 | |||
| 350 | |||
| 450 | |||
| 600 | |||
| A-2 | Potatoes | 1 / over 200 | Microwave 100% |
| 2 / over 400 | |||
| 3 / over 600 | |||
| A-3 | Meat | 150 | Microwave 100% |
| 300 | |||
| 450 | |||
| 600 | |||
| A-4 | Vegetables | 150 | Microwave 100% |
| 350 | |||
| 500 | |||
| A-5 | Fish | 150 | Microwave 80% |
| 250 | |||
| 350 | |||
| 450 | |||
| 600 | |||
| A-6 | Noodles/pasta | 50 (with 450g Water) | Microwave 80% |
| 100 (with 800g Water) | |||
| 150 (with 1200g Water) | |||
| A-7 | Soup | 200 | Microwave 100% |
| 400 | |||
| 600 | |||
| A-8 | Cake | 475 | Convection with pre-heating to 160°C |
| A-9 | Pizza | 200 | Microwave + Quartz grill + lower Heating element (C-1) |
| 300 | |||
| 400 | |||
| A-10 | Poultry (roasted) | 500 | Microwave + Quartz grill + lower Heating element (C-1) |
| 750 | |||
| 1000 | |||
| 1200 |
- Press the START/+30SEC./CONFIRM button to confirm your settings.
- Use the turning knob to set the desired weight.
- Press the START/+30SEC./CONFIRM button to start operation.
After the time has elapsed the device will turn off and 5 signal tones will sound. Take the food from the device.
i Note:
During the A-8 setting for cakes the device will pre-heat to 160^ . 2 signal tones will sound when the temperature is reached. Open the door and place the cake inside. Press the START/+30SEC./CONFIRM button. The baking time of 35 minutes will start running.
- Menu A-9: For best results when preparing your pizza, we recommend that you preheat the pizza stone in G-3 mode for around 5 minutes.
Defrosting
Using the defrost settings you may automatically defrost your food in two different ways. Select the defrost function by weight and time.
- Repeatedly press the W.T./TIME DEFROST button to select one of the defrost functions:
dEF1 Defrosting by weight btw. 0.1 - 2.0kg dEF2 Defrosting by time btw.5 seconds- 95 minutes
- Use the turning knob to set the desired weight/ time.
- Press the START/+30SEC./CONFIRM button to start operation.
After the time has elapsed the device will turn off and 5 signal tones will sound. Take the food from the device.
i Note:
Microwave power when defrosting is 30% (270W).
If the weight of the goods is less than 200g , do not place them on the centre, but at the edge of the metal plate.
Gradual cooking
You can set the programs in such a way that up to 3 different functions can be carried out in succession.
Assume you select the following programs:
| Defrost |
| Cook |
| Grill |
- Select the 1st function: Press the W.T./TIME DEFROST button once or twice.
- Set the weight or the required time using the knob.
- Select the 2nd function: Press the MICROWAVE button once/ repeatedly to select the desired microwave power setting.
- Press the START/+30SEC./CONFIRM button to confirm your settings.
- Use the turning knob to set the desired cooking time between 5 seconds and 95 minutes.
- Select the 3rd function: Select the required grill mode by pressing the DOUBLE GRILL/COMBI button once or repeatedly.
- Press the START/+30SEC./CONFIRM button to confirm your settings.
- Use the turning knob to set the desired cooking time between 5 seconds and 95 minutes.
- Press the START/+30SEC./CONFIRM button to start operation.
i Note:
The change of program is indicated by an acoustic signal.
- When half of the grilling time has passed two acoustic signals are heard to remind you to turn the food over.
After the time has elapsed the device will turn off and 5 signal tones will sound. Take the food from the device.
i Note:
The auto functions and the convection mode with pre-heating may not be used for gradual cooking.
Special functions
Auto start
You may delay the start of microwave, grill, convection, auto functions or even of a combi setting. The maximum time-delay is 23 hours and 59 minutes.
i Note:
First set the clock! Otherwise you may not use this function.
When using auto start, the defrost function is not available.
Example: Proceed as follows for automatically starting the microwave:
- Press the MICROWAVE button once/repeatedly to select the desired microwave power setting.
- Press the START/+30SEC./CONFIRM button to confirm your settings.
- Use the turning knob to set the desired cooking time.
- Press the CLOCK/PRE-SET button. A signal tone sounds and the display will show the current time, with the first digit flashing.
- Use the turning knob to set the hour of the desired start time.
- Press the CLOCK/PRE-SET button. A signal tone sounds and the minutes will be flashing on the display.
- Use the turning knob to set the minutes of the desired start time.
- Press the START/+30SEC./CONFIRM button to confirm. The delimiter symbol “:” of the digital clock on the display stops flashing.
Example: 7:30 minutes cooking time at 100% power; start time 14:20 o'clock
| Step | Button | Display | |
| 1 | MICROWAVE | P100 | (Power setting) |
| 2 | START/+30SEC./CONFIRM | ||
| 3 | 7:30 | (Cooking time) | |
| 4 | CLOCK/PRE-SET | 10:45 | (Current time) |
| 5 | 14:45 | (Set hour) | |
| 6 | CLOCK/PRE-SET | 14:45 | |
| 7 | 14:20 | (Set minutes) | |
| 8 | START/+30SEC./CONFIRM | 10:45 | (Current time) |
i Note:
During this programmed setting the functions of the controls are blocked (except: CLOCK/PRE-SET and STOP/CLEAR).
If you wish to display the start time again, press the CLOCK/ PRE-SET button.
- When the pre-set time has been reached, the microwave will start operation. Two signal tones will indicate the start.
Warning: Risk of fire!
Always supervise the device during operation.
- When using the time-delay function, set the time in such a way that the device will be operating under proper supervision.
Do not operate the microwave empty.
If you take the food earlier from the device, you will have to terminate the function by pressing the STOP/CLEAR button.
After the time has elapsed the device will turn off and 5 signal tones will sound. Take the food from the device.
Locking (Child-proof lock)
Press and hold the STOP/CLEAR button for more than 3 seconds to lock the device. The display will show the locked setting. The functions of the controls are blocked. Press and hold the STOP/CLEAR button again for more than 3 seconds to unlock.
Display function
- During microwave, grilling, combination or convection (without preheating) mode, the mode or temperature setting is displayed by pressing the buttons MICROWAVE, DOUBLE GRILL/COMBI. or CONVECTION for 2 - 3 seconds.
- In disregard to the operation mode, the display will be showing the current time for 2-3 seconds when pressing the CLOCK/ PRE-SET button.
- During time-delay mode, press the CLOCK/PRE-SET button to display the start time.
Cleaning
Turn the microwave off and disconnect the plug.
Interior
- Keep the interior of the microwave clean. Use a damp cloth to remove splashing and spilling on the walls of the microwave. If the device is very dirty, you may also use a mild detergent. Do not use aggressive detergents.
- Use a damp cloth to wipe the viewing window inside and outside, and regularly remove splashing and spots caused by spilled liquids.
Exterior
- Clean the exterior walls of the enclosure with a damp cloth only. Make sure no water enters the openings in the enclosure and therefore the inside of the device.
- Use a damp cloth to clean the switches. When cleaning the function switches, first open the door in order to avoid accidentally switching on the device.
Accessories
If required, clean the metal plate with dish detergent.
- Regularly clean the guide ring and the inside of the bottom. You may remove the guide ring and manually clean it. Use a mild detergent or glass cleaner. Dry thoroughly. Make sure to position the ring properly afterwards.
Odor
- In order to remove unpleasant odor in the microwave, place a bowl suitable for microwave use filled with water and lemon juice in the device and heat for approx. 5 minutes. Then wipe the oven with a soft cloth.
Oven lights
- Please contact a service center for replacing the oven lights.
Troubleshooting
Malfunctions are often just caused due to minor problems. Before contacting our customer service, please check the table below:
| Problem | Possible cause | Notes/ solution |
| Radio or TV reception is interrupted during microwave operation. | The electromagnetic fields of this device might interfere with the pictures and sound of special frequencies. | This is normal and not a malfunction. Position the devices further away from each other. |
| The device is not supplied with electricity; the display is black. | Defect wall socket. | - Try another wall socket. - Check the main fuse in your household. |
| The display shows “0:00” | There was a power failure. | Set the clock again. |
| The device does not start operation. The display shows a readout other than the current time. | The door is not properly closed. The START/+30SEC./CONFIRM button was not pressed after selecting the function. | Check if there are objects or food remains jammed in the door. Press the START/+30SEC./CONFIRM button, or press the STOP/CLEAR button to cancel the function. |
| All controls are locked. | The child-proof lock is activated. The display shows the current time without the delimiter symbol “:” flashing. | Press and hold the STOP/CLEAR button for more than 3 seconds to unlock. The time-delay function is activated. Press the CLOCK/PRE-SET button to display the start time. Press STOP/CLEAR button to terminate the function. |
| The turn-table causes a scratching or aberrant noise. | There are dirt or foreign objects in the area of the turntable shaft. | Remove possible objects and food remains as described under “Cleaning”. |
| The operation is terminated without any obvious reason. | The device is defect. | Please contact our customer service. |
Technical specifications
Model: MWG 779 H
Power supply: 230 V, 50 Hz
Power consumption:
Microwave: 1450 W
Grill: 1700 W
Convection: 2300 W
Rated microwave power output: 900 W/2450 MHz
Cooking chamber capacity: 25 Liter
Protection class:
Net weight: 16.5 kg
Subject to changes without prior notice!
This device complies with all current CE directives, such as electromagnetic compatibility and low voltage directive and is manufactured according to the latest safety regulations.
Meaning of the "Wheelie Bin" Symbol
Take care of our environment, do not dispose of electrical appliances via the household waste.
Dispose of obsolete or defective electrical appliances via municipal collection points.
Please help to avoid potential environmental and health impacts through improper waste disposal.
You contribute to recycling and other forms of utilization of old electric and electronic appliances.
Your municipality provides you with information about collecting points.
Spis tresci
NOT REMOVE THIS COVER.

CAUTION: HOT SURFACE
Tlumaczenie:
Ostrzeżenie
Energia mikrofalowa -
NOT REMOVE THIS COVER.

CAUTION: HOT SURFACE
Forditas:
Figyelmeztetes
Mikrohullámú energia - ne
BVKOpncTaHnHa 3a npn3NaeHHaM 109
IocTyNoBe npiroToBaHnHa 115
Cneuiabhi dyHKuii 116
YiueHHa 116
UcyhenHH HeCnpaBHOCTeI 117
TexhihixapaKtepncnki 117
3araJIbHi Bka3iBKn ⅢoDo TexHikn 6e3neKn
Iepw hIX BnKOpNCtOByBaTn npncTpi, yBaXHo npOHTaTe uei noci6Hnk KopnctyBaHa i 36epiraNe Ioro, a TAKoK rapaHTIO, Yek i, kUso MOxJIInBO, opriHaJIbHy ypaKOBky pa3OM i3 BHyTpiUHM nakyBaHNm. Jkso BV nepeJaCTe npncTpi TpeTI oc6i, doaTe TAKoK cei noci6Hnk KopnctyBaHa.
BnKOpNCTOBuYTe ue npucTpiI dIy npBaTHnx ciJeI 3a npn3NaueHnM. PnpCTpiI He npn3NaueHn IJI KOMepciHOrO BnKOpNCTaHHJ.
He BnKOpNCToBvIe TcE npNCTpi Ha ByIuIc. 3axuauTe npNCTpi BiD TeIIa, npMnx COHryHnx IpOMeHIB, BOIOn (3a JODHx ObCTaBnH He 3aHpyIOte npNCTpi y pIDmH) I roCTpIX KpaIB. He KopNCTyTEcA npNCTpoEM, kUo y BaC BonOI pyKn. YkIo npNCTpi HAMOKHe, HeraiHo BiD'EDHaTne NOrO BiD MepeXi.
3aBxNn BmNkaTe pncTpii i BiD'edHynte BiD MepeXi (TraHITb 3a uTekep, a He 3a Ka6eNb), kUO npctpiH He BnKOpncTOBy- cTbcA abo KOnPi ndHyte npniladn, nId uac NmUeHHy y pa3i HenaLexKHOi po60tn npncTpoIO.
He 3aIiShaJTe npucTpij 6e3 hargJy nID qac po6oTo. 3aIiShaIouH KIMHaTy, 3aBxDn BmMkaJTe npucTpij. BiJ'edHyTe npucTpij BiJ MepeXi.
- PerjIrpNo nepeBiprJTe npicTpij i Ka6JIb Ha HaraBHiCTb
noUkoJKeHb. He BmkaJTe npicTpij, kUso BnraBHeHO noUkoDxKeHHa.
He pemohTyIe npicTpi camOtjKKn. 3BepHItbcr do ynoBHO- baxKeHNxC cneuiiACtIB. Uo6 yHnKHytn He6e3neKn, cnid 3amHHTn noSKoJKeHn Ka6eIb XnBJIeHHra Na TKn CaMn Ka6eIb; 3a- Miny MaC BnKOHyBaTn BnO6HKn, cnyX6a NiTpPmKn CNOxNBAuiv Ch iHsNI KBaIiΦIKOBaHn CneuiAICI.
BukopncToByTe InIe opriHaJIbHi deTani.
-ДotprimyIteb noaHnx dani y po3di npo cneiaIbHi Bka3iBkn 3Texhik6e3neKn.
Iitni oocobn 3 ocobJHBM notpe6amn
3aJ7 6e3n BaInx dTei 36epiraTe nakyBaIbHn MaTepi (nactNKoB i nakTe, cKobn, nHonpact ToO y micx, HeoCTynHnx dIaTei.
IonepeJxKeHnHa!
He do3bojTe MaIIM dITram 6abTnca fOJIbTOIO, icHyc He6e3- neka 3aDyweHnra!
- LéienpincptiHne pni3haueHnI dIy BnKOpNCtAHnOc06aMn (BKNIOUChOnI dTe) 3OBmExKeHMMNΦi3NUHMN yuP03ymOBMn 3d16bHOCTaMn, a6o 36paKOM DOCBiy Ta/a6o 3HaHb, kkuo 3a HMMN He BeDeTbcra HaJy dY iM He 6yIn HaadHi BiNobiHi BkazIKN CTOCOBHO BnKOpNCtAHnI pncTPOIO Oc06O, JaKa Hece BiNPOBdaJIbHicTb 3aixHIO 6e3neky.
- CTeXTe, Ⅲo6 DiTn He 6aBunncb npucTpoem.
CnmbOny ycbomy noci6hNky
3aIyBaIoB6e3neKn noaHOn yITki 3actepexhenr. PaIMo 3BepHyTuHa HnX yBary, uOb yHnKHyTu HeuacnX BInaKIB i no- KOKJKeHHn PnCtpoH.
IopenepeKxHnna.
PonepeJkae npo Hebe3neky 3dopOB'io i Bka3yE Ha MOxJIbNpI3NK TpaBMyBaHHra.
ybara.
Bka3ye Ha moKnBy He6e3neky dny npncTropo uHnix nped-MetIb.
I PnpMItka.
Bka3yE ha niiikak3ky uhiinfoopmaizio JnKoprncTBya.
BaxnBa iHΦopMaζε 3 6e3πεκι!
YBaXHo npOHTaIe i 36epEKeITb dIy DOiDOK y MaIbTyHbOMy.
!PonepeJxKeHHa.
He nizirpibaTe noyuueKn 3epHOM, BnuiHi 3 KICTOuykAmn a6o xeneB mikpoxbnboi nei. ICHYc PN3Nk BNHK- HEHHI NOXEKJI!!!
RaIIO noIkoJKeHO DBepaTa a6o yuJIbHIOBaU DBepaT, He npOIOBxKyIe BnKOpNCaHHa PnICtPOH, DOnOKN Ie noIkoDxKeHHa Byde ycHyTO KBAIipikOBaHm CneiianicTom.
He hamaraTeCb BiDpemOnTyBaTn npicTpri BlnachOpuy; 3B'jXiTbC3 yNOBHOaKeHm ekCpeTOM. Lc Hebe3neHNo dJa 6yDb-Koro, OKiIM ekCpeTIB, aJxke IJa BVKOHaHHa peMOHTy uN OBCnyROyBaHHa NOTpi6Ho 3HrTn KpUkky, JaKa npn3NaeHa dJa 3axnCTy BiD BVInPOMIHOBaHHa, CnpuHHeHO- ro MikPOXBnJIaMn.
PonepeDxKeHn.
He harpiBaIte piDHH Nn iHsII npOyKTN B 3aKpNTnx KOHTeHepax. IChyE He6e3neKa Bn6byx!
He CTaBTe MIKPOXBnIbOBy niu y Iuafoy. YneBnITbcra, 0o BiDCTaHb MIX KOKHOIO CTOPHOIO npncTPOIO IuafoIO, CTiHaMNI TOIO CTaHOBT bioHaIMeHwe 10 cm dIra 3a6e3neueHHaJIexKHOI BEHTnIaII.
ДiTи i HEMiHi OOC6n He NOBHHI BVKOpNCTOByBaTH npNCtpii 6e3HaTMy, kIIO ix He 6bYNo HAnExHNO pOIHCTpyKTOBaHO 5oDo 6e3NeuHOro BVKOpNCTaHHr HmMn pNcTPOIO i RaIcO BOHN He yCbIDOMHIOy, rki pN3Nk icHyOtB b pa3i HeHaJIeKHO BVKOpNCTaHHr pNcTPOIO.
Y BnpaKy BnKOpNCTaHЯ KOM6iHOBaHOro peXIMy DiTINMOxytB BnKOpNCTOByBaTn npIcTpiTiIbKnPiD HaIgIaOM DOpocInx Ypee3 BnCOKI TempepaTyPi.
MikpoxBnIbOba nIy He np3NaYeHa dIy niirpibHna XNBHX TBapIN.
BnKOpncTObuIe TIIbKn npuaTHn dJaMiKpOxBnIbOBoI neCi nocyd, taKn Jk: cKnlo, nopceJHa, KepaMka, TePmoCTiKm Ipnactnk abo CneiaIbHn Nocyd dJa MiKpOxBnIbOBoI neci.
Плд惰 розirpiвань аб орпiroтунвань пюдуктіВ улergо-зай мостин MaTePIaIax, taknx як пл actиki obo napepobi koHTeHepn,notpio6HO nOCTiHNo harlaTaN 3a npicntpoem y 3B'ЯЗКУ 3 MOxNlBICTU BHNKHeHHN NOXExi.
Y BnpaKy IoBn DmBy BmKHiTb npncTiPi i Bi'd'edHaIte NOro BiD MepeXi. TpMaIte DBePcTa 3akpntMn, 063aNo6iRTN MOxNIOBocTI 3aoropHHJ.
360bTaIte a6o NOMiuaTe BMICT dntTayoi nIpaueKn i cKJHOro nocuDy 3 dntTaym XapUyBaHHaM i nepeBipTe TeMnepaTypy, nepH hIX BnKOpNCToBvBaTn. IChYc He6e3neKa OTPMaHnaOnikIB.
ⅡO6 BmHnTn EMHoCTi, BnKOpNtOBuYte raHcIpy KxOHnHi pyKaBnCi.IHAKUIE ICHYE HEBE3NEKA OTPIMAHHr ONIKIB!
PódykTN 3i ŠkapaJyNTO a6o ŠkipKoTO, taki Jk Jnca, CocncKn, 3akpnti cKJHl KOhcepBHi 6aHKn Ta iH. He MoXHa pO3irpiBaTn B MIXPOXBJIbOBiI NeHi, OCKJIbKN BOHMOxTyB B6yHXHTn HabiTb NcIe 3aBepSeHHra Ipouecy po3irpIBaHHa.
He6e3neka neperpiBaHHa.
Плд час пиготуваньixi,ocobиwoпд час пidirpiвань рдн (ВODи),MOXe CTATSCA TAK,TO TempepaTpyN KINHNA DOCSRHy- TO,ODnak TINOBI 6yJIb6aushK Nze He 3'YBnIOTbcr. PdHnHe KINIIPTb pIBHomipHO.PIdчac BnMaHnKoHTeHepa cei epeKT neperpibAHNMAOme pIn3BecTN Do paNTBOI NOBn 6yJIb6aushOK, 50MOxte 6yTu n CnpuHHeNo HABITb He3NaHmM KOINBaHHMn, i nepeJIbAHNpyiDHN. IChye He6e3neKa OTpIMaHnO onikB!ДЯ pIBHomIPHorO KINiHnPoklaIDt b CKJHy naInuKy a6o 5ocb noDi- 6He,He MetaneBe, y KOHTeHep.
- Petelbno nochctbe pamky/yujiNbHOBauchBepaT i cymkihuiactHHN BOJoroIO raHcIPKOIO y BnIaNky ix 3a6pydHeHH.
- Peru npocbte MkpoxbnboBy niCyBaTe 3aIIuKi iXi BCEpeHIni npocpO.
- Y Bnpiakky HehaJIeXHOrO DoIgJIaY 3a IprNCTpoE M IORo NOBepxHr MOKe NOnKoDInTcB, IIO IprN3BeDe DO 3MeHSeHHe TepMIny EKCnIpyatauI IIpNCTpoI i BnHKnHHeH Hne63NeuHX CITyaui.
He ynpabJnIe npicStpoem 3a DOIOMOHO 3OBHiiHbOTo TaI-Mepa a6o OKpeMoI DiCTaHciHoi CNTeM NKepyBaHH.
Ta5nukn 3 iHopmaicio icmboln Ha Bnpo6i
Bropi mikpoxbunboo'i neci e cmbon i3 taKIM TEKCTOM, 10 nopepejkae npo He6e3neky.
WARNING-
MICROWAVE ENERGY-DO
NOT REMOVE THIS COVER.

CAUTION: HOT SURFACE
Ipeekna
PonepedkeHH
Mikpoxbuni -
He 3HimaTe KpnuKy.

Ybara. rapa na NOBepxna.
He noka3aHo: kamiHb dIy
ni4n
MaHIOHOK B.CIMBOJN Ha naneJI kepyBaHHa
1 MikpoxBunl
5ФункцязамkaВддITEI
2 KohBekzij
6 ABTomatuHa dHyHKJIa
3rnnb
7 IIndiKaTop TemnepaTpy
4PozMopoxKeHHa
Mikpoxbni He 3daTHi IPOHnKHyTu y MeTaN; TOMy He BnKOpNCTOBynte MeTaneBi KOHTeHepu YI Tapilkn.
ybara.
He BnKOpNCToBvIe napeoBI cMHOCTi, BnroTOBNeHi 3 BTOpHHOICnOBHH, OckJIbKn BOHm MoKyTb MICTHTN HeBeJIHKI qACTOChkMeTaJy, IIO MOKe pnp3BecTI Do IOPABn icKOp Chn POxExi.
Y tabnui Hxue noaHO BiOMOCTi, kI OONOMOxyTB Bam y Bn-6bopy nocudy.
Ha npn6JI. 100 r-1 XB.npIroTByaHnH IxKi
Yci npodykTN, kki BN hakpnbAcTe KpnUKOIO y 3BnuaHni neyi, cnid HakpnbATn i B miKPOXBnIbOBi nepi.
Kpnka do3BOINb 3aON6iITN BnCysuYBaHHIO npOdykTy. IpeBepHyta TApIka, KnpoHEnpOHNkHnn pAnip qN fOJbRa dIy nprirotyBaHHy y MkiPOXBnIbOBi MoXHa 3aCTOCOBaTH nK pKniSku. JkUo Notpi6Ho, 06 yTBOpNJacc KopHnKa, He NaKpNBaTe cTpaBy.
Ta6JIu3I npaamn 10do nprirotybaHnCTpaB
| Проб乾坤инилой | Кльб-кICTь | Налаштуваши потужностi | Час (прибл. XB.) | Кршka |
| Овочи | ||||
| Ба KMяЖан | 500 r | P80 | 7 - 10 | ТаK |
| ЦВітнаду STауСТа | 500 r | P80 | 8 - 11 | ТаK |
| БрOKkoni | 500 r | P80 | 6 - 9 | ТаK |
| ЦКорій | 500 r | P80 | 6 - 7 | ТаK |
| Горox | 500 r | P 80 | 6 - 7 | ТаK |
| ФECHөнь | 500 r | P 80 | 8 - 11 | ТаK |
| Зелені божи | 300 r | P 80 | 13 - 15 | ТаK |
| Картоюя | 500 r | P 80 | 9 - 12 | ТаK |
| РINA | 500 r | P 80 | 8 - 10 | ТаK |
| ЦИБУЛД-порей | 500 r | P 80 | 7 - 9 | ТаK |
| Проб乾坤и наоюi | Кльь- кICTь | Налаштуваши потужностi | Час (прибл. XV). | Кршka |
| Кукудза на качанi | 250 r | P 80 | 7 - 9 | ТаK |
| Морквa | 500 r | P 80 | 8 - 10 | ТаK |
| Пereць | 500 r | P 80 | 6 - 9 | ТаK |
| БróccSEL- сыka калysta | 300 r | P 80 | 7 - 10 | ТаK |
| Сларka | 300 r | P 80 | 6 - 9 | ТаK |
| Помідори | 500 r | P 80 | 6 - 7 | ТаK |
| Цкунi | 500 r | P 80 | 9 - 10 | ТаK |
Плдказа. ПоріжTe Oвоci Ha MaJI ShMaTKn i roTyJTe 3 npi6IиЗнO 2-3 loxKamn piDHH; yac BiD yacy nomiuyTe. rOtyJTe Ha MaJI INOTyKHOCTi 3-5 XBnINH;doaIte npinpabN npeed cnoKbAH-NHM.
Фрукtn
Po3MopoxeHHI npriroTyBaHHOBOyIB
Moxha Bn6paTn 3-Nomix Tpbox HanaaStyBaHb rpiJra:
G-1 IINSeBepxHnKbapcOuBNrPnlb
G-2 BepxHnKbapcObni rnpJIb i HnXhHi eIeMeHT HaPribaHH
G-3 IINIe HIXHNI eIeMeHT HaRpiBaHHa
KopncTyBaHHraPnJIeM
BctaHObIb rpiNb ha metaneBi Tapinzi, jka doJaetbcra. BnkOpncTobyTe TepMoCTiKn NocSyd qH npocTo noknaDiB npOdykTu Ha pewiTkY.
Y pa3i 3actocybaHHpeKIMy G-1 nonepedne po3irpibaHn He noTpi6He, ockilbkn KBapcOBN rnilrehepye npme npomHHn.
IotpmyTecbnoaHx daJI Bka3iBOK dJIa CmaKeHHa.
- Виберітьnotрибни реким грпя, натуснчыши Кногку DOUBLE GRILL/COMBI. один aбо кльka pa3iB. натуснчыши один pa3, можна викоростовыати ретулготop.
- Hatachitb KhoNky START/+30SEC./CONFIRM, 1o6 niTbepn Tn HanaStyBaHHa.
- 3a donomorooperynlaTopa BcTaHOBitb notpi6Hm qac cMaKeHN HBAID5ceKHyDdo95xbnnH.
- Hatachitb khoiky START/+30SEC./CONFIRM, 06 po3noaTn.
I PnmiTka.
KoIIMHe noIOBHa hAcy npriroTyBaHnry, IpOlyHae 3ByKOBn CnHaI, HaraDyUOni, Izo IOTpi6Ho nepeBepHyTu CTpaBy.
KoJI MInHe BeCb Yac, npIcTpiB BmKHeTbCra I npOlyHae 5 3ByKOBnx CnHAniB. Tenep MoXHa BmHrTn CTpaBy.
BnKOpncTaHnKaMeHaIpn
Pexim KOHBeKzii 3 nonepeD him po3irpibHHaM
-
Bn6epiB nopti6Hy tempeaTy y diaia3oHi 140°C-230°CHaTnCSHeHHaM KhoNk CONVECTION oAnH a6o KiIbKa pa3iB.HaTnCSyBUn OOnH pa3, MoXHa BnKOpNCTOByBaTu peYJrTop.
-
Hatachitb kHonky START/+30SEC./CONFIRM, 06 niTbepn- Tn HanaStyBaHHa.
- HATINCHITb KHOIIky START/+30SEC./CONFIRM ue pa3, zuo6 po3noaTn nonepdHc po3irpiBaHHJ.
I PnmiTka.
- Hatachitb khoiky START/+30SEC./CONFIRM, 106 po3noaTnpo6oty.
Iicna toro, kMHe yac npiroToyBaHnHa iKi, npncTpiB BMKHeTbcra I npolyhae 53BykoBnx CnHanib. Bmmitb npOkykn 3 npncTpoJ.
Pexim KOHBekui 6e3 nonepeHboro po3irpiBaHHa
- PoknadiTb npoDyKTny npncTpi.
- Bn6epiB noTpibHy tempepaty y diana30hi 140°C-230°C HATINCHENHm KHOPIK CONVECTION oDHH a6o KiJIbKa pa3iB. HATINCHYBm ODNH pa3, MoJHa BnKOpNCTOBvBaTn peYIaTOp.
- HATINCHITb KhoNky START/+30SEC./CONFIRM, 1o6 niTBePnTn HanaSTyBaHHa.
- 3a donomoro peyraTopa BCTaHOBiTB noTpiBn yac npiroTyBaHHia biD 5 cekyn do 95 xBnInH.
5.ΗΤιςχίβε Κλοήκγ START/+30SEC./CONFIRM, ζύδ ροδηουαιν πρόθότυ.
I PnpMItKa.
IoiJIKnHaDnCnIeTAKOXBkA3yBaTMMybHaTeMnepaTyp, koiIOcRHyTo.BiO6paXeHnHaDnCnIeMIroTITmpe nID qac pa3n po3irpibAHn.
Iicra toro, kMnHe yac npuroTyBaHH iKi, npncTpiBmKHeTBcra I npolyhae 53bkyOBnx CnHaJIb. BmMitb npOdykTN 3 npncTpoJ.
KombiHaCiЯ peXmMiB mIKPOXBnIb, rPnJIa I KOHBeKciI
Ypa3i 3actocyBaHHaHnHaIaHTyBaHb
MikpoxbnJI
Bepxhi Kbapocboi prnilb
HIXHI eIeMeHT HaPribaHHA
KOHBeKLJ
No Yep3i BMNKaTImyTbCraY TaKNX KOM6iHaζijX:
3MiHa Iporpamn I03HaayTbca 3ByKOBIM CnHaJOM.
Y pekimi rnila 3bva 3bykoBi cnHaJI N Bka3yBaTMyTb, 10 noTpi6HO nepeBepHyTu Iky, KOJI MInHe nOIOBnHa Yacy.
Iicra toro, kMnHe yac npiroToyBaHHiaKi, npNCTpiB BMKHeTcB i npolyhae 5 3BykoBx cnHanib. BmMitb npOdykTu 3 npNCTpoJ.
I PrpMItKa.
AByMaTnHi cyHkujiipexIM KOHBekui 3 nonepedim po3irpiBaHHaM HeMOxNlBO BVKOpNCTOyBaTu dIra NOCTyNOBOr nprirotyBaHHiaKi.
CpeiaJIbHi Функцii
ABTomatnHnnnyck
Moxha Biiknactnyck npicctpou y pexmimi Mikpoxbnlb, rpnla, KOHBeklii, dIy aBtOMaTHNx cyHKLiy nHabITb KOM6iHObaHOro pexmMy. MakcImaJIbHe hanaStyBaHHa Yacy BiiknaJeHHa - 23 roDInH 59 XBnInH.
I PrnIMItka.
Cnepuy BCTaHOBITb rOHHNK! IHaKUe Uo cyHKUIO He BdaCTbcBVKOpNCTaTn.
Y pa3i 3actocyBaHHa yHKJI aBTOMaTHHOro NyCKy yHKJia p03MOPOKeHHa HeIOCTynha.
Hanpiknaad. 106 abTomatuHNo 3aynCTnMikpoxBnIbOBy nH, BnKoHaIte noaHi daJI diI.
- HATINCHITb KHOIIky MICROWAVE oAn h a6o KInbKa pa3iB, 0io6 Bn6paTn Notpi6He HanaStyBaHHa NoTyXHocTi y pexmIMi MikoXBNJb.
- HATNCHITb KhoNky START/+30SEC./CONFIRM, icosiTBePn-Tn HalaSTyBaHHa.
- 3a donomoro hpo peryIaTopa Bn6epiB noTpiHn qac npiroTuBaHHra iKi.
- HATINCHITb KHOJky CLOCK/PRE-SET. IpOlyHaC 3ByKOBn CnHaNl i Ha DnCnJIeI 3'ABNtBcA NOTOnHn Yac; IepSha UnΦpa MInOTITIMHe.
- 3a donomoro peyIaTopa BCTaHOBiB roDHH noTpiHOrO acy nprirotyBaHH iKi.
- Hattichitb KhoIky CLOCK/PRE-SET. IpoIpyHaC 3ByKOBn CnHaiHa DaICPnei NocHyTb MmroTiN XBUNHN.
- 3a donomoro peynapota BCTAHOBiB xBNHn noTpi6horo yacy npiroToBaHH iKi.
- Hatncihitb khoiKy START/+30SEC./CONFIRM nIpiTbePdxKeHHa.CmBOn pOzdiJeHHraToHHnKa ":" Ha dncPiepiINHHTb MfrotITIn.
Hanpikna.7:30 xBnHH npriToyBaHH iXi 3a noTyKHOCTi 100%;
vac 3anycky 14:20
| Крок | Кнорka | Вidiобрахенnya | |
| 1 | MICROWAVE | P100 | (Hалайштуваши- notужностi) |
| 2 | START/+30SEC./CONFIRM | ||
| 3 | 7:30 | (Час пiroгтуваши- икi) | |
| 4 | CLOCK/PRE-SET | 10:45 | (ПOTочné час) |
| 5 | 14:45 | (Bстанов—itь rogenи) | |
| 6 | CLOCK/PRE-SET | 14:45 | |
| 7 | 14:20 | (Bстанов—itь хвлини) | |
| 8 | START/+30SEC./CONFIRM | 10:45 | (ПOTочné час) |
I PrpimItka.
Пд усцьоупограмовагониналштуваньфункii elementiv Керваши заюковано (okpim CLOCK/PRESET i STOP/CLEAR).
3HOBy BIO6pa3nTuac 3ayncky,HaTNCiTB KHONKY CLOCK/PRE-SET.
KoIyde doCraHyTo BCTaHOBJIeHO racy, MikpoxBnIbOba niu po3noue pO6OTy. Ha niTBePdJKeHNr cIbOr npOlyHaE DBA 3ByKOi CnHaJI.
PonepeJxHn. IChyE He6e3neKa noXexi!
3aBxDn HagTaaIte 3a npictroeem nID qac noro po6oTN.
BukopncTObUOHy cnyHcJIO BiKJaHeHO 3aNyCKy, BCTaHOBIT Yac TaKIM YHOM, Uo6 npnctpiI npaUOBAB iHaJIeXHM HaJIaDM.
He BMKaIte MikoXbNtBoby Ni, kIo BOHa npOxHn.
RaKIO BmHrTn CtpaBp paHiue 3 npncTroIO, cnI3abepuHTnФyHKUHO, HATNCHyBUn KhoNkY STOP/CLEAR.
Iicra toro, kMHe yac npiroToBaHHiaKi, npictpi BmKHeTcB i npolyhae 53bkyOBx cHnHaib. Bmmitb npodyktn 3 npictpo.
YcyHeHHa HecnpaBHOCTeH
Hecnpabhocti yacto cnpuynhehi he3naHmnn npo6nemam. Iepi Hix 3BepTaTnca Do CnyxbiPiTpumkn CnoXnBaui, nepebipTe Ta6nuy Hxue.
TexhiHixapaKTepeNCTnKn
MoeB: MWG 779 H
KINBJIeHHa: 230B,50Tc
CnoKmbaHn ehepri:
Mikpoxbni: 1450 Bt
Tpnilb: 1700 Bt
Kohbekci: 2300BT
HominaBbna BnXiHa nOToxHicTb: 900BT/2450M
EmhictkameprnnpiroTuBaHHi: 25 n
Klae 3axncty:
Bara HETTO: 16,5 kT
XapakTepcntKMOke 6yTu 3miHeNo 6e3nonepdKeHHa!
Lcienpncptpi ceptnphiikobaoHbIIOBIDHOdoDiOuHxHopM PC, HapnKlaH Hopm eIeKtpomarHITHOi Cymichocti i Hn3bKOi HanpyrN, i CKOHCTpyIOBAHO bIIOBIDHO do OCTaHHix XapaKTepnCTNK i3 TexhIKn 6e3neKn.

CHATRONIC
INTERNATIONAL GMBH