USER MANUAL SUPER DAISEIKAI TOSHIBA
For general public use
Indoor unit
RAS-077, 107, 137, 167SKV-E7
Outdoor unit
RAS-077, 107, 137SAV-E6
RAS-167SAV-E5
PRECAUTIONS FOR SAFETY
| DANGER | ·Do not install, repair, open or remove the cover. It may expose you to dangerous voltages. Ask the dealer or the specialist to do this.
·Turning off the power supply will not prevent potential electric shock.
·The appliance shall be installed in accordance with national wiring regulation.
·Means for disconnection from the supply having a contact separation of at least 3 mm in all poles must be incorporated in the fixed wiring. |
| WARNING | ·Do not expose your body directly to cool air for a long time.
·Do not insert your finger or any article into the air inlet/outlet.
·When an abnormality (burning smell, etc.) occurs, stop the air conditioner and disconnect the power supply or turn off the breaker.
·This appliance is not intended for use by persons (including children) with reduced physical, sensory or mental capabilities, or lack of experience and knowledge, unless they have been given supervision or instruction concerning use of the appliance by a person responsible for their safety.
·Children should be supervised to ensure that they do not play with the appliance.
·Do not use any refrigerant different from the one specified for complement or replacement. Otherwise, abnormally high pressure may be generated in the refrigeration cycle, which may result in a failure or explosion of the product or an injury to your body. |
| CAUTION | ·Do not wash the unit with water. It may cause an electric shock.
·Do not use this air conditioner for other purposes such as preserving food, breeding animal, etc.
·Do not step or put anything on the indoor/outdoor unit. It may cause an injury or damage the unit.
·Do not touch aluminium fin because it may cause an injury.
·Before cleaning the unit, turn off the main switch or the circuit breaker.
·When the unit won't be used for a long time, turn off the main switch or the circuit breaker.
·It is recommended that maintenance be performed by a specialist when the unit has been operated for a long time.
·The manufacturer shall not assume any liability for the damage caused by not observing the description of this manual. |
1 INDOOR UNIT DISPLAY
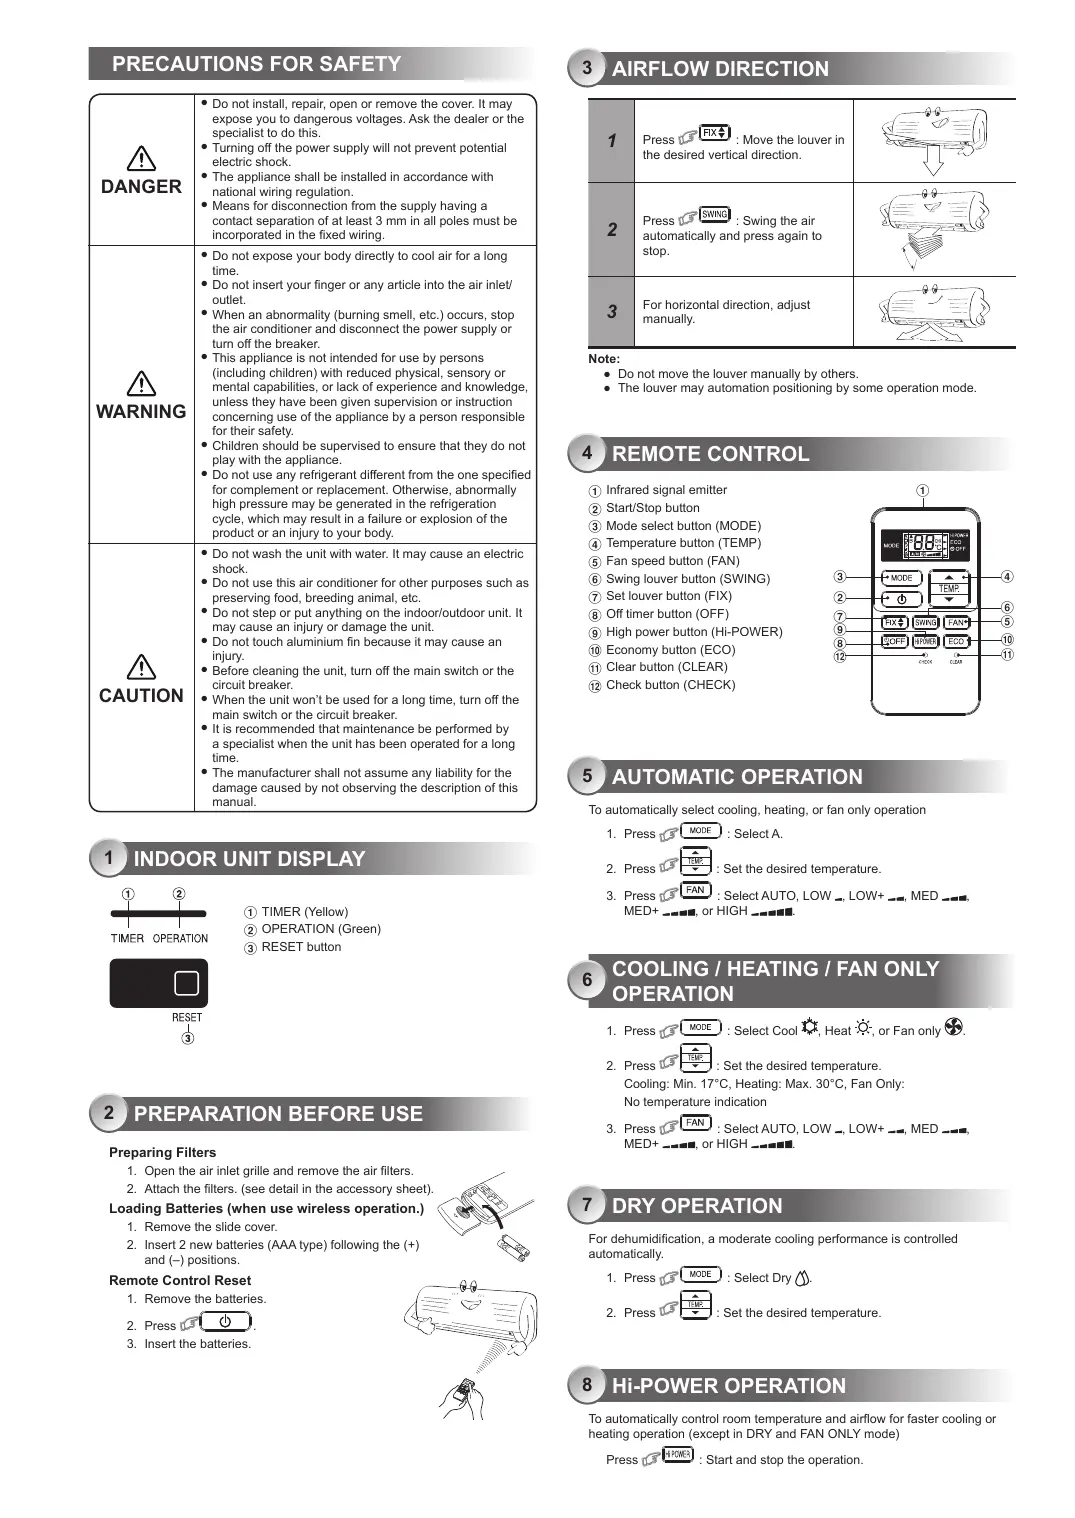
① TIMER (Yellow)
(2) OPERATION (Green)
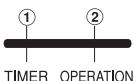
③ RESET button
2 PREPARATION BEFORE USE
Preparing Filters
- Open the air inlet grille and remove the air filters.
- Attach the filters. (see detail in the accessory sheet).
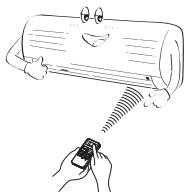
Loading Batteries (when use wireless operation.)
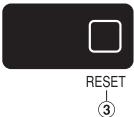
- Remove the slide cover.
- Insert 2 new batteries (AAA type) following the (+) and (-) positions.
Remote Control Reset
- Remove the batteries.

- Insert the batteries.
3 AIRFLOW DIRECTION
| 1 | Press FIX: Move the louver in the desired vertical direction. | |
| 2 | Press SWING: Swing the air automatically and press again to stop. | |
| 3 | For horizontal direction, adjust manually. | |
Note:
- Do not move the louver manually by others.
- The louver may automation positioning by some operation mode.
4 REMOTE CONTROL
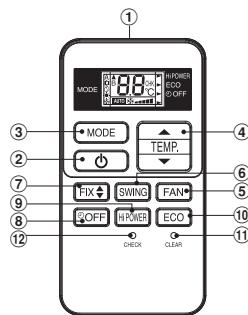
(1) Infrared signal emitter
(2) Start/Stop button
③ Mode select button (MODE)
④ Temperature button (TEMP)
⑤ Fan speed button (FAN)
⑥ Swing louver button (SWING)
⑦ Set louver button (FIX)
(8) Off timer button (OFF)
(9) High power button (Hi-POWER)
Economy button (ECO)
11 Clear button (CLEAR)
12 Check button (CHECK)
To automatically select cooling, heating, or fan only operation
- Press MODE : Select A.
- Press TgIP: Set the desired temperature.
- Press FAN : Select AUTO, LOW-, LOW+, MED+, MED+ or HIGH
6
For dehumidification, a moderate cooling performance is controlled automatically.
- Press MODE : Select Dry
: Set the desired temperature.
To automatically control room temperature and airflow for faster cooling or heating operation (except in DRY and FAN ONLY mode)
Press H-POWER : Start and stop the operation.
To automatically control room to save energy (except in DRY and FAN ONLY mode)
: Start and stop the operation.
Note: Cooling operation; the set temperature will increase automatically 1 degree/hour for 2 hours (maximum 2 degrees increase). For heating operation the set temperature will decrease.
10 TEMPORARY OPERATION
In case of the misplaced or discharged remote control
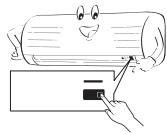
- Pressing the RESET button, the unit can start or stop without using the remote control.
Operation mode is set on AUTOMATIC operation, preset temperature is 24^ and fan operation is automatic speed.
11 TIMER OPERATION
Set the timer when the air conditioner is operating.
| Setting the OFF timer |
| 1 | Press OFF for enter OFF timer setting. |
| 2 | Press TBUF for select desired OFF timer. (0.5 - 12 hrs) |
| 3 | Press OFF for set OFF timer. |
| 4 | Press OFF again for cancel OFF timer. |
To automatically restart the air conditioner after the power failure (Power of the unit must be on.)
Setting
- Press and hold the RESET button on the indoor unit for 3 seconds to set the operation. (3 beep sound and OPERATION lamp blink 5 time/sec for 5 seconds)
- Press and hold the RESET button on the indoor unit for 3 seconds to cancel the operation. (3 beep sound but OPERATION lamp does not blink)
- In case of ON timer or OFF timer are set, AUTO START OPERATION does not activate.
13 MAINTENANCE

Firstly, turn off the circuit breaker.
Indoor Unit and Remote Control
- Clean the indoor unit and the remote control with a wet cloth when needed.
- No benzine, thinner, polishing powder or chemically-treated duster.
14
To protect bad smell caused by the humidity in the indoor unit.
- If the button is pressed once during "Cool" or "Dry" mode, the fan will continue to run for other 30 minutes, then it will turn off automatically. This will reduce the moisture in the indoor unit.
- To stop the unit immediately, press the more 2 times within 30 seconds.
- Three-minute protection feature: To prevent the unit from being activated for 3 minutes when suddenly restarted or switched to ON.
- Preheating operation: Warm up the unit for 5 minutes before the heating operation starts.
- Warm air control: When the room temperature reaches the set temperature, the fan speed is automatically reduced and the outdoor unit will stop.
- Automatic defrosting: Fans will stop during defrost operation.
- Heating capacity: Heat is absorbed from outdoors and released into the room. When the outdoor temperature is too low, use another recommended heating apparatus in combination with the air conditioner.
- Consideration for accumulated snow: Select the position for outdoor unit where it will not be subjected to snow drifts, accumulation of leaves or other seasonal debris.
- Some minor cracking sound may occur when unit operating. This is normal because the cracking sound may be caused by expansion/ contraction of plastic.
Note: Item 2 to 6 for Heating model
Air conditioner operating conditions
| Temp.
Operation | Outdoor Temperature | Room Temperature |
| Heating | -15°C ~ 24°C | Less than 28°C |
| Cooling | -10°C ~ 46°C | 21°C ~ 32°C |
| Dry | -10°C ~ 46°C | 17°C ~ 32°C |
16
TROUBLESHOOTING (CHECK POINT)
| The unit does not operate. | Cooling or Heating is abnormally low. |
| · The power main switch is turned off.
· The circuit breaker is activated to cut off the power supply.
· Stoppage of electric current
· ON timer is set. | · The filters are blocked with dust.
· The temperature has been set improperly.
· The windows or doors are opened.
· The air inlet or outlet of the outdoor unit is blocked.
· The fan speed is too low.
· The operation mode is FAN or DRY. |
17
REMOTE CONTROL A-B SELECTION
To separate using of remote control for each indoor unit in case of 2 air conditioner are installed nearly.
Remote Control B Setup.
- Press RESET button on the indoor unit to turn the air conditioner ON.
- Point the remote control at the indoor unit.
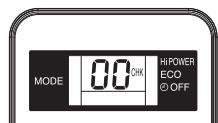
- Push and hold check button on the Remote Control by the tip of the pencil. "00" will be shown on the display. (Picture ①)
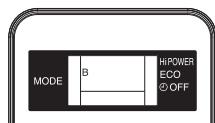
- Press MODE during pushing O CHECK. "B" will show on the display and "00" will disappear and the air conditioner will turn OFF. The Remote Control B is memorized. (Picture ②)
Note: 1. Repeat above step to reset Remote Control to be A.
- Remote Control A has not "A" display.
- Default setting of Remote Control from factory is A.
1
2
| Information according to EMC Directive 2004/108/EC |
| (Name of the manufacturer) | TOSHIBA CARRIER (THAILAND) CO., LTD. |
| (Address, city, country) | 144/9 MOO 5, BANGKADI INDUSTRIAL PARK, TIVANON ROAD, TAMBOL BANGKADI, AMPHUR MUANG, PATHUMTHANI 12000, THAILAND. |
| (Name of the Importer/Distributor in EU) | TOSHIBA CARRIER UK LTD. |
| (Address, city, country) | Porsham Close, Belliver Industrial Estate, PLYMOUTH, Devon, PL6 7DB. United Kingdom |
TOSHIBA