
CORE 55 - Smartphone ARCHOS - Free user manual and instructions
Find the device manual for free CORE 55 ARCHOS in PDF.



| Product Type | Smartphone |
| Brand | ARCHOS |
| Model | CORE 55 |
| Operating System | Android |
| Screen Size | 5.5 inches (estimated) |
| Mobile Network | 3G / EDGE |
| Wireless Connectivity | WiFi 802.11 b/g/n, Bluetooth |
| Front Camera | Built-in Webcam |
| Rear Camera | Camera with Flash |
| Battery Type | Lithium-ion, Removable |
| Battery Capacity | Approximately 2000 mAh (estimated) |
| SIM Card | Dual SIM (Micro-SIM) |
| Memory Card | MicroSD (dedicated slot) |
| Ports | Micro-USB, 3.5mm headphone jack |
| Physical Buttons | Power, Volume Up/Down |
| Sensors | Accelerometer, Proximity (estimated) |
| Dimensions | Approximately 155 x 78 x 9 mm (estimated) |
| Weight | Approximately 170 g (estimated) |
| Box Contents | Smartphone, Battery, Hands-free kit, Micro SIM adapter, USB cable, Charger, Quick start guide, Warranty guide |
| Maintenance | Clean with a soft, dry cloth. Avoid moisture. |
Frequently Asked Questions - CORE 55 ARCHOS
User questions about CORE 55 ARCHOS
0 question about this device. Answer the ones you know or ask your own.
Ask a new question about this device
Download the instructions for your Smartphone in PDF format for free! Find your manual CORE 55 - ARCHOS and take your electronic device back in hand. On this page are published all the documents necessary for the use of your device. CORE 55 by ARCHOS.
USER MANUAL CORE 55 ARCHOS
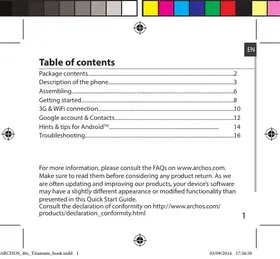
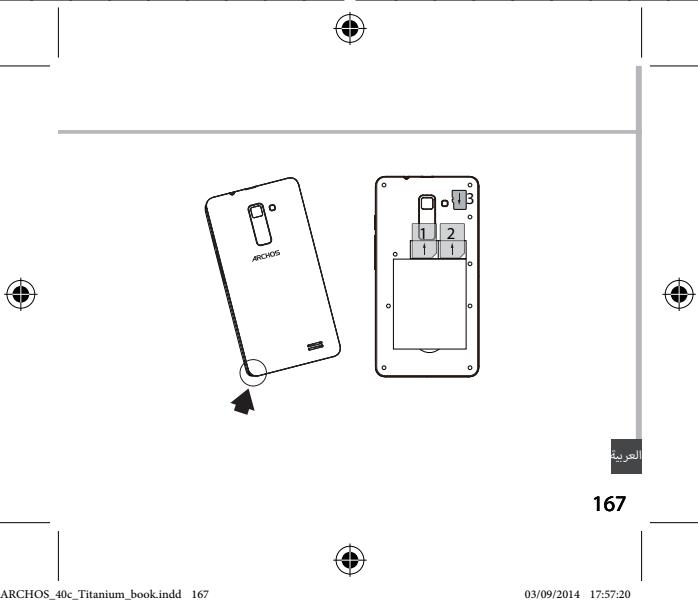
Description of the phone. 3
Assembling. 6
Getting started. 8
3G & WiFi connection. 10
Google account & Contacts. 12
Hints & tips for AndroidTM 14
Troubleshooting. 16
For more information, please consult the FAQs on www.archos.com. Make sure to read them before considering any product return. As we are often updating and improving our products, your device's software may have a slightly different appearance or modified functionality than presented in this Quick Start Guide.
Consult the declaration of conformity on http://www.archos.com/products/declaration_conformity.html
Package Contents
Check your product box for the following items:
- ARCHOS 40c Titanium
- Battery
- Headset
- Micro SIM adaptor
- USB cable
- Charger
- Quick start guide, Warranty, Legal & Safety notices
The items supplied with your device and available accessories may vary depending on your region or service provider.
The supplied items are designed only for your device and may not be compatible with other devices.
Unapproved accessories may cause your device to malfunction.
2

EN
Description of the phone
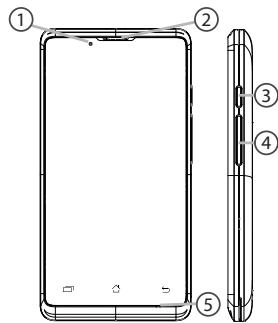
① Loudspeaker ② Webcam ③ ON/OFF button Volume buttons ⑤ Microphone
3
Description of the phone
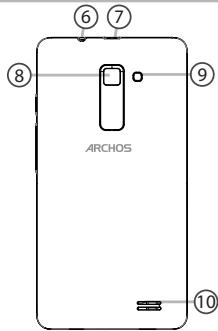
⑥ Headset jack ⑦ Micro-USB port Camera ⑨ Flash ⑩ Loudspeaker
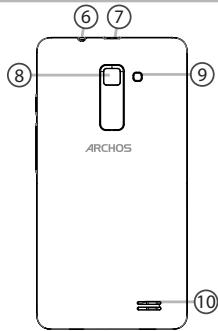
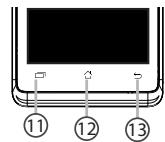
① Multi-task ② Home/Recent apps/Google NOW ③ Back
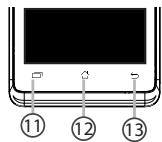
Multi-task: open the list of recent applications;
Home/Google Now: short press to return to the Home screen; long press to access Google Now.
Back: return to the previous screen.



Getting started
Turn ON
- Press and hold the ON/OFF button to turn on the device. When you turn on your device, a PIN code may be requested.
- Type the PIN code supplied with your SIM card.
Beware of typing a wrong PIN code. 3. Select OK
Through the wizard
The first time you start up your ARCHOS, the installation wizard will help you set up your device:
- Language
- Date & time WiFi connection
- Location service options
Turn OFF
To turn off your device, press and hold the ON/OFF button, and then select Power off > OK.
8

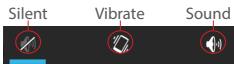
Sound & Notification profiles
- When the device is turned on, press and hold the ON/OFF button.
- Select an option.
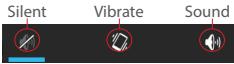
Touch screen actions:
Tap: touch once to select or launch a menu, option, or application.
Tap and hold: tap an item and hold it for more than 2 seconds.
Drag: tap an item and move it to a new location.
Double-tap: tap an item twice quickly.
Flick: briskly scroll up, down, left, or right to move through lists or screens.
Pinch in/out: place two of your fingers far apart, and then pinch them together.
Tip:
Your device goes in standby mode when you do not use it for a specified period of time. To wake up your device, press the ON/OFF button. To set the duration, go to Settings > Display > Sleep.


3G & WiFi connection
3G connection
With your SIM card, you should be connected to the Internet without any further setup. The ARCHOS will only have signal if you are in an area covered by your provider's 3G network. When connected to the 3G network, the 3G icon is displayed in the status bar.
Activating the mobile data
To be able to access the Internet, the mobile data icon must be activated.
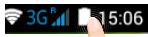
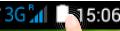
- Touch and hold the time & battery icons to reveal the status bar.
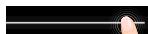
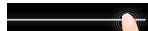
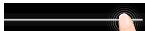
- Pull the white line down to display the status dashboard.

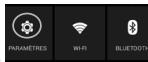
- Touch the status dashboard icon.
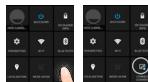
- Touch the mobile data icon to activate it.
Tip:
If you encounter connection problems, see the FAQs on www.archos.com or contact your 3G network connection provider.
WiFi connection
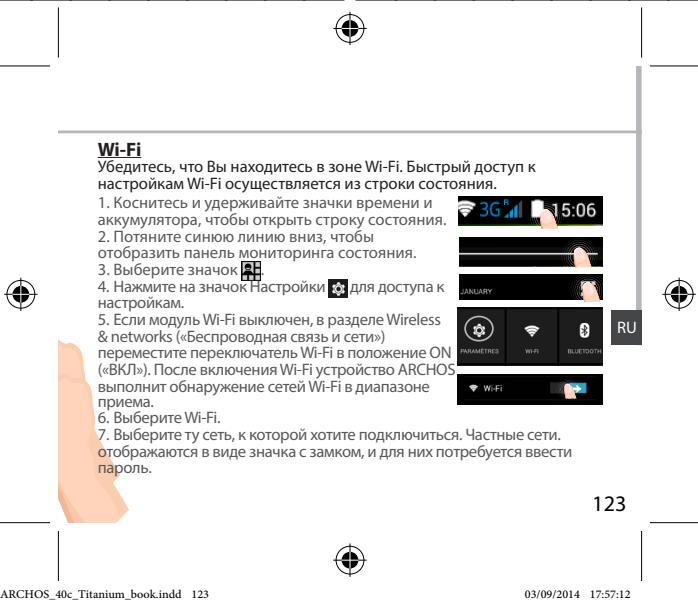
WARNING: Make sure that you are in a WiFi zone. You can access the WiFi settings quickly from the status bar.
- Touch and hold the time & battery icons to reveal the status bar. 2. Pull the blue line down to display the status dashboard.
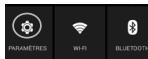
- Touch the status dashboard icon.
- Touch the "Settings" icon to open the settings menu.
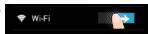
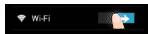
- In the "Wireless & networks" section, if the WiFi is off, slide the WiFi switch to the "ON" position. Once the WiFi is on, the ARCHOS will scan for WiFi networks in range.
- Touch "WiFi" to display available networks.
- Touch the name of the network you want to connect to. Private networks are shown with a lock icon and will require you to enter your password.




Google & Contacts
Adding a Google account
A Google account lets you take full advantage of any Google apps and services that you may want to use.
- Go to "Settings" > "Accounts" > "Add account".
- Select the account type "Google" to add.
- Follow the onscreen instructions to enter information about the account. Once the account is created, you can access Play Store, Gmail, Hangouts, Maps and many other apps.
Synchronizing info
Information must be synced to be saved. Your data is backed up on Google servers.
- Go to "Settings" > "Accounts" > "Google".
- Select your account.
The list of information that can be synced is displayed.
Automatic sync should be activated. To launch the sync, press the Menu button, then Sync now. You can get them back in case of loss of your device or SIM card. When your Google account is added to a new device, all your saved information is transferred.


Saving your contacts
When your contacts are saved, they are always available on the web and can be synced to any Android phone that's set up with your Google account.
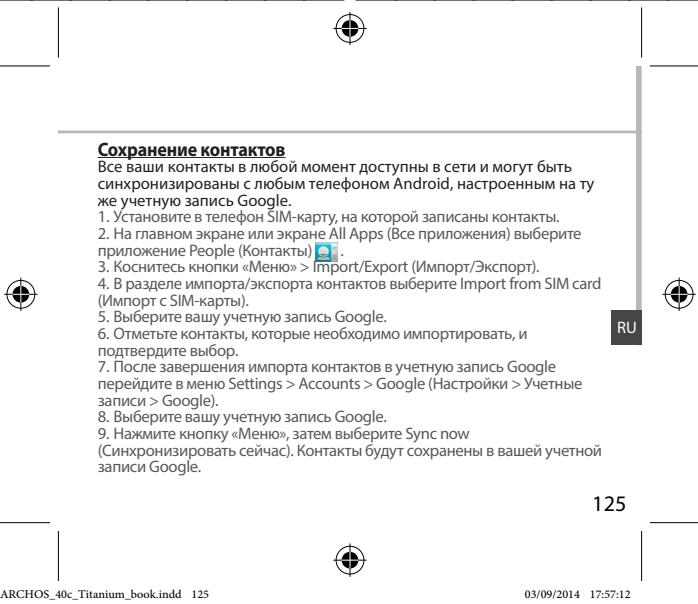
- Install the SIM card with your contacts in your phone.
- From a Home or All Apps screen, select the People app
- Touch the Menu button >"Import/Export".
- In Import/export contacts, select "Import from SIM card".
- Select your Google account.
- Check contacts to be imported and validate.
- Once the contacts are imported in the Google account, go to "Settings" > "Accounts"> "Google".
- Select your Google account.
- Select the Menu button, then "Sync now".
Your contacts are saved via your Google account.

Creating application folders:
Drop one app icon over another on a home screen and the two icons will be combined.
Widgets:
Touch and hold your finger on your home screen. Touch "Widgets".
Changing your wallpaper:
Hold your finger on a home screen at an empty location, then choose from the list.
Locking the touchscreen:
From the quick settings dashboard in the status bar, touch "Settings". In "Settings", scroll down and touch "Security", Touch "Screen lock", Touch the type of lock you would like to use. After you set a lock, a lock screen is displayed whenever your screen wakes up, requesting the pattern, pin or other specified key.


Troubleshooting
My phone is frozen or cannot switch on
Check the battery contacts, remove and reinstall your battery, then turn your phone on. Check the battery power level, charge for at least 20 minutes.
My phone cannot connect to a network or "No service" is displayed
Try connecting in another location. Verify the network coverage with your operator.
Unable to make outgoing calls
Make sure your phone is connected to a network, and the network is not overloaded or unavailable.
Unable to receive incoming calls
Make sure your phone is switched on and connected to a network (check for overloaded or unavailable network).
SIM card PIN locked
Contact your network operator to obtain the PUK code (Personal Unblocking Key).
To configure a new 3G network:
On your device, tap Settings.
Select Wireless & networks > More... > Mobile networks.
Select Network settings. In Network operators, select your operator.
In Access Point Names, select the correct access point name and enter the exact connection parameters provided by your 3G provider.
Components included in the package and accessories may vary depending on the region or service provider. Components included in the package are intended for use only with this device and may be incompatible with other devices. Use of accessories not approved for use with this device may cause malfunction.
114


Device description
① Earpiece ② Web camera ③ Power button / End call button ④ Volume keys ⑤ Microphone
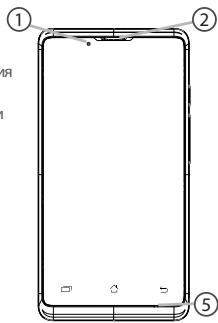
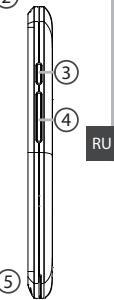
115
Device description
⑥ Touch screen ⑦ Micro-USB port ⑧ Camera ⑨ ⑩ Earpiece


① Multitasking ⑫ Home screen / Google Now ⑬ Back
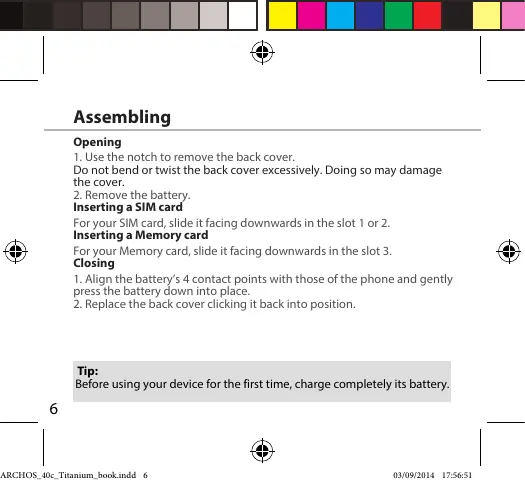
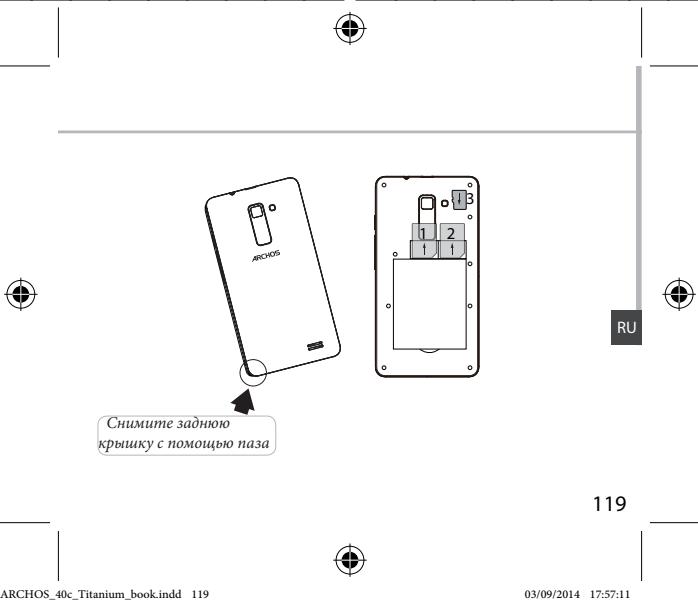
Battery: for opening and closing the device.
Before using the device, charge the battery.
118




Getting started
Turning on
- Press and hold the power button to turn on the device. When turning on, a prompt for entering the PIN code may appear.
- Enter the PIN code provided with the SIM card.
- Press OK.
Setup wizard
The setup wizard may perform the following settings?
- Language - Date and time - Wi-Fi connection - Location services
Turning off
To turn off the device, press and hold the power button, then select Power off > OK.
Sound and notification profiles
- When the device is on, press and hold the button



On/Off.
- Select one of the options.
Actions on the touch screen.
Touch: Touch once to select an item, activate a function, or launch an application.
Without sound or with sound.

Touch and hold: Touch an element and hold it for at least 2 seconds.
Drag: Touch an element and move it to a new location.
Double tap: Quickly tap an element twice.
Swipe: Quickly swipe up, down, left, or right to scroll through lists or move between screens.
Pinch: Spread two fingers apart, then bring them together with a pinching motion.
Tips. If the device is not used for a certain period of time, the screen turns off automatically. To turn on the screen, press the On/Off button. To adjust the duration, go to Settings > Display > Sleep.


Connecting to 3G & Wi-Fi
Connecting to 3G networks
After inserting the SIM card, the device automatically connects to the 3G network if you are in a 3G coverage area. To connect to a 3G network, the device must be in a 3G coverage area.
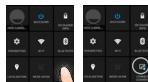
To be able to access the Internet, you must activate the mobile data plan.
- Consult the network operator to check the account status, to open the status bar.
- Press the Home key briefly to open the monitoring panel. 3. Select the icon 4. Contact the mobile data provider

Tip:
If connection problems occur, see the frequently asked questions and answers on the website archos.com or contact your 3G service provider.




Google account and contacts
Adding a Google account
The Google account allows the user to use various Google services and synchronize data.
- Go to Settings > Accounts > Add account.
- Select the Google account to add.
- Follow the instructions to enter the account information. As soon as the account is created, you will have access to Play Store, Gmail, Hangouts, Maps and many other applications.
Data synchronization
Data synchronization is automatic. Real-time management of your data is performed by Google.
- Go to Settings > Accounts > Google.
- Select the data you want to synchronize. The list of data that can be synchronized appears. To synchronize manually, press the Menu key and then select Sync now. Using the synchronization function, you can restore data in case of loss or change of the SIM card. When you enter your Google account on a new device, all saved data is restored automatically.




Getting to know Android™
Home key:
To add shortcuts to the home screen, you can create shortcuts to the applications you use. Select an application and hold it to move it to the home screen. The new home screen will be created. Select another application and hold it to move it to the right to create a new home screen.
List of home screen elements:
Cannot make outgoing calls
Make sure that the phone is connected to the network, that the network is available and not overloaded.
Cannot receive incoming calls
Make sure that the phone is connected to the network (check that the network is available and not overloaded).
SIM card PIN code blocked
Contact your network operator to obtain the PUK code (Personal Unlocking Key).
For a new 3G network
On the device screen, touch Settings.
Select Wireless & networks > More... > Mobile networks.
Select Network Settings. In the Network operators section, select your service provider. In the Access Point Names section, enter the correct access point name and connection parameters provided by your 3G network operator.





.
∴ ab > 10
. 1



∴ ab > la


J
J







10 2



Therefore, cos A = BP/PC = sqrt(3/5).
.1
a aalal al

slawl dgi juiu 2
.(aJwI&JwJ)aJalltae bawol .3
.4sljJoo pJwJ j1 4
. Google 山 ω → 山 .5
.6
.1awll 1g9 ju 5u,Google uua Jusy .8
"jolj"baolaiaiaiaea.9
. Google aoucuiueo Jc slawll baay

173


:aaJll aaiy
Jauu gl jauu aaujul auu uauu Jauu uauu uauu
:aaai jaiiaai jia


: widgetsjolic
. widgets ralic jlll g nnll aill l y , "clalll J" aill Ugul
:laIJI
aaiall no jai, aaiyll aaii 10k
:a

j<allll jy jy jy jy jy jy jy jy jy jy jy jy jy jy jy jy jy jy jy jy jy jy jy jy jy jy jy jy jy
joll lalw galea glgao g aalw glae j, aalw alal jgs jol, aalw
. j, PIN jəj, "JaaU 3gaw" jk algw aJauJ Jaa


[ \Leftrightarrow \frac{1 - k}{x} > \frac{\ln x}{x\left( {1 + u}\right) } - \frac{\ln x}{x\left( {1 + u}\right) }]
ailll jzj zj 0
jy,aiilll jdyddyddyds ydo ydo ydo ydo ydo ydo ydo ydo ydo ydo
.42220jLaiyolJxwlly,aJIbIJIWJxwSgws
a a y y g a y jy Jy
a aaaa aaaa 2g> g no slll y, y| o k (s y | d y d y
aJbckcJgJgJg
![ARCHOS CORE 55 - [ \Leftrightarrow \frac{1 - k}{x} > \frac{\ln x}{x\left( {1 + u}\right) } - \frac{\ln x}{x\left( {1 + u}\right) }] - 1](/content/2024/11/207452/images/9f00f30e18f154c64dd394400bb73a6ef87ec054bb8cb1989c20f0c3dd3344aa.jpg)
![ARCHOS CORE 55 - [ \Leftrightarrow \frac{1 - k}{x} > \frac{\ln x}{x\left( {1 + u}\right) } - \frac{\ln x}{x\left( {1 + u}\right) }] - 2](/content/2024/11/207452/images/b95635e2a504c26fef579693903bfd61f1d4aca541cf10ed560ede3cab42bf29.jpg)
![ARCHOS CORE 55 - [ \Leftrightarrow \frac{1 - k}{x} > \frac{\ln x}{x\left( {1 + u}\right) } - \frac{\ln x}{x\left( {1 + u}\right) }] - 3](/content/2024/11/207452/images/189c6000f244b9d08b02b8db852d2b164e1110bed64a79783f24da2a95ab4286.jpg)
![ARCHOS CORE 55 - [ \Leftrightarrow \frac{1 - k}{x} > \frac{\ln x}{x\left( {1 + u}\right) } - \frac{\ln x}{x\left( {1 + u}\right) }] - 4](/content/2024/11/207452/images/ae750fe98e28acc0947affc7d2d0f80bb6e5fc85da006192f25e6f0abbdbf99c.jpg)
![ARCHOS CORE 55 - [ \Leftrightarrow \frac{1 - k}{x} > \frac{\ln x}{x\left( {1 + u}\right) } - \frac{\ln x}{x\left( {1 + u}\right) }] - 5](/content/2024/11/207452/images/49e395989558f0811deb20f3fce2dad6e94f649f7ed10ab620bc1ff6aa6af33f.jpg)
![ARCHOS CORE 55 - [ \Leftrightarrow \frac{1 - k}{x} > \frac{\ln x}{x\left( {1 + u}\right) } - \frac{\ln x}{x\left( {1 + u}\right) }] - 6](/content/2024/11/207452/images/b7888c6f13dddcacf5659fe0315b64aeec7a0a1bddb80f8a417ae3d991eacaf5.jpg)
![ARCHOS CORE 55 - [ \Leftrightarrow \frac{1 - k}{x} > \frac{\ln x}{x\left( {1 + u}\right) } - \frac{\ln x}{x\left( {1 + u}\right) }] - 7](/content/2024/11/207452/images/d2d261a3f0752379020df090456deb929e92e01b167668aad80a685f9218ca9a.jpg)
![ARCHOS CORE 55 - [ \Leftrightarrow \frac{1 - k}{x} > \frac{\ln x}{x\left( {1 + u}\right) } - \frac{\ln x}{x\left( {1 + u}\right) }] - 8](/content/2024/11/207452/images/f4337c4437751951028dafe1ab2decad62ad1dae21b253bef0bd954671fec14f.jpg)
![ARCHOS CORE 55 - [ \Leftrightarrow \frac{1 - k}{x} > \frac{\ln x}{x\left( {1 + u}\right) } - \frac{\ln x}{x\left( {1 + u}\right) }] - 9](/content/2024/11/207452/images/1d258ece757e2370a5e6baeebdc0f3878cbbf293bd70a2f6987de810ddc38f23.jpg)
![ARCHOS CORE 55 - [ \Leftrightarrow \frac{1 - k}{x} > \frac{\ln x}{x\left( {1 + u}\right) } - \frac{\ln x}{x\left( {1 + u}\right) }] - 10](/content/2024/11/207452/images/0bdda5705b22efef4e3452feaf6dc84d3a40309b259c31e2e9ad3f80dd95f26f.jpg)
![ARCHOS CORE 55 - [ \Leftrightarrow \frac{1 - k}{x} > \frac{\ln x}{x\left( {1 + u}\right) } - \frac{\ln x}{x\left( {1 + u}\right) }] - 11](/content/2024/11/207452/images/8e48694eb220c47ba548ac8ba41dc8e8dea415e471587b71ce63f35b58db75b6.jpg)
![ARCHOS CORE 55 - [ \Leftrightarrow \frac{1 - k}{x} > \frac{\ln x}{x\left( {1 + u}\right) } - \frac{\ln x}{x\left( {1 + u}\right) }] - 12](/content/2024/11/207452/images/a72a33bd34dcb790cf6dd38e2d25126ae59935421155fd0dfacd22bb9038b560.jpg)
Open Source Software Offer
The software bundled with this product includes software files subject to certain open source license requirements. Such open source software files are subject solely to the terms of the relevant open source software license. Such open source software is provided on an "AS IS" basis to the maximum extent permitted by applicable law.
For the open source files contained herein, please access "Open source license" section located at: Settings\About phone\Legal information on the device for the relevant copyright and licensing terms. You may obtain a copy of Apache License, Version 2.0 at http://www.apache.org/licenses/License-2.0. You may also obtain a copy of GNU General Public License, Version 2 at the Free Software Foundation, INC, 51 Franklin Street, Fifth Floor, Boston, MA 02110-1301, USA.
Until the date that is three years after our last shipment of this product, you may obtain a copy of the source code corresponding to the binaries for any GPL-Licensed file by contacting ARCHOS customer service at http://www.archos.com and ARCHOS will send you a link to such source code or will provide instructions to get the source on a physical medium.
This offer is valid to anyone in receipt of this information.
National restrictions
This device is intended for home and office use in all EU countries (and other countries following the EU directive 1999/5/EC) without any limitation except for the countries mentioned below:
Country
Restriction
ReasonRemark
Bulgaria
None
General authorization required for outdoor use and public service
France
Outdoor use
Military Radiolocation use. Refarming of the 2.4 GHz band has been ongoing in recent years to allow current relaxed regulation. Full implementation planned 2012
Italy
None
If used outside of own premises, general authorization is required.
Luxembourg
None
General authorization required for network and service supply (not for spectrum)
Norway Implemented This subsection does not apply for the geographical area within a radius of 20 km from the centre of Ny-Alesund
Russian None Only for indoor applications Federation
Note: Frequency 2454-2483.5MHz is restricted to indoor use in France.
Consult the declaration of conformity at http://www.archos.com/products/declaration_conformity.html
SAR
After laboratory measurement, the SAR value of this mobile phone is:
Archos company declares that this device complies with the essential requirements and other relevant provisions of Directive 1999/5/EC
CE0700


- PACKAGE CONTENTS
- DESCRIPTION OF THE PHONE
- GETTING STARTED
- TURN ON
- THROUGH THE WIZARD
- TURN OFF
- SOUND & NOTIFICATION PROFILES
- TOUCH SCREEN ACTIONS
- TIP
- G & WIFI CONNECTION
- G CONNECTION
- ACTIVATING THE MOBILE DATA
- WIFI CONNECTION
- GOOGLE & CONTACTS
- ADDING A GOOGLE ACCOUNT
- SYNCHRONIZING INFO
- SAVING YOUR CONTACTS
- CREATING APPLICATION FOLDERS
- WIDGETS
- CHANGING YOUR WALLPAPER
- LOCKING THE TOUCHSCREEN
- TROUBLESHOOTING
- MY PHONE IS FROZEN OR CANNOT SWITCH ON
- MY PHONE CANNOT CONNECT TO A NETWORK OR "NO SERVICE" IS DISPLAYED
- UNABLE TO MAKE OUTGOING CALLS
- UNABLE TO RECEIVE INCOMING CALLS
- SIM CARD PIN LOCKED
- TO CONFIGURE A NEW 3G NETWORK
- DEVICE DESCRIPTION
- TURNING ON
- SETUP WIZARD
- TURNING OFF
- SOUND AND NOTIFICATION PROFILES
- CONNECTING TO 3G & WI-FI
- CONNECTING TO 3G NETWORKS
- GOOGLE ACCOUNT AND CONTACTS
- DATA SYNCHRONIZATION
- GETTING TO KNOW ANDROID™
- HOME KEY
- LIST OF HOME SCREEN ELEMENTS
- J
- [ \LEFTRIGHTARROW \FRAC{1 - K}{X} > \FRAC{\LN X}{X\LEFT( {1 + U}\RIGHT) } - \FRAC{\LN X}{X\LEFT( {1 + U}\RIGHT) }]
- OPEN SOURCE SOFTWARE OFFER
- NATIONAL RESTRICTIONS
- SAR
Brand : ARCHOS
Model : CORE 55
Category : Smartphone