
FB53C1HABK - Built-in oven HOTPOINT - Free user manual and instructions
Find the device manual for free FB53C1HABK HOTPOINT in PDF.

| Product Type | Built-in Oven |
| Brand | HOTPOINT |
| Model | FB53C1HABK |
| Dimensions (HxWxD) | 32.9 x 59.5 x 39.4 cm |
| Volume | 78 liters |
| Supply Voltage | 230/400V~ 3N 50Hz |
| Maximum Power Consumption | 10000 W |
| Cooking Type | Electric |
| Cooking Functions | Static, Convection, Grill, Maxi Grill, Defrost |
| Heating Elements | Top element (1050W), bottom element (1300W), grill (2000W), circular element (2850W) |
| Electronic Programmer | Delayed start, timer, programmed end of cooking |
| Safety | Anti-tilt chains, child supervision required |
| Door | Removable for cleaning |
| Interior light | 25W bulb, E14 socket |
| Cleaning | Microporous self-cleaning enamel, ceramic hob |
| Included Accessories | Grid, drip tray |
| Rotisserie | Optional (not included) |
| Electrical Connection | Requires H05RR-F cable, cross-section according to diagram (3x4 mm² for 230V) |
| Installation | By a professional, respect safety distances |
| Energy Consumption | Compliant with directive 2002/40/EC |
Frequently Asked Questions - FB53C1HABK HOTPOINT
User questions about FB53C1HABK HOTPOINT
0 question about this device. Answer the ones you know or ask your own.
Ask a new question about this device
Download the instructions for your Built-in oven in PDF format for free! Find your manual FB53C1HABK - HOTPOINT and take your electronic device back in hand. On this page are published all the documents necessary for the use of your device. FB53C1HABK by HOTPOINT.
USER MANUAL FB53C1HABK HOTPOINT
Operating Instructions
COOKER
Contents
Operating Instructions,1
Warnings,2
Assistance,4
Description of the appliance,5
Installation, 15
Start-up and use,17
Timer (Electric oven), 18
Precautions and tips,21
Maintenance and care,22
FR
Avertissements
WARNING: The appliance and its accessible parts become hot during use. Care should be taken to avoid touching heating elements. Children less than 8 years of age shall be kept away unless continuously supervised. This appliance can be used by children aged from 8 years and above and persons with reduced physical, sensory or mental capabilities or lack of experience and knowledge if they have been given supervision or instruction concerning use of the appliance in a safe way and understand the hazards involved. Children shall not play with the appliance. Cleaning and user maintenance shall not be made by children without supervision.
WARNING: Unattended cooking on a hob with fat or oil can be dangerous and may result in fire.
NEVER try to extinguish a fire with water, but switch off the appliance and then cover flame e.g. with a lid or a fire blanket.
WARNING: Danger of fire: do not store items on the cooking surfaces.
WARNING: If the surface in glass-ceramic is cracked, switch off the appliance to avoid the possibility of electric shock.
Do not use harsh abrasive cleaners or sharp metal scrapers to clean the oven door glass since they can scratch the surface, which may result in shattering of the glass.
The internal surfaces of the compartment (where present) may become hot.
Never use steam cleaners or pressure cleaners on the appliance.
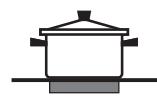
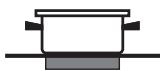
"Remove any liquid from the lid before opening it.
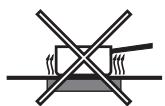
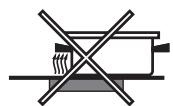
Do not close the glass cover (if present) when the gas burners or electric hotplates are still hot."
WARNING: Ensure that the appliance is switched off before replacing the lamp to avoid the possibility of electric shock.
! When you place the rack inside, make sure that the stop is directed upwards and in the back of the cavity.
FR
Assistance
! Never use the services of an unauthorised technician.
Please have the following information to hand:
The type of problem encountered.
The appliance model (Mod.).
The serial number (S/N).
The latter two pieces of information can be found on the data plate located on the appliance.
FR
Description of the appliance
Overall view
1 Heating element
2 Heating element
3 Radiant/halogen heating element
4 Residual heat indicator lights
5 Electric oven operation indicator light
6 Function selector
7 Thermostat
8 Electronic timer
9 Hotplate selection controls


FR
Installation
! Before placing your new appliance into operation please read these operating instructions carefully. It contains important information concerning the safe installation and operation of the appliance.
! Please keep these operating instructions for future reference. Make sure that the instructions are kept with the appliance if it is sold, given away or moved.
! The following instructions should be carried out by a qualified technician to ensure that the appliance is installed, adjusted and technically serviced correctly in compliance with current regulations.
! Important: any adjustments, maintenance, etc. must be carried out after the appliance has been disconnected from the electricity supply. Whenever it is necessary to maintain the electrical connections, proceed with extreme caution.
Positioning and levelling
! The appliance may be installed alongside any cupboards whose height does not exceed that of the hob surface.
!Make sure that the wall in contact with the back of the appliance is made from a non-flammable, heat-resistant material (T 90^ -
To install the appliance correctly:
- Place it in the kitchen, the dining room or the studio flat (not in the bathroom).
- If the top of the hob is higher than the cupboards, the appliance must be installed at least 500 ~mm away from them.
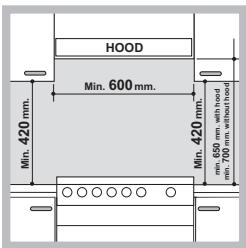
- If the cooker is installed underneath a wall cabinet, there must be a minimum distance of 420 mm between this cabinet and the top of the hob.
This distance should be increased to 700~mm if the wall cabinets are flammable (see figure).
- Do not position blinds behind the cooker or less than 200 mm away from its sides.
- Any hoods must be installed in accordance with the instructions listed in the relevant operating manual.
Levelling
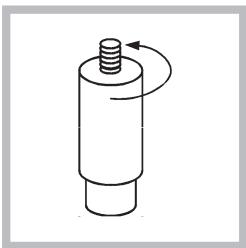
If it is necessary to level the appliance, screw the adjustable feet into the places provided on each corner of the base of the cooker (see figure).
Electrical connection
THE EQUIPMENT MUST BE EARTHED CORRECTLY.
The appliance is designed for operation with an alternating current at the power supply voltage and frequency indicated on the data plate (this is located underneath the appliance; alternatively the information may be found at the end of the instruction manual).
Make sure that the local power supply voltage value is the same as the value indicated on the data plate. The appliance does not come with a power supply cable, because the size of this cable should be determined according to the type of electrical connection used (see connection diagram below). Use a H05RR-F-type rubber cable. Open the terminal board, following the instructions for the adjacent figure:
To install the power supply cable, follow the instructions below:
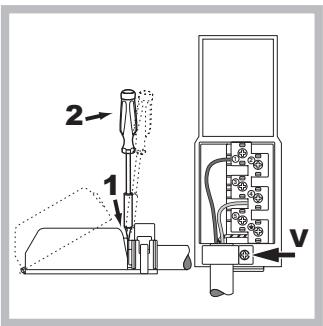
- Loosen the cable clamp screw "V" and the wire contact screws.
Fix the wires under the screw heads in accordance with the following diagram.
| Electrical connection | Power supply voltage | Fuse | Cross-section |
| 230V -1+N ~ 50Hz | 32* A | 3x4 mm² | |
| 400V 2+N ~ 50Hz | 32 A | 4x4 mm² | |
| 400V -3+N ~ 50Hz | 25 A | 5x2.5 mm² | |
| 230V -2 ~ 50Hz | 32* A | 3x4 mm² | |
| 230V -3 ~ 50Hz | 25 A | 4x4 mm² | |
| 400V -2+2N ~ 50Hz | 25* A | 5x2.5 mm² |
*Application of the simultaneity coefficient in compliance with the relevant standard.
Important: the wires in the mains lead are coloured in accordance with the following code:
Green & Yellow
-Earth
Blue
- Neutral
Brown
- Live
As the colours of the wires in the mains lead may not correspond with the coloured markings identifying the terminals in your plug, proceed as follows:
Connect the Green & Yellow wire to terminal marked “E” or 12 or coloured Green or Green & Yellow.
Connect the Brown wire to the terminal marked "L" or coloured Red.
Connect the Blue wire to the terminal marked "N" or coloured Black.
Replacing the cable
Use a rubber cable of the type H05RR-F with a suitable cross section of 3 × 4 mm^2 .
The yellow-green earth wire must be 2-3 cm longer than the other wires.
Connecting the supply cable to the mains
Install a standardised plug corresponding to the load indicated on the data plate.
The appliance must be directly connected to the mains using an omnipolar circuit-breaker with a minimum contact opening of 3mm installed between the appliance and the mains. The circuit-breaker must be suitable for the charge indicated and must comply with current electrical regulations (the earthing wire must not be interrupted by the circuit-breaker). The supply cable must not come into contact with surfaces with temperatures higher than 50^ .
! The installer must ensure that the correct electrical connection has been made and that it is compliant with safety regulations. Before connecting to the power supply, make sure that:
- The appliance is earthed and the plug is compliant with the law.
- The socket can withstand the maximum power of the appliance, which is indicated on the data plate.
- The voltage is in the range between the values indicated on the data plate.
- The socket is compatible with the plug of the appliance. If the socket is incompatible with the plug, ask an authorised technician to replace it. Do not use extension cords or multiple sockets.
! Once the appliance has been installed, the power supply cable and the electrical socket must be easily accessible.
! The cable must not be bent or compressed.
! The cable must be checked regularly and replaced by authorised technicians only (see Assistance).
! The manufacturer declines any liability should these safety measures not be observed.
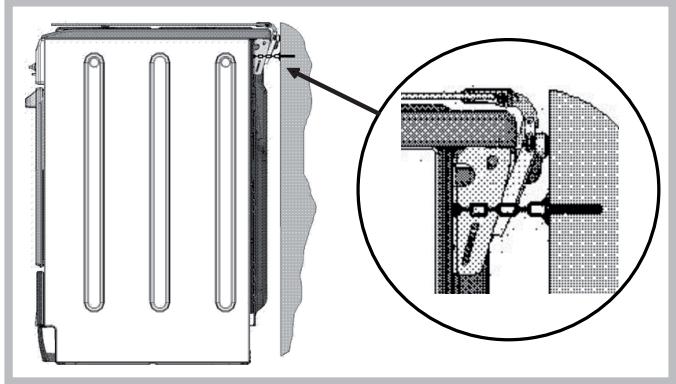
Safety Chain
! In order to prevent the appliance from overturning accidentally, for example in case of a child climbing onto the oven door, the safety chains MUST be installed!
The cooker is provided with safety chains that must be fixed with a screw (not supplied as accessory) on the wall behind the appliance, at the same height as the fixing point on the appliance.
Make sure that the chains are fixed in the back of the cooker, as shown in the drawing, in such way to be tight and parallel to the floor.
! When the installation process is complete, the chains must be kept in tension!
TABLE OF CHARACTERISTICS
| Afmetingen Oven HxLxP | 32,9 x 59,5 x 39,4 cm |
Volume lt. 78
Voltage and 230/400V~ 3N 50Hz - (see data plate) frequency Power supply Max 10.000 W
Directive 2002/40/EC on the label of electric ovens. Standard EN 50304-60350
ENERGY LABEL
Energy consumption for Natural convection - heating mode: Convection mode

Declared energy consumption for Forced convection Class - heating mode: Fan assisted.


This appliance conforms to the following European Economic Community directives:
- 2006/95/EEC dated 12/12/06 (Low Voltage) and subsequent amendments
- 2004/108/EEC dated 15/12/04 (Electromagnetic Compatibility) and subsequent amendments
- 93/68/EEC dated 22/07/93 and subsequent amendments.
- 2009/142/EEC dated 30/11/09 (Gas) and subsequent amendments.
- 2012/19/EEC and subsequent amendments.
Start-up and use
Using the hob
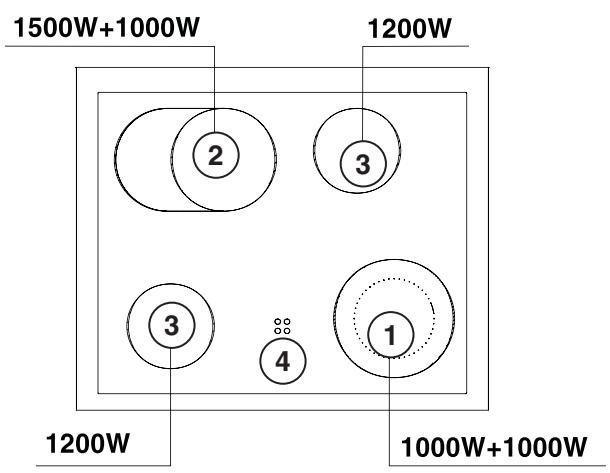
Description of the heating elements
The radiant elements "1-2-3" consist of circular heating elements. These become red a few seconds after they have been switched on.
They are extremely easy to use because they are similar to the other heating elements. Please refer to table 1.
Control knobs
Each cooking zone is fitted with a control knob “5”, which can be used to continuously adjust the temperature intensity level to values between a minimum of 1 and a maximum of 12. Table1 lists the correspondences between the positions indicated on the knob and the use for which the hotplates are recommended.
The "1-2" hotplate control knob usually only activates the small / part of the hotplate. To activate the entire large hotplate, turn the knob past position 12, to the / symbol; a click will indicate that the entire hotplate has been activated. The temperature level may now be adjusted to the desired value, up to level 12, using the same knob.
| Set. | Radiant Burner |
| 0 | Off. |
| 1 | To melt butter and chocolate. |
| 2 | To heat liquids. |
| 3 | |
| 4 | For creams and sauces. |
| 5 | |
| 6 | For cooking at the boiling point. |
| 7 | |
| 8 | For Roasts. |
| 9 | |
| 10 | For boiling large pieces of meat. |
| 11 | |
| 12 | For frying. |
| For utilising both cooking areas. |
Residual heat indicator light
This indicates that one or more cooking zones are at a temperature greater than 60^ , even after the cooking zones have been switched off. The hob is fitted with 4 residual heat indicator lights, one for each cooking zone.
Advice for the operation of the ceramic glass hob
To achieve the best results using your hob, there are several basic suggestions which should be taken into account while cooking or preparing food.
- Use pans with a flat base so as to ensure the pan adheres properly to the cooking zone.
- Always use pans with a diameter which is large enough to cover the cooking zone fully, in order to use all the available heat.
- Make sure that pan bases are always clean and dry, in order to guarantee perfect contact with the hob and to safeguard the durability of the hotplates and the pans themselves.
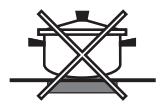
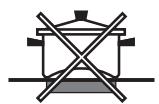
- Do not use cookware which has been used with gas burners. The concentration of heat from gas burners is such that it may warp the base of the pan, and therefore the desired result will never be achieved if it is then used on the glass ceramic hob.
Using the oven
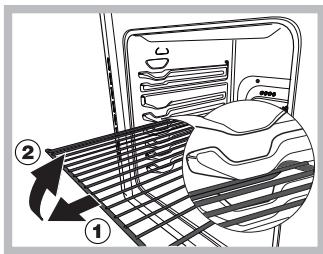
WARNING! The oven is provided with a stop system to extract the racks and prevent them from coming out of the oven (1).
As shown in the drawing, to extract them completely, simply lift the racks, holding them on the front part, and
pull (2).
! Before operating the product, remove all plastic film from the sides of the appliance.
! The first time you use your appliance, heat the empty oven with its door closed at its maximum temperature for at least half an hour. Ensure that the room is well ventilated before switching the oven off and opening the oven door. The appliance may emit a slightly unpleasant odour caused by protective substances used during the manufacturing process burning away.
MULTI-FUNCTION OVEN
The oven offers new, different combinations of electrical heating elements; by selecting the most suitable combination for the dish you wish to cook, the results achieved will be very precise.
The various functions can be selected by turning SELECTOR KNOB to the following positions:
| Symbol | Function | Power |
| 0 | 0) Off | — |
| 2) Upper + Lower heating elements | 2350 W | |
| 3) Lower heating element | 1300 W | |
| 4) Upper heating element | 1050 W | |
| 5) Grill heating element | 2000 W | |
| 6) Maxigrill (Top + Grill heating elements) | 3050 W | |
| 6) Maxigrill (Top + Grill heating elements) + fan | 3100 W | |
| 7) Lower heating elements + fan | 1350 W | |
| 8) Rear round heating element + fan | 2850 W | |
| 9) Quick defrosting | 50 W |
After selecting the cooking function, set THERMOSTAT KNOB to the desired temperature.
- For normal cooking procedures using CONVENTIONAL methods (roasts, biscuits, etc.), use the function (heat from above + below).
Only place the foods to be cooked in the oven when the selected temperature has been reached and, if possible, use only one shelf.
If you wish more heat to be generated below or above the dish, turn the selector to position (heat from below), (heat from below + fan) or (heat from above).
- With function "fan", cooking takes place through the action of air which has been preheated by a heating element and which is then circulated inside the oven by a fan. The oven heats up very quickly, therefore the foods you wish to cook may also be placed inside the oven as soon as it is switched on. It is also possible to cook using two shelves at the same time.
- The "quick defrosting" function takes place without using the heating elements; only the oven light and the fan are activated.
- Cooking with the "grill" uses a high power level, which makes it possible to brown the surface of foods quickly; it is particularly suited to the cooking of meats, which should remain soft and juicy on the inside.
To cook with the grill, turn selector knob to one of the following positions: (grill), (maxigrill), (maxigrill with fan).
While the grill is operating, the oven door must be kept shut. The thermostat knob should also be positioned at a maximum of 200^ .
Oven light
Lighting inside the oven is obtained automatically when SELECTOR KNOB is set to any position. If you wish to switch the light on without activating any of the heating elements, set the thermostat knob to 0^ .
Indicator light
This indicates the heating-up phase of the oven is underway; as soon as the inside of the oven reaches the set temperature the light switches off. At this point the indicator light will begin switching on and off intermittently; this shows that the thermostat is operating correctly in order to maintain a constant temperature inside the oven.
Spit - Rotisserie
This accessory should only be used when cooking with the grill. Proceed as follows: thread the meat you wish to cook onto the rod positioned across the oven lengthwise, fixing it in place with the adjustable forks supplied.
Position supports “A” and “B” in the relevant holes in dripping pan “E”, rest the groove on the rod in slot “C” and use the guide rail to place the rack in the lowest position in the oven; next position the rod in the rotisserie spit hole, sliding the groove forwards to slot “D”.
Activate the grill and rotisserie spit by turning SELECTOR KNOB on the commutator to the positions displaying the (grill), maxigrill) or maxigrill with fan) symbols.

Timer (Electric oven)
The programmer makes it possible to preset the oven and the grill in terms of:
- delay start with a preset length of time for cooking;
- immediate start with a preset length of time for cooking;
timer.
Button functions:
: Timer with hour and minutes;
Length of cooking time;
STOP:End cooking time;
: Manual change;
Change time (backwards);
: Change time (forwards).
How to Reset the Digital Clock
After the appliance has been connected to the power source or following a power outage, the clock display will begin to blink and read: 0:00
- Press the STOP buttons at the same time. Then use (within 4 seconds) the - and + buttons to set the exact time.
Use the button to move the time forwards.
Use the button to move the time backwards.
The time can also be changed in the following two ways:
-
Repeat all of the foregoing steps.
-
Press the button, and then use the and buttons to reset the time.
Manual Operation Mode for the Oven
After the time has been set, the programmer is automatically set to manual mode.
Note: Press the button to return the oven to manual mode after every "Automatic" cooking session.
Delayed Start Time with Preset Cooking Length
The length and the end cooking times must be set. Let us suppose that the display shows 10:00.
- Turn the oven control knob to the cooking setting and temperature desired (example: convection oven at 200^ ).
- Press the and the use (within 4 seconds) the and + buttons to set the length of the cooking time. Let us suppose that 30 minutes was set for the length of the cooking time. In this case, the display will show:
$$ \begin{array}{c c c} \text {A} & 0 & 3 \ \text {O} & \end{array} $$
Release the button, and within 4 seconds, the current time will reappear with the symbol and "auto."
- Press the button, and then use the and buttons to set the end cooking time. Let us suppose that it is 13:00
$$ \begin{array}{c} \text {1 3} \cdot \square \square \end{array} $$
- Release the button and the display will show the current time within 4 seconds:
$$ \begin{array}{c c} \mathbf {A} & 1 0 \cdot \square \ \mathbf {O} \end{array} $$
When "auto" is lighted, it indicates that the length and end cooking time have been preset to operate in automatic mode. At this point, the oven will turn on automatically at 12:30 in order to finish the cooking session within 30 minutes. When the oven is on, the symbol (cooking pot) will appear on the display for the entire length of the cooking process. The button can be pressed at any time to display the setting for the length of the cooking time, while the STOP button can be pressed to display the end cooking time.
At the end of the cooking time, an acoustic signal will sound. Press any button it turns off (except the - and + buttons).
Immediate Start Time with Preset Cooking Length
When only the length of the cooking time is set (points 1 and 2 of the paragraph entitled, "Delayed Start Time with Preset Cooking Length"), the cooking session starts immediately.
Cancelling a Preset Cooking Time
Press the button, and use the button to set the time to:
$$ \begin{array}{l l} \square & \square \ \hline \end{array} $$
Then press the manual cooking mode button
Timer Feature
The timer can be used to count down from a given length of time. This feature does not control when the oven comes on or turns off, but, rather, it only emits an acoustic signal when the preset time has run out.
Press the button, and the display will read:
$$ \begin{array}{l l} \square & \square \ \hline \end{array} $$
Then use the and buttons to set the desired time.
Release the button, and the timer will start at that second.
The display will show the current time.
$$ 1 0 \cdot 0 0 $$
At the end of the preset time, an acoustic signal will sound, which can be turned off by pressing any button (except the and buttons), and the symbol will turn off.
Changing and Cancelling Settings
- The settings can be changed at any time by pressing the corresponding button and using the or button.
- When the length setting for the cooking time is cancelled, the end cooking time setting is also cancelled, and vice versa.
- When in automatic cooking mode, the appliance will not accept end cooking times prior to the start cooking time proposed by the appliance itself.
CONVENTIONAL oven cooking
| Type of dish | Temperature °C | Cooking time (minutes) | Type of dish | Temperature °C | Cooking time (hours) |
| Pastries and cakes | Meat | ||||
| Fruit pie | 130 | 60-70 | Turkey (4-8 kg) | 160 | 3-4½ |
| Meringues | 130 | 30-40 | Goose (4-5 kg) | 160 | 4-4½ |
| Sponge cake | 150 | 20-30 | Duck (2-4 kg) | 170 | 1½-2½ |
| Angel cake | 160 | 40-50 | Capon (2½-3 kg) | 170 | 2-2½ |
| Madeira cake | 160 | 40-50 | Braised beef (1-1½ kg) | 160 | 3-3½ |
| Chocolate cake | 170 | 30-40 | Leg of lamb | 160 | 1-1½ |
| Flat sweet loaf | 170 | 40-50 | Roast hare (2 kg) | 160 | 1-1½ |
| Puffs | 200 | 15-20 | Roast pheasant | 160 | 1-1½ |
| Flaky pastry biscuits | 200 | 15-20 | Chicken (1-1½ kg) | 170 | 1-1½ |
| Mille feuilles | 200 | 15-20 | |||
| Short crust pastry | 200 | 15-20 | Fish | 200 | 15-25 minutes |
GRILLING
| Type of dish | Cooking time (minutes) | Position of shelf | The 1st guide rail is understood as being the lowest position. |
| Chops (0.5 kg) | 60 | 3rdguide rail | |
| Saussages | 15 | 2ndguide rail | |
| Grilled chicken (1 kg) | 60 | 2stguide rail | |
| Veal on the spit (0.6 kg) | 60 | - | |
| Chicken on the spit (1 kg) | 60 | - |
FAN ASSISTED cooking
| Type of dish | Guide rail no. from bottom | Quantity kg. | Temperature °C | Time (minutes) |
| Cakes | ||||
| * With beaten mix, in mould | 1-3 | 1 | 175 | 60 |
| * With beaten mix, without mould | 1-3-4 | 1 | 175 | 50 |
| Short pastry, flan base | 1-3-4 | 0.5 | 175 | 30 |
| Short pastry with wet filling | 1-3 | 1.5 | 175 | 70 |
| Short pastry with dry filling | 1-3-4 | 1 | 175 | 45 |
| * With natural leavened mix | 1-3 | 1 | 175 | 50 |
| Small cakes | 1-3-4 | 0.5 | 160 | 30 |
| Meat | ||||
| Roasts under the grill | ||||
| Veal | 2 | 1 | 180 | 60 |
| Beef | 2 | 1 | 180 | 70 |
| English roast beef | 2 | 1 | 220 | 50 |
| Pork | 2 | 1 | 180 | 70 |
| Chicken | 2 | 1-1.5 | 200 | 70 |
| Roasts on a tray | ||||
| Veal | 1-3 | 1 | 160 | 80 |
| Beef | 1-3 | 1 | 160 | 90 |
| Pork | 1-3 | 1 | 160 | 90 |
| Chicken | 1-3 | 1-1.5 | 180 | 90 |
| Turkey slices | 1-3 | 1.5 | 180 | 120 |
| Duck | 1-3 | 1-1.5 | 180 | 120 |
| Casseroles | ||||
| Beef casserole | 1 | 1 | 175 | 120 |
| Veal casserole | 1 | 1 | 175 | 110 |
| Fish | ||||
| Filletts, steaks, cod, hake, sole | 1-3 | 1 | 180 | 30 |
| Mackerel, turbot, salmon | 1.3 | 1 | 180 | 45 |
| Oysters | 1-3 | 180 | 20 | |
| Timbales | ||||
| Baked pasta dish | 1-3 | 2 | 185 | 60 |
| Vegetable pudding | 1-3 | 2 | 185 | 50 |
| * Sweet and savoury soufflés | 1-3 | 0.75 | 180 | 50 |
| * Pizzas and savoury rolls | 1-3-4 | 0.5 | 200 | 30 |
| Toasted sandwiches | 1-3-4 | 0.5 | 190 | 15 |
| Defrosting | ||||
| Ready-to-eat meals | 1-3 | 1 | 200 | 45 |
| Meat | 1-3 | 0.5 | 50 | 50 |
| Meat | 1-3 | 0.75 | 50 | 70 |
| Meat | 1-3 | 1 | 50 | 110 |
Cooking times may vary according to the nature of the foods, their homogeneity and their volume. When cooking a certain food for the first time, it is advisable to choose the lowest values in the cooking time range given in the table and then increase them if necessary.
Notes:
1) Cooking times do not include oven pre-heating, except for those marked with an asterisk.
2) The indication given in the table for the guide rails is the one that should preferably be used in the event of cooking on more than one level.
3) The indicated times refer to cooking on one shelf only; for cooking on more than one level, increase the time by 5 ÷ 10 minutes.
4) For roast beef, veal, pork and turkey, on the bone or rolled, increase the times by 20 minutes.
Precautions and tips
! This appliance has been designed and manufactured in compliance with international safety standards. The following warnings are provided for safety reasons and must be read carefully.
General safety
- The instruction booklet accompanies a class 1 (insulated) or class 2 - subclass 1 (recessed between 2 cupboards) appliance.
- These instructions are only valid for the countries whose symbols appear in the manual and on the serial number plate.
- The appliance was designed for domestic use inside the home and is not intended for commercial or industrial use.
- The appliance must not be installed outdoors, even in covered areas. It is extremely dangerous to leave the appliance exposed to rain and storms.
- When moving or positioning the appliance, always use the handles provided on the sides of the oven.
- Do not touch the appliance while barefoot or with wet or damp hands and feet.
- The appliance must be used by adults only for the preparation of food, in accordance with the instructions provided in this booklet. Any other use of the appliance (e.g. for heating the room) constitutes improper use and is dangerous. The manufacturer may not be held responsible for any damage caused as a result of improper, incorrect and unreasonable use of the appliance.
- Do not touch the heating elements or certain parts of the oven door when the appliance is in use; these parts become extremely hot. Keep children well away from the appliance.
- Make sure that the power supply cables of other electrical appliances do not come into contact with the hot parts of the oven.
- The ventilation and heat dispersal openings must never be obstructed.
- Always grip the oven door handle in the centre: the ends may be hot.
- Always use oven gloves when placing cookware in the oven or when removing it.
- Do not use aluminium foil to line the bottom of the oven.
- Do not place flammable materials in the oven: if the appliance is switched on accidentally, the materials could catch fire.
Always make sure the knobs are in the "0" position when the appliance is not in use. - When unplugging the appliance, always pull the plug from the mains socket; do not pull on the cable.
- Do not perform any cleaning or maintenance work without having disconnected the appliance from the electricity mains.
- If the event of malfunctions, under no circumstances should you attempt to perform the repairs yourself. Contact an authorised Service Centre (see Assistance).
-
Do not rest objects on the open oven door.
-
If the cooker is placed on a pedestal, take the necessary precautions to prevent the cooker from sliding off the pedestal itself.
- The glass ceramic hob is resistant to mechanical shocks, but it may crack (or even break) if hit with a sharp object such as a tool. If this happens, disconnect the appliance from the electricity mains immediately and contact a Service Centre.
- If the surface of the hob is cracked, switch off the appliance to prevent electric shocks from occurring.
- Remember that the temperature of the cooking zones remains relatively high for at least thirty minutes after they have been switched off.
- Keep any object that could melt away from the hob, for example plastic and aluminium objects, or products with a high sugar content. Keep plastic or aluminium objects away from the hob: if you forget them on surfaces that are still hot, they may cause serious damage to the hob.
- The appliance should not be operated by people (including children) with reduced physical, sensory or mental capacities, by inexperienced individuals or by anyone who is not familiar with the product. These individuals should, at the very least, be supervised by someone who assumes responsibility for their safety or receive preliminary instructions relating to the operation of the appliance.
- Never use steam cleaners or pressure cleaners on the appliance.
- Do not let children play with the appliance.
- The appliance is not intended to be operated by means of an external timer or separate remote-control system.
Disposal
- When disposing of packaging material: observe local legislation so that the packaging may be reused.
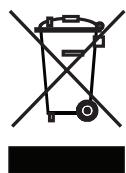
- The European Directive 2012/19/EEC on Waste Electrical and Electronic Equipment (WEEE), requires that old household electrical appliances must not be disposed of in the normal unsorted municipal waste stream. Old appliances must be collected separately in order to optimise the recovery and recycling of the materials they contain and reduce the impact on human health and the environment. The crossed out "wheeled bin" symbol on the product reminds you of your obligation, that when you dispose of the appliance it must be separately collected. Consumers should contact their local authority or retailer for information concerning the correct disposal of their old appliance.
Respecting and conserving the environment
-
You can help to reduce the peak load of the electricity supply network companies by using the oven in the hours between late afternoon and the early hours of the morning. The cooking mode programming options, the "delayed cooking" mode (see Cooking modes) and "delayed automatic cleaning" mode (see Care and Maintenance) in particular, enable the user to organise their time efficiently.
-
Always keep the oven door closed when using the GRILL modes: This will achieve improved results while saving energy (approximately 10% ).
- Regularly check the door seals and wipe clean to ensure they are free of debris so that they stick properly to the door and do not allow heat to disperse.
Maintenance and care
Important: The appliance should be disconnected from the mains supply before starting cleaning operations.
To ensure a long life cycle for the appliance, it is essential to carry out a thorough general clean frequently, while observing the following instructions:
Inside the oven door:
Clean the surface with a cloth moistened with hot water and non abrasive liquid detergent, then rinse and dry thoroughly.
Inside the oven:
- The inside of your oven is coated with a special self-cleaning microporous enamel glaze which, at a normal cooking temperature of between 200 and 300^ , oxidises and completely eliminates all grease spots or other substances that inevitably attack the inner walls of the oven. This way, cleaning is kept right down to a minimum: as a matter of fact, you just need to rub the surfaces of the oven with a wet cloth regularly, after cooking, to remove the thin layer of ash that may have been deposited during cooking, in order to maintain the self-cleaning property of the oven intact.
- After cooking where liquid has overflowed or when the dirt has not been eliminated completely (for example when grilling food, and the temperatures reached are not high enough for the full self-cleaning action of the enamel to be performed), we recommend you leave the oven on at maximum temperature so that all grease residue and the like are eliminated.
- If, after long-term use, you find evident grease stains deposited on the self-cleaning oven walls, probably due to your failing to follow the above maintenance advice, clean the surfaces thoroughly with hot water and a soft cloth (do not use any detergents), then rinse and dry thoroughly.
- Do not remove any dry caked-on grease using sharp objects, as these could etch the self-cleaning coating.
- If the self-cleaning surfaces inside the oven are damaged or worn, due to incorrect or poor maintenance or after many years of use, you can request a kit of self-cleaning panels to line the inside of the oven. To order these, just contact an authorised Service Centre.
Oven exterior:
- Only clean the appliance when the oven is cold.
- The steel parts and especially the areas with the screen-printed symbols should not be cleaned with solvents or abrasive detergents. It is advisable to use only a damp cloth with lukewarm water and washing up liquid.
Stainless steel may remain stained if in long-term contact with very calcareous water or aggressive detergents (containing phosphorus).
It is therefore always necessary to rinse and dry all surfaces thoroughly after cleaning.
Important: cleaning operations must be made horizontally, in the direction of the steel glazing.
- After cleaning, any treatments to polish the surfaces may be performed: only use specific products for stainless steel.
Important: do not use abrasive powders, aggressive detergents or acidic substances for cleaning.
Disassembling/assembly the oven door
To make it easier to clean the inside of your oven, the oven door can be removed, by proceeding as follows:
- Open the door completely and lift the 2 levers "B";
- Now, shutting the door slightly, you can lift it out by pulling out the hooks “A” as shown in figure.
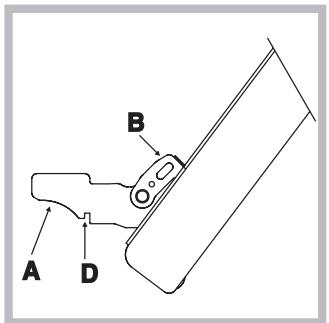
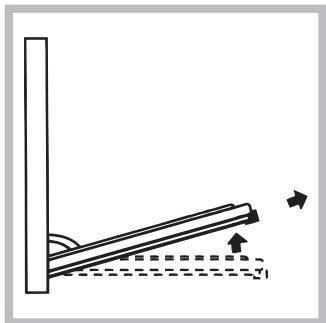
To reassemble the door:
- With the door in a vertical position, insert the two hooks "A" into the slots;
- Ensure that seat “D” is hooked perfectly onto the edge of the slot (move the oven door backwards and forward slightly);
- Keep the oven door open fully, unhook the 2 levers "B" downwards and then shut the door again.
Replacing the oven light bulb
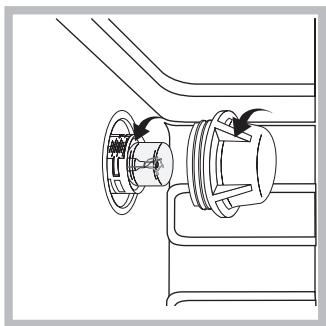
Make sure that the appliance is disconnected from the electricity supply.
Unscrew the glass protective cover from inside the oven, unscrew the lightbulb and replace it with an identical one suitable for high temperatures (300^) and with the following characteristics:
- Voltage 230 V
- Wattage 15 W
- Type E 14.
! Do not use the oven lamp as/for ambient lighting.
Cleaning the glass ceramic hob
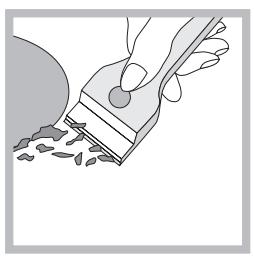
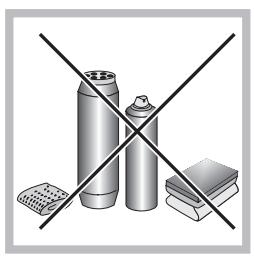
Before cooking, the surface of the hob should be cleaned using a damp cloth, to remove dust or residue from foods cooked previously. The surface of the hob should be cleaned regularly with a solution of warm water and non-abrasive detergent. It will occasionally be necessary to use special cleaning products for glass ceramic hobs. First, remove all food residues and traces of grease from the hob using a special cleaning scraper, for example CERAL (not supplied). Clean the hob when it is warm; use a suitable cleaning product and absorbent kitchen paper, polish with a damp cloth and dry. Aluminium foil, plastic objects or synthetic materials which are accidentally melted on the hob, even sugar or foods with a high sugar content, should be removed from the hot cooking zone immediately, using a scraper. Special cleaning products form a transparent protective layer which repels dirt. This also protects the surface from potential damage caused by foods with a high sugar content. Never use abrasive products or sponges; even aggressive chemical detergents such as oven sprays or stain removal products should be avoided.
GB
- Operating Instructions
- COOKER
- FR
- Avertissements
- Assistance
- Description of the appliance
- Overall view
- Installation
- Positioning and levelling
- Levelling
- Electrical connection
- Replacing the cable
- Connecting the supply cable to the mains
- Start-up and use
- Using the hob
- Description of the heating elements
- Control knobs
- Residual heat indicator light
- Advice for the operation of the ceramic glass hob
- Using the oven
- MULTI-FUNCTION OVEN
- Oven light
- Indicator light
- Spit - Rotisserie
- Timer (Electric oven)
- How to Reset the Digital Clock
- Manual Operation Mode for the Oven
- Delayed Start Time with Preset Cooking Length
- Immediate Start Time with Preset Cooking Length
- Cancelling a Preset Cooking Time
- Timer Feature
- Changing and Cancelling Settings
- Notes:
- Precautions and tips
- General safety
- Disposal
- Respecting and conserving the environment
- Maintenance and care
- Important: The appliance should be disconnected from the mains supply before starting cleaning operations.
- Inside the oven door:
- Inside the oven:
- Oven exterior:
- Disassembling/assembly the oven door
- To reassemble the door:
- Replacing the oven light bulb
- Cleaning the glass ceramic hob
Brand : HOTPOINT
Model : FB53C1HABK
Category : Built-in oven