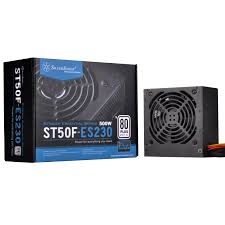
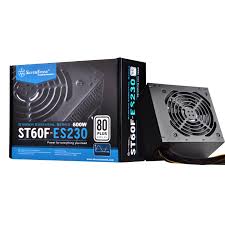
STRIDER ESSENTIAL ST50F-ES230, STRIDER ESSENTIAL ST50F-ES230, STRIDER ESSENTIAL ST60F-ES 80PLUS, STRIDER ESSENTIAL ST70F-ES 80PLUS - Computer power supply SILVERSTONE - Free user manual and instructions
Find the device manual for free STRIDER ESSENTIAL ST50F-ES230, STRIDER ESSENTIAL ST50F-ES230, STRIDER ESSENTIAL ST60F-ES 80PLUS, STRIDER ESSENTIAL ST70F-ES 80PLUS SILVERSTONE in PDF.



| Product Type | Computer Power Supply |
| Brand | SilverStone |
| Models | STRIDER ESSENTIAL ST50F-ES230 (500W), ST60F-ES 80PLUS (600W), ST70F-ES 80PLUS (700W) |
| Power Output | 500 W, 600 W, or 700 W depending on model |
| Form Factor | ATX |
| Dimensions (approx.) | 150 x 86 x 140 mm |
| Weight (approx.) | 1.5 to 2 kg |
| Input Voltage | 100-240 V AC (auto-adjustment with PFC) |
| Efficiency Certification | 80PLUS (ST60F-ES and ST70F-ES models) |
| Main Connectors | 24-pin ATX/EPS, 4+4-pin CPU, 6+2-pin PCI-E, SATA, Molex, FDD |
| Protections | Overvoltage, overcurrent, short-circuit, overtemperature |
| Cooling | 120 mm fan |
| Maintenance | Regular dusting of ventilation grilles |
| Safety | Do not open the power supply casing (dangerous voltage) |
| Warranty | Coverage according to SilverStone terms (do not open, no abnormal use) |
Frequently Asked Questions - STRIDER ESSENTIAL ST50F-ES230, STRIDER ESSENTIAL ST50F-ES230, STRIDER ESSENTIAL ST60F-ES 80PLUS, STRIDER ESSENTIAL ST70F-ES 80PLUS SILVERSTONE
User questions about STRIDER ESSENTIAL ST50F-ES230, STRIDER ESSENTIAL ST50F-ES230, STRIDER ESSENTIAL ST60F-ES 80PLUS, STRIDER ESSENTIAL ST70F-ES 80PLUS SILVERSTONE
0 question about this device. Answer the ones you know or ask your own.
Ask a new question about this device
Download the instructions for your Computer power supply in PDF format for free! Find your manual STRIDER ESSENTIAL ST50F-ES230, STRIDER ESSENTIAL ST50F-ES230, STRIDER ESSENTIAL ST60F-ES 80PLUS, STRIDER ESSENTIAL ST70F-ES 80PLUS - SILVERSTONE and take your electronic device back in hand. On this page are published all the documents necessary for the use of your device. STRIDER ESSENTIAL ST50F-ES230, STRIDER ESSENTIAL ST50F-ES230, STRIDER ESSENTIAL ST60F-ES 80PLUS, STRIDER ESSENTIAL ST70F-ES 80PLUS by SILVERSTONE.
USER MANUAL STRIDER ESSENTIAL ST50F-ES230, STRIDER ESSENTIAL ST50F-ES230, STRIDER ESSENTIAL ST60F-ES 80PLUS, STRIDER ESSENTIAL ST70F-ES 80PLUS SILVERSTONE
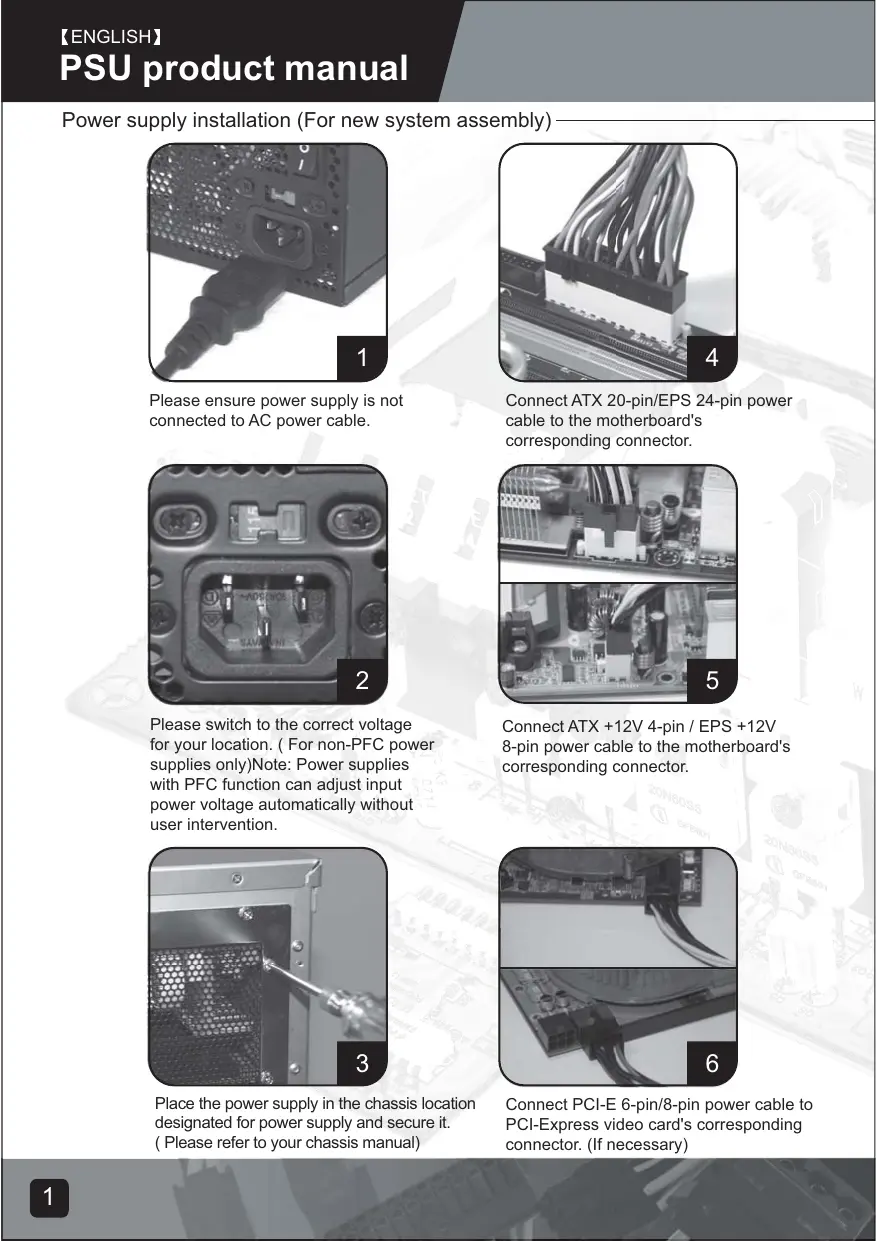
Power supply installation (For new system assembly)
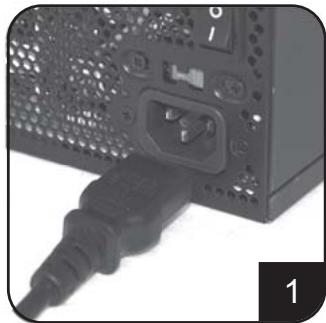
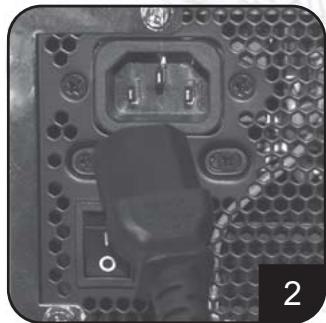
Please ensure power supply is not connected to AC power cable.
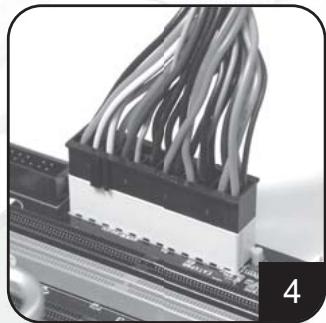
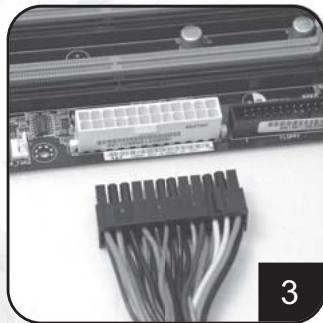
Connect ATX 20-pin/EPS 24-pin power cable to the motherboard's corresponding connector.
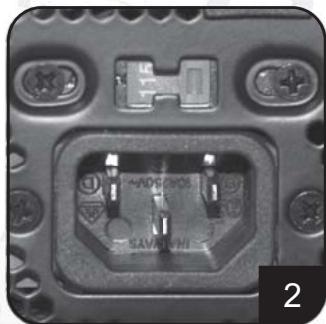
Please switch to the correct voltage for your location. (For non-PFC power supplies only)Note: Power supplies with PFC function can adjust input power voltage automatically without user intervention.
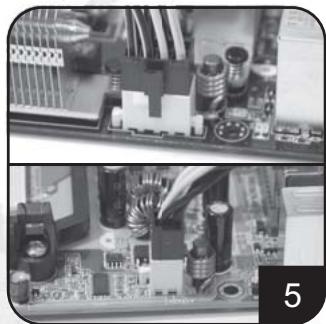
Connect ATX +12V 4-pin / EPS +12V 8-pin power cable to the motherboard's corresponding connector.
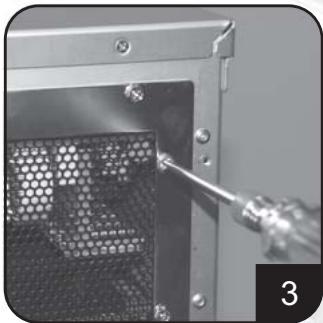
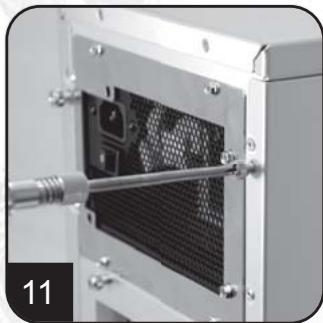
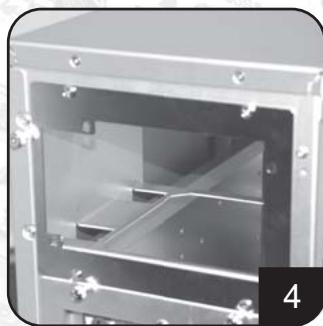
Place the power supply in the chassis location designated for power supply and secure it. (Please refer to your chassis manual)
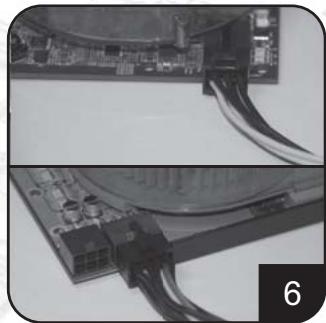
Connect PCI-E 6-pin/8-pin power cable to PCI-Express video card's corresponding connector. (If necessary)
Power supply installation (for new system assembly)
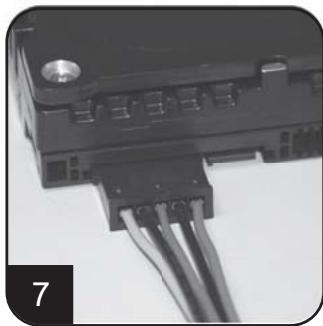
Connect SATA power cables to SATA hard drives or devices.
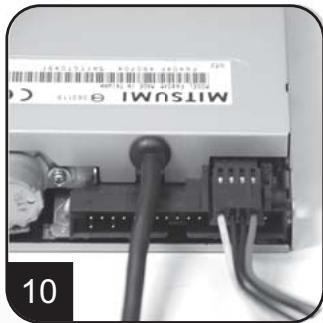
Connect small 4-pin power cable to floppy drives or other compatible devices
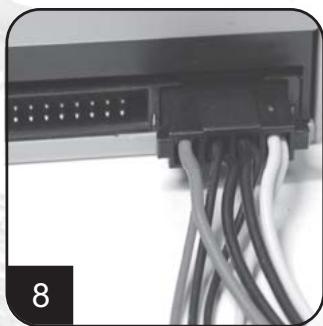
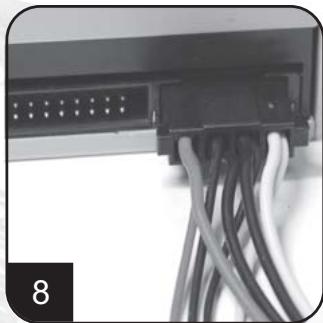
Connect 4-pin peripheral power cables to IDE hard drives, optical drives or other devices.
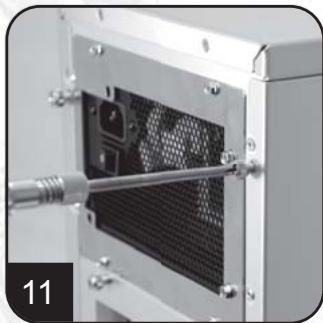
Reinstall chassis's cover, and secure it. (Please refer to the installation of chassis)
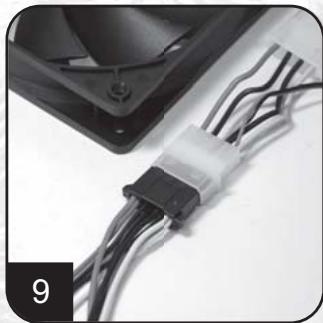
Connect 4-pin peripheral power cables to fans utilizing the peripheral connectors. (DC +12V variety)
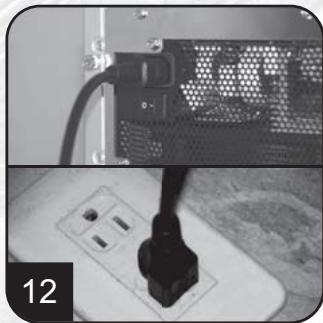
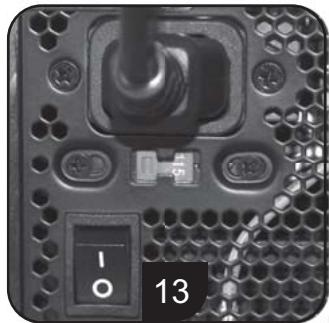
Connect AC power cable to the power supply. (Caution: please do not use extension socket, if using extension socket is necessary, avoid combined usage with other higher powered household appliances such as TV, audio amplifier, etc...)
Power supply installation (For new system assembly)
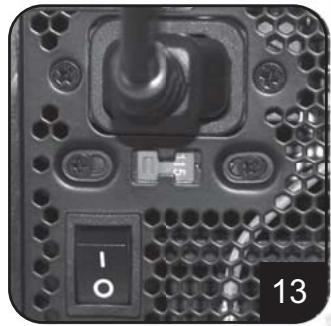
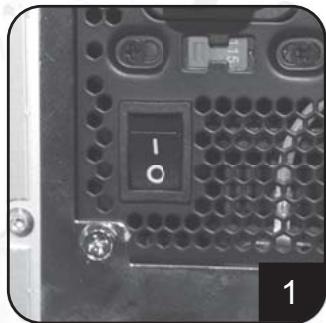
Turn on the power supply by switching to "I" (I/O) mode.
Caution: The power supply is on standby now. System on and off is controlled by the motherboard.
(Pleasesereferto themotherboardmanual)
Power supply installation (For replacement)
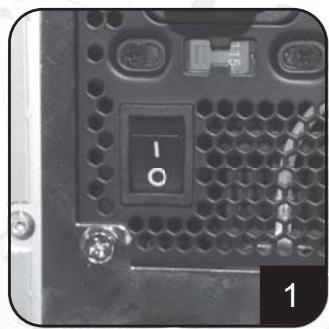
After turning off the system, switch the power supply to "O" position to disable system standby and make sure the system is no longer drawing any power.
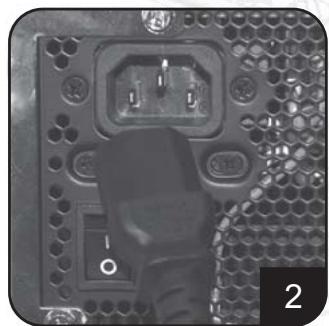
Remove AC power cable from the power supply.
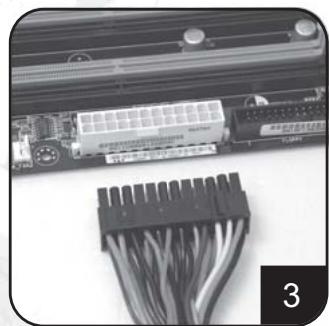
Remove all power supply cables connected to the motherboard, video card, hard drive and other device.
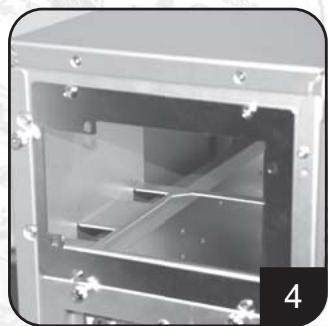
Remove power supply from the chassis. (Please refer to your chassis's installation manual.)
- Please refer now to Step 1 of "Power supply installation (for new system assembly)"
Power supply usage notes and caution
- The power supply includes dangerous high voltage; please do not open the power supply in any condition. Once the power supply enclosure is opened, it will no longer be covered under warranty.
- Please use power supply in safe and dry surroundings.
- Please do not obstruct, insert, or put anything into power supply's vents and any other openings.
- The AC cable included with the power supply has been stringently examined by the factory for defects and quality so please use only the AC cable supplied with your power supply. AC power cable manufactured by a third party may produce incompatible results and possibly cause damage to your system or power supply.
- This product is designed for indoor use only.
Troubleshooting
If your power supply is not operating properly, please refer to the following steps:
- Please make sure the voltage switch is in the correct mode for use in your location (115V or 230V). (For power supplies without PFC function only)
- Please ensure AC power cable is connect to the power supply.
- Please make sure power supply's "I/O" is switched to "I" mode.
- Please double check to see if all motherboard, video card(s), hard drives, and devices' cables are connected correctly.
- Please turn off the power supply by switching the "I/O" to "O" mode. Wait for approximately 5 minutes for the power supply to reset its protection mechanisms, then switch on "I" mode and reboot the system.
Caution: The power supply includes dangerous high voltage; please do not open the power supply under any circumstances. Once the power supply enclosure is opened, it will no longer be covered under warranty.
Power supply connectors

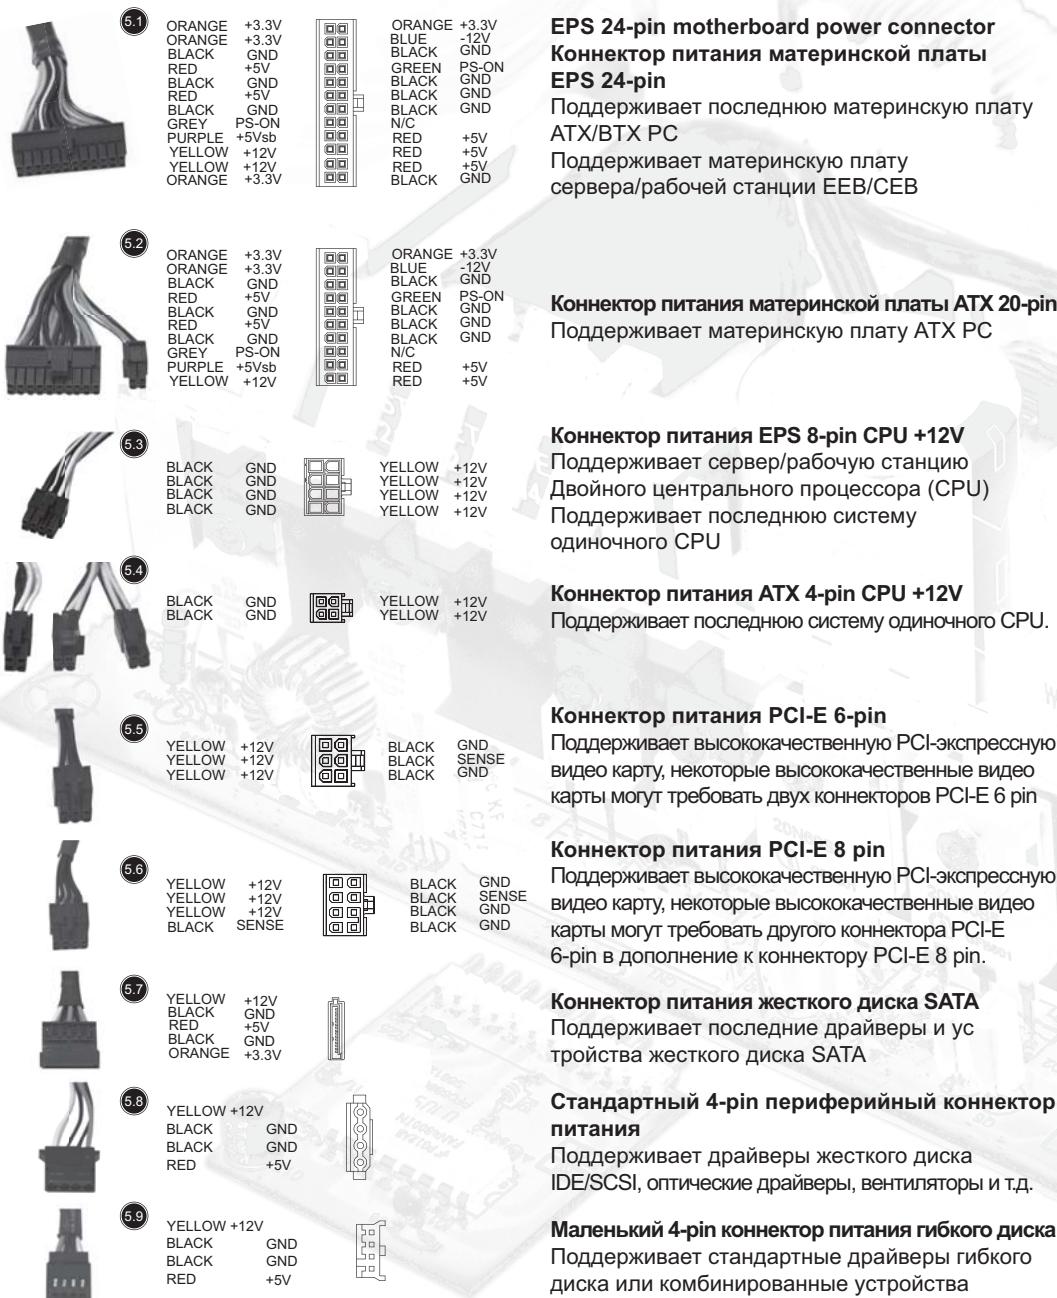
ORANGE +3.3V ORANGE +3.3V BLACK GND RED +5V BLACK GND RED +5V BLACK GND GREY PS-ON PURPLE +5Vsbl YELLOW +12V YELLOW +12V ORANGE +3.3V
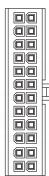
ORANGE +3,3V BLUE -12V
BLACK GND
GREEN PS-ON
BLACK GND
BLACK GND
BLACK GND
N/C
RED +5V RED +5V RED +5V BLACK GND
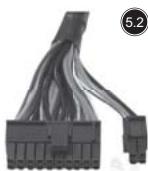
ORANGE +3.3V ORANGE +3.3V BLACK GND RED +5V BLACK GND RED +5V BLACK GND GREY PS-ON PURPLE +5Vsb YELLOW +12V
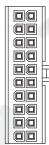
ORANGE +3.3V BLUE -12V
BLACK GND
GREEN PS-ON
BLACK GND
BLACK GND
BLACK GND
N/C
RED +5V RED +5V

EPS 24-pin motherboard power connector
Support the latest ATX/BTX PC motherboard Support EEB/CEB server/workstation motherboard
ATX 20-pin motherboard power connector
Support ATX PC motherboard
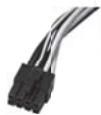
EPS 8-pin CPU +12V power connector
Support Dual CPU server/ workstation Support latest single CPU system
ATX 4-pin CPU +12V power connector
Support latest single CPU system.
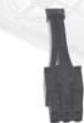
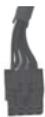
PCI-E 6-pin power connector
Support high-end PCI-Express video card, some high-end video cards may require two PCI-E 6 pin connectors.
PCI-E 8 pin power connector
Support high-end PCI-Express video card, some high-end video cards may require another PCI-E 6-pin connector in addition to PCI-E 8pin connector.
SATA hard disk power connector
Support latest SATA hard drives and devices
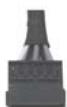
Standard 4-pin peripheral power connector
Support IDE/SCSI hard drives, optical drives, fans, etc...
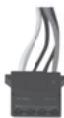
Small 4-pin floppy power connector
Support standard floppy drives or compatible devices


YELLOW -12V YELLOW +12V YELLOW +12V

BLACK
BLACK
BLACK
GND SENSE GND

YELLOW +12V BLACK GND ORANGE +3.7V BLACK RED ORANGE +3.3V


Power supply connectors
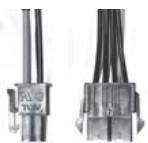

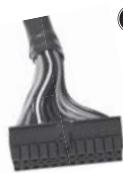
Converting wire
EPS 8-pin connector to convert into ATX 4-pin connector
Caution:
- Please turn off your system and switch to "O" mode on the power supply before attaching or detaching power connectors.
- All power connectors are keyed to prevent incorrect connections. If you cannot connect them easily, please double check to ensure the connector's direction and type before attempting to connect again. Do not attach the connector by force; incorrect connection will damage power supply or devices in your system.
- The converting wire (picture 5.10) can only be attached with EPS 8-pin connector to convert into ATX 4-pin connector. Incorrect connection will damage power supply or devices in your system.
The connectors shown above may differ depending on the model of your power supply.
Warranty
Product component defects or damages resulted in defective production is covered under warranty. Damages resulted with the following conditions will be fixed or replaced under SilverStone's jurisdiction.
- Usage in accordance with instructions provided in this manual, with no misuse, overuse, or other inappropriate actions.
- Damage not caused by natural disaster (thunder, fire, earthquake, flood, salt, wind, insects, animals etc...)
- Product is not disassembled, modified, or fixed. Components not disassembled or replaced.
- Warranty mark/stickers is not removed or broken.
Loss or damages resulted from conditions other than ones listed above are not covered under warranty.
Support ATX PC Motherboard
EPS 8-pin CPU +12V Strombuchse/Stecker
Unterstutz Dual CPU Server/Workstation
Unterstutz neuestes Single CPU System
ATX 4-pin CPU +12V Strombuchse/Stecker
Unterstutz neuestes Single CPU System
PCI-E 6-pin Strombuchse/Stecker
Small 4-pin Floppy Stombuchse/Stecker
m = 311
YELLOW +12V BLACK GND RED +5V BLACK GND ORANGE +3.3V

.
EPS 8-pin CPU +12V power connector
CoéuHnIte cunlOBoKa6eJIb ATX +12V 4-pin / EPS +12V 8-pin c coOTBeTcTBUOuM KOHNekTopOM MaTePnHcKoI PNaTbl.
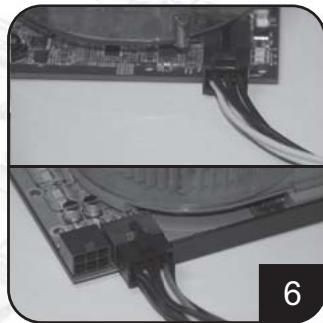
CoeHInHTe cINIOBoi Ka6eJIb PCI-E 6-pin/8-pin c COOTBECTBYOULIM KOHNKETOPOM PCI-3KcPpeCCHo BnDeo KApTbI (B CInyae HeoXoDMOCtN).
PykoBODCTBO npOdyKcIN PSU
YctaHObKa 3JIeKTPoPNTaHn (IINc6OpKn HOBOI CnCTEmbl)
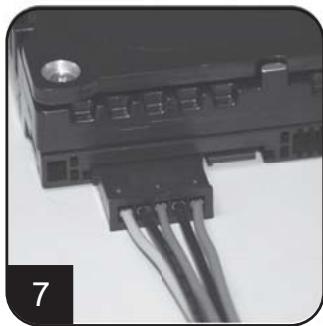
CoeHInHTe cnIObIe Ka6eN SATA c dpaBepaMn JecTKOro DnCKa Nn yctpoCTBaMn SATA.
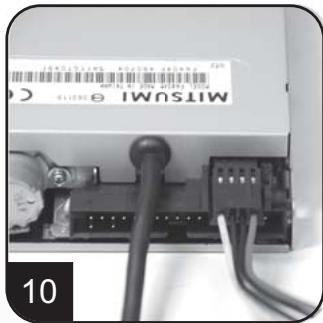
CoeHnHTe MaHbKn 4-pin cInnoBoi Ka6ebIc dpaBepamn r6Koro dNCKa nn DpyHMn COBMecTmblIMyCTpoCTBaMn.
CoedHnHte 4-pin nepi#pepniHbIe cnIObIe Ka6eTn C dpaiBepaMn JxecTKoTo Dmoka IDE,OrTMHeckMn dpaiBepaMn HIN dpyTMMU yCTpoiCTBaMn.
YctaHOBKa 3NeKtpoNTaHnA (IJIa c6OpKn HOBoN CnCTeMbI)
BkIouHte 3neKtropnTaHne, nepeKlIOUaB pexKIM "I" (I/O-BBOD/BbIBOD). IpeOCTepeJKeHne: 3neKtropnTaHne haxoITcH aPe3epBe Teepb. BKn. N bIKN. CNTeMbI ynpabJIeT MaTePHNckA rPiata. (O6paTntecb K pyKOBoCTBy MaTePHNckO nPaTbI),
YctaHObKa 3JIeKTPoPNTaHnA (IINy 3aMeHbI)
Iocne BbIKUChEnHcNTeMbI,peEckIOHHTe 3JIeKTPoNITaHnB bIOJoxKeHnE "O",yTObI dIaTb pe3epB CNTeMbI HeCIOco6HbIM,UYbEdITcEcB TOM,YTO CNTema 60JIbIe HE TReHET HNKAKOTO ITaHnIa
BbHbTe CnIOBo KabeIb IepemEnHOToKa C3NeKTPoNITAHIN.
BbHbTe Bce Ka6eN 3NeKtpOnTaHnna, coeHNHeHHBe C MaTePHNcKo INaToI, BnDeo KapToI, dpaBepom JecTKoro DnCKa nDpyrMMy yCTPOINCTBaMn.
BbHbTe 3JIeKTPoINTaHne C UaCCn. (ObpaTteCb K BaUeMy pykoBOdCTBy NO yCTaHOBKe UaCCn.)
- 06paTntecb K lary 1 "ycTaHOBKn 3JNEKTPoNTaHnA (Дясборкн HOВССТeMbI)".
IpmeuHnI npedocepexeHne nCnoJIb3ObaHnIO 3NeKtpoNTaHnI
- 3JektpoNTaHne BkIouaet B c6e onachoe BbICOKoe HapjxHe; He OTKpbBaTc 3JektpoNTaHne B JIObOM ycIOBn. EcnI orpaJxHe 3JektpoNTaHnry OTKpbTo, OHO 6OJIbSe He 6yET NOKpBTo COrnaCHO rapaHTnN.
2.ИспοльзуITEЗЛЕКТРОПИТAHNEВ6e3ОнacHоиcCyхоКOKpyжаншeIcpeDe. - Hnue He 3acopayte, BCTaBnayte, nI IN PomeaTe B BbIXoN IIObIe npyrne OTBePCTnA 3JIeKTPOnNTAHy.
- Ka6eJIb nepeMeHHoro TOka c 3JIeKTPoNITaHnEM 6blI CTporO npOBepen fap6pIKoHa DeΦeKtBI IN KauEcTBO, PO3ToMy IcNoJIb3yIte TOnbKO Ka6eJIb nepeMeHHoro TOka, Cha6JxHHb BAaIM 3JIeKTPoNITaHnEM.CINIOBoi Ka6eJIb nepeMeHHoro TOka, N3rTOBJIeHHb TpeTbei CTOPOHO, MoXET pON3BecTIHecOBMeCTMlbIpe3yJIbTaBI IN BO3MOXHO pInHeCTN V6blTKBaIeN CnCTeME NN3JIeKTPoNITaHnIO
- 3ta npodykuzna pa3pa6oTaHa TOnbko DJIa KOMHaTHOrO IcNoIb3ObaHnA.
O6napykeHne HncnpaBHOCTeN MeToDbI IN yCTpaHeHnA
Ecni Baue 3neKtpoNTaHHe He pa6oTaET DoJXhBIM O6pa3OM, O6paTntecb K CNeDyUOzIM Waaram:
- Y6eIntecb B TOM, UTO BbIKJIouaTeIb HApJxKeHnHaXoIITcB I npaBnIbHom pexIme IJIy IcNoIb3OBAHnB B BaIeM paCnoIooKeHn (115B nIIN 230B) (TolbKO dIra 3JeKTPoNtAHHn 6e3 cfVHKU PFC).
2.「apaHTnpyuTe,уTO cNIOBOKa6eJIb nepemEHORo TOKa COeINHReTCRc 3JIeKTPONITAHmE. - Y6eHNTecb B TOM, yTo "I/O"(BBOD/BbBOD) 3JIeKTPoNtAHnI nepeKJIIOueH b peXIM "I" (BBOD).
4.Двараза поверъte,чтобьи Видъ,правиьно Ли-coeинь BCЯ MaTeрнckая Плanta,Видао Карта (ы),Драиьевь яжесTKОг ДИССА и Kaбени VстpoиCTB. - BbIKIIOHNTe 3JIeKTPoINITaHne, nepeKIIIOUay "I/O"(BBOJ/BBIOJ) B pexim "O"(BbIOJ). Kdnte B teueHne np6bn3nteJbHO 5 mHyT, kOrJa 3JIeKTPoINITaHne nepeyctaHaBnBaET CBOE MEXAHN3MbI 3aUHTbl, 3aTeM BKJIIOHNTe pexim "I" (BBOJ) I nepe3arpy3nte cnCTeMy.
IpeocTepeKeHne: 3eKtpOniTaNHe BkJIOuAet B c68 onaCHOe BbICOKoe HaprrKeHne; He OTKpbIbAte 3eKtpOniTaNHe npn IIObIX o6cTcTbCTbX. EcIn orpaXdHne 3eKtpOniTAHNr OTKpbIto, OHO 60nbIe He 6ydt NOKpbITo corNaCHO rapaHTnN.
KoHHeKToBpI ΘeKeTpOnnTaHn
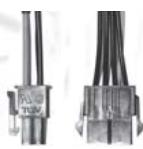

UHyp ppeo6pa3OBAHn
KOMnIeKeTte 8-ItbIpbKOBOrO coeINHITeJIa EPS, UTo6 npeo6pa3OBaTb 4-ItbIpbKOBbl coeINHITeJIb
Пре dioctepexeHne:
IontepnnoBpeKdHnB, Bb3BaHHbIe OndHM n3 dpYnx ycNoBn, He ynomHytbX BblSe, He NOKpbITbI cOrJIaCHO rapaHTnN.
This is the Konkyu Tien's Theorem.
備註
部,如的,有
To be valid, this sheet must be filled out by your salesperson at the time of purchase.
Store :
Purchaser :
Purchase date :
Model No. :
Serial No.:
SilverStone Technology Co., Ltd.
www.silverstonetek.com

- Power supply installation (for new system assembly)
- Power supply usage notes and caution
- Troubleshooting
- Power supply connectors
- EPS 24-pin motherboard power connector
- ATX 20-pin motherboard power connector
- EPS 8-pin CPU +12V power connector
- ATX 4-pin CPU +12V power connector
- PCI-E 6-pin power connector
- PCI-E 8 pin power connector
- SATA hard disk power connector
- Standard 4-pin peripheral power connector
- Small 4-pin floppy power connector
- Converting wire
- Caution:
- Warranty
- EPS 8-pin CPU +12V Strombuchse/Stecker
- ATX 4-pin CPU +12V Strombuchse/Stecker
- PCI-E 6-pin Strombuchse/Stecker
- Small 4-pin Floppy Stombuchse/Stecker
- PykoBODCTBO npOdyKcIN PSU
- YctaHObKa 3JIeKTPoPNTaHnA (IINy 3aMeHbI)
- IpmeuHnI npedocepexeHne nCnoJIb3ObaHnIO 3NeKtpoNTaHnI
- O6napykeHne HncnpaBHOCTeN MeToDbI IN yCTpaHeHnA
- KoHHeKToBpI ΘeKeTpOnnTaHn
- UHyp ppeo6pa3OBAHn
- Пре dioctepexeHne:
- 備註
Brand : SILVERSTONE
Model : STRIDER ESSENTIAL ST50F-ES230, STRIDER ESSENTIAL ST50F-ES230, STRIDER ESSENTIAL ST60F-ES 80PLUS, STRIDER ESSENTIAL ST70F-ES 80PLUS
Category : Computer power supply