M500 - Smartphone E-TEN - Free user manual and instructions
Find the device manual for free M500 E-TEN in PDF.
| Product Type | Smartphone |
| Brand | E-TEN |
| Model | M500 |
| Operating System | Windows Mobile 5.0 |
| Processor | Samsung S3C2440 400 MHz |
| RAM Memory | 64 MB |
| Internal Memory | 128 MB |
| Screen | TFT 2.8 inches (240x320 pixels) |
| Camera | 2.0 megapixels |
| Connectivity | Bluetooth 2.0, Infrared (IrDA), USB 1.1 |
| Network | GSM/GPRS 900/1800/1900 MHz |
| Integrated GPS | Yes |
| Expandable Storage | SD/MMC Card |
| Battery | Li-Ion 1200 mAh (removable) |
| Dimensions | Approximately 125 x 70 x 20 mm |
| Weight | Approximately 180 g |
| Care and Cleaning | Clean with a soft dry cloth. Avoid any contact with moisture. |
| Safety | Use in a dry place at moderate temperature. Do not expose to water or shocks. |
| Spare Parts and Repairability | Removable battery, accessible SIM card. Professional repair recommended. |
Frequently Asked Questions - M500 E-TEN
User questions about M500 E-TEN
0 question about this device. Answer the ones you know or ask your own.
Ask a new question about this device
Download the instructions for your Smartphone in PDF format for free! Find your manual M500 - E-TEN and take your electronic device back in hand. On this page are published all the documents necessary for the use of your device. M500 by E-TEN.
USER MANUAL M500 E-TEN
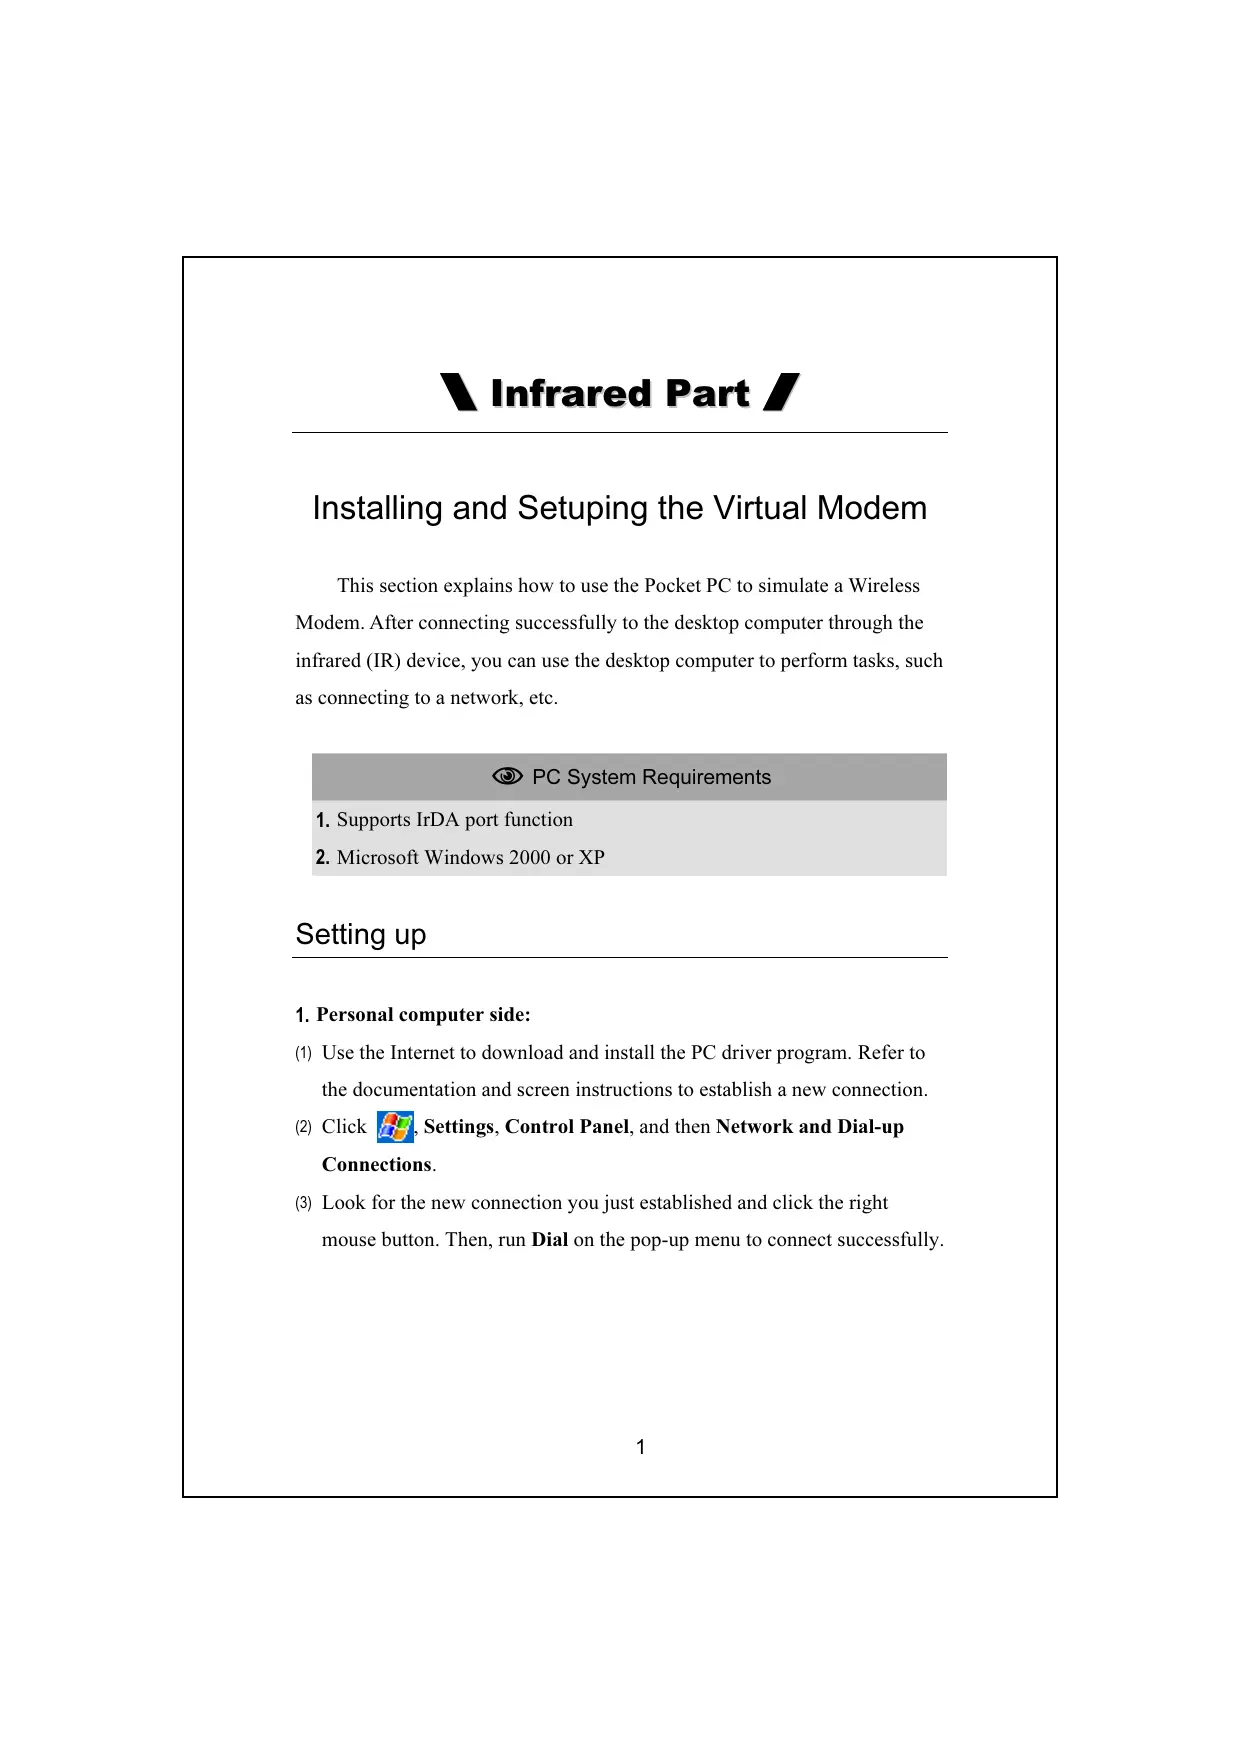
Installing and Setuping the Virtual Modem
This section explains how to use the Pocket PC to simulate a Wireless Modem. After connecting successfully to the desktop computer through the infrared (IR) device, you can use the desktop computer to perform tasks, such as connecting to a network, etc.
PC System Requirements
- Supports IrDA port function
- Microsoft Windows 2000 or XP
Setting up
1. Personal computer side:
(1) Use the Internet to download and install the PC driver program. Refer to the documentation and screen instructions to establish a new connection.
(2) Click Settings, Control Panel, and then Network and Dial-up Connections.
(3) Look for the new connection you just established and click the right mouse button. Then, run Dial on the pop-up menu to connect successfully.
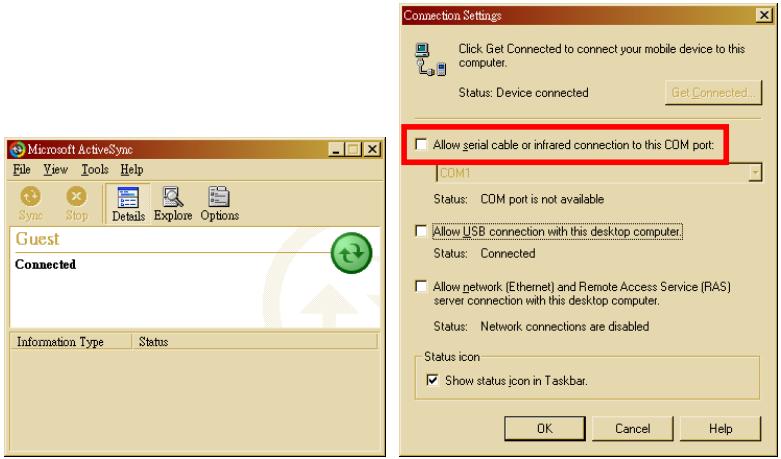
(4) End the ActiveSync connection between the personal computer (desktop or notebook) and the Pocket PC. Under the ActiveSync program on the personal computer, tap File and then Connection Settings. Make sure you did not check "Allow serial cable or infrared connection to this COM port."
2. Pocket PC side:
(1) Install a SIM card with GPRS function.
(2) Make sure that the ActiveSync connected between the personal computer (desktop or notebook) and the Pocket PC has been disconnected.
(3) Pay attention that the infrared ports of the two devices are properly aligned. The area in the effective range should be kept unobstructed. A deviation angle within ± 15 degrees and a distance within 30 50 centimeters are acceptable.
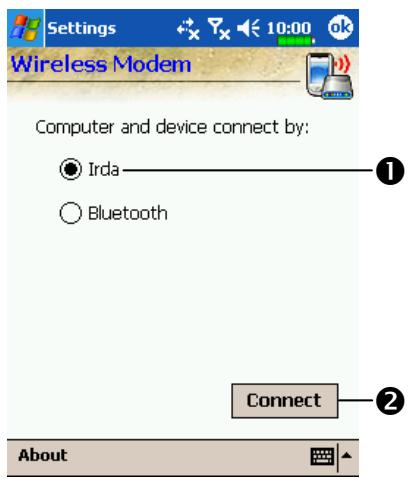
(4) Tap, Programs, Phone, and then Wireless Modem to use the Irda function to connect the personal computer to the Pocket PC.
Tap Irda.
2 Connect Button: Tap to connect. When connection succeeds, the screen will display "Connecting" and the continuous connection time.
Disconnect Button: If the personal computer does not have to access a network, tap this button to disconnect.
(5) When your Pocket PC is simulating a modem, you can use the personal computer to access a network.
Installing Infrared Connection Options
Use the Internet to download and install the Wireless Link file, it is a PC driver program. We need to establish a new connection. After your Pocket PC connecting successfully to the desktop computer, you can use the desktop computer to perform tasks, such as connecting to the network, etc.
Refer to the following explanation to set up a virtual COM port.
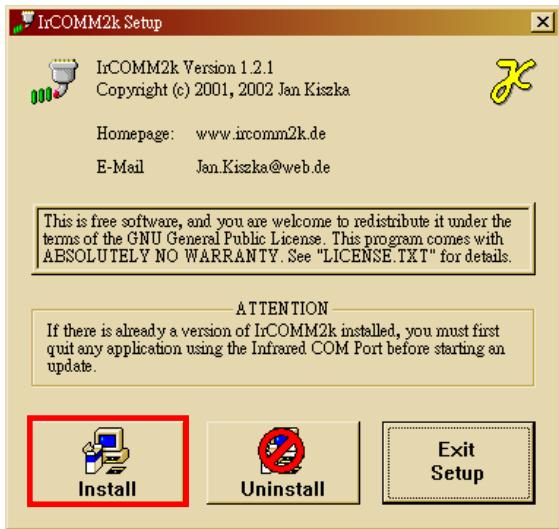
- Unzip the "IrCOMM2k" file you downloaded. Run Setup.exe, and enter the IrCOMM2k setup program.
- Click Install.
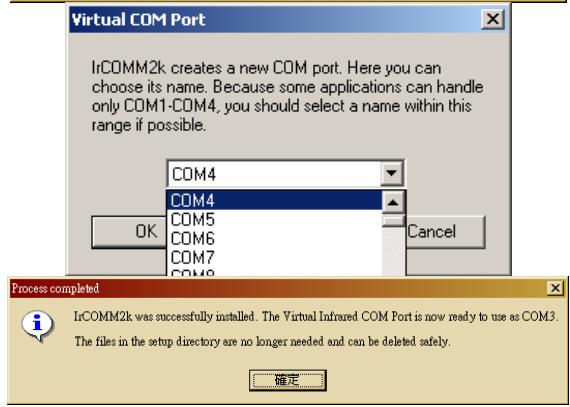
- Select a virtual COM port, it is prepared for the Infrared port.
Refer to the following explanation to set up.
-
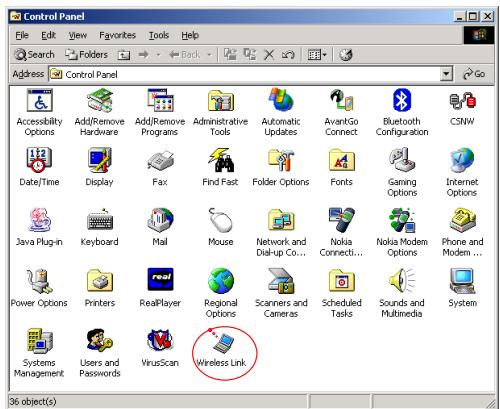
Click Settings, Control Panel, and then Wireless Link.
-
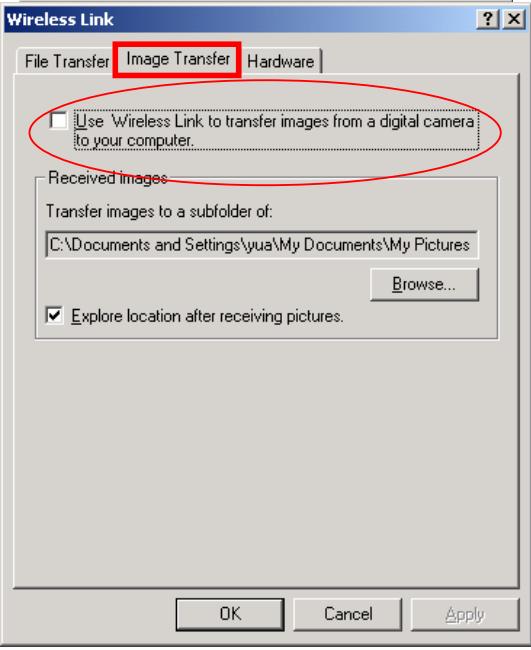
Select the Image Transfer tab, confirm not to check "Use Wireless Link to transfer images from a digital camera to your computer."
Refer to the following explanation to set up a
virtualmodem.
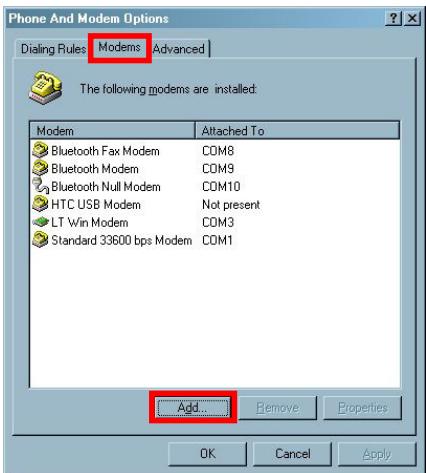
- Click Settings,
Control Panel, and
then Phone and
Modem Options. - Select the Modems tab and then click Add to add a new virtual modem.
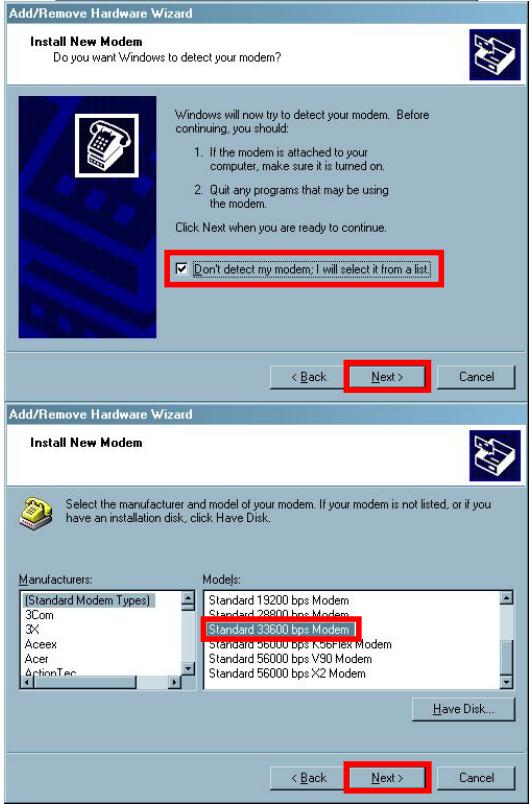
- Check "Don't detect my modem; I will select it from a list," and then click Next.
- Select "Standard 33600 bps Modem," and then click Next.
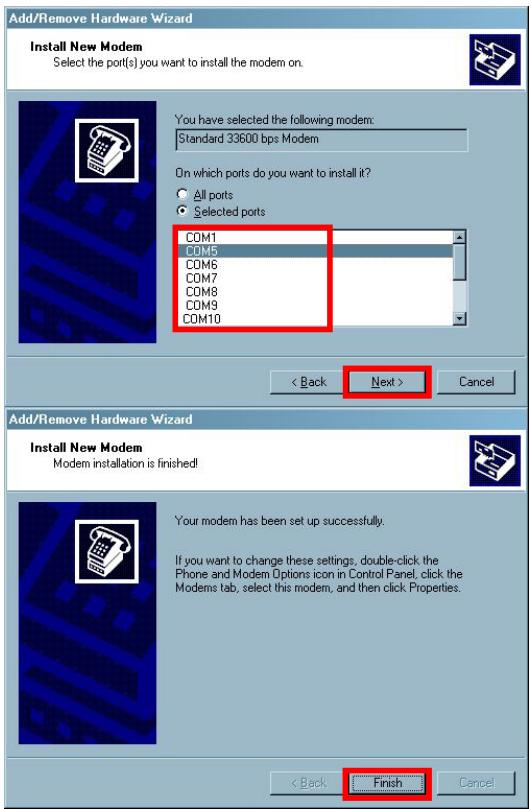
- Select the same COM port you selected earlier using the IrCOMM2k setup program, and then click Next.
- Click Finish. You have set up a virtual modem successfully.
Refer to the following explanation to set up properties of the virtual modem.
- Click

Settings,
Control Panel, and
then Phone and
Modem Options.
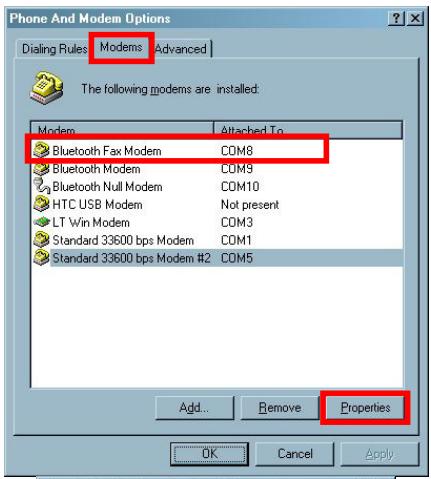
- Select the Modems tab and select the virtual modem you have just set up, and then click Properties.
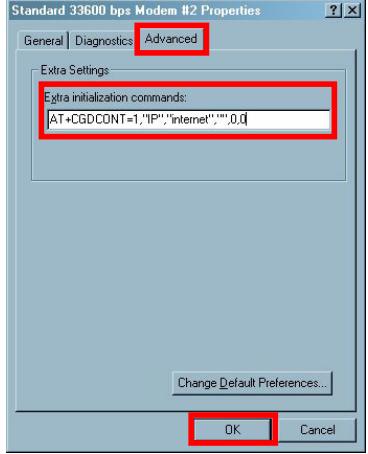
- Select the Advanced tab and input "AT+CGDCONT=1," P","APN","0,0". Change the "APN" to the name specified by your telecom company.
- Finally, click OK to complete and exit Phone and Modem Options.
CRefer to the following explanation to establish a new connection.
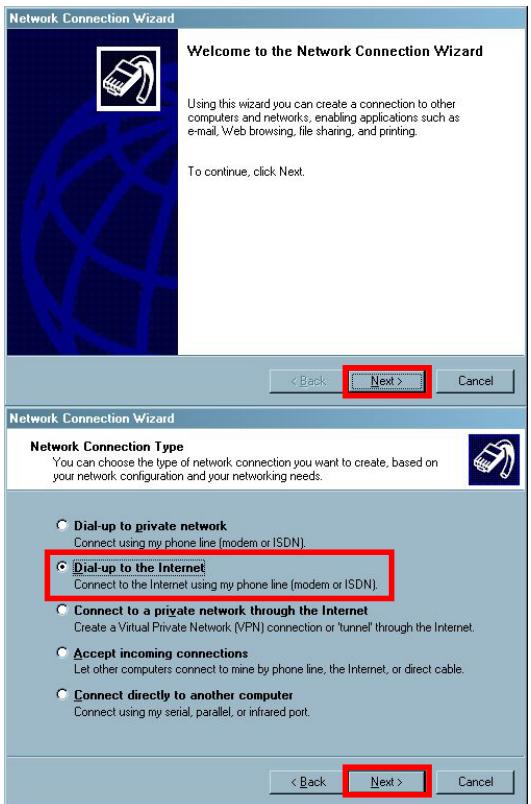
- Click Settings, Control Panel, Network and Dial-up Connections, and then Make New Connection.
- Click Next.
- Select "Dial-up to the Internet," and then click Next.
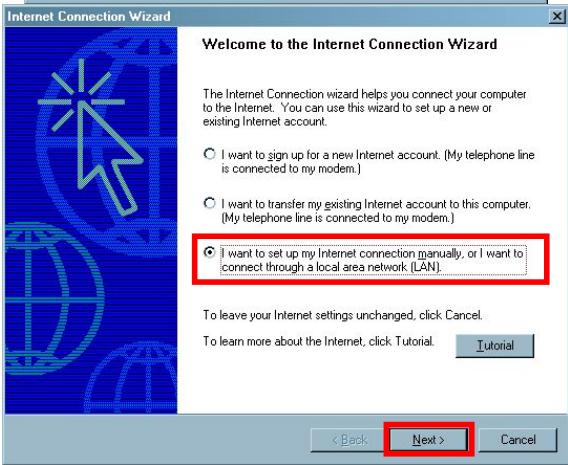
- Select "I want to set up my Internet connection manually, or I want to connect through a local area network (LAN)," and then click Next.
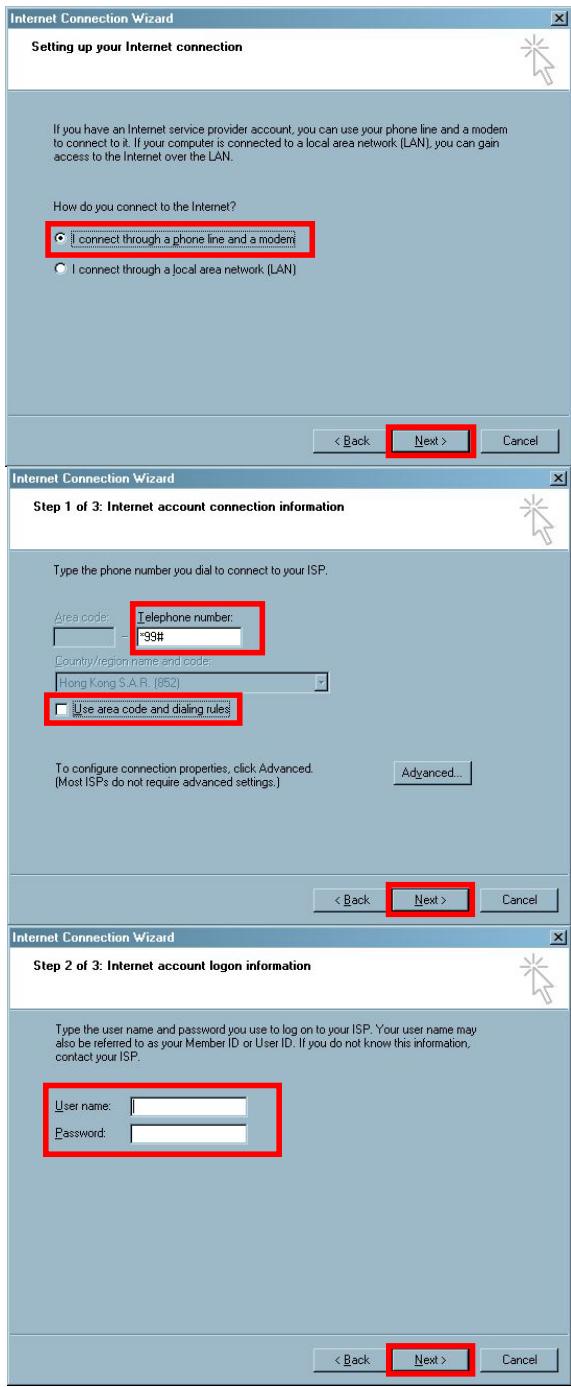
- Select "I connect through a phone line and a modem," and then click Next.
- Do not check "Use area code and dialing rules". Input *99#" in the Telephone Number field and click Next.
- Input your Internet account user name and password. If you don't have this information, leave these 2 fields blank and click Next directly.
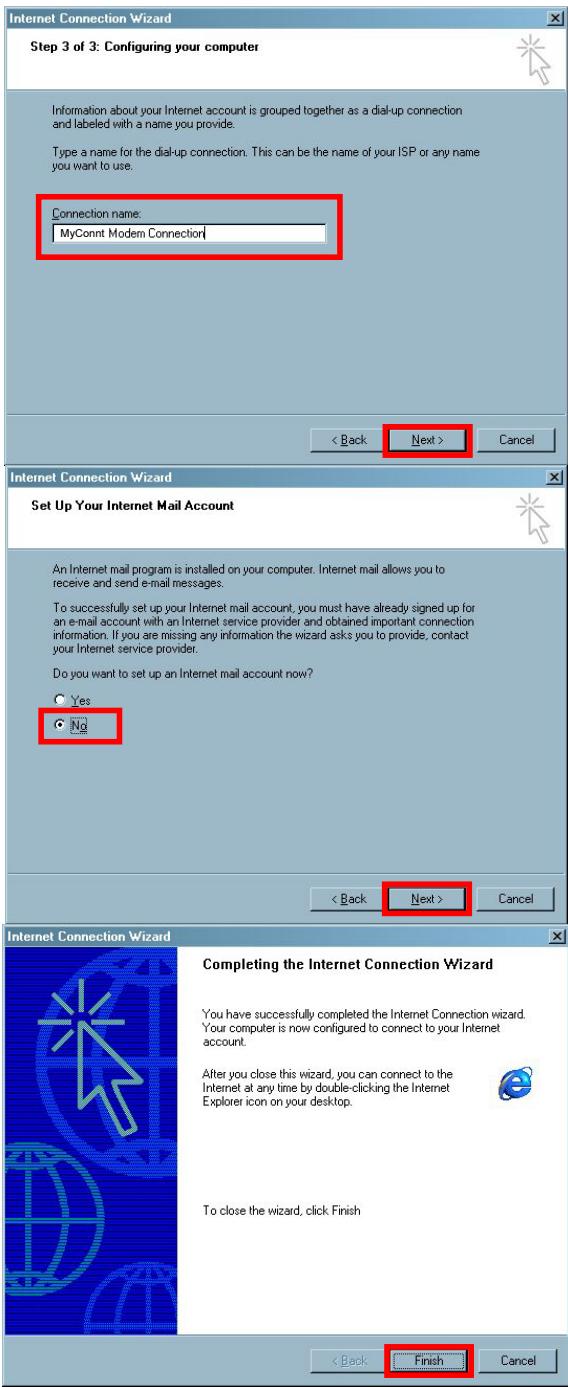
- Input any name you want to use and click Next.
- Select No and click Next.
- Click Finish. You have established a new connection successfully.
Refer to the following explanation to set up properties of the new connection.
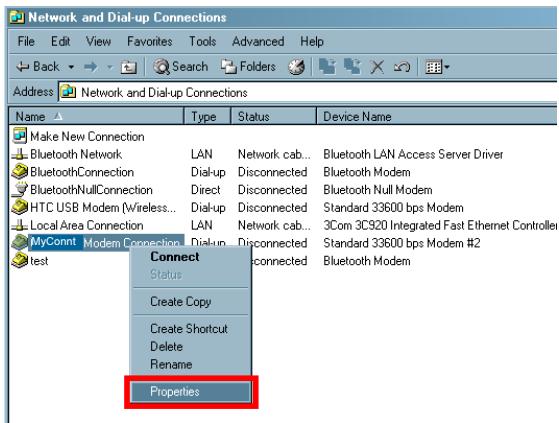
- Click Settings, Control Panel, and then Network and Dial-up Connections.
- Look for the new connection you just established and click the right mouse button. Select Properties from the pop-up menu.
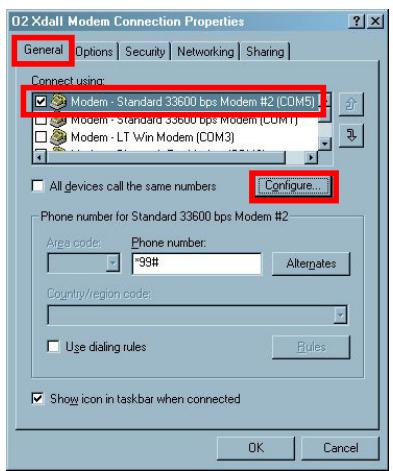
- Select the General tab to confirm that you have selected the virtual modem you have just set up and click Configure.
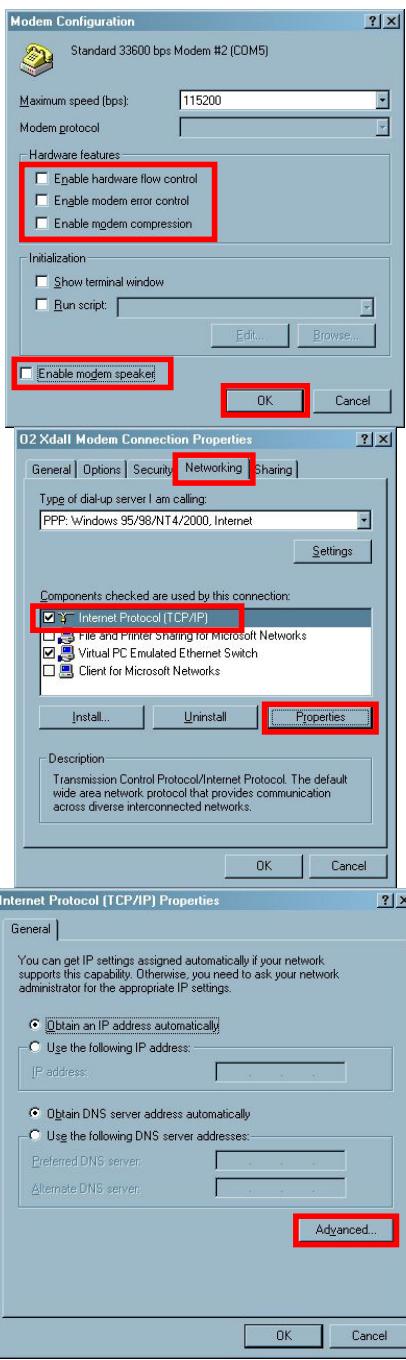
- Do not check the following items: Enable hardware flow control Enable modem error control Enable modem compression Enable modem speaker Finally click OK to save.
- Select the Networking tab and confirm that you have selected "Internet Protocol (TCP/IP)," and click Properties.
- Click Advanced.
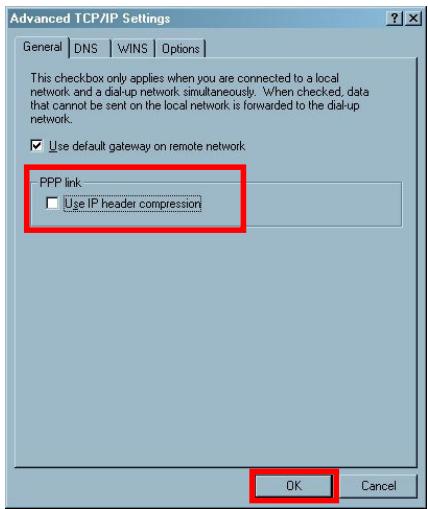
- Do not check "Use IP Header compression."
- Finally, click OK. You have finished setting up all properties for this new connection. Now you can exit Network and Dial-up Connections.
- Installing and Setuping the Virtual Modem
- PC System Requirements
- Setting up
- Personal computer side:
- Pocket PC side:
- Installing Infrared Connection Options
- Refer to the following explanation to set up a virtual COM port.
- Refer to the following explanation to set up.
- Refer to the following explanation to set up a
- virtualmodem.
- Refer to the following explanation to set up properties of the virtual modem.
- CRefer to the following explanation to establish a new connection.
- Refer to the following explanation to set up properties of the new connection.
Brand : E-TEN
Model : M500
Category : Smartphone