FP 563 - Electric oven WHITE & BROWN - Free user manual and instructions
Find the device manual for free FP 563 WHITE & BROWN in PDF.
| Product type | Electric oven for pizza and traditional cooking |
| Brand | WHITE & BROWN |
| Model | FP 563 |
| Power supply | 220-240 V (European standard) |
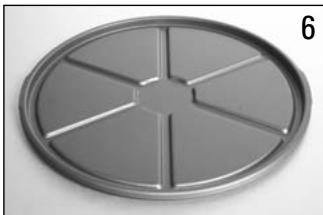
| Timer | 30 minutes with audible signal |
| Heating elements | Top, Bottom, Top+Bottom (selectable) |
| Rotating plate | Yes, rotation axis |
| Maximum diameter of the plate | 28 cm |
| Non-stick plate | Yes, removable |
| Viewing window | Yes, to monitor cooking |
| Steam outlet | Yes |
| Lid | With protective handle |
| Control type | Rotary knobs (timer and heating element selection) |
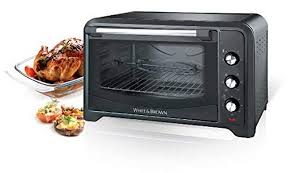
| Main functions | Cooking and reheating pizzas, pies, meats, etc. |
| Preheating required | No |
| First use | Possible smoke, clean plate and interior |
| Cleaning | Plate washable with soapy water; oven wiped with damp cloth |
| Safety | Do not immerse, hot surfaces, minimum distance 10 cm from walls |
| Repairability | Do not repair yourself, contact an authorized repairer |
| Included recipes | Yes, many (pizzas, savory/sweet pies) |
Frequently Asked Questions - FP 563 WHITE & BROWN
User questions about FP 563 WHITE & BROWN
0 question about this device. Answer the ones you know or ask your own.
Ask a new question about this device
Download the instructions for your Electric oven in PDF format for free! Find your manual FP 563 - WHITE & BROWN and take your electronic device back in hand. On this page are published all the documents necessary for the use of your device. FP 563 by WHITE & BROWN.
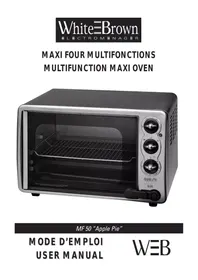
USER MANUAL FP 563 WHITE & BROWN
Congratulations for having chosen this WHITE AND BROWN
product, and thank you for trusting us. For your comfort and safety, your appliance has been checked at every step of manufacturing and has successfully gone through all our tests of quality.
WHITE AND BROWN creates original products to please you, as far as design and easiness to use are concerned in order to give you complete satisfaction.
CAUTION
PLEASE READ ALL THESE INSTRUCTIONS CAREFULLY BEFORE USING THIS APPLIANCE.
- Make sure that the voltage put on the rating plate corresponds to your main voltage.
- Never leave the appliance unsupervised when in use.
- Keep out of children and do not allow them to operate this appliance.
- Only use this appliance for domestic purposes and in the way indicated in these instructions. Never use for other uses.
- Never immerse the product in water or any liquid for any reasons.
- Do not use the appliance outdoor. This product must be placed in a dry environment.
- Do not use if you have wet hands.
- Do not touch the iron pieces to avoid burns.
- Never use the appliance on or near hot surfaces.
- Never move or range the appliance by pulling the cord.
- Unplug the appliance before cleaning or replacement of any pieces.
- Do introduce neither metallic objects, nor fingers inside the appliance.
- Make sure that the connection cord does not touch any hot surface. If the plug get hot, please call a qualified electrician.
- From time to time, check the cord for damages. Never use the appliance if cord or appliance show any sign of damage.
- All interventions made by a non-qualified person can be dangerous; in this case guarantee conditions would cancel. As all electrical products, a competent electrician must repair it.
- Do not touch hot surfaces of the appliance.
- Before using this appliance, removed any object that may have been placed on the top of the appliance
- The cord length of this product has been selected to reduce the possibility of tangling in or tripping over a longer cord. If more cord length is needed, an extension cord may be used. Ensure not to let it drape over the working area or dangle where someone could accidentally pull or trip over it.
-
While operating, ensure that the appliance is not covered or touching flammable material, including curtains, draperies, walls, etc...
-
Do not use on surfaces where heat may cause a problem nor near a hot gas or electric burner.
- Unplug from the mains when not in use and before cleaning. Always set the timer on "0" and the thermostat on "0" before unplugging.
- Use extreme caution when removing the oven pan or disposing of hot grease.
- Do not put any accessory or container directly on the lower heating element.
- Do not place any of the following materials in the oven : paper, cardboard, plastic and the like.
- Never stand in front of appliance when you open the oven. Always stand on one side to avoid burns.
THE MANUFACTURER WILL NOT ASSUME ANY RESPONSIBILITY IN CASE OF NON ADHERENCE TO THESE RECOMMENDATIONS.
SAVE THESE INSTRUCTIONS CAREFULLY
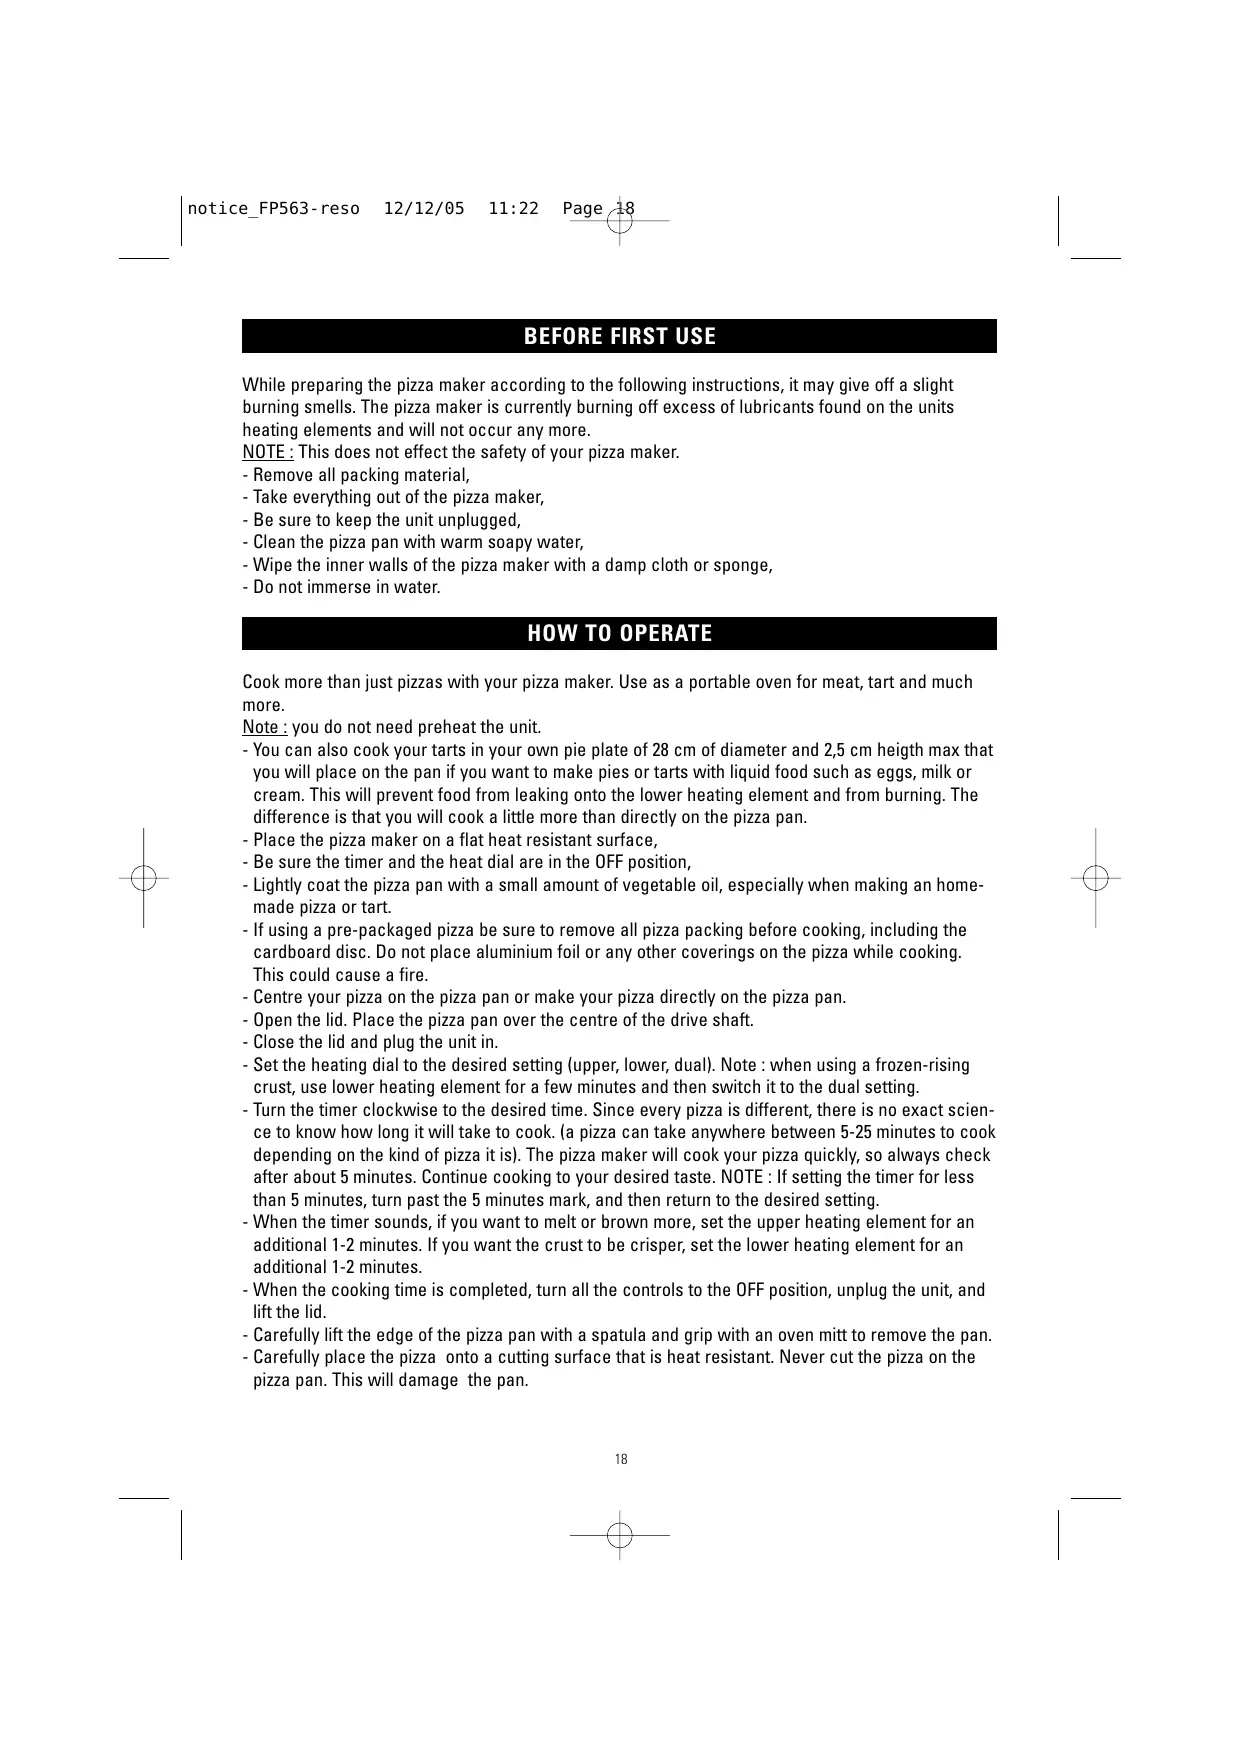
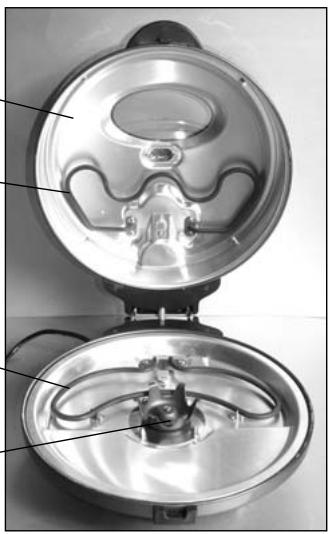
DESCRIPTION OF THE APPLIANCE
1-See-Through Window
2-Vent
3 - Upper Heating Element
4-Lower Heating Element
5-Drive Shaft
6 - Non-Stick Removable Pizza Pan
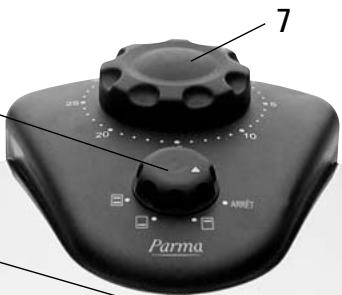
7-30 Minute Timer
8- Heating Dial
9 - Stainless Steel Lid
9
3
5

DUAL
heating
elements

LOWER
heating
element

UPPER
heating
element
8
While preparing the pizza maker according to the following instructions, it may give off a slight burning smells. The pizza maker is currently burning off excess of lubricants found on the units heating elements and will not occur any more.
NOTE: This does not effect the safety of your pizza maker.
- Remove all packing material,
- Take everything out of the pizza maker,
- Be sure to keep the unit unplugged,
- Clean the pizza pan with warm soapy water,
- Wipe the inner walls of the pizza maker with a damp cloth or sponge,
- Do not immerse in water.
HOW TO OPERATE
Cook more than just pizzas with your pizza maker. Use as a portable oven for meat, tart and much more.
Note: you do not need preheat the unit.
- You can also cook your tarts in your own pie plate of 28~cm of diameter and 2,5 cm heigth max that you will place on the pan if you want to make pies or tarts with liquid food such as eggs, milk or cream. This will prevent food from leaking onto the lower heating element and from burning. The difference is that you will cook a little more than directly on the pizza pan.
- Place the pizza maker on a flat heat resistant surface,
- Be sure the timer and the heat dial are in the OFF position,
- Lightly coat the pizza pan with a small amount of vegetable oil, especially when making an homemade pizza or tart.
- If using a pre-packaged pizza be sure to remove all pizza packing before cooking, including the cardboard disc. Do not place aluminium foil or any other coverings on the pizza while cooking. This could cause a fire.
- Centre your pizza on the pizza pan or make your pizza directly on the pizza pan.
- Open the lid. Place the pizza pan over the centre of the drive shaft.
- Close the lid and plug the unit in.
- Set the heating dial to the desired setting (upper, lower, dual). Note : when using a frozen-rising crust, use lower heating element for a few minutes and then switch it to the dual setting.
- Turn the timer clockwise to the desired time. Since every pizza is different, there is no exact science to know how long it will take to cook. (a pizza can take anywhere between 5-25 minutes to cook depending on the kind of pizza it is). The pizza maker will cook your pizza quickly, so always check after about 5 minutes. Continue cooking to your desired taste. NOTE: If setting the timer for less than 5 minutes, turn past the 5 minutes mark, and then return to the desired setting.
- When the timer sounds, if you want to melt or brown more, set the upper heating element for an additional 1-2 minutes. If you want the crust to be crisper, set the lower heating element for an additional 1-2 minutes.
- When the cooking time is completed, turn all the controls to the OFF position, unplug the unit, and lift the lid.
- Carefully lift the edge of the pizza pan with a spatula and grip with an oven mitt to remove the pan.
- Carefully place the pizza onto a cutting surface that is heat resistant. Never cut the pizza on the pizza pan. This will damage the pan.
HOW TO CLEAN
- Turn all controls to the OFF position and unplug.
- Completely cool the pizza maker and pan before removing or attempting to clean.
- Wash the pizza pan in warn, soapy water. Rinse and dry. Do not use abrasives.
- Wipe the pizza maker and cord with a clean damp cloth. Do not immerse the pizza maker in water or any other liquid.
- Dry all parts thoroughly before storing.
HELPFUL HINTS
- Rising crust pizzas – over cooking a pizza may cause the rising crust to touch the upper heating element. This may burn the crust or food.
- Rising crust pizzas must be carefully watched to prevent this from happening.
- When making a fresh dough pizza, always oil the pizza pan with vegetable oil to prevent the dough from sticking.
- The largest crust the pizza maker will accept is 28~cm . Be sure that the crust does not hang over the edge of the pizza pan. If the crust touches the sides of the cover the pizza pan will not turn and the pizza will not cook.
TROUBLESHOOTING
The pizza or food is not cooking evenly.
You may have to experiment with the different element settings and the amount of time you cook your pizza. Every pizza is different and will require different settings.
The pizza pan is not turning :
Check to make sure it is plugged into the wall outlet and that the fuse has not been blown.
Do you have the timer set? The pizza maker will not turn on unless the timer is on and a heat setting has been chosen.
The pizza pan may not be centred over the drive shaft. Turn all controls to the OFF position and allow the pizza maker to cool down before readjusting the pizza pan.
Is the pizza crust too big? If the pizza crust is touching the sides of the cover, the pizza pan will not turn. The pizza pan will hold a maximum size of 28 cm.
Is the pizza maker empty? Never turn the pizza maker on when there is no food inside. This may damage the pizza maker.
Home-made pizza crust is sticking to the pizza pan.
Always oil the pan with a little vegetable oil before using. It is also helpful to use corn meal to prevent the dough from sticking, and it also adds a nice flavour.
Can the pizza maker reheat pizza.
Yes. Replace the pizza on the pizza pan in a single layer and set the heating dial to DUAL. Heat the pizza until the toppings are melted and bubbly.
The pizza pan is rotating, but my pizza is not cooking.
You may have forgotten to select a heat setting. If the heating dial is OFF, your elements will not heat. The heating dial and the timer must be set before the pizza maker operates properly.
Instructions on environment protection
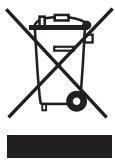
Do not dispose of this product in the usual household garbage at the end of its life cycle; hand it over a collection point for the recycling of electrical and electronic appliances. The symbol on the product, the instructions for use or the packing will inform about the methods of disposal.
The materials are recyclable as mentioned in its marking. By recycling or others forms of re-utilization of old appliances, you are making an important contribution to protect our environment.
Please inquire at the community administration for the authorized disposal location.