USER MANUAL PREMIUM J-280 JACUZZI
Installation Manual and Use & maintenance KEEP CAREFULLY
Important information 16
FCC notice 16
Important safety instructions 16
Electrical safety 17
Start-up instructions 17
Control panel 18
Characteristics and controls 19
Operating instructions 20
Filtering cycles 20
Spa maintenance 22
Draining and refilling 23
Keeping your spa clean 23
Winterizing 23
Restarting your spa in cold weather 24
Maintenance of water quality 24
Conditions and error messages 24
Troubleshooting 26
Wiring diagram J-210/J-220 27
Wiring diagram J-230/J-270/J-280 27
Your Jacuzzi® Premium spa is constructed to the highest standards. However, because heat retentive materials are utilized to insulate the spa for efficient operation, an uncovered spa surface directly exposed to sunlight and high temperatures for an extended period is subject to permanent damage. These components are not covered by the warranty.
Keeping the insulating cover in place anytime the spa is not in use.
Jacuzzi Premium constantly strives to offer the finest spas available, therefore modifications and enhancements may be made which affect the specifications, illustrations and/or instructions contained herein.
FCC Notice.
This equipment has been tested and found to comply with the limits for a Class B Digital Device, pursuant to Part 15 of the FCC Rules. These limits are designed to provide reasonable protection against harmful interference in a residential installation.
This equipment generates and uses radio frequency energy. If not installed and used in accordance with the instructions, it may cause harmful interference to radio. However, there is no guarantee that interference will not occur in a particular installation.
If this equipment does cause harmful interference to radio or television reception, which can be determined by turning the equipment off and on, the user is encouraged to try to correct the interference by one or more of the following measures:
Rearrange or relocate the receiving antenna.
■ Increase the separation between the equipment and receiver.
- Connect the equipment into an outlet on a circuit different from the circuit connected.
Consult the dealer or an experienced radio/TV technician for help.
Important Safety Instructions
READ AND FOLLOW ALL INSTRUCTIONS BEFORE OPERATING THE SPA!
■ Do not permit children to use this product unless they are closely supervised at all times.
Use the straps and clip tie downs to secure the cover when not in use.
The suction fittings are sized to match the water flow created by the pump. If they are replaced, make sure that the flow rate is the same.
Never operate the spa if the suction fittings are broken or missing. Never replace a suction fitting with one rated less than the flow rate marked on the original suction fitting.
■ When the spa is in use, do not use any electrical appliance, unless such appliances are built-in by the manufacturer.
The water in a spa should never exceed 40^ . Lower water temperatures are recommended for young children, pregnant women and when spa use exceeds 10 minutes.
The use of alcohol, narcotics or medicines may cause drowsiness, and affect pulse rate, blood pressure and circulation. Avoid using these substances before getting into the spa.
■ Do not use a spa immediately following strenuous exercise.
The MaxiJacuzzi® are safe products, manufactured in compliance with standards 60335-1:2002, 60335-2-60:2003, 60825-1:1994+A1+A2, EN 55014-2, CISPR 22 CLASS B, EN 61000-3-2, EN 6100-3-3 and tested during production to ensure user safety.
■ Installation must be performed by qualified personnel who ensure compliance with current national regulations and who are also authorized to issue a certificate of compliance with proper installation procedures.

It is the responsibility of the installer to select materials based on their intended use, to carry out work properly, to check the condition of the system that the unit will be connected to and that it ensures safety of use also concerning maintenance work and the possibility to examine the system.
The MaxiJacuzzi® are class "I" appliances and therefore they must be permanently connected, without any intermediate connections, to the electrical system and to the protection system (earth system).

The electrical system of the building must be provided with a 0.03A differential switch and with an efficient protection (earth) circuit. Check for proper operation of the differential switch by pressing the TEST button, which should trip.

Parts incorporating electrical components, except remote control devices, must be located or fixed so that they cannot fall into the spa. Live components and equipment must be out of reach of individuals in the spa.
■ For connection to the electrical mains, it is necessary to install an omnipolar cut-off switch as per the values indicated in the chapter "Electrical characteristics," which is to be located in an area which is compliant with safety instructions and which cannot be reached by the users who are using the MaxiJacuzzi®. It is mandatory to comply with this instruction. Any other procedure is prohibited.
- The installation of electrical devices and equipment (sockets, switches, etc.) near the MaxiJacuzzi® must be in compliance with legal standards and regulations in the country where the MaxiJacuzzi® is installed.
The omnipolar switches which were previously mentioned must ensure an opening of contacts of at least 3mm , and they must be compliant with the voltage and current as specified in the chapter "Technical characteristics".
For the equipotential connection as required by specific national standards, the installer must use the terminal provided (standard EN 60335.2.60) in the electrical box, and marked with the symbol . In particular, an equipotential condition must
be established for all metallic masses surrounding the spa, for example water and gas pipes, metallic platforms, and so on.
Start-up instructions
Read each step in its entirety before proceeding with that step.
■ Remove any dirt from the spa. Although the spa shell has been polished at the factory, you may want to treat it with a specially formulated spa cleaner and wax available from your dealer prior to filling the first time.
Filling the spa
Remove the filter cover and the filter cartridge as indicated in the chapter on cleaning the filter.
Position the end of the hose inside the filter connection and fill the spa until the level of water covers all of the nozzles, without however reaching the headrest.
Do not overfill your mini-pool.
N.B.: If your water is extremely hard, it is preferable to fill halfway with hard water and the rest of the way with softened water. Or, you may fill entirely with hard water if you use a special water additive.
Always fill the mini-pool from the filter fitting so as to expel air trapped in the pump intake. Otherwise, the air may remain in the nozzle of pump, preventing the pump from circulating the water. After filling, make sure the filter is installed properly before applying power to the mini-pool (refer to the chapter on cleaning the filter).
■ Checks
Open the cabinet access panel and check all pump fittings to make sure they are tight. Loosening can occur during shipping and handling.
■Turning on power
Turn on power to spa at the home's circuit breaker: the heater and pump automatically activate. The water temperature LED flash on the control panel and the messages "COL" or "ICE" appear.
Start-up
Activating the pump(s)
■ Addition of chemical additives at first start-up
Add the spa water chemicals as recommended by your dealer (refer to the chapter "Water Quality Maintenance. for general guidance.
N.B.: Always cover the spa (except when mixing chemical additives!) with the insulating cover, so as to reduce heating times and thus minimize operating costs.
The time required for initial heat-up will vary depending on the starting water temperature.

1 Electrical box
2 Power supply entrance(s)
3 2-Speed Pump (pump 1)
4 Heater
5 Pump drain plug(s)
6 1-Speed pump (pump 2)
7 Ozonator (optional)
8 Injector (optional, required for Ozonator)
9 Display
WARNING!
Do not get in the spa until the quantity of disinfectant has not dropped below the level recommended by the manufacturer and/or by your retailer.
Always check water temperature carefully before entering spa.
off automatically to conserve energy. Simply press either jets button to continue operation for an additional 20 minutes.
G. Heat Indicator: lit when heater is on.
Control Panel

A Display: can display current water temperature, water temperature set point, selected skimming/heating mode, and error messages.
B. (+) Button: increases water temperature set point.
C. (-) Button: decreases water temperature set point.
The range of temperature adjustment goes from 18 to 40^ . Factory default setting is 38^ .
D. Light button: switches the underwater light on and off.
Activates the LED lighting system, if present.
The light stays on for an hour and then switches off so that the light bulb will last longer.
E. Pump 1 button: turns pump 1 on and off. Press once for low speed; press a second time for high speed; press a third time to turn pump off.
F. Pump 2 button (only for models with two pumps): turns pump 2 on and off. Press once to turn it on; press twice to turn the pump off.
The jets operate for 20 minutes after activation; then they switch

The model shown is the J-280. The arrangement of the jets and the characteristics vary from one model to the next.
- Control Panel
- Headrest
- Air regulators (4)
- Cup Holder (4)
- Selector for type of massage (1)
- Lighting system
- 6a: Underwater spotlight (standard equipment)
- 6b: LED lighting system (optional)
- Suction intakes, equipped with filters. The filters must be cleaned periodically
- Cascade, equipped with lever to control its flow rate.
- Heater return fitting.
- Filter grille, under which the filter cartridge is located.
- Loudspeakers (4, optional)
- Audio System (optional)
The spa control system has automatic functions that operate upon start-up and normal operation.
Upon power up, the display shows the following information:
■ current version of software: 356 in models with circulation pump; 556 in models without circulation pump
"888" (all LED indicators are on: control of operation of all display segments and indicator lights).
■ After the initial start-up sequence ends, the actual water temperature is displayed. If water temperature is below 38^ C (factory setting) and the spa is set in skimming/heating mode "F1-F3", the heater will come on. The heater goes off when water temperature has reached 38^ C.
N.B.: it is normal for the heater to turn on after the spa is first filled because tap water is often very cold.
Setting water temperature

The spa's thermostat provides optimum control of water temperature. The temperature set point (set temperature) can be adjusted from 18^ to 40^ . To increase the set temperature, press button (+). To lower it, press (-).
N.B.: The first press of either WARMER (+) or COOLER (-) button displays the set temperature.
Pump activation

Button 1 activates the two-speed pump, the first press at low speed, the second press at high speed. Pressing for a third time turns the pump off. Button 2 activates pump 2, which only operates at high speed.

This button makes it possible to turn the spa light on.
The light stays on for an hour. This time can be extended by pressing the key again.
LED lighting system (optional)
Offers 7 fixed colours and 3 random sequence modes.
Press the "spotlight" button once to turn the light on in "random and fadeout" mode. Then press the key repeatedly to turn the light off or to select one of the 7 fixed colours, a random sequence of fixed colours or a random sequence of flashing colours, in this order:
random with fadeout - off - WHITE - off - SKY BLUE - off - VIOLET - off - BLUE - off - LIGHT GREEN - off - DARK GREEN - off - RED - random steady colours - random flashing colours - off.
Press the "Spotlight" button with no more than 3 seconds between presses. If you press the key after 3 seconds the sequence starts over from the "random with fadeout" mode.
NOTE: Any time the light is manually turned on, it will automatically turn off after approximately 1 hour.
Selecting desired massage action

Each model incorporates a massage selector that allows you to customize the massage and performance by diverting water between various jet systems.
Simply turn massage selector to position A (Combo), B o C, to divert water pressure to various jet groups.
N.B.: The valve is designed to operate in positions A (Combo), B, and C for optimum performance.
For optimum filtration benefits, leave the valve in position A when spa is covered. Select position B or C for maximum jet performance during spa use.
Adjusting Individual Jet Flow

The water flow to the individual jets in your spa can be increased or decreased by rotating the outside jet face.
Many jets are also equipped with a direction adjustment module, so that you can aim the jet in the desired position.
N.B.: always keep at least 5 jets open so as to ensure efficient water filtering.
Air controls

Some jets have a dedicated air adjustment. Turn the knob clockwise to reduce the amount of air or counter-clockwise to increase it.
To minimize heat loss, all air controls should be closed when the spa is not in use.
Filter cycles
The control system activates a programmable "standard" or "economy" skimming/heating cycle. These cycles utilize pump #1 and the filter cartridge to clean the water quickly and minimize their "bath-tub ring" effect.
Standard heating/ filtering mode for models without circulation pump
(the display shows the codes F1 to F3)
This mode is normally selected in areas with cold climates where heating times are longer due to a lower ambient temperature.
In these modes, the water temperature is regulated by the set temperature, low-speed pump, and heater which turns on as needed. Once the programmed temperature has been reached, the heater and the pump go off. they come back on at the next programmed filtering/heating cycle, or when the temperature drops below the set value.
Standard heating/ filtering mode for models with circulation pump (available only on J-230, J-270 and J-280)
(the display shows the codes F0 to F3)
The same considerations made for the models without circulation pump, except that the temperature of the water is controlled by the set temperature, by the circulation pump and by the heater, which is activated when necessary. Once the programmed temperature is reached, the heater shuts off and the circulation pump continues running, so as to ensure optimal filtering of the water.
Economy heating/filtering mode (all models)
(the display shows the codes F4 to F6)
This mode is normally selected in areas with cold climates where heating times are longer due to a higher ambient temperature. In these modes, the water temperature is regulated by the set temperature, by the pump operating at low speed (or by the recirculation pump, if present), and heater only when a programmed filtering cycle is active.
These modes consume far less energy than standard modes outlined above.
Lock Modes (L1 - L2)
These modes are designed for use during spa service or to prevent unauthorized use.
Economy skimming/heating modes
■ On the control panel, simultaneously hold down both buttons (+) and (-) and release.
Press either button (+) or (-) to select respectively the filtering/heating mode or lock modes L1-L2 described below:
- filtering mode for models without circulation pump
Standard heating/filtering mode(F1-F3)
(the heater is automatically activated if necessary)

F1: 4 hours of skimming/heating per day (one 2-hour cycle every twelve hours)
F2: 6 hours of skimming/heating per day (one 2-hour cycle every eight hours)
F3: 8 hours of skimming/heating per day (one 2-hour cycle every six hours)
Economy filtering/heating modes
(the heater is activated only during the filtering cycles)

F4: 4 hours of skimming/heating per day (one 2-hour cycle every twelve hours)
F5: 6 hours of skimming/heating per day (one 2-hour cycle every eight hours)
F6: 8 hours of skimming/heating per day (one 2-hour cycle every six hours)
Lock modes

L1: Full lock out (de-activates all mini-pool functions)
L2: Partial lock out
(disables the buttons for jets and light to prevent unauthorized use of the spa). In this mode, the skimming/heating mode continues to operate as programmed. The temperature display flashes when this function is enabled. EXAMPLE: the "F3" skimming/heater cycle was enabled prior to choosing lock mode. The mini-pool continues to perform the "F3" cycle until lock mode is cancelled, allowing another cycle to be selected.
■ To set the time of the first skimming/heating cycle (after purchase of the spa) connect the spa to the power supply two minutes before the desired time.
EXAMPLE: If you desire your first filtering/heater cycle to begin at 10:00 AM turn off the spa and turn it back on again at 9:58 AM.
- filtering mode for models with circulation pump (available only on J-230, J-270 and J-280)
Standard heating/filtering mode (F0-F3)
(the heater is automatically activated if necessary)

F0: 5 minutes of filtering per day.
All pumps are activated for this period of time, so as to remove any impurities from the pipes).
F1: 1 hour of filtering per day (default)
(a half-hour cycle every 12 hours)
F2: 1 1/2 hours of filtering per day (a half-hour cycle every 8 hours)
F3: 2 hours of filtering per day
(one half-hour cycle every 6 hours)
Economy filtering/heating modes
(the heater is activated only during the filtering cycles)

F4: 1 hour of filtering/heating per day (one half-hour cycle every 12 hours)
F5: 1 1/2 hours of filtering/heating per day (a half-hour cycle every 8 hours)
F6: 2 hours of filtering/heating per day (one half-hour cycle every 6 hours)
Lock modes

see "filtering mode for models without circulation pump"
Spa maintenance
Proper and regular maintenance of your spa will help it retain its beauty and performance.
Cleaning the filter (models J-210)
The Jacuzzi® Premium spa is equipped with a basket and a high-performance filter cartridge, located in the compartment on the inner wall of the spa.
Impurities are filtered by the pump which draws water into the basket and filter cartridge which, for best performance, must be cleaned about once a month, depending on frequency of use of the spa. For this purpose, proceed as follows:
A. Turn off power to spa.
B. Remove the cover, unscrew the cartridge and extract it.
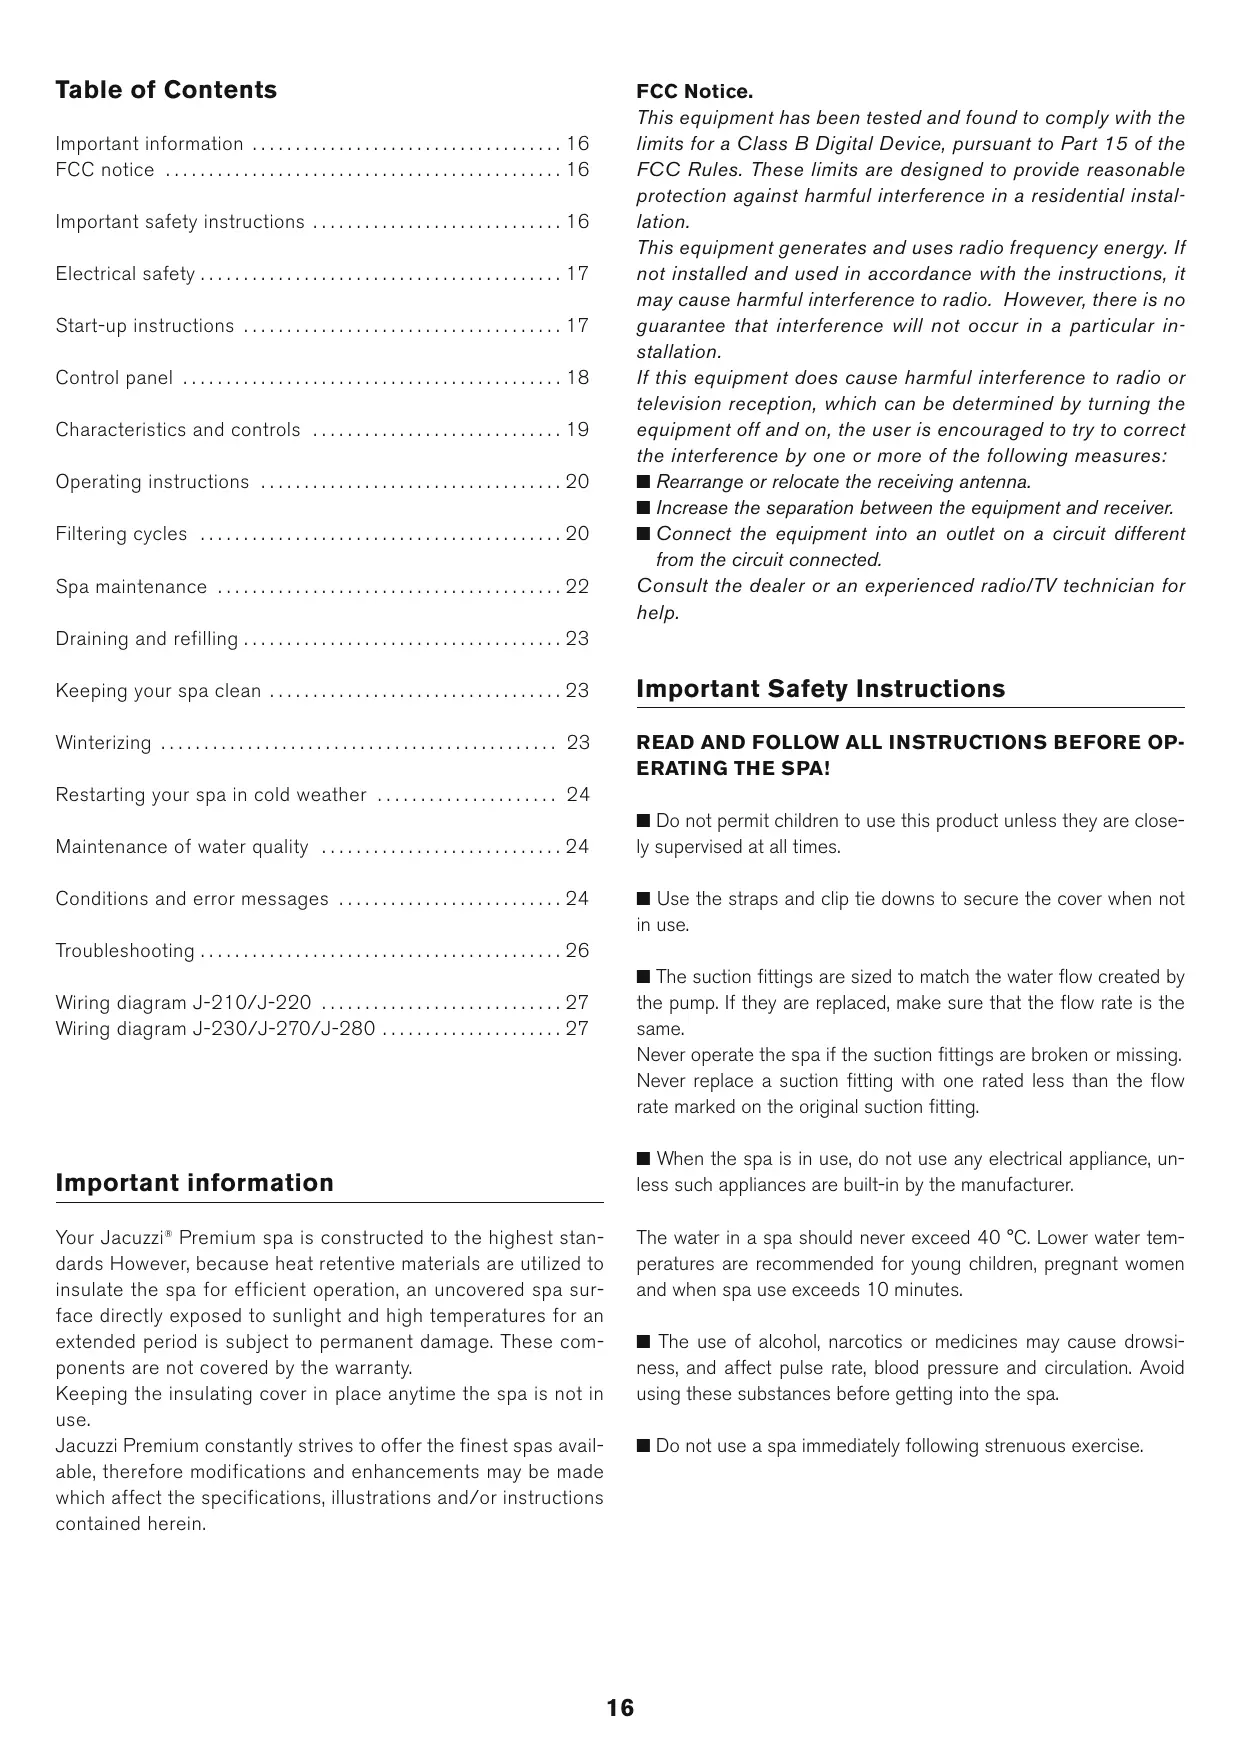
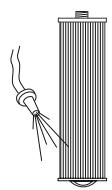
C. Rinse the impurities out of the folds in the filter using pressurised water. Work from the top down. Repeat until all folds are clean.
Cleaning the filter (models J-230, J-270 and J-280)
These models are equipped with a bag and a high-performance filter cartridge, located under the cover, as shown below.
Impurities are filtered by the circulation pump (if included) or by pump 1, which draws water into the bag and filter cartridge which, for best performance, must be cleaned about once a month, depending on frequency of use of the spa. For this purpose, proceed as follows:
A. Turn off power to spa.
B. Remove the cover by lifting it
C. Release the skimmer bag from the clips and clean it.
D - E. Remove the filter cartridge by turning it counter-clockwise (to release it from the fitting) and extract it.
F. Rinse the impurities out of the folds in the filter using pressurised water. Work from the top down. Repeat until all folds are clean.
G. Immerge the cartridge of the filter in the spa, with the threaded end up to remove trapped air bubbles. Then hold the cartridge under water, so as to prevent possible air bubbles from forming during installation.
H. Place the cartridge back in the housing, and turn it clockwise to re-install it on the fitting.
Note the direction of installation.
Do not over tighten.
I. Install clean skimmer bag back onto clips.
J. Install the filter cover. Turn power to the mini-pool back on.

B


C
D

E
F

G


0

0
- The filter cartridge must be thoroughly cleaned on a regular basis. It is advisable to soak the filter overnight in a plastic container filled with a solution of water and a specific cleaning product.
The cartridge has a life cycle of about two years, provided it undergoes regular maintenance and is used with good quality water.
Replacement cartridges may be purchased from your Jacuzzi Premium dealer.
The suction intakes of all J-210 models are equipped with filters that prevent any impurities from entering the massage selectors and pump 2. These filters should be cleaned about every 2 months, or whenever there is a decrease in the performance of the pump.
Draining and refilling
About every 3 months, you will want to replace the water in the spa. Frequency of water replacement depends on frequency of use, care taken in maintaining water quality, etc.
You will know it is time for a change when you cannot control suds and/or you can no longer see the normal sparkle to the water, even though the key water balance measurements are all within the proper parameters.
WARNING! Turn off power to spa before draining it. Do not turn the power back on until your spa has been refilled.
If it is extremely cold, and the spa is outdoors, freezing could occur in the pipes of the hydraulic system (see the section on "Winterizing").
If the weather is very warm, do not leave the spa exposed to direct sunlight.
To drain your spa, perform the following steps:
1. Turn off power to spa.
- Remove the front panel under the control panel.
- (fig. A) Cut the clamp and move the hose outwards, keeping it above the level of water in the tub.
- (fig. B) Unscrew the plug (1), place the hose in a ground drainage point and turn the valve (2).

- After draining the water, close the valve and screw in the plug, without tightening excessively. Then place the hose back in a vertical position and fasten it with a clamp (fig.A).
- Reinstall the front panel and refer to the chapter o first startup to fill the spa.
N.B.: Always fill the mini-pool using the filter fitting.
Keep your spa clean
To preserve the sheen of your spa's surface, it is crucial that you avoid using abrasive cleaners or cleaners which have adverse effects on the surface.
Regardless of the cleanser used, use extreme care to assure that no soap residue is left on the surface. This could cause suds when the spa is refilled.
Headrest Care

Remove and clean the headrest cushions as needed with soapy water using a cloth or soft-bristle brush.
N.B.: Always remove the pillows when adding chemical shock treatment to the spa water. The pillows can be returned to the spa when the sanitizer reading drops below 4 ppm.
To remove the headrests:
- Grasp center pillow insert (A) with finger tips and gently pry outward from pillow base (C).
- Use a standard screwdriver to loosen and remove mounting bolts (B) from pillow base.
- Assemble in reverse order after cleaning, taking care not to over tighten.
Maintaining the cover
Using the insulating spa cover anytime the spa is not in use will significantly reduce your operating costs, heat-up time and maintenance requirements.
To prolong the life of the cover, handle it with care and clean it regularly using mild soap and water or specific products.
N.B.: Never allow anyone to stand or sit on the cover.
Panel maintenance
The panels do not require any special maintenance. To clean them, just wipe them with a clean cloth and a neutral detergent solution.
ATTENTION: do not direct jets of water against the panels, since electro-mechanical parts are located behind them.
Winterizing
■ Your Jacuzzi® Premium spa is designed to automatically protect itself against freezing when operating properly.
During periods of severe freezing temperatures, you should check periodically to be certain that the electrical supply to the spa has not been interrupted.
■ In extreme cold weather, choose the F3 "Standard" skimming/heating mode to prevent freezing.
If you do not intend to use your spa, or if there is a prolonged power outage during periods of severe freezing temperatures, it is important that all water be removed from the spa and equipment to protect against damage from freezing.
In emergency situations, damage can be minimized by taking the following steps:
Restarting your spa in cold weather
If you want to start up your spa after it has sat empty for a time in freezing temperatures, check whether the water remaining in certain sections of the piping is still frozen: this situation may block water flow preventing the spa from operating properly and possibly damaging the equipment.
We recommend you consult your dealer for guidance before attempting to restart your spa under these conditions.
Water quality maintenance
Maintaining the quality of the water within specified limits will serve to enhance your enjoyment and prolong the life of the system. It is a fairly simple task, but it requires regular attention because the water chemistry involved is a balance of several factors.
A careless attitude in regard to water maintenance will result in poor and potentially unhealthy conditions for soaking and may even damage your spa.
For specific guidance on maintaining water quality, consult your dealer who can recommend appropriate chemical products for sanitizing and maintaining your spa.
CAUTION: Never store mini-pool chemicals in the compartments located under the spa.
pH Control
pH is a measure of relative acidity or alkalinity of water and is measured on a scale of 0 to 14. The midpoint of 7 is said to be neutral. Above this value the water is alkaline and below it, it is acidic.
IT IS VERY IMPORTANT TO MAINTAIN A SLIGHTLY ALKALINE CONDITION OF 7.4 to 7.6.
A low pH will be corrosive to metals in the spa equipment. A high pH will cause minerals to deposit on the interior surface (scaling); in addition, the ability of the sanitation agents to keep the spa clean is severely affected as the pH moves beyond the ideal range.
Sanitizing
To destroy bacteria and organic compounds in the spa water, a sanitizer must be used regularly.
There are many suitable additives for the spa. Some are necessary to compensate for out-of-balance water, some aid in cosmetic water treatment and others simply alter the feel or smell of the water.
Your dealer can advise you on the use of these additives.
CAUTION: Do not use chlorine tablets (Trichlor) in your spa: this chemical can have an extremely corrosive effect on certain materials in the spa. Damage caused by use of this chemical, or improper use of any chemicals, is not covered under the spa's warranty.
Ozonator (optional)
If you have elected to have your mini-pool equipped with the o-zone system, you will find that your water stays fresh and clear with significantly less chemical sanitizer usage, while it will not be necessary to change the water so often.
Conditions and error messages
"Summer" mode (models with circulation pump)
If the water temperature exceeds the set temperature by 1^ , the spas enter "summer" mode. The circulation pump is automatically deactivated.
■ Summer mode is not activated until water temperature reaches 35^ .
To help prevent a "Summer Mode" condition, it may be necessary to reduce the filtering/heating cycle in warm weather.
Overheating

Overheat protection. Heater is deactivated.
Do not get into the spa, the water may be too hot.
- To correct the situation:
■ Remove the spa's cover and allow your spa to cool down.
■ Program the filter settings for "Economy" mode.
■ When the water temperature drops below 44^ , the spa will resume normal operation.
If the temperature does not drop below 44^ , contact a Jacuzzi Service Centre
Keep in mind that the spa's ability to cool is directly affected by the ambient temperature: an excessively hot ambient temperature may prevent the spa from cooling down because its fully insulated construction is designed to retain heat and to minimize operating costs.
The panel shows SN1

Open sensor (heater is deactivated) or short circuited sensor (mini-pool is deactivated). The upper-limit temperature sensor is not functioning.
■ Contact an authorized Jacuzzi Service Centre.
The panel shows SN2

Open or short-circuited sensor (heater disabled). The temperature sensor is not functioning.
■ Contact an authorized Jacuzzi Service Centre.
The panel displays FL1 or FL2 (models without circulation pump)


If the message "FL1" flashes on the display, it means that the pressure switch is not working perfectly when pump 1 is activated.
A flashing "FL2" display means the flow switch is malfunctioning closed.
This error will cause the heater to deactivate.
- To correct the situation:
■ Check that the water level is about 3cm from the lowest headrest. Add water if necessary.
Check for clogged/excessively dirty filter cartridge.
- Eliminate any air locks from pump 1 by unscrewing the upper drain plug for a few seconds. Then screw the plug back in.
If the problem persists, contact an authorized Jacuzzi service centre.
The panel displays FL1 or FL2 (models with circulation pump)


If the message "FL1" flashes on the display it means that the flow switch is not working perfectly, the cartridge of the filter is dirty or there is air trapped in the circulation pump.
A flashing "FL2" display means the pressure switch is not properly closed.
This error causes deactivation of the heater. Pump 1 might be deactivated as well.
The panel shows COL

The temperature has dropped 11^ below the set temperature. Pump 1 (or the circulation pump, if included) and the heater are activated to bring the temperature to 8C^ from the set temperature.
No corrective action is required.
N.B.: this is a normal condition during the first filling of the spa, since tap water is often very cold.
The panel shows ICE

Freeze Protection - A potential freeze condition has been detected.
■ No operation is required. The main pump (or the circulation pump, if included) and the heater will activate to circulate warm water through the plumbing until the pool is out of danger.
Panel displays - - -

The safety software has been activated and the spa is deactivated; a problem has been detected which may damage the spa or its components.
■ Contact an authorized Jacuzzi Service Centre.
If the spa is not working the way it should, please first review all the installation and operating instructions in this manual and check the message on the panel display. If you are still not satisfied it is working properly, please follow the troubleshooting instructions provided.
None of the components are working (pump, light)
Is there power to the spa?
Is the household circuit breaker tripped?
■ Contact an authorized Jacuzzi Service Centre.
Pump does not operate but light does
Press the "JETS" key. If the water remains still, check the level and make sure the spa is plugged in. If the problem persists, contact an authorized Jacuzzi service centre.
The main pump operates but no water flows from the jets. Pump may not be properly primed.
This can happen after the spa is drained and refilled.
Press the JETS 1 button several times, never leaving the motor on for more than 5 to 10 seconds at a time.
Disconnect the power supply and unscrew the plug of the deviator valve to let the air out and/or remove the filter. Ensure that the deviator valve has been tightened and/or that the filter has been re-installed before re-connecting the spa to the power supply, then re-start the pump.
Poor jet action.
Press the JETS 1 button to make certain the pump 1 is on.
Place the air control in the "on" position.
Check that filter is not dirty and clean as necessary.
Make sure jets are fully open.
Water is too hot
Reduce temperature setting.
Water is too cold
Check temperature setting.
■ Keep the spa cover in place while heating.
■ Check the settings to see if your spa is in economy mode (see chapter "Filter cycles").
If the problem persists in spite of these checks, contact your retailer or an authorized Jacuzzi service centre.

J-210

J-230/J-270/J-280
Sommaire
IPEd NcNoJIb3OBAHnEM MHHbACCEHa IPOyTtE N BbINOJHnTE BCE IHCTPyKlun
He n03B0JMyTe DeTAM NOJb3ObaTbC8 3TMMnHn6accenHom 6e3 cTpororo nNoctoHHoro Ha3opa.
■Пи НИСПОЛьЗOBAHIN MИNHбACEйа уСТаНВЛВаNTe KPOВЛЮ,ЗАКрЕПЛЯЕ eCпЕЦАльБHIMп рЕмшКамИ.
Pa3Mep BOoO3a6OpHbIX CoeINHeHn COOTBeTCTByET npOn3BOInTeJIbHOCTn HAcOca. B cIyuee 3aMeHbI y6eInTeCb, YTO npOn3BOInTeJIbHOCTb OINHaKOBa.
HnKOrda He BkIIOaIte MmNbAcceH, ecJI BDO3a6OpHbIe COeINHeHn IcnpUeHbI nJIn OTCyTCTBYOT.
HnkOrda He 3aMeHnTe BODo3a6OpHoe CoeDInHeHne dpyrUm, npOn3BOdntelbHOCTb KOTOPO Hxke Toi, KOtOpa yKa3aHa Ha nCXoDHOM.
■ Bo Bpemr nCNoJb3OBAHnMmN6accEHa He noJIb3yIteCb HnKaKmN 3JeKtpnueckmN np6OpamN, ecn OHn HE BCTPOeHbIBaHHy MmN6accEHa n3rotOBuTeJIeM.
Boda B MInHbaccseHne He DoJnxHa HnKOrda pReBbIaTaB 40^ . PekomeHdyetc6oJee Hn3kaTempepatya Bobl, ecnn MInHbaccseHOM Nolb3yOTcMaJeHbKne DeTu, 6epeMeHHbIe XeHsHbI N/INn PpOdoJxHTeNbHOCTb rnpomaccaxa npeBbIaeaT 10 MNHyT.
YnOTpe6JIeHne CnnpTHbIX HAnITKOB, HApKOTIKOB IJI neKapCTBeHHbIX npeNapaTOB MOKeT Bbl3BaTb COHJIIBOCtB, I3MeHNTb cepdue6HeHne, KPOBHOe DaBJIeHne I KPOBOTOK. I36aIte yNoTpe6JIeHn 3TuX BeSeCTB nepeI NCNoJIb3OBAHnEM MmHn6accEHa.
He noJIb3ObaTbcMnHnbaccSeHOM cpa3y Je nocJeYTOMHTeJIbHOJ DeaTeJIbHOCTN.
3JIeKtpnuecka6e3OnaChOcTB
Munh6accenbl MaxiJacuzzi® - 3TO NaJeKbIe N3dJIy, n3ROTOBJIeHHbIe C CO6JIIODeHnEM HOpM 60335-1:2002, 60335-2-60:2003,60825-1:1994+A1+A2,EN 55014-2, CISPR 22 CLASS B,EN 61000-3-2,EN 6100-3-3 INcblTaHHbIe BO BpEMr IpnO3BOIDCTBa,IЯ OBeCpeHnIe 6e3OpaCHOCTN PONb3OBaTeJIa.
YctaHOBka DoJXHa BbIOpHЯTbCk KBaIINpHIpOBAHHbIM nepcoHaIOM, KOToPbI DoJXeH rapaHTnpoBaTb COJIIODeHne DeiCTBvUOx HAIOHaJIbHbIX Tpe6ObaHn, a TaKxe 6bITb yONlHOMOeHNbIM BblDaBaTb aTTecTaCOOTBeTCTBn, IOnTBePckJaIOuN npaBnIbHyIO YcTaHOBky.

OTBETCTBEHHOCTBU OYCTAHOBZUKA YBJIaTcBAb6Op MaTePnaNoB, COOTBETCTBYUzHX Ha3NaueHnIO, npaBnIbHOCTb NcPOJHeHnRApoB, nPoBepKa CoCTOHN CnCTeMbI, K KOToPOI NOkJIuOaETc Pnp6Op, n erO npriOrdHOCTb dIraPaHTnpOBaHn 6e3oNacHOCTn 3KcNpyataun. 3TO TAKKe paCnpocTpaHReTc HbVINOJIHЯEmoe 06cLyXKBaHne N OCMOTp CNCTeMbI.
■ MInH6accenHbI MaxiJacuzzi® - 3TO npnbopbl Knacca "I", PO3TOMy, OHI DOJXHbI NMeTb CTAUHOAPHOe NOdklOChHeK 3JIeKtpnueCKoCetn N CnCTeme 3a3emLeHn863 npomexkyTohblx CBra3eN.

3JIeKTpuecka CnCTema 3daHna DOJIxHa NMeTb DnΦΦepenuaIbHbI BbIKIouaTeIb Ha 0,03A mNcnpaBHyO 3aunTHyIO cenb (3a3emJIeHne).PpOBepbTe NcnpaBHOCTb DnΦΦepenuaIbHoro BblKnUoataIe, Haxmam KHOKNy TeCTnPOBaHNA (TEST), KOtOpbI DoJIxKeH pa3beDInHHTbcra.

Yactn,coepxauue 3JeKtpnueckne KOMnoHentbl, 3a NCKIIOUeHNem yctpoiCTB dNCTaHcNoHHoro UynpaBJIeHnA,doJXhbl I03NuOHOPOBaTbCra NJIu fIKCNPOBaTbCra TAKIM O6pa3OM, YTO6bl OHn He MOrJn UyNaCTb B BaHHy. KomnoHentbl n O6OpudOBaHne noD hAnpJxHeHnem He doJXhbl 6bl TocTyNHbl IJa IInu, NorpyxehHbIX BMHN6accenH.
Для поклioченя К злжКтprueheckо сeТи Heo6xOIMO yctahOBnTB BceIIOJIIOCHbI BbIKIIOUaTeJIb, COOTBETCTBYIUXm XapakTepnCTnKam, npINBeDEHHbIM B rIaNabe "ЗлжКтprueheckne XapakTepnCTnKn", KOTOpbI DoJIXeH 6bITb pa3MeuE H 3OHe, COOTBETCTByIOUe Tpe6OBaHnM 6e3ONaCHOCTn I B JIO6OM Clyuae 6bITb HeoCTNXmblm ДЯн HaxOJaIUXCBA MInHbaccseHrMe XiJacuzzi"ЛIOJe.
CobnOeHne daHHbIX Tpe6oBaHn - o6a3aTeIbHoe, IIO6aIpyra npouedypa 3anpeueHa.
UyctaHOBka 3JIeKtpnuecknx yCtpoiCTB n np6bOpOB (po3ETKN, BbIKIOuATeIN n T.D.) pIOM c MaxiJacuzzi DOLXHa COOTBETCTBOBaTb Tpe6OBAHnM 3aKoHa n HOpMaM, DeIcTBYIOUIM B CTrpaHe UyCTaHOBKn MHN6accseHa MaxiJacuzzi.
Данные BCENOLIOCHьБыКИЧаTeЛДОЛЖьI OБ ecneHbT pa3MbIkaHne KOHTaKTOB MInHIMyM Ha 3 MM И OHIdoJIxHbI COOTBeTCTBOBaT bHaPryXeHnI O N TOKY, yKa3aHHbIM Bг. "TexHnueckne xapaKtepncTиK".
Дя paBHONOTeHuaJIbHOrO NOKJIoueHnA, npeDycmOTpeHHORO CNEuHaJIbHbIMN TocyIapCTBeHHbIMN HopMaMn, yCTaHOBUINK DOJXeH NcNoJIb3OBaTb CneuaJaHbHyO KJIemMy (HOPMa EN 60335.2.60) Ha 3JeKtpUeCKoK oko6Ke, 6o03NaueHHyo CmMbOLOM . B OcObeHHOCtN, Heo6xOdmo 6oecneHTb paBHONOTeHuaJIbHoe IOkJIIOUeHne BCEx MeTaJIInuecknx Macc BOKpyr MmHnbAccSeHnA, HanpImep, BOdoPBOIDhIX Ira3OBbIX Tpy6, MeTaJIInueckNX NaHeJIeB BOKpyr NepIMMeTp a N.T.D.
B TOM,ЧTO касаетс NOДROTOВКИ NOTpe6JIeHЯ TOKa pa3ЛичныМоDEЯМИ, сLEдуET obpaцаТьСЯ KpyKOBOvOCTBy NO NOДROTOВКЕ K yCTaHOBKe.
HnctpyKznn no nepbomy BKJIoueHHIO
PonHocTbIO npOHTaIte KaKdbI pyHKT nepeD BbINOJHeHem erO Tpe6OBaHn.
EcnB MnHbaccHe NmEeTc rpa3b, ydaIte ee. HecmotraHa To, qTO KOpNyc MnHbaccSeHa 6bl OTnOIpOBaHa 3aBoDe, npeD nepBbIM erO 3aOpJIHeHem erO MOxHO dOnoHNtBbHO 6bpa60TaT b OunchTeJEM IN BOCOM, CneuaJIbHO pa3pa60TaHHbIM dJa MnHbaccSeHOB, KOToPbIE MoXHO KUYNTb y OFuIuaJIbHbIX DnCTpN6bIOTOPOB.
HanoJIHeHne MmHn6accseHa
AKTINBnpyET CBeToNDNoDHyO CnCTeMy OCBeUeHnI, npHaJIuHnI.
CBeT rOpNT B TeUeHne Yaca, NocIe Yero BbIKJIouaETcA, yTObblyBvEJIuHTb DOJIROBEuHOCt b lamnbl.
E. Khonka Hacoca 1: obecneuBaet BKIoueHne n BbIKIOUeHne Hacoca 1. HaxaTb OINn pa3 JnH3KoN CKOpOCTn; HaxaTb DBA pa3a JnBbICOKoN CKOpOCTn; HaxaTb TpN pa3a JnBbIKIOUeHn Haocca.
F. Khonka Hacoca 2 (ToIbKO dIy MoJeIeN c 2 HacocamN). oBeCneuBaET BkJIIOUeHne I BbIKJIIOUeHne Hacoca 2. HaxaTb OIN pa3 dIy BkJIIOUeHn; HaxaTb dBa pa3a dIy BbIKJIIOUeHn HACoca.
ΦopcyHKn pa6oTaIoB B TeueHne 20 MmHyT nocNe BkIoueHn. 3aTeM OHN BbIKIOUaOTcA ABToMaTuYeCKN B ueJx 3KOHOmn 3Heprn. BHOBb HaxMtE KHOKn, yTO6bl npOdInTB pa6oTy dONOLHnteJbHo Ha 20 MmHyT.
G. Инданков HarpeBa: 3aropaeTcra, korда HARpeBaTeNb BKJIIOUeH.

PerynipoBkA TempeaTpybI BObl

TepmoperyIaTOp MInHbaccSeHa nO3BolJeT xopoWo perynipobatb Tempepatypy Bobl. BBeDeHHa TEmpepatya MoKet HaxoDnTbcra B npedeJax ot 18^ do 40^ .ДЯ NOBbIeHnA BVeDeHNoI TempepatypbI hAxMnte KHOKNy (+) ,aДЯ eE NOHxKeHnA - KHOKNy (-)
"3KOHOMnHbI"peXIMΦJIbTpaCm/HarpeBa(Bce MoJeIN)
(Ha nCnJIe e NOBnJIOTcH aNnCnOf F4 do F6)
Kak npabnlo,3TOT pexHM BblbnpaetcB 30hax C TeIbIM KInMaTOM,B KOTOpbIX Bpem HaPepBa MeHbUe BvNdy 6OJIe BbICOKo TEMpepaTybl OKpykaIoue cpebl.
Pn daHHbIX pexkmax tempepatypa BOblpeylnpyetcB 3aBNCIMOCTN OT yctaHOBneHHoN TEMpepatypbl, Hacoca,
Функционуюцero Ha Hn3KoI CKOPOCTN (Ип reцирьяционно Habocа, пи habичи) ИharpeBaTeJI, TOLbKO B clyaee aKTiBaZuIN 3anporpaMMIpOBaHHoro zIKla Фильтраци.
3Tu peXnMbI nOtpe6nIOT ropa3IO MeHbIe 3Hepru, Yem CTaHdApTHbIe peXnMbI, ONNcaHHbIe Bblwe.
Pexim 6loKnpobKn (L1 - L2)
3tn pejkmbl 6bln pa3pa60taHb IJnx nCNoIb3ObaHn BO Bpem o6cnykBaHn MmH6accseHa IJN Jx Je IpnpeDynpexdHn HeynolHOMoeyHoro nCNoIb3ObaHn.
Bb6op pexma qnIbTpaun/HarpeBa
UdepKnBaTe OndHOBpeMeHNo HaxKaTbIMn Ha nAHeNnypabLeHnObe KhoNk (+) n(-)nOTnyCTnte ux.
HaxaTb KhONky (+) nIu (-) dJa COOTBeTCTByUoJero Bbl6opa peKIma fNJIbTpauu/HarpeBa Iu nppeKIMOB 6JoknPoBKn L1-L2, onncanhbix daJe:
- peximФильразиДЯ MODEЛeн 6e3 peuRPKyIaHOnHOrHaCoca
"CTaHdapThbI"peKIMΦnIbTpauu/HarpeBa(F1-F3) (HaRpeBaTeJIb aKTINBnpyetc aBTOMaTnueckn B CJIyuae Heo6xOJMoOCTn)

F1:4 yaca qnIbTpaun/HarpeBa B DeHb (OINuKl npoJOnKuTeNbHocTbIO 2 yaca uepe3 KaXdBiE 12 yacOB)
F2:6 yacobФиьТрацИ/HarpeBaВДeнь (OdINH ZIKI npoDOnKHTeJIbHocTbIO 2 Yaca Upe3 KaJDbIe 8 yacOB)
F3: 8 yacob Фильстраци/NarpeBa B DeHb (OДИN YIKN ПОДОЛЖИТЕьНOCТБIO 2 YACa Yepe3 KaJDbIe6 yacob)
"3KohmHyb"peXIM fNtpaHarpeBa (HarpeBaTeJIb aKTINBpyETcra TOnbKO B TeueHne cNKIOB fNtbaPaun)

F4: 4 yacaФильтрацин/HarpeBaВ ДeНb
(ODINH cIKn npoJOnKInTeNbHocTbIO 2 yaca uepe3 KaXdbie 12 YacOB)
F5:6 yacob cnIbTpaun/HarpeBaB DeHb
(ODINH cIKn npoJOnKuTeNbHocTbIO 2 yaca uepe3 KaXdble 8 yacOB)
F6: 8 yacob fnhbTpaun/HarpeBa B DeHb
(Одн сикл поюлжntьhoectbIO 2 уа ca uepe3 KaЖдыe 6 yacob)
Pekim6JIOKnpOBKn

PIM.: He onnpaItecb n He caIntecb Ha KpOblIO.
O6cIyXuBaHne naHeJe
PanaHn He HnykdaIOTcB CneuHaNbHOM 6cbNyXbAHnn. JyXoJa 3a HmN DoCTaTOUHO IpOTepeTb ux YnCTOn TKaHbIO, CMOeHHo B BOde C HeITpaJIbHbIM MOUOIm CpeDCTBOM.
BHIMAHHE: He HanpaBnaIte Ha naneJn cTpyu BObl, TaK KaK 3a HmM HaxOJaTc3JeKtpomexaHnueckne npbOpbl.
Iopdrotobka K 3nme
■ Mниб accrn Jacuzzi® Premium pa3pa6o7an Для obecneueHЯ abTomatUeCKO 3aunTbI OT 3amep3aHЯ B yCNoBnx npabuJbHoJ pa6oTbI.
B Te nepnoDbI, KOrDa TemnepaTypa onyckaetc HnHex Hyn, nepnoDnueckn npOBepaTe, UTo6bI 3JeKtpnueckOe NITaHHe MNHbaccseHa HNKoRa He OTKJIHOaNoCb.
B ycnoBnax cnIbHoro xoJOna Bbl6epnte "CtahapThbIn" peKIM qnlbTpaun/HarpeBa F3, YTO6bl npedotBpatNTb 3aMep3aHne.
■ Bo Bpemr HeucnoB3ObaHnMa MNH6accSeHa, B cIyuae npdoJnxTeIbHOro OTKIOUChEHHaJIeKTPnueCKoro NITaHnRA IINxge pRn HAIIMnCNIuKOM HN3KNX TempeaTp, Heo6xoDnMo NOJHOCTbIO CINTb BOyu MHN6acCeHa N 3aUNTb CNCTemy OT yUep6a, KOTOpBMy MoKeT HaHeCTn 3aMep3aHne.
YTo6bI npaBnJIbHO NOIroTOBNTb MmHn6accenH K 3nme, o6paTntecb K Bawaemy nctpn6bIoTOPy.
B 3KCTpeHHbIX CNTyaunx yuep6 MOKeT 6bITb CHNXeH, eCIN BblONJIHrOTc CNeDyUOune yKa3aHnI:
- BbINOHNTe INHCTpyKcnn no ONOPOXHeHHo MmHn6accenHa.
-CobepTe BOyu n3 NOHKeHHbIX 30H cUdeHn I CO dHa BaHHbl.
- OTKJIIOUHTe MmHbaceH ON 3JIeKtpnuecko CETN.
- Chmnte 60KobIe 6OJIIOBOUHbIe NaHeJIu HaJINTe CInBHbIe np6Kn HAcOCOB. YdaJIte np6Kn, TTo6bl BODa BbITEKJa n3 HAcOCOB n HarpeBaTeJIa.
IcnoJIb3yIte npn6Op IJnA C6opa BObl IINI dpyrooe cpeDCTBO, YTO6bl BOa He 3aJIIna OTCEK CNTEmbl.
-BHObYcTaHOBnTB npo6Kn HacocOB n o6JIuOBOUHbIe NaHeI N pOKpbITb MmN6aCseH n3OJIpyUoSeK kPoBJeI.
BkIIOUeHne MmHbaccseHa B XOJIoHbIX KJIIMaTnuecknx ycIobnax
Ipeed BKNIOUOHeHMe MNHbaccSeHa NocJe npoDoJXnTeBHOro nepNoDa, BO BpeM KOTOPoro OH HaxoDIncnyCTbIM npu OueHb HN3Kx Tempeatypax, y6eINTecb, YTO Boa, OCTabWaaC8 B HeKOtOpbx Uyactkax Tpy6, He HaxoDnTcB 3aMEp3wem COCTOAHIN. 3To MoKet npNBECTN K 6blOKIpOBKe NOTOKA BoDbI, HenCnpaBHOCTN B pa6ote MHNbaccSeHa n NOBpeXdEHNO CnCTeMbI. PekomeHdyETcO6paTntbCkBaWeMy dncTpnbIoTOpy Ipeed TEM, KaBHOBb BKNIOUHTb MNHbaccSeH.
Poeepxahne KaueCTBa BObl
Iopdepxahne kaectba BODb IB yctaHOJIeHHbIX npedeJax
no3BOJnEET npOJNTb yDOBOJbCTBnE N YBEJIuHnBaET
DOLROBeHOCTB CnCTEmbl. 3To DOBOJbHO nPoCTa
OEPaunra, HO Tpe6yUo7a IocTOnHHOro BHIMaHnra,
NOCKOBkky XmMueeCKn COCTAB BOdb 3aBNCIT OT
ypabHOBeWeHooCTn pa3JNUHbIX fakTopoB. He6pexHbIy
YXoJ 3a BOoJ MOKeT pInBeCTN K Usepe6y dJa 3doPobBy
pnI NorpyKeHN, a TaKke K NOBpeJDeHNIO MmHbAccSeHa.
JnI noJyEHnnaJBhBx yKa3aHN No coXpaHeHNIO
kaueCTBa BOdb IOpaauaTeCb K BaWeMy dNcTpnbIoTOpY,
KOTOpbI cMOKe T OpeKOMeHNDoBaT Bam XmMueeCKne
npOdyKTbI, npriOJNbIe dJa caHHTapHoN o6pa6OTKn I dJa
06cLynKBaHnMa MNHbAccSeHa.
BHIMAHHE: He xpaHnte Do6aBKn B OTCekax, mHeouxxCra nop6accenHom.
PpOBepka KncIoTHoCTn pH
YcTpaHHe HeuCnpaBHOCTeI
B cnyae, ecn mnHbaccen H pa6oTaET He npaBnIbHo, npOBepbTe Bce nHCTpyKuIN NO yCTaHOBKe N 3KcPnYatauN, coepKaunecB DaHHOM pkyoBDCTBe, I npOBepbTe coo6eHne, oTo6paXkaemoe Ha dncnlee. Ecn pa6ota octaTcR HeyDobIeTBOpHTelbHOn, BblIOJIHNTe INHCTpyKUIN, npBVeDEHHbIe IJpeSeHnI npObIeM.
Hn Ondn H3 KOMnoHETOB He pa6oTaet (HaCOC, CBeTnIbHnK)
MnHn6accenH noJckJIOUeH K nHTaHHo?
Cpa6oTaI o6uN BbIKIOUaTeIb Ha CyeTuKe?
O6paTnTbcB A bTOpn3OBaHHb CepBnchb LcHtp Jacuzzi.
Hacoc He pa6oTaE, Ho CBetnIbHnK Ropnt
HaxaTb KnaBnSy “ΦOPCYHKN”: ecn Boda HenoDbjxHa, npOBepntb yPoBeHb N y6eDnTbc8, YTO MmHn6accen H noCoeDnHc K cnCTeme nTuHn. Ecn npo6JeMa He ycTpaHareTc8, o6paTnTbc8 B aBTOpn3ObaHHb CepBuchbl LcHTp Jacuzzi.
Boda cIiNkOM ropeyra
CHN3nTb yctaHOBky TeMnepaTpybl.
Boda cInuKOM xoJOnHa
Woodlands, Roydsdale Way, Euroway Trading Estate
Bradford, West Yorkshire - BD4 6SE
Tel 01274 475179·Fax 01274 654762
www.jacuzzi.co.uk
sales@jacuzziuk.com
Jacuzzi Whirlpool GmbH
A Company of Jacuzzi Brands, Corp. (USA)
Humboldtstr. 30/323
D-70771 Leinfelden-Echterdingen
Jacuzzi France s.a.s.
ZA Le Vert Galant 23 Av. de L'Eguillette
BP 70673 Saint Ouen L'Aumone
95004 Cergy Pontoise (FRANCE)
Tel: +33 (0)1 34 40 12 60 • Fax: +33 (0)1 34 40 09 49
info@jacuzzifrance.com
Jacuzzi Bathroom Espana, SL
Sociedad unipersonal - A Company of Jacuzzi Brands, Corp. (USA)
C/Ausias Marc, 157-159
Graner, local 2
08013 Barcelona (Espana)
Tel (93) 238 5031 · Fax (93) 238 5032
www.jacuzzi.eu
spagna@jacuzzi.it
The data and characteristics indicated do not oblige Jacuzzi Europe, who reserves the right to make the necessary changes they feel opportune without forewarning or substitution
JACUZZI EUROPE S.p.A. • all rights reserved • NOVEMBER 2009