S520 - Digital Camera HP - Free user manual and instructions
Find the device manual for free S520 HP in PDF.

| Product type | Digital camera |
| Brand | HP |
| Model | S520 |
| Display | 3.0-inch TFT color LCD screen |
| Internal memory | 32 MB (23 MB available for storage) |
| External storage support | SD/SDHC memory card (not included) |
| Video resolution | 320 x 240, 640 x 480, 720p pixels |
| Digital zoom | Button zoom in/out |
| Built-in flash | Yes |
| Self-timer | Yes, with indicator LED |
| Capture modes | Photo, video, scene modes |
| Power source | Rechargeable lithium-ion battery (included), charges via USB-CA adapter |
| Connectivity | USB 2.0, AV output (composite) |
| Tripod socket | Yes |
| Wrist strap | Included |
| Box contents | Camera, battery, USB cable, power adapter, wrist strap, quick start guide |
Frequently Asked Questions - S520 HP
User questions about S520 HP
0 question about this device. Answer the ones you know or ask your own.
Ask a new question about this device
Download the instructions for your Digital Camera in PDF format for free! Find your manual S520 - HP and take your electronic device back in hand. On this page are published all the documents necessary for the use of your device. S520 by HP.
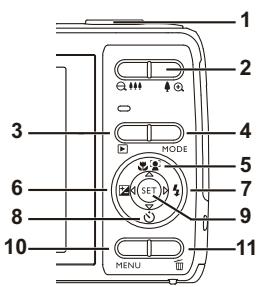
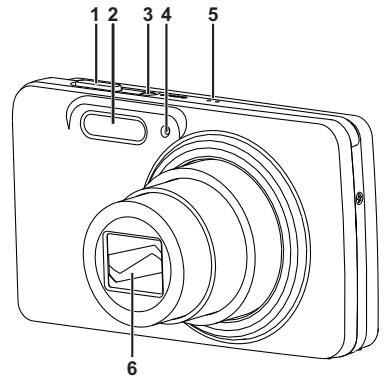
USER MANUAL S520 HP
1.Shutter button
2. Flash
3. ON/OFF Power button
4. Self-timer LED
5. Microphone
6. Lens
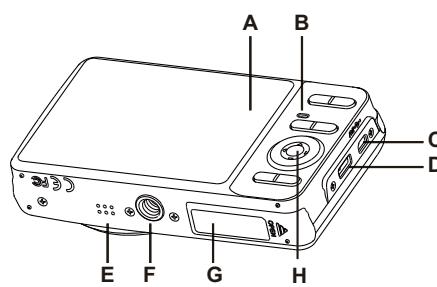
Rear View
A. LCD monitor
B. Status LED
C. USB and AV OUT terminal
D. Strap holder
E. Speaker
F. Tripod socket
G. Battery / Memory card cover
H. Set / 4-way navigation control
| Item | Function | ||
| Capture Mode | Video Mode | Playback Mode | |
| 1. | Shutter button | Record button | Photo: to capture mode Video clip: to capture mode |
| 2. | © : Zooms out ✔ : Zooms in | © : Zooms out ✔ : Zooms in | © : Zooms out ✔ : Zooms in |
| 3. | Playback mode | Playback mode | Photo: to capture mode Video clip: to capture mode |
| 4. | Switches to: Video mode > Capture mode | Switches to: Capture mode > Video mode | Photo: to capture mode Video clip: to capture mode |
| 5. | Focus | Focus | Next 10th photo or video |
| 6. | Compensation ➔ ➔ | -- | Previous photo or video |
| 7. | Flash | -- | Next photo or video |
| 8. | Self-timer | Self-timer | Previous 10th Photo |
| 9. | If any scene mode is set: switches to scene mode selection screen | -- | Photo: to display Photo Records voice memo (if “Voice Memo” is “Record”). Video clip: to play video clip |
| 10. | Capture menu | Video menu | Playback menu |
| 11. | -- | -- | Delete |
GETTING STARTED
Preparation
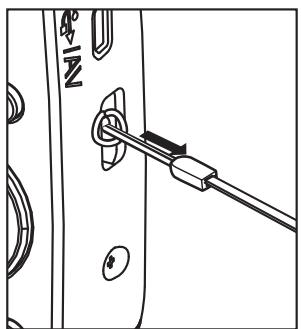
- Attach the camera strap.
- Open the battery/memory card cover.
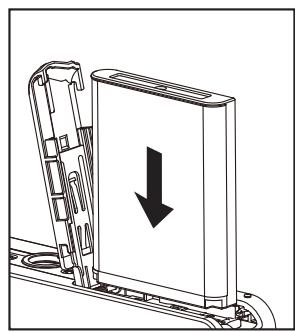
-
Insert the supplied battery with correct orientation as shown (label side front).
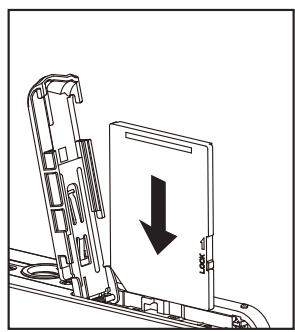
-
Insert an SD/SDHC memory card (Optional).
The camera has 32MB internal memory(23MB available for image storage), but you can load an SD/SDHC memory card to expand the camera's memory capacity.
■ Be sure to format the memory card with this camera before its initial usage.
- Close the battery/memory card cover and make sure it is locked securely.
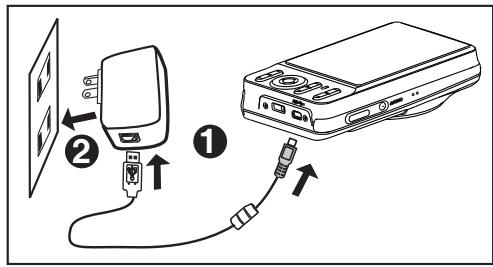
Charging the Battery
The battery is not fully charged at the time of purchase. Fully charge the battery and use it until it is discharged before you recharge it again. This maximize the performance and lifetime of the battery.
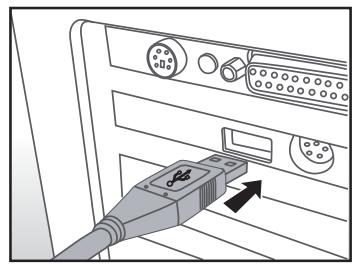
- Connect camera to USB-AC adapter with USB cable.
- Insert the plug into a wall outlet.
| Status LED | Description |
| Green (blinks slowly) | Charging normally |
| Green | Charging finished |
| Green (blinks quickly) | Error |
Capturing Photos
Your camera is equipped with a 3.0" full color TFT LCD monitor to help you compose Photos, playback recorded photos/video clips or adjust menu settings.
- Press the ON/OFF button to turn the power on.
- Press the MODE button, and set the camera mode to [ ]
-
Compose your image in the LCD monitor.
-
Pressing the button zooms in on the subject, and enlarges the subject on the LCD monitor.
-
Pressing the button zooms out on the subject, and provides a wider angle image.
-
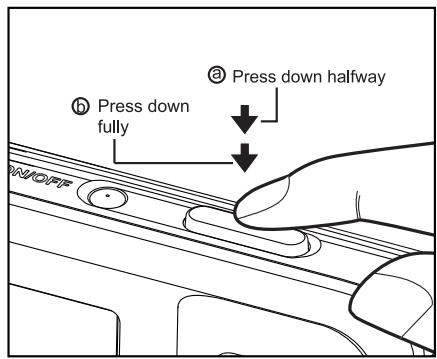
Press the shutter button.
-
Pressing the shutter button down halfway automatically focuses and adjusts the exposure, and pressing the shutter button down fully captures the Photo.
The focus area frame turns green when the camera is in focus and the exposure is calculated. - When the focus is not suitable, the frame of the focus area turns red.
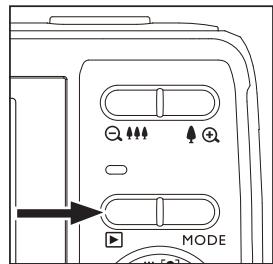
Playing Back Photos
You can play back the Photos on the LCD monitor.
- Press the button.
The last Photo appears on the screen.
-
The Photos can be displayed in forward or reverse sequence with the left or right side of the 4-way navigation control.
-
To view the previous photo, press the left side of the 4-way navigation control.
- To view the next photo, press the right side of the 4-way navigation control.
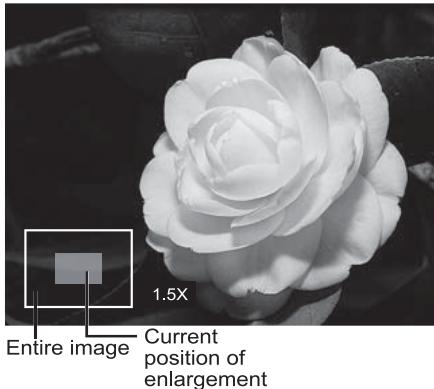
Pressing the button enlarges the photo.
To return to normal magnification, press the button.
Recording Video Clips
This mode allows you to record video clips at a resolution of 320 × 240 / 640 × 480 / 720 p pixels.
- Press the MODE button, and set the camera mode to [ ]
- Compose the subject.
- Press the shutter button.
The recording of the video clip will start.
- Pressing the shutter button one more time will end the recording of the video clip.
The recording time depends on the storage size and the subject of the video to be recorded.
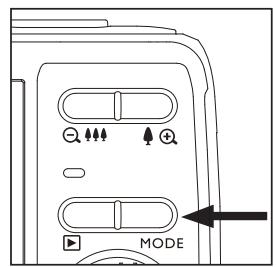
Playing Back Video Clips
You can play back recorded video clips on the camera. You can also play back sound if recorded with the video.
- Press the button.
The last video or photo appears on the screen. - Select the desired video clip with the left or right side of the 4-way navigation control.
- Press the SET button.
A press of the left or right side of the 4-way navigation control during playback allows fast forward play / fast reverse play.
- To stop video playback, press the down side of the 4-way navigation control. This stops playback and returns to the start of the video clip.
- To pause video playback, press the SET button. This pauses video playback.
To cancel pause, press the SET button again.
Erasing Photos and Videos
Erasing a single image / Erasing all images
- Press the l button.
The last photo or video appears on the screen.
- Select the photo or video you want to erase with the right side of the 4-way navigation control.
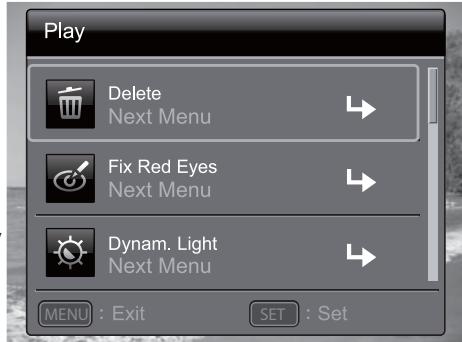
- Press the MENU button.
- Select [Delete] with the up or down side of the 4-way navigation control, and press the SET button.
- Select [Single] or [All] with the left or right side of the 4-way navigation control, and press the SET button.
[Single]: Erases the selected photo, video or the last image.
[All]: Erases all of the photos and videos except for the protected items.
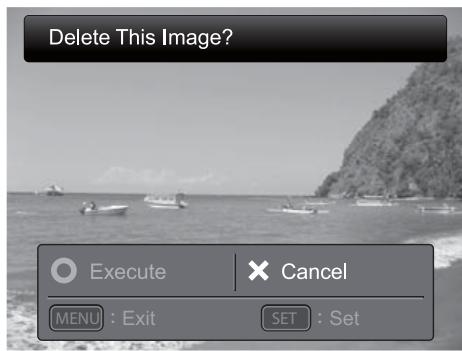
-
Select [Execute] with the left or right side of the 4-way navigation control, and press the SET button.
-
To not erase, select [Cancel], and press the SET button.
-
To exit from the menu, press the MENU button.
TRANSFERRING FILES TO YOUR COMPUTER
Minimum System Requirements
| Windows | Macintosh |
| ■ Pentium III 1GHz or equivalent ■ Windows 7/XP/Vista ■ 2GB RAM ■ 150MB available hard disk space ■ Available USB port | ■ PowerPC G3/G4/G5 ■ OS 10.3.9 or later ■ 256MB RAM (2GB recommended) ■ 128MB available hard disk space ■ Available USB port |
Downloading Your Files
- Power on your camera.
- Connect the camera to your computer with the USB cable.
- Select [PC] using the up or down side of the 4-way navigation controls and press the SET button.
- From the Windows desktop, double click on "My Computer".
- Look for a new "removable disk" icon.
- Double click on the removable disk and locate the DCIM folder.
■ Your recorded photos and video clips will be inside the folders of DCIM folder.
- Copy&Paste or Drag-N-Drop photo and video files to a folder on your computer.
Mac users: Double-click the "untitled" or "unlabeled" disk drive icon on your desktop. iPhoto may automatically launch.
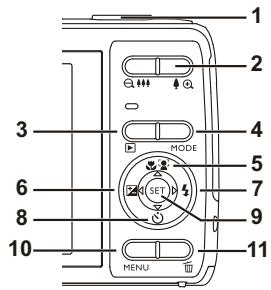
APPRENEZ À CONNAÎTRE VÔTURE APPAREIL
Vue avant
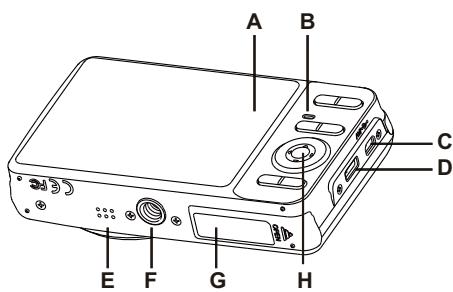
Vue arrière