
BV 6575 - Electric blender Orbegozo - Free user manual and instructions
Find the device manual for free BV 6575 Orbegozo in PDF.
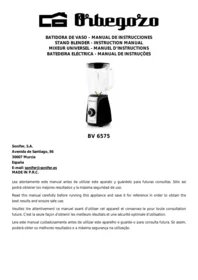


| Product type | Electric blender |
| Brand | Orbegozo |
| Model | BV 6575 |
| Dimensions (approx.) | 20 x 20 x 40 cm |
| Weight (approx.) | 2.5 kg |
| Power supply | 220-240 V, 50/60 Hz |
| Speeds | 2 speeds + Pulse function (P) |
| Pulse function | Yes, for continuous and controlled operation |
| Bowl | With lid and measuring cup |
| Care and cleaning | Dishwasher-safe parts (max 65°C), motor unit wiped with a damp cloth |
| Safety | Very sharp blades, handle with care |
| Usage duration | Max 3 minutes continuous, pause of 10 minutes |
| Use | Blending fruits and vegetables, crushing ice (max 6 ice cubes) |
| Spare parts and repairability | No user-replaceable parts - contact approved service |
| Compliance | Compliant with Low Voltage Directive 2014/35/EU and EMC Directive 2014/30/EU |
Frequently Asked Questions - BV 6575 Orbegozo
User questions about BV 6575 Orbegozo
0 question about this device. Answer the ones you know or ask your own.
Ask a new question about this device
Download the instructions for your Electric blender in PDF format for free! Find your manual BV 6575 - Orbegozo and take your electronic device back in hand. On this page are published all the documents necessary for the use of your device. BV 6575 by Orbegozo.
USER MANUAL BV 6575 Orbegozo
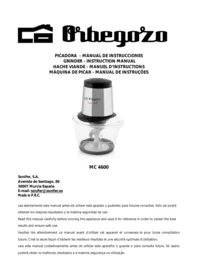
BV 6575
Sonifer, S.A.
Read this manual carefully before running this appliance and save it for reference in order to obtain the best results and ensure safe use.
Fig.6
Fig.8
When using electrical appliances, basic safety precautions should always be followed, including the following:
- This appliance can be used by children aged from 8 years and above and persons with reduced physical, sensory or mental capabilities or lack of experience and knowledge if they have been given supervision or instruction concerning use of the appliance in a safe way and understand the hazards involved. Children must never play with the appliance. Cleaning and user maintenance must never be carried out by children without supervision.
- Children should be supervised to ensure that they do not play with the appliance.
- Keep the appliance and the cable cord out of the reach of children less than 8 years old.
-
WARNING: In order to ensure your children's safety, please keep all packaging (plastic bags, boxes, polystyrene etc.) out of their reach.
-
If the supply cord is damaged it must be repaired by the Authorized Service Agent.
-
Never pull on the cord when unplugging.
-
Do not use the unit with a damaged cord or plug, or if it is not working properly.
-
Do not handle the appliance with wet hands.
-
Never immerse the appliance in water or any other liquid.
-
Make sure the appliance has been unplugged before cleaning.
-
This appliance must be installed following the national regulations for electrical installations.
-
This appliance is for household use only.
-
In case that you need a copy of the instruction manual, you can ask for it writing an email to sonifer@sonifer.es.
IMPORTANT SAFEGURADS:
- The appliance is at risk for injury in the event of misuse. Care should be taken when handling the cutting blades when the glass is empty and during cleaning.
- Always disconnect the power if left unattended and before assembling, disassembling or cleaning.
- Always use the blender on a flat, level work surface.
- Never insert metal utensils, such as knives or forks, into the inside of the jug while the appliance is operating.
- The use of accessories not supplied by the manufacturer may cause accidents.
- Never try to fit or remove the jug on the blender while the appliance is still running.
- Unplug the appliance before attempting to change any accessory or accessing any part of the liquidizer that might move during operation.
- Do not open the lid on the blender until the motor has stopped.
KNOW YOUR BLENDER
- Measuring cup
- Lid
- Jar
- Silicon ring
- Blade assembly
- Speed knob
- Main unit

HOW TO USE
Before initial use
- Before first use, unpack the appliance and place all parts on a horizontal surface.
- The jar assembly (including the measure cup, lid, seal ring 1, jar unit, seal ring 2, and blade assembly) has already been assembled into the motor unit. Disassemble to wash all detachable parts except the motor unit. Refer to the latter chapter CARE AND CLEANING.
- Once all pieces have been cleaned and dry thoroughly, reassemble.
3.1 Invert the jar unit onto a level surface, holding the jar handle, put the the seal ring 2 and blade assembly onto the jar base bottom and secure the blade assembly by turning it anti-clockwise until tight (See Fig.3)
3.2 Reposition the jar assembly with its opening upwards. Wrap the seal ring 1 around the lid bottom and put the lid onto the jar assembly. Place the measure cup exactly into the lid by fitting the small projection on the both sides of the cup into the slots of the lid and turning the cup clockwise until tight. (See Fig.4)
3.3 Finally, place the assembled jar onto the motor unit by aligning the strip on the assembled jar bottom. (See Fig.5)
CAUTION: Jar and jar base is now secure. Do not try to twist the jar and jar base onto motor unit

Fig.3

Fig.4

Fig.5
How to use
- Peeled or cored the fruit or vegetables and then cut it into small dices.
- Place the food to be blended into the jar (See Fig.6). Usually, certain amount of purified water has to be added to facilitate the smooth running of appliance. The proportion of the food and water is 2:3. The amount of mixture should not exceed the max level as indicated on the jar.
Note: never use boiling liquids or run the appliance empty.
-
Put the lid on the jar. Be sure the measuring cup is in place.
-
Plug the power cord into a standard wall outlet.
-
Turn the speed knob to the appropriate speed setting for your task.
- For quick or delicate blending tasks, turn the speed knob to P position and hold for a few seconds and then release, the knob will reset to O position automatically. Operate several times until the consistence you want is obtained
- If you want to add ingredients while the blender is working, remove the measuring cup and place through the lid opening. (See Fig.7)
- When crushing ice or hard food, keep one hand firmly on the lid.
- When the consistence you desire is obtained, turn the knob to O position.
Note: 1) For each use, the consecutive operation time should not exceed 3 minutes. At least 10 minutes rest time must be maintained between two continuous cycles, let the unit cool to room temperature before performing next operation cycle.
2) If you want to stop the machine during operation, turn the knob to O position anytime.
Important operating tips

Fig.6
Before blending, add food to be blended into the jar.

During blending, add the ingredient through the lid opening.
Fig.7
- For best circulation of food that are to be blended with some liquid, pour the liquid into the jar first, then add solids.
- Some of the tasks that cannot be performed efficiently with a blender are: beating egg whites, whipping cream, mashing potatoes, grinding meat, mixing dough, extracting juice from fruit and vegetable
- The following items should never be placed in the unit as they may cause damage: bones, large pieces of solid, frozen food, or tough foods such as turnips.
- To crush ice, add up to 6 ice cubes. If more ice is needed, remove the cup and add cubes one by one through the lid opening.
3) Do not run the appliance for more than 3 minutes per time, and only wait until the unit is cooled to room temperature before performing next operation cycles.
CARE AND CLEANING
This product contains no user serviceable parts. Refer service to qualified service personnel.
-
Before cleaning, unplug the blender.
-
Always wash immediately after use for easier cleaning. Don't let food dry on the jar assembly as this will make cleaning difficult.
- Pour a little warm soapy water into the jar and turn the knob to P position for a few seconds. And then empty the jar.
- Dismantle all detachable parts. Lift the jar assembly off the motor unit, To detach the blade assembly by turning it clockwise from the jar base bottom, and remove the seal ring 2 and blade assembly (see fig.8). In addition, detach the jar cover seal ring 1 from the jar cover

Fig.8
- Rinse the measure cup, lid, seal ring 1, jar unit, seal ring 2 and blade assembly by hands or in a dishwasher and then dry. They are dishwasher safe components, but the temperature setting shall not exceed 65° C.
- Brush the blade clean using warm soapy water, then rinse thoroughly under the tap. Don't touch the sharp blades, handle carefully. Don't immerse the blade assembly in water. Leave to dry upside down away from children.
- Wipe the motor unit with a damp cloth and dry thoroughly. Remove the stubborn spots by rubbing with non-abrasive cleaner. If liquids spill into the motor unit; first unplug the unit, then wipe with a damp cloth and dry thoroughly.
CAUTION
1) Do not immerse the motor unit in liquid to prevent the risk of electric shock.
2) Do not use rough scouring pads or cleansers on parts or finish.

Disposal of old electrical appliances.
The European directive 2002/96/EC on Waste Electrical and Electronic Equipment (WEEE), requires that old household electrical appliances must not be disposed of in the normal unsorted municipal waste stream. Old appliances must be collected separately in order to optimize the recovery and recycling of the materials they contain, and reduce the impact on human health and the environment. The crossed out “wheeled bin” symbol on the product reminds you of your obligation, that when you dispose of the appliance, it must be separately collected. Consumers should contact their local authority or retailer for information concerning the correct disposal of their old appliance.
DECLARATION OF CONFORMITY:
This device complies with the requirements of the Low Voltage Directive 2014/35/EU and the requirements of the EMC directive 2014/30/EU.
MESURES DE SÉCURITÉ IMPORTANTES
Fig.6
Fig.8
Fig.6
Fig.7
Fig.8

Brand : Orbegozo
Model : BV 6575
Category : Electric blender