KH 2340 DESIGNER AUDIO UNIT WITH CD PLAYER - Audio unit EBENCH - Free user manual and instructions
Find the device manual for free KH 2340 DESIGNER AUDIO UNIT WITH CD PLAYER EBENCH in PDF.

| Product type | Design audio unit with CD player |
| Brand | EBENCH |
| Model | KH 2340 (also KH 2341) |
| Dimensions (main unit) | 145 x 180 x 250 mm (W x H x D) |
| Weight (main unit) | Approximately 1.5 kg |
| Dimensions (speakers) | 130 x 174 x 155 mm each |
| Weight (speakers) | Approximately 1 kg each |
| Power supply | 230 V ~ 50 Hz |
| FM frequency range | 87.5 - 108 MHz |
| MW frequency range | 531 - 1602 kHz |
| CD player | Compatible with CD, CD-R, CD-RW; 1-bit dual D/A converter |
| Speaker system | 1 way per speaker |
| Radio memory | Up to 32 stations (20 FM / 12 MW) |
| CD track programming | Up to 16 tracks |
| Preset equalizer | Flat, Rock, Jazz, Pop, Classic, D-Bass |
| Sleep timer | 10 to 90 minutes in 10-minute steps |
| On/off timer | Programmable (TIMER ON / OFF) |
| Display | Blue LED |
| Remote control | Yes, with CR2025 battery (3 V) |
| Auxiliary input | RCA jack (AUX) |
| Headphone jack | 3.5 mm jack, 8-32 ohms |
| Laser class | Class 1 (safe) |
| Recommended cleaning | Soft dry cloth; avoid solvents |
| Included accessories | Remote control, battery, wire antenna, speakers (x2) |
Frequently Asked Questions - KH 2340 DESIGNER AUDIO UNIT WITH CD PLAYER EBENCH
User questions about KH 2340 DESIGNER AUDIO UNIT WITH CD PLAYER EBENCH
0 question about this device. Answer the ones you know or ask your own.
Ask a new question about this device
Download the instructions for your Audio unit in PDF format for free! Find your manual KH 2340 DESIGNER AUDIO UNIT WITH CD PLAYER - EBENCH and take your electronic device back in hand. On this page are published all the documents necessary for the use of your device. KH 2340 DESIGNER AUDIO UNIT WITH CD PLAYER by EBENCH.
USER MANUAL KH 2340 DESIGNER AUDIO UNIT WITH CD PLAYER EBENCH
GB Designer Audio Unit with CD player
I Impianto Mini-Design con CD-Player
Burgstraße 21 - D-44867 Bochum (Germany)
The following pictograms/symbols are used in these operating instructions:

Before reading, fold out the page with the illustrations and make yourself familiar with all the functions of the equipment.

Only compact discs with this mark are to be used.

This device also plays recordable (CD-R) and rewrites compact discs (CD-RW). However, due to the varying characteristics of the different recording platforms (PC, special recording devices) in use, it may be the case that CD-R and CD-RW cannot be read.

Observe all warnings and safety advice!

Caution! Danger of electric shock!

Do not expose yourself to laser radiation.
Introduction / Safety
Proper use
- Important safety advice
Do not infringe copyright
Technical information
- Setting up and connecting
- Instructions for switching on Page 7
- Operating features and controls
Operation
General
- Switching on and off [ »POWER / STAND-BY« ]
Using the remote control handset - Changing the battery in the remote control handset
Device/ source select [ »CD/TUNER/AUX« ] Page 8
Adjusting Volume / Mute settings [ ^vOLUME/MUTE ] - Selecting the Tone [ >FLAT/ROCK/JAZZ/POP/CLASSIC/D-BASS< ] Page 8
·Headphones[PHONES] Page 8 - Setting time
- Setting times for switching on and off [»TIMER«]
Activate/deactivate the Sleep function [ SLEEP<]
Radio
- Attaching aerial
Radio mode / Band selector (VHF/MW) Page 10
Automatic station search/manual search
- Store station preset [ 三 MEMORY] Page 10
- Select stored station
CD-Player
- Inserting a CD Page 10
- Intro function [INTRO*]
Basic features of the cd player - Programming a track sequence [»track memory«]
- Start programmed track sequence
Repeat functions [REPEAT] Page 11 - Play tracks in random sequence [ »RANDOM« ]
Cleaning / Disposal
Care and cleaning
Disposal
Information
Statement of conformity
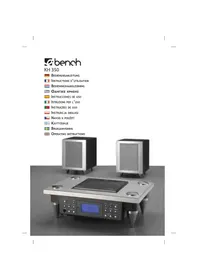
Designer Audio Unit with CD player KH 2340/2341
Proper use
The device is intended for playing audio compact disks (CD, CD-R, CD-RW) and for the reception of radio stations. Any modification of the device is deemed to be improper use and could give rise to considerable dangers. The manufacturer will not accept liability for loss or damage arising from improper use. Not suitable for commercial use.
Important safety advice
The following safety advice must be always observed when using electrical equipment:
This advice will help you avoid serious injury or damage and achieve better results.
Please read carefully through the following information concerning safety and proper use. Before reading, fold out the page with the illustrations (1) and make yourself familiar with all the functions of the device. Be careful to keep these advice notes and if necessary pass them on to a third party.
To avoid danger to life from electric shock:
Do not remove the cover or take the back off the device. There are no maintainable parts inside the device.
- Do not operate the device if it has a damaged mains lead or mains plug. If the device does not work perfectly or is damaged, have it examined and repaired immediately at the service centre. The service centre for your country is shown on the guarantee card.
- Do not place the device out in the rain. Do not use it in a damp or wet environment (e.g. bathroom) or in rooms in which a lot of dust is generated. Make sure that the mains lead never gets wet during operation.
- Caution! - Keep the device out of reach of children. Children frequently underestimate the dangers associated with electrical equipment. Therefore you must never leave children unsupervised in the vicinity of electrical equipment.
Protecting yourself from laser radiation:
Note: The CD player in this device is classed as a "Class 1 Laser Product" and is appropriately labelled by a sticker on the outside.
- Never open the device and do not attempt to repair the device yourself. There is invisible laser radiation inside the device.
- Do not expose yourself to laser radiation.
Avoiding the danger of fire:
- Do not expose this device to extremes of temperature; if heat builds up inside the device it can lead to defects or to the device catching fire.
Therefore: -
Avoid direct sunlight and heaters
-
Do not cover the ventilation slots on the device
- Leave approx. 10 cm free around all sides if at all possible
The device is not to be placed in the direct vicinity of inflammable materials (e.g. curtains, inflammable liquids etc.).
This is how to use the device safely:
- Never use the device for a purpose for which it was not intended.
If the device is brought into a warm room from the cold (for example after transport) then this can lead to condensation forming on the insides. To avoid damaging the device, wait at least 2 hours before switching it on again. - Never leave the device working unattended.
Always pull the plug out of the mains socket during a storm and disconnect the aerial. Equipment connected to the mains during a thunderstorm can be damaged by lightning.
If the device is not to be used for an extended period, be sure to disconnect it from the mains and remove the batteries.
Pull the plug out of the mains socket to properly disconnect the device from the electricity supply. When doing this always pull on the plug itself and never on the lead. - Protect the mains lead from hot surfaces or other sources of damage and do not allow it to become constrained.
Note: This device is fitted with non-slip rubber feet. The rubber feet may become stuck to or softened by the material used for or used to clean the supporting surface. This cannot be excluded because of the variety of materials in common use. You should therefore place an anti-slip layer under the feet of the device.
Do not infringe copyright
When you record CDs or radio broadcasts using an external device (connected to AUX ⑥ , for example, a cassette recorder), you must comply with the copyright laws of the country in which the device is used.
Technical information
Nominal voltage: 230V 50Hz
VHFunerangel: 87.5MHzto108MHz
MWtuner range: 531-1602 kHz
CD player, D/A converter: 1 Bit, dual
Speaker system: 1-way speakers
Dimensions of device: 145 (L) x 180 (H) x 250 (W) mm
Weight of device: approx. 1,5 kg
Dimensions of speakers: 130 (L) x 174 (H) x 155 (W) mm each
Weight of speaker: 1 kg each
Setting up and connecting
Be sure to follow the instructions in the correct sequence and insert the mains plug into the mains socket
- Carefully take the Designer Audio Unit and the loudspeakers out of the packaging.
- Choose a suitable position for your Designer Audio Unit. It should be
horizontal
- dust-free and dry
away from heaters and direct sunlight.
- Connect the two loudspeakers. The loudspeaker connections 色 are appropriately labelled (L = LEFT / R = RIGHT)
Tips for setting up the loudspeakers:
If possible set up the speakers at head height
- Do not cover the loudspeakers with curtains or other objects
- Set up the loudspeakers on the shelf so that the front trim is flush with the front edge of the shelf.
You can place rubber pads under the loudspeakers to prevent them from turning.
-
Use cinch connectors to connect an external device such as a turntable.
-
To receive FM radio signals connect a 75 Ohm aerial lead (house or cable) to the aerial connector socket ② . If these signals are not available, use the supplied wire aerial connected to the middle contact in the aerial connection ② .
The aerial for medium wave reception is built into the equipment.
- Now insert the mains plug into the mains socket.
The mains voltage at the mains socket must match that shown on the rating plate on the device.
Devices rated at 230V can also be operated at 220V .
- Remove the transport protection from the CD player.
Important: The motorised CD compartment ① can only be opened if the device has been switched on and set in CD mode (see instructions for switching on).
- Switch on the device as described above.
- Select CD mode by pressing the CD mode button ②
- Press button ⑤ to open the CD compartment.
- Remove the transport protection.
-
Press button ⑤ again to close the CD compartment.
-
Place the battery supplied with your device into the battery compartment.
-
Open the battery compartment in the back of the remote controller as described there.
- Insert the battery, making sure that the polarity is correct (+ pole of the battery points upwards)
- Close the battery compartment again
Instructions for switching on
This device has a main On/off switch @ at the back. Insert the mains plug into the mains socket and move the switch into position "I". The device is now ready for operation and can be switched on and off (Stand-By) using the button ② on the front of the device.
Operating features and controls
① CD compartment
② ON/OFF (Stand-By) switch
③ Remote control signal sensor
④ Display
⑤ CD compartment open/close button
⑥ Radio mode / band selector button (VHF/MW) ()
⑦ (-) Reverse button ()
(+) Forward button (*)
⑨ Mono/stereo button (only on VHF radio)
Volume control
⑩ Timer button
⑫ MEMORY button
13 Tone selector button (Preset EQ)
14 Button for operating a connected external device (LINE/AUX)
Sleep button
16 Mode/Remain button
⑦ Preset/Repeat button (radio pre-set, recall / repeat button CD)
18 Stop button
Play/Pause button (CD mode only)
CD mode button
② Aerial connection
2 Main On/off switch
23 Mains connection
24 Speaker connections
② Headphone connector
26 Cinch connections for an external device (AUX)
Mute button - remote control only
28 Random button (CD) remote control only
Intro button (title playing CD) remote control only
D-Bass button (Bass-Boost) remote control only
The operating features marked with a (^) have several different functions depending on the device selected (e.g. radio or CD mode). Please read the appropriate sections.
Operation: General
Switching on and off [ POWER / STAND-BY ]
Note: This device has a main On/off switch at the back. Insert the mains plug into the mains socket and move the switch into position "I". The device is now ready for operation and can be switched on and off
(Stand-By) using the button ② on the front of the device.
If you switch the power supply off at the main switch then any stored data such as time and radio presets will be lost.
When the power supply is switched on at the main switch (position I), the device goes into Stand-By mode.
Press the ON/OFF switch (Stand-By) button ② and the device comes on. The Display ④ lights up in blue.
Press the ON/OFF switch (Stand-By) button ② again to switch off the device.
If the device is not to be used for an extended period, pull the mains plug out of the mains socket.
Using the remote control handset
- Point the remote control handset at the sensor ③ to achieve the best signal.
The functions of the buttons on the remote control handset are identical with those on the device.
The maximum range of the remote control signal is about 5 metres.
A strong light source in the room may adversely affect the remote control functions.
Changing the battery in the remote control handset
-
Replace the battery in the remote control handset if the device does not react appropriately to the handset signal.
For this you will require a 3 volt battery CR 2025. -
Open the battery compartment in the back of the remote control handset as described there and remove the discharged battery
Insert the new battery, making sure that the polarity is correct (+ pole of the battery points upwards) -
Close the battery compartment again
-
Avoid pressing more than one function button at a time as otherwise this could reduce the service life of your handset.
If the handset is not to be used for an extended period, remove the battery from the battery compartment.
Device/ source select [ >CD/TUNER/AUX^长 ]
Press the appropriate button * to select a device or change the source:
CD = CD player TUNER = radio AUX = external device, e.g. record deck
Adjusting Volume / Mute settings [ >VOLUME/MUTE< ]
You can adjust the volume by using the Volume control or the appropriate button on the remote control handset. The Mute setting can be activated from the handset only.
Setting the volume at the device:
- Turn the Volume control in the VOL + direction to increase the volume. The volume setting is displayed (increasing) for a short period in the Display 4.
- Turn the Volume control 圆 in the VOL - direction to decrease the volume. The volume setting is displayed (decreasing) for a short period in the Display 圆 .
Adjusting the volume using the remote control handset:
- Press the VOL + button to increase the volume. The volume setting is displayed (increasing) for a short period in the Display ④.
- Press the VOL - button to decrease the volume. The volume setting is displayed (decreasing) for a short period in the Display .
Activating/deactivating Mute:
- Press the Mute button to activate Mute. Whilst in Mute mode the Display continuously alternates between the operating mode (e.g. Radio mode = station frequency) and "VOL 0".
- Press the Mute button ② again to deactivate Mute. The Display briefly shows "VOL ON" and then changes back to the last operating mode (e.g. back to Radio mode).
Selecting the Tone [ >FLAT/ROCK/JAZZ/POP/CLASSIC/D-BASS®]
Use the tone selector button ⑤ to set the tone quality of a track to suit the type of music and increase listening pleasure. The current setting Rock/Jazz/Classic/Pop is shown in the display ④ - (FLAT = neutral tone).
Note: On model KH 2341, the Tone can be selected only using the remote control handset.
Press the D-Bass button on the handset to set the Bass Boost. The Display shows D-BASS.
Headphones [PHONES< ]
8-32 Ohm stereo headphones ⑤ can be connected to the headphones connector with a 3.5mm jack plug. As soon as the headphones are connected the loudspeakers are turned off. Please note that high levels of sound can lead to serious hearing damage.
Setting the time
You can set the time in Stand-By mode or by using the Timer function.
Setting the time in Stand-By mode:
- Press the Memory button once. The Hours display starts to flash.
- Now press buttons ⑦ or ⑧ to set the Hours display. The Hours setting is shown in the Display ④
-
Press the Memory button ⑫ once more and the Minutes display starts to flash.
-
Now press buttons ⑦ or ⑧ to set the Minutes display. The Minutes setting is shown in the Display ④.
- Press the Memory button ⑫ again. The time has now been set and is shown in Stand-By mode.
Note: If you do not perform the setting within 5 seconds the process is cancelled. If this happens, press the Memory button © again to repeat the process.
Setting the time using the Timer function:
- Switch on the device as described above.
- Press the Mode/Remain button 16 once. The time is displayed.
- Press the Memory button 12 once. The Hours display starts to flash.
- Now press buttons ⑦ or ⑧ to set the Hours display. The Hours setting is shown in the Display ④
- Press the Memory button 12 once more and the Minutes display starts to flash.
- Now press buttons ⑦ or ⑧ to set the Minutes display. The Minutes setting is shown in the Display ④
- Press the Memory button ⑫ again. The time has now been set and is displayed in Stand-By mode.
- Press the Mode/Remain button 16 three times to quit the Timer function.
Note: If you do not perform the setting within 5 seconds the process is cancelled. If this happens, press the Memory button © again to repeat the process.
Setting times for switching on and off [ TIMER\*]
Using this function you can set the times at which the device will automatically switch on and off. You can also use this function as an alarm.
Note: If you do not perform the setting within 5 seconds the process is cancelled. If this happens, press the Memory button © again to repeat the process.
Setting the Switch-on time (TIMER ON):
- Switch on the device as described above.
- Select the desired sound source / operating mode (⑧, ⑧) or (⑧) by which you wish to be woken, (e.g. radio or CD).
- Prepare the sound source, i.e. set the radio to the desired station or insert a CD and program the tracks as necessary.
- Set the required volume as described above.
- Press the Mode/Remain button twice. The Display 4 shows TIMER ON (TIMER flashes).
- Press the Memory button once. The Hours display starts to flash.
- Now press buttons ⑦ or ⑧ to set the Hours display. The Hours setting is shown in the Display ④.
- Press the Memory button once more and the Minutes display starts to flash.
- Now press buttons ⑦ or ⑧ to set the Minutes display. The Minutes setting is shown in the Display ④.
- Press the Memory button ② again. The Switch-on time (TIMER ON) has now been set.
If you just wish to activate the Switch-on time only, you can quit this Timer menu by pressing the Mode/Remain button twice. The Display will then show TIMER ON only.
If you also wish to set a Switch-off time, continue from here to step 11 below.
Setting the Switch-off time (TIMER OFF):
- Press the Mode/Remain button ⑥ once. The Display ④ shows TIMER OFF (TIMER flashes).
- Press the Memory button once. The Hours display starts to flash.
- Now press buttons ⑦ or ⑧ to set the Hours display. The Hours setting is shown in the Display ④
- Press the Memory button once more and the Minutes display starts to flash.
- Now press buttons ⑦ or ⑧ to set the Minutes display. The Minutes setting is shown in the Display ④
- Press the Memory button again. The Switch-off time (TIMER OFF) has now been set.
- Press the Mode/Remain button ⑥ once to quit the Timer menu. The Display shows TIMER ON and OFF (in Stand-By mode as well).
Deactivating the Switch-on or -off times:
- Press the Mode/Remain button twice. The Display 4 shows TIMER ON (TIMER flashes).
- To deactivate the Switch-on time press the Timer button (1) - TIMER and ON flash.
- Press the Mode/Remain button 16 once. The Display 4 shows TIMER OFF (TIMER flashes).
- To deactivate the Switch-off time, press the Timer button (1) - TIMER and OFF flash.
- Press the Mode/Remain button once to quit the Timer menu. The Display no longer shows TIMER ON and OFF.
The same procedure (with the appropriate changes) can be used to reactivate the Switch-on or -off times (then the Display just flashes TIMER).
Activate/deactivate the Sleep function [ 艹 _ 空 ^ 空 ]
You can set a time of between 90 and 10 minutes, after which the device switches itself off.
Press the Sleep button ⑤ once. The Display ④ shows SLP-10 (= turns off in 10 minutes).
Each additional press of the button will increase the Turn-off time by 10 minutes (SLP-20, SLP-30 etc. up to SLP-90). Set the value as required.
After a few seconds the device returns to the last operating mode (e.g. returns to Radio mode).
The Display ④ shows SLEEP and thus indicates that the Sleep function is activated. The device will automatically turn off on this single occasion only and enter Stand-By mode.
To deactivate the Sleep function, keep the Sleep button 5 pressed until the Display shows SLP-00.
After a few seconds the device returns to the last operating mode (e.g. returns to Radio mode).
Operation: Radio
Attaching aerial
If you use the wire aerial for FM reception:
The wire must be fully wound out
Determine the best position by trial and error
- Attach the wire aerial to the wall if necessary using a strip of adhesive tape.
For MW reception, place the device in the best position for the in-built aerial, again by trial and error.
Radio mode / Band selector (VHF/MW)
Press button 6 once and the device switches to Radio mode.
Press button ⑥ again as appropriate, to switch between VHF (FM) and MW (AM).
Automatic station search/manual search
In an automatic search the frequency is increased or deceased until a station of adequate reception strength is found.
- Hold down the UP/Forward button ④ or DOWN/Reverse button ⑦ for about 1 second - the search starts and stops automatically.
- To start the search again, hold down the UP/Forward button ⑥ or DOWN/Reverse button ⑦ again for about 1 second.
You can use the manual station search for fine adjustment or when the frequency of the station is known.
- Press the UP/Forward button ⑧ or DOWN/Reverse button ⑦ briefly to increase or decrease the frequency in small steps.
- Keep the UP/Forward button ⑧ or DOWN/Reverse button ⑦ pressed until you are close to the frequency you require.
Store station preset [ MEMORY ]
The Designer Audio Unit KH 2340/2341 can store up to 32 stations (20 FM/12 AM).
- You set up the desired station by following the instructions relating to "Automatic station search/manual station search" described above.
- Press the Memory button once. The Display 4 shows CH (Channel = preset) to the right and above the set frequency.
- Press and keep pressing the Preset/Rep button until the desired preset memory number appears to the right near the frequency. Press the Memory button - and the station is stored in the desired preset.
- Repeat steps 1 to 3 for each further station you wish to preset.
Select stored station
Press the Preset/Rep button ⑨ repeatedly until the required station number for the stored station is displayed 4.
Operation: CD-Player
DANGER! The CD player uses a weak but sharply focussed laser beam to scan the surface of the CD. If the device is used improperly then this light can be dangerous to the eyes - never open the case.
Inserting a CD
The motorised CD compartment ① can only be opened if the device has been switched on and set in CD mode.
- Switch on the device as described above.
- Select CD mode by pressing the CD mode button ②
- Press the button ⑤ to open the CD compartment.
- Place a CD into the compartment (the label must face upwards). The CD must be placed securely on the central pin.
- Press button ⑤ again to close the CD compartment.
- The Display ④ shows the total playing time and the number of tracks.
NOTE: When you insert a CD, if the display does not show the number of tracks and the total playing time then the CD is possibly the wrong way round or dirty. Clean the CD with a CD cleaning cloth or insert the CD correctly and check the display again.
Intro function [INTRO]
Activating the Intro function can only be done when the CD has stopped. Press the INTRO button 念 each title on the inserted CD is played for 10 seconds.
Basic features of the cd player
- START PLAY: Press the PLAY/PAUSE button 值 - to start playing.
- INTERRUPT PAUSE: Press the PLAY/PAUSE button - to interrupt playing. The duration of play flashes in the display ④.
Press the PLAY/PAUSE button once more - to continue playing.
- STOP PLAY: Press the STOP button 18 - to stop playing.
NEXT TRACK: The UP/Forward button ⑧ jumps forward one track each time it is pressed. - PREVIOUS TRACK: The DOWN/Reverse button ⑦ jumps backward one track each time it is pressed.
FORWARD: Keeping the UP/Forward button ⑧ pressed goes forward within a track. - REVERSE: Keeping the DOWN/Reverse button ⑦ pressed goes backward within a track. The CD compartment ① can be opened anytime. Play stops automatically. Remove the CD only when movement has stopped completely.
Programming a track sequence [ TRACK MEMORY ]
Programming a track sequence can only be done when the CD has stopped. You can program up to 16 tracks.
- Place a CD into the compartment as described in "Inserting a CD".
- Press the Memory button ⑫. The Display ④ shows MEMORY TRACK PR:01.
- Use buttons ⑦ or ⑧ to select the number of the track that you wish to occupy programmed position PR:01.
- Press the Memory button again. This track is now stored in this programmed position (PR:01). The Display changes to the next programmed position (PR:02).
Repeat steps 3) - 4) for up to 20 tracks. You can also program a track several times.
The programmed track sequence is stored until you remove the CD from the CD compartment, choose another function or switch off the equipment.
Start programmed track sequence
- Press the PLAY/PAUSE button to start playing in the programmed track sequence.
- Press the STOP button to switch of a programmed track sequence.
Repeat functions [REPEAT<]
To repeat all the tracks on a CD, press the Preset/Rebutton ⑦. The display ④ shows REPEAT.
To repeat a single track on a CD, press the Preset/Rep button twice when the desired track is running. The display flashes REPEAT.
To repeat a programmed track sequence on a CD, press the Preset/Rep button ⑦ when the programmed track sequence is running. The display ④ shows REPEAT.
- To switch off the repeat functions, press the Preset/Rep button = repeatedly until the display ④ no longer shows REPEAT.
Play tracks in random sequence [ RANDOM ]
The Random function selects a random choice of tracks on the inserted CD.
To activate this function press the Random button ②. The Display ④ shows RANDOM.
To start playing tracks in a random order press button 19.
- To cancel the Random function press the Random button until the Display no longer shows RANDOM.
Care and cleaning
- Remove the mains plug from the socket before carrying out any tasks on the tool!
- Do not allow any liquids to enter the saw. Use a soft cloth to clean the housing. Never use petrol, solvents or cleaning agents that might attack plastic.
Disposal
The packaging is wholly composed of environmentally-friendly materials that can be disposed of at a local recycling centre.
Please contact your local council office to find out about disposal facilities for your worn-out appliances.
Batteries must not be disposed of as household refuse. Battery users are obliged by law to take all unwanted rechargeable and non-rechargeable batteries to a collection point operated by a public authority or a retailer.
This law is intended to ensure that batteries are disposed of in an environmentally-friendly manner. The batteries must be handed in only in the discharged state.
Statement of conformity
We, Kompernaß Handelsgesellschaft mbH, Burgstr. 21, D-44867 Bochum, Germany, hereby declare that this product conforms with the following EC regulations:
EU Low Voltage Directive: 72/23/EEC
Electromagnetic compatibility: 89/336 EEC
Applicable harmonised standards: EN 55013, EN 55020, EN 61000-3-2,
EN 61000-3-3, EN 60065
Model type: KH 2340/2341
Description: Designer Audio Unit with CD player
Bochum, 31.01.2004

Hans Kompernaß
- Managing Director -