POWERSCAN 9.0 - Document scanning and processing software IRIS - Free user manual and instructions
Find the device manual for free POWERSCAN 9.0 IRIS in PDF.


| Product Type | Document scanning and processing software |
| Version | POWERSCAN 9.0 |
| System Requirements | Intel Pentium or equivalent, 512 MB RAM (1 GB recommended), 400 MB free disk space, Windows 2000/XP/Vista |
| Supported Scanners | All TWAIN and ISIS drivers; compatible with Kodak, Fujitsu, Canon, HP, Epson, Böwe Bell&Howell, Inotec, Avision |
| Input Methods | Scanning, import from files (TIF, JPG, BMP), emulation images |
| Barcode Recognition | 23 types of 1D barcodes including PDF417 |
| OCR Languages | 125 languages including European, Cyrillic, Baltic, Greek, Turkish; optional Asian (Japanese, Chinese, Korean) and Hebrew/Arabic |
| ICR | Hand-printed numbers and capital letters (Latin alphabet), plus dot, comma, hyphen |
| MICR | Optional; reads banking fonts OCR-A, OCR-B, E13B, CMC7 |
| Output Formats | PDF, PDF/A, PDF iHQC, JPEG 2000, TIFF, Word, Excel, XML, HTML, CSV index files |
| Compression | iHQC (intelligent High Quality Compression), JPEG, TIFF G4 |
| Processing Steps | Scanning, indexing, image editing, output processing |
| Image Editing | Rotate, crop, adjust brightness/contrast, despeckle, deskew, black border removal |
| Document Separation | By barcode, OCR zone, patch code, blank page, page count |
| Indexing | Automatic extraction from barcodes/OCR; manual drag&drop OCR; validation tools |
| Batch Output Connectors | IRISCapture Pro, third-party applications via solution packages |
| Security | User roles, password protection, project locking |
| Maintenance & Cleaning | Software updates via version upgrades; no hardware cleaning required |
| Spare Parts & Repairability | Software only; replaceable via reinstalling or upgrading |
| General Information | Demo version available (emulation mode); hardware key for full version speed licensing |
Frequently Asked Questions - POWERSCAN 9.0 IRIS
User questions about POWERSCAN 9.0 IRIS
0 question about this device. Answer the ones you know or ask your own.
Ask a new question about this device
Download the instructions for your Document scanning and processing software in PDF format for free! Find your manual POWERSCAN 9.0 - IRIS and take your electronic device back in hand. On this page are published all the documents necessary for the use of your device. POWERSCAN 9.0 by IRIS.
USER MANUAL POWERSCAN 9.0 IRIS
What is IRISPowerscan? 5
How to use IRISPowerscan? 7
IRISPowerscan processing steps. 9
Software versions 10
Supported scanners 11
Chapter 2 Installation. 13
System requirements 13
Installing IRISPowerscan 13
Installing your scanner. 16
Uninstalling IRISPowerscan. 17
How to get product support? 18
How to register? 19
Chapter 3 Starting up 23
Configuring your anti-virus 23
Starting up 23
Start up window 25
Using a Quick Project 27
Using a Solution Package 29
Using a Template Project 31
Creating a project 34
Importing/exporting a project 35
User interface 38
Panes 39
Toolbars 41
Viewer. 42
Slider 42
Available workspaces 43
Chapter 4 Software Options 45
Software options 45
General options 46
User profiles. 47
Workspaces 50
Shortcuts 52
Advanced 53
Chapter 5 Project setup 55
Project setup 55
General 56
Project options 56
Scanning. 58
Scanning options 58
Barcode/OCR 60
Barcode and OCR setup 60
Capturing template images 61
Defining barcodes 62
Defining OCR zones 65
Setting barcode properties 67
Setting a mask syntax 72
Setting OCR zone properties 74
General barcode and OCR properties 77
Testing barcodes and OCR zones 78
Patch code 80
Defining and using patch codes 80
Testing the patch codes 81
Blank page 82
Defining and using blank pages 82
Testing blank pages 85
Image processing 85
Defining image processing operations 85
Indexing 89
Indexing 89
Defining batch/document types 90
Defining index fields 92
Setting batch/document names 95
Defining value formulas 96
DataLink. 98
Processing 99
Processing options. 99
Security 102
Chapter 6 Scanning 103
Scanner selection 103
Scanner setup 104
Running emulation images 106
Capturing existing files 107
Page setup (scanning parameters) 108
Page setup (scanning parameters) 108
Scanner settings 111
Image parameters 112
Automatic merge/split 114
Scanning tasks 115
Scanning operations 115
Creating new batches/documents. 117
Attaching documents. 118
Inserting pages 119
Rescanning pages 120
Chapter 7 Index validation. 121
Index validation. 121
Indexing tasks 122
Indexing operations 122
Indexing tools 123
Indexing tools 123
Drag&Drop OCR 124
Drop down lists. 125
Last five values. 126
Chapter 8 Post-scanning operations 127
Post-scanning operations 127
Editing images 128
Editing images 128
Zooming and scrolling images 129
Selecting and filtering images 130
Rotating and flipping images 132
Erasing image zones 133
Cropping images 133
Adjusting images 134
(Re)organizing images 135
(Re)organizing images 135
Reordering images 137
Splitting and merging. 138
Chapter 9 Output processing 139
Output processing 139
Index 141
Copyrights
Copyrights ©2002-2009 I.R.I.S. All Rights Reserved. IPS9.0-adel090602-01
I.R.I.S. detains the copyrights of the IRISPowerscan software, of the on-line help system and of this publication.
The information contained in this document is the property of I.R.I.S. Its content is subject to change without notice and does not represent a commitment on the part of I.R.I.S. The software described in this document is furnished under a license agreement which states the terms for use of this product. The software may be used or copied only in accordance with the terms of that agreement. No part of this publication may be reproduced, transmitted, stored in a retrieval system, or translated into another language without the prior written consent of I.R.I.S. This manual utilizes fictitious names for purposes of demonstration; references to actual persons, companies, or organizations is strictly coincidental.
Trademarks
The I.R.I.S. logo and IRISPowerscan are trademarks of I.R.I.S. OCR ("Optical Character Recognition"), Linguistic technology, ICR ("Intelligent Character Recognition") technology, MICR ("Magnetic Ink Character Recognition") technology, BCR ("Bar Code Reading") technology, and iHQC ("intelligent High Quality Compression) technology by I.R.I.S.
All other products mentioned in this user's guide are trademarks or registered trademarks of their respective owners.
About this guide
Important note about this guide's contents
The English version of this manual corresponds to the IRISPowerscan's complete User Guide.
The other language versions of the manual, correspond to a Quick User Guide. They cover the main start up steps for installing and using the software.
CHAPTER 1 ABOUT IRISPOWERSCAN
WHAT IS IRISPOWERSCAN?
IRISPowerscan is a powerful scanning and OCR software solution that offers to:
- scan all your documents at an extremely high speed,
sort and index them, - enhance the document images,
- convert them into fully searchable files,
- generate a variety of output files : PDF files, highly compressed color iHQC. PDF files, JPEG 2000, XML, HTML, etc., as well as index files in CSV or XML format.
High-Speed Scanning
The scanning is fully automatic and handles pre-processing operations such as document deskew, cropping, page orientation, blank page deletion, split & merge, etc. The scanned documents are automatically distributed into a logical document structure of "batches", "documents" and "pages". Various types of separator can be used to separate the documents such as: barcodes, patch codes, OCR zones, blank pages, etc. After the scanning, images can be easily manipulated and edited. The user can rescan the documents, rotate them, rename them, etc., and he can freely reorder them by using common commands such as splitting, merging, Drag&Drop, Cut&Paste, etc.
Sorting & Indexing
The software handles the automatic sorting of documents. It uses pre-defined identifiers such as barcodes, type-written data (OCR),
the document layout, etc. to identify the document types.
The software not only sorts the documents but also indexes them. The indexing values are directly extracted from the documents (barcodes, type-written data (OCR), hand-written data (ICR), etc.), and/or picked up from the system data. The user validates the data on screen. He can easily modify, replace or complete the indexing fields, either manually or using the "On the Fly" OCR feature.
Quality Control and Validation
A full range of tools are available for post-scanning operations. All scanned documents directly appear in the application explorer where they are divided up into batches, documents and pages. The corresponding images are displayed in the viewer. The operator can act on the displayed objects: he can reorder them, remove them, split or merge them, and carry out post-processing operations such as: rotation, cropping, adjustment, etc.
OCR and output formats
IRISPowerscan is able to recognize 23 types of barcodes (all standard 1D-barcodes), including the PDF 417 high density barcode. It integrates the latest OCR (Optical Character Recognition) engine developed by I.R.I.S. and is able to recognize typewritten data in up to 125 languages. All American and European languages are supported, including Central-European languages. Greek, Turkish, the Cyrillic ("Russian") and the Baltic languages are also supported. Optionally, IRISPowerscan reads 4 Asian languages (Japanese, Simplified Chinese, Traditional Chinese, Korean), as well as Hebrew and Arabic. The recognition of hand-printed data (ICR) covers handprinted numbers and handprinted capital letters in languages using the Latin alphabet, as well as the dot, comma and hyphen symbols. The MICR (Magnetic Ink Character Recognition) technology (optional) offers to read banking fonts such as OCR-A, OCR-B, E13B and CMC7.
High Compression
IRISPowerscan is able to produce highly compressed files, including the unrivalled iHQCTM (intelligent High Quality
Compression) technology that offers extremely high image compression.
Batch Output Formats
IRISPowerscan offers a wide variety of output formats, among which IRISDocument™ which converts the document images into fully searchable files.
IRISPowerscan's full list of features
The full list of IRISPowerscan's features is detailed in the IRISPowerscan datasheet. This datasheet is available on the I.R.I.S. website: http://www.irislink.com/irispowerscan
IRISDocument-user guide
Also refer to the IRISDocument for IRISPowerscan user guide to get all instructions on how to use IRISDocument™.
HOW TO USE IRISPOWERSCAN?
1. Choose the appropriate pre-configured project
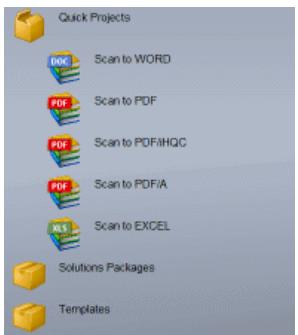
IRISPowerscan is provided with 3 types of pre-configured projects: Quick Projects, Solution Packages and Templates. The first thing to do when starting IRISPowerscan is to have a look at these projects and check whether any of them fits your particular needs. The available projects are listed in the Start up window:
Quick Projects
Quick projects offer to use some standard features of IRISPowerscan in just a few mouse clicks. You will simply open a project, scan your documents, and export them to whatever format proposed in the list (Word, PDF, Excel). (See: Starting up, Using a Quick Project).
Solution Packages
If you wish to use IRISPowerscan to further process your documents in a third party application, you will choose a project among the solution packages. These projects have been set to perfectly fit the requirements of the third party application. (See: Starting up, Using a Solution Package).
Templates
If you wish to perform more specific tasks with IRISPowerscan, you will preferably go for a template project. The template projects offer to use a wide range of advanced features such as sorting, indexing, compression, etc. (See: Starting up, Using a Template).
New project
If no pre-configured project fits your needs, you can still create and set up a project from scratch. In this case, the Demo project must be used as a starting point. (See: Starting up, Creating a project)
Once you have opened your project in the Start up window, you proceed to the actual user interface from which you can launch any of the required processing. See: Starting up, User interface.
2. Refine or modify the default settings (Project Setup)
If the pre-configured project you have chosen does not totally match your needs, you can refine or change some of its default settings.
The project settings can be accessed from the user interface, in the
Project Setup window. See: Project Setup.
3. Launch the required processing steps
Once you have chosen a project and possibly refined its settings, your project is ready for use. You can then launch any of the required processing operations from the user interface. See: About IRISPowerscan, IRISPowerscan processing steps.
IRISPOWERSCAN PROCESSING STEPS
Here are the main processing steps that can be carried out in IRISPowerscan. Depending on your project configuration, you will launch one, two or more of the described steps. All processing steps can be launched from the user interface.
Scanning
Before you start scanning, you must make sure your scanner has been properly installed, then set your scanner settings (resolution, color, image pre-processing, etc.). You will then put your documents in the scanner feeder then start scanning. Your scanned documents will directly appear in the image viewer as well as in the explorer. See: Scanning: Scanning operations.
If some automatic indexing has been set for the project, it will take place during the scanning. This automatic step is totally transparent for the user.

As soon as the documents have been scanned (and automatically indexed), their index cards are ready for validation in the user interface. You will then be able to check the displayed index values, then correct them by means of the available indexing tools. See: Index validation.
Post-scanning operations (if required)
Once scanned, all documents appear in the explorer where they are divided up into documents and pages. Their corresponding images are displayed in the viewer. At this stage, you can act on the objects: you can reorder them, remove them, split or merge them, as well as carry out post-processing operations such as: rotation, cropping, adjustment, etc. See: Post-scanning operations.
Processing
Once the images have been scanned and validated, you can convert them into whatever output format (TIFF, JPEG 2000, PDF, PDF iHQC, XML, etc.) and possibly send to the available connectors. This is the "Process" operation. Remember that the settings related to the output processing are defined at Project Setup level. See: Output processing
SOFTWARE VERSIONS
IRISPowerscan is available in several versions. Please visit the I.R.I.S. web site to get more information about those versions (http://www.irislink.com/irispowerscan)
Full version
-
Full version giving all functionalities of the product
-
Hardware key required to run the application
- Licensing dependent on the speed
Demo version
- Same as IRISPowerscan Full but without hardware key and the ability to scan or import files
- Used in emulation mode with the in-built image sets
- Allows the user to 'experience' IRISPowerscan for free
Startup version
- Software protected version for OEM bundling
- Has many limitations that can be customized
Site version
- Special for "Site Licensing" (for large clients only)
- Software protection through registration
SUPPORTED SCANNERS
IRISPowerscan is able to communicate with all scanners equipped with a Twain driver, with an Isis driver (through an Add-on to IRISPowerscan), as well as with the scanners supported by Kofax Virtual Rescan 4.2 or higher. This means that it supports all popular high-speed scanners from Kodak, Fujitsu, Canon, HP, Epson, Böwe Bell&Howell, Inotec, Avision, and many more.
TWAIN driver
If your scanner is equipped with a Twain driver, note that version 1.9 or higher is highly recommended. Version 1.9 actually offers a dedicated user interface and provides profile management options as well as a series of advanced settings.
Please check with your scanner manufacturer whether version 1.9 of your scanner driver is available.
CHAPTER 2 INSTALLATION
SYSTEM REQUIREMENTS
Here is the minimum system configuration required to use IRISPowerscan:
- An Intel® Pentium® or equivalent. An Intel® Pentium® IV 2GHz or equivalent is recommended.
- 512 MB RAM. 1 GB RAM is recommended.
- 400 MB free disk space for the software, plus the space necessary for the image files.
- Operating system: Windows® Vista, Windows® XP, Windows® 2000.
INSTALLING IRISPOWERSCAN
IRISPowerscan is delivered on a self-running CD-ROM.
To install the software, simply insert the CD-ROM in the CD-ROM drive, then follow the on-screen instructions.
Caution:
You must log on as administrator or make sure you have the required administration rights to install the software.
- Click on Install IRISPowerscan Software.

IRISPowerscanTM
IBT2bOMEL2cGU

Install IRISPowerscan™ software

Welcome to the InstallShield Wizard for IRISPowerscan
The InstallShield(R) Wizard will install IRISPowerscan on your computer. To continue, click Next.
- Choose the language of the software user interface.
- Choose the destination folder for the software. Click Next to install to the default folder, or click Change to install to a different folder.
Destination Folder
Click Next to install to this folder, or click Change to install to a different folder.

Install IRISPowerscan to:
C:\Program Files\IRISPowerscan
Change...
- Choose the setup type for the installation: Complete is recommended.

Complete

All program features will be installed. (Requires the most disk space.)

Custom

Choose which program features you want installed and where they will be installed. Recommended for advanced users.
- Click on Install to actually launch the installation. Wait until the installation is complete, then click on Finish to close the installation program.
The software is dongle protected. Once the installation is complete, you must insert the hardware key provided with the CD-ROM into the parallel or USB port of your PC. The hardware key determines the maximum scanning speed (in number of images per minute) of IRISPowerscan. To increase the scanning speed, please get in contact with your Value Added Reseller or contact I.R.I.S. at var.opt@irislink.com
The submenu "IRISPowerscan" under the "Programs" menu is created automatically by the installation program.
The same holds for a shortcut to IRISPowerscan on the Windows desktop. You are thus able to start IRISPowerscan directly from your desktop.
Should this be necessary, install the Adobe Reader software required to access the software documentation.
The electronic version of the user guide is by default copied to your hard disk.
INSTALLING YOUR SCANNER
1. Install your scanner driver
Your scanner is provided with scanner drivers that must be installed on your computer.
To install your scanner, you must first insert your scanner driver installation CD-ROM into your computer CD-ROM drive and run the installation.
Once your scanner is installed, it is recommended to make a few scanning tests with a standard scanning application (e.g.: Microsoft Office Document Imaging).
Note:
If your scanner is equipped with a Twain driver, note that version 1.9 or higher is highly recommended. See About IRISPowerscan, Supported scanners.
2. Plug in your hardware key
Do not forget to plug the hardware key provided with your software package. This key determines the maximum scanning speed (in number of images per minute) of IRIS Powerscan.
Insert the key into the parallel or USB port of your PC.
Further steps
Scanner selection
When running IRISPowerscan, you will be automatically prompted to confirm the scanner selection. If you want to scan documents, do not forget to confirm the selection. This will disable the Emulation Mode* that is set to run by default in the application. See:
Scanning, Scanner selection
(*) A series of emulation images are provided with the application for demonstration and testing purposes. The Emulation Mode that enables to run these emulation images is activated by default. If you do not connect a scanner to IRISPowerscan, the Emulation Mode remains activated.
Scanning parameters
Before you start the actual scanning, you will have to define the scanning parameters. Refer to the section on Scanning operations, Page setup.
Twain user interface
When using a scanner equipped with a Twain driver 1.9 or higher for the first time, do not forget to configure the scanner Twain user interface. See: Scanning, Page setup.
UNINSTALLING IRISPOWERSCAN
There are only two correct ways of uninstalling IRISPowerscan: using the IRISPowerscan "uninstall" program or using the Windows (un)install wizard. You are strongly recommended not to uninstall IRISPowerscan or any of its components by manually erasing the program files.
To uninstall IRISPowerscan:
Use the IRISPowerscan uninstall program:
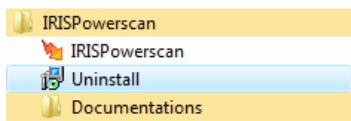
- From the Windows Start menu, select Programs, IRISPowerscan, Uninstall to start the "uninstall" program and follow the on-screen instructions.
Or:
Use the Windows (un)install wizard:
- From the Windows Start menu, select Control Panel, and access the list of installed programs.
- Select IRISPowerscan from the list and click the Uninstall button to remove the software.
- Follow the on-screen instructions.
HOW TO GET PRODUCT SUPPORT?
If you have purchased your product through an I.R.I.S. Value Added Reseller (VAR), said reseller will offer software support*, as he is in the best position to do so.
(*) The I.R.I.S. Value Added Reseller, at his sole discretion, may charge additional fees for the services provided.
Once you have registered your product, you are also entitled to product support from I.R.I.S. on all basic software functionalities.
Contact I.R.I.S. at:
Europe:
support.pro@irislink.com
Phone: +32-10-45 13 64
USA:
support.pro@irisusa.com
Phone: +800 447 4744
Asia-Pacific:
support.pro@irislink.com
Phone: +852 22646133
I.R.I.S. Software Maintenance and Support Services
In addition to (or included into) any Support and Maintenance contract signed with a Value Added Reseller, you can benefit from the I.R.I.S. Software Maintenance and Support Services program. The program offered varies according to the type of services needed: Minor/Major** version software maintenance,
basic/advanced support, end-user/partner/on-site support, level of support reaction time, etc.
(**) Minor version software maintenance: gives access to all relevant software updates.
Major version software maintenance: gives access to all relevant software updates and upgrades.
To obtain the I.R.I.S. Software Maintenance and Support
Services Program application form, please contact your Valued
Added Reseller or I.R.I.S. at:
Europe:
irispowerscan@irislink.com
Phone: +32-10-48 75 72
USA:
irispowerscan@irislink.com
Phone: +1-800 447 4744
Asia-Pacific:
irispowerscan@irislink.com
Phone: +852 22646133
Product features
For any questions about the application's optional features, modules, technologies, any updates, or possible custom features, please contact I.R.I.S. at:
Europe:
irispowerscan@irislink.com
Phone: +32-10-45 13 64 - Ask for Sales Department
USA:
irispowerscan@irislink.com
Phone: +1-800 447 4744 - Ask for Sales Department
Asia-Pacific:
irispowerscan@irislink.com
Phone: +852 22646133 - Ask for Sales Department
HOW TO REGISTER?
You are automatically prompted to register your application when starting the application for the first time. Once you have registered,
your are:
-
kept informed of future product developments and related I.R.I.S. products;
-
entitled to free product support on all basic functionalities;
- entitled to special offers on I.R.I.S. products.
To register:
- Fill in the required fields in the IRISPowerscan Registration window.
1 Fill out the form
Company: I.R.I.S.A
First Name: Louis
Last Name: DUPONT
E-mail: louis.dupont@irislink.com
Country: Belgium
Phone: 32-10-45 1364
- Secondly, either "Register via Internet" (this can be directly made on the I.R.I.S. Web site: http://www.irislink.com/register), "Copy the message to clipboard" to send an e-mail to I.R.I.S., or phone I.R.I.S. during working hours, and you will receive your software key*.
(*) Another way of registering your software is to send in or fax the registration card provided with your DVD box.
- Once you have received your software key from I.R.I.S., introduce it in the Software key field and click OK.

Unlock your software
Hardware key:
04d3f664
Software key:
Registration of software Add-ons
If you have acquired an Add-on to IRISPowerscan, you will also have to register it.
To register an add-on:
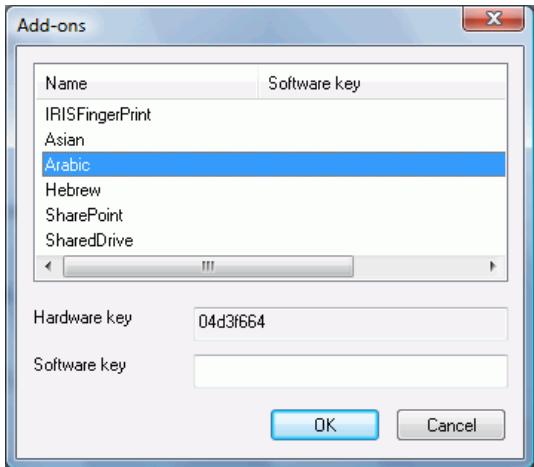
From the Help menu, select Add-ons.
- In the Add-ons dialog box, fill in the required software key.
CHAPTER 3 STARTING UP
CONFIGURING YOUR ANTI-VIRUS
The anti-virus installed on your PC scrutinizes all the files that are being written on your hard disk. This may dramatically slow down the writing speed of the images being scanned with IRISPowerscan. Your target production level may thus not be reached.
In order to avoid such problem, you must properly configure your anti-virus and exclude from the process the list of folders into which your images are being placed. This configuration depends on the anti-virus used. Please refer to your anti-virus manual to define the required settings.
In IRISPowerscan, the folder to be excluded is: C:\IRISPowerscan
STARTING UP
To start IRISPowerscan:
- Select IRISPowerscan in the IRISPowerscan menu under the Windows Start menu or click the application shortcut on your desktop. The application opens on the Start up window.
Tip: You may also launch one of the Quick Projects available in IRISPowerscan and directly start the scanning. See: About IRISPowerscan, How to use IRISPowerscan, and Starting up, Using a Quick Project.
- If you start IRISPowerscan for the first time, you are automatically prompted to register the application. Fill in the required fields in the Registration window (see: Installation, How to register?).
Once you have received your software key from I.R.I.S., introduce it in the required field of the Registration window and click OK. This will unlock your software.
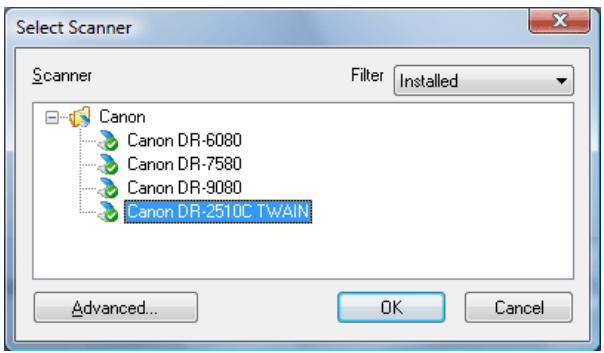
- The scanner selection window pops up on your screen. The scanner installed on your computer is automatically displayed (if not, click on Advanced, and select the right source). Select the scanner and click OK to connect your scanner.
If you wish to use the application in Emulation Mode*, click Cancel.
(*) A series of emulation images are provided with the application for
demonstration and testing purposes. The Emulation Mode is activated by default. If you do not connect a scanner to IRISPowerscan, the Emulation Mode remains activated.
START UP WINDOW
The Start up window contains five windows: Actions, Help, System, Projects, and About (at the bottom)
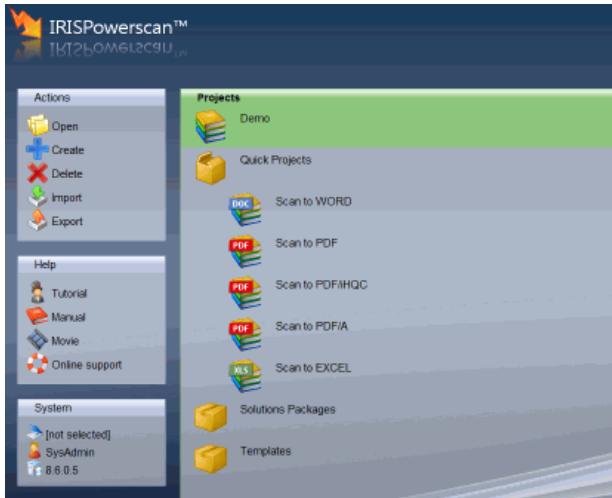
The Actions window (on the left)
The Actions window offers to act on the project selected in the Projects window. The available actions are:
- Open a project,
- Create a project, based on an existing project,
-Delete a project, - Import a project,
- Export a project.
The Help window (on the left)
The Help window gives access to:
- The Tutorial
- The user Manual (in the language chosen for the user interface),
- The Movie that gives a short presentation of IRISPowerscan,
- The Online support addresses and phone numbers.
The System window (on the left)
The System window gives access to:
- The Scanner selection window,
- The Login window,
- The IRIS Powerscan's splashscreen.
The Projects window (on the right)
The Projects window displays:
- a Demo project,
- five Quick Projects,
- two Solution Packages,
- a series of Template Projects.
A double-click on a quick project or solution package opens the referred project, a double-click on a template opens the project creation dialog box.
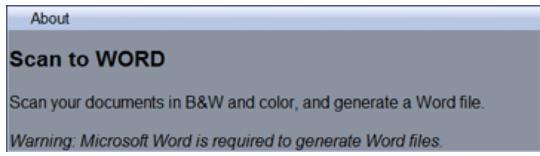
The About window (at the bottom)
The About window displays the detailed settings and objectives of any shortcut/template selected in the Projects window.
USING A QUICK PROJECT
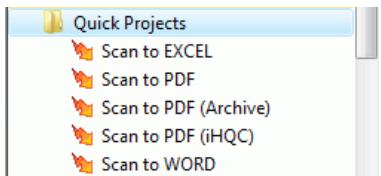
Five Quick Projects are available in the Start up window. These projects can be used as such. You will thus be able to directly scan and convert your files into one of the proposed output formats (Word, PDF, PDF/iHQC, PDF/A, Excel).
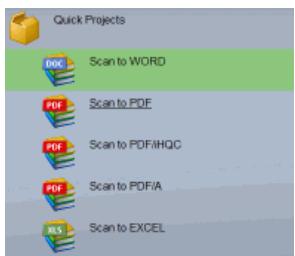
The quick projects are pre-configured as follows*:
(*) Check the About window in the Start Up window to get the detailed description of the settings
- Scan to Word: Set to scan documents in color and black&white and generate a
Word file. Resolution : 200 dpi
IRISDocument options:OCR:activated
-
Scan to PDF: Set to scan documents in color and black&white and generate one PDF file. Resolution : 200 dpi
-
Scan to PDF/iHQC: Set to scan documents in color and black&white and generate one PDF/iHQC file. Resolution : 200 dpi
- Scan to PDF/A: Set to scan documents in color and black&white and generate one PDF/A file. Resolution : 200 dpi
- Scan to Excel: Set to scan documents in color and black&white and generate one Spreadsheet file. Resolution : 200 dpi
How to use a Quick Project?
A quick project is set to be directly ready for use, without having to go through project configuration. To open it, simply double-click on it.
The whole processing can be handled in 3 main steps:
1. Check the default scanning parameters
Before you start scanning, you must carefully check the scanning parameters. This is done in the Page Setup window. See: Scanning, Page Setup.
2. Launch the scanning
You can then launch the scanning: put your documents in the scanner paper feeder and launch the scanning. See: Scanning, Scanning operations.
3. Process your documents
Once the scanning is complete, the application automatically prompts you to process the documents. Click Yes in the displayed dialog box. The output processing takes place.
What to do if the quick project does not exactly fit my needs?
Let's imagine, for example, that you want to produce a Word file in Portuguese, rather than in English, French, German, Spanish (which are the default languages settings for the OCR)*. In this case, the Scan to Word project as such will not work properly.
(*) The default settings of each project are described in the About window of the Start up window.
You must thus:
1. Create a new project
You must create a new project based on the chosen quick project. See: Starting up, Creating a project. The settings remain the same as for the chosen quick project.
2. Change its project setup
In the new project, change the project settings according to your needs. See the chapter on Project setup.
USING A SOLUTION PACKAGE
Two Solution Packages are available in the Start up window. These solutions can be used as such. You will thus be able to scan and convert your files into the needed formats. The resulting files will be available for further use in the third party solution.
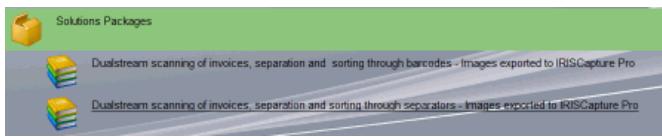
The solution packages are pre-configured as follows*:
(*) Check the About window in the Start Up window to get the detailed description of the settings
- Dualstream scanning of invoices, separation and sorting through barcodes. Images are exported to IRISCapture Pro fro Invoices.
- Dualstream scanning of invoices, separation and sorting through separators. Images are exported to IRISCapture Pro fro Invoices.
How to use a Solution Package?
A solution package project is set to be directly ready for use, without having to go through project configuration. To open it, simply double-click on it.
The whole processing can be handled in 3 main steps:
1. Check the default scanning parameters
Before you start scanning, you must carefully check the scanning parameters. This is done in the Page Setup window. See:
Scanning, Page Setup.
2. Launch the scanning
You can then launch the scanning: put your documents in the scanner paper feeder and launch the scanning. See: Scanning,
Scanning operations.
3. Process your documents
Once the scanning is complete, the application automatically prompts you to process the documents. Click Yes in the displayed dialog box. The output processing takes place.
What to do if the solution package does not exactly fit my needs?
Let's imagine, for example, that you want to separate your invoices using a blank page, rather than a barcode*. In this case, the solution package as such will not work properly.
(*) The default settings of each project are described in the About window of the Start up window.
You must thus:
1. Create a new project
You must create a new project based on the chosen solution package. See: Starting up, Creating a project. The settings remain the same as for the chosen solution package.
2. Change its project setup
In the new project, change the project settings according to your needs. See the chapter on Project setup.
USING A TEMPLATE PROJECT
A series of Template Projects are available in the Start up window. These projects offer to use the advanced features of IRISPowerscan such as: document sorting, automatic indexing, etc. Some of the projects can be used as such, but many will have to be refined if you want to make them fit your very particular needs.
Emulation images
A series of emulation images are provided with the application for demonstration and testing purposes. The emulation images show good examples of the way indexing and sorting values can be set in the application.
The Emulation Mode is set by default in the application. If you connect a scanner to IRISPowerscan, the Emulation Mode is disabled. You can revert to the Emulation Mode, by selecting Scanner, Setup from the Settings drop-down menu (either the Start up window or from the user interface) and check the box Emulation Mode.
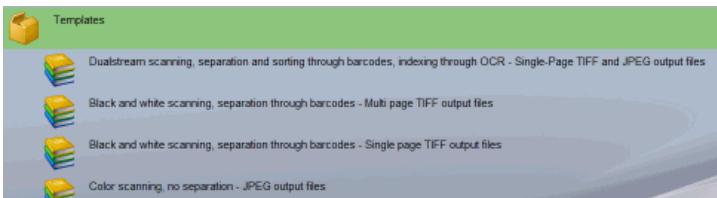
How to choose a Template Project?
You must choose the template project that best fits your needs. To do so, you must first carefully examine your documents, set your objectives, and make up his mind about the following issues:
The types of documents to be processed...
- Are there several types of documents to be dealt with?
- Do they contain blank pages?
- Should the document types be sorted automatically?
- Should there be any image pre-processing such as image adjustment, image rotation, cropping, page merge or split?
The types of images to be generated...
- Do you wish to generate color, bitonal or/and black&white images?
- What should their resolution be?
- What is the output format required: JPEG2000, PDF, PDF iHQC, etc.?
The document identification method...
- Do the documents bear a barcode or an OCR zone that can be used to identify them?
- Could they alternatively be identified according to their layout?
The document hierarchical structure...
- How should the documents be organized (in batches, documents, pages)?
- What should the maximum size of a batch/document be?
- How should they be named?
The document separation method...
- Do the documents bear a barcode, an OCR zone, or a patch code that could be used to separate them?
- Could their layout be used?
- Could blank pages be used as separators?
- Should the separation be made according to page count?
The batch/document indexing values...
- What should be the indexing values of each type of batch/document?
- Should they be extracted from barcodes or from OCR zones?
- Should they be automatically validated through mask formulas?
- Should there be special default values?
How to use a Template Project?
You must first open the project that best fits your needs, have a look at the emulation images and examples, then make a few tests with your own documents. You will further be able to create your own project, with your own settings, then start the actual processing steps.
To open a template project:
Select the project in the list and click on Open in the Actions window or in the context menu.
To create a new project based on a template project:
Select the project in the list and click on Create in the Actions window or on New in the context menu.
Here are the main steps to follow when using a template project:
1. Create a project based on the chosen template
You must create your own project, rather than change the template itself. By doing so, the template will still be used as such. Your project will have its own name and configuration.
See: Starting up, Creating a project.
2. Refine the project settings in the Project Setup
Once your project is created, you can make tests with your own documents, then refine the project settings in the Project Setup window. See: Project Setup.
3. Check the default scanning parameters
Before you start scanning, you must carefully check the scanning parameters. This is done in the Page Setup window. See:
Scanning, Page Setup.
4. Launch the scanning
You can then launch the scanning: put your documents in the scanner paper feeder and launch the scanning. See: Scanning, Scanning operations.
5. Carry out index validation (if required)
If the application has been set to index your documents, the index values are ready for validation just after the scanning is complete. The operator can check and possibly correct the index fields in the Index pane. See: Index validation.
6. Carry out post-processing operations (if required)
Once scanned, the documents are appear in the explorer and their corresponding images are displayed in the viewer. If necessary, the operator can act on the explorer, as well as carry out post-processing operations such as: rotation, cropping, adjustment, etc. See: Post-scanning operations.
7. Process your documents
Once all the required processing steps have been completed on the images, these are ready for the output processing. Refer to the section on Output processing.
CREATING A PROJECT
Why create a new project?
Most of the projects proposed in the Start up window can be used as such. You can simply open them and directly start with the scanning and processing. However, if you intend to change the default settings of a project, it is highly recommended that you first create your own project - based on the chosen project -, then change the settings. Your project will thus have its own name and its own settings. And the source project will still be available as such in the list of projects.
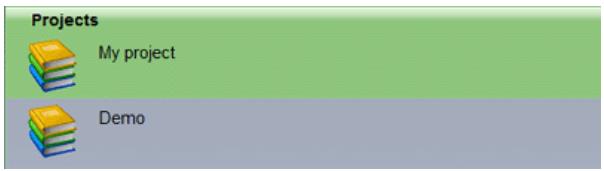
Once created, your own project will appear at the top of the project list (in the Projects section, before the Demo project).
To create a project:
From the Start up window, select the project to be refined.
- Click on Create in the Actions window or click on New in the context menu.
- Introduce your project name and location in the creation dialog box and click OK.
The Location is the folder name of the physical location of the project (see: Project Setup, General options).
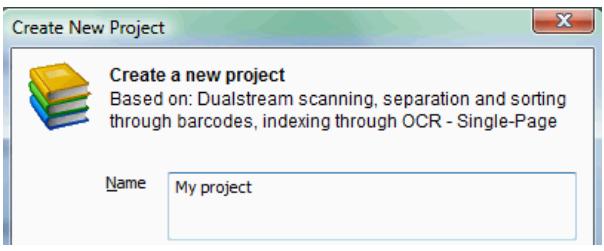
- Your project becomes listed at the top of the Projects window. You can now open it (either double-click or select it and click on Open in the Actions window), check and refine its settings in the Project Setup window (see: Project setup), then start the actual production workflow in IRISPowerscan.
IMPORTING/EXPORTING A PROJECT
! Feature available in IRISPowerscan Full Version only
The Import/Export feature of IRISPowerscan will be used if:
- you want to share the same project configuration with several people, or if
- you want to import a project that was created with a previous version of IRISPowerscan, or if
- you want to import a project that was created on another workstation.
It will also enable you to import into IRISPowerscan any project created with Kodak Capture Software 6^* .
(*) This is only possible if Kodak Capture Software is installed on the same workstation as IRISPowerscan.
! Any project must first be exported before it can be imported into the application.
To export a project:
- From the Start up window*, first select the project to be exported, then click on Export (Export selected project) in the Actions window.
(*) To import a project into an upgraded version of IRISPowerscan, first export the project from the previous version of IRISPowerscan.
-
Select the required options in the Project Export window and choose a destination folder for the export.
-
Export scan cache images: select this option if you want the scan cache images to be exported (this is necessary if you still need to work on the images).
-
Export emulation images: select this option if you want to import the emulation images of IRISPowerscan.
-
Export settings of scanners: select this option to import the scanner settings of your project.
-
Click on Export. The project is exported and becomes available as a .ips file.
() In case of a project to be shared with other users, transmit the .ips file to the other users.
From IRISPowerscan
The following files will be exported:
C:\RISPowerscan\Settings\UTwainUI\Page\200 DPI-Ready to Scan-DualStream.PS
C:\IRISPowerscan\CommonApps\Demo(1)\app.ini
C:\IRISPowerscan\Common\Apps\Demo(1)\BARCODES\Bitonal.TIF
C:\IRISPowerscan\Common\Apps\Demo(1)\BARCODES\Color.JPG
C:\RISPowerscan\Common\Apps\Demo(1)\BR_readme.rtf
C:\IRISPowerscan\Common\Apps\Demo(1)\CS_readme.rtf
C:IRISPowerscan\Common\Apps\Demo(1)\CT_readme df
Files
Export scan cache images
Export emulation images
Export scanner settings
Destination file: C:\IRISPowerscan\Common\Demo(1).jps
Browse...
Tip:
If the project to be imported into IRISPowerscan was created with Kodak Capture Software 6^* , you must also make an export/import using the IRISPowerscan interface. In the Project Export window, select the tab From Kodak Capture Software., then click on Export.
(*) This is only possible if Kodak Capture Software is installed on the same workstation as IRISPowerscan.
To import a project:
- From the Start up window*, click on Import in the Actions window.
(*) If you import a project into an upgraded version of IRISPowerscan, open the new version of IRISPowerscan and click on Import.
- Browse your explorer for the exported *.ips file, then click on Open. The imported project is directly available in the Projects window.
Tip:
Installing a new version of IRISPowerscan
When installing a new version of IRISPowerscan, don't forget to export the
project(s) to be kept for the new version before you desinstall the application:
- Export your project(s)
- Deinstall IRISPowerscan
- Install the new version of IRISPowerscan
- Import your project(s)
USER INTERFACE
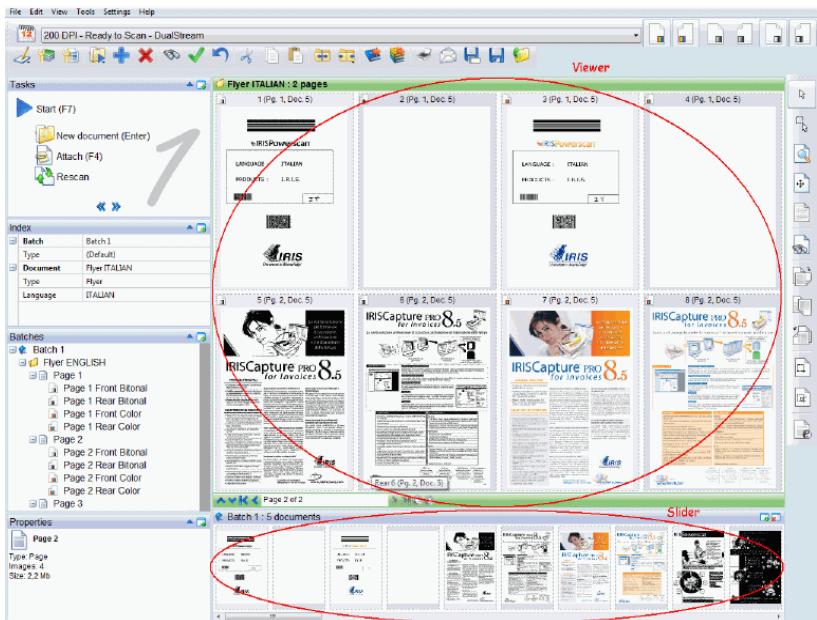
Once a project is open, you get to the actual user interface. The user interface contains various resizeable panes (left part), customizable toolbars, an image viewer (right part), and a slider (bottom right part).
Panes
The number of panes displayed on screen depends on the workspace chosen (see: Starting up, Workspaces). All panes are resizeable: use the horizontal and vertical resize pointers to resize them. The panes can be minimized and restored by a simple click on their title bars. The panes' contents can be displayed in a separate window: click on the Plus sign in the title bar to open a separate window.
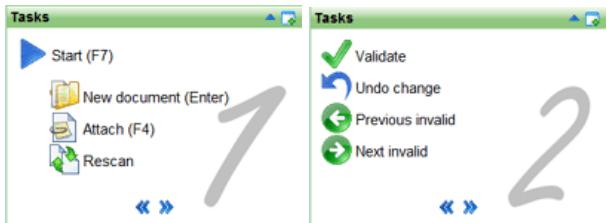
- The Tasks pane gives access to all main scanning and indexing tasks such as: Start, Attach, Rescan, Validate, etc.
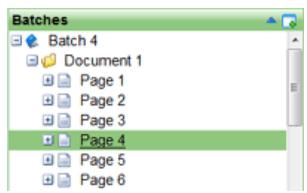
- The Batches pane displays the hierarchical structure of the scanned objects (batches, documents, pages). From this pane, you can delete, cut, copy, paste an object, drag & drop objects, split or merge them.
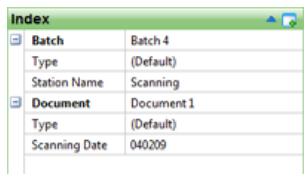
- The Index pane lists the index fields that are being filled out for the current batch and/or document. Fields that do not match the validation rules set for the indexing are highlighted in red.
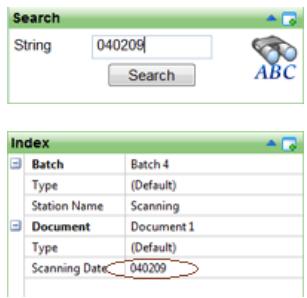
- The Search pane enables you to carry out searches on the document index values. The searches cover all the batches of documents of the open project. If several results are available, the user can go from one result to the other by pressing the Search button. IRISPowerscan will then position itself on the various documents containing the searched value.
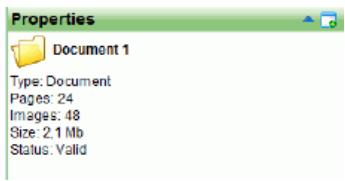
- The Properties pane displays the basic properties of the object selected in the explorer.
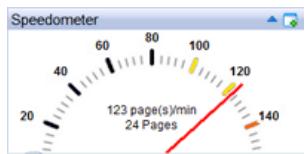
- The Speedometer displays the medium speed with which IRISPowerscan is scanning the documents.
Toolbars
All tobars are dockable. A tooltip appears each time the cursor slides over their icons. Toolbars can be either hidden or displayed: select Toolbars from the View menu, then select or deselect the required toolbars.
- The main toolbar (top left part) gives access to all frequent scanning and indexing commands, as well as to the various workspaces (first icon on the left).

- The Scanner bar gives access to all main scanning parameters. The other scanning parameters are defined in the Page Setup window (choose Page> Setup from the Settings menu).

- The Browse bar (top right part) offers to navigate through the document structure (batches/documents/pages). You can get up and down a level, or get to the next, the last, the previous or the first object within a given level. The last arrows on the right offer to get from one invalid field to the other in the Index pane.

- The Image bar (right part) gives access to all operations to be carried out on the scanned images (selection, rotation, cropping, adjustments, etc.).

Viewer
The viewer displays the images that have been selected in the Batches pane. Up to 81 images can be displayed at a time. Filtering criteria can be applied: display only front or rear pages, color or bitonal images, etc. A scroll bar (on the right) is available for browsing the images.
The image headers bear icons, numbers, flags. Images displayed on a light grey background are front pages. Images displayed on a dark grey background are rear pages.
Slider
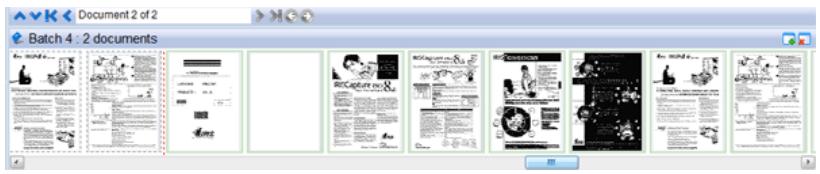
The slider offers to easily browse through the images of the object selected in the Batches pane. It contains a navigation bar that corresponds to the Browse bar.
A red dotted line indicates the separation between documents. The color of the image borders can be customized (right-click on the viewer, select Change Color and choose your preferred color).
AVAILABLE WORKSPACES
The application is provided with various default workspaces (four in total), i.e. various versions of the user interface. These workspaces are made available to the different users according to their particular user profile*.
(*) Access to the workspaces is defined by the application's system administrator through the user management features.
All workspaces are customizable.
To access the default workspaces:
- Click the Workspaces button on the main toolbar or select Workspaces from the View drop-down menu.
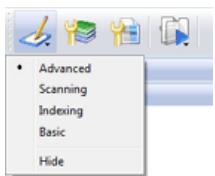
The list of default workspaces directly depends on the user's profile
To customize a workspace:
The user can to a certain extend* customize the workspace(s) to which he has access.
(*) Full customization of the workspaces can be handled by administrators only. See: Software Options, Workspaces.
-
Select the workspace to be modified.
-
Simply open, hide and/or customize the various user interface components (see: Starting up, User Interface).
Alternatively, from the View drop-down menu, select or deselect the toolbars to be displayed on screen, the status bar, the slider, and choose the number of images to be displayed in the image viewer.
- Save your customized workspace: from the View menu, select Workspaces (the current workspace is selected in the list of workspaces), then click on Save.
CHAPTER 4 SOFTWARE OPTIONS
SOFTWARE OPTIONS
Features available for system administrators only.
Note:
The default automatic login when starting IRISPowerscan for the first time is SysAdmin (case sensitive), which is assigned to the application's system administrator.
System administrators of IRISPowerscan can set the software options. These include the software general options, the user profiles, workspaces, shortcuts, as well as more advanced features.
To set the software options:
-
Select Options from the Settings drop-down menu (either from the Start up window or from the user interface).
-
Introduce the required data in the various tabs, then click OK.
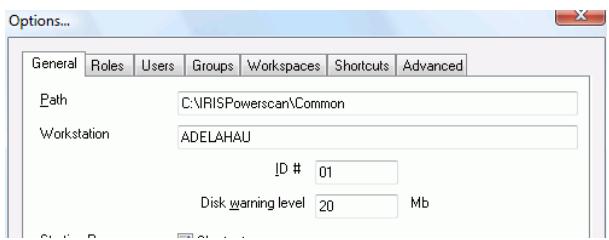
GENERAL OPTIONS
Features available for system administrators only.
System administrators of IRISPowerscan can set the software general options.
To set the software general options:
- Select Options from the Settings drop-down menu (either from the Start up window or from the user interface).
- Introduce the required data in the General tab.
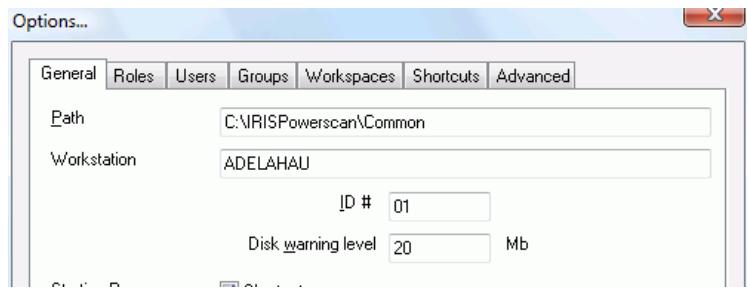
Path: confirm (or change) the location of the application data files
Workstation: confirm (or change) the name of the workstation (
(Note: In a multi-station environment, each station must be identified by means of a unique station name and station ID.)
ID number: confirm (or change) the application ID number (
Disk warning level: confirm (or change) the maximum volume (in Mb) that the application may contain (a warning message will appear on screen once the limit is reached)
Starting Page: select/deselect the boxes according to the pre-configured projects to be displayed/hidden in the Start up page.
Theme: select your preferred theme (user interface color)
Unit: choose the unit in which the dimensions of the images must be given in the application
USER PROFILES
Features available for system administrators only.
System administrators of IRISPowerscan can define the users, user groups, and user profiles.
In IRISPowerscan, user profiles are referred to as roles. A role corresponds to a generic class of users to whom a certain number of permissions are granted. Permissions enable to carry out actions on the various categories of objects (batches, documents, pages), to setup or select scanners, to use tools, and access certain projects and/or workspaces.
A user will be given one or several roles.
Users can also be defined as part of user groups.
To access the user management module:
- Select Options from the Settings drop-down menu (either from the Start up window or from the user interface). The default roles, users, and groups are detailed in the Roles, Users and Groups tabs.
Creating and modifying roles
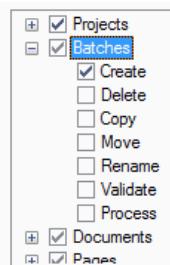
Select the Roles tab, use the Add/Modify buttons, and select/deselect the needed options in the various tabs.
General
Select/deselect the actions allowed for the different categories of objects.
Projects
Select/deselect the projects to which the users having this role will have access.
Workspaces
Select/deselect the workspaces to which the users having this role will have access.
Creating and modifying users
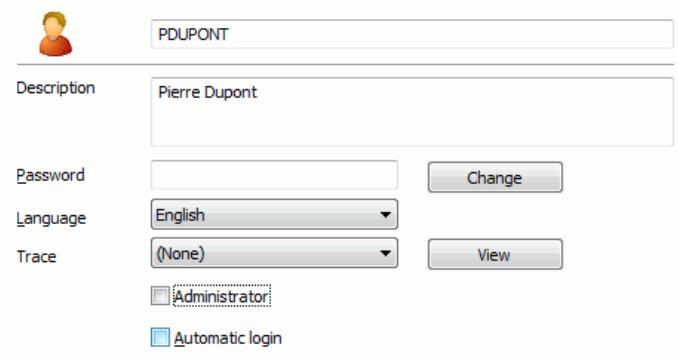
Select the Users tab, use the Add/Modify buttons, and introduce the needed data in the user's properties window.
General
Name: user's name (e.g.: fdupont).
Description: describe the user (e.g.: François Dupont)
Password: introduce the user's password
Language: select the preferred user interface language for the user.
Trace: select an option in order to enable the generation of a log file containing information on the user's actions (Medium/Full refer to more or less detailed information).
Administrator: check the box to give the user the System Administrator right.
Tip:
Only system administrators have access to the software options. You must thus make sure that at least one user is qualified as system administrator. By default, the user SysAdmin (password SysAdmin) is set as a user administrator. The SysAdmin logon is automatic. No logon screen will thus be displayed at start up.
Automatic login: check the box if you want to enable the automatic login of the user (this option is particularly interesting if you want
to create a generic user having a given role on a given workstation). If you do so, remember to make sure that this option is deactivated in the system administrator profile.
Roles
Assign one or several roles to the user.
Groups
Assign one several groups to the user.
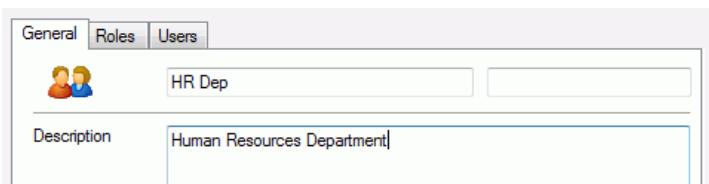
Creating and modifying groups
Select the Groups tab, use the Add/Modify buttons, and introduce the needed data. Select/deselect the needed options in the various tabs.
Name: group's name.
Description: describe the group.
Roles
Select/deselect the role(s) to be attributed to the group.
Users
Select/deselect the users who must be part of this group.
WORKSPACES
Features available for system administrators only.
System administrators of IRISPowerscan can customize any of the workspaces available in the application, or even create new workspaces and assign them to the various users.
To customize a workspace:
- From the Settings menu, select Options, then the Workspaces tab.
- Select the workspace to be customized and click on Modify, then change the options in the various tabs:
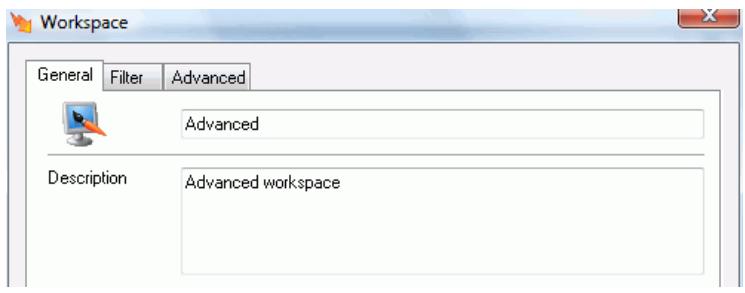
General tab:
- Display: indicate the number of columns and rows of images to be displayed in the viewer.
- Show title bars: indicate whether the image title bars must be displayed in the viewer.
- Slider: indicate whether the slider must be hidden or not, and where it must be positioned on your screen.
- Show pages: if you deselect this option, the document pages will not be displayed in the Batches pane.
- Show images: if you deselect this option, the document images will not be displayed in the Batches pane.
-
Small icons: if you deselect this option, bigger icons will appear in the Batches pane.
-
Form: if you select this option, the index values will be displayed in a form rather than a grid in the Index pane.
Filter tab:
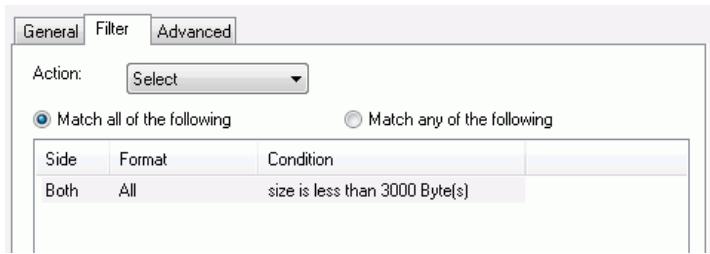
This tab allows you to define a filter to be applied on the viewer. You can ask the application to show, hide, select, or flag certain images (front/rear, bitonal/grayscale/color) matching certain conditions (e.g.: size is less than x, etc. When pressing on the Filter button in the viewer, IRISPowerscan will apply the filter.
(Match all: enable the action if matches all the conditions - Match any: enable the action if matches at least one condition).
Advanced tab:
Deselect, select or define the toolbars and panes to be made visible in the user interface. Use the Move Up and Move Down buttons to reorder the panes.
To create a new workspace:
- From the Settings menu, select Options, then the Workspaces tab.
- Click on Add to add the new workspace, give it a name, a description, and select the required options in the 3 tabs (General, Filter, Advanced) (see above), then click OK to save the settings.
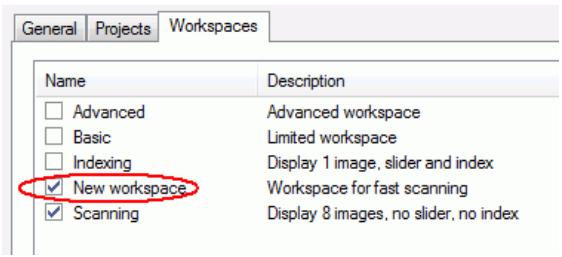
- In the Role tab, choose the role to which you want to assign the new workspace, then click on Modify. In the chosen role's Properties window, open the Workspace tab and select the new workspace, then click on OK to save your settings. All users having the given role will have access to the new workspace.
SHORTCUTS
Features available for system administrators only.
System administrators of IRISPowerscan can confirm the list of keyboard shortcuts that have been set for the application. He can clear the shortcuts, set new ones, or reset the default ones.
To clear a shortcut:
- Select the shortcut in the list, then click on Clear.
To set a shortcut:
- Select the shortcut in the list, then press the desired key on your keyboard.
To reset the shortcuts:
- Click on Reset. The default shortcuts definitions will be reloaded.

ADVANCED
Features available for system administrators only.
System administrators of IRISPowerscan can set the necessary parameters to use the Shared Drive Add-on to IRISPowerscan. The Shared Drive Add-on offers to set and locate on a shared drive
a certain configuration of the application (corresponding to the software options). Each time the configuration is being changed by the administrator, that same configuration is updated for all the connected workstations.
To configure the Shared Drive Add-on:
Get in contact with I.R.I.S. to receive the necessary documentation on the Shared Drive Add-on to IRISPowerscan.
System administrators can also set a batch counter which is not linked to the projects.
To set the Batch counter:
- Set the number of the first batch. Once the maximum number is reached, the counter is reset to the minimum number (in this case: 1).
Batch counter
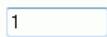
Minimum

Maximum
9999999
Tip: A batch counter can be set at project level. See: Project Setup, Project options.
CHAPTER 5 PROJECT SETUP
PROJECT SETUP
If the configuration of the project chosen in the Start Up window does not totally fit your needs, you can refine or modify its settings in the Project Setup window.
To access the Project Setup window:
- Open the chosen project.
- Select Setup from the File menu, or click the Project Setup button from the main toolbar. The Project Setup window opens with the chosen project configuration.
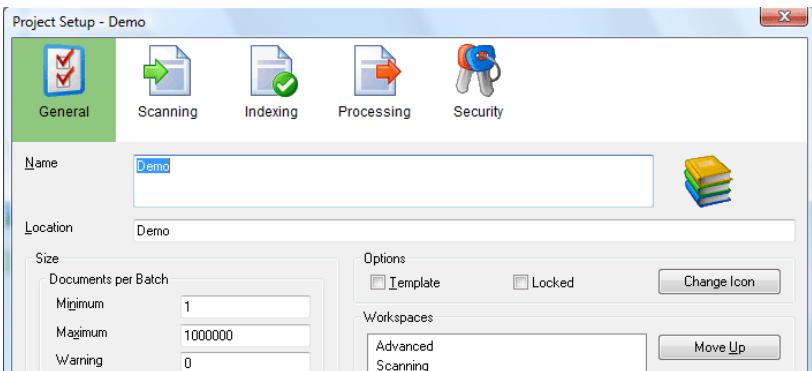
You must carefully analyze your documents and the work to be performed in IRISPowerscan, then check and refine the parameters in the following Project Setup tabs:
General
Scanning
Indexing
Processing
Security
GENERAL
Project options
To set the project's general options, select or fill in the required fields in the project setup General tab.
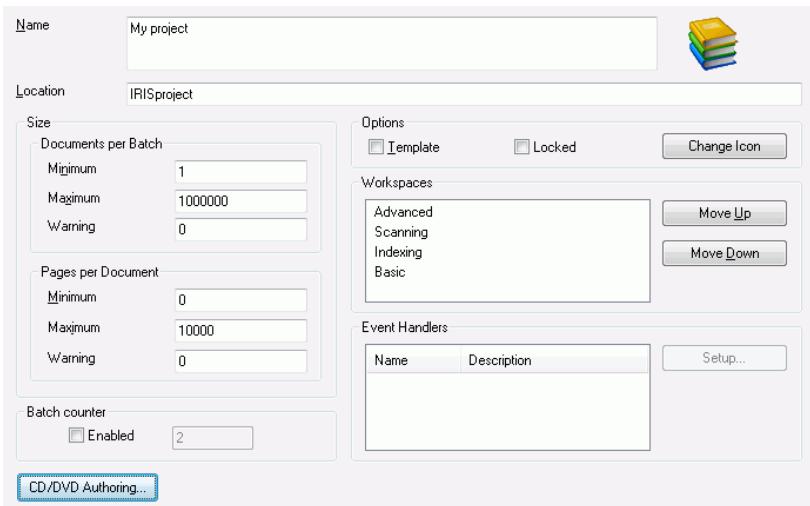
Name: confirm your project name. You may localize the name in the languages in which the application is available. To do so, select another interface language (select Settings, Language), introduce
the localized name in the Project Setup window, then click OK.
Location: folder name of the physical location of the project (in this case: C:\IRISPowerScan\Common\Apps\IRISproject)
Size
You can set a limit to the size of your batches/documents (in number of documents/pages). During the scanning, the software will automatically display a warning message each time it gets to the limit. If you go on scanning even though the limit has been reached, your batch/document will be displayed in red in the explorer, and the output processing will not be possible.
Documents per Batch: determine the minimum and maximum number of documents within a batch, and ask the application to warn you whenever a batch comes to its end (in number of documents before reaching the size limit).
Pages per Document: determine the minimum and maximum number of pages within a document, and ask the application to warn you whenever a document comes to its end (in number of pages before reaching the size limit).
Batch counter: enable this box if you want to use a separate counter for your particular project*. Introduce the number from which the numbering must start. The number will be incremented by 1 (introduce "0" if you want the new batch to start with "1").
(*) By default, IRISPowerscan uses a unique batch counter for all projects. See: Software options, Advanced.
Options
Template: select this option if you want this project to become a new template project; it will be listed in the template projects list in the Start up window.
Locked: if you lock the project, only a system administrator will be able to modify the Project Setup.
Change icon: you can change the project icon that will appear in the Start up window. To change the icon: click and browse for your own *.ico file.
Workspaces
Determine the order in which the workspaces will appear in the user interface. Select the required and use the Move Up and Move Down buttons on the right.
Event handlers
Use this option if you want to change the standard behavior of the application: you will then link another program to the application thanks to an API. Refer to the white paper provided by I.R.I.S. on this subject to define your settings (Setup button).
SCANNING
Scanning options
In the Scanning tab, you can set the document separation procedure.
If you intend to use barcodes, OCR (ICR) zones, patch codes or blank pages to identify, separate or index your documents, or if you wish to set image processing operations, you must also define the required settings in the various Scanning modules (access through icons on the right).
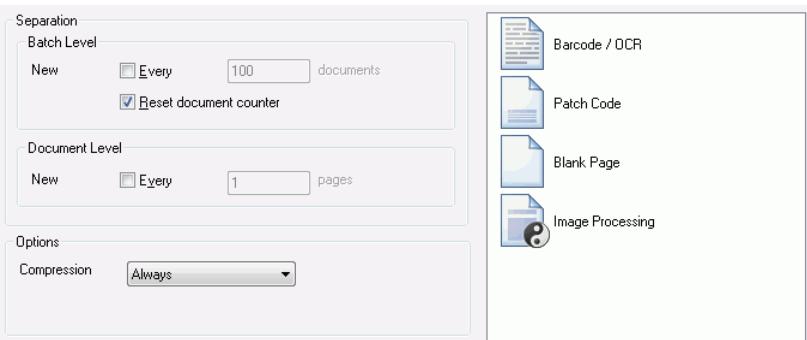
Separation (based on batch or document counter)
The batch/document separation procedure is based on the number of objects they contain.
Batch Level: set the number of documents after which the software must automatically create a new batch.
Reset document counter (default): if you check this box, the document counter is reset to 1 each time a new batch is being created.
Document Level: set the number of pages after which the software must automatically create a new document.
Tip:
The separation process can be set according to:
-OCR/ICR zones
- Patch codes
- Blank pages
To define such separation processes, select the corresponding modules in the right part of the Scanning tab and click on Setup.
Refer to: Scanning, Barcode/OCR, Setting barcode properties, Setting OCR zone properties, Defining and using patch codes, Defining and using blank pages.
Tip:
The IRISFingerPrint add-on to IRISPowerscan provides an additional separation process based on the general image layout. Get in contact with I.R.I.S. to acquire such add-on.
Options
Compression:
Default: select this option to make the application produce image files according to what was defined at scanner level (either compressed or uncompressed files).
Always: select this option to make IRISPowerscan always compress your images to the JPEG (color & grayscale) or TIFF G4(B&W) format, without taking into account what has been defined at
scatter level.
Never: select this option in order never to compress the images and thus produce BMP images.
Barcode/OCR
Barcode and OCR setup
The Barcode/OCR Setup module is used to define the
barcodes/OCR zones to be automatically read on the images.
These zones can be used to:
- separate the batches/documents,
- extract indexing values,
- identify the type of batch/document.
The reading takes place during the scanning process. Manual data extraction ("On the Fly OCR") will still be possible after the scanning (see: Indexing validation, Indexing tools).
To access the Barcode and OCR Setup window:
- Open your project. Select Setup from the File menu, or click the
Project Setup button from the main toolbar, then select the
Scanning tab and click on the Barcode/OCR Setup button.
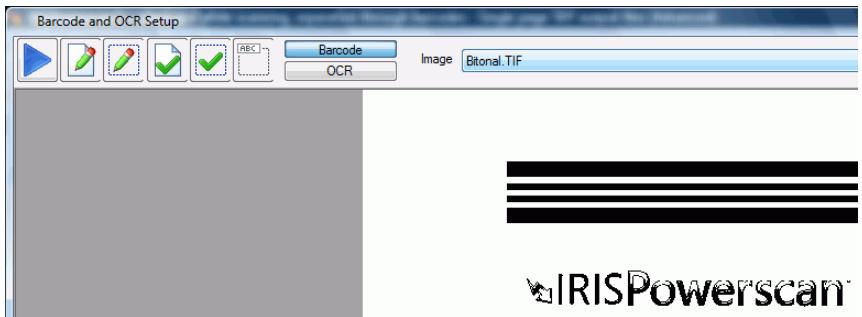
The Barcode and OCR Setup window allows you to scan an image and define general properties for all defined barcodes/OCR zones, as well as barcode/OCR zone-specific properties. You must first select your template image in the Image drop-down list before barcode/OCR zones can be defined.
To create your own template images. See: Project Setup, Scanning, Barcode/OCR, Capturing template images.
Default template images
The template project that you have chosen for creating your own project already contains one (or more) template image. This image is automatically displayed when opening the Barcode and OCR Setup window.
Capturing template images
The template image to be used for barcode/OCR zone definition must be in the Image drop-down list before barcodes or OCR zones can be defined. There are two ways to capture images for barcode/OCR setup: you can either scan an image directly from the Barcode and OCR Setup window, or scan an image from the main window and copy it to the Project Setup.
1. To scan an image from the Barcode and OCR Setup window:
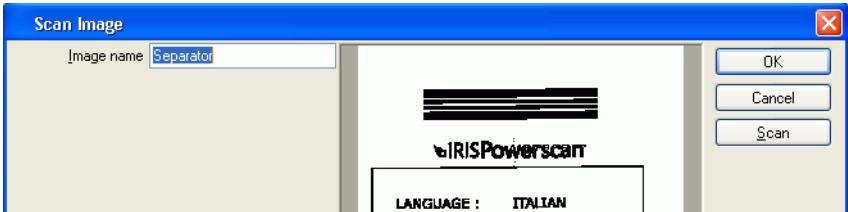
- Click on the blue Scan button (Scan an image) on the left. The Scan Image window opens.
-
Enter a name in the Image name field. The image name should not contain the following special characters: ", ?, *, ., >, <, /, \
-
Position the document in the feeder and click on the Scan button. The image appears in the Scan Image window. (The current Page Setup will be used for the scanning (see: Scanning, Page Setup). Any auto-rotation, auto-cropping and deskew settings will be applied to the scanned image before it appears).
-
If the image you scanned is acceptable, click OK to save it as a template image.
2. To scan an image from the main window and copy it to the Project Setup
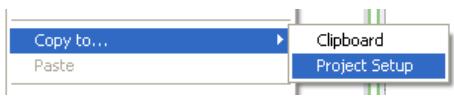
- Select the template image in the application viewer, right-click on it, and select Copy to Project Setup.
The image is directly available in the Project Setup window, Image field.
Defining barcodes
To define barcodes:
- From the Project Setup Scanning tab, select Barcode/OCR to access the Barcode and OCR Setup window. If your project already contains template zones, these will directly appear on screen.
What to do with the default template barcodes?
The template project that you have chosen when starting your project (see: Starting up, Creating a project) is provided with template images and default
template zones. Before defining new barcodes, check whether the template zones can be useful to you: check their type, location and properties. You may wish to simply modify them rather than start creating new zones from scratch.
You can for example use a template barcode and relocate it on the image, change any of its properties, etc. (see: Project setup, Scanning, Barcode/OCR, Setting the barcode properties).
!Caution
If you decide not to use the default template barcodes, delete them.
- To create a new barcode, select the template image to be used for barcode definition in the Image drop-down list.
- Click the Barcode button BarCode at the top of the window.
- Place your cursor at the top left corner of the barcode area. Click the left mouse button and drag the cursor until a rectangle is drawn around the area of the barcode.
The barcode will be enclosed in a red box.
Tip
Leave at least a 1/4-inch of space around a barcode to guarantee that the full barcode will always fall within the zone. Move the zone around the barcode until the highest confidence rate is achieved (see: Project setup, Scanning, Barcode/OCR, Testing barcodes and OCR zones.)
PRODUCTS : I.R.I.S.

Note
Barcode zones are project-specific; not image-specific. Therefore, displaying a new image will continue to display the zones as defined.
- Define the barcode properties in the Barcode Zone Properties window. See: Project setup, Scanning, Barcode/OCR, Setting the barcode properties.
- Once the barcode has been properly defined on the template image, you can test it. See: Project setup, Scanning, Barcode/OCR, Testing barcodes and OCR zones.
Modifying the barcode zone
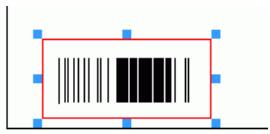
You can always modify the barcode zone. Simply click on the barcode zone and drag the whole rectangle or any of the red lines as you wish.
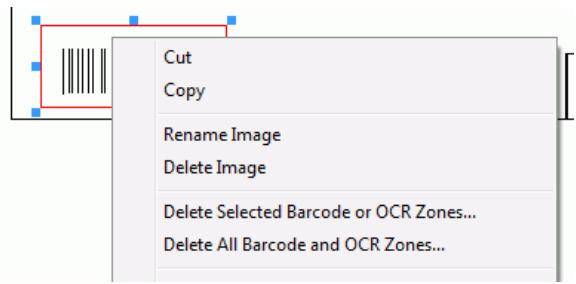
Deleting the barcode zone
You can always delete any barcode zone. Select the barcode zone and right-click to access the context menu; Click Delete Selected Barcode or OCR Zone.
Defining OCR zones
To define an OCR zone on a template image:
- From the Project Setup Scanning tab, select Barcode/OCR to access the Barcode and OCR Setup window.
If your project already contains template zones, these will directly appear on screen.
What to do with the default template OCR zones?
The template project that you have chosen when starting your project (see: Starting up, Creating a project) is provided with template images and default template zones. Before defining new OCR zones, check whether the template zones can be useful to you: check their location and properties. You may wish to simply modify them rather than start creating new zones from scratch.
You can for example use a template OCR zone and change any of its properties, etc. (see: Project setup, Scanning, Barcode/OCR, Setting the OCR zone properties).
!Caution
If you decide not to use the default template OCR zones, delete them.
- To create a new OCR zone, select the template image to be used for the definition of the OCR zone in the Image field (down arrow to access the drop-down list).
- Click on the OCR button at the top of the window.
- Place your cursor at the top left corner of the OCR zone. Click the left mouse button and drag the cursor until a rectangle is drawn around the OCR zone.
The barcode will be enclosed in a green box.
Tip:
For variable length and height, make sure that you draw the zone large
enough to capture all the data. At the same time, be careful not to draw the zone too large so that stray data (e.g.: lines on a form) can accidentally be captured.
NAME:
KEVIN GRAHMS
CLIENT NUMBER:
1R1S123456789
BIRTH DATE:
1977/03/13
CONTRACT NUMBER:
123456
STREET:
RUE DU BOSQUET
CITY:
LOUVAIN-LA-NEUVE
ZP:
B-1348
- Define the OCR zone properties in the OCR Zone Properties window. See: Project setup, Scanning, Barcode/OCR, Setting the OCR zone properties.
- Once the OCR has been properly defined on the template image, you can test it. See: Project setup, Scanning, Barcode/OCR, Testing barcodes and OCR zones.
Modifying the OCR zone
You can always modify the OCR zone. Simply click on the OCR zone and drag the whole rectangle or any of the green lines as you wish.
LANGUAGE:
GERMAN
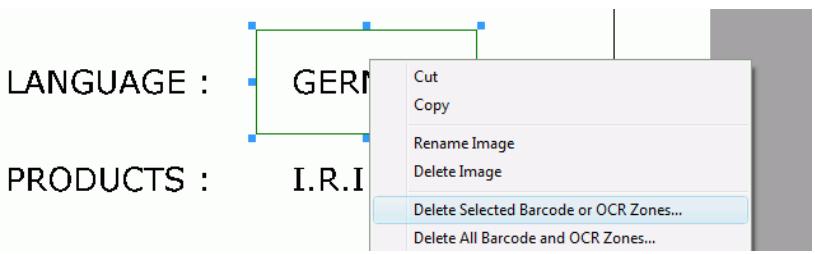
Deleting the OCR zone
You can always delete any OCR zone. Select the OCR zone and right-click to access the context menu. Click Delete Selected Barcode or OCR Zone.
Setting barcode properties
Once a barcode has been located on a document template, you can define its properties (size, type, name, etc.). You can also tell the software whether it must be used as a separator for the batches/documents, if it must be used to create attachments, etc.
To set the barcode properties:
- Once you have drawn your barcode on the template image, IRISPowerscan attempts to read the barcode in the zone and automatically displays the Barcode Zone Properties window. (Alternatively, select the barcode zone and click on Barcode zone and OCR properties from the toolbar).
Select or fill in the required options in the Barcode Zone Properties window. Click OK to confirm, then set the general barcode properties (see: Scanning, Barcode/OCR, General barcode and OCR properties).
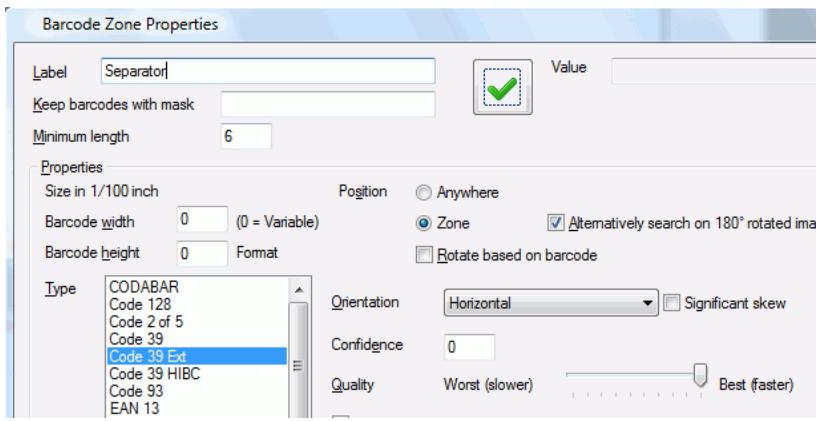
Label: name of the barcode*. This name identifies the barcode and, if the barcode is used as an index field, it will appear in the Index Setup as BC_[Label] (see: Indexing, Defining index fields).
(*) The label will appear in the top left corner of the barcode zone (in red) by clicking on on the Barcode and OCR Setup window toolbar).
- Keep barcodes with mask: give the barcode a mask to make sure that only barcodes with that mask are retained for the defined zone. For example, a mask of A(8) will retain a barcode value of up to, but not exceeding, eight alphabetic characters ("Surgery" will be retained - "Admission" will not be retained). See: Project setup, Scanning, Barcode/OCR, Setting a mask syntax.
Minimum length: indicate the minimum number of characters to be contained in the barcode. If the barcode does not contain the minimum number, it will not be returned by the software.
Properties
Size: if the barcode has a fixed width and height, enter these values in the Barcode width and Barcode height fields. Making an entry in one or both of these fields increases the performance of barcode reading. If one of the dimensions is variable, enter "O".
Position: indicate the position of the barcode on the template image.
Anywhere: if the barcode can appear anywhere on the image (the rectangle around the barcode will become blue).
Zone: if the barcode is always positioned at the same place (the position is indicated by drawing the barcode on the template image (see: Project setup, Scanning, Barcode/OCR, Defining barcodes).
Alternatively search on 180^ rotated images (only in case the Zone option is selected): tick this option to prevent barcode read failure in case a page is scanned upside down. If the barcode reading fails on a page, the software will thus look for the zone after rotating the image by 180 degrees. This slows down barcode reading.
Rotate based on barcode: tick this option to rotate all the pages of the document in the same manner as the lead page containing the barcode zone.
Type: select the barcode type(s)* from the list.
(*) The barcode to be read may be of different types.
Verify checksum: tick this option to make the software automatically verify the barcode check character(s), if there are any.
Orientation: indicate the barcode's orientation on the template image: horizontal, vertical, etc.
If your barcodes are all in the same orientation (i.e. all horizontal or all vertical), it is recommended that you indicate the specific orientation; this will increase the reading performance.
If your barcodes are predominantly in the same orientation but there may have an occasional barcode in the opposite direction, it is recommended to use the appropriate "then" orientation, e.g.
"Horizontal then Vertical". This will improve the reading performance.
Significant skew: enable this option if there is a possibility that barcodes could be skewed on a page. Significant skew means more than 15 degrees.
Confidence: enter a confidence level if you want to restrict what the software will consider to be a successful reading. When reading a barcode, the software reader indicates how confident it was in correctly reading the barcode (see: Project setup, Scanning, Barcode/OCR, Testing barcodes and OCR zones). If this confidence percentage (between 0 and 100% ) falls below the specified confidence level, then a barcode value is not returned.
Quality: if you notice that the quality of the barcodes to be read is rather poor, slide the quality indicator to the left. This will however slow down the barcode reading.
Allow out-of-specs barcodes: tick this option if you suspect the barcodes to be "out-of-specs", i.e. that they have been generated without respecting the barcodes specifications.
Minimum partial read: enable this option if you want the software to generate a barcode value even if a barcode is incomplete. This may be the case if the end of the barcode is unavailable or of insufficient quality, etc. If enabled, enter the minimum number of characters that will be allowed for a partial read. This option is useful for barcodes that are only used for document or batch separation where the absolute value is less critical.
Verify checksum: tick this option to make the software automatically verify the barcode check character(s) - if there are any.
Separation and Deletion
When a barcode is detected, it can be used to enable the following options:
- Separate batches
- Separate documents
-Create attachments.
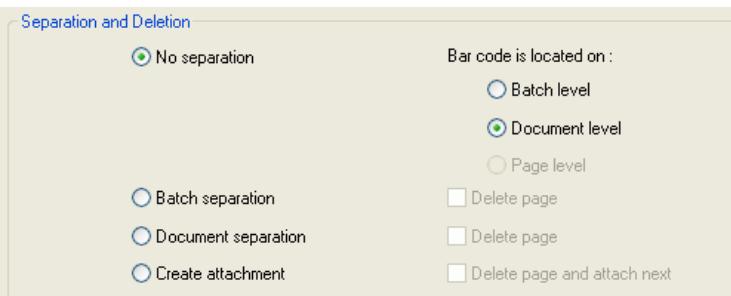
No separation: if you choose this option, you must indicate what level the barcode is located on. Barcodes can be found at batch level or document level.
Batch level: the barcode is located at batch level; barcodes that are located on the batch level or that separate batches are available for batch and document indexing.
Document level: the barcode is located at document level; barcodes that are located on the document level or that separate documents are available for document indexing. They are not available for batch indexing.
Batch separation: check this option to separate batches with the defined barcode.
(Remember to fill in the Keep barcodes with mask and/or
Minimum length fields if you wish to restrict batch separation to a specific barcode value or mask).
Delete page: check this option to delete the page containing the barcode that started the new batch.
Document separation: check this option to separate documents with the defined barcode.
(Remember to fill in the Keep barcodes with mask and/or
Minimum length fields if you wish to restrict document separation to a specific barcode value or mask).
Delete page: check this option to delete the page containing the barcode that started the new document.
(This is important when inserts are used for the purpose of document separation and do not contain any significant information.
The barcode, however, is still available for document level indexing).
(Remember to select Rotate based on barcode if you want to rotate all the pages in the document in the in the same orientation as the orientation of the barcode of the document.
Note: Rotate based on barcode is not available if the barcode separator page is deleted).
Create attachment: check this option to create an attachment with the defined barcode.
(Remember to fill in the Keep barcodes with mask and/or
Minimum length fields if you wish to restrict the attachment to a specific barcode value or mask).
Delete page and attach next: check this option to delete the page (both front and rear) containing the barcode and to use the next page as the attachment.
(Remember to select Rotate based on barcode if you want to rotate the attachment (both front and rear) in the same orientation as the orientation of the barcode on the page.
Important
The Create attachment option is only valid for one attachment page. If multiple attachments are required, then an attachment barcode must be applied to each attachment.
The barcode on the attachment page is not available for indexing.
Separation triggered by change of value: check this option if you want the separation to take place only if the barcode value changes.
Setting a mask syntax
The barcode masks are defined according to a mask syntax. They are used to validate the values detected on the documents, such as, for example, the index field values.

A mask is made of characters that correspond to different values:
A = alphabetic character (from A to Z and a to z)
X = alphanumeric character
9 = a digit (from 0 to 9)
? = any character
E.g.: if the value mask is AA99: the value is valid if it starts with two alphabetic characters followed by two digits.
Some portion of the mask may have to match a literal expression. This expression must then be written between quotes.
E.g.: if the value mask is AA"CONTRACT"99, the value is valid if it starts with two alphabetic characters followed by the literal expression "CONTRACT", followed by two digits.
For each character, you can also specify a counter, i.e. the number of characters that must be present in the value.
E.g.: ?(3) means up to 3 characters.
E.g.: A(3) means up to 3 alphanumeric characters.
E.g.: A(3)"CONTRACT"99 the value is valid if it starts with up to three alphabetic characters followed by the literal expression "CONTRACT", followed by two digits.
Number type mask characters
9 = numeric
E.g.: 9(3) or 999 453 or 123 or 657, etc.
Date type mask characters
D = numeric
M = alphabetic
Y = alphanumeric
H = any character
m = minute
s = second
t = time
E.g.:
DDMMYY = > 240309
D(2)M(2)Y(4) = >24032009 or 2439
H(2)''h''mm => 15h30 or 9h05, etc.
Setting OCR zone properties
Once an OCR zone has been located on a document template, you can define its properties (size, language, etc.). You can also tell the software whether it must be used as separator for the batches/documents, if it must be used to create attachments, etc.
To set the OCR zone properties:
- Once you have drawn your OCR zone on the template image, IRISPowerscan attempts to read the information in the zone and automatically displays the OCR Zone Properties window.
(Alternatively, select the OCR zone and click on Barcode zone and OCR properties from the toolbar).
Select or fill in the required options in the OCR Zone Properties window. Click OK to confirm.
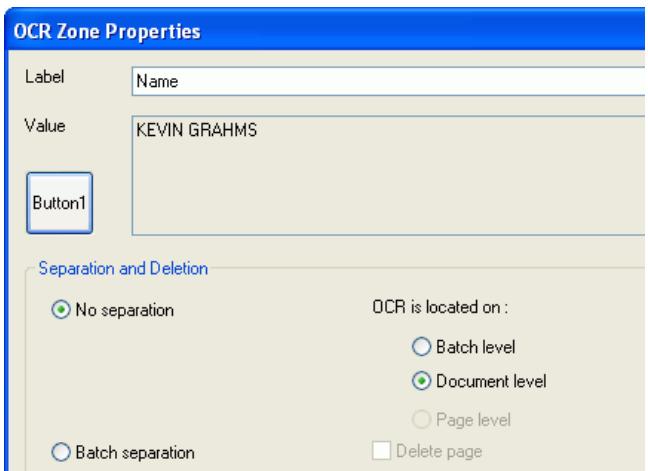
Label: enter a name for the OCR zone. This name identifies the OCR zone and will appear in the Index Setup as OCR_[Label] in the list of default values (see: Indexing, Defining index fields). (*) The label will appear in the top left corner of the barcode zone (in green) by clicking on on the Barcode and OCR Setup window toolbar).
Note
The OCR label does not define or identify an index field. All index fields must be defined in Project Setup, Indexing.
Multi-line OCR
When the text in an OCR zone is on more than one line, IRISPowerscan will insert a caret character (\^) between each line of data. The result is a delimited string of OCR text that can be broken up into separate index fields.
Gap between words
A gap between words on the same line that is greater than 5/16 of an inch will be interpreted by IRISPowerscan as multiline OCR data.
Separation and Deletion
When an OCR zone is detected, it can be used to enable the following options:
-
Separate batches
-
Separate documents
-Create attachments.
No separation: if you choose this option, you must indicate what level the OCR zone is located on. OCR zones can be found at batch level or document level.
Batch level: OCR zones that are located on the batch level or that separate batches are available for batch and document indexing.
Document level: OCR zones that are located on the document level or that separate documents are available for document indexing. They are not available for batch indexing.
Batch separation: check this option to separate batches with the defined barcode.
Document separation: check this option to separate documents with the defined OCR zone.
Delete page: check this option to delete the page containing the OCR zone that started the new document.
(This is important when inserts are used for the purpose of document separation and do not contain any significant information. The barcode, however, is still available for document level indexing).
Create attachment: check this option to create an attachment with the defined OCR zone.
Delete page and attach next: check this option to delete the page (both front and rear) containing the OCR zone and to use the next page as the attachment.
Important
The Create attachment option is only valid for one attachment page. If multiple attachments are required, then an attachment OCR zone must be applied to each attachment.
The OCR zone on the attachment page is not available for indexing.
Separation triggered by change of value: check this option if you want the separation to take place only if the OCR value changes.
Properties
Language: select the language of the OCR zone in the drop-down list.
Character set: define the character set that must be supported by the OCR engine; any character outside the defined character set will be ignored.
Keep OCR with mask:
Handprint: select this option in order to read handprinted data (ICR text). IRIS Powerscan is able to read handprinted numbers and handprinted capital letters in languages using the Latin alphabet, as well as the dot, comma and hyphen symbols.
Format
Remove spaces: select this option to remove spaces in the OCR result.
Remove format: select this option to remove formatting characters (e.g. carriage return) in the OCR result.
General barcode and OCR properties
You can provide properties that will apply to all barcodes and OCR zones that have been defined for the project.
To set general barcode and OCR properties:
- From the Barcode and OCR Setup window (Barcode/OCR section), select the General Barcode and OCR Properties button l and fill in the required options. Click OK to confirm.
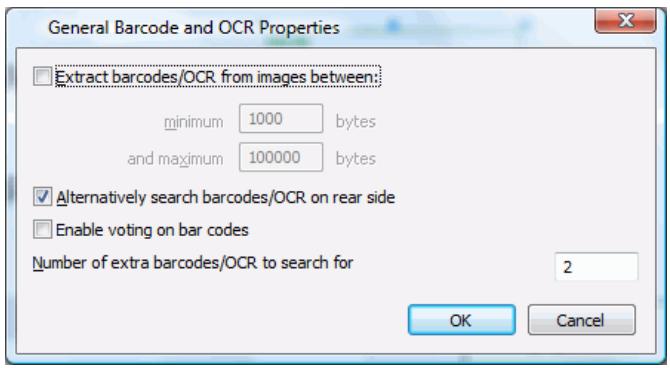
Extract barcodes/OCR from images between: enter values in the minimum and maximum fields. The values limit the images from which barcodes or OCR text will be read to only those whose size falls in between these values.
Alternatively search for barcodes/OCR on rear side: enable this option if you want to search for the barcode/OCR text on the rear side of the document.
Enable voting on barcodes: check this option if you want to activate the voting on barcode recognition results*.
(*) IRISPowerscan integrates several barcode recognition engines. The voting system calls all the engines for every barcode zone, then chooses the best result.
Tip:
Enabling the voting system means that you get better results, but it takes more processing time. The recognition becomes slower.
Number of extra barcodes/OCR to search for: specify a number if you want the software to search the image for the specified number of extra barcodes/OCR zones.
Testing barcodes and OCR zones
You can test the reading of your barcodes and OCR zones. The extracted values will be displayed in the Barcode and OCR values window.
To test a selected barcode or OCR zone:
- Select the barcode or OCR zone on the template image and click on Test Selected Barcode or OCR Zone.
To test all barcodes and OCR zones:
- Click on Test all Barcodes and OCR Zones
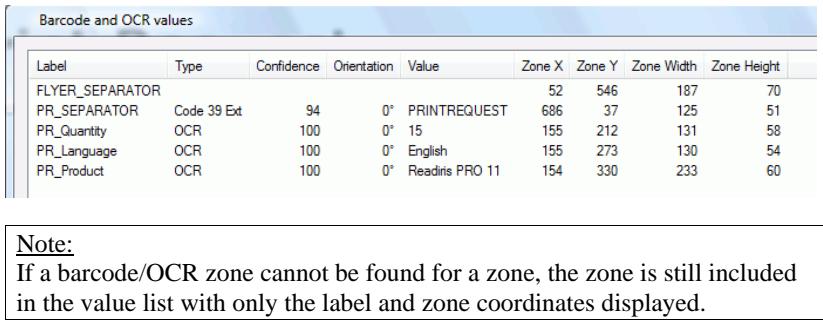
Label: label of the barcode/OCR zone.
Type: type of barcode found. If the zone is an OCR zone, the Type will be "OCR".
Confidence: confidence level (in percentage) of the barcode/OCR value found.
Orientation: orientation of the barcode (with 0 degrees representing a horizontal right-side up barcode).
Value: value of the barcode/OCR string.
X and Y: are coordinates of the upper left corner of the barcode/OCR zone. The coordinates are in 1/100 of an inch and represent the distance of the zone from the upper left corner of the image.
Width and Height: width and height of the barcode/OCR zone in units or 1/100 of an inch.
Patch code
Defining and using patch codes
The Patch Code module is used to define the patch codes to be detected on the images in order to separate the batches/documents. The reading will automatically take place during the scanning process.
To access the Patch Code Setup window:
- From the Project Setup Scanning tab, select the Patch Code icon on the right.

Patch Code
To define how to use a patch code:
- From the Patch Code Setup window, select the type of patch to be detected, then the required options in the Action section:
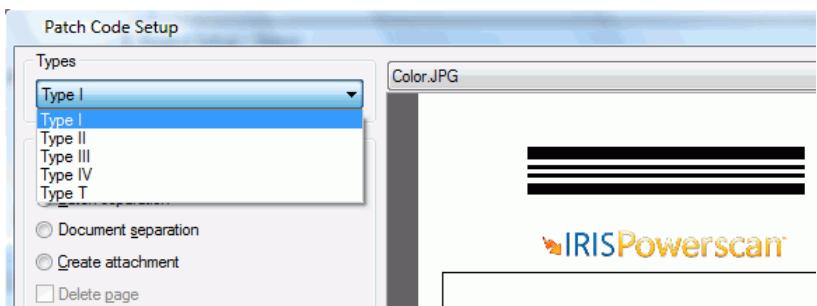
Batch separation: to make the software create a new batch when detecting the selected patch code.
Document separation: to make the software create a new document when detecting the selected patch code.
Create attachment: to make the software create an attachment when detecting the selected patch code.
Delete page: to make the software delete the page is the selected patch code is detected on the page.
Patch based rotation: tick this option to rotate all the pages of the document in the same manner as the lead page containing the patch code.
Search also on 180^ rotated images: tick this option to prevent patch code read failure in case a page is scanned upside down. If the patch code reading fails on a page, the software will thus look for the zone after rotating the image by 180 degrees. This slows down patch code reading.
Search also on rear images: tick this option to make the software also look for the patch code on the rear sides of the images.
Testing the patch codes
The Patch Code Setup window also enables to test your document patch codes. Simply select an image in the right part of the window (drop-down list) and IRISPowerscan will test whether the patch code can be properly detected.
Tip:
To make an image available for project setup, access the application viewer and select the image to be used:
-
Select the required image in the viewer, right-click on it, and select Copy to Project Setup.
-
The image is directly available in the Project Setup window, Image drop-down list.
To test a patch code on a template image:
- From the Project Setup Scanning tab, select the Patch Code icon on the right to access the Patch Code Setup window.
- In the left part of the window, select the type of patch to be detected, and on the right side, select the template image on which the patch code must be read.
Tip:
To make an image available for project setup, access the application viewer and select the image to be used:
-
Select the required image in the viewer, right-click on it, and select Copy to Project Setup.
-
The image is directly available in the Project Setup window, Image dropdown list.
-
The type of path code is directly displayed at the bottom of the window.
Result

Image is 180^ rotated
Patch detected:
Type II
Image is 180^ rotated: tick this option to also test a patch code after rotating the image by 180^ .
Blank page
Defining and using blank pages
The Blank Page module is used to define the blank pages that will be used to separate the batches/documents.
The detection will automatically take place during the scanning process.
You must first define what should be considered as a blank page, then determine how the detected blank pages should be used in your project.
Caution:
A page is considered blank only if both the front and the rear sides are blank.
To access the Blank Page Setup window:
- From the Project Setup Scanning tab, select the Blank Page icon on the right.

Blank Page
To define what is to be considered as a blank page:
- In the Blank Page Setup window, define what should be considered as a blank page by the application in the Detection method section, then fill in the required options in the Actions section.
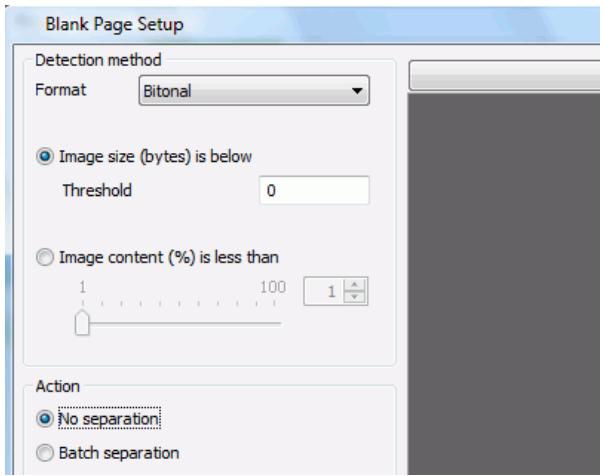
Detection method
Format: select the type of image for which you want to set up the detection method. (The detection method can be different for black&white and color/grayscale images).
Image size is below: set the image size in number of bytes. Below the defined threshold, the page will be considered as blank.
Image content is less than: set the percentage of content of the page. Below this content, the page will be considered as blank.
Action
No separation: if a blank page is detected, it should not be used as a separator.
Batch separation: to make the software create a new batch when detecting a blank page*.
(*) Both front and rear images are blank
Document separation: to make the software create a new document when detecting a blank page*.
(*) Both front and rear images are blank
Create attachment: to make the software create an attachment when detecting a blank page*.
(*) Both front and rear images are blank
Delete page: to make the software delete the detected blank pages*.
(*) Both front and rear images are blank
Delete image: to make the software delete the detected blank images.
Flag: to display a flag in the application viewer on top of each detected blank image.
Testing blank pages
The Blank Page Setup window also enables to test your blank pages. Simply select an image and IRISPowerscan will test whether the page is considered as blank according to the parameters that have been set.
To test a blank page:
- In the Blank Page Setup window, select the image you want to test from the Image drop-down list (right part of the window).
Tip:
To make an image available for project setup, access the application viewer and select the image to be used:
-
Select the required image in the viewer, right-click on it, and select Copy to Project Setup.
-
The image is directly available in the Project Setup window, Image dropdown list.
-
The test results are directly displayed in the Test results section at the end of the window.
Test results
The image is NOT BLANK
The image size is 20 Bytes
Image processing
Defining image processing operations
The Image Processing module is used to define the automatic image processing operations to be carried out on the scanned images (contrast, binarization, deskew, despeckle, black border removal, etc.).
You can create various image processing models, then later activate the one that fits your needs.
You can display your images and directly test the processing operations.
To access the Image Processing window:
- From the Project Setup Scanning tab, select the Image Processing icon on the right.

Image Processing
To define the required image processing operations:
- In the Image Processing window, right part, select the image* on which you want to test your processing operations.
(*) Two versions of the image are displayed: a small one and a large one. The small image corresponds to the selected source image, the large image automatically shows the result of the processing operations activated in the left part of the window.
Tip:
To make an image available for project setup, access the application viewer and select the image to be used:
-
Select the required image in the viewer, right-click on it, and select Copy to Project Setup.
-
The image is directly available in the Project Setup window, Image drop-down list.
In the left part, define the required options:
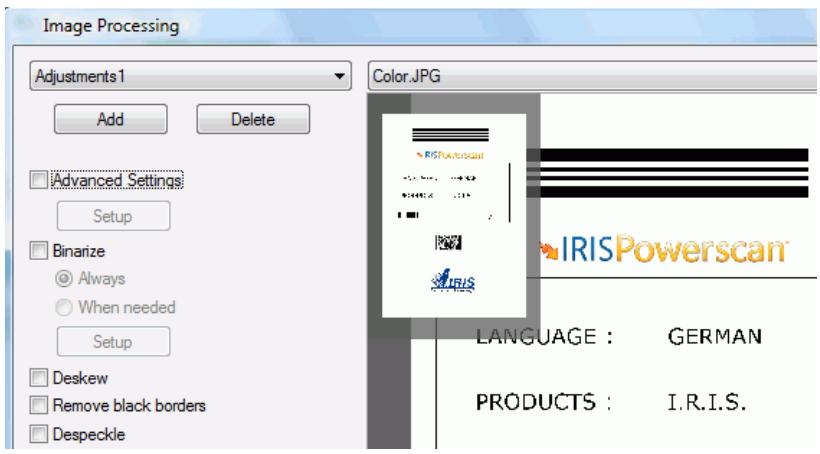
if you wish to, you can create a model: give it a name (in the above example: "Adjustments1").
Advanced settings
Click on Setup and set the brightness and contrast of your scanned images.
Binarize
IRISPowerscan is able to work in dual-stream with any scanner, i.e. to produce bitonal images from color images.
Select Binarize if you want the software to binarize your images.
Always: to make the software always binarize the images according to the parameters defined in the Setup window (see below) and keep the bitonal images after the scanning.
When needed: to make the software binarize the images according to the parameters defined in the Setup window (see below) only for the reading of barcodes, OCR zones, patch codes, etc. The software will automatically binarize the images before the reading. The bitonal images will not be kept after the scanning.
Setup: Click on Setup and set the binarize options. The adjustments will be made on the color images, before the images are converted into bitonal images.
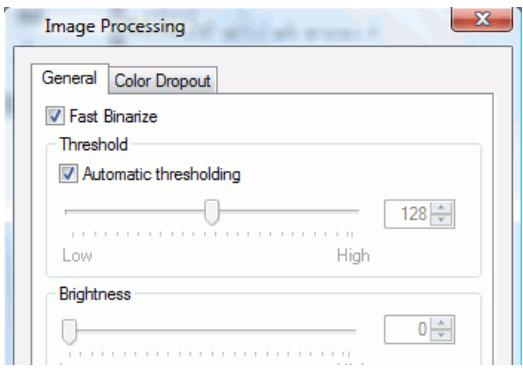
General
Fast Binarize: to activate the default fast binarization.
Threshold: select the automatic threshold or set your own thresholding.
If you want to your own binarization options, deactivate Fast
Binarize and set your own options:
Brightness
Contrast
Smooth Color Image
For each option, use the slider bar, make a few tests and check the resulting images in the right part of the Image Processing window.
Color Dropout: use this option to define colors to be dropped.
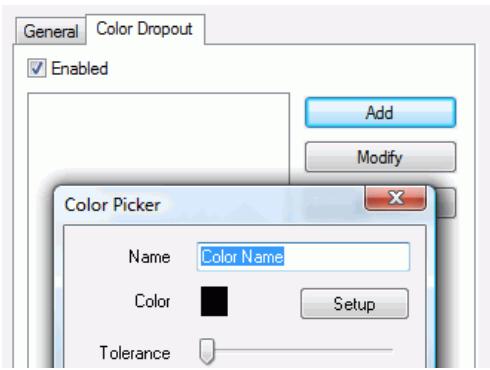
Deskew: to deskew the images
Remove black borders: to remove the image black borders
Despeckle: to remove the noise (little dots) present on the images. Determine the dots' size.
Remove lines: to remove the lines present on the images. Determine the lines' size.
Tip: Test the Binarize options on the images selected in the right part of the Image Processing window before you set the final parameters.
INDEXING
Indexing
The Indexing tab is used to define the indexing fields that will be automatically filled in by IRISPowerscan at batch and document level. The validation of the indexing is handled by the user. It can be done either during the scanning or after the scanning.
If your project contains documents/batches of different types, you will also define them in this tab.
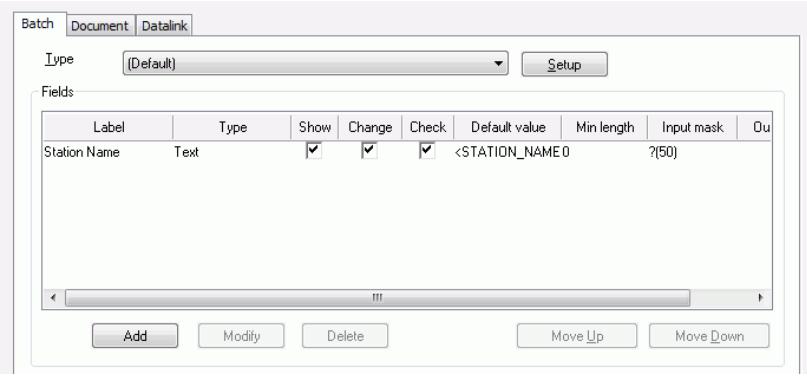
Defining batch/document types
To define various types of batches/documents, you must give them a name and define their identifiers (barcodes and/or OCR zones).
To define a type of batch/document:
- In the Indexing tab, choose the Batch or Document tab, then open the Setup Index Types dialog box (click the Setup button of the Type field).
Type
Default

Setup
- In the Setup Index Types dialog box, click on Add to add a new type. In the Index type dialog box, fill in the required information and click on OK to confirm.
Label: type in the name of the batch/document type; this name that will appear in the Index pane.
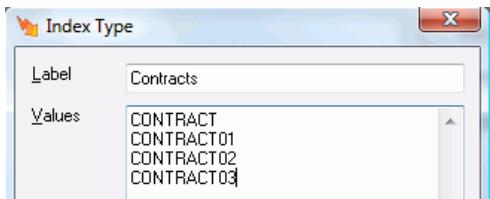
- In the Setup Index Types dialog box, also define the type's identifier. The identifier is the same for all types. It is usually a barcode or an OCR zone. Get to the Formula field and click on Setup, then choose the formula that contains the required barcode/OCR zone (the barcode/OCR values are defined in the Barcode/OCR section - see: Barcode/OCR). To match a type, the extracted value will have to correspond exactly to one of the type values.
Complex formulas can also be used (see 3rd example below).
E.g.:
- 2 types: Contracts, Letters
- identifier is a barcode that contains either "CONTRACT" or "LETTER"
E.g.:
- 10 types: 10 names of people
- identifier is an OCR zone that correspond to any of the persons defined as document types
E.g.:
- 12 types: Contract 01, Contract 02, (...), Contract 12
- identifier is a barcode containing the word "Contract", plus a space, plus the month
In this case, the formula is
If the scanning date is January, the value extracted from the
barcode is "Contract". The document corresponds to the first type (i.e.: Contract 01).
To define the formula, refer to: Project setup, Indexing, Defining value formulas.
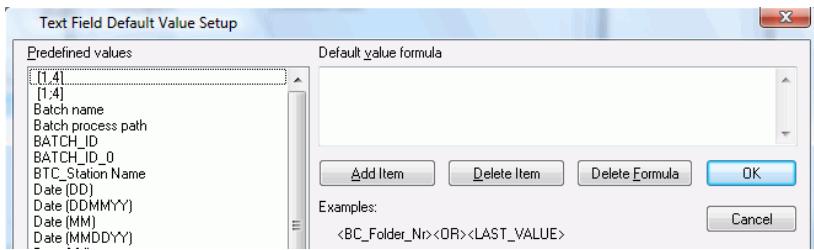
Defining index fields
For each type of batch or document to be processed in IRISPowerscan, you can define an unlimited number of index fields. The field values are extracted from barcodes or OCR zones present on the documents, or from system values (e.g. name of the user who scanned the document, scanning date, etc.).
To define index fields at batch level, access the Batch tab within the Project Setup Indexing tab.
To define index fields at document level, access the Document tab within the Project Setup Indexing tab.
To define an index field:
- Choose the batch/document type for which you want to define an indexing field in the Type field, then click the Add button below the Fields section.
- Fill in the required options in the General and Advanced tabs, then click OK to confirm.
General tab
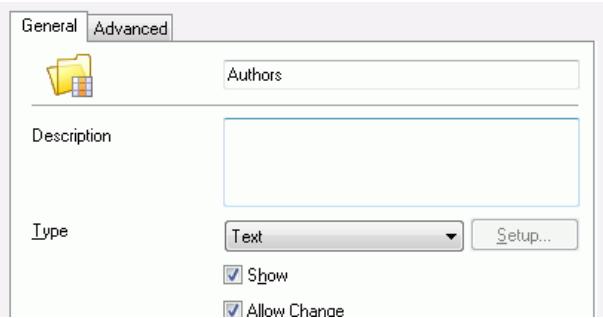
Label: name of the field to be displayed in the Index pane.
Description: describe the field's content.
Type: type of the field (text, number, date).
Show: tick the box if the field must be visible in the Index pane.
Allow Change: tick this box to enable the user to manually change the value in the Index pane.
Check during Scanning (always ticked in the case of batch fields): tick the box if the scanning must stop when the software encounters an error during the indexing.
Default Value: from the Setup button, define the value formula: type in a character string between quotes, and/or choose a system value from the list, and/or choose a barcode/OCR formula (these are set up using the Barcode/OCR section).
To define the formula, refer to: Project setup, Indexing, Defining value formulas.
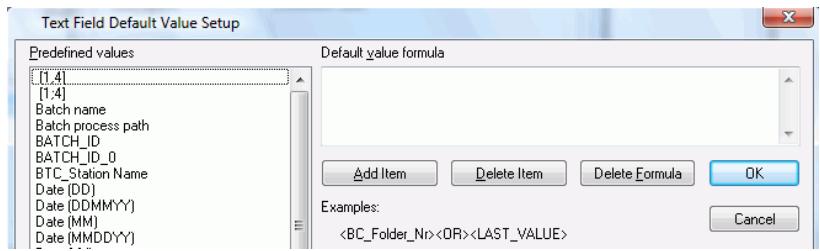
Minimum Length: define the minimum number of characters to be contained in the value. If the value does not contain the minimum number, it will be considered as invalid by the software and will be highlighted in red in the Index pane.
Input mask: define the format of the value. If the value does not have the given format, it will be considered as invalid by the software and will be highlighted in red in the Index pane. See: Project setup, Scanning, Barcode/OCR, Setting a mask syntax.
Output mask: define the format into which the value must be converted.
Advanced tab
The options available in this tab are used to set multiple value fields, with possible multi selection. You can indeed connect a field with an external database or with a list of valid values. If the data extracted from the documents does not correspond to one of the (database) values, the index field will be considered invalid by the application and appear in red in the Index pane.
DataLink: type in the database name, i.e. the one that has been defined in the DataLink tab. See: Project setup, Indexing, DataLink.
Values: define a list of possible values.
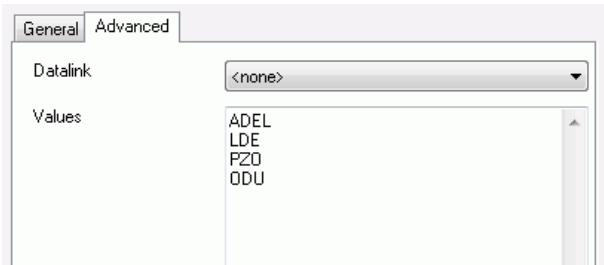
In some cases, it is very useful to define values as pairs made of a CODE and a DATA.
CODE is the value that will be stored (and exported), DATA is the value being displayed in teh Index pane.
The CODE and the DATA must be separated by semi-columns (;)
E.g.:
BE;Belgium
FR;France
GE;Germany
Multiple values: tick this option to make multi-selection possible in the index field.
Separator: select the separator that will be used to separate the values in the index field.
Setting batch/document names
The names you assign to your batches/documents will appear in the explorer (Batches pane) while the documents are being scanned.
You can build up the names as you wish to. Formulas can be made of custom character strings, and/or system values, and/or from barcodes/OCR zones picked up from the documents.
E.g.: "Contract"
This first part is a chosen word, the second part of the name
corresponds to the clients name which is picked up from the document.
To define a batch/document name:
- In the Indexing tab, access the Batch or Document tab, then get to the Name section at the bottom.

- Click on Formula Setup and introduce the required formula: type in a character string between quotes and/or choose a system value from the list and/or choose a barcode/OCR formula (these are set up using the Barcode/OCR section).
To define the formula, refer to: Project setup, Indexing, Defining value formulas.
Defining value formulas
Formulas are expressions that determine a value's contents. They are evaluated by the software during the scanning or when a batch/document is being created.
Formulas can be used to:
- (Re)name a batch or a document (see: Project setup, Indexing, Setting batch/document names)
- Automatically fill in index fields (see: Project setup, Indexing, Defining index fields)
- Identify the type of document (see: Project setup, Indexing, Defining batch/document types)
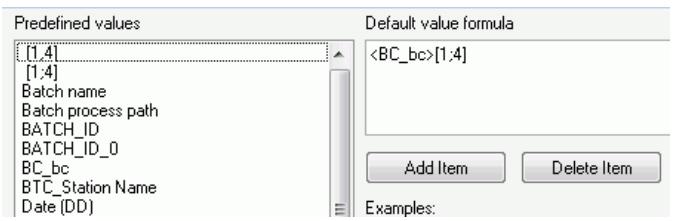
An expression is made of variables and a literal part.
Variables are predefined values that are computed by IRISPowerscan at runtime. They can be:
- The username (
) - the id (
) or the name ( ) of the station - the id (
) or the name ( ) of the current batch - the id of the current document (
) - the id of the current page (
) - the current date and time
- any OCR value (
) - any barcode value (
)
E.g.: The formula
E.g.: Typically, you can build unique batch identifier like this:
<STATION_ID>"_"<BATCH_ID>"(""<DATE_MDY>""<TIME_24>")
Tip:
You can extract some part of the variable specifying the offset (position of the first character) and the length.
E.g.: BC_Value = 12345678
Tip:
The offset can be less than zero which means "starting from the end"
E.g.: BC_Value = 12345678 < BC_Value >[-4;2] = 56
Sometimes barcode contains many values delimited by a separator. You can extract a particular value specifying the index and the separator.
E.g.. 12345678;NURSERY;AA1234
The operator <OR> can be used to combine expressions; in that case the first not empty expression will be kept.
E.g.:
DataLink
The DataLink tab offers to establish a connection between IRISPowerscan and an external database. The objective is to validate the index values extracted from the documents against a list of valid values defined in the external database. See: Project setup, Indexing, Defining index fields.
To establish the connection:
Install the ODBC driver under Windows.
- In the DataLink tab, click on Add to introduce a new data source and introduce the required data in the DataLink Setup window, then click OK to confirm.
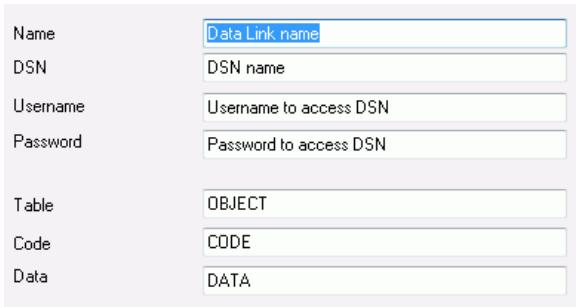
- In the Indexing tab, access the concerned index field and establish the connection.
PROCESSING
Processing options
The Processing tab is used to define the output processing options. You will be able to define and setup the service to be used for document creation, as well as the connector used to export the data to another application or repository.
Tip: The processing is launched by the user each time a batch is ready for processing (i.e. when the user has checked that everything is fine in the batch.


Path: confirm the proposed location path for the output files, or browse for another location.
Options
Automatic processing: if you check this option, the user will be prompted to launch the processing once the scanning is complete and all index fields are valid.
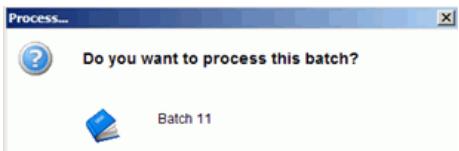
Background processing: if you select this option, the processing will work in the background after being launched. The user will not have to wait for the processing to finish before he starts to scan again.
Delete batch: if you select this option, the batch is deleted after processing and it disappears from the Batches pane. If you do not select it, the user will be able to see the processing results in the viewer.
Create index file: tick this option to generate an index file containing all information about the processed batch (number of documents, images, etc.).
Service: enable the service if you want to activate IRISDocument* for document creation in many possible formats. Click the Setup button to fill in the required options for document creation, as well as image pre-processing, OCR, compression (iHQC), etc. Refer to the IRISDocument user guide.
(*) Only one service available in this version.
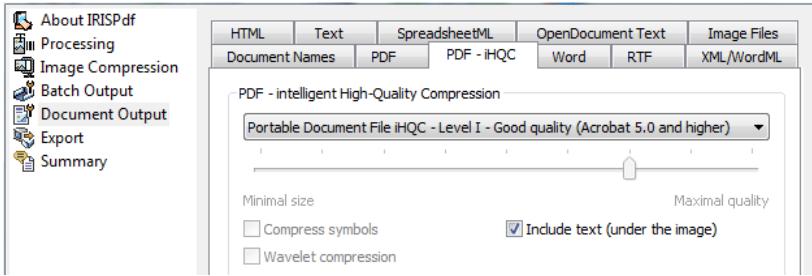
Display log file: enables to have the service log file automatically displayed at the end of the processing.
Connector: choose the connector that will export the data to a third party application or repository. The IRISCapture Pro for Invoices/Forms send documents directly to IRISCapture Pro*.
(*) Provided IRISFastLink is installed on your PC.
Configure each connector through the Setup button on the right. Note:
You can also create your own connector. Please get in contact with I.R.I.S. for instructions on how to integrate it in the application.
Tip: If you activate both a service and a connector, the documents generated by the service will be available for the connector.
SECURITY
Features available for system administrators only.
The Security tab gives an overview of the roles that can access the selected project.
| Name | Description |
| Administrator | Full control |
| Indexing | Limited privileges for indexing |
| Scanning | Limited privileges for scanning |
| Supervisor | Privileges for projects create/delete/import/export |
Remember that all roles, users and user groups are defined through the User Management module. See: Software options, User profiles.
CHAPTER 6 SCANNING
SCANNER SELECTION
When running IRISPowerscan, you are automatically prompted to confirm the scanner selection in the Select Scanner window*. You must select your scanner then click OK.
(*) You can also access the scanner selection is window by selecting Scanner, Select, from the Settings drop-down menu (either from the Start up window, or from the user interface).
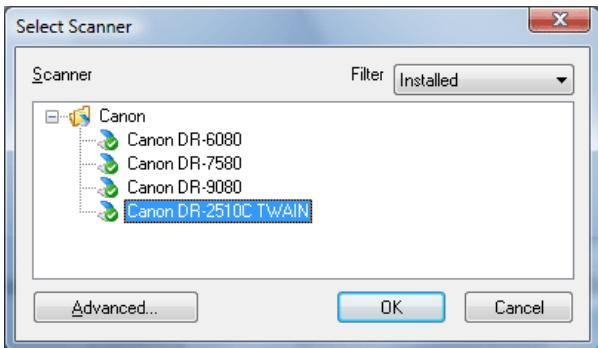
If the scanner is not displayed in the list, click Advanced and select the right source (Universal Driver and scanner).
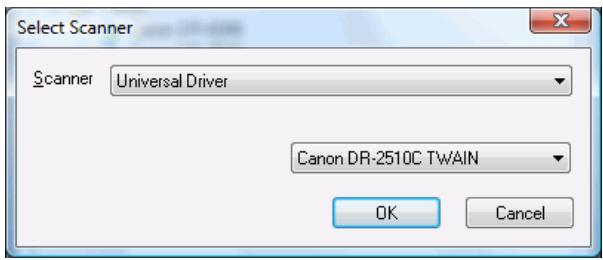
Once a scanner has been connected, the Emulation mode (which enables to run emulation images) is disabled and the scanning of document sheets can start. (You can access the Scanner Setup dialog box by selecting Scanner, Setup, from the Settings drop-down menu).
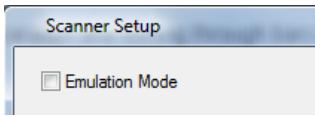
SCANNER SETUP
By default, the application is set to run with the Twain protocol which requires a Twain driver version 1.9 or higher. If you do have a Twain driver 1.9 or higher, the Twain driver interface will be accessed via the application Page Setup window (see: Scanning, Page Setup: scanner icon on the right).
It is recommended to make a few scanning tests.
If your Twain driver version is prior to 1.9, or if the scanning does not seem to work properly - e.g.: the received images do not match the defined scanner settings -, you must choose one of the other communication methods with the scanner:
- Twain Programmatic: if the scanner Twain driver is prior to version 1.9
- Twain Safe Mode: if the scanning still does not work
If you choose any of the above options, all scanning parameters will be set in the application Page Setup window, Scanner tab.
If the scanning still does not work properly, choose Show Scanner Dialog. By doing so, you will be able to introduce your scanner settings directly in your scanner interface each time you want to start the scanning.
Be careful:
- this will have to be done each time you want to start the scanning
- you must make sure your scanning parameters do match the settings introduced in the application Page Setup window (see: Scanning, Page Setup).
To change the scanner communication method:
- Access the Scanner Setup window: select Scanner, Setup, from the Settings drop-down menu (either from the Start up window, or from the user interface).
- Choose another communication method in the drop-down list,
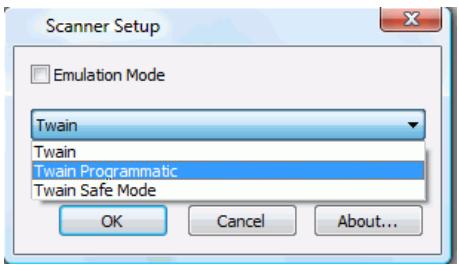
or:
choose Show Scanner Dialog.
RUNNING EMULATION IMAGES
IRISPowerscan is also provided with emulation images. These can be used for demonstration or testing purposes. You can run the emulation images to make a few tests before you start with the actual production scanning process.
The Emulation Mode that enables to run these emulation images is activated by default. If you connect a scanner, however, the Emulation Mode becomes disabled.
To reset the Emulation Mode:
- Select Scanner, Setup, from the Settings drop-down menu (either from the Start up window, or from the user interface).
- Select Emulation Mode in the Scanner Setup dialog box.
To run the emulation images:
- Make sure the application is set to run in Emulation Mode (see above). The big blue Scan button on the main toolbar turns into a small one.
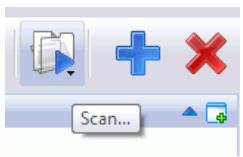
- Click on Scan, then Start in the drop-down menu to scan the emulation images.
CAPTURING EXISTING FILES
IRISPowerscan offers the possibility to scan already existing images. This is the Scan from Files option.
To capture existing images:
- From the Settings drop-down menu, select Scanner, From Files, or click on Scan on the main toolbar, then From Files, then browse for your image files.
The Scan icon on the main toolbar changes.
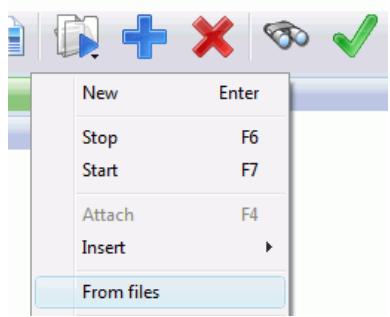
Tip: Next time you will launch the scanner (by using Start/New Document (ENTER)/Insert/Attach/Rescan), you will be prompted to browse for the folder containing the images.
- Click the Scan icon on the main toolbar, then select Start, and browse for your files. The Image formats supported are: BMP, TIFF, JPEG, PNG.
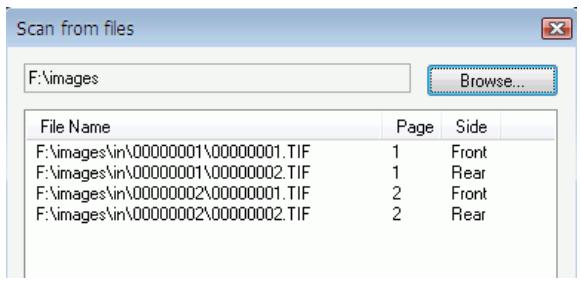
Important note:
The images in the input folder must be consistent with the project scanner settings (Page Setup).
E.g.: If the scanner is configured for black & white images only, the input folder must contain black & white images (color images will be ignored).
PAGE SETUP (SCANNING PARAMETERS)
Page setup (scanning parameters)
The Page Setup window allows you to set the scanning parameters and get ready for the scanning. You can set:
- the scanning parameters
- the image parameters
- the automatic merge of documents
- the automatic split of documents
To access the Page Setup window:
- Click on the Page Setup button on the main toolbar, or select Page, Setup from the Settings drop-down menu (either from the Start up window, or from the user interface).
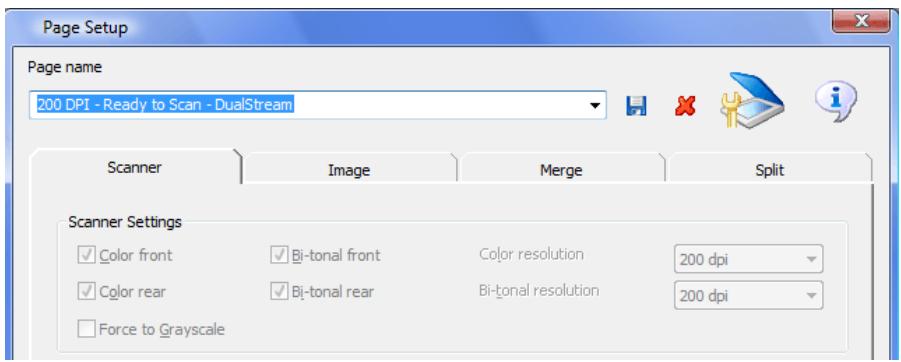
The scanner settings are disabled. They must be introduced in the Twain user interface: select the scanner icon at the top right of the window to access to the scanner Twain user interface.
Note:
If your scanner Twain driver version is prior to 1.9, the scanner icon will not be displayed and the scanner settings will be enabled in the Scanner tab.
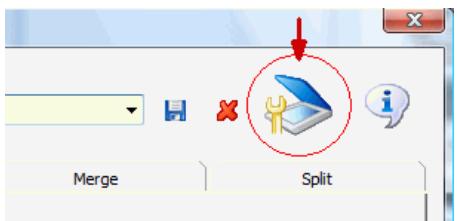
Important:
Enable communication between your scanner and IRISPowerscan
The first time you intend to scan with your scanner, you must first activate the link between the scanner and IRISPowerscan. To do so, simply access the Twain user interface, if necessary confirm or set your settings, then click OK in the Twain interface. The corresponding scanner settings are automatically activated in the Page Setup window, Scanner tab. Also confirm the settings by clicking OK in the Page Setup window.
If you do not activate the link between the scanner and IRISPowerscan, you will not be able to scan, and the following message will appear on screen:

This scanner has never been used for this page setup. In order to configure it, please go to the Twain driver interface.
To define your settings in the Page Setup window:
- Select an existing page setup configuration from the Page name field and modify it according to your needs: set your scanner settings, image parameters, and required merge/split operations.
If you change the scanner options in the Twain user interface, it is recommended to give the configuration a new name. The new name will later appear in the top part of the user interface (Scanner bar).
To save the configuration with the new name:
- Type in the new name in the Page Name field and click on the Save icon on the right.
- Click on OK to confirm your scanning configuration.
Scanner settings
To set the scanner settings:
- Access the Twain user interface (press the scanner icon at the top right of the Page Setup window) and introduce your scanner settings. Click OK to confirm your settings in the Twain user interface window.
Once you have confirmed your settings, the corresponding options get automatically adapted in the Scanner tab of the Page Setup window.
- If your scanner Twain driver version is prior to version 1.9, your settings must be introduced in the Page Setup window, Scanner tab.
Indicate the type of images to be generated: color/bitonal images, etc., as well as the resolution needed. Also tell whether the document pages must be rotated, cropped, etc.
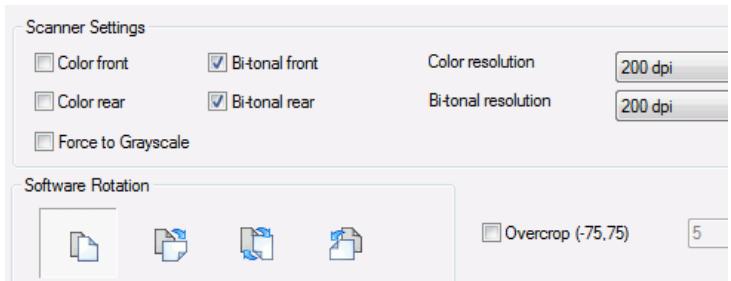
Color front: to scan the document front pages in color.
Color rear: to scan the document rear pages in color.
Bi-tonal front: to scan the document front pages in black and white.
Bi-tonal rear: to scan the document rear pages in black and white.
Color resolution: select the required resolution for color images.
Bi-tonal resolution: select the required resolution for black and white images.
Force to Grayscale: to ask grayscale images to the scanner rather than color images (the "Color" option must be selected)
- Introduce the other scanning parameters:
Software Rotation: select the required automatic rotation operation.
Overcrop: to remove a little margin all around the images, e.g. a black border.
Note: a more powerful black border removal option can be activated in the Image Processing module. See: Project Setup, Scanning, Image processing, Defining image processing operations.
Flatbed: select the option to use a flatbed scanner. Delay: set the number of seconds that the flatbed will wait before it starts scanning the next page, so that the operator has the time to position the next page on the scanner.
Duplex Mode: (default: Classic) choose the Calendar mode if you want to rotate the rear images by 180^ (this is useful if you scan a calendar).
Image parameters
To set the image parameters:
- In the Image tab, select the order in which the scanned images must appear in the application.
- Define the setup features of each image in the corresponding Image Setup window (click the Setup button on the right).
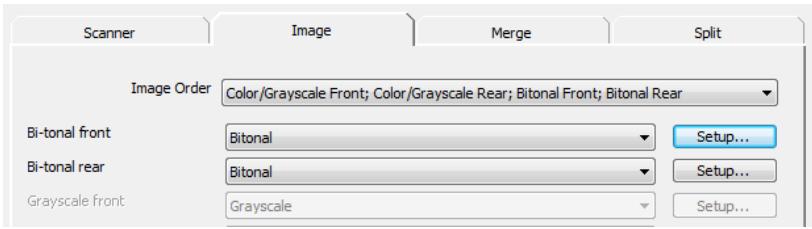
Filters
Set the brightness and contrast values in the required fields.
JPEG Quality: JPEG quality controls the amount of file compression performed by the scanner when producing JPEG images. If you increase the image compression (smaller file size), you decrease the image quality.
Check
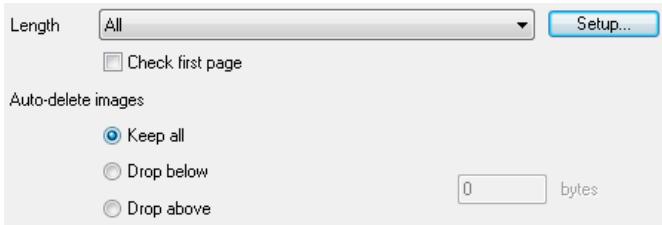
Length: select the document format required for the images. All the images that do not match the format (dimensions) specified in this field will be dropped. If necessary, change the dimensions through the Setup button.
Check first page: disable this option to ask the software not the check the first page of your documents. (This is useful when you scan e.g. envelopes as first pages (the envelopes are scanned as headers). Because of their larger size, you do not want to check their size.
Auto-delete images : you can set the size (in bytes) below which or above which the images must be deleted. This can be used to delete blank bitonal images (in TIFF G4 format).
Note that more advanced blank page deletion/detection option is
available in the application. It can be set at project setup level. See: Project setup, Scanning, Blank page, Defining and using blank pages.
Mask

Scan mask: this is used to define the region of the image to be scanned.
Automatic merge/split
To set an automatic merge/slit of your documents:
- In the Merge tab, indicate whether the front and rear images of a page must be merged and in which conditions. (You may wish to merge two A4 pages to get an A3). The merge will be done only if the width or height of the images correspond to the dimensions set in 1/100 of inch.
Width: indicate the minimum and maximum width Height: indicate the minimum and maximum height
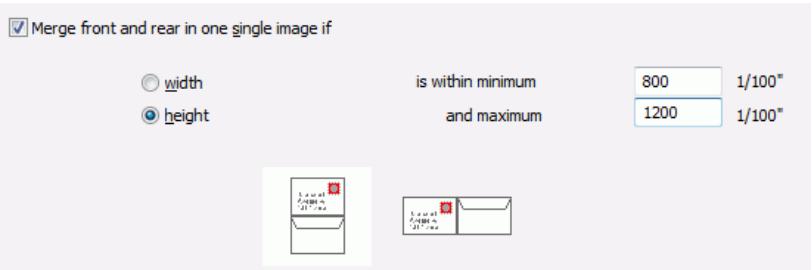
- In the Split tab, indicate whether the front and rear images must be split into 2 or 3 parts, and in which conditions. (You may wish to split an A3 image into two A4 images). The split (into 2 or 3) will be done only if the width or height of the image correspond to the dimensions set in 1/100 of inch.
Width: indicate the minimum and maximum width Height: indicate the minimum and maximum height
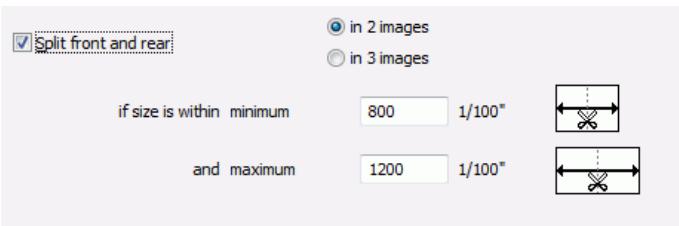
SCANNING TASKS
Scanning operations
Important
Before you start scanning documents, remember to:
- Make sure the hardware key provided with your software is properly plugged into your computer's USB port.
- Make sure your scanner has been properly installed and connected to IRIS Powerscan. See: Installation, Installing your scanner, Scanning, Scanner selection.
- Define your scanning parameters in the Page Setup window. See: Scanning operations, Page setup.
All frequent commands related to the scanning are available from the main toolbar or from the Tasks pane.

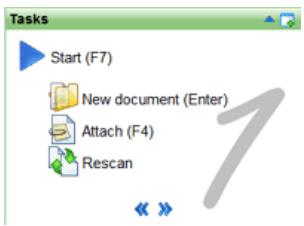
To scan your documents:
- Insert the documents in the scanner feeder.
- Click on the Scan button in the main toolbar or on Start in the Tasks pane. Use any other scanning features available in the Tasks pane. Use the Batches pane to organize the hierarchical structure of the scanned documents.
To interrupt the scanning:
- Click on the Stop button (blue square) in the main toolbar or in the Tasks pane. The blue square appears instead of the Start button (blue arrow) once the scanning has been launched.
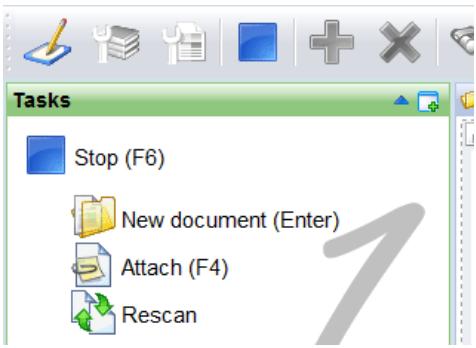
Alternatives
- Scan emulation images (for capturing emulation images provided with the application)
See: Scanning, Running emulation images.
- 'Scan from Files' (for acquiring existing images into the application)
See: Scanning, Capturing existing files.
Creating new batches/documents
At any moment during the scanning, you can manually create a new document or batch. All the scanned pages will be integrated into the new object.
To create a new document:
- Click on New on the main toolbar and select Document. A new document is instantly created in the Batches pane.
You can now start the scanning.
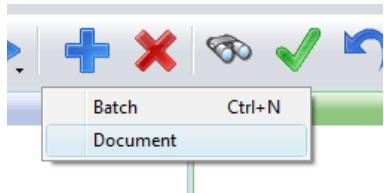
Alternatively, click on New document in the Tasks pane (or press the Enter key of your keyboard). By doing so, you will not only create a new document, but also launch the scanning.

New document (Enter)
To create a new batch:
- Click on New on the main toolbar and select Batch. A new batch is instantly created in the Batches pane.
- Confirm the batch name and numbering of the documents in the batch creation window and click OK. Tick the Start scanning option if you want to automatically start the scanning just after the batch creation.
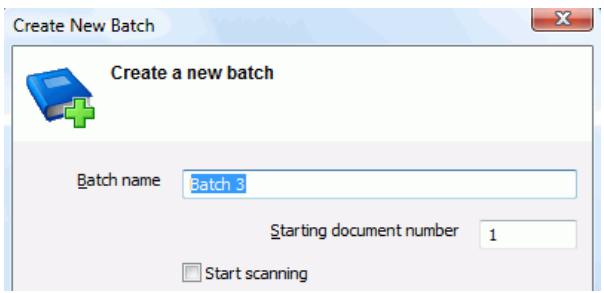
Attaching documents
At any moment in time during the scanning, you can attach a page to the object selected in the Batches pane.
To attach objects:
- Click on the Attach button in the Tasks pane (or press the F4 key of your keyboard). The scanned documents will be attached to the object selected in the Batches pane.
Repeat the operation for each page to be attached.
Tip:
Attaching a page means that the page will always be appended at the end of the current document. No document separation will be handled.
Examples:
-
Even if the attached page contains a barcode set as a separator in the application (this is set at project setup level), the barcode will not act as a separator.
-
Even if a document has been configured to contain x pages (this is set at project setup level), you will be able to attach one or more pages.
Inserting pages
At any moment in time during the scanning, you can insert a page before or after the object selected in the Batches pane.
To insert pages:
- Click on Scan on the main toolbar and select the Insert option in the drop-down menu.
- Choose whether you want to insert before or after the selected object.
The pages will be inserted in the Batches pane.
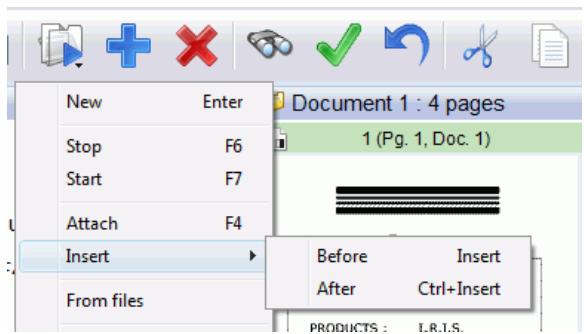
Rescanning pages
If some of your documents have been badly scanned, you can have them rescanned by the application. The newly scanned images will directly be integrated at the right place in the hierarchical structure of documents.
To rescan pages:
- Check that the page selection is activated in the viewer: right-click on the viewer or select the Tools menu from the toolbar, then choose Select and Page.
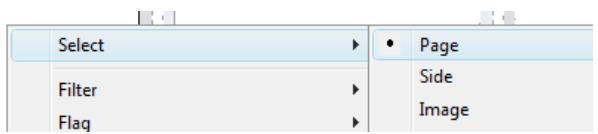
- Select the badly scanned page(s) in the viewer.
- Introduce the page(s) again in the scanner paper feeder and click on Rescan.

Rescan
CHAPTER 7 INDEX VALIDATION
INDEX VALIDATION
Batch/document indexing is carried out automatically during the scanning process according to the parameters defined in the project setup (see: Project setup, Indexing).
The index values are further displayed in the Index pane (see: Starting up, User interface) for verification. If an indexing value does not match the validation rules set for that value in the project setup, it is automatically highlighted in red.
To perform the index validation, the user must modify the invalid values so as to make them valid. See:
- Index validation, Indexing operations.
- Index validation, Indexing tools.
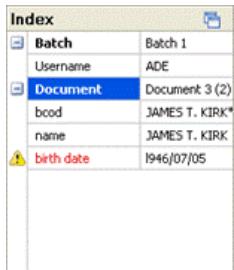
INDEXING TASKS
Indexing operations
All frequent commands related to index validation are available from the main toolbar or from the Tasks pane (if necessary, use the blue arrows to the right or to the left at the bottom of the pane to access the next indexing tasks).
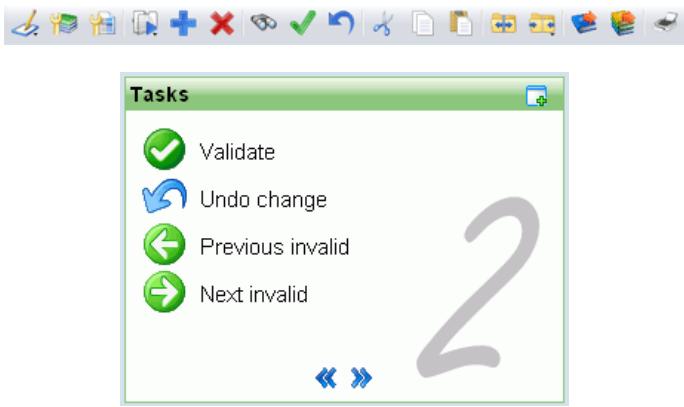
To validate an index value:
Once you have modified an index value in the Index pane, you must directly validate it to make it valid for the application.
- Once you have set the correct indexing value, click on Validate
on the main toolbar or on Validate in the Tasks pane. The value becomes valid.
To undo the last modification:
At any moment in time, you can remove the values that have just been changed in the indexing fields. You will then come back to the previous index values.
- Click on Undo in the main toolbar or on Undo change in the Tasks pane.
To get to the previous invalid document (or batch):
To easily get from one invalid document to the other, you can use the arrows to the left or to the right in the Tasks pane. Alternatively use the arrows of the Browse bar (see: Starting up, User interface).
- Press the arrow to the left (Previous invalid).
To get to the next invalid document (or batch):
- Press the arrow to the right (Next invalid).
INDEXING TOOLS
Indexing tools
To modify an invalid index value displayed in the Index pane, you can perform any of the following:
-
Manually (re)type the value in the field.
-
Select a value from the field's drop-down list. See: Index validation, Indexing tools, Drop-down lists).
-
Select a value among the 5 values that were last entered in the field (see: Index validation, Indexing tools, Last five values).
-
Extract a value from a document image and drag it to the indexing field, using the Drag&Drop OCR tool (see: Index validation, Indexing tools, Drag&Drop OCR).
Use the shortcuts
Use the shortcuts to easily get to the previous/next index field:
To go to the next index field:
Press the Tab key of your keyboard.
To go to the previous index field:
- Press SHIFT + Tab key of your keyboard.
Drag&Drop OCR
Thanks to the OCR technology, the user can directly extract values from the document images. The software "reads" the data, converts it into editable text, and transfers it directly to the required field. This allows the user not to retype the data in the indexing field. All he needs to do is to located the required data.
If your application is provided with the ICR module, the user will also be able to extract hand-printed data (capital letters and figures).
If your application is provided with the MICR module, the user will also be able to extract banking data (OCR-A, OCR-B, E13B, CMC7).
To Drag&Drop an OCR zone in an indexing field:
-
Locate the data to be picked up in the viewer.
-
Position your cursor on the indexing field to be modified/filled in.
-
Click on the button Drag&Drop OCR in the Image toolbar (right side of the viewer).
-
Position your cursor in the top left corner of the OCR zone to be extracted, then drag your cursor to the bottom right corner of the zone.
The selected data instantly appears in the indexing field.
VICTOR BECKER
1
Drop down lists
An index field may contain a drop-down list. Multi-value fields are set at project setup level (they contain either a list of values or a link to an external database through DataLink), (see: Project setup, Indexing, Defining index fields). The user can thus easily select any value from the list. If multi-selection has been enabled for the field, the user can select several items in the list.
To select a value from the drop-down list:
- Click the down arrow at the right end of the field and select the required value.
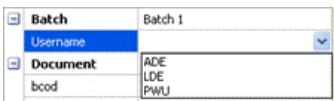
To select several values from the drop-down list:
- Click the icon at the right end of the field.

- Select the values in the Edit dialog box and click OK.
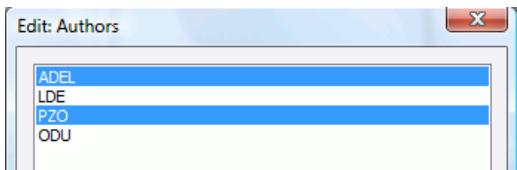
Last five values
The software automatically "remembers" the values that were last introduced in the indexing fields. If the value to be entered in the field is one of the last 5 values, the user can select the value in the field list rather than retype it.
To select a value within the last five values:
- Right-click on the indexing field to access the list, then select the required value.
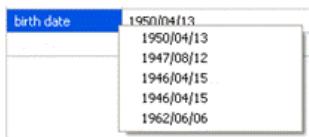
CHAPTER 8
POST-SCANNING OPERATIONS
POST-SCANNING OPERATIONS
Once the scanning is complete on a certain number of documents, you can operate changes in the hierarchical structure that has been build (you can reorder the files, merge them, split them, etc.). You can also perform image editing in the viewer (image rotation, image binarization, image cropping, etc.).
Right-click in the viewer and in the Batches pane to access most post-scanning operations. For image editing, also use the Image bar.
Image editing
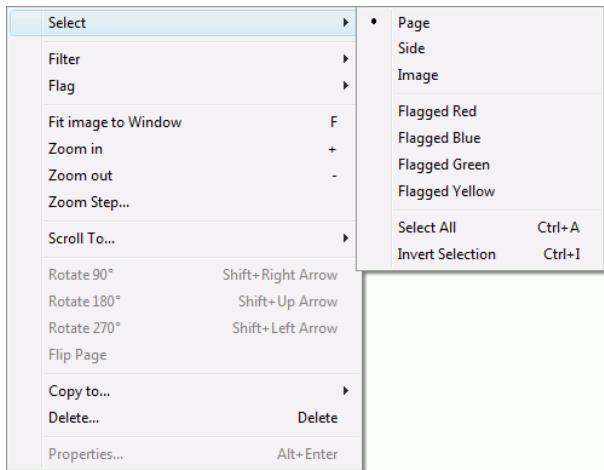
Image (re)organization
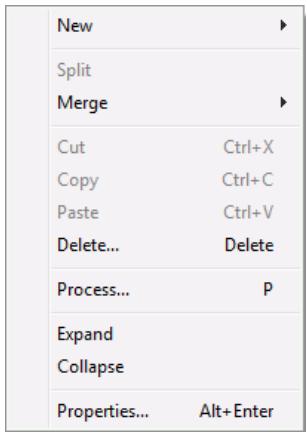
EDITING IMAGES
Editing images
You can perform all sorts of post-scanning operations on the images. Those operations can be carried out from within the viewer. They can be launched from the Image toolbar (on the right).

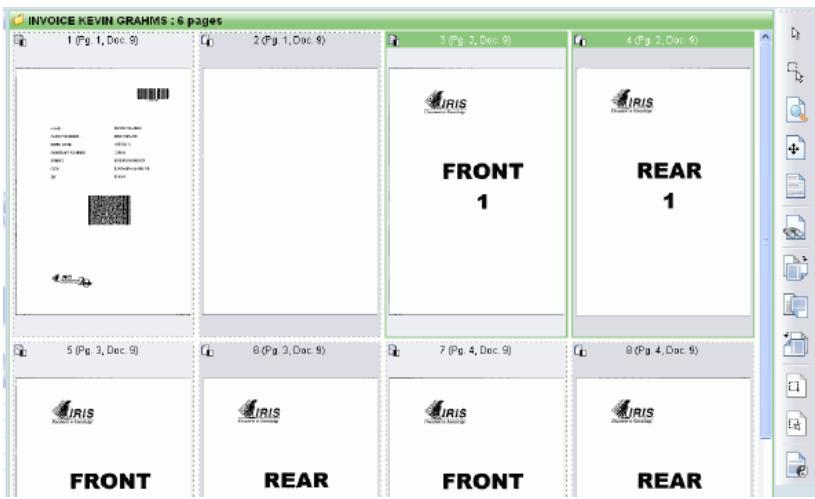
Zooming and scrolling images
Zooming and scrolling options offer the user to better see the image details before editing the images.
Zoom
To zoom an image, click on the Zoom button , position your cursor on the image zone to be magnified and keep your mouse pressed while moving your cursor within the zone.
Additional zoom options are available from the context menu (right-click):
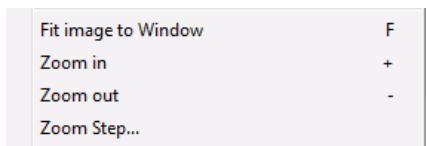
Fit image to Window: to make the image fit the viewer window.
Zoom in: to magnify the image.
Zoom out: to diminish the image size.
Zoom Step: to determine the zoom step percentage.
Scroll
Once you have magnified the images, you can also scroll them.
To scroll an image, click the Scroll button + , position your cursor on the image to be scrolled and keep your mouse pressed while moving your cursor.
Additional scroll options are available from the context menu (right-click).
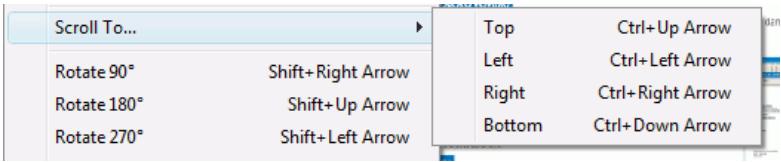
Selecting and filtering images
Before you carry out post-scanning operations on the images, you can select or filter them in the viewer or in the Batches pane by using the and buttons or the context menu (right-click in the viewer).
Image selection
To set the image selection:
- Access the context menu from the viewer and select the required option.
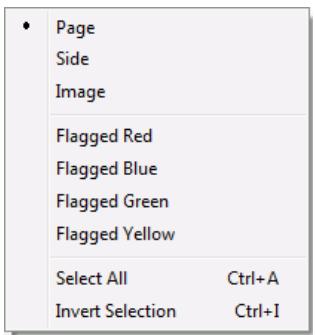
Page: to make the software select one page at a time.
Side: to make the software select one side of a page at a time. If you have scanned the front and the rear sides of a page, both in color and black&white, the front (or rear) sides will be selected.
Image: to make the software select one image at a time.
Flagged: to make the software select only the flagged images.
Select All: to select all the images.
Invert Selection: to invert the last selection, i.e. select the images that were last unselected.
To apply the image selection:
- Click the Select button from the Image bar, then get to the required, pages/images in the viewer.
Image filtering
You can apply to the viewer the image filtering that has been set for a given workspace (the available workspaces are created and customized by the system administrator. See: Software options, Workspaces).
To activate the image filtering:
- Click the Filter button from the Image bar or select Filter, Advanced from the context menu. The viewer automatically filters the images.
Rotating and flipping images
To rotate images, select the images to be rotated in the viewer, then click on the buttons Rotate 90^ , Rotate 180^ and Rotate 270^ from the image toolbar, or select the required rotation option from the context menu.
| Rotate 90° | Shift+Right Arrow |
| Rotate 180° | Shift+Up Arrow |
| Rotate 270° | Shift+Left Arrow |
| Flip Page |
Flip Page
You can also flip pages, i.e.: invert the front and the rear sides of a page.
Select Flip Page from the context menu.
Erasing image zones
You can select an image zone and erase it from the image.
To erase an image zone:
- Select the image from which you want to erase a zone.
- Click on the Region button on the Image toolbar.
- Draw a rectangle around the zone to be erased, then click on Erase.
Cropping images
You can select an image zone, then keep it while cropping the rest of the image.
To crop an image:
- Select the image to be cropped.
- Click on the Region button on the Image toolbar.
- Draw a rectangle on the image to determine where the image must be cropped, then click on Crop.
Only the zone defined by the rectangle remains in the image.
Adjusting images
Tip:
This option is available only if you have scanned your images in dualstream, i.e. that you have acquired bitonal images.
You can manually rebinarize any color image.
To binarize an image with IRISPowerscan:
- Select the color image and click on Adjust image.
- Select the required options in the Tool Binarize Setup window. You will directly view the adjustment results in the viewer.
Smooth Color Image: to smoothen the image.
Fast Binarize: to apply default adjustments.
If you deselect Fast Binarize, you can customize the binarization: adjust the brightness and contrast as needed.
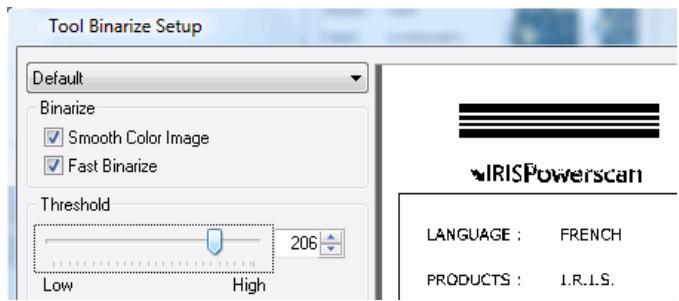
(RE)ORGANIZING IMAGES
(Re)organizing images
The scanned images can be easily (re)organized from the Batches pane. Drag&Drop operations can also be carried out in the viewer.
Tip:
Use the Collapse and Expand options from the Batches pane's context menu to view the contents of your document hierarchical structure.
You can:
- delete objects
- rename objects
- merge objects
- Cut/Copy&Paste objects
- Drag&Drop objects
Some operations can be directly launched from the main toolbar or from the Tasks pane.
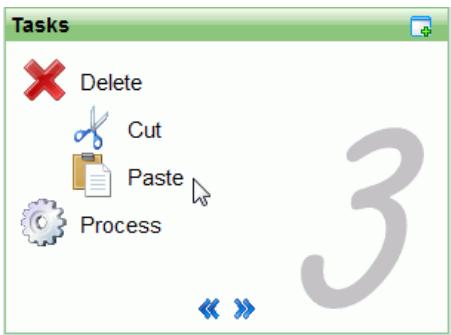
To delete objects:
- Select the object(s) to be deleted in the Batches pane or in the viewer. The objects of the 3 hierarchical levels can be deleted: batch, document, page.
- Click on the Delete button × on the main toolbar, or on Delete in the Tasks pane.
To rename objects (applies to batches and documents):
- Select the object to be renamed in the Batches pane.
- Right-click to get access to the Properties window.
- Modify the name in the Properties window.
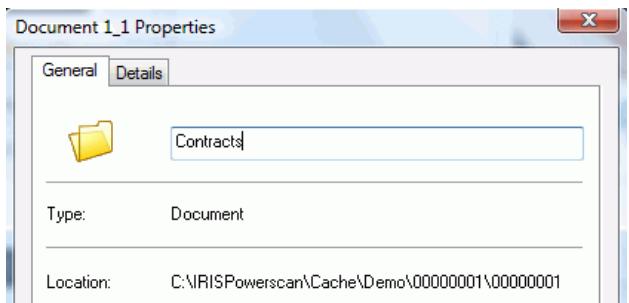
Reordering images
You can reorder the scanned images by using the Cut&Paste, Copy&Paste, and Drag&Drop features of IRISPowerscan.
To perform a Cut&Paste:
- Select the object to be cut in the Batches pane.
- Click on Cut on the main toolbar or in the Tasks pane. The cut object becomes grayed out.
- Locate your cursor at the place you want to insert the object and click on Paste on the main toolbar or in the Tasks pane.
To perform a Copy&Paste:
- Select the object to be copied in the Batches pane.
- Click on Copy on the main toolbar or in the Tasks pane, then position your cursor at the place you want to copy the object and click on Paste on the main toolbar or in the Tasks pane.
To perform a Drag&Drop:
- Select the object to be dragged in the Batches pane or in the viewer.
- Drag it to the required position. The object will be inserted just before the object towards which it is being dragged.
Splitting and merging
You can split one object into different objects, or on the conversely, merge various objects and make it one object.
To split objects:
- Select to object to be split in the Batches pane.
- Select Split from the context menu (right-click), or click on Split on the main toolbar. The software creates a new object, gives it a number, and introduces the required objects.
To merge objects:
- Select the object to be merged with another one in the Batches window.
- Select Merge from the context menu (right-click), or click on Merge on the main toolbar, then select Previous or Next according to what needs to be merged. The software merges the two objects and gives a new number to the object.
CHAPTER 9
OUTPUT PROCESSING
OUTPUT PROCESSING
The output processing enables to convert or export the scanned images according to the settings introduced at project setup level (see: Project Setup, Processing, Processing options).
This processing can take place either on one batch - or on several batches of documents at a time - once all indexing fields are valid for the application.
Tip:
If the Automatic processing option has been selected in the Project Setup, or if you work with a project that is set with the automatic processing, you will be automatically be prompted to launch the processing when needed.
To launch the output processing on one batch:
- Click the Process button from the main toolbar or from the Tasks pane, or simply click P , or from the Edit menu, select Process.
- Confirm in the Process dialog box.
To launch the output processing on several batches:
-
Click the Process All button from the main toolbar, or from the Edit menu, select Process All.
-
Confirm the batches to be processed in the Process All dialog box and click OK to confirm.

INDEX
A
access rights. 47
adjust image. 134
anti-virus. 23
attach objects 118
automatic indexing. 89
B
barcode properties. 67, 77
barcodes. 60
batch counter. 53
batch name. 95
batch size 57
batch types. 90
binarize .87,134
bi-tonal. 111, 112
black border removal. 89
blank pages 82
blank zones. 133
brightness 88
C
color. 111, 112
configure anti-virus 23
contrast 88
copy&paste. 137
create project 34
crop. 133
cut&paste. 137
D
datalink 98
deskew. 89
despeckle 89
document name. 95
document separation. 59
document size. 57
document types. 90
drag&drop. 137
drag&dropOCR 124
E
emulation images. 106
emulation mode 106
export. 35
external database. 98
F
filtering images 131
formula 96
front/rear. 111, 112
G
general project settings 56
1
iHQC 101
image edition 128
image filter. 131
image filtering. 131
image parameters. 112
image processing 85
image rotation. 132
image selection. 130
import 35
index fields. 92
index validation. 121
indexing tasks. 122
indexing tools 123
insert page 119
installation 13
invalid values. 121
IRISDocument. 101
IRISPowerscan 5
L
link with external database 94
M
manual indexing 121
manual merge 138
manual split 138
mask syntax. 72
merge. 114
multi-selection 125
N
new batch. 117
new document. 117
0
OCR 'on the fly' 124
OCR zone properties. 74, 77
OCR zones. 60
output files 101
output formats. 101
output processing. 139
P
page setup. 108
panes 39
patch codes 80
PDF iHQC 101
post-scanning operations. 127
product registration. 19
product support. 18
project creation 34
project list 25
project setup. 55
project templates. 7, 31
Q
quick project. 27
R
re)organizing images 135
red value 121
register. 19
rescan. 120
resolution. 111
roles. 47
rotation 111, 132
S
scan. 115
scan from files 107
scatter installation 16
scanner selection. 103
scanner settings. 111
scanner setup 104
scanners 11
scanning. 115
scanning parameters 108
scanning tasks. 115
security 47
settings. 55
setup. 55
shortcuts. 52
smoothening 88
software versions 10
solution package 29
split 114, 138
start up window 25
system requirements 13
T
template images 61
template project 31
U
user interface 38
user profiles. 47
V
validate. 121
value formula. 96
W
workflow 9
workspace. 43
Z
zoom. 129