
TLCOMMANDE UNIVERSELLE LCD 6 EN 1 H360 - Universal remote EMTEC - Free user manual and instructions
Find the device manual for free TLCOMMANDE UNIVERSELLE LCD 6 EN 1 H360 EMTEC in PDF.

| Product Type | Universal remote control with LCD screen |
| Brand | EMTEC |
| Model | Universal Remote LCD 6 in 1 H360 |
| Number of controllable devices | Up to 6 devices (TV, VCR, DVD, SAT, AMP, AUX) |
| Screen type | Backlit LCD, 23 characters x 3 lines |
| Power supply | 2 AAA alkaline batteries (LR03) included |
| Estimated battery life | Several months depending on usage (replace when display is dim) |
| Dimensions (approx.) | 20 × 5 × 2 cm (estimated) |
| Weight (with batteries) | Approximately 150 g (estimated) |
| Main functions | Infrared control, code programming, auto search, learning, macros (3), 4 timers, TV sleep, adjustable backlight |
| Compatibility | Large code library for TV, VCR, DVD player, satellite, cable, amplifier, etc. |
| Programming | By scrolling, direct entry, auto search, or by brand |
| Learning | Up to 150 keys from an original remote |
| Macros | 3 programmable macros, up to 10 commands each |
| Timer | 4 programmable timers (time, mode, up to 3 commands) |
| TV sleep | Sleep timer from 1 to 90 minutes |
| Display languages | Multiple languages (French, English, German, etc.) |
| Safety | Observe battery polarity, do not short-circuit, keep out of reach of children |
| Maintenance | Clean with a soft cloth, no abrasive products |
| Spare parts / Repairability | Batteries replaceable. No other spare parts available. |
| General information | Manual available as free PDF on notice-facile.com |
Frequently Asked Questions - TLCOMMANDE UNIVERSELLE LCD 6 EN 1 H360 EMTEC
User questions about TLCOMMANDE UNIVERSELLE LCD 6 EN 1 H360 EMTEC
0 question about this device. Answer the ones you know or ask your own.
Ask a new question about this device
Download the instructions for your Universal remote in PDF format for free! Find your manual TLCOMMANDE UNIVERSELLE LCD 6 EN 1 H360 - EMTEC and take your electronic device back in hand. On this page are published all the documents necessary for the use of your device. TLCOMMANDE UNIVERSELLE LCD 6 EN 1 H360 by EMTEC.
USER MANUAL TLCOMMANDE UNIVERSELLE LCD 6 EN 1 H360 EMTEC
Universal Remote Control User guide H340 - H360 - H380
FRANÇAIS 1
ENGLISH 13
DEUTSCH 24
ESPANOL 36
ITALIANO 48
NEDERLANDS 60
PUCCKN 72
8/6/4in1 Universal Remote Control
1. Safety instructions
1.1 General Security Note
Technical manipulations of the product or any changes to the product are forbidden, because of security and approval issues.
Please take care to set up the device correctly - consult your user guide.
Children should use the device only under adult supervision.
Avoid the following.
- Strong mechanical wear and tear
High temperature - Strong vibrations
- High Humidity
Please also respect the additional notes in the various user guide chapters. For questions not covered from the user guide please contact our technical hotline or another specialist.
To ensure correct set up please read the manual and security notes carefully.
Keep the instructions in a safe place for future reference or in case you need to pass them on to someone else.
1.2 Battery instructions
The device may only be used with 2 AAA Alkaline batteries - never try to connect to another power supply. When inserting batteries be sure the right polarity is used. Remove the batteries when the device is not used for a longer period. Make sure that the batteries are not short circuited and are not disposed in fire (danger of explosion)
Batteries do not belong in children hands. Don't let batteries lay around openly - they might be swallowed by children or animals. If this happens see a doctor immediately.
Leaking or damaged batteries can upon contact with skin cause burning or acid damage – if necessary use suitable gloves.
Please dispose of batteries in accordance with local bylaws.
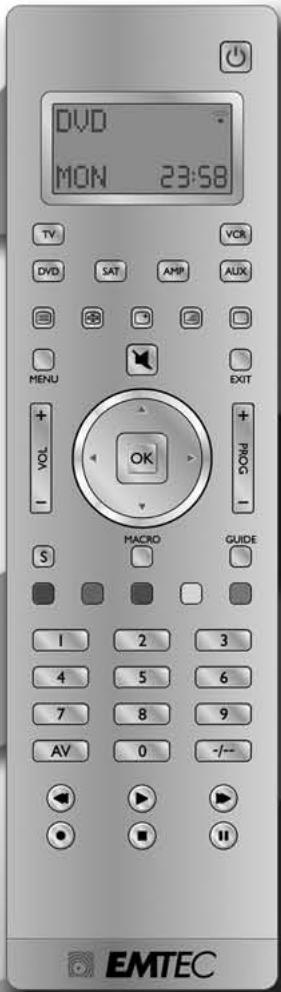
2. Product description
This universal remote control has four, Six or eight mode keys (depend of the model you have) can replace up to eight normal remote control ("4in1 function, 6in1 function or 8in1 function"). These may be remote controls for practically every type of remote-controlled consumer electronics (see supplied code list).
The labels "TV" "VCR" "DVD" "SAT" "AMP" "AUX" on the mode keys are the overviews purposes. Except the TV key mode, you can assign any device to any other key modes.
2.1 Inserting Batteries for the first time
2 LR03 AAA micro batteries are supplied.
Open the battery compartment cover on the back of the universal remote control.
Insert both batteries into the compartment; verify that they are placed correctly with the + on the battery in the same position as marked inside the battery compartment.
Replace the cover.
Select Language
A help screen will be displayed to indicate the keys used during Setup routines.

Press and release any key, the "Language?" screen is displayed with the current language. Use the Up/Down Keys to select the desired language. The default language is English. Press and release the OK key.
The "confirm language" screen is displayed. Press and release the Okay key to confirm.
"Success" will be displayed and the remote will remain in Setup mode, returning to the "CODE SETUP" screen.
2.2 Battery replacement and Memory
All user programmed parameters except Time, Day, Date and MACROS will be retained indefinitely in the event of battery replacement. Time, Day, Date and Macros will be cleared to factory defaults.
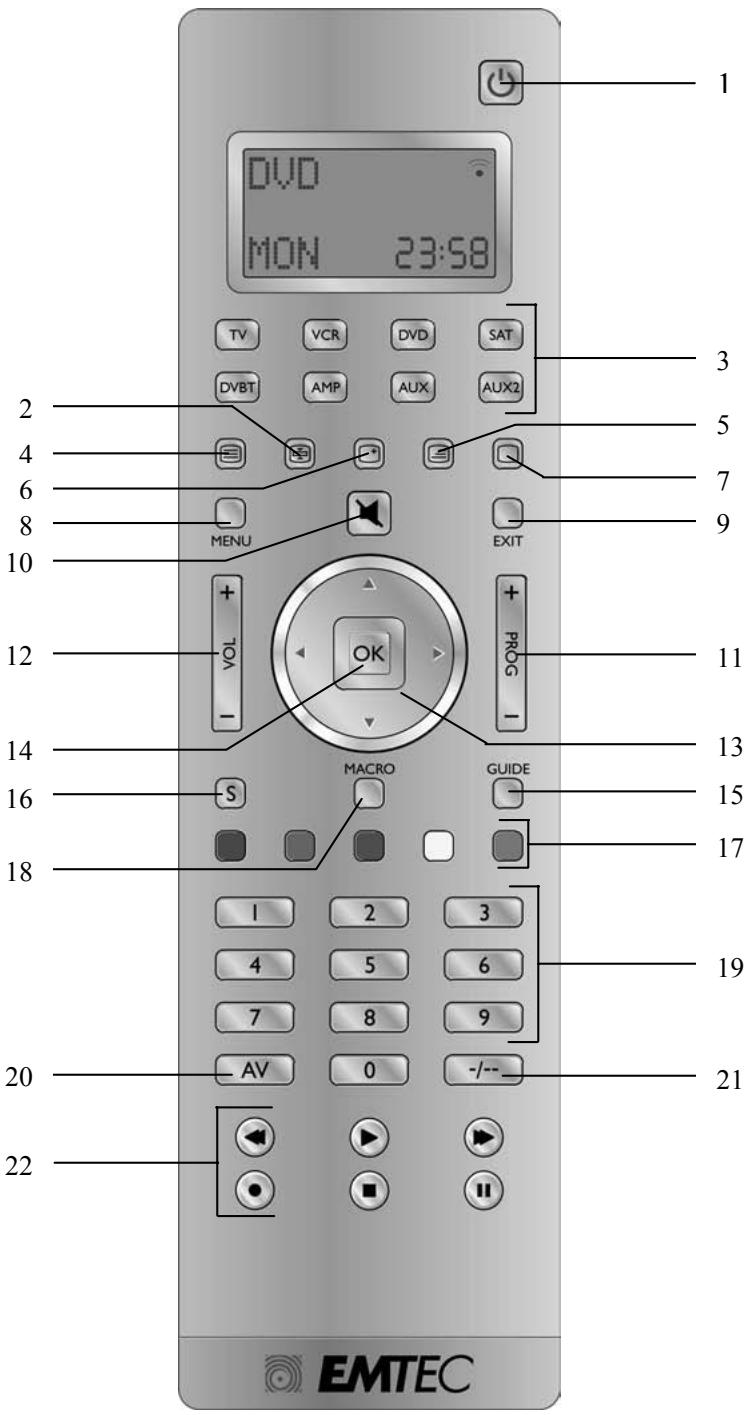
3. Functions of the keys
[1] POWER: Allows you to switch off the last selected appliance.
[2] Teletext Hold: Stop page change in teletext mode.
[3] TV, VCR, DVD, SAT.... These keys allow you to select the appliance you wish to control. The number of mode keys depends of the model of your remote (4in1, 6in1 or 8in1)
[4] Teletext ON: Start/stop Teletext.
[5] Teletext MIX : Allows to mix the Teletext and the picture of the selected channel
[6] INFO: Displays information of the selected appliance.
[7] Teletext OFF: Stop Teletext.
[8] Menu: Menu On.
[9] Exit: Menu OFF.
[10] Mute: allows you to turn on/off the sound.
[11] Prog +/:- Select the next or the previous channel of your TV, SAT..., in DVD mode: next or previous chapter.
[12] Vol + / - : Allows you to control the volume.
[13] Up, Down, Left and Right: menu navigation keys, allows you to navigate into a menu.
[14] OK key: confirms menu selection.
[15] Guide: Turn on the electronic Program Guide.
[16] S: Allows you to program your remote before the first use. It also allows you to access to secondary functions of certain A/V appliances (Shift). Press and release the "S" key followed by the function key you want.
[17] Coloured keys: control of videotext or special equipment functions.
[18] Macro: The MACRO key in coordination with one of the digit keys 1, 2, or 3 allows the programming and memorisation of up to 3 command sequences.
[19] Numeric keys 0 - 9: Work the same way as your original remote.
[20] A/V: Selection of an external source (SCART input).
[21] --: In connection with the numeric keys, this button allows you with some equipment to select directly channels higher than 9.
[22] Play, FF, Stop, Rew, Pause: These buttons work the same way as in your original remotes.
REC (record): This key works the same way as the one on your original remote for your VCR. In order to avoid a mistake you have to press this key twice to activate this feature.
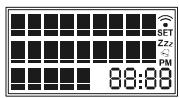
4. LCD Display
4.1 Overview
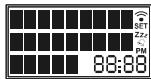
The LCD display provides a visual interface between the User and the remote. LCD is a 23 character, 3-line display with 9-character top and central line and 5-character bottom line.
Additionally LCD includes 4-Digit segmented clock and indicator symbols.
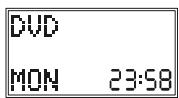
4.2 Default readouts in Normal display mode
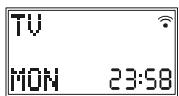
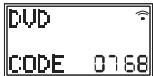
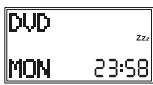
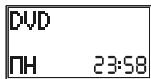
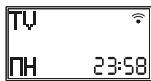
Normal display: the display is always on when batteries are installed, normally displaying the active Mode and its code e.g. DVD, the day of the week e.g. Mon, and the time of the day e.g. 23:58, in 24 hour format.
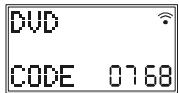
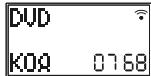
Mode Keypress display: Pressing a mode Key changes remote operation to that Mode and displays the active mode and its code e.g. DVD and the programmed 4-digit code e.g. 0768. Display returns to Normal display on Mode Key release.
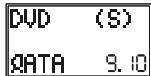
Setup (shift) Keypress Display: Briefly pressing and releasing the Setup key displays the active Mode of the remote e.g. DVD, the date e.g. 9:10 (Day:Month) and indicate "Shift" operation with "(S)". Press and release Exit to return to normal display. To use Setup key for Shift, press and release (normal keypress) the Setup key followed by the desired secondary function key.

Keypress indication: Keypresses are indicated by either a "transmit" symbol in the LCD display or by change of screen display.
4.3 Navigating the menus
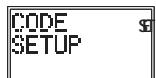
To open the Setup Menu, press and hold the S (Setup) key until CODE SETUP appears along with the "SET" symbol on the display.
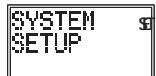
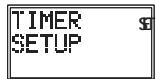
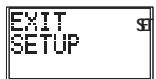
If the display shows CODE SETUP continue to press the S (Setup) key to access to the other Menus: CODE SETUP SYSTEM SETUP TIMER SETUP LEARN SETUP MACRO SETUP EXIT SETUP
Press the Okay Key to select the desired programming step required.
Setup routines are used for direct Library Code entry, code Searching, Learning, etc...
To exit Setup routines, press the EXIT key or navigate to the "EXIT SETUP" screen and press okay key.
CODE SETUP to affect Code entry to Devices
System Setup to set Time, Date, Volume control
Timer SETUP to set Timer events
Learn SETUP to program a mode with learned commands

Macro Setup to set a macro Key sequences

EXIT SETUP to exit Setup routines and return to normal operation.
5. Programming CODE SETUP
Code Setup options: Pressing Okay at CODE SETUP presents 4 options for programming a mode with codes.
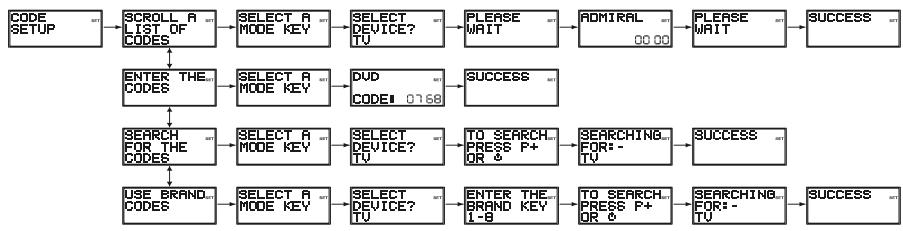
5.1 Scroll a list of codes
First method to enter the code
a. Turn on the device to be controlled (i.e.: for TV turn on your TV device)
b. Press and Hold the key until "Code Setup" is displayed (takes approximately -3 seconds)
c. Release Setup key
d. Press and release OK key. "SCROLL A LIST OF CODES" is displayed.
e. Press and release OK key. "SELECT A MODE KEY?" is displayed
f. Press and release desired mode key (TV, VCR, DVD, etc). "SELECT DEVICE? TV" is displayed.
g. Using the Up/Down (, ) keys, select the device type to be programmed: TV, VCR, DVD,... See the note "Select Device?" below.
h. Press and release OK key to confirm selection.
i. The first Code List Brand and Code will now be displayed (e.g. Admiral 0000). To access quicker to the brand name of your device, you can use the numeric keys 2 to 9 (as on a mobile phone: 2=abc,3=def, etc.). For example to access to VIETA Brand (DVD Brand) push the numeric key 8 (8=tuv) 3 times and use Up/Down keys to select your brand and Left/Right keys to select the code. Codes can be functionally tested on the target device using, Volume, Mute, Channel, Power, AV, Teletext, Play, Stop, FF, Rewind and Pause keys. Once the correct code has been found, press and release OK key to store the Code.
j. "Please Wait" followed by "Success" will be displayed and the remote will exit the Setup routine and return to normal operation.
k. Test your remote control with your equipment. Repeat this procedure from step "a" for the other equipment you want to control.
Note: "Select Device?" selections are TV, VCR, LD, DVD, DVR, HDD, SAT, CABLE, DVBT, STB, AUDIO, AMP, RECR, HTIB, MP3, CD, TAPE, TUNER and PHONO. For TV Mode, only TV "Device" can be selected.
5.2 Enter the Codes
To enter codes directly from library code tables.
a. Turn on the device to be controlled (for TV turn on your TV device)
b. Press and Hold the S key until "Code Setup" is displayed (takes approximately 3 seconds)
c. Release S key.
d. Press and release OK key. "Scroll a list of Codes" is display.
e. Use Up/Down Key to reach "Enter codes" screen. Press and release the OK key. "Select a Mode Key?" is displayed.
f. Press and release desired mode Key (TV, VCR, DVD, etc.). The mode key is displayed along with its currently programmed code.
g. Enter the 4-digit code number using the digit 0-9 keys.
h. On the 4^th digit entry. "Success" will be displayed and the remote will exit the Setup routine and return to normal operation.
i. Point the remote in the direction of your equipment and press the POWER button. Your device should turn off. Check other functions (for example for a DVD: FF or REW etc.). If certain functions are not responding this indicates that the entered code is not the correct one. In that case repeat the above procedure with the next corresponding code of your brand.
j. Repeat this procedure from step "a" for the other equipment you want to control (TV, VCR, DVD, SAT, etc.)
5.3 Search for the Codes
Facility to manually search the entire Code Library for a particular device that may not be listed in the Library or listed under a different Manufacturer.
a. Turn on the device to be controlled (for TV turn on your TV device)
b. Press and Hold the S key until "Code Setup" is displayed (takes approximately 3 seconds)
c. Release S key
d. Press and release OK key. "SCROLL A LIST OF CODES" is displayed.
e. Using the Up/Down keys, navigate to "Search for the Codes" screen. Press and release OK key. "SELECT A MODE KEY?" is displayed
f. Press and release desired mode key (TV, VCR, DVD, etc). "SELECT DEVICE? TV" is displayed.
g. Using the Up/Down keys, select the device type to be programmed (TV, VCR, DVD...) . See the note "Select Device?" above. Press and release OK key to confirm selection.
h. "To Search Press P+ or Power" is displayed. Press the Prog+ key (or Power or Play (VCR, DVD only)) repeatedly until the device to be controlled changes channel, turns off or responds accordingly. "Searching for-." will be displayed (along with the device selection) during the search process. If the required Code is accidentally passed then press the Prog- key to backtrack through the Library. Press Prog+ (or Power or Play) to change direction forward again. Press and release OK key to store the Code.
i. "Success" will be displayed and the remote will exit Setup routine and return to normal operation.
j. Point the remote in the direction of your equipment and press the POWER button. Your device should turn off. Check other functions (for example for a DVD: FF or REW etc.). If certain functions are not responding this indicates that the entered code is not the correct one. In that case repeat the above procedure.
k. Repeat this procedure from step "a" for the other equipment you want to control (TV, VCR, DVD, SAT, etc.)
Notes:
- If the Device does not have a Prog+ key, use the Play (VCR, DVD...) or the Power keys instead.
- Code Search starts from the currently stored 4-digit number under that Mode.
- When all codes have been searched "Search End" will be displayed and remote returns to normal operation.

5.4 Use Brand Codes
Facility to manually search specific Brands within the Code Library for a particular manufacturer. Brand Search Library table typically consists of 30-40 codes.
a. Turn on the device to be controlled.
b. Press and hold S key until "Code Setup" is displayed (takes approximately 3 seconds).
c. Release S key.
d. Press and release the OK key. "Scroll a List of Codes" is displayed.
e. Using the Up/Down keys, navigate to "Use Brand Codes". Press and release the OK key. "Select a Mode Key?" is displayed.
f. Press and release desired Mode key (TV, VCR, DVD, etc.). "Select Device? TV" is displayed.
g. Using the Up/Down keys, select the Device type to be programmed (TV, VCR, DVD, etc. - See the note "Select Device?" above). Press and release the OK key to confirm selection.
h. "Enter the Brand Key 1-8" is now displayed. Press and release the numeric key (1-8) corresponding to desired Manufacturer from separate Brand code table.
i. "To Search Press P+ or Power" is displayed. Press the Prog+ key (or Power or Play (VCR, DVD only)) repeatedly until the Device to be controlled changes channel, turns off or responds accordingly. "Searching for:-" will be displayed (along with the Device selection) during the search process. If the required Code is accidentally passed then press the Prog- key to backtrack through the Library. Press Prog+ (or Power or Play) to change direction forward again. Press and release OK key to store the Code.
j. "Success" will be displayed and the remote will exit Setup routine and return to normal operation.
k. Point the remote in the direction of your equipment and press the POWER button. Your device should turn off. Check other functions (for example for a DVD: FF or REW etc.). If certain functions are not responding this indicates that the entered code is not the correct one. In that case repeat the above procedure with the next corresponding code of your brand.
I. Repeat this procedure from step "a" for the other equipment you want to control (TV, VCR, DVD, SAT, etc.)
5.5 Code Identification
Press the respective Mode key in normal operation to display programmed code for that Mode e.g. "DVD Code 0768".
5.6 Programming Combo Device Codes
Some Combo devices (e.g. TV/VCR, TV/DVD, DVD/VCR, etc) will require you to set up two different Mode keys to control both parts of the Combo device. For example, if you have a TV/DVD Combo, you might need to set up one code under the TV key to control the TV part AND a separate code (under any other Mode key) to control the DVD part.
5.7 Controlling Combo Devices
Some Combo devices (e.g. TV/VCR, TV/DVD, DVD/VCR, etc) have separate keys on the original remote to select the part of the Combo device to be controlled. For example, if your Combo device is a DVD/VCR then its original remote may have separate DVD and VCR keys for selection of the Combo part you would control. The equivalent key functions can be found on your remote by using the Mode and Setup keys. Assuming your Combo device is a DVD/VCR and its code is programmed under DVD Mode:
-
press and hold the DVD Mode key for more than one second to send the DVD key command,
-
quickly press and release the S key followed by pressing and releasing the DVD Mode key to send the VCR key command.
This method can be applied similarly to all Combo devices (e.g. TV/VCR, TV/DVD, DVD/VCR, etc) and is available for all Modes. This feature is not supported by all codes.
6. System Setup Options
Pressing OK at SYSTEM SETUP accesses the System Setup Options for Volume Punch-Through control Setup, Time Setup, Date Setup, Backlight Setup and System Reset.
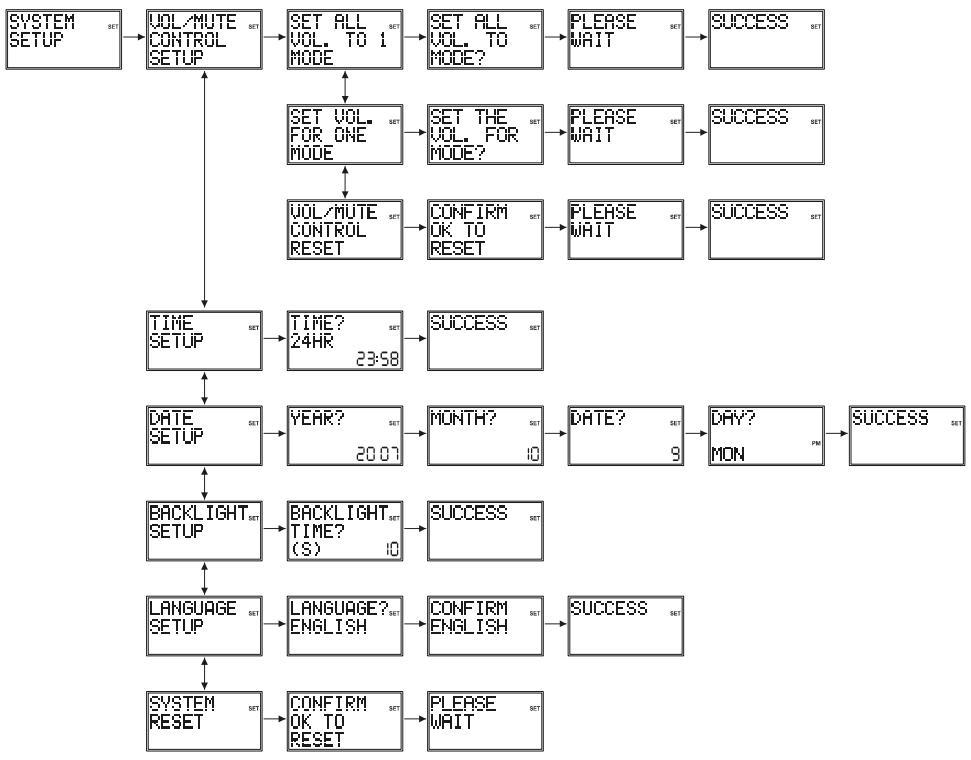
6.1 Vol/Mute Control Setup
Volume/Mute Control and Punch-Through Feature:- This remote allows you to select which Mode controls your Volume/Mute keys. The remote is initially set (factory default) for all Modes programmed with "Visual" codes (e.g. TV, VCR, DVD, PVR, SAT & CABLE) and "Audio" codes (e.g. CD & AUDIO) to use their own Volume/Mute control if present. If the programmed "Visual" code has no Volume/Mute operation of its own then those keys will punch-through control to the TV Mode device without needing to change to TV Mode.
Setting Volume/Mute Control and Punch-Through - Any Mode chosen for Volume/Mute control MUST have its own Volume/Mute function either in the programmed code or learned otherwise the Volume/Mute keys will do nothing.
6.1.1 Set All Vol. to one Mode
Setting ALL Volume/Mute Control to any one Mode e.g. TV : - This routine will set all Modes to punchthrough to any one chosen Mode for Volume/Mute key control without the needing to change to that Mode.
a. Press and hold S key until "Code Setup" is displayed (takes approximately 2-3 seconds).
b. Release S key.
c. Using the Up/Down keys, navigate to "System Setup". Press and release OK key. "Vol/Mute Control Setup" is displayed.
d. Press and release OK key. "Set All Vol. to 1 Mode" is displayed.
e. Press and release the OK key. "Set All Vol. to Mode?" is displayed.
f. Press and release desired Mode key (TV, VCR, DVD, etc.) for Volume/Mute control.
g. "Please Wait" will be displayed briefly followed by "Success" and the remote will exit Setup and return to normal operation.
h. All Modes will now punch-through to your chosen Mode for Volume/Mute control.
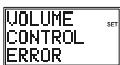
If the chosen Mode has no Volume/Mute commands of its own, "Volume Control Error" will be shown in the display and the remote will exit Setup routine and return to normal operation.
6.1.2 Set Vol. for one Mode
This routine will set any Mode to use only its own Volume/Mute control i.e. Volume/Mute punch-through is disabled for this Mode. Note: before using this routine, check that the chosen Mode has its own Volume/Mute functions, either in the code or by learning, otherwise the Volume/Mute keys will do nothing.
a. Press and hold S key until "Code Setup" is displayed (takes approximately 3 seconds).
b. Release S key.
c. Using the Up/Down keys, navigate to "System Setup". Press and release OK key. "Vol/Mute Control Setup" is displayed.
d. Press and release OK key. "Set All Vol. to 1 Mode" is displayed.
e. Using the Up/Down keys, navigate to "Set Vol. for one Mode". Press and release the OK key. "Set All Vol. to Mode?" is displayed.
f. Press and release desired Mode key (TV, VCR, DVD, etc.) to be disabled for Volume/Mute punch-through control.
g. "Please Wait" will be displayed briefly followed by "Success" and the remote will exit Setup routine and return to normal operation.
h. The chosen Mode will now use its own Volume/Mute control.
6.1.3 Vol/Mute Control Reset
This routine will reset Volume/Mute control back to its Factory default settings.
a. Press and hold key until "Code Setup" is displayed (takes approximately 3 seconds).
b. Release S key.
c. Using the Up/Down keys, navigate to "System Setup". Press and release OK key. "Vol/Mute Control Setup" is displayed.
d. Press and release OK key. "Set All Vol. to 1 Mode" is displayed.
e. Using the Up/Down keys, navigate to "Vol/Mute Control Reset". Press and release the OK key.
f. "Confirm OK to Reset" is displayed. Press and release the OK key.
g. "Please Wait" will be displayed briefly followed by "Success" and the remote will exit Setup routine and return to normal operation.
h. Volume/Mute control is now rest to its Factory default settings.
6.2 Time Setup
To set the Time of day for normal LCD time display.
a. Press and hold S key until "Code Setup" is displayed (takes approximately 3 seconds).
b. Release S key.
c. Using the Up/Down keys, navigate to "System Setup". Press and release OK key. "Vol/Mute Control Setup" is displayed.
d. Using the Up/Down keys, navigate to "Time Setup". Press and release the OK key.
e. The "Time?" screen is displayed showing current format (12 or 24 hour) flashing and current time. Use the Up/Down keys to set the format (12Hr or 24Hr) then press and release the OK key.
f. The "hours" will be flashing. Use the Up/Down keys to set the hours then press and release the OK key.
g. The "minutes" will be flashing. Use the Up/Down keys to set the minutes then press and release the OK key. "Success" will be displayed and the remote will remain in Setup routine, returning to the "Code Setup" screen.
6.3 Date Setup
To set the Month, Date and Day.
a. Press and hold S key until "Code Setup" is displayed (takes approximately 2-3 seconds).
b. Release S key.
c. Using the Up/Down keys, navigate to "System Setup". Press and release OK key. "Vol/Mute Control Setup" is displayed.
d. Using the Up/Down keys, navigate to "Date Setup". Press and release the OK key.
e. The "Year?" screen is displayed with the last 2 year digits flashing. Use the Up/Down keys to set the Year then press and release the OK key.
f. The "Month?" screen is displayed with the Month digits flashing. Use the Up/Down keys to set the Month then press and release the OK key.
g. The "Date?" screen is displayed with the Date digits flashing. Use the Up/Down keys to set the Date then press and release the OK key.
h. The "Day?" screen is displayed with the Day flashing. Use the Up/Down keys to set the Day then press and release the OK key.
i. "Success" will be displayed and the remote will remain in Setup, returning to the "Code Setup" screen.
6.4 Backlight Setup
To set the length of time the Backlighting remains on after a keypress.
a. Press and hold S key until "Code Setup" is displayed (takes approximately 3 seconds).
b. Release S key.
c. Using the Up/Down keys, navigate to "System Setup". Press and release OK key. "Vol/Mute Control Setup" is displayed.
d. Using the Up/Down keys, navigate to "Backlight Setup". Press and release the OK key.
e. The "Backlight Time?" screen is displayed with the current Backlight On time digits flashing. Use the Up/Down keys to set the Backlight On time in increments of 5 seconds up to a maximum of 60 seconds. The default Backlight On time is 10 seconds. To turn the Backlighting feature off, set the time to "00" (zero). Press and release the OK key.
f. "Success" will be displayed and the remote will remain in Setup routine, returning to the "Code Setup" screen.
6.5 Language Setup
To set the remote display language.
a. Press and hold S key until "Code Setup" is displayed (takes approximately 2-3 seconds).
b. Release S key.
c. Using the Up/Down keys, navigate to "System Setup". Press and release OK key. "Vol/Mute Control Setup" is displayed.
d. Using the Up/Down keys, navigate to "Language Setup". Press and release the OK key.
e. The "Language?" screen is displayed with the current language flashing. Use the Up/Down keys to select desired language. The default language is English. Press and release the OK key.
f. The "Confirm English" screen is displayed. Press and release the Okay key.
g. "Success" will be displayed and the remote will remain in Setup, returning to the "Code Setup" screen.
6.6 System Reset
To reset the LCD remote back to factory default settings. All User programmed parameters e.g. code settings, learned commands, Macros, etc., are cleared to their respective default settings.
a. Press and hold S key until "Code Setup" is displayed (takes approximately 3 seconds).
b. Release S key.
c. Using the Up/Down keys, navigate to "System Setup". Press and release OK key. "Vol/Mute Control Setup" is displayed.
d. Using the Up/Down keys, navigate to "System Reset". Press and release the OK key.
e. "Confirm OK to Reset" is displayed. Press and release the OK key.
f. "Please Wait" will be displayed while all parameters are Reset then the remote will exit Setup and return to normal operation.
7. Timer Setup
Pressing OK at TIMER SETUP accesses the available Timer Options. These are a TV Sleep Timer and 4 Timers that can send a sequence of up to 3 key commands at the preset time.
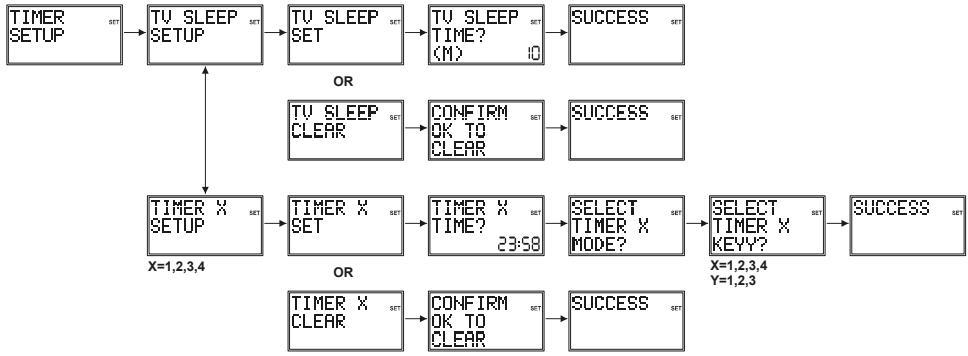
7.1 TV Sleep Setup
The LCD remote can be programmed with a TV Sleep Timer. At the end of the set Timer period, the LCD remote sends the Power command for the TV Mode device. The TV Sleep Timer can be set for a period of 1-90 minutes. The "Zzz" symbol is displayed when a TV Sleep Timer is set.
To set a TV Sleep Timer (no "Zzz" in normal display)
a. Turn on the TV Mode device.
b. Press and hold S key until "Code Setup" is displayed (takes approximately 3 seconds).
c. Release S key.
d. Using the Up/Down keys, navigate to "Timer Setup". Press and release OK key.
e. "TV Sleep Setup" is displayed. Press and release the OK key.
f. "TV Sleep Set" is displayed. Press and release the OK key.
g. "TV Sleep Time?" is displayed with "minutes" flashing. Use the Up/Down keys to set the minutes then press and release the OK key.
h. "Success" will be displayed and the remote will remain in Setup routine, returning to the "Code Setup" screen.
i. Press and release Exit key to return to normal operation. Leave the remote pointing at the TV device.
To clear a TV Sleep Timer ("Zzz" in normal display)
a. Press and hold S key until "Code Setup" is displayed (takes approximately 2-3 seconds).Release Skey.
b. Using the Up/Down keys, navigate to "Timer Setup". Press and release OK key.
c. "TV Sleep Setup" is displayed. Press and release the OK key.
d. "TV Sleep Clear" is displayed. Press and release the OK key.
e. "Confirm OK to Clear" is displayed. Press and release the OK key.
f. "Success" will be displayed and the remote will remain in Setup routine, returning to the "Code Setup" screen.
7.2 Timer Setup
The LCD remote can be programmed with up to 4 Timers (Timer1, 2, 3 & 4). Each Timer can be assigned up to 4 keys to activate at the set time (e.g. to change SAT Mode channel to 123 at 22:35). The first key must always be a Mode key. Subsequent keys cannot include Up, Down, Left, Right, OK, Exit, Macro, Setup or any Mode key. Timers can only be set to activate within the following 24-hour period. Timers are automatically cleared after activation. The "Timer Bell" symbol is displayed when any Timer is set.

To set a Timer (Note the Timer must be cleared first if it was previously set - see To Clear a timer below)
a. Press and hold S key until "Code Setup" is displayed (takes approximately 2-3 seconds).
b. Release S key.
c. Using the Up/Down keys, navigate to "Timer Setup". Press and release OK key. "TV Sleep Setup" is displayed.
d. Using the Up/Down keys, navigate to "Timer X Setup" (where "X" is 1, 2, 3 or 4). Press and release the OK key.
e. "Timer X Set" is displayed. Press and release the OK key.
f. "Timer X Time?" is displayed with the "hours" flashing. Use the Up/Down keys to set the hours then press and release the OK key.
g. The "minutes" will be flashing. Use the Up/Down keys to set the minutes then press and release the OK key.
h. "Select Timer X Mode?" is displayed. Press and release the desired Mode key (TV, VCR, DVD, etc.).
i. "Select Timer X Key1?" is displayed. Press and release the first key required. If only one key is required, press and release OK at this point and go to Step "I" below.
j. "Select Timer X Key2?" is displayed. Press and release the second key required. If only two keys are required, press and release OK at this point and go to Step "I" below.
k. "Select Timer X Key3?" is displayed. Press and release the third key required.
I. "Success" will be displayed and the remote will remain in Setup routine, returning to the "Code Setup" screen.
m. Press and release the Exit key to return to normal operation. Leave the remote pointing at the target device.
To clear a Timer ("Timer Bell" in normal display)
a. Press and hold key until "Code Setup" is displayed (takes approximately 3 seconds).
b. Release S key
c. Using the Up/Down keys, navigate to "Timer Setup". Press and release OK key. "TV Sleep Setup" is displayed.
d. Using the Up/Down keys, navigate to the desired "Timer X Setup" (where "X" is 1, 2, 3 or 4) screen. Press and release the OK key.
e. "Timer X Clear" is displayed. Press and release the OK key.
f. "Confirm OK to Clear" is displayed. Press and release the OK key.
g. "Success" will be displayed and the remote will remain in Setup routine, returning to the "Code Setup" screen.
8. Code Learning
Facility to Learn and store the IR Commands from your original remote under the Mode and key of your choice. The Remote can store up to 150 original remote key commands (this depends upon the format of the IR Code to be learned). Only one original remote type should be stored under any one Mode (see Tips on Learning). The Remote can also be pre-programmed with one of the library codes and then have Learned keys "overlaid" in key positions of your choice i.e. the Remote can be customised using a preprogrammed code and then learning key functions from their original IR remote.
Tips On Learning :
a. Where possible, use of fresh batteries for both remotes is recommended.
b. Only one original remote type can be learned per individual Mode.
c. Carry out a "Clear All Learn Modes" (clear all learned commands) before attempting any Learning.
d. Experiment by Learning 2 or 3 keys initially (to ensure compatibility and familiarity) and then carry out a "Clear All Learn Modes" (clear all learned commands) before completely Learning your original remote's keyboard.
e. Carry out a "Clear One Learn Mode" before learning a Mode to make sure there are no previously learned commands for that Mode.
f. Place the remotes end-to-end so the IR LED's on both remotes are directly in line with each other. You may need to adjust the height of either remote to achieve this.
g. Keep the distance between the two remotes to approximately 25mm
h. Do not move or change the distance between the two remotes while learning all the required keys for that Mode.
i. Do not attempt to Learn directly under an incandescent or low-energy light as these can cause interference with the IR transmissions. Keep at least one metre away from any such light sources.
j. Avoid learning the Volume/Mute keys on your original remote unless you are sure these operate the same target device e.g. some original DVD remotes also include TV Volume/Mute key control – these can be two different types of code.
k. Avoid learning the VCR keys on your original remote unless you are sure these operate the same target device e.g. some original TV remotes also include VCR key control – these can be two different types of code.
I. Learning a key can take up to 3 seconds. Do not release the key being Learned until the "Success" or "Key Learn Error" screens have been displayed.
m. If learning the first or second keys for a Mode results in continuous errors then try the following :-
i. End the Learn session by pressing the Exit key.
ii. Clear out the learned commands for that Mode.
iii. Check the IR LEDs are correctly aligned between the two remotes.
iv. Adjust the distance between the two remotes to be closer (e.g. 15mm) or further away 50mm) from each other.
v. Try learning the original remote for that Mode again.
If the problem occurs again with the same key check the original remote key being learned - does it transmit? Does it operate the target device? Try learning that key under a different clear Mode. If it learns okay then it is likely to be a different code type from the others and cannot be learned under the same Mode.
Learning Notes
a. You cannot learn under the Setup, Home Cinema or Macro keys.
b. All learned commands for a Mode are deleted if the same or a new 4-digit code is entered for that Mode (includes Direct Code Entry, Code Search and Brand Search entries).
c. The Backlighting is turned off for Learning.
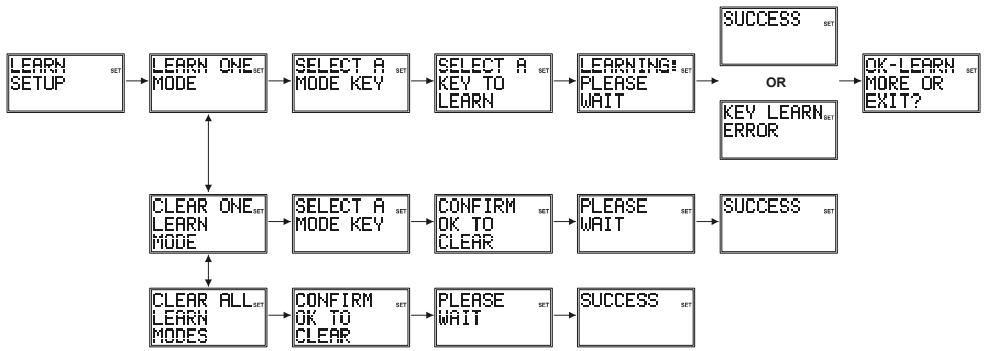
8.1 To Learn Commands
15-50mm

a. Press and hold key until "Code Setup" is displayed (takes approximately 2-3 seconds).
b. Release S key
c. Using the Up/Down keys, navigate to "Learn Setup". Press and release OK key.
d. "Learn One Mode" is displayed. Press and release OK key.
e. "Select a Mode Key?" is displayed. Press and release the desired Mode key (TV, VCR, DVD, etc.).
f. "Select a Key to Learn?" is displayed. Press and release the LCD remote key to be taught with original remote code.
g. "Learning: Please Wait" is displayed. Press and hold original remote key until the "Success" or "Key Learn Error" screens have been displayed (see Tips on Learning) followed by the "OK-Learn More or Exit?" screen (this process can take up to 2 or 3 seconds to complete). Release the original remote key.
h. "OK-Learn More or Exit?" screen is still displayed. To learn more keys, press and release the OK key and repeat from step "f". To exit at this point, press and release the Exit key.
i. "Please Wait" will be displayed briefly and the remote will exit Setup and return to normal operation.
8.2 To Clear all stored Learned Commands under a Mode
a. Press and hold S key until "Code Setup" is displayed (takes approximately 3 seconds).
b. Release S key
c. Using the Up/Down keys, navigate to "Learn Setup". Press and release OK key. "Mode Learn" is displayed.
d. Using the Up/Down keys, navigate to "Clear One Learn Mode". Press and release OK key.
e. "Select a Mode Key?" is displayed. Press and release the desired Mode key (TV, VCR, DVD, etc.).
f. "Confirm OK to Clear" is displayed. Press and release OK key.
g. "Please Wait" will be displayed briefly and the remote will exit Setup and return to normal operation.
8.3 Master Clear
To Clear all stored Learned Commands (recommended on first time Learning):-
a. Press and hold S key until "Code Setup" is displayed (takes approximately 2-3 seconds).
b. Release S key.
c. Using the Up/Down keys, navigate to "Learn Setup". Press and release OK key. "Mode Learn" is displayed.
d. Using the Up/Down keys, navigate to "Clear All Learn Modes". Press and release OK key.
e. "Confirm OK to Clear" is displayed. Press and release OK key.
f. "Please Wait" will be displayed briefly and the remote will exit Setup routine and return to normal operation
9. Macros
The MACRO key, in conjunction with digits 1, 2 and 3, lets you to program and store up to 3 sequences of key-presses of your choice. One press of the respective Macro digit key results in that sequence of key-presses (IR commands) being sent. Any sequence of key-presses that you regularly perform can be reduced to two keypresses (MACRO key followed by digit 1, 2 or 3 key). For example pressing MACRO followed by a single key can turn on your TV, turn on your cable box, change to your favourite channel, turn on your VCR, and tell it to record, etc. A total of 10 keypresses can be stored under each of the 3 Macro digits.
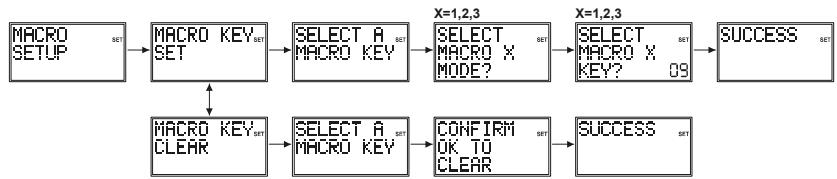
9.1 To Setup a Macro
a. Press and hold S key until "Code Setup" is displayed (takes approximately 3 seconds).
b. Release S key.
c. Using the Up/Down keys, navigate to "Macro Setup". Press and release OK key.
d. "Macro Key Set" is displayed. Press and release OK key.
e. "Select a Macro Key" is displayed. Press and release digit key 1, 2 or 3 where you want to store the Macro.
f. "Select Macro X Mode" (where "X" is 1, 2 or 3) is displayed. Press and release the desired Mode key (TV, VCR, DVD, etc.). The first key in a Macro sequence must always be a Mode key.
g. "Select Macro X Key?" is displayed along with the key count (initially "02"). Press and release the keys you want to be included in the Macro, in the order you want them to be sent (up to "10").
h. To store the Macro at any point, press and release the Macro key. Note the Macro will be stored automatically on the 10th keypress.
i. "Success" will be displayed and the remote will exit Setup routine and return to normal operation.
9.2 To Clear a Macro
a. Press and hold S key until "Code Setup" is displayed (takes approximately 2-3 seconds).
b. Release S key.
c. Using the Up/Down keys, navigate to "Macro Setup". Press and release OK key.
d. Using the Up/Down keys, navigate to the "Macro Key Clear" screen. Press and release OK key.
e. "Select a Macro Key" is displayed. Press and release digit key 1, 2 or 3 for the Macro you want to delete.
f. "Confirm OK to Clear" is displayed. Press and release OK key.
g. "Success" will be displayed briefly and the remote will exit Setup routine and return to normal operation.
In normal operation, to activate the Macro press and release the MACRO key followed (within 20 seconds) by the digit key 1, 2 or 3.

"Macro X" is displayed while the Macro sequence is being carried out then remote returns to normal operation.
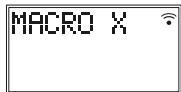
If no Macro is stored under the chosen digit key then "Macro X Void" is briefly displayed and the remote returns to normal operation.

9.3 Macro Notes
- You might want to add "delays" in a Macro sequence (e.g. to allow for your TV warm-up time). Delays can be added by using the PAUSE key followed by the number of seconds delay required at Step "g" in
setting a Macro. For example, to enter a delay of 3 seconds, press and release PAUSE followed by 3. Maximum delay is 9 seconds. It is not possible to have a "0" digit entered after Pause i.e. there is no zero delay.
2. There is an automatic delay of half a second between each IR transmission
in a Macro sequence.
3. The first key stored in a Macro sequence MUST be a Mode key (TV, VCR, etc.).
4. Setup and Macro keys cannot be included in a Macro.
5. Press Setup to quit Macro Setup.

10. Problems and troubleshooting
The remote doesn't work or loses codes entered
-22-
Confirm with your original remote that the equipment works correctly.
Make sure that you have pressed the corresponding mode key of the equipment or device that you want to control.
If the listed code does not work, try the AUTOSEARCH method or enter the next code of that brand.
To find the corresponding code for your equipment use the automatic search.
Check that the batteries have the correct polarity position.
The programming of the remote requires 2 AAA alkaline batteries (new). If the remote loses codes within a few days/weeks the problem can be solved by using 2 new batteries from the same brand.
If the backlight of the LCD screen is very weak, in general it will be necessary to replace the batteries.
Telecomando universsale 8/6/4 in 1
- CINbHOro MExaHnueCKOrO n3HOca
- BbICOKNX TEMNepaTyp
- CINbHOB Bn6paquin
- BbICOKOINBIAHXOCTN
Takke npimnte BO BHIMAHne DOJONIHInTeNbHbIe npimeaHn, CODepKaaUncEeB pa3JIuHbIX rnaBax 3TOrO pykoBDCTBa NOJIb3OBeTJe. ECnY bAC B03HNKn KaKe-1NIOB BonpOsbl, HE OcBeUeHHbE HACTOUE mpyKOBOCTBe NOJIb3OBeTJe, CBXINTEcB c HsWei IopRyew NINHee TeHXuecko PndepKKn INIb o6patntecb Kdpryomny cneunlntcy.
BhIMATEbHO npOHTNE 3TO pYKOBOCTBO u peKOMeHdaaunn no 6e3oNaChocTN, YTObI npabINbHO NaCTPONTb yCTPOINCTBO.
XpaHnTe pykoBDCTBO B HAdEJHOM MeCTe, YTObI bIMeTb BO3MOXHOCTb ObaTbC K HeMy B nocJeDyUoIeM, INI ECINY BAC BO3NkHET HeOxOJIMOCtB IpePaTb Ero DpyrOmy CenOBeky.
1.2 Pekomehdaци no 6aTapey m nHTaHn
B 3OTOM yCTPOICTBE MOKHO IICNIOb3OBAbT TOJIbKO DBe aIKaJIINHOBbIe aKKyMylTOPbIe 6aTapei TnIa AAA. HIKoRJa He NbITaIeTbc NOcOeDInHbT 3TO yCTPOICTBO K dpyrOMy IcTOCHNKY PIiTAHMy. YCTahABNIbA B6aTeAp, CO6IIOaIte NOIpaHOCb. ECIN yCTPOICTBO He IcNIOb3yETcB T TeEHMe DIITeJIbHOrO BPemEH, INBHeKeITe 6bATapei. U6BeNTceB ToM, cTO b6aTeAp 10tINaHReH Ne pINBOJr K KOpOTKMOy 3AmbKaHMo I He NOIDBePraIoTc DeIeCTBnO OTH (CUYecETByE ONaCHOCTB B3PbIBa).
He p3pewaute deTAM 6pabTB yPKN 6bapae nHTAHn. He donyckaiTe, YTO6bl kAkyMynIATOpHbte 6batape JekxalB O TOKbTOM DOCTyN McTe -DeTI INI JX NBOITbE MOYr IIN pOrrIoTb. Ecn 3To pOn3oJIO, HemeJIENHO 6OpaTHTecb K DOKTOpy 3A NMOUBo.
Ecni batape Teky IINIOBpexdeHb, Ia6eraIe KOtAKTCA KcKoeJ, TAK KAc 3TO MOxET pINBecTN K OKOrAM INIIOBpexdeHIO KcNtOToB. B 30m CnyAe HcNoIb3yTe NOxdoJaUne nepuATkn. Pn yTInN3aunbatape Heo6XDoHMo c6bIooTaB NoCTaHOBHeNMeCTHbIX OPAHOB NACTn.
2. OnncaHne npOdykTa
Ipeep BAMn yHnBepcaIbHbIy nIyt D, ImeHOuIy qTeIbIe, Iwctb IIN BOCeMb KHOJOK peKeJIIOUeHIna PEXIMMOB (KoJIYcECTBO KHONK 3AusbciT OT MOdEnIa Bauero kynIbTa D), KOtOpBI cNOcOBeH zAMEHITb DO BOCMb MObIHybX nIytob DY ("fhyKUny 4 B1, 6 B1 IIN 8 B1"). 3TmIMn ObIyHbIM nIytamN DY MOryt 6bItb npakTlueckn IIObIe nIytbTy DYN T6bIOTOB 3NeKtPOHnIKC (CM. NocTABIeMbl CnICCK KOIOB).
O63nHcHHe "TV" ("TB") "VCR" ("BKM") "DVD" ("DVD-npOirrpBbATElb") "SAT" ("CnyTHNKOBbl pecmbep") "AMP" ("YcnInIeB") "AUX" ("DOnoJInHteBNo") ha KNOKkx nepeKIOueHnpeKIMOB cNyKat dInnKauzim yctpoCTb. 3a NCKIOueHempeKIMHO kONIK TV, Bbl MoKeTe 3aKpeNt b IIO6oe yctpoCTBO 6bItoBo 3JeKTOHNI 3a IIObo dpyropeKIMHO KNOKoi.
2.1 Yctanobka 6aTapei nntaan
BmecTe C npbTom Dy noctabnhotc 2 AAA mknpoaTapen LR03.
OtkpoTe KpbIbUkOy OTeKa dIa 6aTape NITaHnHa 3aDHe Yactn yHbEpcanbHoro nYbTa DY.
UctanobITE obe 6atapei nitaHnB O tCEk, npOBebTe, TTObl OH bIJIy uCTaHOBJI npabInlho, N TObl 6o3NaueHne + Ha 6atapee COBnadaLo C Takoi Jc MapKIpOBKO BHTPNOTcKaI py6atapei.
YctaHOBnTe KpbIiKy OTCeKa Ha npexHHee MeCTO.
Bb6opra3bika
KpHn nOoun 6ydt OTo6paXaTbCn Ha KK-dncnnee dnn Hndkaun KHONOK,NCnOJb3yEmbX BO BpemOnepaun YcTaHOBKn.

HaxMMTE n OTNyCTnTE IIO6yIO KHNKy, Ha DmCnIe NORBITcN HADNNCb "Language?" ("YbIK" C nHmKaIeM TeKyuIero BbIBpaHHOrO y3bka. NcNoJIb3yIte KONKn BBePx/Bn3 dnn BbIbopa JeaenAemoro 3bIka. 3bIKOM no yMOJuaHHIO RABIETcN aHrJIIMCKM. HaxMMTE n OTNyCTnTE KHNKy OK.
Ha 3kpae nncnpe noBntcra haanncb "confirm language" ("noTBePntb r3bIK"). Haxmnte n OTnyCTte KONky OK nna noTBePxdeHn Bbl6opa.
Ha dincnnee noarntc haadnncb "Success" ("YcneuHo"), n nylt DY octaHecTc B peKIMe YctahOBKn, BepHyBwIncb K ekpaHy MeHIO "CODE SETUP" (HACTPOIKA KOIDOB).
2.2 3aMeHa 6aTapei nItaHn i naMrtb
B clyae 3aemeHb 6batape nHTaHnBce nporpaMMpyeMbte noIb30BaTeJemnapaMeTpbl, kPome BpemeHn, dHneHn, daTbI N MACRO KOMaHd ocTaHyTcB e3 n3MeHeHn. YCTaHOBKn BpemeHn, dHneHn, daTbI N MACRO KOMaHdb bepHyTcK 3aBODcKIM yCTaHOBKaM.
3.ФункцинКНОК
[7] Teletext OFF (TeJTeKCT BblKI): BbIKJIouaet TeJTeKCT.
[8] Menu (MeHIO): 3anyckaet MeHK
[9] Exit (BbIXoD): BbIKIOHaeMeHIO.
[10] Mute (BbIKJIoueHne 3Byka): I03BOJraT Bam BkIIOuHTb/BbIKIIOuHTb 3ByK.
[11] Prog +/- (Поррамma +/-): Побъяет Вьбиравс селушии иnpelbyduшик kanaT TB, cnTyTNKOBOrO TeJIeBnIeHnA...,В ржIMe DVD: cSeLyuOuNи nIn npelbdyuNи Фразмent.
KK-DiCnneI DOnONHnTeBHO BkInouaet B c6e4-UnΦpOBoN INDnKaTOp COCToHnYacOB IN DpyTne CmMbObl NINDnKaUzIN.
4.2 BbIOd daHHbIX no yMOJIaHnIO B obIyHOM pexKIMe nCInJeA
O6bHnBnpeKmIe:IcNcneBcerDA BkIOHeH, KOrDa YCTAHOBNeHb 6aTapeH nHTAHn. OH NokaBaBAeTeKyuUe pKemn H erO KoD, HanpIMep, DVD, DeHb HeDeHn, HanpIMep, Mon (IN), INBpE MAn D B 24-aXacOBm fOpMATE, HanpIMep, 23:58.
Дицлгпprnнхаатнн кногкпөркнluчehнг ржимов:prn HaЖаТи ржимноун кногкпynblтДупрекoДTВ pexIMy nprablenyaugcTbOM, KOTOPOE 3a KhONka obOЗнhaаet,иЖК-дснглг otOБраеттЕтуш� ржими erkoJd, HanpIMep, DVD n 3anporpaMmPobAHnhb 4-uzpobov kQd, HanpIMep,0768.Пprn OTnyckannu ржимноун кногкИKK-дснглг Bo3BaPaaTeB O6bIHyB pexIM pa60tBJ.
Диспгелprnнхашин KhONк Setup (shift) (Hactpoika (pekeknioeHne): npn KOPOTKOM haxatmN INocNeIyUoIeM OTnyCzakHn KhONk Setup dinCpIeN nok3aBbaeT TekyuI pexIM nynbTa DY, HanpIMep, DVD, DaTy, HanpIMep, 9:10 (fOpmat YncINo: MeCJI), n OTOb6paxHeM na 3ekPae ("S") dinCpIeN nok3aBbaeT BblONHHeN eФHyKUIN "Shift" ("PekeknIOueHne"). HaxMnte N otnyCTte KhoNkiy Exit, YTOb6 bepHytbcB o6bIhny pexIM dinCpIe. TcOb6 cncIb3ObaTb KhoNk Setup dЯpekeKnOueHnA HaxMnte n OYcTite (obbyHoe HaxaTIe KhoNk) KhONk Setup, a 3aTe m HaxMnte KHOKNy, OTEBaUOlyu 3a BbIbOp BTopocTeHHOn ΦHyKUIN.
HnDnKaunna Haxatn KaonKn: npn Haxatnn KhoNok Ha KK-dncnnee noBnIeTcnyo CBBOJ "pepexoanda", nbo Ha KK-dncnnee npocxOaNT cMeHa HnDnKaun.
4.3 Habiragua nO MeHIO
Ytobb MyHn HAcTpoek, HaxMnte N yDexKmbaTe KhONky S (HacTpoiKa), noka Ha dncJIee He noBHTcnaHdncb CODE SETUP (HACTPOIKA KOIOB) n cMbON "SET".
Korda ha dincnee noaBntca Hndncb CODE SETUP, npoJolkaTe haxmTa b KhoNky S (HactpoJa) dIydoctyna KdpYrIM MeHo:
CODE SETUP (HACTPOIKA KOJIOB) SYSTEM SETUP (HACTPOIKA CNTSTEMbl) TIMER SETUP (YCTAHOBKA TAIIMEPA) LEARN SETUP (HACTPOIKA 3ANOMINHAHNA) MACRO SETUP (HACTPOIKA MAKPO) EXIT SETUP (BbIXOD IN3 HACTPOEK)
Haxmte KhONky OK dny Bb6opa TORO 3Tana nporpaMMPOBAny, KOtOpB Bam Heo6xOaM.
Onepaun no HactpoKe nCnoB3yOTc dI npMOro BXOa B 6n6nIOTeKy KoIOB, noncka KoIOB, 3anOMHaHnI rT.D....
YTo6bI BByTNn 13 onepaunn no HactpoKe, HaxMNTe KhoNky EXIT nIN B MeHNO nepeynTe K "EXIT SETUP" ("BbIXOД IV3 HACTPOEK"), a 3aTeM HaxMNTe KhoNky OK.
MeHIO CODE SETUP (HACTPOIKA KOIOB) nCnoIb3yETcR dIa BBOda KODOB pIpa3JIuHbIX yCTPOIcTB

MeHIO System Setup (Hactpoika CnCTeMbI) nCNoIb3yeTcra IyctaHOBKn BpeMeHN, daTbI ynpabNeHH ypOBhem rPOMKoCTn

Mehio Timer SETUP (HACTPOIKA TaIMepa) nCnoJIb3yETcI yCTaHOBKn Oepaun no TaImepy

MeHIO Learn SETUP (HACTPOIKA 3aONMHaHn) nCNoB3yeTcA npOrpAMmPoBaHnpeKIMa C coXpaHeHHbIM B nAmrT KOMaHdAMN

MeHIO Macro Setup (HAcTpoIka MaKpo) nCnOJIb3yETcI dIa HAcTpoIKn nocIeOBaTeJIbHOCTeI KOMaHd C nOMoUb IKnOIIK Macro

MeHIO EXIT SETUP (BbIXOДИЗ HACTPOEK) ИСПОЛБ3уETСДЯ BBIXOДИЗ MEHIO HACTPOEK I BO3BpATA B OБИЧьп рекIM pa60Тbl.
BbIXoI3 MeHIO HAcTpoE K TakKe IpnOCxOJNT ABOTMaTueeCKN NO nCTeueHIN npn6JIu3nTeIbHo 15 cekyHd, ecnn HOn Onda KhONka He Haxkmaetc. Ha dncnnee noBaITcra NaHnncb "Timeout" ("Bpemr NCTeKNo").

Korda npbT Dy BblonHneT obpaBcTy opeaun no HacTroKe, Ha 3kpaHe dncnpeoToBpaKaetcHaDnCb "Please Wait" ("PnoDoXdnte").

5.ПограмmarpoBaHne CODE SETUP (HACTPOIKA KOIOB)
Onu MeHIO Code Setup (HactpoKa KoOB): Pn HaxaTIn KhoNk OK B MeHIO CODE SETUP HaDcPiee NoBJIOTc4 0uIN dIpy npOrpaMMIOBaHnpeKIMa C NMOUbKOOB.
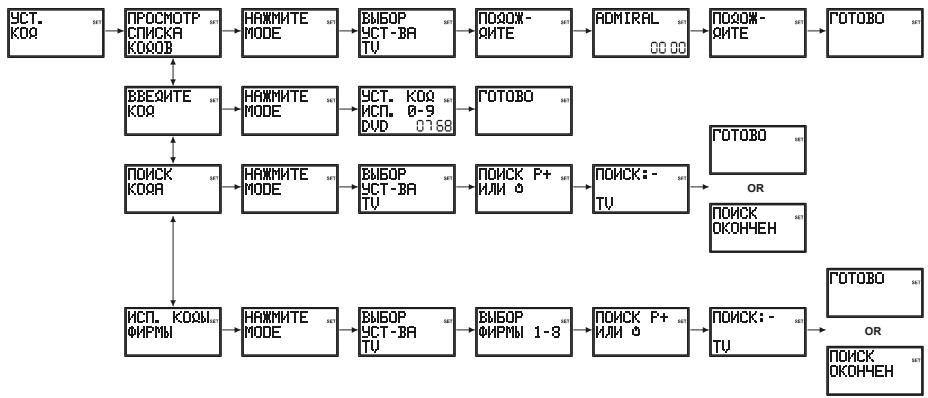
5.1 Ppokpyka no cnncky KoDoB: IepBbI MeToD BBoDa KoDa
a. BkHOnHTe yCtpoCTBO, KOTOpbIM Bbl co6bpaTeBc ynpaBnTb c nOmoIbIO npIbTa DY (HanpImep, YTO6bIyynpaBnTb TB c nOmoIbIO npIbTa DY, BkHOnHTe TB-nPmeMHNK)
b. HaxmTe n yapedkivai Te KhoNky S, noka Ha JK-dinCnnee He noBHTcra HaIINCb "Code Setup" ("HactpoiKa KoIOB") (3To npOn3oJET npIn6n3nteHbHO uepe 3 cekyHbl)
c. Otnyctnte KhoNky Setup (HacTpoNka)
d. Hαχmiteи Μθηγιντην ΚΚΟρκύ ḌΚ. Ḍλεκραή εἰπιπλερ Μοραυτός Ḍαπης β“SCROLL A LIST OF CODES" ("ΠΡΟΚΡΥΤΑ ΠΟ ΣΤΙΝΥΚY ΚΟΙΟβ").
e. HauKmTe nOTnCyTIne KhoNky OK. Ha 3kaPe IncIpe IpoBnTCra HadnCb "SELECT A MODE KEY?" ("BbIPATb PEXKIMHyIO KhoNky?")
f. Haxmnte n OTnyctnTe HxkyHyo pexmMHyo KhoNkTy (TV, VCR, DVD, n T.d.). Ha 3kpane dincnpe noBtcrHaDnncb "SELECT DEVICE? TV" ("BbIPATb YCTPOICTBO? TB").
6.3 YctaHOBKa DaTbI: nO3BONJET yCTaHOBtB NOKa3aTeJI Mecra, DaTbI n DnH HeJeJI.
a. HaxmTe u ydepxBaIte KhoKy S, noka Ha KK-dncIee He noBHTcH aIINCb "Code Setup" ("HactpoJa Ka KoOB") (3TO npO30JdET np6bn3nTbHO uee3 2-3 cekyHbI).
b. OTnyctnte KhoNky S.
c. Испόньэутke Kнόнки Вьерх/Bинз, Утобл蕲етик орци "System Setup" ("Hасторika сиземы") на зара themselves on the system OK. Ндоступные посторically "Vol/Mute Control Setup" ("Hасторika уразавлиения ромковостю/выкlioчением зуka").
d. Исторы Кнокки Вьерх/Bин3, Утосы полейки К опции "Date Setup" ("Устовка даты") на заиме диспег. НжмITE и OTпстente Кноку OK.
e. Ha 3kpahe nOoBITcH NnDkaJMaY "Year?" ("Tod?"), rIe DBe NocpeHne UOpPbI o60hauHHe roa 6byT MrrA. HcNpO83yTe KhoNkn BBepx/Bn3, yTO6bI yCTaHOBt b NOKa3aTeIb rOa, 3ATem HaxKMITE n OTYNCTIte KhoNky OK.
f. Ha 3kpAne NOBHTCNA INHDAKUaNIA "Month?" ("MeCua?"), rIe cHpbl o6o3HaENH Maecuza 6buyT MIRAtb. IcNoIb3yIte KHOKN BBePb/Bn3, YTObbl yCTaHOBt b NOKa3aTeJIb MeCua, 3aTeM HAKMMTE n OTNCTIte KHNKY OK.
g. Ha 3kpHaene noBHTCn HmDnKauZna "Date?" ("Data?") rIe cnFpbbl o603Haehn DaTbI bdyT MIRaTb. McNo13yTe KHOKN BBePx/BHn3, YTO6bI yCTaHOBtB daTy, 3aTe m HAKMITE n OTNYCTte KHONky OK.
h. Ha 3kpAne NoRbTcN HmDnKauNg "Day?" ("DeHb HeDenN?") ,rge 06o3HaueHme DnH HeDenN 6ydt MmTaB. IcNoIb3yTe KhoKNk BBePx/BHn3, UToBbl YctaHOBtB DeHb HeDenN, 3aTeM HAKMMTE N OTNcyTIte KhoNKy OK.
i. Ha 3kpahe DnCnIe NpBntcH aDnncb "Success" ("YcneuHo"), nnyt T y octaHETcB B pekmHe hAcTpoKn, BepHyBnCb K 3KpaHOMy MeHIO "Code Setup" (HacTpoKa KoDob").
6.4 HactpoKa nOcbETKn: no3BOLJrE HAcTpoTb npoDJIKHTeJbHOCTb BpeMeHn noCDBeTKn KK-DCnPrr NaCte Haxatna JIOB0n 3 KHO9OK.
a. HaxmTe u ydepxBaTe KhoKy S, noka Ha KK-dncnlee He noBHTcH naHncb "Code Setup" ("HactpoJa Ka KoOB") (3TO npO30IeT np6bn3ntbHO yepe3 3cekyndbl).
b. OTnycntte KhoNky S.
c. Испόньэутke Kнόнки Вьерх/Bинз, Утосы поелейник орцим "System Setup" ("Hасторika сиземы") на зара themselves on the system OK. Ндоступные посторically "Vol/Mute Control Setup" ("Hасторika уразавлиения ромковостю/выклочених в�ьka").
d. NcnoIb3yIte KhoNk BBePx/BHm3, TOb6I nepeTn K onCm "Backlight Setup" ("HactpoJa noCDBeTKn") Ha 3KpaHe DcNpEe. HaxMnte n OTnyCTne KhoNky OK.
e. Ha 3kpahe nnoBntcnaHnDnkaun "Backlight Time?" ("Bpemr noCBeTkn?", rpe cnppbI o6o3haeHnra TeKyuien npOdoJnxTeNbHOCTn noCBeTkn bdyt MnrTaB. IcNoIb3yIte KhoNk BBepx/Bn3, yTo6bl yctAHOBHTb Heo6XoDMoe BAM Bpemr noCBeTkn KK-dncIeR, KOtope npn Haxattn KhoNk Bepx MoKeT yBEnuHBaTcBcRaHa INTEpBaB V 5 ckyHd N DOCTnTaB MaKcImaIbHoro 3naueHnB 60 ckyHd. BbIbpaHNOe No yMOJauHIO Bpemr noCBeTkn DnCIneR coCTaJIeT 10 ckyHd. YTo6bl BbIKHouHb FyHKUIO noCBeTkn KK-dncIeR, yCTAHOBtbePemr noCBeTkn Ha "00"(HyIb). HaxMITE n OTNcyTnte KhoNk OK.
f. Ha 3kpane DnCnpe NpOBInTcH NaDnncb "Success" ("YcneUHO"), nnyt T y octaHecrB peKIMHe HAcTPOkN, BepHyBUnCb K 3KpaHOMy MeHIO "Code Setup" (HAcTPOka KoDob").
6.5 YctaHOBka 3bIka: no3BOJAEYCTaHOBHT bIbIK DnCIIeBaWero NylTa IY.
a. HaxmTe u ydepkBaIte KhoKy S, noka Ha KK-dncIee He noBHTcH aHaNscb "Code Setup" ("HactpoJa Ka KoOb") (3TO npOn3oJdET np6bn3nteHbHO uepe3 2-3 cekHyDbI).
b. OTnyctnte KhoNky S.
c. Исторьштей Кноки Вьерх/Bинз, Ктосы полку System Setup" (Hасторika Спостмы) на заразе диспег. Нарочи с OTNуCTиКноку OK. Н диспee noявntся
Hadnncb "Vol/Mute Control Setup" ("HacptoKa ynpaBneHna rpoMKocTbIO/BblKJIOueHnEM 3Byka").
d. История Клики Великий Клип "Language Setup" ("Устовская"). История Клики Великий Клип "Language Setup".
e. Ha 3kpaHanoe NnBHTCn INHnKauniae "Language?" ("Jb3bK?")", rde 6yDet MURt BtekyuDn J3bIK dncnnner. IcnoIb3yIte KONKn BBePx/Bn3, tObI bIbPaT heoXoNmbln J3bIK. AHRNIckn J3bIK YBnTcR a3bIKOM NOymOnaHInO. HaxMITE n ONTyCTIne KONKY OK.
f. Ha 3kpahe no8Bntcra Hnncb "Confirm English" ("PoiTBeprntb aHrnnckn"). Haxmnte n OTnyctnte KhoNky OK.
g. Ha 3kpahe DnCnIe NpOBITcH HApNcB "Success" ("YcneuHO"), nIyIbT dy OCTaHETcB B peKIMHe HAcTPOKn, BepHyBUnCb K 3KpaHOMy MeHIO "Code Setup" (HAcTPOKa KoDOb").
6.6 C6poc cncTeMbI: no3B0n8eT c6pocntb HacToPoiKn npbTa Dc c KK-dncnneem 6paTHo K 3aBODcIMN HAcToPoiKam NO yMOnJIaHnIO. Bce 3anIporpAmmIoBaHnIIbe NoIb3ObaTeIeM npaMeTpbl, NaHpIMep, HAcToPoiKNo KOID, COxPAHeHHBe N bAMrTI KOMaHdBi, MaKpOKOMaHdBi N T.D. c6pacsBaHOTcN I N3MEHaHTcA HO CTOBETCTBHyOUINE IM HAcToPoiK No yMOnJIaHnIO.
IyctaHOBk TaMepa aBTOMaTHueCKO BbIKHoueHn TB (cHMBOJ "Zzz" He
OTobpaKaTcB O6bIyHOM pexnme ducnJeA):
a. BkIIOHTe yCTpoIcTBO bpeKIMe TB.
b. Haxmte u ydepkmbaTe KhoNky S, noka ha KK-Dncnnee He noBHTcH aDnCb "Code Setup" ("HactpoKa KoOb") (3TO npOn3oIeT np6bn3nteIbHO uepe3 3eKynbl).
c. OTnyctnTe KhoNky S.
d. Испόльczутě Кнόнки Вьерх/Bин3, чтосы пени К опци "Timer Setup" ("Установка таймера") на заразе диспег. Нажmente и OTNYCTITE Кнόнky OK.
e. Ha əkpahe nərBNTcH aɪnɪncb "TV Sleep Setup" ("YctaHOBka aBtOMaTNUeCKOrO bɪkJIHOeHINr TB"). Hαχmnte i OTnyCTnte KhoNkY OK.
f. Ha 3kpahe noiBntcnaHdnnbc "TV Sleep Set" ("HaCtpoIka aBtOMaTnueckoro BbIKIOUeHnra TB"). HaxMNTe n otnyctnte KhoNky OK.
g. Ha 3Kpaane Hcnpner NoBHTCn Hndnkaunae "TV Sleep Time?" ("Bpemr ABTOMATNueckoro BbIKIoueHn TB?") rde 6byt MmRatb "MnHyTb). IcNoJIb3yIte KONIKn BBePx/BHn3, YTObbl yctAHOBtMbHnytbl, a3aTeM HAKMNIT O NTyCTNTe KHONKY OK.
h. Ha 3kpane DnCnpe NpOBntcH NaDnCb "Success" (YcneuH), n npbl T y octaHcTcB B pexkme HacToPkn, BepHyBunCb K 3KpaHOMy MeHIO "Code Setup" (HacToPka KoOb).
i. Haxmnte n Otnyctnte KhONky Exit nra Bo3bpaTa B obuHbI peXnM pa60tby nybTa DY. IonoXnTe npbT dy taKIM o6pa3OM, YTObI OH 6bl HAnpabJIeH Ha TB-npneMHNK.
I. 3aONMHAHHe KONIKMOKET 3aHHTb Do 3ceyHd. HaxMNTe N He OTNyCKaTe TY KHOKN, KOtOpYBO bI 3aONMHaTe, Do TepoN, NOKa HA 3kpaHe KK-DnCpNHe He NoBnTc HADnCb "Success" (YcneuHo) INI NaHnCB "Key Learn Error" (Ow6ka 3aONMHANH KONKH).
m. B cnuyae ecn coxpanehme B namrB nepBoi nIIN BTOPOH KONKn DnI OTdJIbHOro peKIMa npNBOIDNT K HnpepbIBHbIM OUsbKaM, PnpDpIMTc CLeyUOuE WArH:
i. 3aBepuTe Ipocecc 3anOMnHaHna HaxaTne KHOKN Exit.
ii. OuHCTHTe BCE COxpaHeHHbIe B IaMaTn KOMaHdbI dIra 3TOrO peKIma.
iii. Ybntecb B TOM, UTO HnpaBneHbIe dpyr Ha dpyra INppaKpaChbIe CBeToIOIObly TOB IV o6pa3yOT npAmy IOHNIO.
iv. YmehbHnTe (HaNPmep, 15 MM) nIIN yBEnuHte (HaNPmep, 50 MM) pacctOHHne MEXKdy DByMn PnblTamn DY.
v. Ппьтайтесь NOВТОРно 3ANOMHITb KHONKIN epBOHauJIbHOrO nyIbTa IY dIЯ 3TOROpexIMa.
Ecnn npn 3anomnHaHm ToJx Ce camo KhoNk BHOb npocXoHnt Osi6ka, y6eHInTecb TOM, YTOKhoNk nepBOHaayabHoro NylbTa DY, KOtOpyB bI 3aONmHaete, fynKuOnHpyet - nepeAdaeT CnHAn. MoXho Jn C e ee NOMouB Yo npABnTB bblpaHHbIM ycPoINCTBOM 6blTOBoi 3JIeKToPOnHKn? PnOItaTeCb 3aONMnHb 3Ty KhoNky ND pDyHM pexJMOM, KOTOpB nPeDbapNTebHo 6bl OUnSeH. Ecnn 3anomnHaHne npoLo ycnEhO, TO, CKopee Bcero, 3ta KhoNk IMeET OTmHnBb NT BCEx DpyNX KOOD TIN H Me MOKET 6blb CoXpAHeBA N pAmrTb NOTEM peKMOM, NOd KOTOpBb Mbl nepBOHaayabHOb NblTAMCb ee CoXpAHNb.
a. Khonk n HactpoiKa, Domaunn KInHoteaTp Nm MaKpO He MOrTy 6bItb NcNoJIb3ObaHbl dIy 3aONMHaHn.
b. BCE kOMAHdb, COxPAHHeB b NAMTb DnI ONpeDEHeHORO peJIMMA, 6yDyt ydaNEHbI, eCNi dNt3TOro peJIMMA 6yDet BVEHEM IMeUHOsc HIN HOBV KO h3 4 cHpO (3TO OTHOCITc TaKke K pIyMAmy BVDy KODa, BVDy KODa PO pESyNbTatam NONCA KOa n 6bpHNA).
c. Пи 3aONMHAN NOCBETKa JKK-ДИСПЛЯОТКЛЮЧаETCA.
8.1 3aONMaHHe KOMaHd

15-50mm
a. Hajkmnte u ydepjkBaIte KhoNky S, noka ha KK-dncIeee He noBHTcnaHdncb "Code Setup" ("Hactpojka kOdoB") (3TO npOn3oJdt np6bn3ntelbHO uepe3 2-3 cekyHdbI).
b. OTnyctnte KhoNky S.
c. Испόлььзуге Кнόнки Вьерх/Bин3, Утосы пени Т сони "Laym Setup" ("Hасторка заломни"). Habtmite и OTNYCTITE Kнόнky OK.
d. Ha 3kpane DnCpIe IopBntcH aDnCb "Learn One Mode" ("3anOMHITb dIy oDHoro pexIma"). HaxMInTe n OTnyCTnTe KHOkky OK.
e. Ha 3kpane DnCnIe NpOByTcra HApNcB "Select a Mode Key?" ("BbIbpaTb peKmMHyo KOnKy?"). HApMnte n OTnyCTnTe HyKHyO peKmMHyO KOnKy (TV, VCR, DVD, n T..).
f. Ha 3kpAne NoBnTcnaHnncb "Select a Key to Learn?" ("BbIbpaTb KOnNkY IJIa 3aONMHaHnra?"). HAnMeNTe O NTyNCtte TY KOnKny pNbTa DY C KK-DmCnpeem, KOtOpO BBy XOTNe npINncatb KOD nepBOHaunbHoro NpNbTa DY.
g. Ha 3kpahe noRbntc Hadnncb Learning: Please Wait" (Ndt 3anomnHaHne: noOxnte). HaxMMte n ydepXbaaTe KhONky nepBOHaunbHoro npbTa DY, noka Ha 3kpahe XK-DinCnpe He noRbTc HADnncb "Success" (YcneuHO) nni HADnncb Key Learn Error" ("OUn6ka 3anomnHaHnK hONKn") (CM. COBtBu nO 3anomnHaHnIO). 3atem Ha 3kpahe noRbTc HADnncb OK-Learn More or Exit?" (OK - PpOOnKnB 3anomnHaHnIO nii BmItn?") (DJIa 3abePseHn 3TOrnpoucecca notpe6yetc2-3 cekynDbI). OTNyctnte KhoNky nepBOHaunbHoro npbTa DY.
h. Hauinbck "OK-Learn More or Exit?"(OK- IpoDolKnItb 3anOMHaHne nIi BbIn?") 6ydt BCE eue OTo6paXaTbc8 Ha 3kPae He dmCnpe. JIra 3anOMHaHna DpyrNx KHOKn HaxMnte n OTNyCTnte KONky OK nOBTopTe BCE 7aarr, NaHnHa C 7ara "I. JIra BbIXoDa HaxMnte n OTNyCTnte KHONy Exit.
i. Ha 3kpaH e TceHe Me KopoTko RbpeMeH 6ydt OTobpaXaTcB NaHnCb "Please Wait" ("PdoXdTe), 3aTe mIyIbT DY BbIeT n3 peKIMa HAcTpoE K BepHctc B ObIyHbI pexIM paObToI.
8.2 Ouchtska Bcex coxpaehnbbix B namrtn KOMaHd pejima :
a. Hajkmnte n ydepjkBaIte KhoNky S, noka ha JKK-dncIeee He noBnTcra HaIncb "Code Setup" ("Hactpojka kOdoB") (3TO npOn3oJdTe np6bn3uTeNb Ho cepe3 cekyHdbI).
b. OTnyCTne KhoNky S.
c. Исторытей Клиоки Вьерх/Винз, Тобл лени К ошим "Learn Setup" ("Hасторika Заноминаши") на захалдяпг.
Намате и OTус'tе Клиоку OK. Н захалдачоть саддь Mode Learn" ("Заноминаши рекима").
d. Исплььштей Кноги Вьрх/Bиз, чобіп поевши К опци Clear One Learn Mode" ("Очирка заломпанядя одною ржима"). HabKMITEи OTNYCTIte KhoNkOу OK.
e. Ha 3kpane DnCnIe NpOBuTcra HAnncb "Select a Mode Key?" ("Bb6paTb peKmHHy KOnKy?"). HAnMnte n OTnyCTnTe HyKHyO peKmHHy KOnKy (TV, VCR, DVD, n T..).
h. Ha 3kpane noRbntcH aHnncb "Confirm OK to Clear" ("HaKmTe OK nIa noTBepxdenn OuchTk"). HAKMITE n OTNcyTtne KhONky OK.
g. Ha 3kpaH e B TeueHHe KopoTkoR BpeMeHb6ydet OTo6paxaTcBc HAdnCb "Please Wait" ("PdoXdTe"), 3aTeM pIyIbT Dv BbIeT n3 peKIMa HAcTpoE K BepHcTB O6bIHybpeKIM paObToI.
8.3 Mactep ounctkn - ounctka Bcex coxpaehhbix B namrT KOMaHd (pekomehnyetcBbIIOHNITb peed npoBeDeHem nepBoro npoceca 3anOMHaHnA):
a. Hajkmnte n ydepknBaTe KhoKy S, noka Ha KK-dncIee He noBHTcH aHaNscb "Code Setup" ("HactpoKa KoOB") (3To npOn3oJdT np6bn3ntelbHo cepe3 2-3 cekyHdbI).
b. OTnyCTnTe KhONKy S.
c. Исторытей Клиок Варх/Виим, Тюбл Лени К ошим "Learn Setup" ("Hасторika Зелега", Надимь Mode Learn) на захалдпян.
Надимь mode Learn" ("Зелега повитсу), Надимь mode Learn" ("Зелега повитсу").
d. Исплььштей Кногки Вьрх/Bинз, чтобл пени Тк опци Clear All Learn Modes"("Oчиска 3аноинаядя BCex ржимов") на захалди сплег. Нжмгеше OTусгштей Кногку OK.
e. Ha 3kpane noRbntcra Hauinbc "Confirm OK to Clear" ("HaxMnte OK nnoTBePxDeHnOuCTKn"). HaxMnte n OTNcyTnte KhONky OK.
f. Ha 3kpAne B TeueHMe KopoTkoR BpeMeHn 6yDet OTo6paxTaBcra HAdnCb ("Please Wait" ("PtoOxDnte"), 3aTe m npIbT Dv BbIdet n3 peKIma Hactpoek N BepHeTc B o6bUHb pexIM pa0BoTb.
- MakpokomHaBbI: - KONka MAKPO B coUeTaHm C cUfpoBbIMn KHONkAMN 1, 2 n 3, no3BOJrT Bam nporpaMMPOBaT b COxpaHraT b NaMaTn Do 3 NocJeDoBaTeNbHcTeH HaxaTNI KONOK NO BaWemy
Bb60py. Haxatne COOTBETCTByooueIuOPOBn KhoNkMaKp 3aMeHReT NocJeObaTeNbHOCTb HcckOBkHX Haxatni KhoNOK (KOMaHbIr) KOtOpAOTnpABnRErTa Ha yCToPcIbTO. JIO6a8 nocJeObaTeNbHOCTb Haxatni KhoNOK, KOTOpyBu bIOCTORHH BbIOINHReTe, MoKeT bOITcBeDeHa Do Haxatnia Bcero IuMb dByx KhoNOK (KhoNk MAKPO, a 3aTeM uOJFpoBOh KhoNk 12, uIn 3). HanPmEp, Haxatne KhoNk MAKPO, a 3aTeM OTdeNBHO uOJFpoBOh KhoNk No3BOINr Bam BKIOUHTb TB, BKIOUHTb peciBep Ka6eJIbHOro TeneBvDHeNe, pepeKIOUHTb TB-npiEeMHNK ha Baai IIOHMb kaHAp, BKIOUHTb BKM m OTrdE My KOMaHy du 3aNoCb ts. I.D. Pnd KaKaDo n3 3 uOPOBbIX KhoNOK MaKp MOXHO coXpaHNTb nocJeObaTeNbHOCTb n3 10 Haxatni KhoNOK.
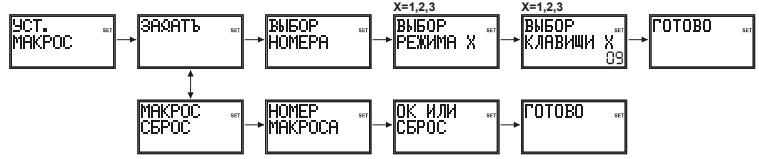
9.1 Hacptoika KhoNkMaKpO
a. Hajkmnte n ydepknBaTe KhoNky S, noka Ha KK-dncIee He noBnTcH aHaIncb "Code Setup" ("HactpoJa Ka KoDob") (3To npOn3oJdTe np6bn3nTeNb Ho uepe3 cekyHbl).
b. OTnyctnte KhoNky S.
c. NcnoIb3yIte KhoIeB BBepx/Bn3, YTO6bI nepeTIn K onuIN "Macro Setup" ("HactpoJaMaKpO") Ha 3kpaHe dncIIeA. HaxMITE n OTnyCTnte KhoIky OK.
d. Ha 3kpane IIOBnTc HnIncb "Macro Key Set" ("HactpoiKa KhoNkMakpo"). Haxmnte n OTnyctnte KhoNky OK.
e. Ha 3kpAne nOaBtCn HAdnnCb "Select a Macro Key" ("BbIpaTb KOnKy MaKpo"). HaxMnte n OTnyCTte OndHy n3 uΦpObBix KHONoK 1, 2 nH 3, Ha KOtopyU bbl XOTnTe coXpaHNTb MaPOKOMAHyD.
f. Ha 3kpahe noBHTcnaHdnnbc"Select Macro X Mode"(rIe "X"-3to1,2nun3)(Bb6paTbe pexm d nA maKpO X).HakMnte n otnyctnte HyHKHy opezmHyo kHOnKy (TV,VCR,DVR, n T.D.).PepBoi KONKoi B nocneIobatebnHOCTn MaKp BCerda doJnxHa 6blb pexmmHaa KOnkna.
g. Ha 3kpAne noaBntc HnAnbc "Select Macro X Key?" ("Bb6paTb KOnKy dIra MaKpo X?") BmEcTe CO cHTeHkOM 3aIeCTBOaBHbX KHONK (HaunHaeTc T NOKa3aTeJIY "02"). HaxMNTe INOTyCHTe TE KONKN, KOTOpBe Bbl XOTNe BKnOuHTb B NocPeIOBATEb MaKPO, B TOM NOPJAcB, B KOTOPOM Bbl XOTNe, YTObIb ONI bIIIN OTNpAbJeHb Na YcTPOCTBO (do "10").
h. 甲06bI B IIO60 MOMENT COXPAHITb NOCNEBOATEBHOCTb MAKPO, HAKMITE IN OTNYYCTNTKE KHOKNY MAKPO. ImeTe B VNDy, YTO NOCNEBOATEBHOCTb MAKPO bdyET ABTomuHECKn COXPAHEHa NocTe TOrO, kak bdyet hakata 10-ya KHONka.
i. Ha 3kpane DnCnIe NORBNTc HAnINCB "Success" ("YcneHNO"), INyIbT Yy BbIeT n3 peKIma HactpoJKN, BepHyBUnCb K O6bUHOMy pexmMy paobTobl.
9.2 C6poc Makpo
a. Hajkmnte n ydepjkBaIte KhoNky S, noka ha JKK-dncIpee He noBbTcra HaIpcnb "Code Setup" ("Hactpojka KoIOB") (3TO npO30dET np6bn3ntelbHO uepe3 2-3 cekyHdbI).
b. OTnyctnte KhoNky S.
c. Исторьштей Кноши Вьерх/Винз, чтосы пени К опции "Macro Setup" ("Hасторікамakpo") на заразе диспяe. HabKMITE и OTNYCTHTE Кноши OK.
d. Исплььштей Кногки Вьрх/Bин3, чобл пени К опци "Macro Key Clear" ("Сбpos Кногки Марpo") на заpane диспя. НжмITE и OTNYCTTE Кногky OK.
e. Ha 3kpae nOaBITcH aDnncb "Select a Macro Key" ("BbOpatb KOnkny MaKpo"). Haxmnte nOTyucntte uDpOByo KOnky 1, 2 iN3 dIra ToI pocneobateJIbHocTm MaKpo, KOtopyu Bbl XOTNTe yDaIANTb.
f. Ha 3kpane noRbntc HauHnCb "Confirm OK to Clear" ("HaXMMte OK nIa noTBePxDeHna OuchTk"). HaXMMte n OTNCTnTE KhONkOK.
g. Ha 3kpane DnCnIe Ha KopoTKe Bpem IOnBntc HAnPiNc b "Success" ("YcneHNO"), INyIbT YByIaTeI n3 peKIMMa HacTroHKn, BepHyBUnsCb K ObblHomy peKIMMy paObTbI.
ДяakИваи МAKPOВ OobHNoHm peKIMme pa6ObToI pyIbTa Iy HauKMITE N OTNcyTHe KONky MAKPO, a 3aTeM (B TeueHne He 6oee 20 cekyHd) HauKMITE zuΦpObyu KhoNky 1, 2 nnn 3.
B To BpemKaK BbInOpHnReTcNocTeIOBaTeIbHocTb MaKpo,Ha 3kaPHe DicnIeR oTo6paXaETc HApINCb "Macro X" ("MaKpo X"), a 3aTeM nIyt DY BepHecr B OobHyh peXm paOTobl.
EcnnnohakatoonKhoKoHne CoXPOAHENoCpeOBOAtenbHOCTbMaKpOHa 3kPAne dncnner Ha KOPOTKe BPEm NoBHTc HaNnbc "Macko X Void" (MaKpO X HeJeCTBnTEnbHa") nNytIy BVepETcB o6bHy pexHM pa60tBu.


9.3Примechик Марpo
- Bo3MOxHb, Bb3axOTnte Do6aBHTb "Bpemr 3aIepKKn" K nocneIOBaTeNbHOCTn MaKpo (HanpIMep, dTTO, YtObI datb BaIeMY TB pIeMHNky pa3orpeTbc). Bpemr 3aIepKKn MoXHO ToD6aBHTB Bo BpEMr BbI0nIHNeHb Iura "g" B hAcTPOReMaKp, HnaxB KHONy PAUSE (nay3a), a3aTeM uΦPoyu bKONkY B 3aBnCmOCTn OT KOJIueCTBa cekyHd, Heo6xoINMbIX dNr BpEmeHi 3aIepKKn. HanpIMep,
YTObI BVEcTI BVPm 3aepKnn PabHOE 3ceyHdAm, HaxMMTE I OTNCTHKe KHOIKy PAY3A, a3aTeM UINpOBOyHO KHOKNy 3.MacCMnJIbHOe BPEm 3aepKnn COCTABJnET 9 cekHy. HeB03MOxHO BVEcTI UINpPy "0" Nocle Haxatna YKHOKNnyay3a, Ta kak BpeMeHN 3aepKnn PabHOH CyhNo H cyuIectByeT.
YTo6bI HaHTN KOI, COOTBETCTBYUOUI BAHEMy yCTPOINCTBy, BOCNOJIb3yInTEc b ATOMaTnueckmNONCKOM.
Y6eIntecb TOM, UTO 6atapei NITaHnY cTahOBnEhbl B COOTBETCTBm C NOJIAphOcTBIO.
Длгплгррммровань п ly Tpe6yotc2 aIkanHOBbe 6aTapeи nITAHN Tnna AAA (HOBbe).EcnnIbT yTepret KoIbI no IeCTeHTHe HecKoJIbIXn DeH/HeJIb,3Ty npOblemy MOXHO peuMb,3aMeHNb CTapBbe 6bAtePnHa 2 HOBBe 6aTapeN TORO xe Camoro 6bpHa.
Ecni noCDCBtka KK-dncnneer Oueh b TycknaB, B 60nbunHCTBe cnyaeb 3TO CbndTeNbCTByET O Heo6xOUMOCTn 3amehbl 6baapei nItaHn.