
UNI_ROLL_04 F - Washing machine Uniprodo - Free user manual and instructions
Find the device manual for free UNI_ROLL_04 F Uniprodo in PDF.


| Product type | Wheeled walker (rollator) |
| Brand | Uniprodo |
| Model | UNI_ROLL_04 F |
| Maximum load | 136 kg |
| Width | 65 cm |
| Length | 74 cm |
| Height | 98 cm |
| Adjustable height | 88 to 98 cm |
| Wheel diameter | 8 inches (20.32 cm) |
| Seat dimensions | 25 x 46 cm |
| Seat height | 60 cm |
| Walker weight | 7.175 kg |
| Recommended use | Flat, hard surfaces |
| Brakes | Hand brakes with parking function |
| Handle height adjustment | Yes, with locking knobs |
| Included accessories | Shopping bag and cane holder |
| Cleaning | Soft damp cloth, mild detergent |
| Maintenance of metal parts | Protection with a product like WD40 |
| Safety | Check the locking pins and brakes before each use |
| Repairability | Only by the manufacturer's after-sales service |
| Folding | Yes, for transport and storage |
Frequently Asked Questions - UNI_ROLL_04 F Uniprodo
User questions about UNI_ROLL_04 F Uniprodo
0 question about this device. Answer the ones you know or ask your own.
Ask a new question about this device
Download the instructions for your Washing machine in PDF format for free! Find your manual UNI_ROLL_04 F - Uniprodo and take your electronic device back in hand. On this page are published all the documents necessary for the use of your device. UNI_ROLL_04 F by Uniprodo.
USER MANUAL UNI_ROLL_04 F Uniprodo
Read instructions before use.

PLEASE NOTE! Drawings in this manual are for illustration purposes only and in some details it may differ from the actual machine.
The original operation manual is in German. Other language versions are translations from German.
1. USAGE SAFETY

ATTENTION! Read all safety warnings and all instructions. Failure to follow the warnings and instructions may result in serious injury or even death.
Whenever „device“ or „product“ are used in the warnings and instructions, it shall mean < Rollator/Rollator 2 in 1 >.
a) Follow the instructions to assemble the product.
b) If in doubt whether the product works correctly or if it is damaged, contact the manufacturer's customer service.
c) Product repairs must only be carried out by the manufacturer's maintenance technicians. Do not attempt to repair it yourself!
d) Both handles must be locked at the same height.
e) Before each use make sure the brakes are working properly.
f) Before each use make sure that the product is in good technical condition.
d) Do not exceed the maximum load specified in the specifications table.
h) Do not overload the shopping bag. It is designed to carry light objects.
i) Do not use the product if any of its wheels is not moving freely or if you feel that the user may tip over with the product.
j) Do not use a damaged product.
k) Do not alter any product parts or accessories.
I) Check the technical condition of the product every day.
2. USE GUIDELINES
The product is intended only to help people walk. The product must only be used on flat, hard surfaces. Do not use the product on uneven and marshy terrain or on surfaces with holes.
The product falls outside the scope of MDD 93/42/EEC directive concerning medical devices.
The user is liable for any damage resulting from nonintended use of the device.
2.1. PRODUCT DESCRIPTION

ACHTUNG! Product drawings referenced to by individual numbers in the description can be found on page 30.
Fig. 1. Models UNI_ROLL_01 DF and UNI_ROLL_02 DF
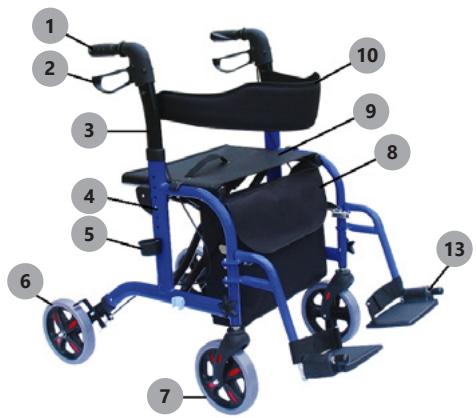
Fig, 2. Model UNI_ROLL_03 2in1
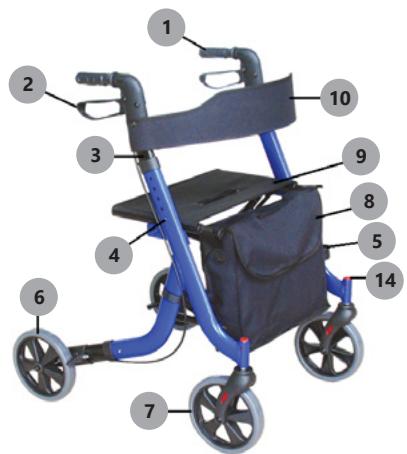
Fig. 3. Model UNI_ROLL_04 F
-
Handle
-
Brake lever
-
Handle frame with height adjustment
-
Height adjustment button
-
Walking stick holder
-
Rear wheel
-
Front wheel
-
Shopping bag
-
Seat
-
Seatback
-
Rear wheels folding mechanism
-
Front wheels folding mechanism
-
Footrest
-
Front wheel detach button
2.2. PREPARING FOR USE
Assembly:
All drawings concerning the assembly can be found at the end of the user manual, starting on page 31-32.
Carefully remove the product from the packaging and check for damage.
Models UNI_ROLL_01 DF and UNI_ROLL_02 DF
- Release the clip and remove the knobs of the rear wheels folding mechanism (Fig. 4).
- Turn the rear wheels frame down (Fig. 5).
- Insert and tighten the knobs of the rear wheels folding mechanism. Make sure all wheels are properly set.
- Remove knobs of the front wheels folding mechanism.
- Turn the front wheels frame forwards the product front (Fig. 6).
- Insert and firmly tighten the knobs of the front wheels folding mechanism. Make sure all wheels are properly set.
- Slide out the handles.
- Move the frame to the sides until the cross-bar interlock mechanism locks automatically. Check that the seat is locked by pressing on both the edges of the seat (Fig. 7).
IMPORTANT - Make sure that the cross-bar interlock mechanism is securely locked and the knobs of the rear and front wheels folding mechanisms are firmly tightened.
FOLDING (models UNI_ROLL_01 DF and UNI_ROLL_02 DF) Remove the accessories and, if necessary, lower the handle. Pull the belt of the cross-bar safety locking mechanism to release the cross-bar lock. Fold the frame as shown in Figure 8. Pull the handles to each other. Unscrew the knobs of the front and rear wheels folding mechanisms. Rotate the rear wheels toward the handles, screw in the knobs of the folding mechanism and secure the clip-on rear legs.
Models UNI_ROLL_03 2in1 and UNI_ROLL_04 F
- Install the front wheel in its seat on the front-side of the frame.
- UNI_ROLL_03 2in1 only: Pass screws through holes in the product frame, fasten and tighten the star-knob. Repeat step 1 to install the second front wheel (Fig. 14).
- UNI_ROLL_04 F only: When the wheel is safely installed, you will see coloured protrusions that will lock the wheel. Repeat step 1 to install the second front wheel. (see Fig. 21).
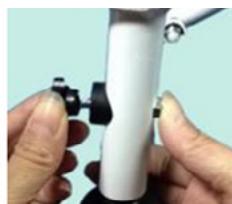
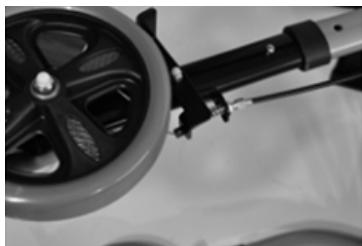
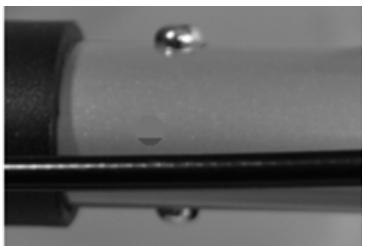
- Install the rear wheel in its seat at the back of the frame by simultaneously pressing the locking bolt. The locking bolt will fit into its position when the wheel is safely installed in place. Repeat step 2 to install the second rear wheel. (see Fig. 15) When installing the rear wheels, make sure the wheels are installed on the exterior side of the frame and that the brake lever is located on the bottom side.
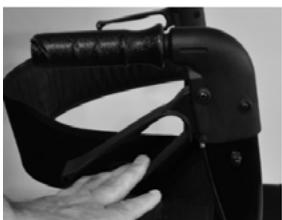
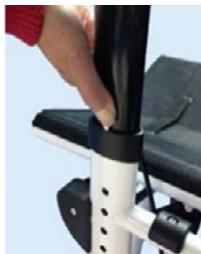
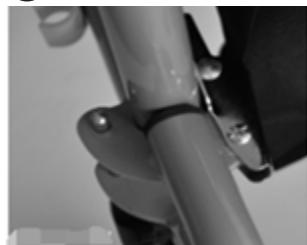
- Install the handle by pressing the locking bolt at the bottom of the handle frame and slide it into the socket on the main frame. Repeat the procedure for the handle on the other side (Fig. 16).
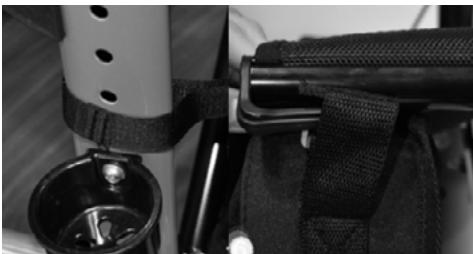
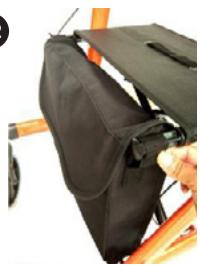
When installing the handle make sure it is pointing toward the rear wheels. The ergonomic curve in the handle must be facing inward. - Hang the shopping bag straps on the hooks on both sides of the seat. Using the longer straps, hang the bag on the product frame (Fig. 17).
-
(UNI_ROLL_04 F only) Install the walking stick holder on the holder base. The walking stick holder base can be found near the bottom of the left side of the frame.
-
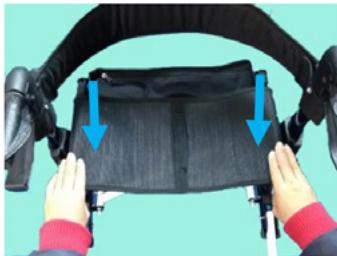
Unfold the rollator by pressing down on both sides of the seat frame (Fig. 7).
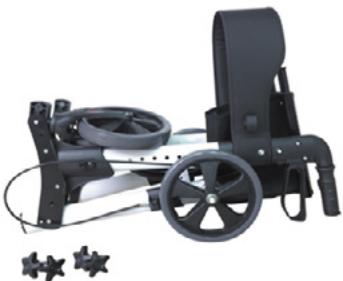
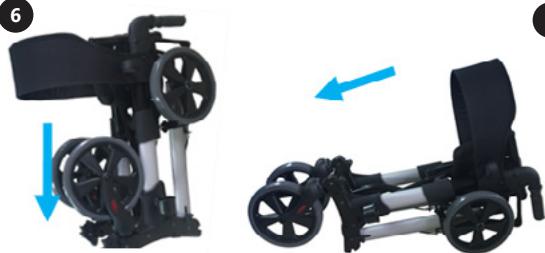
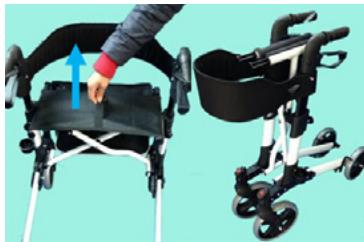
FOLDING (models UNI_ROLL_03 2in1 and UNI_ROLL_04 F) Pull the seat by the belt in the middle and push both sides of the seat frame towards each other (Fig. 8).
IMPORTANT: Before use, make sure all the locking bolts are fully extended through connecting holes (Fig. 19).
FOOTREST ADJUSTMENT (model UNI_ROLL_03 2in1)
- Place the footrest support socket on the protrusion on the front of the product frame. (see Fig. 20.a.).
- Repeat on the other side. Shift the footrests to the inside to lock them (see Fig. 20.b.).
- The footrests will lock in place with a "click" sound. (see Fig. 20.c.).
Adjusting the height of the handles
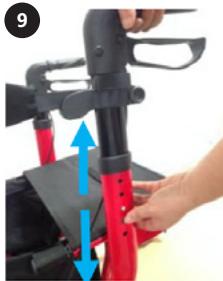
Adjust the height of the handles to the needs of the user. Press the locking button on the main frame and pull the handle up or down. When the handle moves, release the buttons. The button will automatically lock at the next possible height. Repeat the process until the desired height is set and make sure that both handles are locked at the same height (Fig. 9).
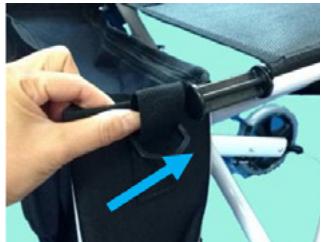
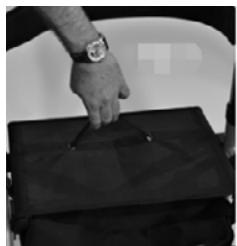
Fasten the bag to the hook on the seat frame. The shopping bag can be easily detached during use (Fig. 10).
How to operate the brakes
- To brake, gently press both brakes at the same time (Fig. 11), which will slow down and stop the Rollator.
- The brakes are equipped with an option to park the Rollator (brake lock) (Fig. 12). To activate the brake lock, press both brakes down at the same time. You will hear a slight "click". The brakes are now locked.
- To unlock the brakes, pull the brake levers again. You will hear a slight "click" when the park function switches off.
Brakes adjustment
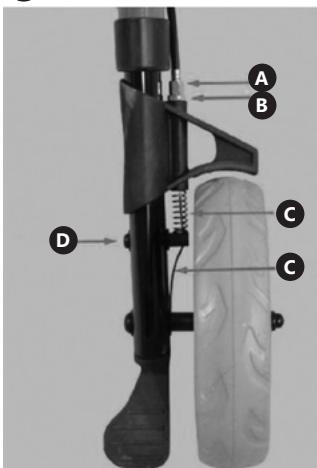
The Rollator brake system requires periodic adjustments. To adjust the brakes, loosen the locking nut B (Fig. 13) and then tighten/loosen the nut A. After adjusting, tighten the nut B. If further adjustment is required, loosen the locking screw and then, using pliers, pull the wire about a millimetre downwards. Re-tighten the locking screw. Brakes can be now be adjusted by loosening the nut B and tightening/loosening the nut A as described above.
Description of Figure 13., page 25.
A. Nut A
B. Nut B
C. Wire
D. Locking screw
Preparation for use after a long storage period
After a long period of product storage, the following elements must be checked, and if necessary adjusted or sent to an authorized service for repairs:
• bent or damaged frame
• cracks on frame tubing connections
• faulty lock holes for height adjustment
- loose handles
- loose or worn wheels and wheel-fastening elements
• worn or damaged panels
Inspection before each use
Check that all wheels and the folding mechanism work correctly and that all wheels can move freely. Care should be taken when inspecting the front wheels. Make sure that they can freely turn and that they are safely secured to the frame.
Monthly inspections
Check that all locking bolts are properly secured. Check that there are no loose elements. Check the brake adjustment. Check the condition of the wheels.
2.3. CLEANING AND MAINTENANCE
• Clean the product after every use.
- Cleaning products must not contain corrosive substances. It is recommended to use mild detergents.
• Clean with a soft, damp cloth.
- The product must be stored in a cool and dry place, protected from moisture and direct sunlight.
• After each cleaning, wipe the product with a dry cloth and protect metal connections against moisture with a suitable agent, e.g. WD40.
DANE TECHNICZNE
Modele UNI_ROLL_01 DF oraz UNI_ROLL_02 DF
Modely UNI_ROLL_01 DF oraz UNI_ROLL_02 DF
Modelli UNI_ROLL_01 DF e UNI_ROLL_02 DF
Modelos UNI_ROLL_01 DF y UNI_ROLL_02 DF
2
UNI_ROLL_03 2in1
3
UNI_ROLL_04 F
ZUSAMMENSETZEN DES GERÄTS | FOLDING THE EQUIPMENT | SKŁADANIE SPRZĘTU | SKLÁDÁNÍ ZAŘÍZENÍ ASSEMBLAGE DE L'APPAREIL | MONTAGGIO DEL DISPOSITIVO | MONTAJE DEL EQUIPO | AZ ESZKÖZ ÖSSZESZERELÉSE
4
5

6
7
8
10
11

12
13
14

15
16

18

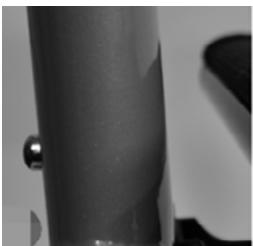
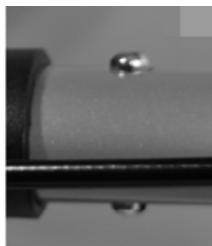
20a
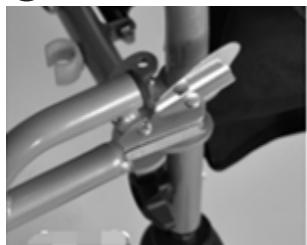
20b
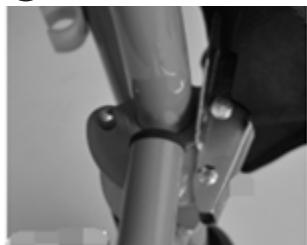
20c

22
NOTES/NOTIZEN
NOTES/NOTIZEN
NOTES/NOTIZEN
Our customers' satisfaction is our main goal!
Please contact us with questions AT:



- READ INSTRUCTIONS BEFORE USE
- USAGE SAFETY
- USE GUIDELINES
- THE PRODUCT FALLS OUTSIDE THE SCOPE OF MDD 93/42/EEC DIRECTIVE CONCERNING MEDICAL DEVICES
- PRODUCT DESCRIPTION
- PREPARING FOR USE
- ASSEMBLY
- MODELS UNI_ROLL_01 DF AND UNI_ROLL_02 DF
- MODELS UNI_ROLL_03 2IN1 AND UNI_ROLL_04 F
- FOOTREST ADJUSTMENT (MODEL UNI_ROLL_03 2IN1)
- ADJUSTING THE HEIGHT OF THE HANDLES
- HOW TO OPERATE THE BRAKES
- BRAKES ADJUSTMENT
- DESCRIPTION OF FIGURE 13., PAGE 25
- PREPARATION FOR USE AFTER A LONG STORAGE PERIOD
- INSPECTION BEFORE EACH USE
- MONTHLY INSPECTIONS
- CLEANING AND MAINTENANCE
- MODELE UNI_ROLL_01 DF ORAZ UNI_ROLL_02 DF
- MODELY UNI_ROLL_01 DF ORAZ UNI_ROLL_02 DF
- MODELLI UNI_ROLL_01 DF E UNI_ROLL_02 DF
- MODELOS UNI_ROLL_01 DF Y UNI_ROLL_02 DF
- OUR CUSTOMERS' SATISFACTION IS OUR MAIN GOAL
- PLEASE CONTACT US WITH QUESTIONS AT
Brand : Uniprodo
Model : UNI_ROLL_04 F
Category : Washing machine