GLACONS EXPRESS - Ice Maker LAGRANGE - Free user manual and instructions
Find the device manual for free GLACONS EXPRESS LAGRANGE in PDF.
| Brand | LAGRANGE |
| Model | GLACONS EXPRESS |
| Product type | Ice maker |
| Tank capacity | 1.15 L |
| Power supply | 230 V - 50 Hz - 140 W |
| Cord type | H05VV-F 3G 0.75 mm² with earth plug |
| Materials | Thermoplastic base, stainless steel cover |
| Number of ice cubes (small) per cycle | 90 cubes in 1h30 |
| Number of ice cubes (medium) per cycle | 80 cubes in 1h30 |
| Number of ice cubes (large) per cycle | 50 cubes in 1h15 |
| Maximum number of ice cubes (small) before emptying | 140 cubes in 2h30 |
| Maximum number of ice cubes (medium) before emptying | 120 cubes in 2h15 |
| Maximum number of ice cubes (large) before emptying | 80 cubes in 2h00 |
| Main functions | Ice cube size selection, start/stop, full drawer detection, water shortage detection |
| Indicator lights | Green indicators for size, red for full drawer and water shortage |
| Safety | Automatic stop if drawer full or water shortage |
| Maintenance | Clean base with damp sponge, stainless steel cover with special product, drain and dry tank |
| Warranty | 2 years, extendable to 3 years upon registration (www.lagrange.fr) |
| Included accessories | Ice scoop, measuring jug |
| Use | Household use only |
Frequently Asked Questions - GLACONS EXPRESS LAGRANGE
User questions about GLACONS EXPRESS LAGRANGE
0 question about this device. Answer the ones you know or ask your own.
Ask a new question about this device
Download the instructions for your Ice Maker in PDF format for free! Find your manual GLACONS EXPRESS - LAGRANGE and take your electronic device back in hand. On this page are published all the documents necessary for the use of your device. GLACONS EXPRESS by LAGRANGE.
USER MANUAL GLACONS EXPRESS LAGRANGE
CONDITIONS DE GARANTIE
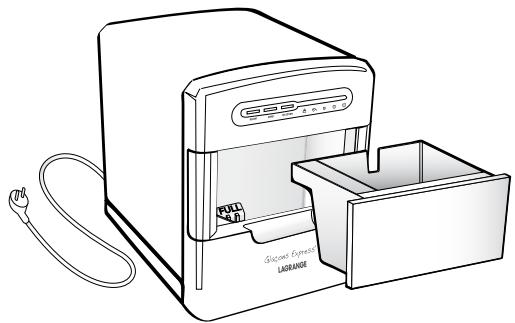
Description of the appliance
- Presa
Toma - Socket
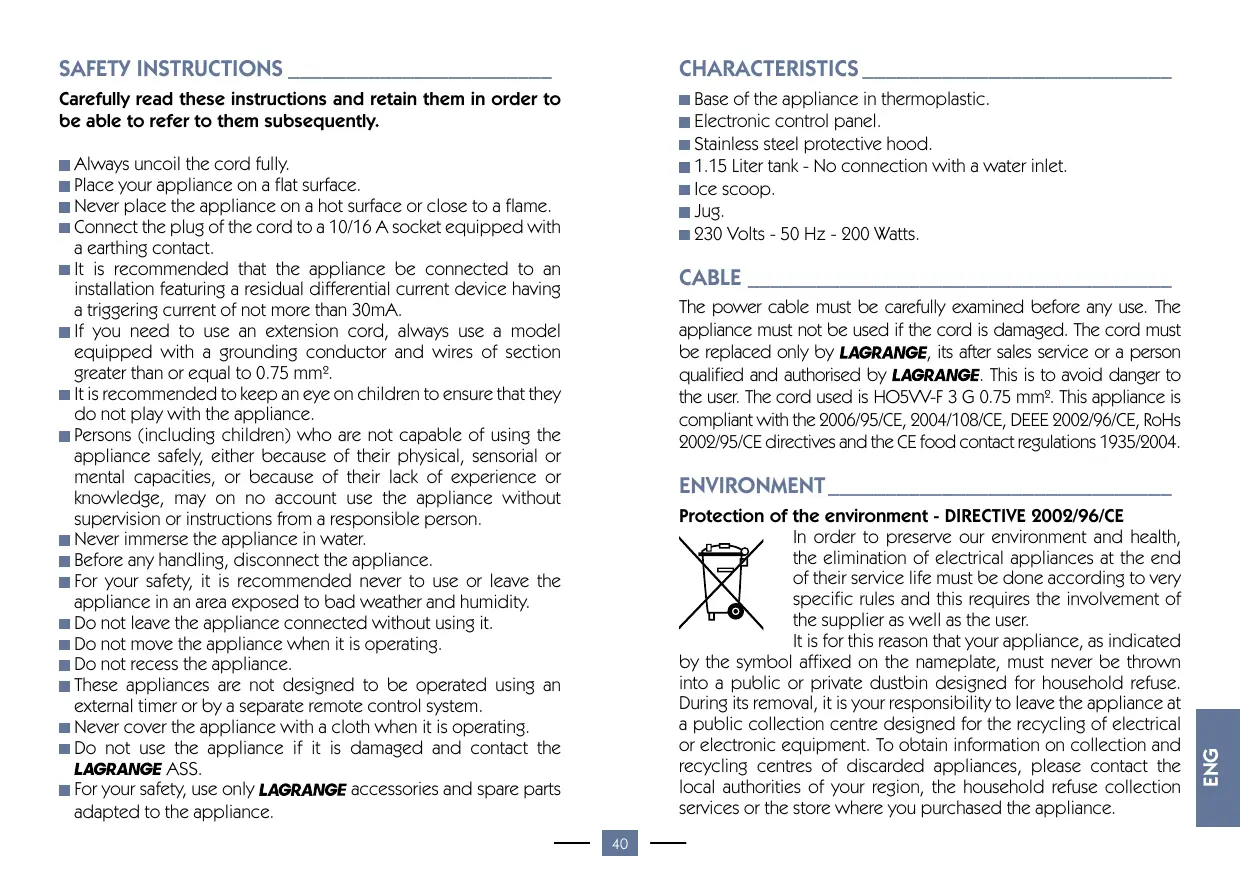
Carefully read these instructions and retain them in order to be able to refer to them subsequently.
Always uncoil the cord fully.
Place your appliance on a flat surface.
Never place the appliance on a hot surface or close to a flame.
- Connect the plug of the cord to a 10/16 A socket equipped with a earthing contact.
It is recommended that the appliance be connected to an installation featuring a residual differential current device having a triggering current of not more than 30mA .
If you need to use an extension cord, always use a model equipped with a grounding conductor and wires of section greater than or equal to 0.75 ~mm^2 .
It is recommended to keep an eye on children to ensure that they do not play with the appliance.
- Persons (including children) who are not capable of using the appliance safely, either because of their physical, sensorial or mental capacities, or because of their lack of experience or knowledge, may on no account use the appliance without supervision or instructions from a responsible person.
Never immerse the appliance in water.
Before any handling, disconnect the appliance.
For your safety, it is recommended never to use or leave the appliance in an area exposed to bad weather and humidity.
Do not leave the appliance connected without using it.
Do not move the appliance when it is operating.
Do not recess the appliance.
These appliances are not designed to be operated using an external timer or by a separate remote control system.
Never cover the appliance with a cloth when it is operating.
- Do not use the appliance if it is damaged and contact the LAGRANGE ASS.
For your safety, use only LAGRANGE accessories and spare parts adapted to the appliance.
CHARACTERISTICS
Base of the appliance in thermoplastic.
Electronic control panel.
Stainless steel protective hood.
1.15 Liter tank - No connection with a water inlet.
Ice scoop.
Jug.
230 Volts - 50 Hz - 200 Watts.
CABLE
The power cable must be carefully examined before any use. The appliance must not be used if the cord is damaged. The cord must be replaced only by LAGRANGE, its after sales service or a person qualified and authorised by LAGRANGE. This is to avoid danger to the user. The cord used is HO5VV-F 3 G 0.75 ~mm^2 . This appliance is compliant with the 2006/95/CE, 2004/108/CE, DEEE 2002/96/CE, RoHs 2002/95/CE directives and the CE food contact regulations 1935/2004.
ENVIRONMENT
Protection of the environment - DIRECTIVE 2002/96/CE

In order to preserve our environment and health, the elimination of electrical appliances at the end of their service life must be done according to very specific rules and this requires the involvement of the supplier as well as the user.
It is for this reason that your appliance, as indicated by the symbol affixed on the nameplate, must never be thrown into a public or private dustbin designed for household refuse. During its removal, it is your responsibility to leave the appliance at a public collection centre designed for the recycling of electrical or electronic equipment. To obtain information on collection and recycling centres of discarded appliances, please contact the local authorities of your region, the household refuse collection services or the store where you purchased the appliance.
BEFORE USING THE APPLIANCE
Before first use, ensure that the appliance has been left for 12 hours on a flat surface without any connection.
Make sure to always maintain the appliance in a horizontal position when moving it, otherwise there is a risk of damaging the compressor. Otherwise, wait for 12 hours before restarting the appliance.
COMMISSIONING AND USE
1STUSE
While unpacking the appliance, make sure that you remove all wedging elements.
Make sure that all parts and accessories are present and without defect.
Before using the appliance, clean all the parts properly (see maintenance section).
Before every operation, check properly that your appliance is disconnected. When the appliance is turned on, the "small size ice cube" indicator lamp flashes. This means that the appliance is awaiting instructions.
USING THE CONTROL PANEL
SELECTION
By default, the ice cube size selected will be the smallest one.
You can select the size of ice cubes by successively pressing the SELECTION button. A green indicator lamp lights up above the corresponding illustration.


Note: The SELECTION button is inactive when the appliance is operating and throughout its entire duration.
DEPART ARRET
Once the size of ice cubes is selected, production can be started by pressing the START button. The production of ice cubes can then be stopped at any time by pressing the STOP button.

When the ice tray is full, the indicator lamp turns red.
Then, empty the ice-bucket and replace it.
The red indicator lamp goes off as soon as there is space in the tray.
The appliance will then automatically produce new ice cubes.

When there isn't enough water in the tank to carry out an additional cycle, the indicator lamp turns red. The appliance then stops operating. If water is added in the tank, the indicator lamp goes off and the appliance restarts.
PRODUCTION OF ICE CUBES
Step 1: Preparing the appliance
Always keep the appliance on a flat, dry and unobstructed surface (leave a space of 15cm around the appliance).
Remove the ice-tray as well as the cord and the measuring jug if they are stored inside.
Step 2: Filling the tank
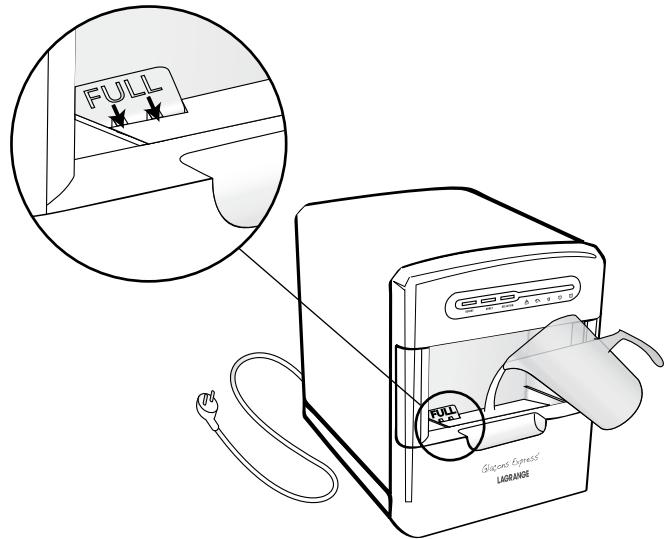
Using the measuring jug, fill the tank without exceeding the maximum level indicated by the arrows and the "FULL" marking.
The capacity of the tank is 1.15L .
Put the ice-tray back in its place.
Step 3: Programming
Connect the appliance correctly to the mains.
Select the size of ice-cubes (small, medium or large) by successively pressing the SELECTION button.
Press the START button to start the production of ice cubes.
Step 4: Removing the ice-cubes
After about 1h30 of production, the tray is filled with ice-cubes. The "tray full" indicator lamp then turns red and the appliance stops the production. The ice-cubes are kept cool in the appliance but will nevertheless start melting.
Therefore, empty the ice-tray quickly, either to use the ice-cubes immediately, or to refrigerate them in the freezer before the next use.
Step 5: Continuing production
If you wish to have a larger quantity of ice-cubes, and therefore continue the production of ice cubes, re-insert the empty tray. The "tray full" indicator lamp goes off and the production restarts.
Step 6: Depletion of water in the tank
After about 2h to 2h 30 of use (depending on the ice cube size selected), the appliance would have exhausted the water in the tank. The "lack of water" indicator lamp turns red as there is no longer sufficient water to restart a cycle. If you wish to have a larger quantity of ice-cubes, and therefore continue the production of ice cubes, remove the tray and fill the tank with water without exceeding the maximum level. The "lack of water" indicator lamp goes off and the production restarts.
Step 7: Stopping production
When the quantity of ice-cubes obtained is sufficient, the production may be stopped by pressing the STOP button. Remove the ice-tray to collect the last ice-cubes produced.
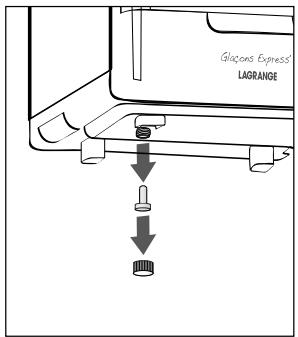
Step 8: Draining the appliance
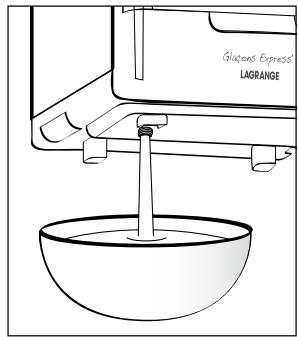
If there is any water left in the appliance once the production is over, it may be drained. To do this, move the appliance closer to the edge of the table. Turn it around so that it stands on three legs and the drainage button is accessible. Remove the plug then place a container under the plug. Remove the small white seal to enable the water to flow. When the water stops flowing, replace the seal, then the plug and push the appliance back on the counter before putting it away.
Indication of approximate production times and quantities obtained
| Size of ice-cubes | Production duration | Number of ice-cubes |
| For a tray filled with ice cubes | ||
| Small | 1h30 | 90 |
| Medium | 1h30 | 80 |
| Large | 1h15 | 50 |
| Until the water tank is empty (the tray is emptied and we continue) | ||
| Small | 2h30 | 140 |
| Medium | 2h15 | 120 |
| Large | 2h00 | 80 |
MAINTENANCE
Caution: Never dip the base of the appliance or the plug in water. Always disconnect the appliance before cleaning.
Base of the appliance: Clean with a damp sponge. Dry properly. Do not use aggressive or abrasive cloth or products to preserve the plastic and its sheen.
Caution: Never dip the base of the appliance in water. Never put it in a dishwasher.
Protective hood: Clean with a wet sponge than use a soft cloth and some "special stainless steel" product to polish.
Tank: Drain, clean with a wet sponge and dry properly.
Ice-tray: Clean it with a wet sponge and some dish washing product. Dry it well before re-installing in the appliance.
Plastic measuring jug: Clean it with a wet sponge and some dish washing liquid. Dry properly.
Note: Always dry all items properly before repositioning them and putting them away. Put away the appliance with the tray closed after cooling, draining, cleaning and drying.
Always follow the preparation procedure described in the operating instructions scrupulously. This will save you from most of the inconveniences. If you encounter difficulties, here is a table that will help you understand why, and how to solve the problem.
| Problem | Cause | Solution |
| The lamp indicating that the ice-tray is full is on while the latter isn't full. | The room temperature is too cold. | Remove the ice-tray, and re-insert it when the indicator lamp goes off. |
| The sensor is no longer operating. | Contact the After Sales Service. | |
| The lamp indicating that there isn't sufficient water in the appliance is lighted but the tank isn't empty (more than 1 cm to the bottom of the tank). | The conductivity of water is too low. | Add a pinch of salt in the jug, stir well and pour into the tank. |
| The sensor is no longer operating. | Contact the After Sales Service. | |
| No indicator lamp lights up when the appliance is connected. | The appliance is not connected properly. | Check that the cord is correctly fixed and that the outlet does not have any problem. Otherwise, contact the after sales service. |
| Both lamps indicating that the ice-tray is full and that there isn't sufficient water in the appliance flash at the same time. | The motor has an operating problem. | Contact the After Sales Service. |
| The ice-cubes formed are too big. They are stuck together and cannot fall into the ice-tray. | Switch the appliance off and wait until the ice-cubes melt, then restart the appliance selecting a smaller size of ice cubes. If the problem persists contact the After Sales Service. |
PUTTING AWAY THE APPLIANCE
Disconnect the appliance after use.
Drain the tank if you won't be using it immediately.
Always wash and dry all components properly before repositioning them.
Aerate the appliance without the tray after use so that it dries inside.
- Disconnect the cord, fold it up, and place it in the dry measuring jug.
Place the measuring jug in the ice-tray and re-insert the latter in the appliance.
Put away the appliance on a flat and easily accessible surface.
Do not put anything on top of the appliance.
GUARANTEE CONDITIONS
Your appliance is guaranteed for 2 years.
To enjoy an additional year of guarantee free of cost, register on the LAGRANGE website (www.lagrange.fr). The guarantee includes parts and labour and covers manufacturing defects. The following are excluded from the guarantee: Damage resulting from incorrect use or failure to respect the operating instructions, and breakage by falling.
THIS GUARANTEE APPLIES TO DOMESTIC USE, AND ON NO ACCOUNT TO PROFESSIONAL USE.
The legal guarantee owed by the seller in no way excludes the legal guarantee owed by the Manufacturer for faults or manufacturing defects according to articles 1641 and following of the Civil Code. In case of breakdown or malfunction, contact your reseller. In case of a technical fault within 8 days of purchase, the appliances will be exchanged. After this period they will be repaired by the LAGRANGE after sales service.