
Bar 700MK2 - Soundbar JBL - Free user manual and instructions
Find the device manual for free Bar 700MK2 JBL in PDF.


| Product Type | Soundbar with wireless subwoofer and detachable surround speakers |
| Brand | JBL |
| Model | Bar 700MK2 |
| Total Power Output | 620 W |
| Channels | 5.1.2 |
| Soundbar Dimensions (W x H x D) | 1010 x 60 x 100 mm |
| Subwoofer Dimensions (W x H x D) | 305 x 440 x 305 mm |
| Surround Speaker Dimensions (each) | 200 x 170 x 145 mm |
| Total Weight | 13.2 kg |
| Power Supply | AC 100-240 V, 50/60 Hz |
| Connectivity | HDMI eARC, HDMI Input, Optical, Bluetooth, USB |
| Supported Audio Formats | Dolby Atmos, DTS:X, Dolby Vision Passthrough |
| Wireless Surround Speakers | Yes, battery-powered for easy placement |
| Subwoofer Type | Wireless, 10" driver |
| 4K HDR Passthrough | Yes, supports HDR10, Dolby Vision |
| Audio Enhancements | DTS Virtual:X, JBL Surround Sound |
| Maintenance | Clean with a soft, dry cloth; avoid using liquids |
| Safety | Do not expose to water or moisture |
| Spare Parts & Repairability | Available through authorized JBL service centers |
| General Information | Free user manual available for download on notice-facile.com |
Frequently Asked Questions - Bar 700MK2 JBL
User questions about Bar 700MK2 JBL
0 question about this device. Answer the ones you know or ask your own.
Ask a new question about this device
Download the instructions for your Soundbar in PDF format for free! Find your manual Bar 700MK2 - JBL and take your electronic device back in hand. On this page are published all the documents necessary for the use of your device. Bar 700MK2 by JBL.
USER MANUAL Bar 700MK2 JBL
OWNER'S MANUAL
IMPORTANT SAFETY INSTRUCTIONS
Verify Line Voltage Before Use
The JBL BAR 700MK2 (soundbar, detachable speakers and subwoofer) has been designed for use with 100-240 volt, 50/60 Hz AC current. Connection to a line voltage other than that for which your product is intended can create a safety and fire hazard and may damage the unit. If you have any questions about the voltage requirements for your specific model or about the line voltage in your area, contact your retailer or customer service representative before plugging the unit into a wall outlet.
Do Not Use Extension Cords
To avoid safety hazards, use only the power cord supplied with your unit. We do not recommend that extension cords be used with this product. As with all electrical devices, do not run power cords under rugs or carpets, or place heavy objects on them. Damaged power cords should be replaced immediately by an authorized service center with a cord that meets factory specifications.
Handle the AC Power Cord Gently
When disconnecting the power cord from an AC outlet, always pull the plug; never pull the cord. If you do not intend to use this speaker for any considerable length of time, disconnect the plug from the AC outlet.
Do Not Open the Cabinet
There are no user-serviceable components inside this product. Opening the cabinet may present a shock hazard, and any modification to the product will void your warranty. If water accidentally falls inside the unit, disconnect it from the AC power source immediately, and consult an authorized service center.

To protect battery lifespan, fully charge at least once every 3 months. Battery life will vary due to usage patterns and environmental conditions.
When using an external adapter, the output voltage/current of the external adapter should not exceed 5V/3A.

WARNING
DO NOT ATTEMPT TO OPEN, SERVICE, OR DISASSEMBLE THE BATTERY | DO NOT SHORT CIRCUIT | MAY EXPLODE IF DISPOSED OF IN FIRE | RISK OF EXPLOSION IF BATTERY IS REPLACED BY AN INCORRECT TYPE | DISPOSE OR RECYCLE USED BATTERIES ACCORDING TO THE INSTRUCTIONS
TABLE OF CONTENTS
IMPORTANT SAFETY INSTRUCTIONS 2
1. INTRODUCTION 4
2. WHAT'S IN THE BOX 5
3. PRODUCT OVERVIEW 6
3.1 Soundbar 6
3.2 Detachable speakers 7
3.3 Subwoofer 7
3.4 Remote control 7
4. PLACE 8
4.1 Desktop placement 8
4.2 Wall-mounting 8
5. CONNECT 10
5.1 Connect with your TV and digital devices 10
5.2 Connect to your Bluetooth device 11
5.3 Connect to your home network 11
6. SETUP 12
6.1 Connect the detachable rear speakers and subwoofer 12
6.2 Charge the detachable speakers 12
6.3 3D surround sound 13
7. PLAY 16
7.1 Switch on/Auto standby/Auto wakeup 16
7.2 Play from the TV source 16
7.3 Play from the HDMI IN source 17
7.4 Play from the Bluetooth source 17
7.5 Play over your home network 17
7.6 Multi-room playback 19
8. SOUND SETTINGS 20
8.1 Audio sync 20
8.2 Detachable speaker audio settings 20
9. RESTORE FACTORY SETTINGS 21
10. SOFTWARE UPDATE 21
11. RE-CONNECT THE SUBWOOFER 22
12. PRODUCT SPECIFICATIONS 22
13. TROUBLESHOOTING 23
14. TRADEMARKS 25
15. OPEN SOURCE LICENSE NOTICE 26
1. INTRODUCTION
Thank you for purchasing the JBL BAR 700MK2 (soundbar, detachable speakers and subwoofer) which is designed to bring an extraordinary 3D sound experience to your home entertainment system. We encourage you to take a few minutes to read through this manual, which describes the product and includes step-by-step instructions for setting up and getting started.
To make the most of product features and support, you may need to update the product software through the Internet in the future. Refer to the software update section in this manual to ensure that your product has the latest software.
Designs and specifications are subject to change without notice. If you have any questions about the soundbar, installation or operation, please contact your retailer or customer service representative, or visit our website: www.jbl.com.
JBL One app
With the JBL One app, you can
- easily complete product setup;
- connect *music streaming services;
• discover new music with integrated music services; - access software updates when they are available;
- personalize audio settings;
- access additional features.

For more information, see "5.3 Connect to your home network" and "7.5 Play over your home network".
NOTES:
- *Subscription may be needed and not provided by the JBL One app.
- App screens in this Owner's Manual may vary due to software updates. Always follow the app instructions.
2. WHAT'S IN THE BOX
Unpack the box carefully and ensure that the following parts are included. If any part is damaged or missing, do not use it and contact your retailer or customer service representative.
Soundbar

Subwoofer

Detachable speakers (with rechargeable battery)


Remote control (with 2 AAA batteries)

Power cord*
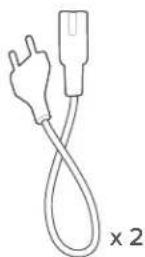
* Power cord quantity and plug type vary by regions.
HDMI cable (1.2m/3.9ft)

Side caps

Wall-mounting kit

Product information & wall-mounting template

3. PRODUCT OVERVIEW
3.1 Soundbar
3.1.1 Front panel & Top panel

1) Status indicator
| System: | ||
| Regular pulsing (white) System startup | ||
| Fast pulsing (white) Software updating in progress | ||
| Solid (amber) Restoring factory settings | ||
| Network connection: | ||
| Slow pulsing (white) | Wi-Fi setup mode, or network disconnected | |
| Solid (white) Network connected | ||
| Solid (yellow) Weak Wi-Fi connection | ||
2) + (Volume)
- Wake up the soundbar.
• Decrease or increase the volume. - Press the two buttons together to mute or unmute.
- Hold the two buttons together for more than 10 seconds to enter Wi-Fi setup mode.
3) Microphone
- For sound calibration
4) (Source)
- Wake up the soundbar.
- Select a sound source: TV (default, for audio input from TV connection where the HDMI / HDMI OUT connector is prioritized over the OPTICAL OPTIQUE / OPTICAL connector), Bluetooth or HDMI IN.
- Hold for more than 3 seconds to enter Bluetooth pairing mode.
5) Status display
3.1.2 Back panel
Americas version (excluding Brazil)
![graph TD A["1"] --> B["Device Icon"] C["2"] --> D["USB Interface Icon"] E["3"] --> F["Device Icon"] G["4"] --> H["Home Icon"] I["5"] --> J["TV/USB Interface Icon"] K["6"] --> L["Hardware Icon"] M["7"] --> N["Optical Interface Icon"]](/content/2026/08/1621799/images/eac9ba3b4b465cc1228a8745bc9934e74d2eb8f09e3c2347a65bc5152977e792.jpg)
All other versions
![graph TD 1["POWER LINK"] --> 2["USB SWITCH"] 2 --> 3["ETHERMETH"] 3 --> 4["HOME IN"] 4 --> 5["HDMI OUT (THASE FLOW)"] 5 --> 6["OPTICAL"]](/content/2026/08/1621799/images/5a2b16daff8ee93de0ad3e50254c69a54f1c5b439aa8921af13d6cc3158d2324.jpg)
1) ♦ / POWER
- Connect to power (with the supplied power cord).
2) USB
- USB connector for software update (for service only).
- Connect to USB storage device for MP3 file playback (for US version only).
3) ETHERNET
- Connect to your home network through an Ethernet cable.
4) HDMI / HDMI IN
- Connect to the HDMI output on your digital device.
5) TV connectors
HDMI / HDMI OUT
- Connect to the HDMI ARC / HDMI eARC input on your TV.
OPTICAL / OPTICAL
- Connect to the optical output on your TV or digital device.
3.2 Detachable speakers

1) (Power)
- Press to switch on.
- Hold for more than 3 seconds to switch off.
2) Type-C USB connector
- For battery charging
3) Status indicator
| Battery power: | ||
| Flashing (red) Low battery | ||
| Solid (red) Battery charging in progress | ||
| Wireless connection: | ||
| Regular flashing (white) | Reconnecting to the soundbar / Disconnected from the soundbar | |
| Solid (white) Connected to the soundbar | ||
3.3 Subwoofer

1)
- Connection status indicator
| ○ | Solid (white) Connected to the soundbar |
| ☀️ | Fast flashing (white) Pairing mode |
| ☐ | Regular flashing (white) Reconnecting mode |
| ● | Solid (amber) Standby mode |
2) Power connector
- Connect to power (with the supplied power cord).
3.4 Remote control
Americas version (excluding Brazil)

All other versions

1) Ⓧ
- Switch on or to standby.
2) + / -
- Press to increase or decrease the volume.
- Hold to increase or decrease the volume continuously.
3) / (Mute)
- Mute / unmute.
4) Sound effect buttons

- Switch the virtual Dolby Atmos sound effects on or off (Default: on).

- Select the bass level: 1/2/3 (default)/4/5.
/ REAR (available when both detachable speakers are undocked from the soundbar)
- Select the surround sound level for the detachable speakers: middle (default), high, muted or low.
5) CALIBR
- Start sound calibration.
6) (Moment)
- Press to directly access the playlist or speaker settings that you have personalized in the JBL One app.
7) (Playback controls for Wi-Fi music streaming or Bluetooth)
- Single press: Pause or resume playback
- Double press: Next track
- Triple press: Previous track
8) Source selectors
TV
- Select the TV source (default, for audio input from TV connection where the HDMI / HDMI OUT connector is prioritized over the OPTICAL / OPTICAL connector).
* (Bluetooth)
- Select the Bluetooth source.
- Hold for more than 3 seconds to enter Bluetooth pairing mode.
HDMI
- Select the HDMI IN source.
4. PLACE
4.1 Desktop placement
Place the soundbar, detachable speakers and subwoofer on a flat and stable surface. Refer to the recommended distance in the following diagram.

NOTES:
- The power cord shall be properly connected to power.
- Do not place any objects on the top of the soundbar, detachable speakers or subwoofer.
- Charge the detachable speakers in time to ensure sufficient battery power (See "6.2 Charge the detachable speakers").
- Use the supplied side caps to cover the two ends of the soundbar after undocking the rear surround speakers (See Step 6 under "4.2.2 Wall-mount the detachable speakers as rear surround speakers").
4.2 Wall-mounting
Wall-mount the soundbar and detachable rear speakers together or separately.
4.2.1 Wall-mount the soundbar

1. Preparation:
a) With the distance of about 120mm / 4.7" from your TV, stick the supplied wall-mounting template to a wall by using adhesive tapes.
b) Use your ballpen tip to mark the screw holder location. Remove the template.
c) On the marked location, drill a 4 mm / 0.16" hole.
- Install the support for wall-mounting bracket.
- With the screw, fasten the wall-mounting bracket onto the bottom of the soundbar.
- Mount the soundbar.
- After the soundbar is securely wall-mounted, dock the two detachable speakers onto the soundbar.
NOTES:
- Make sure that the wall can support the weight of the soundbar.
- Install on a vertical wall only.
- Avoid a location under high temperature or humidity.
- Before wall-mounting, make sure that cables can be properly connected between the soundbar and external devices.
- Before wall-mounting, make sure that the soundbar is unplugged from power. Otherwise, it may cause an electric shock.
- To move the soundbar, first remove the two detachable speakers to avoid accidental damage.
- Use the supplied side caps to cover the two ends of the soundbar after undocking the rear surround speakers (See Step 6 under "4.2.2 Wall-mount the detachable speakers as rear surround speakers").
4.2.2 Wall-mount the detachable speakers as rear surround speakers

- From the soundbar, remove the two detachable speakers
- Use your ballpen tip to mark the location.
- Install the wall-mounting bracket.
- Fasten the support onto the back of the speakers.
- Mount the speakers.
- Install the side caps as needed.
5. CONNECT
5.1 Connect with your TV and digital devices
For audio playback through the soundbar, connect the soundbar with your TV through the supplied HDMI cable or an optical cable (sold separately).
An HDMI connection supports digital audio and video with a single connection. HDMI connectivity is the best option for your soundbar.
NOTES:
- When both HDMI and optical cables are connected to the soundbar for audio input from TV connection, the HDMI connection is prioritized.
– Full compatibility with all HDMI-CEC devices is not guaranteed.
* The HDMI cable (for digital device connection) and the optical cable are sold separately.
5.1.1 TV (HDMI eARC)
(Recommended connection for the best Dolby Atmos experience)
![graph TD A["Monitor"] --> B["HDMI OUT (TV ARC/ TV eARC)"] B --> C["HDMI (eARC)"] C --> D["* HDMI IN"] D --> E["HDMI OUT"]](/content/2026/08/1621799/images/14d3c4d4739be76866aec26ffc1a53c07ed094abcd5683bbea357569b87829ef.jpg)
- Connect the soundbar with the HDMI IN (eARC) connector on your TV by using the supplied HDMI cable.
- On your TV, check that HDMI-CEC and HDMI eARC have been enabled. Refer to the owner's manual of your TV for more information.
- Use an HDMI cable (V2.0 or later) to connect your TV with your digital device, such as a streaming device, set-top box, DVD/Blu-ray player or game console.
- On your digital device, check that HDMI-CEC has been enabled. Refer to the owner's manual of your digital device for more information.
- On your TV and digital device, select "Bitstream" or "Raw data" in the audio output settings for the best Dolby Atmos experience.
NOTE:
- To play audio from the digital device connected to your TV, select the TV source (See "7.2 Play from the TV source").
5.1.2 TV (HDMI ARC)
![graph TD A["HDMI (ARC)"] --> B["HDMI OUT (TV ARC/ TV eARC)"] B --> C["HDMI IN"] C --> D["*"] D --> E["HDMI OUT"]](/content/2026/08/1621799/images/cf7aeb096c2db60d4fefa2d286638b61e53df19341ce97246e814afd97b2e9dc.jpg)
- Connect the soundbar with the HDMI IN (ARC) connector on your TV by using the supplied HDMI cable.
- On your TV, check that HDMI-CEC and HDMI ARC have been enabled. Refer to the owner's manual of your TV for more information.
- Use an HDMI cable (V2.0 or later) to connect the soundbar with your digital device, such as a set-top box, DVD/Blu-ray player or game console.
- On your digital device, check that HDMI-CEC has been enabled. Refer to the owner's manual of your digital device for more information.
- On your digital device, select "Bitstream" or "Raw data" in the audio output settings for the best Dolby Atmos experience.
NOTES:
- To play audio from the digital device connected to the soundbar, select the HDMI IN source (See "7.3 Play from the HDMI IN source").
- If your TV does not support HDMI eARC, make sure that you connect your digital device through the HDMI / HDMI IN connector on the soundbar instead of your TV. Otherwise, the Dolby Atmos information cannot pass through the HDMI (ARC) connectors to the soundbar.
5.1.3 OPTICAL
![graph TD A["Monitor"] --> B["Optical"] B --> C["Optical IN"] C --> D["HDMI OUT"] D --> E["Output"]](/content/2026/08/1621799/images/acfbe79b30936a363db6d1bd13efa17edb1abf91358efcf498d0ff6215581e35.jpg)
- Connect the soundbar with your TV by using an optical cable.
- Use an HDMI cable (V2.0 or later) to connect your TV with your digital device, such as a streaming device, set-top box, DVD/Blu-ray player or game console.
NOTE:
- To play audio through the optical cable, select the TV source (See "7.2 Play from the TV source").
5.2 Connect to your Bluetooth device
Through Bluetooth, connect the soundbar with your Bluetooth device, such as a smartphone, tablet and laptop.

5.2.1 Connect a Bluetooth device
- To select Bluetooth source, press 📄 on the soundbar or 🌐 on the remote control.
→ "BT PAIRING": Ready for Bluetooth pairing
- On your Bluetooth device, enable Bluetooth and search for "JBL BAR 700MK2" within three minutes.
→ "BT CONNECTED": Successful connection. A confirmation tone is heard.
5.2.2 Reconnect the last paired device
Your Bluetooth device is retained as a paired device when the soundbar goes to standby mode. Next time you switch to the Bluetooth source, the soundbar reconnects the last paired device automatically.
5.2.3 Connect to another Bluetooth device

- In the Bluetooth source, hold ⬆ on the soundbar or ⚙ on the remote control until "BT PAIRING" is displayed.
→ The soundbar enters the Bluetooth pairing mode.
- Follow the Step 2 under "5.2.1 Connect a Bluetooth device".
- If the device has ever been paired with the soundbar, first unpair "JBL BAR 700MK2" on the device.
NOTES:
- The Bluetooth connection will be lost if the distance between the soundbar and Bluetooth device exceeds 10 m / 33 ft.
- Electronic devices may cause radio interference. Devices that generate electromagnetic waves must be kept away from the soundbar, such as microwaves and wireless LAN devices.
5.3 Connect to your home network
With the JBL One app and the supported streaming services (Google Cast, AirPlay, Spotify Connect, Tidal Connect and Roon Ready), the soundbar allows you to stream audio from smartphones or tablets.
5.3.1 Wi-Fi connection with your home network
![graph TD A["JBL One"] -->|Wireless Signal| B["Router"] B -->|Wireless Signal| C["Setup WiFi"] C -->|Wireless Signal| D["Wireless Signal"] D -->|Wireless Signal| E["Wireless Signal"] E -->|Wireless Signal| F["Wireless Signal"] F -->|Wireless Signal| G["Wireless Signal"] G -->|Wireless Signal| H["Wire…](/content/2026/08/1621799/images/45ba2640bf89b6b2fdc3fe305bfca371e1331d3a0be59699becb93948d96d49c.jpg)
- On the soundbar, enter the Wi-Fi setup mode:
- Press any button on the soundbar (See "7.1 Switch on/ Auto standby/Auto wakeup").
→ If the soundbar has not been connected to a network, the screen shows "HELLO" and then, "SETUP WIFI".
→ If your soundbar is not discovered by the JBL One app, hold and together for more than 10 seconds to re-enter the Wi-Fi setup mode.
-
Connect your Android™ or iOS device to your home Wi-Fi network. Download the JBL One app.
-
Launch the JBL One app. Follow the app instructions to complete Wi-Fi setup.
![graph TD A["USB"] --> B["BAR 700MK2 CONNECT"] B --> C["Press the 📄 button"] C --> D["Connect To Wi-Fi"] D --> E["Wi-Fi password"] E --> F["Connect"] F --> G["USB"] G --> H["Wireless"] H --> I["USB"]](/content/2026/08/1621799/images/7707a2a0cd5a2e845aaefd8f24f0d94cc563bec163936b21b789b78a0a467fe0.jpg)
- (Solid white): The soundbar is connected to your home network.
- You can stream music from the JBL One app or the streaming services you have enabled in the JBL One app (See "7.5 Play over your home network").
5.3.2 Wired connection with your home network (Optional)
- Use an Ethernet cable (not supplied) to connect the soundbar to your home network.

- On your Android or iOS device, download and launch the JBL One app for music streaming.
NOTES:
- On your Android or iOS device, you can rename the soundbar in the JBL One app.
- On your iOS device, add the soundbar to the Apple Home app and manage it together with other AirPlay-compatible speakers.
- On your iOS device, if the soundbar has been added to your home Wi-Fi network, you can start AirPlay streaming from an AirPlay-compatible app (See "7.5.4 Play through AirPlay").
– Availability of online music streaming services varies by country. - Some features require subscriptions or services not available in all countries.
6. SETUP
6.1 Connect the detachable rear speakers and subwoofer

- Connect the soundbar to power by using the supplied power cord.
→ The screen on the soundbar shows "LOAD" and then, "HELLO".
-
Do the following to start the connection:
-
Connect the subwoofer to power by using the supplied power cord.
→ The soundbar connects the subwoofer automatically. Connected: ☐ turns solid white on the subwoofer.
- Dock the detachable speakers onto the soundbar, or press ⏻ on the detachable speakers to fast re-connect to the soundbar.
→ The soundbar connects the detachable speakers automatically.
Connected: The status indicator turns solid white ( ) on the detachable speakers.
NOTES:
- Use the supplied power cords only.
- Before connecting to power, make sure that you have completed all other connections (See "5.1 Connect with your TV and digital devices").
6.2 Charge the detachable speakers
When the detachable surround speakers are out of battery, the wireless connection with the soundbar will be lost.
The first time you use the two detachable speakers, charge them for more than 3 hours to ensure sufficient battery power.
→ When the battery power runs low, the status indicator flashes red on the detachable surround speakers and "REAR SPKR LOW BATT" is displayed on the soundbar.
→ When the battery power runs out, "DOCK REAR SPKR" is displayed on the soundbar.

6.2.1 Charge by docking the detachable speakers
Charging starts when you dock the detachable speakers onto the soundbar.
→ When the soundbar switches to standby mode, ● turns on; ● turns off when the detachable speakers are fully charged.
→ It takes about 4 hours for the empty battery to be fully charged.

6.2.2 Charge through a USB cable

- Use a USB-C cable (not supplied) to connect the detachable speakers to power respectively.
- For the detachable speakers, the status indicator is used for status indication of both battery power and wireless connection (See "3.2 Detachable speakers").
6.3 3D surround sound
6.3.1 Sound calibration
Optimize your 3D surround sound experience for your unique listening environment.
For sound calibration, make sure that:
- your room is quiet;
- the soundbar and the two detachable rear speakers are fully in sight of each other, without obstacles in between;
- the left and right rear speakers are properly placed, the L speaker on the left and the R speaker on the right.

1) Calibrate the listening zone
- Place the detachable rear speakers beside your seating position.


- Make sure that the two detachable speakers have been connected to the soundbar (See "6.1 Connect the detachable rear speakers and subwoofer").
- On the remote control, press ✿ / CALIBR to start calibration.
→ "1-CALIBRATION" is displayed on the soundbar.

- When "PRESS AGAIN TO CONFIRM" is displayed, press ✿ / CALIBR again.
→ Countdown starts from 5 to 1.
→ Calibration tone is heard. Audio calibration starts.
"CALIBRATING": Calibration in progress
"1-DONE": Calibration of the listening zone is completed successfully.
![graph TD A["Press AGAIN TO CONFIRM"] --> B["CALIBRATING"] B --> C["1-DONE"] D["CALIBR"] --> E["Arrow pointing to the button"]](/content/2026/08/1621799/images/52493434a17a8ab3d504ec00620c1dbde9a5ae2776ad134b3fbdc70ee68f2785.jpg)
2) Calibrate the speaker position
- Place the detachable rear speakers in your desired location.


- On the remote control, press ✿ / CALIBR.
→ "2-CALIBRATION" is displayed on the soundbar.
→ Countdown starts from 5 to 1.
→ Calibration tone is heard. Audio calibration starts.
"CALIBRATING": Calibration in progress
"2-DONE": Calibration of the speaker position is completed successfully.
![graph TD A["Input: Circle with 'CALIBR' icon"] --> B["2-CALIBRATION"] B --> C["CALIBRATING"] C --> D["2-DONE"]](/content/2026/08/1621799/images/d0b665c316c38ee492d9c15eabe75a6e318b5c4c8c2a17149b0100f2872921ad.jpg)
NOTES:
- During sound calibration, all buttons on the remote control are disabled except for ⏻ and ⚙ CALIBR.
- During sound calibration, environmental sound will be recorded. Hold ✅ / CALIBR for 10 seconds, then press ✅ / ✅ to play the recorded audio (for US version only).
6.3.2 Dolby Atmos
With Dolby Atmos, overhead audio distribution is provided for powerful 3D sound immersion.

- To play the surround sound of Dolby Atmos, connect and play your Blu-ray player or streaming device as described under "5.1 Connect with your TV and digital devices".
- Press ▶n the remote control to switch the height sound effects on or off (Default: on).
NOTE:
- The Dolby Atmos sound effects apply only to Dolby Atmos audio content.
6.3.3 Rear adjustment
With both detachable rear speakers undocked, you can adjust the surround sound level.

- Check that the soundbar and the detachable rear speakers are connected wirelessly (See "6.1 Connect the detachable rear speakers and subwoofer").
- On the remote control, press ✉ / REAR to toggle between surround sound levels.
→ "MID"/"HIGH"/"MUTE"/"LOW" is displayed (Default: "MID").
→ "UNDOCK REAR SPKR" is displayed if the detachable rear speakers have been docked onto the soundbar.

6.3.4 Bass adjustment
You can make bass adjustment as needed.
![graph TD A["Room with monitor"] --> B["Remote Control Panel"] B --> C["LVL 2"] B --> D["LVL 3"] B --> E["LVL 4"] B --> F["LVL 5LVL1"] G["BASS Indicator"] --> H["Main Display Icon"] style A fill:#f9f,stroke:#333 style B fill:#ccf,stroke:#333 style C fill:#cfc,stroke:#333 style D fill:#fcc,stroke:#333…](/content/2026/08/1621799/images/eec5455b075025511ff34f0693f6beb6c5b83af7503e31470fa6123104c8e8b9.jpg)
- On the remote control, press / BASS to toggle between bass levels.
→ "LVL1" to "LVL5" is displayed (Default: "LVL3").
7. PLAY
7.1 Switch on/Auto standby/Auto wakeup

7.1.1 Switch on
To switch on, press on the remote control, or press any button on the soundbar to wake up the system.
→ "HELLO" is displayed.
→ The subwoofer is reconnected to the soundbar automatically. Connected: ☐urns solid white.
→ The detachable speakers are reconnected to the soundbar automatically. Connected: The status indicator turns solid white (Q).
7.1.2 Auto standby
If the soundbar is inactive for more than 10 minutes, it will switch to standby mode automatically. "STDBY" is displayed.
→ The subwoofer also goes to standby, and turns solid amber.
→ The detachable speakers switch to standby, and the status indicator turns off for wireless connection status.
→ Next time you switch on the soundbar, it returns to the last selected source.
NOTE:
- On the detachable speakers, hold for more than 3 seconds to switch off; press C again to reconnect to the soundbar.
7.1.3 Auto wakeup
In standby mode, the soundbar will wake up automatically when
- the soundbar is connected to your TV through the HDMI eARC/ARC connection and your TV is switched on;
- the soundbar is connected to your TV and digital device such as a set-top box, DVD / Blu-ray player or game console through HDMI cables, and your digital device is switched on;
- the soundbar is connected to your home network and audio is streamed to the soundbar through the music streaming services.
7.2 Play from the TV source
With the soundbar connected, you can enjoy TV audio from the soundbar speakers.

- Make sure that your TV is set to support external speakers and the built-in TV speakers are muted. Refer to the owner's manual of your TV for more information.
- Make sure that the soundbar has been properly connected to your TV (See "5.1 Connect with your TV and digital devices").
- To select the TV source, press ⬇ on the soundbar or TV on the remote control.
→ "TV": The TV source is selected.
- In the factory settings, the TV source is selected by default.
NOTE:
- If the soundbar is connected to your TV through both an HDMI cable and an optical cable, the HDMI cable source is selected for the TV connection.
7.2.1 TV remote control setup
To use your TV remote control for both your TV and the soundbar, check that your TV supports HDMI-CEC. If your TV does not support HDMI-CEC, follow the steps under "TV remote control IR learning".
HDMI-CEC
If your TV supports HDMI-CEC, enable the functions as instructed in your TV user manual. You can control the "volume +/-, mute/unmute, and power on/standby" functions on your soundbar through the TV remote control.
TV remote control IR learning
Through IR learning, you can program the soundbar to accept IR commands from your TV remote control, and then use your TV remote control for simple commands.
- On the soundbar, hold Ⓔ and + until "LEARNING" is displayed.
→ The soundbar enters the TV remote control learning mode.
- Point your TV remote control at the soundbar. Follow the screen instructions to operate the buttons on your TV remote control:
- When any one of "POWER", "VOL+", "VOL-", or "MUTE" is displayed on the soundbar, press the desired button on your TV remote control.
→ "DONE": These commands are learnt by the soundbar.
→ The soundbar returns to the last selected source.
- To exit the TV remote control learning mode, hold Ⓗ and + on the soundbar until "EXIT LEARNING" is displayed. → The learnt functions are discarded.
NOTE:
- The soundbar will exit the TV remote control learning mode automatically if no action is taken for 30 seconds. The learnt functions are discarded.
7.3 Play from the HDMI IN source
With the soundbar connected as shown, your digital device can play video on your TV and audio from the soundbar speakers.
![graph TD A["HDMI (ARC)"] --> B["+"] C["HDMI OUT (TV ARC/TV eARC)"] --> D["+"] E["HDMI IN"] --> F["+"] G["HDMI OUT"] --> H["+"] I["Computer"] --> J["+"]](/content/2026/08/1621799/images/8f6b5bc71510b9c0b3fa5bbba92a9e006e8390054586082eeef2817b6e13be8e.jpg)
-
Make sure that the soundbar has been properly connected to your TV and digital device (See "5.1 Connect with your TV and digital devices").
-
Switch on your digital device.
→ Your TV and the soundbar wake up from standby mode and switch to the input source automatically.
- To select the HDMI IN source on the soundbar, press ⏻ on the soundbar or HDMI on the remote control.
NOTE:
– Full compatibility with all HDMI-CEC devices is not guaranteed.
7.4 Play from the Bluetooth source
Through Bluetooth, stream audio play on your Bluetooth device to the soundbar.

-
To select the Bluetooth source, press Ⓗ on the soundbar or ♂ on the remote control.
-
Check that the soundbar has been properly connected to your Bluetooth device (See "5.2 Connect to your Bluetooth device").
-
Start audio play on your Bluetooth device.
• Alternatively, press on the remote control to control playback.
- Adjust the volume on the soundbar, remote control or your Bluetooth device.
7.5 Play over your home network
NOTES:
- The soundbar can support audio streaming, but not video streaming. - During Wi-Fi music streaming, music playback will pause on the currently connected device when you start music playback on a second connected device.
Before you start, make sure that:
- your Android or iOS device is connected to the same Wi-Fi network as your soundbar (See "5.3 Connect to your home network").
7.5.1 Play with Google Cast
With Google Cast, stream audio from your Android or iOS device to the soundbar.
On your Android or iOS device:
- Launch the JBL One app, and check that you have enabled Google Cast.

- On a Google Cast-enabled app, play music, tap the cast icon and select the connected soundbar.

7.5.2 Play through Spotify Connect
Through Spotify Connect, stream audio from your Android or iOS device to the soundbar.
NOTE:
– Subscription is required for Spotify Connect.

On your Android or iOS device:
- Launch the Spotify app and select a song to play.
- Tap the speaker icon 📄 the bottom corner of your screen.
- Select the connected soundbar from the device list, and then start audio streaming.
7.5.3 Play through Tidal Connect
Through Tidal Connect, stream audio from your Android or iOS device to the soundbar.
NOTE:
- Subscription is required for Tidal Connect.

On your Android or iOS device:
- Launch the Tidal app and select a song to play.
- Tap on the device selector ☐ at the top right of the screen.
- Select the connected soundbar from the device list, and then start audio streaming.
7.5.4 Play through AirPlay
Through AirPlay, stream audio on your iOS device to the soundbar. On your iOS device:
-
Swipe down from the upper right corner to enter the Control Center.
-
Tap 📷 to select the connected soundbar and then start audio streaming from an app.

7.5.5 Play through the JBL One app
Through the JBL One app, stream audio from enabled music services to the soundbar.
On your Android or iOS device,
- Launch the JBL One app, browse available *music streaming services to select music, and then start music streaming to the connected soundbar.
![graph TD A["Mobile Phone"] --> B["JBL BAR 700MK2"] B --> C["In-App Music"] C --> D["Supported Music Services"] D --> E["MUSIC SERVICE"]](/content/2026/08/1621799/images/42bc387b86638ee5c0eb958feb619a39585416a187e8973003bb902e67f01115.jpg)
NOTE:
- *Subscription may be needed and not provided by the JBL One app.
Access your presets with the ⏻Moment) button
- In the JBL One app,
- Personalize the (Moment) feature, and set your own playlist.

- On the soundbar,
- Press on the remote control to directly access your music playlist and speaker settings that you have personalized in the JBL One app.

7.6 Multi-room playback
With the multi-room playback, you can stream music on your Android or iOS device to multiple Google Cast / AirPlay-enabled soundbars.
7.6.1 Google Cast
- Through the Google Home app, connect multiple Google Cast-enabled speakers to the same network, assign them to multiple rooms, and create groups as needed.
- Run a Google Cast-enabled app on your smartphone or tablet.
- Play music. Press and select the grouped soundbars.
NOTES:
- To create a multi-room speaker group in the Google Home app, make sure that you have connected all the soundbars to the same home network and have used the same Google login account. Refer to the Google Home app for more details.
- Depending on the bandwidth of your local network, you can stream music to up to 6 Google Cast-enabled soundbars.
7.6.2 AirPlay

- On an iOS device, enter the Control Center.
- Tap ☐ to select multiple connected soundbars as needed.
- Start music streaming from an app.
8. SOUND SETTINGS
8.1 Audio sync
With the audio sync function, you can synchronize audio and video to make sure that no delay is heard from your video content.
- On the remote control, hold TV for more than 3 seconds and then press +
→ "SYNC" is displayed.
- Within 5 seconds, press or on the remote control to adjust the audio delay and match with video.
→ The audio sync timing is displayed.
NOTE:
- You can also adjust the audio delay through the JBL One app.
8.2 Detachable speaker audio settings
Using the JBL One app, while both detachable speakers are undocked, you can:
- adjust the volume level of the detachable speakers;
- check the battery status of the detachable speakers;
- enable Audio Broadcasting to adjust the audio settings of the detachable speakers to your preference;
- enable Night Listening to create a quiet listening environment at night.
8.2.1 Audio Broadcasting
- In the JBL One app, enable Audio Broadcasting and select your preferred audio settings: Mono or Stereo.
![graph LR A["BAR 700MK2"] --> B["More Audio Settings"] B --> C["Broadcasting"] C --> D["Broadcasting"] D --> E["Detectable Speaker Output (4:1) & More Display"]](/content/2026/08/1621799/images/fb3da58cfb28c0cc590ecfcfb05d315d40b0ae5d209923d8ea3bbc2b38a9a135.jpg)
- When the Mono audio channel is selected, "MONO BROADCASTING" is displayed on the soundbar.
-
When the Stereo audio channel is selected, "STEREO BROADCASTING" is displayed on the soundbar.
-
Undock one or both detachable speakers from the soundbar, and then move the detachable speaker(s) to your desired locations.
![graph TD A["1"] --> B["2"] B --> C["Person in the upper section"] style A fill:#f9f,stroke:#333 style B fill:#ccf,stroke:#333 style C fill:#cfc,stroke:#333](/content/2026/08/1621799/images/014508b0d0e3abebb1410fd5046f1e1fc81ac9c04bf89cb9abf71dc7f8f5fcd3.jpg)
→ You can enjoy audio from the soundbar at the living room and audio from the detachable speaker in the kitchen or other areas of the room.
8.2.2 Night Listening
- In the JBL One app, enable Night Listening.
![graph LR A["BAR 700MK2"] --> B["More Audio Settings"] B --> C["Night Listening"] C --> D["Night Listening"]](/content/2026/08/1621799/images/5d35ef0639a3a93d1489c1ac8d08dd8fee2e1dd6373a2ee473197f00764d437b.jpg)
- Undock the detachable speakers from the soundbar, and then move the detachable speakers close to you.
![graph TD A["Top View"] --> B["1"] B --> C["2"] C --> D["3"] D --> E["L"] D --> F["R"] style A fill:#f9f,stroke:#333 style B fill:#ccf,stroke:#333 style C fill:#cfc,stroke:#333 style D fill:#fcc,stroke:#333 style E fill:#ffc,stroke:#333 style F fill:#fcc,stroke:#333](/content/2026/08/1621799/images/7b318f2d2bf70fb90725c21bad59a3434399385d47e5441e4d399f9d46a06fb0.jpg)
→ The soundbar and subwoofer are muted. You can enjoy audio at night without disturbing others.
9. RESTORE FACTORY SETTINGS
To restore the factory settings, hold Ⓗ and for more than 5 seconds.
→ "RESET" is displayed.
→ When the factory reset is complete, the soundbar will automatically restart.
10. SOFTWARE UPDATE

Connect the soundbar to your home network. Online updates will be performed automatically when software updates are available.
→ "WAIT": Software updating in progress
→ "DONE": Software updating completed
NOTE:
- Software updates will be synchronized to the two detachable speakers when they are connected to or docked onto the soundbar.
11. RE-CONNECT THE SUBWOOFER
The soundbar and subwoofer are paired at factories. After power-on, they are paired and connected automatically. In some special cases, you may need to pair them again.

To re-enter the subwoofer pairing mode
-
On the rear panel of the subwoofer, hold until it turns fast flashing white.
-
To enter the subwoofer pairing mode on the soundbar, hold ☐ / BASS on the remote control for more than 3 seconds, and then press — on the remote control.
→ "SUB PAIRING": The subwoofer is ready for pairing.
→ "SUB PAIRED": The subwoofer is connected.
NOTE:
- If pairing is not completed within 3 minutes, the subwoofer will exit pairing mode and enter standby. ☐ turns from fast flashing white to off. To return to the pairing mode, press 📄
12. PRODUCT SPECIFICATIONS
General specification
- Model: BAR 700MK2 (soundbar unit)
BAR 700MK2 SURROUND (detachable speaker)
BAR 700MK2 SUB (subwoofer unit)
• Sound system: 7.1 channel
• Power supply: 100 - 240 V AC, \~ 50/60 Hz
• Total speaker power output* (Max. @THD 1%): 780 W
• Soundbar output power** (Max. @THD 1%): 400 W - Surround speaker output power*** (Max. @THD 1%): 2 x 40 W
- Subwoofer output power**** (Max. @THD 1%): 300 W
- Soundbar transducer: 6 x (44 x 80) mm racetrack drivers, 2 x 1" (25 mm) tweeters
- Surround speaker transducer: 2 x (44 x 90) mm racetrack drivers
- Subwoofer transducer: 10" (260 mm)
• Networked standby power: <2.0 W
• Operating temperature: 0 °C - 45 °C
• Lithium battery: 3.635 V, 3283 mAh - Detachable surround speaker playtime: up to 10 hours (may vary according to content type and volume level)
HDMI specification
- HDMI video input: 1
- HDMI video output (with Enhanced Audio Return Channel, eARC): 1
• HDMI HDCP version: 2.3
• HDR pass through: HDR10+, Dolby Vision
Audio specification
• Frequency response: 35 Hz - 20 kHz (-6 dB)
- Audio inputs: Optical, Bluetooth, USB (USB playback is available in US version. For other versions, USB is for Service only.)
USB specification
- USB port: Type A
• USB rating: 5 V DC, 0.5 A
• Supporting file formats: mp3 - MP3 codec: MPEG 1 Layer 2/3, MPEG 2 Layer 3, MPEG 2.5 Layer 3
• MP3 sampling rate: 16 - 48 kHz
• MP3 bitrate: 80 - 320 kbps
Wireless specification
- Bluetooth version: v5.3
- Bluetooth profile: A2DP v1.3, AVRCP v1.5
- Bluetooth transmitter frequency range: 2400 MHz - 2483.5 MHz
- Bluetooth transmitter power: <15 dBm (EIRP)
• Wi-Fi network: IEEE 802.11 a/b/g/n/ac/ax (2.4 GHz / 5 GHz) - 2.4G Wi-Fi transmitter frequency range: 2412 - 2472 MHz (2.4 GHz ISM Band, USA 11 Channels, Europe and others 13 Channels)
• 2.4G Wi-Fi transmitter power: <20 dBm (EIRP)
• 2.4G wireless transmitter frequency range: 2406 - 2474 MHz
• 2.4G wireless transmitter power: <10 dBm (EIRP)
- 5G Wi-Fi transmitter frequency range: 5.15 - 5.35 GHz, 5.470 - 5.725 GHz, 5.725 - 5.825 GHz
- 5G Wi-Fi transmitter power: 5.15 - 5.25 GHz <23 dBm, 5.25 - 5.35 GHz & 5.470 - 5.725 GHz <20 dBm, 5.725 - 5.825 GHz <14 dBm (EIRP)
Note: Band 5.6 - 5.64 GHz will be disabled when shipped to Australia / New Zealand.
Dimensions
- Total soundbar dimensions (W x H x D): 1163 x 52 x 128 mm / 45.8" x 2.0" x 5.0"
- Soundbar dimensions (W x H x D): 854 x 52 x 128 mm / 33.6" x 2.0" x 5.0"
- Detachable surround speaker dimensions (each) (W x H x D): 169 x 52 x 128 mm / 6.7" x 2.0" x 5.0"
- Subwoofer dimensions (W x H x D):
325 x 400 x 325 mm / 12.8" x 15.7" x 12.8"
• Soundbar weight: 5 kg / 11 lbs - Detachable surround speaker weight (each): 0.7 kg / 1.6 lbs
- Subwoofer weight: 8.1 kg / 17.8 lbs
- Packaging dimensions (W x H x D): 980 x 398 x 495 mm / 38.58" x 15.67" x 19.49"
- Packaging weight: 20.8 kg / 45.9 lbs (EMEA/UK/AU/NZ); 18.08 kg / 41.4 lbs (Others)
* RMS @THD 1%: 390 W
** RMS @THD 1%: 200 W
*** RMS @THD 1%: 2 x 20 W
**** RMS @THD 1%: 150 W
13. TROUBLESHOOTING
Never try to repair the product yourself. If you have problems using this product, check the following points before you request services.
System
The unit will not turn on.
- Check if the power cord is plugged into power and the soundbar.
The soundbar has no response to button pressing.
- Restore the soundbar to factory settings (See "9.RESTORE FACTORY SETTINGS").
Sound
No sound from soundbar
• Make sure that the soundbar is not muted.
- Select the correct audio input source on the remote control.
- Connect the soundbar to your TV or other devices properly.
- Restore the soundbar to factory settings (See "9. RESTORE FACTORY SETTINGS").
Distorted sound or echo
- If you play audio from your TV through the soundbar, make sure that your TV is muted or the built-in TV speaker is disabled.
Audio and video are not synchronized.
- Enable the audio sync function to synchronize audio and video (See "8.1 Audio sync").
No height sound effects of Dolby Atmos
- If your TV supports HDMI ARC only, make sure that you have connected your digital device to the soundbar through the HDMI / HDMI IN connector on the soundbar (See "5.1.1 TV (HDMI eARC)")
- Enjoy the sound effects of Dolby Atmos when you play movies from the TV / HDMI source. For audio streaming over Bluetooth or casting apps (enabled by Google Cast or AirPlay), Dolby Atmos is not supported.
Bluetooth
A device cannot be connected with the soundbar.
- Check if you have enabled Bluetooth on the device.
- If the soundbar has been paired with another Bluetooth device, reset Bluetooth (see "5.2.3 Connect to another Bluetooth device").
- If your Bluetooth device has ever been paired with the soundbar, reset Bluetooth on the soundbar, unpair the soundbar on the Bluetooth device, and then pair the Bluetooth device with the soundbar again (see "5.2.3 Connect to another Bluetooth device").
Poor audio quality from a connected Bluetooth device
- The Bluetooth reception is poor. Move the source device closer to the soundbar, or remove any obstacle between the source device and the soundbar.
The connected Bluetooth device connects and disconnects constantly.
- The Bluetooth reception is poor. Move the source device closer to the soundbar, or remove any obstacle between the source device and the soundbar.
Wi-Fi
Failed to connect to Wi-Fi.
• Make sure that Wi-Fi is turned on.
- Make sure that you have selected the right network and entered the correct password.
- Make sure that your router or modem is turned on and within the range.
- In your router settings, make sure that you have set the security type to WPA2 or auto.
- Make sure that your soundbar is connected to the same wireless LAN as your smartphone or tablet.
- If you have difficulties in setting up Wi-Fi, re-enter the Wi-Fi setup mode by holding hand on the soundbar until "SETUP WIFI" is displayed.
Playback
AirPlay cannot find the soundbar as an AirPlay speaker for music streaming.
- On your Apple device, update the software to the latest version: iOS 13.4 and later, Mac OS 10.15.4 and later, or TV OS 14.3.
- Make sure that your Apple device has been connected to the same network as the soundbar.
- For a PC running iTunes for Windows, you can stream music from your PC to the soundbar through Bluetooth.
Music playback does not work smoothly when the sound source switches from Bluetooth to Google Cast or AirPlay.
- The quality of audio casting and playback are dependent on the traffic and coverage of the network that connects the soundbar and your casting devices, such as phones, tablets and PCs.
Music playback does not resume when the sound source switches from Bluetooth to TV / HDMI IN, and then back to Bluetooth.
- The music playback in the Bluetooth device stops when the sound source switches from Bluetooth to TV / HDMI IN. When you switch back to the Bluetooth source, start music playback in the Bluetooth device again.
Remote control
The remote control does not work.
- Check if the batteries are drained. If so, replace them with new ones.
- Reduce the distance and angle between the remote control and the main unit.
Failed to complete the TV remote control learning.
- Check if you are using an infra-red TV remote control. The IR learning is not supported by a Bluetooth TV remote control.
Low power standby mode
Failed to enter the low power standby mode
- To enter the low power standby mode, when the detachable speakers are docked on the soundbar, hold on the remote control for 10 seconds until "CEC 1" is displayed on the soundbar. Next, hold for another 10 seconds until "CEC 2" is displayed. After entering the "CEC 2" mode, the soundbar will switch to the standby mode while continuing to charge the detachable speakers. When the detachable speakers are fully charged after about 4 hours, the soundbar will automatically switch to the low power standby mode and stop charging the detachable speakers.
- To exit the low power standby mode, unplug the power cord and then plug it again.
14. TRADEMARKS

Bluetooth®
The Bluetooth ® word mark and logos are registered trademarks owned by Bluetooth SIG, Inc. and any use of such marks by HARMAN International Industries, Incorporated is under license. Other trademarks and trade names are those of their respective owners.

HIGH DEFINITION MULTIMEDIA INTERFACE
The terms HDMI, HDMI High-Definition Multimedia Interface, HDMI trade dress and the HDMI Logos are trademarks or registered trademarks of HDMI Licensing Administrator, Inc.

CERTIFIED
The Wi-Fi CERTIFIED™ Logo is a registered trademark of Wi-Fi Alliance®.
COMPATIBLE WITH
Dolby Vision
Dolby Atmos
Dolby, Dolby Vision, Dolby Atmos, and the double-D symbol are registered trademarks of Dolby Laboratories Licensing Corporation. Manufactured under license from Dolby Laboratories. Confidential unpublished works. Copyright © 2012–2024 Dolby Laboratories. All rights reserved.

works with
Google Home

works with
Google Cast
Google, Android, Google Home, Google Cast and other marks are trademarks of Google LLC.
Google Assistant is not available in certain languages and countries. Availability and performance of certain features, services, and applications are device and network dependent and may not be available in all areas.

Works with
Apple AirPlay
Use of the Works with Apple badge means that an accessory has been designed to work specifically with the technology identified in the badge and has been certified by the developer to meet Apple performance standards.
Apple, and AirPlay are trademarks of Apple Inc., registered in the U.S. and other countries and regions.
To use AirPlay with JBL Bar 700MK2, the latest version of iOS, iPadOS, or macOS is recommended.

Use your phone, tablet or computer as a remote control for Spotify. Go to spotify.com/connect to learn how.
The Spotify Software is subject to third party licenses found here: https://www.spotify.com/connect/third-party-licenses.
ROON READY
Being Roon Ready means that HARMAN uses Roon streaming technology, for an incredible user interface, simple setup, rock-solid daily reliability, and the highest levels of audio performance, without compromise.

Manufactured under license from DTS, Inc. and/or its affiliates. For patents, see https://xperi.com/dts-patents/. DTS, the DTS logo, DTS:X, the DTS:X logo, Virtual:X, and the DTS Virtual:X logo are trademarks or registered trademarks of DTS, Inc. and/or its affiliates in the U.S. and/or other countries. © DTS, Inc. and/or its affiliates. All rights reserved.
15. OPEN SOURCE LICENSE NOTICE
This product contains open source software licensed under GPL. For your convenience, the source code and relevant build instruction are also available at https://harman-webpages.s3.amazonaws.com/Harman_One_OS_C_package_license_list.htm.
Please feel free to contact us at: Harman Deutschland GmbH ATT: Open Source, Gregor Krapf-Gunther, Parkring 3 85748 Garching bei Munchen, Germany or OpenSourceSupport@Harman.com if you have additional question regarding the open source software in the product.

HARMAN International Industries, Incorporated 8500 Balboa Boulevard, Northridge, CA 91329 USA www.jbl.com
© 2025 HARMAN International Industries, Incorporated. All rights reserved.
JBL is a trademark of HARMAN International Industries, Incorporated, registered in the United States and/or other countries. Features, specifications and appearance are subject to change without notice.

- IMPORTANT SAFETY INSTRUCTIONS
- VERIFY LINE VOLTAGE BEFORE USE
- DO NOT USE EXTENSION CORDS
- HANDLE THE AC POWER CORD GENTLY
- DO NOT OPEN THE CABINET
- WARNING
- TABLE OF CONTENTS
- INTRODUCTION
- WHAT'S IN THE BOX
- PRODUCT OVERVIEW
- PLACE
- CONNECT
- SETUP
- PLAY
- SOUND SETTINGS
- RESTORE FACTORY SETTINGS
- SOFTWARE UPDATE
- RE-CONNECT THE SUBWOOFER
- PRODUCT SPECIFICATIONS
- TROUBLESHOOTING
- TRADEMARKS
- OPEN SOURCE LICENSE NOTICE
- JBL ONE APP
- NOTES
- SOUNDBAR
- FRONT PANEL & TOP PANEL
- STATUS INDICATOR
- (VOLUME)
- MICROPHONE
- (SOURCE)
- STATUS DISPLAY
- BACK PANEL
- ♦ / POWER
- USB
- ETHERNET
- HDMI / HDMI IN
- TV CONNECTORS
- HDMI / HDMI OUT
- OPTICAL / OPTICAL
- DETACHABLE SPEAKERS
- (POWER)
- TYPE-C USB CONNECTOR
- SUBWOOFER
- )
- POWER CONNECTOR
- REMOTE CONTROL
- Ⓧ
- (MUTE)
- SOUND EFFECT BUTTONS
- CALIBR
- (MOMENT)
- (PLAYBACK CONTROLS FOR WI-FI MUSIC STREAMING OR BLUETOOTH)
- SOURCE SELECTORS
- TV
- (BLUETOOTH)
- HDMI
- DESKTOP PLACEMENT
- WALL-MOUNTING
- WALL-MOUNT THE SOUNDBAR
- PREPARATION
- WALL-MOUNT THE DETACHABLE SPEAKERS AS REAR SURROUND SPEAKERS
- CONNECT WITH YOUR TV AND DIGITAL DEVICES
- TV (HDMI EARC)
- NOTE
- TV (HDMI ARC)
- OPTICAL
- CONNECT TO YOUR BLUETOOTH DEVICE
- CONNECT A BLUETOOTH DEVICE
- RECONNECT THE LAST PAIRED DEVICE
- CONNECT TO ANOTHER BLUETOOTH DEVICE
- CONNECT TO YOUR HOME NETWORK
- WI-FI CONNECTION WITH YOUR HOME NETWORK
- WIRED CONNECTION WITH YOUR HOME NETWORK (OPTIONAL)
- CONNECT THE DETACHABLE REAR SPEAKERS AND SUBWOOFER
- CHARGE THE DETACHABLE SPEAKERS
- CHARGE BY DOCKING THE DETACHABLE SPEAKERS
- CHARGE THROUGH A USB CABLE
- D SURROUND SOUND
- SOUND CALIBRATION
- CALIBRATE THE LISTENING ZONE
- CALIBRATE THE SPEAKER POSITION
- DOLBY ATMOS
- REAR ADJUSTMENT
- BASS ADJUSTMENT
- SWITCH ON/AUTO STANDBY/AUTO WAKEUP
- SWITCH ON
- AUTO STANDBY
- AUTO WAKEUP
- PLAY FROM THE TV SOURCE
- TV REMOTE CONTROL SETUP
- HDMI-CEC
- TV REMOTE CONTROL IR LEARNING
- PLAY FROM THE HDMI IN SOURCE
- PLAY FROM THE BLUETOOTH SOURCE
- PLAY OVER YOUR HOME NETWORK
- PLAY WITH GOOGLE CAST
- PLAY THROUGH SPOTIFY CONNECT
- PLAY THROUGH TIDAL CONNECT
- PLAY THROUGH AIRPLAY
- PLAY THROUGH THE JBL ONE APP
- ACCESS YOUR PRESETS WITH THE ⏻MOMENT) BUTTON
- MULTI-ROOM PLAYBACK
- GOOGLE CAST
- AIRPLAY
- AUDIO SYNC
- DETACHABLE SPEAKER AUDIO SETTINGS
- AUDIO BROADCASTING
- NIGHT LISTENING
- TO RE-ENTER THE SUBWOOFER PAIRING MODE
- GENERAL SPECIFICATION
- HDMI SPECIFICATION
- AUDIO SPECIFICATION
- USB SPECIFICATION
- WIRELESS SPECIFICATION
- DIMENSIONS
- SYSTEM
- THE UNIT WILL NOT TURN ON
- THE SOUNDBAR HAS NO RESPONSE TO BUTTON PRESSING
- SOUND
- NO SOUND FROM SOUNDBAR
- DISTORTED SOUND OR ECHO
- AUDIO AND VIDEO ARE NOT SYNCHRONIZED
- NO HEIGHT SOUND EFFECTS OF DOLBY ATMOS
- BLUETOOTH
- A DEVICE CANNOT BE CONNECTED WITH THE SOUNDBAR
- POOR AUDIO QUALITY FROM A CONNECTED BLUETOOTH DEVICE
- THE CONNECTED BLUETOOTH DEVICE CONNECTS AND DISCONNECTS CONSTANTLY
- WI-FI
- FAILED TO CONNECT TO WI-FI
- PLAYBACK
- AIRPLAY CANNOT FIND THE SOUNDBAR AS AN AIRPLAY SPEAKER FOR MUSIC STREAMING
- MUSIC PLAYBACK DOES NOT WORK SMOOTHLY WHEN THE SOUND SOURCE SWITCHES FROM BLUETOOTH TO GOOGLE CAST OR AIRPLAY
- MUSIC PLAYBACK DOES NOT RESUME WHEN THE SOUND SOURCE SWITCHES FROM BLUETOOTH TO TV / HDMI IN, AND THEN BACK TO BLUETOOTH
- THE REMOTE CONTROL DOES NOT WORK
- FAILED TO COMPLETE THE TV REMOTE CONTROL LEARNING
- LOW POWER STANDBY MODE
- FAILED TO ENTER THE LOW POWER STANDBY MODE
- BLUETOOTH®
- DOLBY VISION
- GOOGLE HOME
- APPLE AIRPLAY
- ROON READY
Brand : JBL
Model : Bar 700MK2
Category : Soundbar