Feego Washvacuum Sray - Jigsaw CECOTEC - Free user manual and instructions
Find the device manual for free Feego Washvacuum Sray CECOTEC in PDF.


| Product type | Electric jigsaw |
| Brand | Cecotec |
| Model | Feego Washvacuum Sray |
| Power supply | 220-240 V ~ 50/60 Hz |
| Power | 500 W |
| Cutting speed | 0 to 3,000 strokes/min |
| Blade stroke | 20 mm |
| Cutting capacity | Wood: 65 mm, metal: 5 mm |
| Blade type | T-shank |
| Tilting base | Up to 45° |
| Weight | 1.5 kg |
| Dimensions | 20 × 7 × 5 cm |
| Main functions | Variable speed, orbital cutting, integrated ventilation |
| Maintenance and cleaning | Clean the vents and cutting area regularly |
| Safety | Overload protection, safety lock, non-slip handle |
| Spare parts | Available blades, blade holder, motor carbon brushes |
| Repairability | Official Cecotec technical service |
| Usage | Household use only |
| Low-voltage supply | Safety extra-low voltage according to the manual |
| Warranty | Official Cecotec warranty |
Frequently Asked Questions - Feego Washvacuum Sray CECOTEC
User questions about Feego Washvacuum Sray CECOTEC
0 question about this device. Answer the ones you know or ask your own.
Ask a new question about this device
Download the instructions for your Jigsaw in PDF format for free! Find your manual Feego Washvacuum Sray - CECOTEC and take your electronic device back in hand. On this page are published all the documents necessary for the use of your device. Feego Washvacuum Sray by CECOTEC.
USER MANUAL Feego Washvacuum Sray CECOTEC
Aspirador vertical/Upright vacuum cleaner
cecòtec
Manual de instrucciones Instruction manual Manuel d'instructions Bedienungsanleitung Manuale di istruzioni Manual de instruções Instructiehandleiding Instrukcja obstugi
Návod k použití
Instrucciones de seguridad 4
Safety instructions 7
Instructions de sécurité 10
Sicherheitshinweise 13
Istruzioni di sicurezza 16
Instruções de segurança 20
Veiligheidsinstructies 23
Instrukcje bezpieczeństwa 26
Bezpečnostní pokyny 29
ÍNDICE
- Parts and components 40
- Before use 40
- Product installation 41
- Operation 42
- Cleaning and maintenance 43
- Troubleshooting 44
- Technical specifications 45
- Disposal of old electrical
and electronic appliances 45 - Technical support and warranty 45
- Copyright 45
SOMMAIRE
- Read these instructions thoroughly before using the appliance. Keep this instruction manual for future reference or new users.
- Make sure that the mains voltage matches the voltage stated on the rating label of the appliance and that the wall outlet is earthed.
- Avoid operating the appliance under extremely high or low temperatures.
- This appliance is designed for domestic use only and is not intended for bars, restaurants, farmhouses, hotels, motels, and offices.
- The appliance must be powered at a low safety voltage as stated on the marking.
- The appliance should not be left unattended while plugged to a power supply.
- The appliance should not be used if it has fallen, shows any visible sign of damage, or if it leaks.
- Keep the appliance out of the reach of children while in operation or cooling down.
- The appliance must be unplugged after use and before any user maintenance is carried out.
- Check the power cable regularly for visible damage. If the cable is damaged, it must be repaired by the official Cecotec Technical Support Service to avoid any type of danger.
- Keep the cable away from heat sources. Do not pass the cable through gaps under doors or over sharp edges. Keep
the cable away from movement areas and from places where it may obstruct passage.
- If the appliance does not work as described in this manual, has suffered a major impact, falls from a height, is damaged, or falls into water, do not use it and contact the official Cecotec Technical Support Service.
- Stop using the appliance if you notice an abnormal sound or sense a temperature higher than usual.
- Do not try to repair the appliance by yourself. Contact the official Cecotec Technical Support Service for advice.
- Do not use any accessory that is not recommended by Cecotec, as this may cause damage to the appliance.
- Do not place the appliance near heat sources, flammable substances, or surfaces where it can fall or be thrown into water from. Do not use outdoors.
- Keep the packaging materials out of the reach of children, as they could be dangerous.
- Switch off and unplug the appliance from the mains when not in use, before cleaning, and before assembling or disassembling components. Pull from the plug, not the cable, to disconnect it from the outlet.
- Do not immerse the cable, plug, or any other part of the appliance in water or any other liquid or expose electrical connections to water. Make sure your hands are dry before handling the plug or switching on the appliance.
- Do not use the appliance to vacuum flammable or explosive liquids such as gasoline or use it where such liquids or vapours may be present.
- Do not use the appliance to pick up burning or smouldering objects such as cigarette butts, matches, or hot ashes.
- Non-rechargeable batteries should not be recharged.
- WARNING: the appliance has rotating parts which may pose
a risk of entrapment. Exercise extreme caution.
- This appliance can be used by children aged 8 and above and persons with reduced physical, sensory, or mental capabilities or lack of experience and knowledge, as long as they have been given supervision or instruction concerning the use of the appliance in a safe way and understand the hazards involved. Children must not play with the appliance. Cleaning and maintenance must not be performed by unsupervised children.
- Supervise children to prevent them from playing with the appliance. Close supervision is necessary if the appliance is used by or near children.
Battery instructions
- Do not burn or expose the battery to high temperatures, as it may explode.
- Batteries may leak under extreme conditions. Should that be the case, do not touch the liquid. If the liquid gets into contact with skin, wash immediately with soap and water. If the liquid gets into the eyes, wash them immediately with clean water for a minimum of 10 minutes and seek medical attention. Wear gloves to handle the battery and dispose of it immediately in accordance with local regulations.
- Battery ingestion can cause burns, perforation of soft tissue, and death. It can cause severe burns within two hours of the ingestion.
- In case of battery ingestion, please seek medical help immediately.
- WARNING: to recharge the battery, use only the power supply included with the appliance, with reference E013-1C174060VE, E013-1C174060HK, or E013-1C17060HE.
INSTRUCTIONS DE SÉCURITÉ
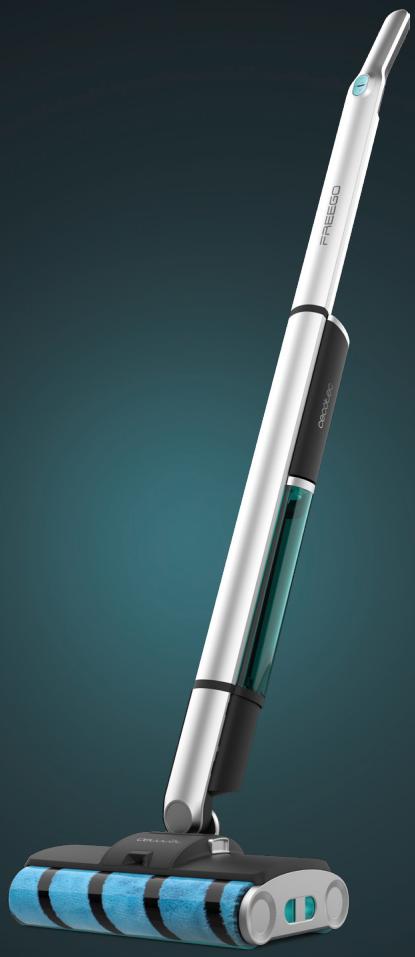
- Power button
- Spray button
- Self-cleaning brush
- Adapter
- Top-cover brush lock
- Rotary brush
- Handle
- Battery
- Water tank
- Waste-water tank
- Floor brush
- Support
NOTE:
The graphics in this manual are schematic representations and may not exactly match the appliance.
2. BEFORE USE
- This appliance is packaged in a way as to protect it during transport. Take the appliance out of its box and remove all packaging materials. You can keep the original box and other packaging elements in a safe place. This will help you prevent damage to the appliance when transporting it in the future. In case the original packaging is disposed of, make sure all packaging materials are recycled accordingly.
- Make sure all parts and components are included and in good conditions. If there is any piece missing or in bad conditions, contact the official Cecotec Technical Support Service immediately.
Box content
- FreeGo Wash Twice Spray electric mop
- Charging base
- Battery charger
- Instruction manual
3. PRODUCT INSTALLATION
Installing the handle and main body. Fig. 2
- Insert the end of the handle into the hole at the top of the appliance body, perpendicular to the direction of the appliance and connect the connection cables as shown in Figure 2. Once you hear a click, make sure the handle is fixed in place to ensure it was correctly installed.
- If you wish to remove the handle from the main body, press the release hole while pulling the handle away from the appliance.
Note
During assembly, the cables must be placed into the slot and inserted. Do not apply too much pressure to avoid damaging the cables.
Installing and removing the water tank. Fig. 3
- To remove the water tank, hold the body of the appliance with one hand, grasp the tank with the other hand, and pull the tank out as shown in Figure 3.
- To re-install it, first place the bottom of the tank against the edge of the tank bracket and push the tank into position as shown in Figure 3. You will hear it click into place if correctly installed.
Installing and removing the waste-water tank. Fig. 4
To remove the waste-water tank, press the release tabs and pull the cover upwards. Once the cover is removed, pull out the waste-water tank as shown in Figure 4. To reattach it, align the clips at both ends of the cover, then press the assembly together until it clicks into position.
Filling up the water tank. Fig. 5
- Remove the water tank as described in the "Installing and removing the water tank" section.
- Open the cap and pour clean water up to the marked line.
- Make sure the tank is tightly closed to avoid spillage.
- Install the water tank as explained in the "Installing and removing the water tank" section. You will hear it click into place if done properly.
NOTE:
- This appliance was designed to work with both distilled and tap water. Please note that the latter may lead to limescale deposits, which in turn can clog the appliance.
- Do not exceed the marked line when filling up the tank.
Installing and removing the rotary brush. Fig. 6
To remove the rotary brush, press the right-cover lock buttons inwards and pull outwards to
remove the right-hand cover, take the rotary-brush head, and remove it pulling it outwards as shown in Figure 6. To re-install it, follow the reverse procedure.
4. OPERATION
Charge indicator light
- During operation, the indicator will light up red, and the appliance will stop working when battery is low.
- Once plugged to the mains, if the indicator lights up red, it means that the appliance is charging. When the indicator changes from red to green, the appliance is fully charged.
- If the appliance is not unplugged, it will stop charging, and the indicator will stay green to remind you that the battery is charged.
- Charging time is 4-5 hours. Once fully charged, unplug the appliance from the mains.
Please note
The appliance battery will not be charged on first use. The appliance can be used normally after a first full charge. During the first 3 uses, it is recommended to charge the battery for approximately 12 hours. The appliance will work normally after fully charging it and discharging it.
Using the electric mop
- Remove the appliance from the charging base and press the power button on the handle to switch the mop on.
- Hold down the Spray button to spray water through the front nozzle of the rotary brush. Spray the floor and clean it with the front rotary brush, then dry it with the rear rotary brush. Release the Spray button to stop spraying water.
Using the appliance
After using the appliance, place the support on the floor. Align the bottom of the appliance with the support, place it in the slot, and leave the appliance upright.
Fig. 7
Please note
After use, the appliance should be placed on the support to prevent the wet bristles of the rotary brush from touching and, in turn, damaging the floor.
5. CLEANING AND MAINTENANCE
Cleaning the waste-water tank Fig. 8
Remove the top cover and the waste-water tank, use a brush to clean the dirt from the floor-brush holder, lift the waste-water tank, turn the handle, and pull it out. Open the water inlet and empty the waste-water tank. Rinse the waste-water tank with clean water and reinstall it in the appliance. If you have difficulty removing the waste-water tank, there may be some dust or dirt particles between the tank and the brush base. It is recommended to clean the dirty floor-brush base and the waste-water tank.
Notes
We recommend cleaning the waste- water tank after every use.
If you notice that water stains on the floor do not dry up when using the appliance, check that the waste-water tank is not full. If full, empty and clean it before use.
Once the waste-water tank has been removed, it is normal for the brush base to be wet. Dry it in a well ventilated place.
When installing the rotary brush, push it in all the way, then install the cover. If it is not properly installed, the appliance will make unusual noises when turned on. If this occurs, stop using the appliance immediately and re-install the rotary brush.
Please note
During the operation of the rotary brush, if there are too many objects, too many fibres are entangled, or even a child has accidentally reached in, the rotary brush will stop rotating and the appliance will automatically switch off as a safety measure.
Rotary brush
Manual cleaning
Follow the instructions in the "Installing and removing the rotary brush" section to remove the brush. Clean it manually and then install it in the floor's brush. Fig. 9
Self-cleaning. Fig. 10
- Place the appliance in the support and hold down the Spray button for 5 seconds; the red light will blink and the rotary brush will enter self-cleaning mode. The rotary brush will spin, the pump will spray water for 40 seconds and then will stop for 20 seconds, repeating these cycles every 2 minutes.
- Press any button to stop cleaning.
- Because the nozzle is located at the front of the appliance, self-cleaning mode will only clean the front rotary brush.
- To clean the rear rotary brush, switch both brushes so that it can be cleaned at the front part.
Notes
- After using the appliance, the rotary brush will be wet. Leave it in a well ventilated area until it dries to ensure it does not affect operation.
- If the rotary brush is wet, the appliance must not be used in environments below 0 °C to prevent it from freezing and damage.
Storage
- After using the appliance, place it on the support to prevent the wet bristles from touching and, in turn, damaging the floor.
- It is advisable to clean the rotary brush before storing the appliance, and then store it in a cool, ventilated place to prevent the bristles from deforming and emitting unpleasant odours. This will prevent its service life from being affected.
-
If the appliance is not going to be used for a long period of time, it is recommended to store it as described above, in a cool and dry place. Do not store it under direct sunlight or in damp places.
-
TROUBLESHOOTING
| Problem | Possible causes | Possible solution | |
| The rotary brush does not rotate.The rotary brush is pressed down by a heavy object or has too much hair on it. | Low battery. | Charge the appliance. | |
| Remove heavy objects and/or hair. | |||
| No water comes out of the pump.Blocked by foreign objects. | The clean-water tank has run out of water. | Fill up the clean-water tank. | |
| Clean the dirt from the nozzle and clean the waste-water tank. | |||
| Indicator light status during charge.(charging: red light). | Green light. | Battery is fully charged. | Check that the battery is fully charged. |
| Sudden switch-off | The charging adapter is not properly connected. | Correctly plug in the adapter. | |
| Insufficient operating time after charging.Battery time | Insufficient charge time. | The battery is a consumable product. You can get a new battery from Cercoter. | |
7. TECHNICAL SPECIFICATIONS
Product reference: 04552
Product: FreeGo Wash Twice
Rated input power: 60 W
Adapter: 100-240 V, 50-60 Hz
Power rating of the floor-brush motor: 25 W
Spray-pump power: 5 W
Battery capacity: 2000 mAh
Charging time: approximately 4-5 hours.
Technical specifications may change without prior notification to improve product quality.
Made in China | Designed in Spain
7. DISPOSAL OF OLD ELECTRICAL AND ELECTRONIC APPLIANCES
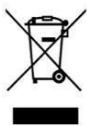
This symbol indicates that, according to the applicable regulations, the product and/or batteries must be disposed of separately from household waste. When this product reaches the end of its shelf life, you should dispose of the cells/batteries/accumulators and take them to a collection point designated by the local authorities.
Consumers must contact their local authorities or retailer for information
concerning the correct disposal of old machines and/or their batteries.
Compliance with the above guidelines will help protecting the environment.
8. TECHNICAL SUPPORT AND WARRANTY
Cecotec shall be liable to the end user or consumer for any lack of conformity that exists at the time of delivery of the product under the terms, conditions, and deadlines established by the applicable regulations.
It is recommended that repairs be carried out by qualified personnel.
If at any moment you detect any problem with your product or have any doubt, do not hesitate to contact the official Cecotec Technical Support Service at +34 963 210 728.
9. COPYRIGHT
The intellectual property rights over the texts in this manual belong to CECOTEC INNOVACIONES, S.L. All rights reserved. The contents of this publication may not, in whole or in part, be reproduced, stored in a retrieval system, transmitted, or distributed by any means (electronic, mechanical, photocopying, recording or similar) without the prior authorization of CECOTEC INNOVACIONES, S.L.
1. PIÈCES ET COMPOSANTS
Img. 1.
3. INSTALLATION DU PRODUIT
Product: FreeGo Wash Twice
Nominaal ingangsvermogen: 60 W
Adapter: 100-240 V, 50-60 Hz
3. INSTALACE PRODUKTU
Fig./Img./Abb./Afb./ Rys./Obr. 2

Fig./Img./Abb./Afb./Rys./Obr. 3

Fig./Img./Abb./Afb./Rys./Obr. 6

Fig./Img./Abb./Afb./Rys./Obr. 4
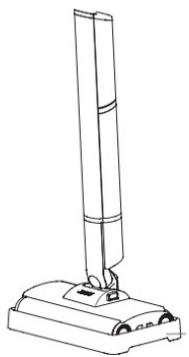
Fig./Img./Abb./Afb./Rys./Obr. 7

Fig./Img./Abb./Afb./Rys./Obr. 5

Fig./Img./Abb./Afb./Rys./Obr. 8

Fig./Img./Abb./Afb./ Rys./Obr. 9


Fig./Img./Abb./Afb./ Rys./Obr. 10
www.cecotec.es
- ÍNDICE
- SOMMAIRE
- BATTERY INSTRUCTIONS
- INSTRUCTIONS DE SÉCURITÉ
- BEFORE USE
- BOX CONTENT
- PRODUCT INSTALLATION
- INSTALLING THE HANDLE AND MAIN BODY. FIG. 2
- NOTE
- INSTALLING AND REMOVING THE WATER TANK. FIG. 3
- INSTALLING AND REMOVING THE WASTE-WATER TANK. FIG. 4
- FILLING UP THE WATER TANK. FIG. 5
- INSTALLING AND REMOVING THE ROTARY BRUSH. FIG. 6
- OPERATION
- CHARGE INDICATOR LIGHT
- PLEASE NOTE
- USING THE ELECTRIC MOP
- USING THE APPLIANCE
- CLEANING AND MAINTENANCE
- CLEANING THE WASTE-WATER TANK FIG. 8
- NOTES
- ROTARY BRUSH
- MANUAL CLEANING
- SELF-CLEANING. FIG. 10
- STORAGE
- TECHNICAL SPECIFICATIONS
- DISPOSAL OF OLD ELECTRICAL AND ELECTRONIC APPLIANCES
- TECHNICAL SUPPORT AND WARRANTY
- COPYRIGHT
- PIÈCES ET COMPOSANTS
- INSTALLATION DU PRODUIT
- INSTALACE PRODUKTU
Brand : CECOTEC
Model : Feego Washvacuum Sray
Category : Jigsaw