
LabelWorks Safety Label Kit - Label printer EPSON - Free user manual and instructions
Find the device manual for free LabelWorks Safety Label Kit EPSON in PDF.


| Product Type | Portable Label Printer Kit |
| Brand | Epson |
| Model | LabelWorks Safety Label Kit |
| Printing Technology | Direct Thermal Printing |
| Maximum Print Resolution | 180 dpi (dots per inch) |
| Label Width Supported | Up to 18 mm (0.7 inches) |
| Label Types Included | Safety labels (e.g., danger, warning, caution) in various colors |
| Display | Monochrome LCD screen with preview function |
| Keyboard | Integrated QWERTY keyboard for direct input |
| Connectivity | USB port for PC and Mac connectivity |
| Power Source | 6 AAA batteries or AC adapter (sold separately) |
| Dimensions (W x D x H) | Approximately 170 x 145 x 60 mm (6.7 x 5.7 x 2.4 inches) |
| Weight | Approximately 340 g (12 oz) without batteries |
| Supported Operating Systems | Windows, macOS, and Linux (via Epson Label Editor software) |
| Key Functions | Create custom safety labels, barcode printing, multiple font styles, symbol library |
| Maintenance and Cleaning | Clean print head with a dry cotton swab or isopropyl alcohol; clean exterior with a soft dry cloth |
| Safety Features | Auto power-off function, low battery indicator, safety label symbols compliant with ISO standards |
| Repairability and Spare Parts | Replacement print heads and label cassettes available; user-replaceable batteries |
| General Information | Supports multiple languages, includes a starter roll of safety labels, compatible with Epson LabelWorks tape cartridges |
Frequently Asked Questions - LabelWorks Safety Label Kit EPSON
User questions about LabelWorks Safety Label Kit EPSON
0 question about this device. Answer the ones you know or ask your own.
Ask a new question about this device
Download the instructions for your Label printer in PDF format for free! Find your manual LabelWorks Safety Label Kit - EPSON and take your electronic device back in hand. On this page are published all the documents necessary for the use of your device. LabelWorks Safety Label Kit by EPSON.
USER MANUAL LabelWorks Safety Label Kit EPSON
Contents
Welcome 3
Getting Started....4
Inserting batteries .... 4
Using the optional AC adapter .... 5
Inserting a label cartridge....5
Removing a label cartridge ....6
Creating Labels....7
Entering text....7
Creating long labels....7
Saving Labels....8
Deleting labels 8
Enhancing Your Labels....8
Adding symbols....8
Adding frames....13
Changing the font size....15
Changing the font....15
Changing the font style....16
Printing Labels 16
Printing multiple copies 17
Customizing Your Labels 17
Creating vertical text....17
Adding space between characters ..... 18
Selecting narrow characters 18
Increasing print density....18
Adding punctuation....18
Adding letters with an accent mark ..... 19
Customizing the length of labels.....19
Using mirror-image text ..... 19
Creating sequentially numbered labels....20
Safety Applications for Labels 20
Special Format Labels....21
Flag labels 21
Wrapped labels 22
Index tab labels 23
Barcode labels 24
Adjusting the Display 25
Cleaning the Printer 25
Cleaning the print head 25
Storing Your Kit 26
Solving Problems ...... 27
Error messages 27
Problems and solutions....28
Epson Technical Support ....30
Recycling 30
Purchase supplies and accessories ..... 31
Registration 31
Specifications 32
Notices 32
Safety instructions....32
About printed labels....35
FCC Compliance Statement....35
Epson America, Inc. Limited Warranty ..... 36
Trademarks 38
Welcome
Your LabelWorks ™ Safety Label Kit lets you create custom labels to help you identify hazards, emergency supplies, warning instructions, and other applications.
Reflective labels grant high visibility to safety equipment, such as bike helmets and first-aid kits, while glow-in-the dark labels can help locate items in the case of a power loss.
Add identifiers or custom text to your labels along with symbols and frames for warning symbols, emergency equipment, and more.
Save up to 50 labels to reuse at any time. The kit includes two cartridges so you can print over six feet of labels.
Additional label sizes and colors are available, as shown on the back cover of this guide.
With the tapes listed on the back cover, you can do even more:
Organize stuff in your kitchen, bathroom, and every room of your house.
■Decorate and personalize school supplies.
■ Create professional-looking file labels.
■ Use glow-in-the-dark labels for light switches and electrical panels
■Identify your cables and wiring with flag labels and wrap labels.
You'll find hundreds of uses for your LabelWorks printer!
Getting Started
Your LabelWorks printer requires 6 AA batteries (not included). An optional AC adapter is also available (C52CB73020).
Follow the instructions in this section to insert the batteries and tape cartridge.
Inserting batteries
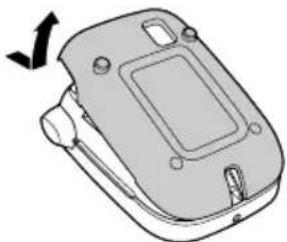
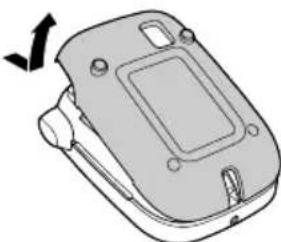
- Remove the rear cover.
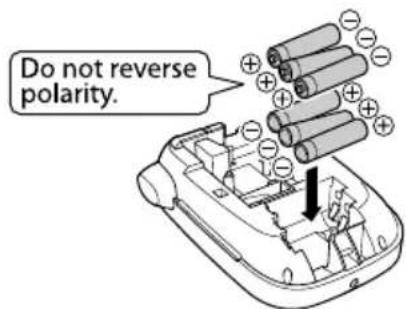
- Insert 6 AA alkaline batteries, positioning the + and - ends as shown.
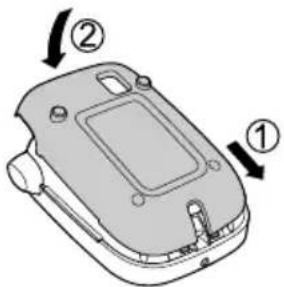
- Replace the cover and snap it into place.
Using the optional AC adapter
Plug in the AC adapter as shown.
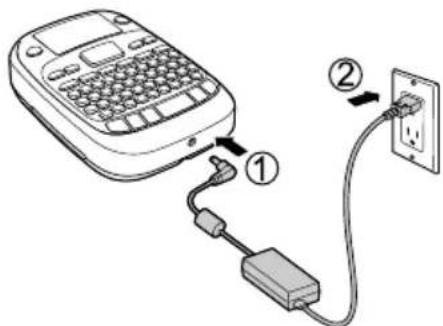
Caution: Make sure you use only the AC adapter designed for your LabelWorks printer (C52CB73020) or damage may occur.
Inserting a label cartridge
- Remove any slack from the label.
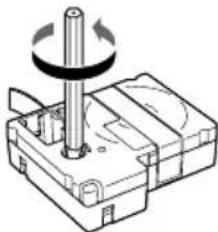
- Remove the rear cover.
- Insert the cartridge and press it down firmly until it snaps into place.
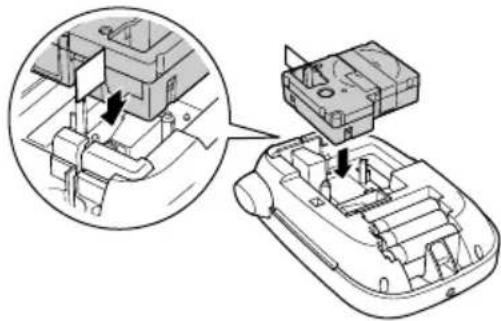
-
If there is excess label, feed the end through the tape guide slot.
-
Replace the cover and snap it into place.
-
Press to turn on the printer.
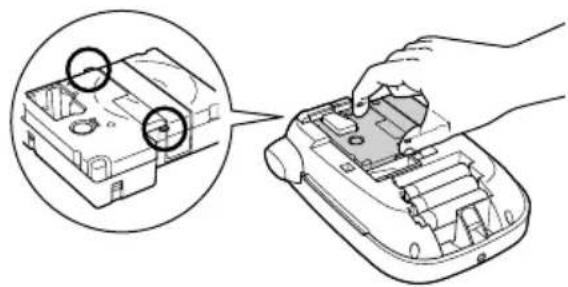
Removing a label cartridge
-
Remove the rear cover.
-
Hold the cartridge by the tabs, and lift it straight up.
Creating Labels
Enter text to begin creating your label. Then follow the suggestions for adding length if necessary.
Entering text
Use the built-in keyboard to enter letters and numbers.
■ Press to use upper case for all letters, or character for a single letter.
■Press to delete the previous character.
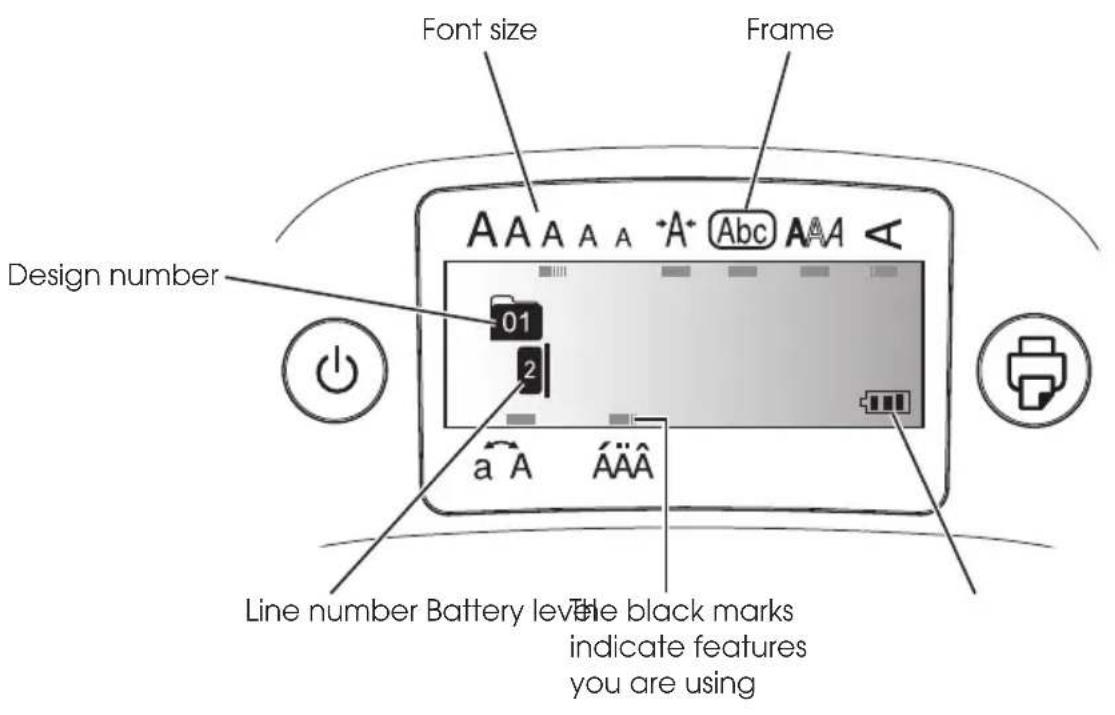
■Press to start a new line. The line number is indicated on the display.
Note: You can print up to four lines of text, depending on the label format and tape width. If you try to exceed the maximum, X appears and you will not be able to print. Press to delete the and print your label.
Creating long labels
The number of characters and symbols you can enter is limited, but you can use the following techniques to create longer labels:
■ Select multiple copies of your label to create a longer label with repeated text. See page 17 for instructions.
To add length to one end of the label (unprinted), press ☑ to feed about an inch before printing. Press these buttons repeatedly to add more length. Repeat this step after printing to add length to the other end of the label.
■Press the spacebar to add blank spaces between printed areas.
■ Using a larger font will make the label longer.
Note: You'll see a ◀ back arrow when you get to the character limit. You may have to add or delete spaces to make the label fit.
Saving Labels
You can store up to 50 saved labels at a time.
After you finish creating your first label, press ⏻ + [◆] create another label (the label number appears to the left of the text). Your first label is automatically saved.
Deleting labels
- Press + or ▼ to select a label for deletion.
- Press +You see a confirmation message.
- Press to delete, or press if you change your mind.
Enhancing Your Labels
Get creative by adding symbols or frames to your labels and selecting the right font..
Tip: Use clear labels for a professional look.
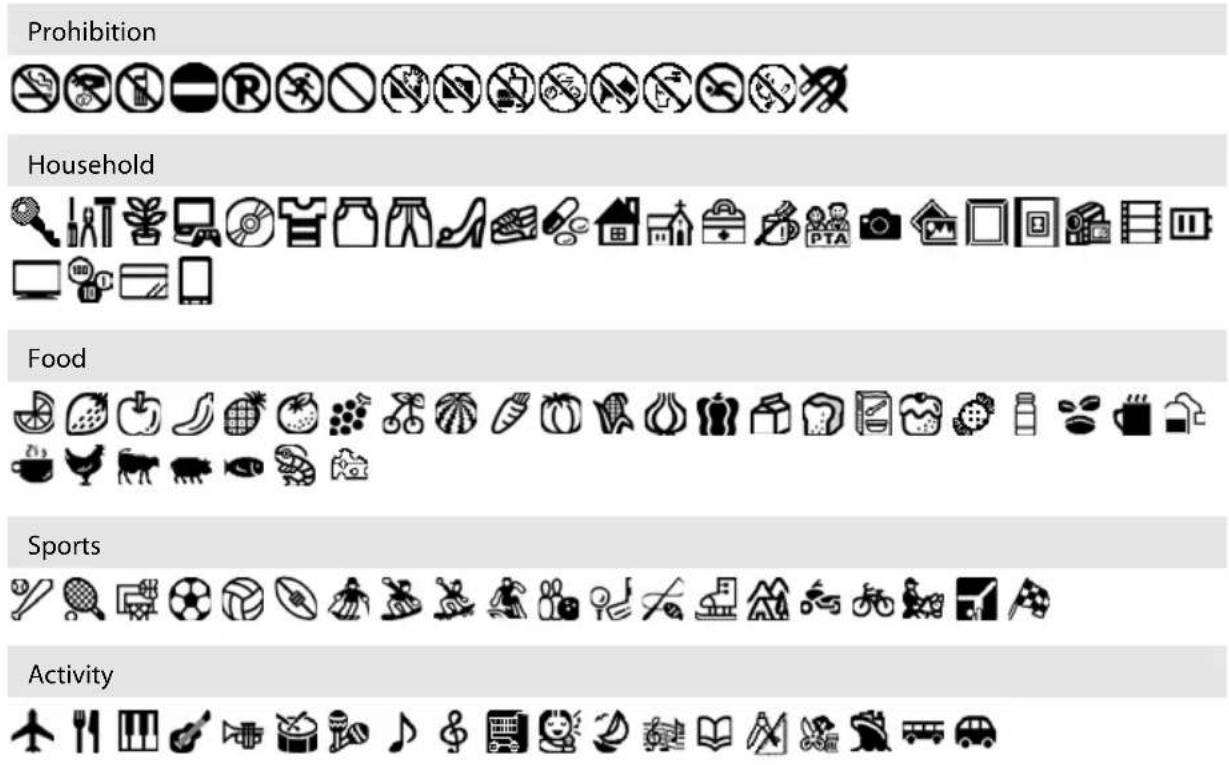
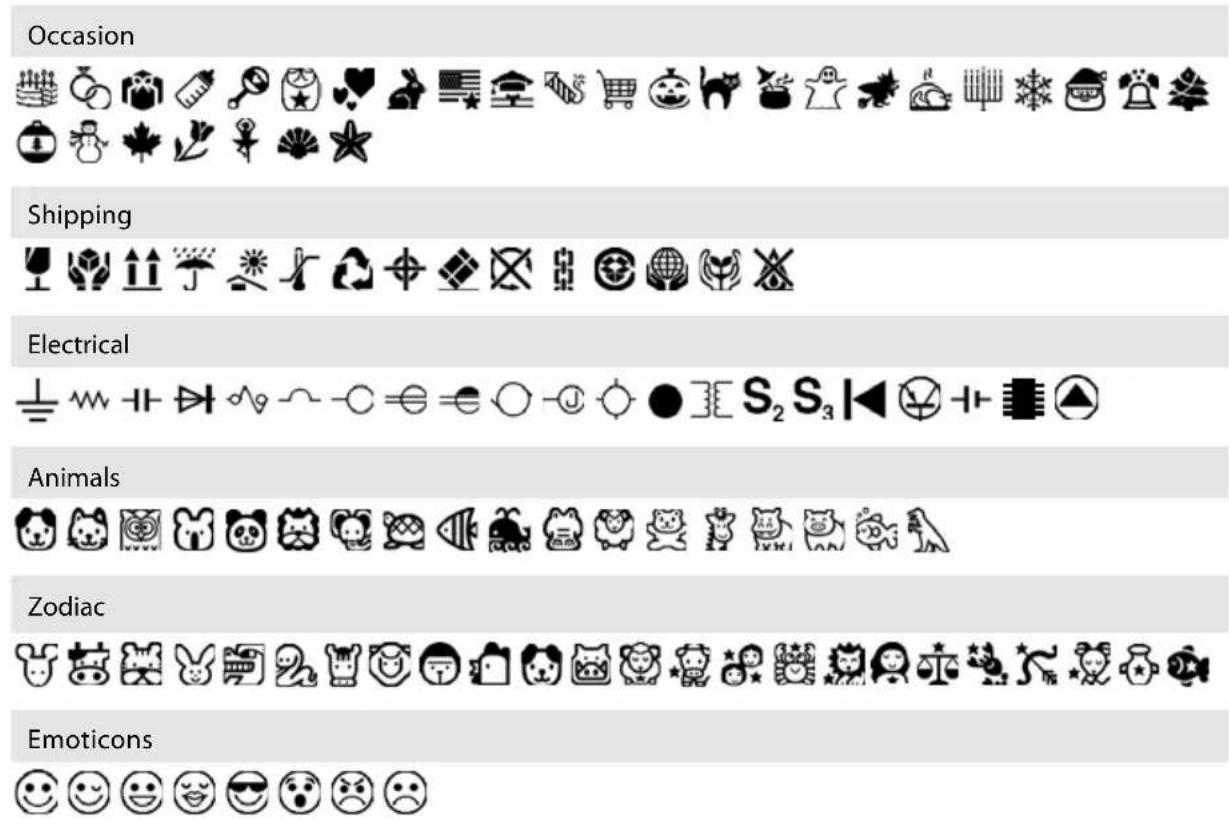
Adding symbols
You can add symbols for poisonous chemicals, dangerous areas, high voltage, and more.
- Press
- Press to scroll through the symbol categories, then press to select a category.
- Press of to highlight a symbol, then press to select it.
Note: To cancel and return to the previous menu, press ★★★★
You can choose from the symbols shown on the following pages.
Symbols
Measurement
°F°C° A VΩ WkWHzdBHPÅft' " %
Metric
µm\ mm\ cm\ m\ km\ cm2m2\ km2cm3m3\ mg\ g\ kg\ ml\ l\ °C
Abbreviation
# No. & © ® TEI FAX™
Punctuation
, . . : ; ? ! - /\~@ \~ § i ¿
Parentheses
Adding frames
Frames include borders and symbols for activities and other purposes.

-
Press
-
Press to scroll through the frames or enter the frame number to jump directly to a frame, then press to select the frame you want to use.
Note: To quickly remove a frame from a label, press (ABC), type the number "0", then press twice. You can choose from the following frames:
| 12 |  |  |  |  |  |  | |||||
| 78 |  |  |  | 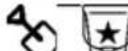 | 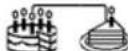 |  | |||||
| 13 |  | 14 | 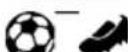 | 15 | 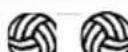 | 16 |  | 17 |  | 18 |  |
| 19 |  | 20 |  | 21 | 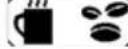 | 22 | 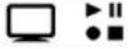 | 23 | 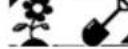 | 24 |  |
| 25 | 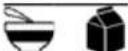 | 26 |  | 27 |  | 28 |  | 29 |  | 30 |  |
| 31 | 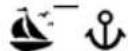 | 32 | 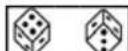 | 33 | 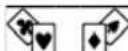 | 34 |  | 35 | 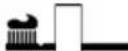 | 36 | 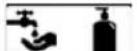 |
| 37 | 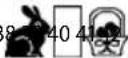 |  | 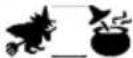 | 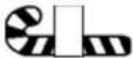 | 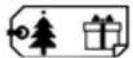 |  | |||||
| 43 |  | 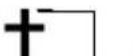 | 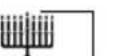 |  |  |  | |||||
| 49 | 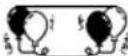 | 50 | 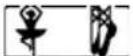 | 51 | 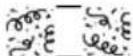 | 52 | 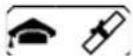 | 53 |  | 54 | 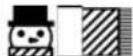 |
| 55 | 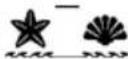 | 56 |  | 57 |  | 58 | 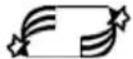 | 59 | 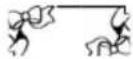 | 60 | 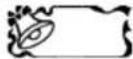 |
| 61 | 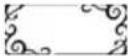 | 62 |  | 63 |  | 64 |  | 65 |  | 66 |  |
| 67 |  | 68 |  | 69 |  | 70 |  | 71 |  | 72 |  |
| 73 |  | 74 |  | 75 | 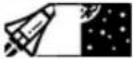 | 76 | 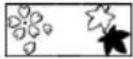 | 77 | 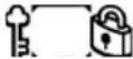 | 78 | 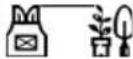 |
| 79 | 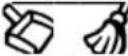 | 80 | 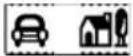 | 81 | 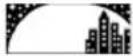 | 82 |  | 83 |  | 84 |  |
| 85 |  |  | 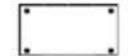 | 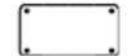 | 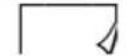 | ||||||
Changing the font size
You can change the size of the letters, numbers, and symbols on your label.
-
Press
-
Press to select a 1-4 line layout, then press You see squares representing the text, and numbers representing the available size variations.
Note: If you select a 2- or 3-line layout, you can make each line a different size. However, the larger font sizes may not be available.
- Press to scroll through the available sizes, then press to select the one you want to use.

Tip: The size you select is indicated on the display.
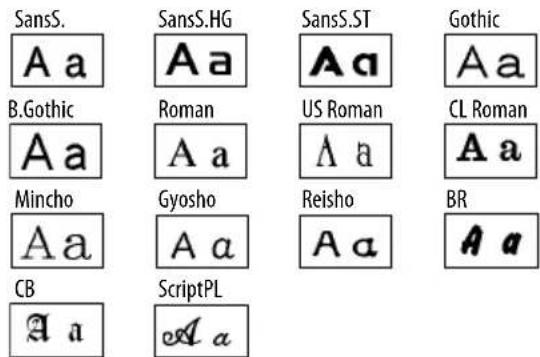
Changing the font
Choose a font that fits your needs.
-
Press
-
Press to scroll through the fonts, then press to select the one you want.
The font you select will apply to the entire label.
You can choose from the following fonts:
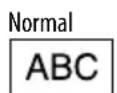
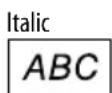
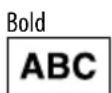
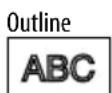
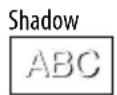
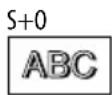
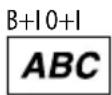
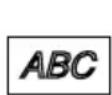
Changing the font style
Personalize your label text with bold, italic, shadow, and outline effects.
- Press
- Press to scroll through the styles, then press to select the one you want.
Note: Styles applied to small or elaborate characters may not print clearly.
You can choose from the following font styles:
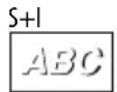
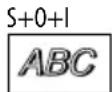
Printing Labels
- Press to print the current label.
The length of the label and the number of copies shows on the display while the label prints. - When printing stops, press the Cut button.
Warning: Do not press the Cut button until the tape stops moving or the tape cartridge may be damaged.
To select a saved label for printing, press + [or + to scroll through your labels, then press to select the one you want.
To preview your label before printing, press the text scrolls across the display.
Note: Only the text and the length of the label can be previewed. The actual print image will not show on the display.
Printing multiple copies
You can print up to 9 copies of a label on one label. This lets you create longer labels for increased visibility on larger items.
- Press . You see 2-9 on the display.
- Press a number key to enter the number of copies (2-9).
-
Press . The length of the label and the number of copies shows on the display while the label prints.
-
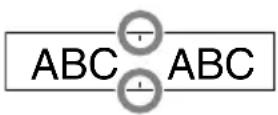
When printing stops, press the Cut button to cut the label. A cut mark is printed between each copy, as shown:
- Using scissors, cut along the marks to separate each label.
Customizing Your Labels
You can customize your labels by creating special effects, such as vertical and mirrored text. In addition, you can adjust the font width, spacing, and print density. You can also add punctuation and accented characters to the text.
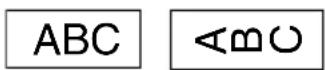
Creating vertical text
You can specify vertical orientation either before or after you enter the text for a label.
- Press
- Press until you see Vertical, then press to select it.
- Press to select On, then press.
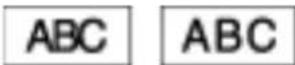
Adding space between characters
You can add extra space between the letters, numbers, and symbols on your label.
- Pres
- Press until you see Char. spacing, then press to select it.
- Press to change from Narrow to Wide, then press ↙
Selecting narrow characters
You can change from normal characters and symbols to narrow ones.
-
Pres
-
Press until you see Narrow, then press to select it.
-
Press again to select Narrow.
Increasing print density
You can make the print on your labels darker if necessary.
-
When the power is off, press Ⓗ. ⏻ Print density appears on the display.
-
Press
-
Press to adjust the print density, then press to select the density you want.
Note: The default value (0) is recommended.
Adding punctuation
In addition to the basic punctuation marks shown on the keyboard, you can select from two more groups of punctuation marks, as shown below:
Group 1
; () lt; gt; []
Group 2
" + - = ^ - |
■Press repeatedly to scroll through the first group of marks, then press to select the desired mark.
Press +, then press repeatedly to scroll through the second group of marks. Then press to select the desired mark.
Adding letters with an accent mark
You can choose from a list of accented letters on the display.
- Enter the letter that needs an accent mark.
- Press . Alist of options appears on the display (for example, ÀÂÂ).
- Press or to highlight an item, then press ↗ to select it.
Customizing the length of labels
You can specify the length of your labels (up to 15 in.)
- Press
- Press until you see Label length, then press to select it.
- Press to select a value up to 15 in. (40 cm), then press Tip: Selecting Auto will adjust the length automatically.
- Press to select On, then press.
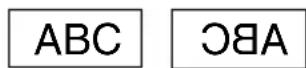
Using mirror-image text
Create unique labels with mirror-image text.
- Press
- Press until you see Mirror print, then press to select it.
Creating sequentially numbered labels
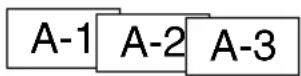
You can create a label, and then print numbered copies of it.
- Create your label as described on page 7.
- Press or to move the cursor where you want to add the number, then press ↑ ★★★★
- Enter the number for the first label, then press 🔍.
- Follow the instructions on page 17 to print multiple copies of the label. Each copy is numbered in order.
Safety Applications for Labels
LabelWorks labels can be used in many different ways to improve home or office safety.
■ Label emergency supplies and information
■ Use flag labels to identify key rings
■ Attach expiration labels to medicine or food containers
■ Use reflective labels on bike helmets, bikes, skateboards, or other gear
■ Label food for allergic reactions
■ Post contact numbers near the phone
■ Use glow-in-the-dark labels to locate light switches or circuit breakers
Special Format Labels
You can use custom labels to identify high-voltage cables and shut-off switches. Reflective, glow-in-the-dark, or fluorescent labels can identify emergency supplies or dangerous areas. Available tapes are listed on the back cover of this guide.
Some of the functions in this section require the format to be selected before entering text. If prompted, press to delete the current text and show the Special label menu. After choosing your label format, type your label text.
To exit out of Special label mode, press , press [to select Exit, then press .
Flag labels
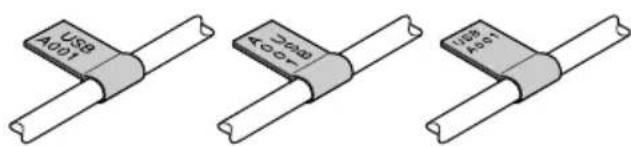
Flag labels provide a large surface for multiple lines of text. A vertical line marks the center of the flag to help wrap the cable evenly.
Flag: Hori. Flag: Vert. Flag: Edge
-
Press
-
Press to select a flag type (Flag: Hori., Flag: Vert., or Flag: Edge), then press
-
Press to select the length, then press
-
Enter your text, then press .
Flag label tips
When labeling cables with a flag label, set a specific length for the label. If you use the "Auto" feature, the text will be too close to the center of the label and you will not have enough extra tape to wrap around the cord.
When adhering the flag label to the cable, loop the label around the cord loosely and stick the ends of the label together, then move inwards toward the cable. This makes it easier to align the ends.
■ Add an extra inch or more to your flag label to allow enough blank label to wrap around the cord.
The starting and ending half-inch of empty label cannot be reduced. To remove them, trim the excess label.
If space is limited, use narrower tapes (such as 9 mm and 6 mm widths).
Wrapped labels
Wrapped labels are useful for tight spaces where flags are too large or only a short identifier is necessary.
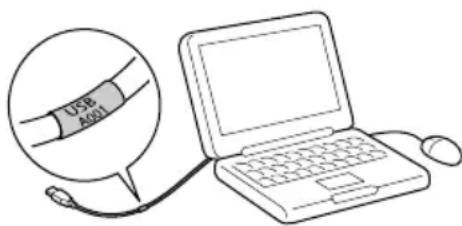
- Press
- Press until you see Wrap, then press to select it.
- Press to select the length, then press ↗.
- Enter your text, then press.
Wrap label tips
For small cables (1-2 mm), use a flag label to increase readability.
■ Repeat a single line of text on multiple lines to improve readability.
■ Use multiple labels on a single cord to include more information.
■ Include a label on both ends of the cable.
Do not use a regularly printed label (lengthwise) as a wrapped label — bending the cord will eventually cause the label to detach from the cord.
■Use reflective labels in dark locations where visibility is limited.
Index tab labels
You can print index tab labels for labeling folders and dividers.
Note: Index tabs are only available when printing on 1/2" (12 mm) or 3/4" (18 mm) tape.
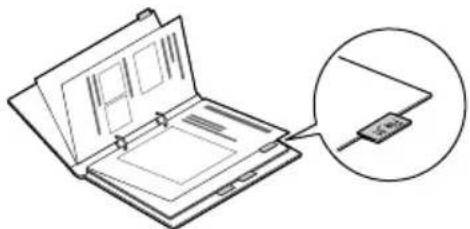
-
Press
-
Press to select Tab:Medium, Tab:Small, or Tab:Large (depending on what text size you want), then press
-
Press to select the length, then press
-
Enter your text, then press .
Barcode labels
LabelWorks can create barcode labels in a variety of formats. These barcodes can be used for inventory management and asset tagging.
Supported formats: CODE39, CODE128, ITF, CODABAR, UPC-A, UPC-E, EAN-8, EAN-13
- Press
- Press to select a barcode format, then press to select it.
- Press to select the Width for the barcode, then press to set it. Repeat for each setting. The settings differ depending on the type of barcode.
- Enter the code, then press .
The following barcode settings can be modified:
Width: Adjusts the space between the bars of the barcode.
Ratio: Adjusts the width of the wide bars in the barcode (2, 2.5, or 3 thin bar widths).
Check Digit: Determines whether a check digit is included in the barcode (for error correction). If selected, the check digit will be previewed on the display.
Adjusting the Display
You can adjust the following display settings:
Backlight: Turns the backlight of the display on or off.
Contrast: Adjusts the density of the fonts on the display.
Language: Changes the language of the settings and messages on the display.
inch:cm: Selects the unit of measurement.
-
Press
-
Press to highlight a setting, then press to select it.
-
Press to highlight the option you want, then press to select it.
Cleaning the Printer
Use a dry, soft cloth or, for stubborn stains, a moist cloth that has been wrung dry.
Caution: Never use chemicals or solvents such as benzine, thinner, alcohol, or a chemical duster. This could damage your product.
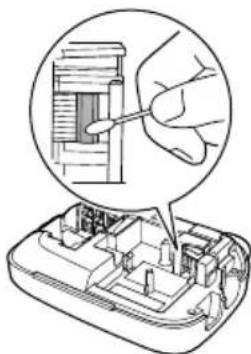
Cleaning the print head
If the print becomes faint or distorted, the print head may need cleaning.
Remove the tape cartridge and clean the print head using a cotton swab moistened with rubbing alcohol.
Storing Your Kit
Solving Problems
If you have a problem with your LabelWorks, check the display or the troubleshooting suggestions below.
Error messages
| Insert tape Turn the | power off and install a tape cartridge. |
| Check tape! An incompatible tape cartridge has been installed. Check the tape cartridge. | |
| Check tape cartridge | |
| Check battery The batteries may be running out or installed incorrectly, non-alkaline batteries are being used with alkaline batteries, or old and new batteries are being used together. Turn the power off and replace batteries with new ones, or use the optional AC adapter. Make sure new batteries are installed correctly. | |
| Too many lines You have exceeded the maximum number of lines (4). Press ✗ to delete the lines indicated. | |
| Seq. num. only 1 | Sequence numbers have already been set. You can only enter one sequence number per label. |
| Text too long | Entered text is too long for the specified label length. Press and adjust the label length or make text shorter. |
| Text is too long. Continue? | Entered text is too long for the specified label length. Press to confirm and continue printing. The label length will be adjusted automatically. |
| Text will be deleted. OK? | When creating a label with a special format, the current text will be deleted. Press to delete the text and show the special format. |
| Fill every digit | Entered values for barcodes are incorrect. Make sure the barcode format is supported and that the correct number of values is entered. |
| Load wider tape | Unable to print on the current tape. Use a wider tape. |
| Overheated! The | Print head is too hot. Turn the power off and take out the tape cartridge. Allow the print head to cool before trying to print again. |
| Cover open! Powering off. | If you open the rear cover while the power is on, this message displays and the power turns off automatically. Always turn the power off before opening the rear cover. |
| Delete all text? When creating a label with a special format, the current text will be deleted. Press to delete the text and show the special format. | |
| Motor error! An error occurred in the motor operation. Turn the power off, then turn it back on. If the same message appears, turn the power off again and contact Epson for technical support. | |
Problems and solutions
Check the solutions below if you are having trouble using your product.
The product does not function normally
The product may stop functioning due to static electricity or other causes. If your product does not function normally (for
example, the power doesn't turn on/off or the display is distorted), reset your product by following the procedure below.
Warning: Resetting your product will erase all saved labels and formatting and return your product to default settings.
- Press to turn the power off.
- Press and hold +, and press .
- When a message appears, press (to cancel, press any other button).
The product will be reset.
Power is on but no images appear on the display
■ Make sure the batteries are correctly seated.
■Replace the batteries with new ones, or use the optional AC adapter (C52CB73020).
If you are using the AC adapter, make sure that it is securely connected to both the wall outlet and the product.
■Adjust the contrast as described on page 25.
The display turns off
■The power turns off automatically if the product is idle for more than 5 minutes.
If an incorrect button sequence is entered, the display may flicker or turn off for an instant.
Nothing prints
■ Make sure text has been entered.
■Replace the tape cartridge if necessary.
- Check the display for an error message and perform the suggested solution.
■Replace the batteries with new ones, or use the optional AC adapter (C52CB73020).
■ Make sure the rear cover is closed.
Characters do not print properly
■ Make sure the tape cartridge is correctly seated.
■ Clean the print head.
Change the font (sometimes symbols do not print properly when certain fonts are selected).
Printing stops in the middle of text
■ Install a new tape cartridge.
■Replace the batteries or use the optional AC adapter (C52CB73020).
Saved labels are gone
■ Make sure you have not accidentally deleted the label.
If the product is reset, all of the previously entered text will be deleted.
If the AC adapter is unplugged or the batteries are removed during operation, the text may be deleted.
Cannot attach the label
■ Make sure to peel off the backing paper before attaching the label.
■ Make sure the surface you are attaching to is clean and dry. The label may not adhere to some materials, rough or uneven surfaces, or surfaces subject to extreme environmental conditions, such as high humidity or heat.
Epson Technical Support
Visit epson.com/support (U.S.) or epson.ca/support (Canada) where you can view manuals, get FAQs, or e-mail Epson.
To speak with a support specialist, call:
U.S.: (562) 276-7245, 6 AM to 8 PM, Pacific Time, Monday through Friday, and 7 AM to 4 PM, Saturday.
Canada: (905) 709-2567, 6 AM to 8 PM, Pacific Time, Monday through Friday.
Days and hours of support are subject to change without notice. Toll or long distance charges may apply.
Recycling
Epson offers a recycling program for end of life products. Please go to www.epson.com/recycle for information on how to return your products for proper disposal.
Purchase supplies and accessories
Epson offers a wide array of tapes for multiple uses. For a complete list of available tapes, including additional widths, visit www.epson.com/LW400Tapes.
You can purchase tape cartridges and accessories at:
www.epson.com/LabelWorks (U.S. sales) or www.epson.ca/LabelWorks (Canadian sales).
You can also purchase supplies from an Epson authorized reseller. To find the nearest one, call 800-GO-EPSON (800-463-7766).
Registration
To receive special offers and updates on new tapes, make sure you register your LabelWorks printer.
Go to www.epson.com/LabelWorks and select Product Registration.
Specifications Notices
| Dimensions (approximate) | Width: 4.33 inches (110 mm)Depth: 6.70 inches (170 mm)Height: 2.20 inches (56 mm) |
| Weight (approximate) | 14 oz (400 g) (excluding batteries and tape cartridge) |
| Operating temperature | 50 to 95 °F (10 to 35 °C) |
| Storage temperature | 14 to 131 °F (-10 to 55 °C) |
| Power supply - batteries | AA alkaline battery x 6 |
| Power supply - optional AC adapter | Model: C52CB73020Manufacturer: Seiko Epson Corp.Input: AC100-240 V, 0.3 A, 50-60HzOutput: DC 6.5 V, 1.5 ATotal output power: 10 W |
| Supported tape widths (approximate) | 1/4" (6 mm)3/8" (9 mm)1/2" (12 mm)3/4" (18 mm) |
Safety instructions
Before using your product, read the following safety instructions to make sure you use it safely and effectively.
■Always use the product as instructed in the manual. Otherwise, damage or injury may occur.
Do not subject the product to any strong force or shock such as dropping, hitting, or standing on the product.
- Do not spill liquid on the product or use the product with wet hands.
- Do not open any covers on the product other than the rear cover.
■ Do not touch the print head.
■Turn the product off, unplug the AC adapter and remove the batteries, and refer servicing to qualified service personnel under the following conditions: if liquid or foreign objects get inside the product; if the product does not operate normally or exhibits a distinct change in performance.
Continuing to use the product may result in damage or injury.
To avoid injury, keep your fingers away from the label exit slot when printing or using the cutter.
■Avoid locations that are subject to rapid changes in heat or humidity, shocks or vibrations, or dust.
Do not place or store the product in the following locations: outdoors or in direct sunlight; near sources of excessive heat, humidity, shocks, vibrations, or dust; where it may get wet or be exposed to excessive humidity; on an unstable place such as a shaky or inclined surface; near potential sources of electromagnetic interference such as loudspeakers or the base units of cordless telephones.
The product and product manuals may come packaged in plastic bags. Keep plastic bags away from small children to avoid any risk of suffocation.
If you will not be using the product for a long period, unplug the power cord and remove the batteries.
Before cleaning, unplug the power cord and remove the batteries. Use only a dry, soft cloth to clean the product; do not use liquid or chemical cleaners.
■Operate the keyboard gently.
Take care not to cut your fingers when cutting a tape with scissors.
Batteries
■ Use batteries properly to avoid injury or fire caused by leaking, overheating, explosion, erosion, or damage to the product.
- Keep batteries out of reach of children. If battery acid gets into your eyes or on your skin, immediately rinse the affected area thoroughly with water and seek medical treatment. If a battery is swallowed, seek medical treatment immediately.
■When replacing batteries, follow these safety instructions:
If battery acid leaks from a battery, wipe it off with a cloth and replace the battery with a new one.
Do not use new and old batteries together or mix different types of batteries.
■ Use only AA alkaline batteries. You cannot use rechargeable batteries with your product.
■Insert batteries so that the polarities (+ and -) are correct.
■Remove dead batteries promptly.
- Do not heat batteries or throw them in fire or water.
Do not remove batteries with metal objects such as tweezers or the tip of a pen.
■ Make sure to follow local battery disposal regulations.
AC adapter
Use only model C52CB73020 AC adapter and power cord with your product. Do not use the AC adapter with any other equipment and use only with the specified voltage. Using the wrong AC adapter and power cord may result in damage, overheating, fire, or electric shock.
Plug the power cord firmly into the outlet. When removing the plug from the outlet, grasp the plug firmly and do not yank on the cord.
■ Make sure the plug is not dusty when inserting it into an outlet.
- Do not hold the plug with wet hands.
Do not make any modifications to the AC adapter or power cord.
Place the AC adapter and power cord to avoid abrasions, cuts, fraying, crimping, and kinking. Do not place heavy objects on top of the AC adapter or power cord.
Make sure the AC adapter has sufficient ventilation so that it doesn't overheat and become damaged. Do not crowd it with too many other adapters or cords.
Do not forcibly bend or twist the power cord.
Do not place the AC adapter or power cord near a heater.
To avoid fire or electric shock, do not use a damaged AC adapter or power cord.
■Turn off the product before unplugging the AC adapter. Otherwise, it may not function properly or may become damaged.
Tape cartridges
■Use only compatible LCTAPE™ cartridges.
To avoid damage, do not drop or disassemble tape cartridges.
■Feed the tape using the + buttons. Do not forcibly pull out the tape. Otherwise, you may damage the tape cartridge.
Do not try to print with an empty tape cartridge; this may overheat the print head and damage the product.
Note: Tape cartridges contain ink ribbons. Make sure to follow local ink disposal regulations.
About printed labels
Attached labels and adhesive are affected by the type of surface and by environmental conditions such as humidity and heat. Labels may peel off, curl, or fade; printed characters may fade; color may be left behind after removing the label; adhesive may become stuck to the attached surface.
Epson is not responsible for any damage or loss caused by labels or adhesive.
FCC Compliance Statement
For United States Users
This equipment has been tested and found to comply with the limits for a Class B digital device, pursuant to Part 15 of the FCC Rules. These limits are designed to provide reasonable protection against harmful interference in a residential installation. This equipment generates, uses, and can radiate radio frequency energy and, if not installed and used in accordance with the instructions, may cause harmful interference to radio or television reception. However, there is no guarantee that interference will not occur in a particular installation. If this equipment does cause interference to radio and television reception, which can be determined by turning the equipment off and on, the user is encouraged to try to correct the interference by one or more of the following measures:
■Reorient or relocate the receiving antenna.
■ Increase the separation between the equipment and receiver.
■Connect the equipment into an outlet on a circuit different from that to which the receiver is connected.
Consult the dealer or an experienced radio/TV technician for help.
For Canadian Users
This Class B digital apparatus complies with Canadian ICES-003.
Epson America, Inc. Limited Warranty
What Is Covered: Epson America, Inc. ("Epson") warrants to the original retail purchaser that the Epson label-printing device and its consumables and accessories covered by this limited warranty statement (each, a "product"), if purchased and operated only in the United States, Canada, or Puerto Rico, will be free from defects in workmanship and materials for a period of one (1) year from the date of original purchase, in the case of the label-printing device, and for a period of thirty (30) days from the date of original purchase, in the case of its consumables or accessories. Consumables include label and tape rolls and cassettes. Accessories include an AC adapter. For consumables, the warranty covers only mechanical defects in workmanship and materials. For warranty service, you must provide proof of the date of original purchase.
What Epson Will Do To Correct Problems: Should your Epson product prove defective during the warranty period, please call the Epson Connection SM at (562) 276-7245 (U.S. and Puerto Rico) or (905) 709-2567 (Canada) for warranty repair instructions and return authorization. An Epson service technician will provide telephone diagnostic service to determine whether the product requires service. If service is needed, Epson will, at its option, exchange or repair the product without charge for parts or labor. If Epson authorizes an exchange for the defective unit, Epson will ship a replacement product to you, freight prepaid, so long as you use an address in the United States, Canada, or Puerto Rico. Shipments to other locations will be made freight collect. You are responsible for securely packaging the defective unit and returning it to Epson within five (5) working days of receipt of the replacement. Epson requires a debit or a credit card number to secure the cost of the replacement product in the event that you fail to return the defective one. If Epson authorizes repair instead of exchange, Epson will direct you to send your product to Epson or its authorized service center, where the product will be repaired and sent back to you. You are responsible for packing the product and for all costs to and from the Epson authorized service center. When warranty service involves the exchange of the product or a part, the item replaced becomes Epson property. The replacement product or part may be new or refurbished to the Epson standard of quality, and, at Epson's option, may be another model of like kind and quality. Exchange products and parts assume the remaining warranty period of your original product covered by this limited warranty.
What This Warranty Does Not Cover: This warranty covers only normal use in the United States, Canada, or Puerto Rico. Using this product for continuous production or similar high duty purposes is not considered normal use; damage, maintenance or service from such use will not be covered under this warranty. This warranty is not transferable. This warranty does not cover damage to the Epson product caused by parts or supplies not manufactured, distributed or certified by Epson. This warranty does not cover third party parts, components, or peripheral devices added to the Epson product after its shipment from Epson, e.g., dealer or user-added boards or components. Epson is not responsible for warranty service should the Epson label or logo or the rating label or serial number be removed or should the product fail to be properly maintained or fail to function properly as a result of misuse, abuse, improper installation, neglect, improper shipping, damage caused by disasters such as fire, flood, and lightning, improper electrical current, software problems, interaction with non-Epson products, or service other than by an Epson Authorized Servicer. If a claimed defect cannot be identified or reproduced, you will be held responsible for the costs incurred.
THE WARRANTY AND REMEDY PROVIDED ABOVE ARE EXCLUSIVE AND IN LIEU OF ALL OTHER EXPRESS OR IMPLIED WARRANTIES INCLUDING, BUT NOT LIMITED TO, THE IMPLIED WARRANTIES OF MERCHANTABILITY, NON-INFRINGEMENT OR FITNESS FOR A PARTICULAR PURPOSE. SOME LAWS DO NOT ALLOW THE EXCLUSION OF IMPLIED WARRANTIES. IF THESE LAWS APPLY, THEN ALL EXPRESS AND IMPLIED WARRANTIES ARE LIMITED TO THE WARRANTY PERIOD IDENTIFIED ABOVE. UNLESS STATED HEREIN, ANY STATEMENTS OR REPRESENTATIONS MADE BY ANY OTHER PERSON OR FIRM ARE VOID. IN NO EVENT SHALL EPSON OR ITS AFFILIATES BE LIABLE FOR ANY SPECIAL, INCIDENTAL, OR CONSEQUENTIAL DAMAGES RESULTING FROM THE USE OR INABILITY TO USE THE EPSON PRODUCT, WHETHER RESULTING FROM BREACH OF WARRANTY OR ANY OTHER LEGAL THEORY. IN NO EVENT SHALL EPSON OR ITS AFFILIATES BE LIABLE FOR DAMAGES OF ANY KIND IN EXCESS OF THE ORIGINAL RETAIL PURCHASE PRICE OF THE PRODUCT.
In Canada, warranties include both warranties and conditions.
Some jurisdictions do not allow limitations on how long an implied warranty lasts, and some jurisdictions do not allow the exclusion or limitation of incidental or consequential damages, so the above limitations and
exclusions may not apply to you. This warranty gives you specific legal rights and you may have other rights which vary from jurisdiction to jurisdiction.
To find the Epson Authorized Reseller nearest you, visit our website at http://www.epson.com.
To find the Epson Customer Care Center nearest you, visit http://www.epson.com/support.
You can also write to Epson America, Inc., P.O. Box 93012, Long Beach, CA 90809-3012.
Trademarks
EPSON is a registered trademark, EPSON Exceed Your Vision is a registered logomark, and LabelWorks and LC TAPE are trademarks of Seiko Epson Corporation. Epson Connection is a service mark of Epson America, Inc.
General Notice: Other product names used herein are for identification purposes only and may be trademarks of their respective owners. Epson disclaims any and all rights in those marks.
This information is subject to change without notice.
© 2013 Epson America, Inc., 5/13 CPD-39571
Printed in USA
LabelWorks tapes available at www.epson.com/LabelWorks
 | 1/4 inch(6 mm) | 3/8 inch(9 mm) | 1/2 inch(12 mm) | 3/4 inch(18 mm) | ||
| Glow-in-the-Dark | LC-4ZBU1 | LC-5ZBU1 | ||||
| Reflective | LC-4SBR1 | LC-4YBR1 | LC-5SBR1 | LC-5YBR1 | ||
| Standard labels | LC-2WBN9 | LC-3WBN9 | LC-4WBN9 | LC-4BWV9 | LC-5BKP9 | LC-5WBN9 |
| LC-3WLN9 | LC-4WLN9 | LC-4BKP9 | LC-5SBE9 | |||
| LC-3WRN9 | LC-4WRN9 | LC-4NWT5 | ||||
| Clear | LC-4TBN9 | LC-4TKN9 | LC-5TBN9 | LC-5TWN9 | ||
| LC-5TKN9 | ||||||
| Metallic | LC-4SBM9 | LC-4KBM9 | LC-5SBM9 | LC-5KBM9 | ||
| Fluorescent | LC-5DBF9 | LC-5YBF9 | ||||
| Strong Adhesive | LC-4WBW9 | LC-4YBW9 | LC-5WBW9 | LC-5YBW9 | ||
| LC-5RBW9 | ||||||
| Pearlized | LC-4LBL9 | LC-4GBL9 | ||||
| LC-4RBL9 | ||||||

- CONTENTS
- WELCOME
- GETTING STARTED
- INSERTING BATTERIES
- USING THE OPTIONAL AC ADAPTER
- INSERTING A LABEL CARTRIDGE
- REMOVING A LABEL CARTRIDGE
- CREATING LABELS
- ENTERING TEXT
- CREATING LONG LABELS
- SAVING LABELS
- DELETING LABELS
- ENHANCING YOUR LABELS
- ADDING SYMBOLS
- SYMBOLS
- ADDING FRAMES
- CHANGING THE FONT SIZE
- CHANGING THE FONT
- CHANGING THE FONT STYLE
- PRINTING LABELS
- PRINTING MULTIPLE COPIES
- CUSTOMIZING YOUR LABELS
- CREATING VERTICAL TEXT
- ADDING SPACE BETWEEN CHARACTERS
- SELECTING NARROW CHARACTERS
- INCREASING PRINT DENSITY
- ADDING PUNCTUATION
- ADDING LETTERS WITH AN ACCENT MARK
- CUSTOMIZING THE LENGTH OF LABELS
- USING MIRROR-IMAGE TEXT
- CREATING SEQUENTIALLY NUMBERED LABELS
- SAFETY APPLICATIONS FOR LABELS
- SPECIAL FORMAT LABELS
- FLAG LABELS
- FLAG LABEL TIPS
- WRAPPED LABELS
- WRAP LABEL TIPS
- INDEX TAB LABELS
- BARCODE LABELS
- ADJUSTING THE DISPLAY
- CLEANING THE PRINTER
- CLEANING THE PRINT HEAD
- STORING YOUR KIT
- SOLVING PROBLEMS
- PROBLEMS AND SOLUTIONS
- THE PRODUCT DOES NOT FUNCTION NORMALLY
- WARNING: RESETTING YOUR PRODUCT WILL ERASE ALL SAVED LABELS AND FORMATTING AND RETURN YOUR PRODUCT TO DEFAULT SETTINGS
- POWER IS ON BUT NO IMAGES APPEAR ON THE DISPLAY
- THE DISPLAY TURNS OFF
- NOTHING PRINTS
- CHARACTERS DO NOT PRINT PROPERLY
- PRINTING STOPS IN THE MIDDLE OF TEXT
- SAVED LABELS ARE GONE
- CANNOT ATTACH THE LABEL
- EPSON TECHNICAL SUPPORT
- RECYCLING
- PURCHASE SUPPLIES AND ACCESSORIES
- REGISTRATION
- SPECIFICATIONS NOTICES
- SAFETY INSTRUCTIONS
- BATTERIES
- AC ADAPTER
- TAPE CARTRIDGES
- ABOUT PRINTED LABELS
- FCC COMPLIANCE STATEMENT
- FOR UNITED STATES USERS
- FOR CANADIAN USERS
- EPSON AMERICA, INC. LIMITED WARRANTY
- TRADEMARKS
Brand : EPSON
Model : LabelWorks Safety Label Kit
Category : Label printer