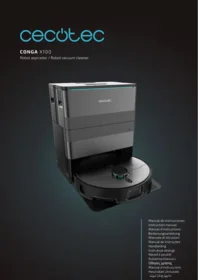
Conga X100 X Treme - Robot vacuum CECOTEC - Free user manual and instructions
Find the device manual for free Conga X100 X Treme CECOTEC in PDF.


| Product type | Robot vacuum cleaner |
| Brand | Cecotec |
| Model | Conga X100 X Treme |
| Dimensions (L × W × H) | 33 × 33 × 9.5 cm |
| Weight | 3.2 kg |
| Power supply | Li-ion battery 14.4 V / 2600 mAh |
| Battery life | Up to 90 minutes |
| Charging time | Approximately 4 hours |
| Dustbin capacity | 500 ml |
| Water tank capacity | 300 ml |
| Navigation system | Laser LDS and infrared sensors |
| Mopping function | Yes, with mop cloth and water tank |
| Cleaning modes | Auto, Spot, Edge, No-go zones, Scheduled cleaning |
| Control | Cecotec mobile app, remote control, voice assistants |
| Noise level | 60 dB |
| Filtration | High-efficiency HEPA filter |
| Obstacle detection | Drop and collision sensors |
| Maintenance | Regular cleaning of brushes, filter, and sensors |
| Spare parts | Side brushes, HEPA filter, mop cloth, battery available |
Frequently Asked Questions - Conga X100 X Treme CECOTEC
User questions about Conga X100 X Treme CECOTEC
0 question about this device. Answer the ones you know or ask your own.
Ask a new question about this device
Download the instructions for your Robot vacuum in PDF format for free! Find your manual Conga X100 X Treme - CECOTEC and take your electronic device back in hand. On this page are published all the documents necessary for the use of your device. Conga X100 X Treme by CECOTEC.
USER MANUAL Conga X100 X Treme CECOTEC
- Parts and components 16
- Before use 17
- Preparation and installation 18
- Operation 18
- Wi-Fi connectivity and mobile App 22
- Cleaning and maintenance 22
- Troubleshooting 23
- Copyright 25
- Simplified EU Declaration of Conformity 25
SOMMAIRE
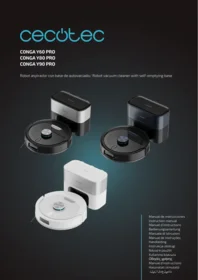
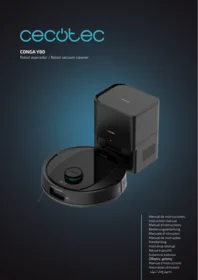
EU01_114479_Conga X100
EN • The coding in this manual is generic and applies to all code variants of the appliance.
https://cecotec.es/es/information/declaration-of-conformity
ENGLISH
1. PARTS AND COMPONENTS
Front view of the robot (closed cover)
Fig. 1
- Front bumper
- Back Home button
- Start/Pause button
- Laser
- Edge sensor
- Charging terminals
Bottom view of the robot
Fig. 2
- Side brush
- Main brush and cover
- Omnidirectional wheel
- Fall-detection sensor
- Rotating mops
Main view of the robot (open cover)
Fig. 3
- Top cover
- Dust container
Front view of the self-emptying base
Fig. 4
- LED indicator light
- Dust container
- Self-emptying channel
- Tray
Rear view of the self-emptying base
Fig. 5.
- Power cable storage slot
Top view of the self-emptying base
Fig. 6.
- Clean water tank (front side)
- Dirty water tank (rear side)
Docking port
Fig. 7
- Charging terminals
Accessories list
Fig. 8
- Side brush x1 (pre-installed)
- Base ramp extension plate x1
- Dust bag x1 (pre-installed)
- Spin mop x2
- Mop holder x2
Note:
The graphics in this manual are schematic representations and may not exactly match the appliance.
2. BEFORE USE
- This robot vacuum cleaner comes in packaging designed to protect it during transport. Take the robot vacuum cleaner out of its box. You can keep the original box and other packaging materials in a safe place to prevent damage to the robot vacuum cleaner if you need to transport it in the future. If you wish to dispose of the original packaging, make sure all items are recycled properly.
- Check that all parts and components are included and in good condition. If any of them are missing or damaged, please contact Cecotec's Official Technical Support Service immediately.
Box content
- Robot vacuum cleaner
- Self-emptying base with 2 tanks (clean and dirty water)
- Dust bag
- Side brush
- 2 spin mops
- Power cord
- Main brush
- Instruction manual
- Do not remove the product's serial number in order to keep proper traceability if technical assistance is required.
ENGLISH
3. PREPARATION AND INSTALLATION
3.1. Installing the self-emptying base
- Place the self-emptying base on a stable, level surface, ensuring at least 80 cm of clearance on both sides and a clear area of at least 1.2 m in front. Fig. 9
- Connect the power cord to a mains socket and carefully store any excess cord in the rear slot of the self-emptying base to prevent interference with the robot's operation.
Note:
- Avoid direct sunlight.
- Do not cover the base's signal transmission area with stickers or other objects.
- Do not place the self-emptying base on soft surfaces such as carpets.
- Make sure the charging area remains dry.
- For optimal cleaning effectiveness, it is recommended that the robot starts from the self-emptying base during initial use.
3.2. Preparing/Emptying the water tanks
- To add clean water, remove the front clean water tank, hold the left tab of the tank lid, open the lid to add clean water, and replace it in the self-emptying base. Fig. 10
- To empty dirty water, remove the rear dirty water tank, open the tank lid and pour out the dirty water. Fig. 11
Note:
Do not add laundry detergent, fabric softener, disinfectants, hand soap, unknown oily liquids, or acidic/alkaline substances to the water tank to prevent damage.
3.3. Installing the spin mop holder
- First, securely attach the mops to the mop holder.
- Align the centre of the holder with the installed mop, then attach the holder to the robot vacuum cleaner. Fig. 12
3.4. Environment preparation
Before starting cleaning, clear loose cables, hard objects, sharp items (such as nails, glass) and other debris from the floor, and remove easily fallen, fragile, valuable, and potentially hazardous objects. This helps prevent entanglement, blockages, dragging, or tipping over by the robot that could cause personal injury or property damage.
4. OPERATION
4.1. Power On/Off and charging
- Connect the power supply to the self-emptying base, press and hold the "☐" button for 3
seconds to switch it on and wait for the power indicator light to remain steady, then dock the robot to the self-emptying base.
- For proper daily use, please keep the robot in charging state.
- Press and hold the "☐" button for 3 seconds to switch off the robot.
Note:
- When manually placing the robot on the self-emptying base, ensure the charging terminals are correctly aligned.
- Before the first cleaning session, ensure the robot's battery is fully charged to 100%.
- For first use, manually place the robot on the self-emptying base, and the robot will automatically switch on.
- The mops on this model are designed to swing outwards when the robot approaches edges such as walls, allowing it to reach into corners better and ensure a more thorough clean.
4.2. Pause/resume operation
- While the robot is cleaning, briefly press any button on the robot to pause operation.
- When the robot is paused, briefly press the “☐” button to resume cleaning.
4.3. Recharging
When the robot is powered on, briefly press the “☐” button on the robot to make it return to the self-emptying base from its current location for recharging.
4.4. Child Lock
- You can activate the child lock function using the APP. The robot will emit a sound to confirm that the child lock function is enabled.
- Once enabled, the buttons on the robot and self-emptying base will no longer be effective, and operations can only be performed through the APP to prevent pets or children from accidentally pressing buttons.
- To deactivate the child lock, use the APP again. After deactivation, the robot will emit a sound confirming that the child lock has been disabled.
4.5. Restore factory settings
When buttons become unresponsive or the robot cannot be switched off, try a factory reset. Press and hold both the “☐” button and “↑” button simultaneously for 7 seconds to restore factory settings.
4.6. Buttons and their functions
| Button | Operation | Function |
| [YYTS] | Press and hold for 3 seconds | Power On/Off |
| Briefly press once | Start cleaning | |
 | Briefly press once when the robot is on standby mode outside the self-emptying base | Start charging |
| Briefly press once when the robot is at the self-emptying base | Start dust collection | |
| Briefly press twice when the robot is at the self-emptying base | Start mopping | |
| Briefly press twice when the robot is on standby mode outside the self-emptying base | Start spot cleaning | |
| Press and hold for 3 seconds | Enter network configuration mode | |
| Press and hold for 15 seconds | Force hardware shutdown | |
| [4Y2T] | Press and hold for 7 seconds | Restore factory settings |
4.7. Indicator light guide
| Indicator light | Light effect | Meaning |
| Button indicator light | Off | Powered Off / Standby / Do not disturb |
| Gradually brightening blue | Switching on | |
| Solid blue | Normal status | |
| Slowly flashing blue | Repositioning / Charging / Drying | |
| Solid red | Low battery | |
| Flashing red | Fault | |
| Flashing blue | Live video enabled | |
| Fast flashing red | Entering network configuration | |
| Slow flashing red | Connecting to the network | |
| Self-emptying base indicator light | Solid red | Network connection successful |
| Off | Powered Off / Standby / Do not disturb | |
| Gradually brightening blue | Switching on | |
| Solid blue | Normal status | |
| Flashing red | Fault |
4.8. Mopping
- To ensure effective mopping, the robot is configured to return to the self-emptying base to clean the mop every 10 minutes during mopping. You can manually adjust the mop cleaning frequency in the App according to your needs.
- After the mopping task is complete and the robot vacuum cleaner returns to the self-emptying base, it will automatically clean the mop (this takes additional time).
4.9. Mop drying
After the mopping task is complete and the robot vacuum cleaner returns to the self-emptying base, it will automatically dry the mop (using warm air by default, which can be changed in the App if necessary). You can also manually start/stop mop drying via the App.
ENGLISH
4.10. Dust collection
- During or after the cleaning task, the robot will return to the self-emptying base to perform automatic dust collection.
- You can manually initiate the dust collection task via the App.
- Please ensure the dust bag in the self-emptying base is correctly installed and not full.
Note:
- Do not forcibly remove the robot during the mop cleaning process.
- Do not move the self-emptying base after the robot begins cleaning.
5. WI-FI CONNECTIVITY AND MOBILE APP

By scanning the following QR code you will be able to access the app download option and an instruction manual explaining how to pair your appliance
6. CLEANING AND MAINTENANCE
6.1 Cleaning the dust container and filter
Fig. 13
-
Open the robot's top cover, press the dust container release button to remove the dust container; remove the filter from the dust container and empty the dust.
-
To ensure effective filtration, it is recommended to clean and replace the filter regularly.
6.2 Cleaning the main brush
Fig. 14
- Press the left and right release buttons on the bottom cover and lift to remove the covers.
- Hold the main brush handle on the left side, lift and remove the main brush.
- Use appropriate tools to clean tangled hair or threads from the roller brush, then clean the roller brush and main brush cover with a soft cloth.
6.3 Cleaning the sensors
- Clean the linear laser transmitter window.
- Clean the cliff sensor.
- Clean the edge sensor.
6.4 Cleaning the self-emptying base
Fig. 15
- Lift the cleaning plate from the self-emptying base.
- Rinse the self-emptying base tray with water, dry it and replace.
6.5 Cleaning the drive wheel
Rotate the drive wheel forwards and backwards to remove foreign objects and clean with a soft cloth.
6.6 Cleaning the side brush
Remove the screw, remove the side brush; use appropriate tools to clean dust.
6.7 Replacing the dust bag
- Remove the dust tank cover. Fig. 16
- Pull out to remove the dust bag.
- Use a dry, soft cloth to clean the dust container area.
- Install a new dust bag. Replace the dust tank cover. Fig. 17
Note:
The black cotton on the left side of the dust bag is filter cotton; do not remove or discard it.
7. TROUBLESHOOTING
| Problem | Possible cause and solution |
| The robot vacuum cleaner does not switch on or does not clean. | The robot vacuum cleaner does not work when battery is low. Allow it to charge before operation. |
| The room temperature is below 0 °C or above 40 °C. | |
| The robot vacuum cleaner isn't charging or returning to the self-emptying base. | There are too many obstacles near the self-emptying base. Relocate the base to an obstacle-free area. |
| Clean the charging terminals of the robot vacuum cleaner and the self-emptying base. | |
| Make sure the robot vacuum cleaner is switched on. | |
| The robot vacuum cleaner is too far away from the self-emptying base. Place it closer and try again. | |
| The robot vacuum cleaner makes a strange noise during operation. | The main brush, side brush, or omnidirectional wheel are blocked or tangled. Stop the robot vacuum cleaner and clean them. |
ENGLISH
| The robot vacuum cleaner does not clean efficiently or doesn't pick up all the dirt. | The tank is full. Empty it and clear the high-efficiency filter if it is blocked. |
| The high-efficiency filter is blocked. Clean it. | |
| The main brush is blocked or tangled. Clean it. | |
| The robot vacuum cleaner could not connect to the Wi-Fi network. | Bad Wi-Fi signal. Check that the robot vacuum cleaner is located in an area with good Wi-Fi signal. |
| The Wi-Fi connection is unstable. Reset the router, check if there are any App updates, and try again. | |
| Make sure that your device mobile data are disabled to improve the linking process. | |
| The robot vacuum cleaner did not carry out the scheduled cleaning task. | Check if the robot vacuum cleaner is in Sleep mode and change mode. This option can be found on the general settings of the robot vacuum cleaner and allows you to define time slots in which the robot will not perform the scheduled cleaning tasks when in Sleep mode. |
| Ensure proper connection of the robot vacuum cleaner to the Wi-Fi: you will not be able to carry out scheduled cleaning without connection and with a low battery. | |
| The robot vacuum cleaner does not return to the self-emptying base after finishing Spot cleaning or changing the starting position. | The robot vacuum cleaner will map and calculate a new route after running in Spot cleaning mode or after changing its starting position. |
| If the self-emptying base is too far away from the robot vacuum cleaner, the latter won't be able to return to the base. Manually move the robot vacuum cleaner close to the self-emptying base. | |
| The robot vacuum cleaner does not resume cleaning. | Make sure the robot vacuum cleaner is not in Sleep mode, as it will not resume cleaning in this mode. |
| When manually placed in the self-emptying base, the robot will not resume cleaning. | |
| The robot vacuum cleaner is always offline. | Make sure the robot is successfully connected to the network and always in areas with a good Wi-Fi signal. |
| The connection between the smartphone and the robot vacuum cleaner failed. | Make sure the robot vacuum cleaner and the self-emptying base are in an area with good Wi-Fi signal, reset the router, and retry connection. |
Self-emptying base
| Problem | Possible cause and solution |
| The self-emptying base flashes in red. | The dust bag is not installed or incorrectly fitted. Check that the bag is correctly fitted. |
| The dust bag is full, or the dirt collection channel is blocked. Check if the dirt-disposal bag is full and if so, replace it with a new one. If the issue persists, check for foreign objects blocking the dirt collection channel of the self-emptying base. If so, unscrew the transparent lid and remove the obstruction. | |
| The fan of the self-emptying base doesn't start. Frequent dust collection can lead to overheating of the fan guard or failure. It is recommended to wait 30 minutes before resuming use. | |
| No indicator light turns on. | No power supply or damaged plug. Make sure the self-emptying base is connected to the mains and that the plug isn't damaged. Should the latter occur, please contact the official Cecotec Technical Support Service. |
8. COPYRIGHT
The intellectual property rights over the texts in this manual belong to CECOTEC INNOVACIONES, S.L. All rights reserved. The contents of this publication may not, in whole or in part, be reproduced, stored in a retrieval system, transmitted, or distributed by any means (electronic, mechanical, photocopying, recording or similar) without the prior authorization of CECOTEC INNOVACIONES, S.L.
9. SIMPLIFIED EU DECLARATION OF CONFORMITY
CE Cecotec Innovations hereby declares that the robot vacuum cleaner model EU01_114479 - Conga X100 is in conformity with the Radio Equipment Directive 2014/53/EU.
The full text of the EU Declaration of Conformity can be found on the following website: https://cecotec.es/es/information/declaration-of-conformity
FRANÇAIS
1. PIÈCES ET COMPOSANTS
5. CONNETTIVITÀ WI-FI E APP

https://storececotec.it/it/information/declaration-of-conformity
1. PEÇAS E COMPONENTES
https://cecotec.pt/pt/information/declaration-of-conformity
NEDERLANDS
1. ONDERDELEN EN COMPONENTEN
https://cecotec.es/es/information/declaration-of-conformity
1. CZĘŚCI I KOMPONENTY
https://cecotec.es/es/information/declaration-of-conformity
ΕΛΛΗΝΙΚΑ
1. MEPH KAI E≡APTHMATA
https://cecotec.es/es/information/declaration-of-conformity
CATALÀ
1. PECES I COMPONENTS
Vista frontal del robot (coberta tancada)
Fig. 1
https://cecotec.es/ca/information/declaration-of-conformity
https://cecotec.es/es/information/declaration-of-conformity
| QLKSHM | LHJALO LMTHJALI BIBESLA | |
| QSNKMJALI YI GHTM JETI ALI AYI TOWBIRJA YI YI YI YI YI YI YI YI YI YI YI YI YI YI YI YI YI YI YI YI YI YI YI YI YI YI YI YI YI YI YI YI YI YI YI YI YI YI YI YI YI YI YI YI YI YI YI YI YI YI Yi | YOTCSM IZAFCHNIA QILAHYF QIYI YI YI YI YI YI YI YI YI YI YI YI YI YI YI YI YI YI YI YI YI YI YI YI YI YI YI YI YI YI YI YI YI YI YI YI YI YI YI YI YI YI YI YI YI YI YI YI YI YIYI YI YI YI YI YI YI YI YI YI YI YI YI YI YI YI YI YI YI YI YI YI YI YI YI YI YI YI YI YI YI YI YI YI YI YI YI YI YI YI YI YI YI YI YI YI YI YI YIYIYI YI YI YI YI YI YI YI YI YI YI YI YI YI YI YI YI YI YI YI YI YI YI YI YI YI YI YI YI YI YI YI YI YI YI YI YI YI YI YI YI YI YI YI YI YI YI YI YI | |
| TJRD 40 Nm IJLOA WYI YI YI YI YI YI YI YI YI YI YI YI YI YI YI YI YI YI YI YI YI YI YI YI YI YI YI YI YI YI YI YI YI YI YI YI YI YI YI YI YI YI YI YI YI YI YI YI YI YIIYI YI YI YI YI YI YI YI YI YI YI YI YI YI YI YI YI YI YI YI YI YI YI YI YI YI YI YI YI YI YI YI YI YI YI YI YI YI YI YI YI YI YI YI YI YI YI YI YI YiYI YI YI YI YI YI YI YI YI YI YI YI YI YI YI YI YI YI YI YI YI YI YI YI YI YI YI YI YI YI YI YI YI YI YI YI YI YI YI YI YI YI YI YI YI YI YI YI YI YlYI YI YI YI YI YI YI YI YI YI YI YI YI YI YI YI YI YI YI YI YI YI YI YI YI YI YI YI YI YI YI YI YI YI YI YI YI YI YI YI YI YI YI YI YI YI YI YI YI YfYI YI YI YI YI YI YI YI YI YI YI YI YI YI YI YI YI YI YI YI YI YI YI YI YI YI YI YI YI YI YI YI YI YI YI YI YI YI YI YI YI YI YI YI YI YI YI YI YI YFYI YI YI YI YI YI YI YI YI YI YI YI YI YI YI YI YI YI YI YI YI YI YI YI YI YI YI YI YI YI YI YI YI YI YI YI YI YI YI YI YI YI YI YI YI YI YI YI YI YVYI YI YI YI YI YI YI YI YI YI YI YI YI YI YI YI YI YI YI YI YI YI YI YI YI YI YI YI YI YI YI YI YI YI YI YI YI YI YI YI YI YI YI YI YI YI YI YI YI YIfYI YI YI YI YI YI YI YI YI YI YI YI YI YI YI YI YI YI YI YI YI YI YI YI YI YI YI YI YI YI YI YI YI YI YI YI YI YI YI YI YI YI YI YI YI YI YI YI YI YIFYI YI YI YI YI YI YI YI YI YI YI YI YI YI YI YI YI YI YI YI YI YI YI YI YI YI YI YI YI YI YI YI YI YI YI YI YI YI YI YI YI YI YI YI YI YI YI YI YI Y!YIYIYIYIYIYIYIYIYIYIYIYIYIYIYIYIYIYIYIYIYIYIYIYIYIYIYIYIYIYIYIYIYIYIYIYIYIYIYIYIYIYIYIYIYIYIYIYIYIYIYiYiYiYiYiYiYiYiYiYiYiYiYiYiYiYiYiYiYiYiYiYiYiYiYiYiYiYiYiYiYiYiYiYiYiYiYiYiYiYiYiYiYiYiYiYiYiYiYiYiYjYiYiYiYiYiYiYiYiYiYiYiYiYiYiYiYiYiYiYiYiYiYiYiYiYiYiYiYiYiYiYiYiYiYiYiYiYiYiYiYiYiYiYiYiYiYiYiYiYiYnYiYiYiYiYiYiYiYiYiYiYiYiYiYiYiYiYiYiYiYiYiYiYiYiYiYiYiYiYiYiYiYiYiYiYiYiYiYiYiYiYiYiYiYiYiYiYiYiYiYsYiYiYiYiYiYiYiYiYiYiYiYiYiYiYiYiYiYiYiYiYiYiYiYiYiYiYiYiYiYiYiYiYiYiYiYiYiYiYiYiYiYiYiYiYiYiYiYiYiYkIIYiYiYiYiYiYiYiYiYiYiYiYiYiYiYiYiYiYiYiYiYiYiYiYiYiYiYiYiYiYiYiYiYiYiYiYiYiYiYiYiYiYiYiYiYiYiYiYiYiY/IIYiYiYiYiYiYiYiYiYiYiYiYiYiYiYiYiYiYiYiYiYiYiYiYiYiYiYiYiYiYiYiYiYiYiYiYiYiYiYiYiYiYiYiYiYiYiYiYiYi | QRSIMN KIMN JHSTM JHSTM JHSTM JHSTM JHSTM JHSTM JHSTM JHSTM JHSTM JHSTM JHSTM JHSTM JHSTM JHSTM JHSTM JHSTM JHSTM JHSTM JHSTM JHSTM JHSTM JHSTM JHSTM JHSTM JHSTM JHST M JHSTM JHSTM JHSTM JHSTM JHSTM JHSTM JHSTM JHSTM JHSTM JHSTM JHSTM JHSTM JHSTM JHSTM JHSTM JHSTM JHSTM JHSTM JHSTM JHSTM JHSTM JHSTM JHSTM JHSTM JHSTN JHSTM JHSTM JHSTM JHSTM JHSTM JHSTM JHSTM JHSTM JHSTM JHSTM JHSTM JHSTM JHSTM JHSTM JHSTM JHSTM JHSTM JHSTM JHSTM JHSTM JHSTM JHSTM JHSTM JHSTM JHISTM JHSTM JHSTM JHSTM JHSTM JHSTM JHSTM JHSTM JHSTM JHSTM JHSTM JHSTM JHSTM JHSTM JHSTM JHSTM JHSTM JHSTM JHSTM JHSTM JHSTM JHSTM JHSTM JHSTM JHSTM JHISTN JHSTM JHSTM JHSTM JHSTM JHSTM JHSTM JHSTM JHSTM JHSTM JHSTM JHSTM JHSTM JHSTM JHSTM JHSTM JHSTM JHSTM JHSTM JHSTM JHSTM JHSTM JHSTM JHSTM JHSTM JHITM JHSTM JHSTM JHSTM JHSTM JHSTM JHSTM JHSTM JHSTM JHSTM JHSTM JHSTM JHSTM JHSTM JHSTM JHSTM JHSTM JHSTM JHSTM JHSTM JHSTM JHSTM JHSTM JHSTM JHSTM JH17M JHSTM JHSTM JHSTM JHSTM JHSTM JHSTM JHSTM JHSTM JHSTM JHSTM JHSTM JHSTM JHSTM JHSTM JHSTM JHSTM JHSTM JHSTM JHSTM JHSTM JHSTM JHSTM JHSTM JHSTM JH27M JHSTM JHSTM JHSTM JHSTM JHSTM JHSTM JHSTM JHSTM JHSTM JHSTM JHSTM JHSTM JHSTM JHSTM JHSTM JHSTM JHSTM JHSTM JHSTM JHSTM JHSTM JHSTM JHSTM JHSTM J HSTM JHSTM JHSTM JHSTM JHSTM JHSTM JHSTM JHSTM JHSTM JHSTM JHSTM JHSTM JHSTM JHSTM JHSTM JHSTM JHSTM JHSTM JHSTM JHSTM JHSTM JHSTM JHSTM JHSTM JHSTM J H17M JHSTM JHSTM JHSTM JHSTM JHSTM JHSTM JHSTM JHSTM JHSTM JHSTM JHSTM JHSTM JHSTM JHSTM JHSTM JHSTM JHSTM JHSTM JHSTM JHSTM JHSTM JHSTM JHSTM JHSTMJHSTM JHSTM JHSTM JHSTM JHSTM JHSTM JHSTM JHSTM JHSTM JHSTM JHSTM JHSTM JHSTM JHSTM JHSTM JHSTM JHSTM JHSTM JHSTM JHSTM JHSTM JHSTM JHSTM JHSTM JHSTMJH17M JHSTM JHSTM JHSTM JHSTM JHSTM JHSTM JHSTM JHSTM JHSTM JHSTM JHSTM JHSTM JHSTM JHSTM JHSTM JHSTM JHSTM JHSTM JHSTM JHSTM JHSTM JHSTM JHSTM JHSTmJHSTM JHSTmJHSTmJHSTmJHSTmJHSTmJHSTmJHSTmJHSTmJHSTmJHSTmJHSTmJHSTmJHSTmJHSTmJHSTmJHSTmJHSTmJHSTmJHSTmJHSTmJHSTmJHSTmJHSTmJHSTmJHSTmJHSTm | |
| قسنكملا توبورalcيöl قي ئنتلا عادب قي ئابر مكلا لودجملا قي ئابر مكلا | عضولا يف قي توبورلا قي ئابر مكلا قسنكملا نأ نم دCAFت قماعلا تادادعالا يف رايخلا اذه دجوي. عضولا روي غتب مقو قطانم ديدحسب كل حسستيو قي توبورلا ؤي ئابر مكلا قسنكملا قارجاب قي توبورلا ؤي ئابر مكلا قسنكملا اديف قوقت نل قيينز يلييللا عضولا يف نوكت ادنع قلودجم في ظنت تایلمع | |
| رايتالاب قي توبورلا ؤي ئابر مكلا قسنكملا لى يصروت نم دCAFات قلودجملا في ئنتلا تایلمع عارج ىلع ارداق نوكي نل ئي ئابر مكلا قيراطبلا يوتسم ضافخنا دنع وأ تنترتن إلاب لاصettaلا مzeug دنع | ||
| قسنكملا توبور دوعي ال يتلا قداقلا ىل! ئي ئابر مكلا دعب اسفمن غيرفعت بوقت وأ عقبلا في ئنت نم عامتنلا. يلولالا اعضوم روي غت | راسم باسح وقتiper خ مسرب ؤي ئابر مكلا قسنكملا توبورلا موق يس عضوم روي غت دعب وأ ي عضوملا عضولا يف قي ئنتلا دعب ديد لزنملا | |
| نع اдж قدي عب اسفمن غيرفعت بوقت يتلا قدعاقلا تنالك اذا لقنب بق. أي ئالت قدعلا نم نكمت تلف، توبورلا قسنكم قوقت يتلا قدعاقلا ىل! أيودي قي توبورلا ؤي ئابر مكلا قسنكملا اسفمن غيرفعت | ||
| قسنكملا توبور فسن أتسي ال في ئنتلا ؤي ئابر مكلا | عضو يف تسيل ؤي توبورلا ؤي ئابر مكلا قسنكملا نأ نم دCAFات عضولا اذه يف قي ئنتلا فن أنتست نل امن! ئي ح، نوكسلا | |
| فن أنتسي نلف، أيودي يتاتلا غيرفعتلا قدعاق ىلع عضو دنع في ئنتلا | ||
| قي ئابر مكلا توبورلا قسنكم-amياد نترت Estoniaلاب ئصItem ريغ | تلكىشلاب ئلصتم قي توبورلا ؤي ئابر مكلا قسنكملا نأ نم دCAFات Wi -Fi قديچ | |
| كغتاه نيې لاصتالا لشف توبورلا قسنكم للومجلا ؤي ئابر مكلا | غيرفعتلا قدعاقو ؤي توبورلا ؤي ئابر مكلا قسنكملا دوج نم دCAFات Wi -Fi قراشرا قتاد قютنم يف يتاتلا يرخا قرم لاصتالا لواح 戦يجوتلا | |
يعتاذ غارف! تدعاق
https://cecotec.es/es/information/declaration-of-conformity
www.cecotec.es
- SOMMAIRE
- ENGLISH
- PARTS AND COMPONENTS
- Front view of the robot (closed cover)
- Fig. 1
- Bottom view of the robot
- Fig. 2
- Main view of the robot (open cover)
- Fig. 3
- Front view of the self-emptying base
- Fig. 4
- Rear view of the self-emptying base
- Fig. 5.
- Top view of the self-emptying base
- Fig. 6.
- Docking port
- Fig. 7
- Accessories list
- Fig. 8
- Note:
- BEFORE USE
- Box content
- PREPARATION AND INSTALLATION
- Installing the self-emptying base
- Preparing/Emptying the water tanks
- Installing the spin mop holder
- Environment preparation
- OPERATION
- Power On/Off and charging
- Pause/resume operation
- Recharging
- Child Lock
- Restore factory settings
- Indicator light guide
- Mopping
- Mop drying
- Dust collection
- WI-FI CONNECTIVITY AND MOBILE APP
- CLEANING AND MAINTENANCE
- Cleaning the dust container and filter
- Cleaning the main brush
- Cleaning the sensors
- Cleaning the self-emptying base
- Cleaning the drive wheel
- Cleaning the side brush
- Replacing the dust bag
- TROUBLESHOOTING
- COPYRIGHT
- SIMPLIFIED EU DECLARATION OF CONFORMITY
- FRANÇAIS
- PIÈCES ET COMPOSANTS
- CONNETTIVITÀ WI-FI E APP
- PEÇAS E COMPONENTES
- NEDERLANDS
- ONDERDELEN EN COMPONENTEN
- CZĘŚCI I KOMPONENTY
- ΕΛΛΗΝΙΚΑ
- MEPH KAI E≡APTHMATA
- CATALÀ
- PECES I COMPONENTS
Brand : CECOTEC
Model : Conga X100 X Treme
Category : Robot vacuum