
G1X - Guitar effects pedal ZOOM - Free user manual and instructions
Find the device manual for free G1X ZOOM in PDF.
| Product Type | Guitar effects pedal with built-in expression pedal |
| Brand | ZOOM |
| Model | G1X |
| Dimensions (L x W x H) | 234 mm x 155 mm x 52 mm |
| Weight (without batteries) | 600 g |
| Power Supply | 9 V DC, 300 mA power adapter (center negative, ZOOM AD-0006) or 4 AA alkaline batteries |
| Battery Life | Approximately 12 hours with alkaline batteries |
| Number of Effects | 54 effects (compressor, wah, distortion, modulation, delay, reverb, etc.) |
| Simultaneous Effects Modules | Up to 8 modules (including ZNR and amp simulator) |
| Number of Patches | 80 patches (40 user patches + 40 preset patches) |
| Patch Memory | User area: 10 patches x 4 banks (A-d); Preset area: 10 patches x 4 banks (0-3) |
| Special Features | Built-in chromatic tuner, built-in rhythms (40 patterns), assignable expression pedal, auto power on by jack insertion |
| Connections | Mono jack input (INPUT), stereo jack output (OUTPUT/PHONES), DC input |
| Headphone Output | Yes, via OUTPUT/PHONES jack |
| Sampling Frequency | 96 kHz |
| A/D and D/A Conversion | 24-bit, 128x oversampling |
| Internal Processing | 32-bit |
| Frequency Response | 20 Hz - 40 kHz (+1.0/-4.0 dB, 10 kΩ load) |
| Nominal Input Level | -20 dBm |
| Input Impedance | 470 kΩ |
| Max Output Level (Line) | +3 dBm (load ≥ 10 kΩ) |
| Headphone Output Level | 20 mW + 20 mW (32 Ω load) |
| Included Accessories | Built-in expression pedal (G1X only) |
| Care and Cleaning | Use a soft, dry cloth (slightly damp if necessary). Do not use abrasive products, wax, or solvents. |
| Safety | Use only the specified adapter. Do not open the casing. Avoid extreme temperatures, humidity, dust, and shocks. |
| Spare Parts and Reparability | Contact ZOOM customer service. The device contains no user-serviceable parts. |
| General Information | Manufactured by ZOOM CORPORATION, Japan. Website: www.zoom.co.jp |
Frequently Asked Questions - G1X ZOOM
User questions about G1X ZOOM
0 question about this device. Answer the ones you know or ask your own.
Ask a new question about this device
Download the instructions for your Guitar effects pedal in PDF format for free! Find your manual G1X - ZOOM and take your electronic device back in hand. On this page are published all the documents necessary for the use of your device. G1X by ZOOM.
USER MANUAL G1X ZOOM
Thank you for selecting the ZOOM G1/G1X (hereafter simply called the "G1/G1X"). Please take the time to read this manual carefully to get the most out of this product and to ensure optimum performance and reliability.
Keep this manual at hand for future reference.
Contents
SAFETY PRECAUTIONS / Usage
Precautions 2
Terms Used in This Manual. 3
Controls and Functions /
Connections 4
Selecting a Patch 6
Using the Tuner 8
Using the Rhythm Function 10
Editing a Patch 12
Storing/Copying Patches 14
Changing the Way Patches Are
Called Up 16
Using a Foot Switch or Pedal ....16
Using the foot switch (FS01)
(G1 only) 16
Using the expression pedal .... 17
Effect Types and Parameters ....18
Linking Effects 18
Explanation of symbols 18
PATCH LEVEL 19
COMP/EFX (Compressor/EFX)
module 19
DRIVE module 19
EQ module 21
ZNR/AMP (ZNR/Amp Simulator)
module 21
MODULATION module 22
DELAY module 23
REVERB module 241
G1/G1X Preset Pattern 25
Restoring Factory Defaults 25
Special Features of G1X 26
[PEDAL ASSIGN] key
Section 26
Adjusting the expression
pedal 26
Specifications 27
Troubleshooting 27
SAFETY PRECAUTIONS / Usage Precautions
SAFETY PRECAUTIONS
In this manual, symbols are used to highlight warnings and cautions for you to read so that accidents can be prevented. The meanings of these symbols are as follows:

This symbol indicates explanations about extremely dangerous matters. If users ignore this symbol and handle the device the wrong way, serious injury or death could result.

This symbol indicates explanations about dangerous matters. If users ignore this symbol and handle the device the wrong way, bodily injury and damage to the equipment could result.
Please observe the following safety tips and precautions to ensure hazard-free use of the G1/G1X.

Power requirements
Since power consumption of this unit is fairly high, we recommend the use of an AC adapter whenever possible. When powering the unit from batteries, use only alkaline types.
[AC adapter operation]
- Be sure to use only an AC adapter which supplies 9 V DC, 300mA and is equipped with a "center minus" plug (Zoom AD-0006). The use of an adapter other than the specified type may damage the unit and pose a safety hazard.
- Connect the AC adapter only to an AC outlet that supplies the rated voltage required by the adapter.
- When disconnecting the AC adapter from the AC outlet, always grasp the adapter itself and do not pull at the cable.
- During lightning or when not using the unit for an extended period, disconnect the AC adapter from the AC outlet.
[Battery operation]
- Use four conventional IEC R6 (size AA) batteries (alkaline).
- The G1/G1X cannot be used for recharging.
- Pay close attention to the labelling of the battery to make sure you choose the correct type.
- When not using the unit for an extended period, remove the batteries from the unit.
- If battery leakage has occurred, wipe the battery compartment and the battery terminals carefully to remove all remnants of battery fluid.
- While using the unit, the battery compartment cover should be closed.
![ZOOM G1X - [Battery operation] - 1](/content/2025/01/152205/images/db3890840aae6a6f6d576c6ee7ccf4d30fde6e78f5c235b26431e542543a9688.jpg)
Environment
To prevent the risk of fire, electric shock or malfunction, avoid using your G1/G1X in environments where it will be exposed to:
Extreme temperatures
- Heat sources such as radiators or stoves
High humidity or moisture
- Excessive dust or sand
- Excessive vibration or shock
Handling
Warning Never place objects filled with liquids, such as vases, on the G1/G1X since this can cause electric shock.
- Do not place naked flame sources, such as lighted candles, on the G1/G1X since this can cause fire.
The G1/G1X is a precision instrument. Do not exert undue pressure on the keys and other controls. Also take care not to drop the unit, and do not subject it to shock or excessive pressure.
Take care that no foreign objects (coins or pins etc.) or liquids can enter the unit.
Connecting cables and input and output jacks
You should always turn off the power to the G1/G1X and all other equipment before connecting or disconnecting any cables. Also make sure to disconnect all connection cables and the power cord before moving the G1/G1X.
Alterations
Warning Never open the case of the G1/G1X or attempt to modify the product in any way since this can result in damage to the unit.
Volume
Caution Do not use the G1/G1X at a loud volume for a long time since this can cause hearing impairment.
Usage Precautions
Electrical interference
For safety considerations, the G1/G1X has been designed to provide maximum protection against the emission of electromagnetic radiation from inside the device, and protection from external interference. However, equipment that is very susceptible to interference or that emits powerful electromagnetic waves should not be placed near the G1/G1X, as the possibility of interference cannot be ruled out entirely.
With any type of digital control device, the G1/G1X included, electromagnetic interference can cause malfunctioning and can corrupt or destroy data. Care should be taken to minimize the risk of damage.
Cleaning
Use a soft, dry cloth to clean the G1/G1X. If necessary, slightly moisten the cloth. Do not use abrasive cleanser, wax, or solvents (such as paint thinner or cleaning alcohol), since these may dull the finish or damage the surface.
Please keep this manual in a convenient place for future reference.
Terms Used in This Manual
This section explains some important terms that are used throughout the G1/G1X documentation.
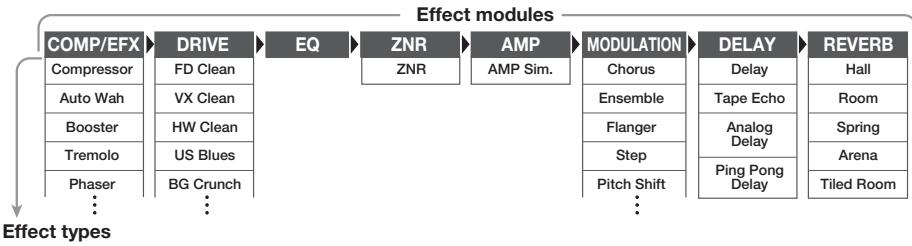
IN COMP/EFX DRIVE EQ ZNR AMP MODULATION DELAY REVERB OUT
■Effect module
As shown in the illustration above, the G1/G1X can be thought of as a combination of several single effects. Each such effect is referred to as an effect module. In addition to modules such as DRIVE and MODULATION, the G1/G1X also provides a module for noise reduction and amp simulation (ZNR/AMP). Parameters such as effect intensity can be adjusted for each module individually, and modules can be switched on and off.
■ Effect type
Some effect modules have several different effects which are referred to as effect types. For example, the MODULATION module comprises chorus, flanger, pitch shifter, and other effect types. Only one of these can be selected at a time.
■ Effect parameter
All effect modules have various parameters that can be adjusted. These are called effect parameters. When thinking of an effect module as a compact effect, the parameters change the tone and effect intensity similar to the knobs on the device.
Patch
In the G1/G1X, effect module combinations are stored and called up in units referred to as patches. A patch comprises information about the on/off
status of each effect module, about the effect type used in each module, and about effect parameter settings. The internal memory of the G1/G1X can store up to 80 patches.
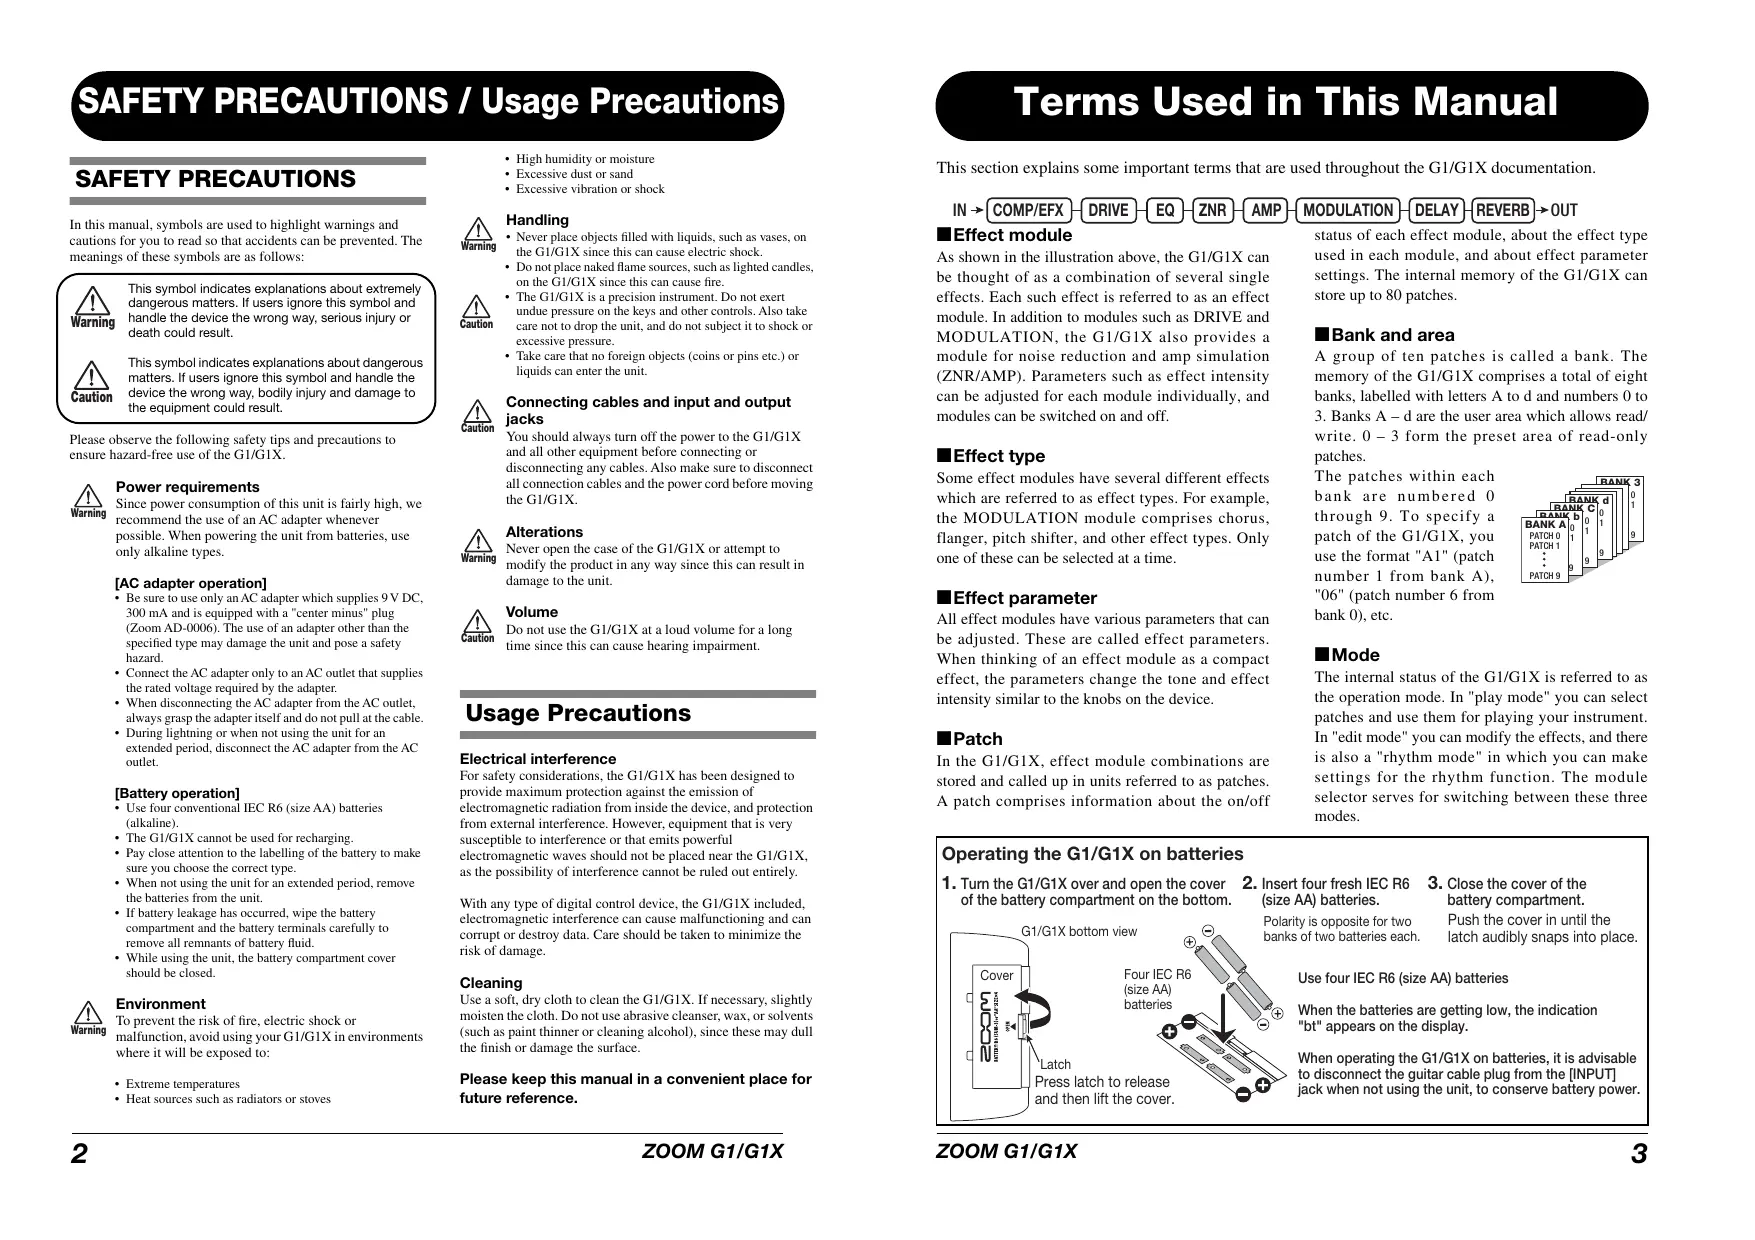
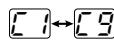
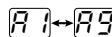
■ Bank and area
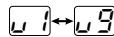
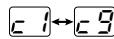
A group of ten patches is called a bank. The memory of the G1/G1X comprises a total of eight banks, labelled with letters A to d and numbers 0 to 3. Banks A - d are the user area which allows read/write. 0 - 3 form the preset area of read-only patches.
The patches within each bank are numbered 0 through 9. To specify a patch of the G1/G1X, you use the format "A1" (patch number 1 from bank A), "06" (patch number 6 from bank 0), etc.
Mode
The internal status of the G1/G1X is referred to as the operation mode. In "play mode" you can select patches and use them for playing your instrument. In "edit mode" you can modify the effects, and there is also a "rhythm mode" in which you can make settings for the rhythm function. The module selector serves for switching between these three modes.
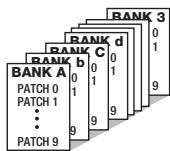
Operating the G1/G1X on batteries
-
Turn the G1/G1X over and open the cover of the battery compartment on the bottom.
-
Insert four fresh IEC R6 (size AA) batteries.
-
Close the cover of the battery compartment.
Polarity is opposite for two banks of two batteries each.
Push the cover in until the latch audibly snaps into place.
Use four IEC R6 (size AA) batteries
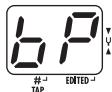
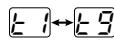
When the batteries are getting low, the indication "bt" appears on the display.
When operating the G1/G1X on batteries, it is advisable to disconnect the guitar cable plug from the [INPUT] jack when not using the unit, to conserve battery power.
Controls and Functions / Connections
This section describes the names and functions of all parts of the G1 and G1X. Functions that are special to the G1X are explained on page 26. Please also refer to that section.
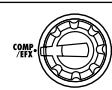
Module selector
Switches between play mode, edit mode, and rhythm mode. In edit mode, the knob selects the module for operation.


In play mode and rhythm mode, this key serves to start and stop the rhythm pattern. In edit mode, the key serves to select the module to control with the pedal.
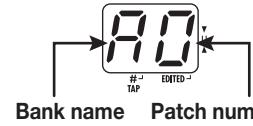
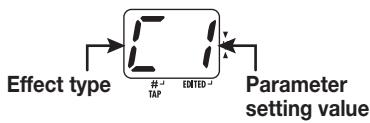
Display
Shows patch numbers, setting values, and other information for operating the G1/G1X.
When operating the G1/G1X on batteries, it is advisable to disconnect the guitar cable plug from the [INPUT] jack when not using the unit, to conserve battery power.
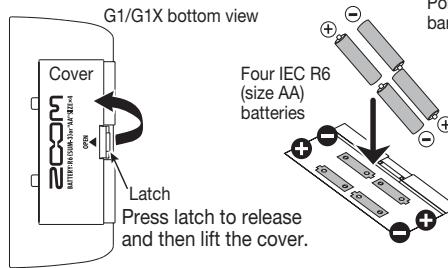
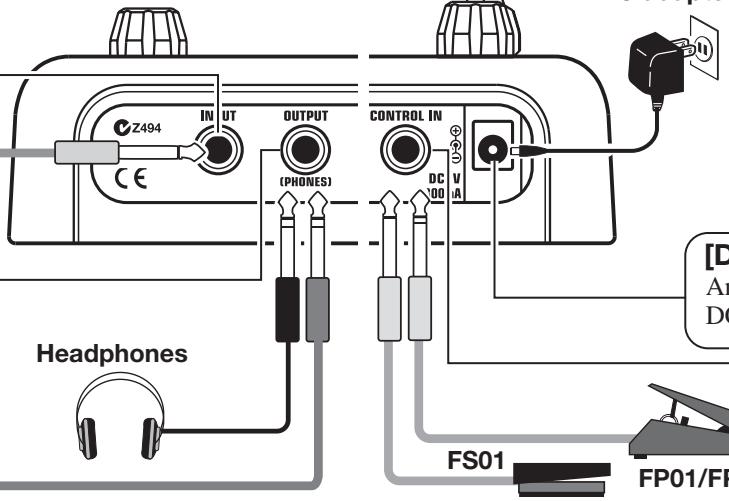
[INPUT] jack
Serves for connecting the guitar. When operating the G1/G1X on batteries, inserting the guitar cable plug into this jack will turn the unit on.
[OUTPUT/PHONES] jack
This stereo phone jack serves for connection to the guitar amplifier. It is also possible to use a Y cable for sending the output to two amplifiers, or to plug a pair of stereo headphones into this jack.
Guitar amplifiers
![ZOOM G1X - [OUTPUT/PHONES] jack - 1](/content/2025/01/152205/images/0a98d3b56cf865b57127508eeb5e88c2f89bf6f3a233a38dd1e997af6d02b202.jpg)
![ZOOM G1X - [OUTPUT/PHONES] jack - 2](/content/2025/01/152205/images/4438dfb5a0d6505e1ea6258db51042d61afd03a7f10660ad1d9238c7eaebe49c.jpg)
Top Panel (G1X)
![ZOOM G1X - [OUTPUT/PHONES] jack - 3](/content/2025/01/152205/images/c8f9b3352fac278c81c6cea967daa36044c34298abfa7c028d4b3910c0ad5f3d.jpg)
![ZOOM G1X - [OUTPUT/PHONES] jack - 4](/content/2025/01/152205/images/60a457fcf4b187178e8366102130d856c58344e8ba14c74dfd9e3d48b4089bea.jpg)
GUTBAR EFFECTS PEDAR G1X
![ZOOM G1X - [OUTPUT/PHONES] jack - 5](/content/2025/01/152205/images/9c3f6e564b706a05ae6e8f97b2797500458204d078036faa142b06b8663df73e.jpg)
![ZOOM G1X - [OUTPUT/PHONES] jack - 6](/content/2025/01/152205/images/c613e4f8c916f2f8be6326b8c8f9dab16131da474238922f725cb491d5a882fb.jpg)
![ZOOM G1X - [OUTPUT/PHONES] jack - 7](/content/2025/01/152205/images/ec2b9198bf28b40328a3abae83eb66eaba3ab48fdb774a2e74bf82765182c150.jpg)
![ZOOM G1X - [OUTPUT/PHONES] jack - 8](/content/2025/01/152205/images/53398c306a27edd8d39c018fc3db3081b39fd0c51df2c9df7046ec7c18faa816.jpg)
![ZOOM G1X - [OUTPUT/PHONES] jack - 9](/content/2025/01/152205/images/d65c17f296ed1f529da7a7a6a080254282a73e27005c2f4e55b94b6356305fe0.jpg)
![ZOOM G1X - [OUTPUT/PHONES] jack - 10](/content/2025/01/152205/images/113688aeb651b1effdbb4d1a0b252e9aa31aa492b218dcd6cfc9a76718a85f80.jpg)
![ZOOM G1X - [OUTPUT/PHONES] jack - 11](/content/2025/01/152205/images/8269840a199a217ea3a0dbec7f19dce133a3acf5b25fea4853b32abd297f3d4e.jpg)
![ZOOM G1X - [OUTPUT/PHONES] jack - 12](/content/2025/01/152205/images/142eae03cfc54844aa028d0b35fee4cd85303281500152262248911253641ff4.jpg)
![ZOOM G1X - [OUTPUT/PHONES] jack - 13](/content/2025/01/152205/images/4f0aca3f3f64a93f928bab555aca75db747d3e0d07b81759c24c4829739b3d90.jpg)
![ZOOM G1X - [OUTPUT/PHONES] jack - 14](/content/2025/01/152205/images/f0301314926dcdd79ddb86881d5d4e678299be4e55a6512271ad98c364e78ba0.jpg)
![ZOOM G1X - [OUTPUT/PHONES] jack - 15](/content/2025/01/152205/images/3cc10d01599c975cb8a775d69cde9472266594df76a4a4c7fefc390a37bbaf0d.jpg)
![ZOOM G1X - [OUTPUT/PHONES] jack - 16](/content/2025/01/152205/images/534a57d8064a11ac0815e49db40ce049f58113c14c1381f08409ded871238861.jpg)
![ZOOM G1X - [OUTPUT/PHONES] jack - 17](/content/2025/01/152205/images/ff6fce207d037a9dd9d4da69cef43ad67cbd2f2dfe08ba593c46d8cc7a9c70e3.jpg)
![ZOOM G1X - [OUTPUT/PHONES] jack - 18](/content/2025/01/152205/images/f0d3b2a9f0c5e83033404c6da6a38916dc80d9e9271ea645ac011a5e7d009363.jpg)
![ZOOM G1X - [OUTPUT/PHONES] jack - 19](/content/2025/01/152205/images/698927081e38f0acbf94313a61bf32b25df59089b52c0bec920231d2b06c5e38.jpg)
![ZOOM G1X - [OUTPUT/PHONES] jack - 20](/content/2025/01/152205/images/aa5327c8daf6447f79d4a5ea6498b8e6d2020de4404e4912398ed6f981cee6a6.jpg)
![ZOOM G1X - [OUTPUT/PHONES] jack - 21](/content/2025/01/152205/images/1ee24b26a254184808e31d0b3f241fa72a5b64e56490ea1f56a9e7d522927527.jpg)
![ZOOM G1X - [OUTPUT/PHONES] jack - 22](/content/2025/01/152205/images/0972be944fd46f57faac0c04fe460a225e62b9edc8dd1fa7b613c3bc12f03c8b.jpg)
![ZOOM G1X - [OUTPUT/PHONES] jack - 23](/content/2025/01/152205/images/958d895a66ab2232dc90cfb55fcdb6007fc445a0dba0fcf9f0af8b7c3fb66ece.jpg)
![ZOOM G1X - [OUTPUT/PHONES] jack - 24](/content/2025/01/152205/images/429c6cac3c0b91208c9db3a37da55602d42800a5ea5119c1578b32996aa62e70.jpg)
![ZOOM G1X - [OUTPUT/PHONES] jack - 25](/content/2025/01/152205/images/f2224e42be9a3aba257e2683390e0bba54ac5b1fa8991c78acf66db17a1bc03e.jpg)
![ZOOM G1X - [OUTPUT/PHONES] jack - 26](/content/2025/01/152205/images/f24277ca9fd528fd149901a75fd0b7c30a68fa2ee08accffe4b51e1493867af7.jpg)
expression pedal.
[BANK UP·TAP] key
In play mode, the key switches to the next higher bank. In other modes, the key lets you manually specify the rhythm pattern tempo and other parameters related to timing and cycle.
![ZOOM G1X - [BANK UP·TAP] key - 1](/content/2025/01/152205/images/ea2560d08686150f5287597f9d34c83df9e0bbb84587f51699e78dfcc3ec9bb1.jpg)
foot switches
These switches are used for selecting patches, controlling the tuner, and other functions.
Rear Panel (G1)
AC adapter
Differences between G1X and G1
G1X special features that differ from G1:
- Equipped with expression pedal as standard feature ( p.26)
- [PEDAL ASSIGN] key on top panel allows selection of module to be controlled with expression pedal ( p. 26)
- No [CONTROL IN] jack on rear panel; optional foot switch (FS01) or expression pedal (FP01/FP02) cannot be used.
[DC IN] jack
An AC adapter (ZOOM AD-0006) with a rated output of 9 volts DC, 300mA (center minus plug) can be plugged into this jack.
[CONTROL IN] jack (G1 only)
Serves for connection of the optional foot switch (FS01) or expression pedal (FP01/FP02).
Selecting a Patch
To try out the various effects of the G1/G1X, we recommend that you simply play your instrument while switching patches.
1 Turn power on
- When using the G1/G1X on batteries, plug a shielded cable with mono phone plug into the [INPUT] jack on the rear panel of the G1/G1X.
- When using the G1/G1X with the AC adapter, plug the adapter into the outlet and plug the cable from the adapter into the [DC IN] jack on the G1/G1X.
- Turn the guitar amplifier on and adjust the volume to a suitable position.
Set the G1/G1X to play mode
- If the Module selector is set to a position other than "PLAY", set it to "PLAY".
The currently selected bank and patch number are shown on the display.
HINT
Immediately after turning the G1/G1X on, the unit will be in play mode, even if the Module selector is set to a position other than "PLAY".
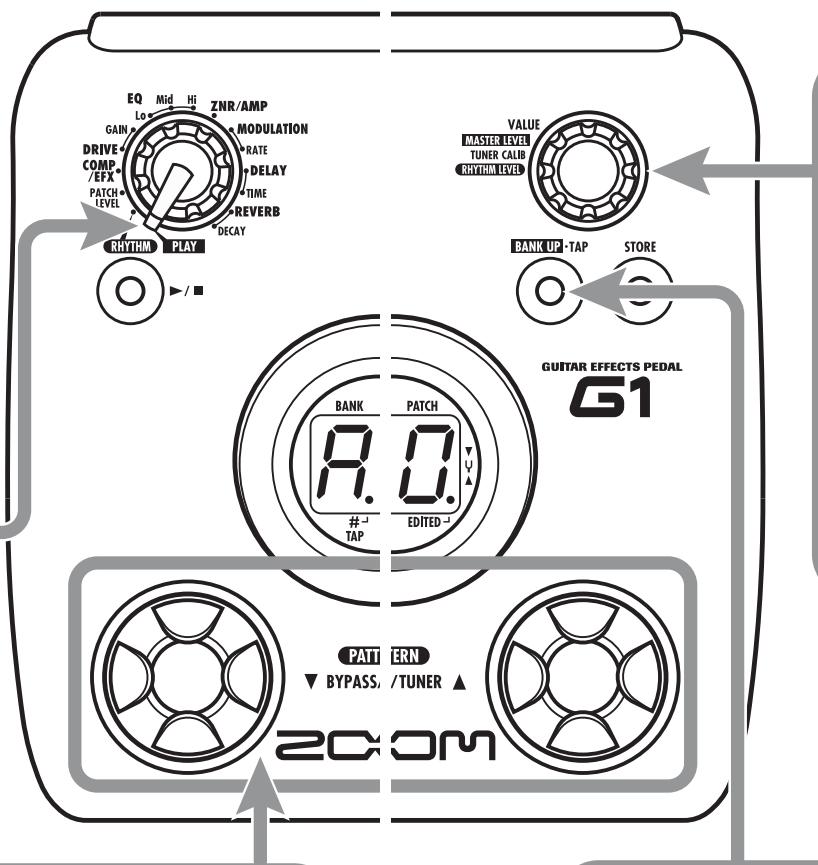
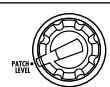
Adjust the master level
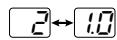
- To adjust the master level in play mode, you can use the [VALUE] knob.
When you turn the [VALUE] knob, the master level setting is shown for a time on the display.
The master level setting range is 0 - 98, 1.0. It will be reset to 80 when the unit is turned off and then on again.
NOTE
When using headphones, this knob adjusts the listening volume.
3 Select a patch
- To switch the patch, press one of the [] / [] foot switches.
Pressing the [] foot switch calls up the next lower patch, and pressing the [] foot switch calls up the next higher patch.
Repeatedly pressing one foot switch cycles through patches in the order A0 - A9 ... d0 - d9 00 - 09 ... 30 - 39 A0 , or the reverse order.
4 Directly selecting a bank
- To select the banks A - d, 0 - 3 directly, use the [BANK UP•TAP] key.
Each push of the key switches to the next higher bank.
NOTE With the G1, using the foot switch (FS01) to switch banks is also possible ( p. 16).
Using the Tuner
The G1/G1X incorporates an auto-chromatic tuner. To use the tuner function, the built-in effects must be bypassed (temporarily turned off) or muted (original sound and effect sound turned off).
Switch to bypass or mute
- Setting the G1/G1X to the bypass state
In play mode or rhythm mode ( p. 10),
press both [ ] / [ ] foot switches
together briefly and release.
- Setting the G1/G1X to the mute state
In play mode or rhythm mode ( p. 10), press both [] / [] foot switches
together and hold for at least 1 second.
NOTE The bypass or mute condition cannot be activated when the unit is in edit mode.
Patch change at bypass/mute
When you press both [ ] / [ ] foot switches together while playing your instrument, the sound may change momentarily just before the bypass/mute condition is activated. This is because the G1/G1X switches to the next higher or lower patch when one of the foot switches is pressed slightly earlier. (When you cancel the bypass/mute condition, the original patch number will be active again.)
This behavior is not a defect. It is due to the very high speed at which the G1/G1X responds to patch switching. To prevent the sound change caused by the above condition, do not produce sound with your instrument until the bypass/mute condition is fully established.
2 Tune your instrument
- Play the open string to tune, and adjust the pitch.
The left side of the display shows the note which is closest to the current pitch.
A D = G =
A^# = D^# = .G^# =
B = E =
C = F =
C^# = . F^# = F.
Adjusting the reference pitch of the tuner
If required, you can fine-adjust the reference pitch of the G1/G1X tuner.
- Turn the [VALUE] knob.
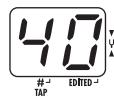
When you turn the [VALUE] knob in the bypass/mute condition, the current reference pitch is shown for a time on the display. The default setting is 40 (center A = 440 Hz).
- While the reference pitch is shown, turn the [VALUE] knob to adjust the value in the range from 35 - 45 (center A = 435 to 445 Hz).
Shortly after you release the [VALUE] knob, the display indication will revert to the previous condition.
NOTE When you turn the G1/G1X off and on again, the reference pitch setting will be reset to 40 (center A = 440 Hz).
4 Return to play mode
- Press one of the [] / [] foot switches.
The right side of the display shows a symbol that indicates by how much the tuning is off.
Pitch is high Pitch is correct Pitch is low
Tune the other strings in the same way.
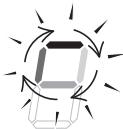

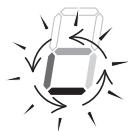
Indication turns faster the more the pitch is off
Using the Rhythm Function
The G1/G1X has a built-in rhythm function that plays realistic drum sounds in various patterns. The rhythm function is available in play mode and in rhythm mode. This section describes how to use the function in rhythm mode.
Select rhythm mode
- Set the Module selector to the "RHYTHM" position.
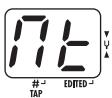
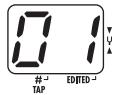
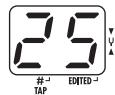
The number of the currently selected rhythm pattern (01 - 40) appears on the display.
You cannot switch patches or adjust the master level.
HINT
- The rhythm function can also be used in play mode.
- In play mode, you cannot switch the rhythm pattern or adjust the rhythm volume and tempo.

Start the rhythm function
To start the rhythm function, press the RHYTHM [▶/■] key.
NOTE
While the rhythm is playing, the reverber effect is disabled.

Select a rhythm pattern
The G1/G1X has 40 built-in rhythm patterns. For more information on pattern contents, see page 25.
- To switch rhythm patterns, press one of the [] / [] foot switches in rhythm mode.
HINT
When you press both [ ] / [ ] foot switches in rhythm mode, the G1/G1X switches to the bypass/mute condition ( p.8) . The rhythm function can also be used in this condition.

Adjust the rhythm volume
- To adjust the rhythm volume, turn the [VALUE] knob.
When you turn the [VALUE] knob, the current setting (0 - 30) is shown for a time on the display.
Adjust the tempo
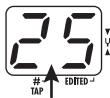
The rhythm pattern tempo can be adjusted in the range of 40 - 250 BPM (beats per minute).
- To continuously change the rhythm tempo, hit the [BANK UP·TAP] key once and then turn the [VALUE] knob while the tempo value is being shown on the display.
- To manually specify the tempo, hit the [BANK UP·TAP] key at least twice in the desired interval.
The G1/G1X automatically detects the interval in which the key is pressed the second and subsequent times, and sets the tempo accordingly (tap tempo function).
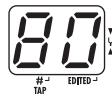
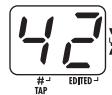
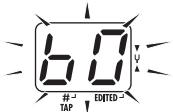
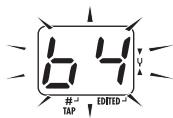
While the above steps are carried out, the current tempo value (40 - 250) is shown for a time on the display. For values in the range from 100 to 199, a dot is shown in the bottom right corner (after the second digit). For values of 200 and above, dots are shown after the first and second digits.

Dot is shown
Tempo = 120 BPM
Tempo =240 BPM
HINT
With the G1, using the foot switch (FS01) to manually adjust the tempo is also possible ( p. 16). The G1X does not support use of a foot switch.
Stop the rhythm
- To stop the rhythm, press the RHYTHM [▶/■] key.
The G1/G1X returns to the previous condition.
Editing a Patch
The patches of the G1/G1X can be freely edited by changing the effect parameter settings. Try editing the currently selected patch to create your own sound.
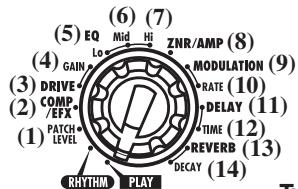
1 Select the effect module/ parameter
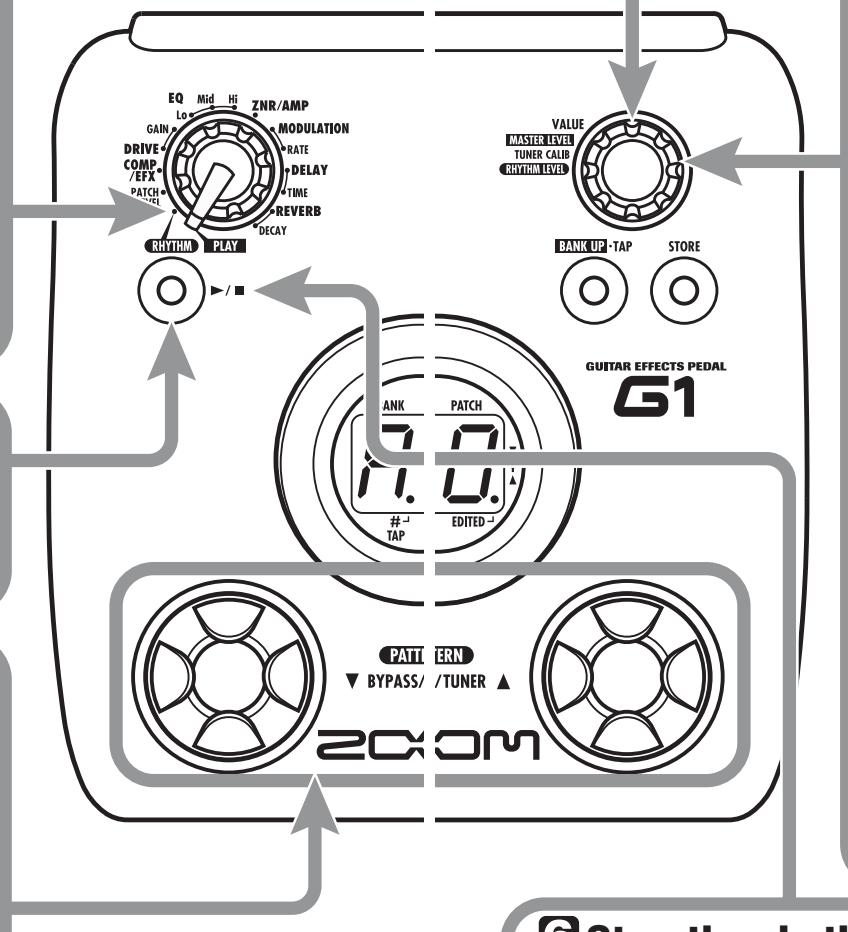
- Turn the Module selector to select the effect module and parameter to edit. The available settings are listed below.
The EQ module has three parameters, and the MODULATION, DELAY, and REVERB modules have two parameters each. The Module selector lets you directly access each of these.
Type = Effect type Prm = Parameter
(1) Patch level (Prm)
(2) COMP/EFX module (Type&Prm)
(3) DRIVE module (Type)
(4) DRIVE module (Prm)
(5)-(7) EQ module (Prm)
(8) ZNR/AMP module (Type&Prm)
(9) MODULATION module (Type&Prm1)
(10) MODULATION module (Prm2)
(11) DELAY module (Type&Prm1)
(12) DELAY module (Prm2)
(13) REVERB module (Type&Prm1)
(14) REVERB module (Prm2)
- Type&Prm or Type&Prm1
Item where the effect type (left side of display) and parameter setting value (right side of display) are adjusted simultaneously.
- Type
Item where the effect type only is selected.

- Prm or Prm2
Item where the parameter setting value only is adjusted.
Parameter setting value
Change the setting
- Use the [VALUE] knob to change the effect type and parameter as shown on the display.
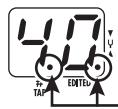
When the effect type and/or parameter setting has been changed, a dot (. ) appears in the bottom right of the display. This indicates that a setting has been changed.
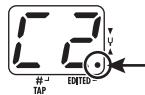
Dot indicates that setting has been changed
NOTE
When you have selected a parameter that can be set with the tap function ( p. 18), you can use the [BANK UP·TAP] key to specify a time interval or rate by repeatedly hitting the key.
3
To switch an effect module on and off
- To switch the currently selected effect module between on and off, press one of the []/[] foot switches.
The indication "oF" appears on the display. When you press one of the switches once more, the indication returns to the previous condition.

4 Terminate the edit mode
- To terminate the edit mode and return to the play mode, set the Module selector to the "PLAY" position.
NOTE When you return to play mode and have made any change to the patch, the dot (. ) will be shown in the bottom right of the display. If you select another patch in this condition, the changes you have made in edit mode will be lost unless you store the patch first. To retain the changes, store the patch as described on page 14.
Storing/Copying Patches
An edited patch can be stored in a bank of the user area (A - d). It is also possible to store an existing patch in another location to create a copy.
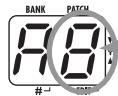
In play mode or edit mode, press the [STORE] key.
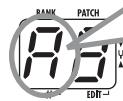
- The bank and patch number are shown on the display as a flashing indication.
![ZOOM G1X - In play mode or edit mode, press the [STORE] key. - 1](/content/2025/01/152205/images/c673af5aac7c209c34d3791816fdf119cc0ecb78962a5c0701fcf59c7ddb6668.jpg)
NOTE Patches of banks in the preset area (0 - 3) are read-only. No patches can be stored or copied into these locations. If you press the [STORE] key while a patch from the preset area is selected, the patch "A0" (bank A, patch number 0) will be selected automatically as default store/copy target.
Select the store/copy target bank
- To select the store/copy target bank, use the [BANK UP·TAP] key.
NOTE
- Only a bank of the user area (A - d) can be selected as store/copy target bank.
- During the store/copy process, the foot switch (FS01) cannot be used to change banks.
To cancel the store process
- To cancel the store process, operate the [VALUE] knob before pressing the [STORE] key again in step 4.

4 Press the [STORE] key once more
- When the store/copy process is completed, the G1/G1X returns to the previous mode, with the target patch being selected.
![ZOOM G1X - Press the [STORE] key once more - 1](/content/2025/01/152205/images/d74a9493f274ea7b1f9f4b03e5563f467e3f3b4ebc1c00c79d2eade5a5da862e.jpg)
Specify the store/copy target patch number
- To specify the store/copy target patch number, use the [] / [] foot switches.
Changing the Way Patches Are Called Up
In normal operation, changing a patch in play mode of the G1/G1X will be active immediately. This means that the sound changes straight away when you make the selection.
In some cases, such as when the new patch is at a memory location not adjacent to the current one, this method may not be ideal, because the sound will change in various ways as you switch through the patches. In such a case, you may want to change the patch selection method to "pre-select". In this mode, you first select the patch to use next, and then perform an additional step to activate the patch.
To change G1/G1X operation to pre-select, perform the following steps.
1. Turn power to the G1/G1X on while holding down the [▲] foot switch.
The indication "PrE-SElEc" scrolls on the display during startup.
2. In play mode, use the [] / [] foot switches to specify the patch to use next.
You can use the [BANK UP·TAP] key or a foot switch (FS01) connected to the [CONTROL IN] jack to switch only the bank (The G1X does not support use of a foot switch.)
The new bank or patch number specified by the above step flashes on the display. The sound does not change yet.
3. When you have specified the patch to use, press both [ ] / [ ] foot switches together.
The patch change is accepted, the display changes from flashing to permanently lit, and the sound changes.
![ZOOM G1X - When you have specified the patch to use, press both [ ] / [ ] foot switches together. - 1](/content/2025/01/152205/images/30d2597b62f45cb06949439a87949bc13e002f9239508ee16bc16febef6e2f95.jpg)
4. To return the G1/G1X to the normal patch selection method, simply turn power off and then on again.
The patch selection method is automatically reset to conventional operation.
Using a Foot Switch or Pedal
The G1 is equipped with a [CONTROL IN] jack that allows connection of an optional foot switch or expression pedal.
This section explains how to use this capability.
Using the foot switch (FS01) (G1 only)
Simply connect the optional foot switch (FS01) to the [CONTROL IN] jack of the G1 and turn the unit on. This allows you to switch banks and specify the tempo for rhythm patterns with the foot switch.
Depending on the currently selected mode, the foot switch operates as follows.
Play mode
Pressing the foot switch selects the next higher bank.
Rhythm mode
When you press the foot switch two times or
more, the G1 detects the interval and automatically adjusts the tempo accordingly (tap tempo function).
Edit mode
The foot switch has no effect.
Using the expression pedal
With the G1, an expression pedal (FP01/FP02) can be connected to the [CONTROL IN] jack and used as a volume pedal or for adjusting a certain parameter of an effect type in real time.
With the G1X, the built-in expression pedal can be used in the same way. The function of the expression pedal can be selected and stored individually for each patch.
- To use an expression pedal with the G1, plug the FP01 or FP02 into the [CONTROL IN] jack and turn on the power.
- Select the patch in which to use the expression pedal.
- Set the Module selector to a position other than "PLAY" or "RHYTHM".
The G1/G1X goes into edit mode.
- While holding down the [RHYTHM] key, use the [VALUE] knob to select the module to control with the expression pedal. Available settings are shown below.
| Display | Control target |
| DF | Disabled |
| UP | Volume |
| HP | COMP/EFX module |
| CP | DRIVE module |
| AP | MODULATION module |
| Display | Control target |
| DP | DELAY module |
| RP | REVERB module |
HINT
- In the section "Effect Types and Parameters" (page 19 - 24), a pedal symbol indicates which effect type/parameter is controlled by the pedal.
- When a module has been selected as control target, but the effect type currently selected for that module does not have a pedal symbol, the expression pedal has no effect.
5. Store the patch as required.
The expression pedal setting is stored for that patch.
6. Select this patch in play mode, and operate the expression pedal.
The respective parameter changes when you operate the pedal (pushing the pedal down has the same effect as increasing the value of the parameter).
In the bypass condition, the expression pedal always functions as volume pedal, regardless of the setting made in step 4.
HINT
- The expression pedal operates also in edit mode.
- With the G1X, you can also use the [PEDAL ASSIGN] key on the top panel instead of the [RHYTHM] key and [VALUE] knob to select the module to be controlled by the pedal. For details, see page 26.
Effect Types and Parameters
Linking Effects
The patches of the G1/G1X consist of eight serially linked effect modules, as shown in the
illustration below. You can use all effect modules together or selectively set certain modules to on or off.
- Manufacturer names and product names mentioned in this listing are trademarks or registered trademarks of their respective owners. The names are used only to illustrate sonic characteristics and do not indicate any affiliation with ZOOM CORPORATION.
For some effect modules, you can select an effect type from several possible choices. For example, the MODULATION module comprises Chorus, Flanger, and other effect types. The REVERB module comprises Hall, Room, and other effect types from which you can choose one.
Explanation of symbols
- Module selector

The Module selector symbol shows the position of the knob at which this module/parameter is called up.
Expression pedal

A pedal icon in the listing indicates a parameter that can be controlled with the built-in or an external expression pedal.
When this item is selected, the parameter in the module can then be controlled in real time with a connected expression pedal.
- Tap

A [TAP] icon in the listing indicates a parameter that can be set with the [BANK UP·TAP] key.
When the respective module/effect type is selected in edit mode and the [BANK UP·TAP] key is pressed repeatedly, the parameter (such as modulation rate or delay time) will be set according to the interval in which the key is pressed.
PATCH LEVEL
PATCH LEVEL (Prm)
Determines the overall volume level of the patch.
Sets the patch level in the range from 2 - 98, 1.0. A setting of 80 corresponds to unity gain (input level and output level are equal).
COMP/EFX (Compressor/EFX) module
This module comprises the effects that control the level dynamics such as compressor, and modulation effects such as tremolo and phaser.
COMP/EFX (Type&Prm)
Adjusts the COMP/EFX module effect type and intensity.
Compressor
This is an MXR Dynacomp type compressor. It attenuates high-level signal components and boosts low-level signal components, to keep the overall signal level within a certain range. Higher setting values result in higher sensitivity.
Auto Wah
This effect varies wah in accordance with picking intensity. Higher setting values result in higher sensitivity.
Booster
Raising signal level and creates a dynamic sound. Higher setting values result in higher gain.
Tremolo
This effect periodically varies the volume. Higher setting values result in faster modulation rate.

Phaser
This effect produces sound with a pulsating character. Higher setting values result in faster modulation rate.
Ring Mod (Ring Modulator)
This effect produces a metallic ringing sound. Higher setting values result in higher modulation frequency.
Slow Attack
This effect reduces the attack rate of each individual note, producing a violin playing style sound. Higher setting values result in slower attack times.
Vox Wah
This effect simulates a half-open vintage VOX wah pedal. Higher setting values result in higher emphasized frequency.
Cry Wah
This effect simulates a half-open vintage Crybaby wah pedal. Higher setting values result in higher emphasized frequency.
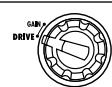
■DRIVE module
This module includes 20 types of distortion and an acoustic simulator. For this module, the two items DRIVE and GAIN can be adjusted separately.
DRIVE (Type)
Selects the effect type for the DRIVE module.

FD Clean
Clean sound of a Fender Twin Reverb ('65 model) favored by guitarists of many music styles.

VX Clean
Clean sound of the combo amp VOX AC-30 operating in class A.
| HB | HW Clean | BL | US Blues |
| Clean sound of the legendary all-tube Hiwatt Custom 100 from Britain. | Crunch sound of a Fender Tweed Deluxe '53. | ||
| BG | BG Crunch | AS | MS #1959 |
| Crunch sound of the Mesa Boogie MkIII combo amp. | Crunch sound of the Marshall 1959 that has become legendary. | ||
| MS | MS Drive | PL | PV Drive |
| High gain sound of the Marshall stack amp JCM2000. | High gain sound of a Peavey 5150 developed in cooperation with a world-famous hard rock guitarist. | ||
| DZ | DZ Drive | bd | BG Drive |
| High gain sound of the hand-made German guitar amp Diezel Herbert with three separately controllable channels. | High gain sound of the Mesa Boogie Dual Rectifier red channel (vintage mode). | ||
| Overdrive | Overdrive | Gd | Guv'nor |
| Simulation of the Boss OD-1 that first created the "overdrive" concept. | Simulation of the Guv'nor distortion effect from Marshall. | ||
| dist+ | dist+ | -ct | RAT |
| Simulation of MXR distortion+ that made distortion popular worldwide. | Simulation of the PROCO RAT famous for its edgy distortion sound. | ||
| FF | Fuzz Face | NT | Metal Zone |
| Simulation of the Fuzz Face that made rock history with its zany look and smashing sound. | Simulation of the Boss Metal Zone with long sustain and dynamic lower midrange. | ||
| ExtremeDS | ExtremeDS | Hb | Hot Box |
| High gain sound with the most powerful gain of any distortion effect in the world. | Simulation of the compact Matchless Hot Box preamp with built-in tubes. | ||
| Flat Clean | Flat Clean | Ld | Lead |
| Zoom original flat clean sound. | Smooth, bright distortion sound. | ||
| Aco.Sim | This effect makes an electric guitar sound like an acoustic guitar. | ||
| Gain (Prm) | |||
| Sets the DRIVE module parameters. | |||
| When TYPE is set to a distortion effect type | |||
| Gain | |||
| Adjusts the gain (distortion intensity) for distortion effect types. | |||
| When TYPE is set to Aco.Sim | |||
| TOP | |||
| Adjusts the characteristic string tone of acoustic guitar. | |||
- Manufacturer names and product names mentioned in this listing are trademarks or registered trademarks of their respective owners. The names are used only to illustrate sonic characteristics and do not indicate any affiliation with ZOOM CORPORATION.
| EQ module | |||||
| This is a 3-band equalizer. For this module, the three items EQ LO, EQ MID, and EQ HI can be adjusted separately. | |||||
| EQ LO (Prm) | EQ MID (Prm) | EQ HI (Prm) | |||
| Adjusts the LO band of the EQ module. | Adjusts the MID band of the EQ module. | Adjusts the HI band of the EQ module. | Adjusts the HI band of the EQ module. | ||
| Lo | Mid | Hi | |||
| Adjusts the low range (160 Hz) boost/cut. | Adjusts the midrange (800 Hz) boost/cut. | Adjusts the high range (3.2 kHz) boost/cut. | |||
■ZNR/AMP (ZNR/Amp Simulator) module
This module combines two elements. ZNR is a noise reduction circuit developed by ZOOM. It removes noise during play pauses without affecting sound quality. The amp simulator recreates the sound of various speaker cabinets.
| ZNR/AMP | ZNR/AMP (Type&Prm) |
| Selects ZNR sensitivity and amp simulator type at the same time. | |
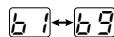
| 0→9 | ZNR (ZOOM Noise Reduction) |
| This is the noise reduction function only. Higher setting values result in stronger effect. Set the value as high as possible without causing the sound to be cut off unnaturally. | |
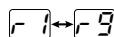
| 0→69 | Combo & ZNR |
| Combination of ZNR with amp simulator that recreates the sound of a combo amp with closed-back cabinet. The right-digit value controls ZNR sensitivity. | |
| 69→69 | Bright Combo & ZNR |
| Combination of ZNR with amp simulator that recreates the sound of a bright combo amp with open-back cabinet. The right-digit value controls ZNR sensitivity. | |
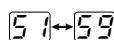
| 59→59 | Stack & ZNR |
| Combination of ZNR with amp simulator that recreates the sound of a stack amp cabinet. The right-digit value controls ZNR sensitivity. |
■ MODULATION module
| This module comprises effects such as chorus, pitch shifter, delay, etc. For this module, the two items MODULATION and RATE can be adjusted separately. | |||
| MODULATION (Type&Prm1) | MODULATION (Type&Prm2) | RATE (Prm2) | |
| Selects the MODULATION module effect type and controls parameter 1 at the same time. | Controls parameter 2 of the MODULATION module. | ||
| Chorus | Rate | ||
| This effect mixes a variable pitch-shifted component to the original signal, resulting in full-bodied resonating sound. Higher right-digit setting values result in higher effect sound mixing ratio. | Adjusts the modulation rate. | ||
| Ensemble | |||
| This is a chorus ensemble with three-dimensional movement. Higher right-digit setting values result in higher effect sound mixing ratio. | |||
| Flanger | Rate | ||
| This effect produces a resonating and strongly undulating sound. Higher right-digit setting values emphasize the characteristics of the effect. | Adjusts the modulation rate. | ||
| Step | |||
| Special effect that changes the sound in a staircase pattern. Higher right-digit setting values emphasize the characteristics of the effect. | |||
| Pitch Shift | Shift | ||
| This effect shifts the pitch of the original sound up or down. Higher right-digit setting values increase the mixing ratio of effect sound versus original sound. | Sets the pitch shift amount in semitones. "dt" results in a detune effect. | ||
| Mono Pitch | |||
| This is a monophonic pitch shifter (for single-note playing) with reduced flutter. Higher right-digit setting values increase the mixing ratio of effect sound versus original sound. | |||
| HPS (Harmonized Pitch Shifter) | Key | ||
| This is an intelligent pitch shifter that automatically generates major scale harmonies according to a preset key. Higher right-digit setting values increase the mixing ratio of effect sound versus original sound. | Specifies the tonic for the scale used for pitch shifting. The "o" symbol stands for #. | ||
| Vibrato | Rate | ||
| This is an effect with automatic vibrato. Higher right-digit setting values emphasize the vibrato intensity. | Adjusts the vibrato rate. | ||
| Pitch Bend | 0←10 | Pedal Position | |||
| This effect allows using the expression pedal to change the pitch in real time. Right-digit setting values select the pitch change type caused by the expression pedal (see Table 1). | Sets the initial value for the pitch shift amount (the value that is active when the pedal is at rest). The original sound/effect sound level balance also changes according to the parameter 1 setting. | ||||
| [Table1] | |||||
| Type&Prm1 | Prm2=0 | Prm2=1.0 | Type&Prm1 | Prm2=0 | Prm2=1.0 |
| Pedal fully raised (minimum) | Pedal fully depressed (maximum) | Pedal fully raised (minimum) | Pedal fully depressed (maximum) | ||
| b1 | 0 cent | +1 octave | b6 | -1 octave + original sound | +1 octave + original sound |
| b2 | 0 cent | +2 octaves | b7 | -700 cent + original sound | +500 cent + original sound |
| b3 | 0 cent | -100 cent | b8 | Doubling | Detune + original sound |
| b4 | 0 cent | -2 octaves | b9 | -∞(0Hz) + original sound | +1 octave + original sound |
| b5 | 0 cent | -∞ | |||
| Delay | 0←20 | Time(TA) | |||
| This is a delay with a maximum setting of 2000 ms. Higher right-digit setting values increase the mixing ratio of effect sound versus original sound and the feedback amount. | Sets the delay time. In the 10 - 1000 millisecond range, the adjustment is performed in 10-ms steps (1 - 99, 1.0). Above 1 second, the adjustment is performed in 100-ms steps (1.1 - 2.0). | ||||
| ■DELAY module | |||||
| This module comprises various delay effects. For this module, the two items DELAY and TIME can be adjusted separately. | |||||
| DELAY (Type&Prm1) | |||||
| Selects the DELAY module effect type and controls parameter 1 at the same time. | |||||
| Delay | |||||
| This is a delay with a maximum setting of 5000 ms. The right-digit setting values control the mixing ratio of effect sound versus original sound and the feedback amount. | |||||
| Tape Echo | |||||
| This effect simulates a tape echo with a long delay time of up to 5000 ms. The right-digit setting values control the mixing ratio of effect sound versus original sound and the feedback amount. | |||||
| Analog Delay | |||||
| This effect simulates an analog delay with a long delay time of up to 5000 ms. The right-digit setting values control the mixing ratio of effect sound versus original sound and the feedback amount. | |||||
| Ping Pong Delay | |||||
| This is a ping-pong type delay where the delay sound alternates between left and right. The right-digit setting values control the mixing ratio of effect sound versus original sound and the feedback amount. | |||||
| TIME (Prm2) | |||||
| Controls parameter 2 of the DELAY module. This parameter is common to all effect types. | |||||
| TimetAX | |||||
| Sets the delay time. In the 10 - 1000 millisecond range, the adjustment is performed in 10-ms steps (1 - 99, 1.0). Above 1 second, the adjustment is performed in 100-ms steps (1.1 - 5.0). | |||||
REVERB module
| This module contains effects that simulate various reverb sounds. For this module, the two items REVERB and DECAY can be adjusted separately. | |
| REVERB (Type&Prm1) | |
| Selects the REVERB module effect type and controls parameter 1 at the same time. | |
| Hall | |
| This reverb effect simulates the acoustics of a concert hall. Higher right-digit setting values increase the mixing ratio of effect sound versus original sound. | |
| Room | |
| This reverb effect simulates the acoustics of a room. Higher right-digit setting values increase the mixing ratio of effect sound versus original sound. | |
| Spring | |
| This effect simulates a spring-type reverb. Higher right-digit setting values increase the mixing ratio of effect sound versus original sound. | |
| Arena | |
| This reverb effect simulates the acoustics of a large venue such as a sports arena. Higher right-digit setting values increase the mixing ratio of effect sound versus original sound. | |
| Tiled Room | |
| This reverb effect simulates the acoustics of a tiled room. Higher right-digit setting values increase the mixing ratio of effect sound versus original sound. | |
| DECAY (Prm2) | |
| Controls parameter 2 of the REVERB module. This parameter is common to all effect types. | |
| Decay | |
| Adjusts the decay duration. |
G1/G1X Preset Pattern
| # | Pattern Name | TimSig | # | Pattern Name | TimSig | # | Pattern Name | TimSig |
| 1 | 8beat 1 | 4/4 | 15 | FUNK 1 | 4/4 | 29 | 5per4 2 | 5/4 |
| 2 | 8beat 2 | 4/4 | 16 | FUNK 2 | 4/4 | 30 | LATIN | 4/4 |
| 3 | 8beat 3 | 4/4 | 17 | HIPHOP | 4/4 | 31 | BALLAD 1 | 4/4 |
| 4 | 8shuffle | 4/4 | 18 | R'nR | 4/4 | 32 | BALLAD 2 | 3/4 |
| 5 | 16beat 1 | 4/4 | 19 | POP 1 | 4/4 | 33 | BLUES 1 | 4/4 |
| 6 | 16beat 2 | 4/4 | 20 | POP 2 | 4/4 | 34 | BLUES 2 | 3/4 |
| 7 | 16shuffle | 4/4 | 21 | POP 3 | 4/4 | 35 | JAZZ 1 | 4/4 |
| 8 | ROCK | 4/4 | 22 | DANCE 1 | 4/4 | 36 | JAZZ 2 | 3/4 |
| 9 | HARD | 4/4 | 23 | DANCE 2 | 4/4 | 37 | METRO 3 | 3/4 |
| 10 | METAL 1 | 4/4 | 24 | DANCE 3 | 4/4 | 38 | METRO 4 | 4/4 |
| 11 | METAL 2 | 4/4 | 25 | DANCE 4 | 4/4 | 39 | METRO 5 | 5/4 |
| 12 | THRASH | 4/4 | 26 | 3per4 | 3/4 | 40 | METRO | |
| 13 | PUNK | 4/4 | 27 | 6per8 | 3/4 | |||
| 14 | DnB | 4/4 | 28 | 5per4 1 | 5/4 |
Restoring Factory Defaults
In the factory default condition, the patches of the user area (A0 - d9) of the G1/G1X contain the same settings as the patches of the preset area (00 - 39). Even after overwriting the user patches, their original content can be restored in a single operation ("All Initialize" function).
- Turn the G1/G1X on while holding down the [STORE] key.
The indication "AL" appears on the display.
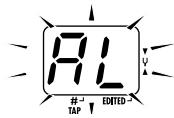
- To carry out the All Initialize function, press the [STORE] key once more.
All patch settings are returned to the factory default condition, and the unit switches to play mode. To cancel All Initialize, press the RHYTHM [▶/■] key instead of the [STORE] key.
NOTE
When you carry out All Initialize, any newly created patches that were stored in the user area will be deleted (overwritten). Perform this operation with care to prevent losing any patches that you want to keep.
Special Features of G1X
This section explains features and operating steps that are unique to the G1X.
[PEDAL ASSIGN] key operation
The top panel of the G1X has a [PEDAL ASSIGN] key. Besides the method described on page 17, the module to be controlled by the pedal can be selected with this key.
- In play mode or edit mode, press the [PEDAL ASSIGN] key to select the control target module.
The module currently selected as control target is indicated by the row of LEDs above the [PEDAL ASSIGN] key.
All out Pedal is inactive
VOLUME Volume
WAH/EFX COMP/EFX module
O DRIVE DRIVE module
MODULATION · · · MODULATION module
DELAY DELAY module
REVERB · · · · · · REVERB module
![ZOOM G1X - [PEDAL ASSIGN] key operation - 1](/content/2025/01/152205/images/4495e6f6f97df182f371f339bf3cb1cc19f77a8f9885f1584b6d21387eff2025.jpg)
- Store the patch as required.
- In play mode, select the patch and operate the expression pedal.
The respective parameter changes in real time.
- To toggle the module assigned to the pedal between on and off, briefly push the pedal fully down.
When the module is off, the respective LED above the [PEDAL ASSIGN] key flashes. This function can also be used in edit mode.
Adjusting the expression pedal
The expression pedal of the G1X can be readjusted as necessary. If the effect change seems insufficient when pushing the pedal down, or if the volume or tone changes excessively even when the pedal is only lightly pushed, adjust the pedal as follows.
- Hold down the [PEDAL ASSIGN] key while turning power to the G1X on.
The indication "dn" appears on the display. - Fully raise the expression pedal and press the [STORE] key.
The indication "UP" appears on the display. - Push the expression pedal fully down and release it.
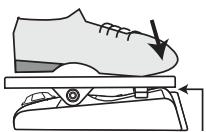
Push strongly, so that pedal touches here
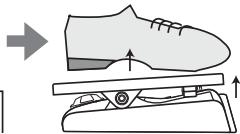
When foot is lifted,
pedal returns slightly
- Press the [STORE] key once more.
The adjustment is complete, and the unit returns to the play mode. If the indication "Er" is shown, repeat the procedure from step 2.
Specifications
Effect types
Effect modules
Patch memory
54
max. 8 simultaneous modules
User area: 10 patches x 4 banks = 40
Preset area: 10 patches x 4 banks = 40
Total 80 patches
96 kHz
24 bit, 128 times oversampling
24 bit, 128 times oversampling
32 bit
20Hz - 40kHz + 1.0dB -4.0 dB (10-kilohm load)
Display
Input
Rated input level
Input impedance
Output
Maximum output level
2-digit 7-segment LED
Standard mono phone jack
-20 dBm
470 kilohms
Standard stereo phone jack (doubles as line/headphone jack)
Line +3dBm
(output load impedance of 10 kilohms or more)
Phones 20mW + 20mW (into 32-ohm load)
Control input
Power requirements
AC adapter
Batteries
For FP02/FP01 or FS01 (G1 only)
9 V DC, 300mA (center minus plug) (ZOOM AD-0006)
G1/G1X Four IEC R6 (size AA) batteries, approx. 12 hours continuous operation (alkaline batteries)
G1 350g (without batteries)
G1X 600g (without batteries)
Expression pedal FP01/FP02 or Foot switch FS01 (G1 only)
Troubleshooting
No power
Refer to "Turn power on" on page 6.
- Reverb effect does not operate
While a rhythm pattern is playing, the reverber effect is not available. Stop the rhythm pattern first ( p. 11).
- Patches cannot be switched
Has the method for calling up patches been changed to "pre-select" ( p. 16)? Turn power off and then on again to reset the unit to
normal operation.
High level of noise
Is ZOOM AC adapter being used? Be sure to use only an adapter for 9V DC, 300mA with center minus plug (ZOOM AD-0006).
Battery life is short
Are manganese batteries being used? Continuous operation time is 12 hours with alkaline batteries.
The FCC regulation warning (for U.S.A.)
This equipment has been tested and found to comply with the limits for a Class B digital device, pursuant to Part 15 of the FCC Rules. These limits are designed to provide reasonable protection against harmful interference in a residential installation. This equipment generates, uses, and can radiate radio frequency energy and, if not installed and used in accordance with the instructions, may cause harmful interference to radio communications. However, there is no guarantee that interference will not occur in a particular installation. If this equipment does cause harmful interference to radio or television reception, which can be determined by turning the equipment off and on, the user is encouraged to try to correct the interference by one or more of the following measures:
- Reorient or relocate the receiving antenna.
- Increase the separation between the equipment and receiver.
- Connect the equipment into an outlet on a circuit different from that to which the receiver is connected.
- Consult the dealer or an experienced radio/TV technician for help.
Disposal of Old Electrical & Electronic Equipment (Applicable in European countries with separate collection systems)
This symbol on the product or on its packaging indicates that this product shall not be treated as household waste. Instead it shall be handed over to the applicable collection point for the recycling of electrical and electronic equipment. By ensuring this product is disposed of correctly, you will help prevent potential negative consequences for the environment and human health, which could otherwise be caused by inappropriate waste handling of this product. The recycling of materials will help to conserve natural resources. For more detailed information about recycling of this product, please contact your local city office, your household waste disposal service or the shop where you purchased the product.

ZOOM CORPORATION
ITOHPIA Iwamotocho 2chome Bldg. 2F, 2-11-2, Iwamoto-cho,
Chiyoda-ku, Tokyo 101-0032, Japan
Web Site: http://wwwzoomom.co.jp
G1/G1X Patch List
| Bank | Patch | Name | Comment | Main effect | Pedal Assign |
| A | 0 | Scream Lead | Aggressive screaming sound modeled on the Peavey 5150. Pushing the pedal down shifts the pitch upwards by up to one octave, heightening the aggressive character even more. | PV Drive | Pitch Bend |
| 1 | Mercury | A combination of Hiatt Custom 100 simulation and Ensemble gives a spacious, beautiful sound with a clear presence. Great for cutting and arpeggio. | HW Clean | VOLUME | |
| 2 | Hot Blues | Bluesy drive sound that faithfully brings out picking nuances. Pushing the pedal down gives that hot drive feeling ideal for guitar solos. | US Blues | DRIVE GAIN | |
| 3 | Multi Phaser | Clean sound with a dash of Phaser. Try it and lead your band with some groovy cutting. | Phaser | Phaser Rate | |
| 4 | Automat | Combination of Marshall 1959 and Auto Wah results in bold auto wah sound with a distinctive touch, great for a wide range of extravagant effects. | Auto Wah | VOLUME | |
| 5 | Good Vibe | Clean sound with a shimmering blend of Tremolo and Vibrato. Deep reverb creates a fantastic universe of sound. | Vibrato | DELAY Mix | |
| 6 | Wah Lead | Michael Schenker style half-closed wah pedal sound. By pushing the pedal down, you can get dynamic wah in the fashion of Zakk Wylde. | Guv'nor | Vox Wah | |
| 7 | Duet in G | Flamboyant lead tone based on a combination of HPS (Harmonized Pitch Shifter) and Lead. Moving the pedal controls the HPS mixing ratio. | Lead | HPS Mix | |
| 8 | Jetter | Typical Flanger jet sound. Play the low-end strings, and make a jet plane take off from your amp. Experience the king of hard rock sounds. | Flanger | VOLUME | |
| 9 | Aco.Sim | Turn your guitar into an acoustic instrument at the touch of a key. Even if heavy rock is your thing, why not try that gorgeous acoustic tone once in a while. | Aco.Sim | VOLUME | |
| b | 0 | Hot Box | This sound is modeled on the Matchless foot type preamp. The supple tone with rich harmonics will make you want to go on playing for ever. | Hot Box | VOLUME |
| 1 | AC30TBX | This sound is modeled on the VOX AC30TBX. Class A drive ensures excellent response and yields a clean tone. That realistic feeling of chords pouring out of the speakers is hard to get with any other amp. | VX Clean | VOLUME | |
| 2 | 5150 | Many guitars love the Peavey 5150 for its distinct and detailed distortion even at high gain. Power chords, speedy riffs, technical solos all will benefit from this high-gain sound. | PV Drive | VOLUME | |
| 3 | TwinReverb | Typical surf rock sound of the Fender TwinReverb ('65 model), with Tremolo and Reverb creating that pulsating tone. Ride the surf on a cascade of phrases. | FD Clean | VOLUME | |
| 4 | ExtremeDS | This original ZOOM creation features ultra-powerful distortion, for aggressive metal sound that will set your spirit on fire. | ExtremeDS | VOLUME | |
| 5 | RAT | Simulation of the PROCO RAT famous for its edgy distortion sound. First made popular by Jeff Beck in the late seventies, this effect is behind a lot of rock sounds out there. Powerful distortion that stays well defined. | RAT | VOLUME | |
| 6 | Fuzz Face | This patch is modeled on the Fuzz Face that made rock history with its wild yet smooth sound. A favorite of many great guitarists. | Fuzz Face | VOLUME | |
| 7 | OD-1 | Simulation of the Boss OD-1 that produces natural, rich overdrive. Enjoy its great sound without having to pay a premium price for a vintage unit on the second-hand market. | Overdrive | VOLUME | |
| 8 | DIEZEL | Simulation of the Diezel Herbert amp that is creating a new standard for loud music. Make your sound hit as hard as never before. | DZ Drive | VOLUME | |
| 9 | MARKIII | This patch is modeled on the Mesa Boogie Mark III, an amp noted for its powerful midrange suitable for many genres. Particularly good for playing fusion phrases on a hollow-body guitar. | BG Crunch | VOLUME | |
| c | 0 | Page Crunch | The simple Marshall drive sound used by Jimmy Page of early Led Zeppelin. Use a Telecaster or Les Paul and recreate "Good Times Bad Times". | MS #1959 | VOLUME |
| 1 | Beck Oct | Jeff Beck's favorite drive tone with a one-octave lower component. Try it out and hear yourself irresistibly drawn towards playing "Led Boots". | Mono Pitch | VOLUME | |
| 2 | Cream Drive | This patch is modeled on "Crossroads" by the Cream which features one of the greatest rock solos ever. Ideal crunch tone for playing blues rock with a single-coil pickup or a humbucker. | Hot Box | VOLUME | |
| 3 | Breathe | From Pink Floyd's 1973 smash album Dark Side of The Moon, we have selected the song "Breathe". The fat Clean + Ensemble sound faithfully reproduces what David Gilmour did at the time. | Ensemble | VOLUME | |
| 4 | Van Ampen | Signature tone of Eddie Van Halen, the revolutionary of the guitar world. Use it to play phrases full of technical ideas. | PV Drive | VOLUME | |
| 5 | Adrian | Unique lead sound as created by Adrian Belew in his song "Big Electric Cat". The addition of high octaves to the original sound is the expression of a distinctive sonic outlook. This mysterious sound matches any guitar. | Slow Attack | VOLUME | |
| 6 | Kirk Lead | High gain sound as employed by Metallica's Kirk Hammett in the ending solo of their hit song "One". Shake your hair, get wild and emotional, and let fly with your own performance. | ExtremeDS | VOLUME | |
| 7 | Santana | Passionate crunch sound played by Carlos Santana. Choking up with soul is what it's all about. | BG Crunch | VOLUME | |
| 8 | Kurt Clean | Nirvana's much missed genius, Kurt Cobain loved this clean sound with its interweaving modulation, as can be heard for example on "Come As You Are". | Chorus | VOLUME | |
| 9 | ZZ Drive | The hot crunch sound of Billy F. Gibbons from the hard Boogie band ZZ Top. Sling your guitar low and try the patch for intense backing or slide play. | BG Crunch | VOLUME | |
| d | 0 | Rage Rift | This patch simulates the heavy drive sound of Rage Against The Machine guitarist Tom Morello. Operate the pedal to get that tricky "octave-up sound". | BG Drive | Pitch Bend |
| 1 | Angus Lead | Straight rock sound as played by Angus Young of AC/DC. Combination of Marshall 1959 simulation and Delay produces a rugged tone that still blends well with an ensemble. | MS #1959 | VOLUME | |
| 2 | El Rayo Clean | David Lindley, guitarist of the band El Rayo-X uses this clean chorus sound. Great for reggae rhythms or arggios. Lindley prefers lipstick type pickups, but this patch will also work fine with single-coils or humbuckers. | FD Clean | VOLUME | |
| 3 | Anthem | Vintage rock ballad sound a la Pearl Jam. Whether chord stroke with a stack amp or playing lead with front-mounted pickups, this tone will give a great match. | MS #1959 | VOLUME | |
| 4 | Who Bleed | Clean sound with superb rock feel in the vein of Pete Townshend of the Who. It's bound to get you excited, but better not smash up your guitar and amps. | HW Clean | VOLUME | |
| 5 | Steve Lukather | TOTO's super guitarist Steve Lukather is famous for this lead drive sound which is effective yet smooth. | Pitch Shift | VOLUME | |
| 6 | Joe Walsh | The Eagles guitarist Joe Walsh introduced this crunch sound characterized by prominent phaser in "Hotel California". Go for it and recreate a seminal moment in rock. | Phaser | VOLUME | |
| 7 | MilkyWay | Ping Pong Delay and Phaser produce a sparkling clean sound. Freely control the delay mix with the pedal. Try it with tension chords and arggios. | Phaser | DELAY Mix | |
| 8 | Shimmer | This patch simulates the sound of a dulcimer which is regarded as one of the ancestors of the piano. The pedal lets you adjust the pitch shift mixing ratio. | Pitch Shift | Pitch Shift | |
| 9 | TremoStep | Combination of Tremolo and Step creates a dramatic pulsating sound that makes even simple guitar phrases stand out from the crowd. Freely tailor the Step Rate with the pedal, for enhanced effectiveness. | Step | Step Rate |
- The preset area of banks 0 - 3 contains the same patches as A - d.
- The ZNR value may need to be adjusted depending on the guitar and amplifier.
Manufacturer names and product names mentioned in this patch list are trademarks or registered trademarks of their respective owners. These names as well as artist's names are used only to illustrate sonic characteristics and do not indicate any affiliation with ZOOM CORPORATION.
- Contents
- SAFETY PRECAUTIONS / Usage Precautions
- SAFETY PRECAUTIONS
- Power requirements
- [AC adapter operation]
- [Battery operation]
- Environment
- Handling
- Connecting cables and input and output jacks
- Alterations
- Volume
- Usage Precautions
- Electrical interference
- Cleaning
- Terms Used in This Manual
- IN → COMP/EFX DRIVE EQ ZNR AMP MODULATION DELAY REVERB → OUT
- ■Effect module
- ■ Effect type
- ■ Effect parameter
- Patch
- ■ Bank and area
- Mode
- Operating the G1/G1X on batteries
- Controls and Functions / Connections
- Module selector
- Display
- [INPUT] jack
- [OUTPUT/PHONES] jack
- [BANK UP·TAP] key
- foot switches
- Differences between G1X and G1
- [DC IN] jack
- [CONTROL IN] jack (G1 only)
- Selecting a Patch
- Turn power on
- Set the G1/G1X to play mode
- Adjust the master level
- Select a patch
- Directly selecting a bank
- Using the Tuner
- Switch to bypass or mute
- Patch change at bypass/mute
- Tune your instrument
- Adjusting the reference pitch of the tuner
- Return to play mode
- Using the Rhythm Function
- Select rhythm mode
- HINT
- Start the rhythm function
- NOTE
- Select a rhythm pattern
- Adjust the rhythm volume
- Adjust the tempo
- Stop the rhythm
- Editing a Patch
- Select the effect module/ parameter
- Change the setting
- 3
- To switch an effect module on and off
- Terminate the edit mode
- Storing/Copying Patches
- In play mode or edit mode, press the [STORE] key.
- Select the store/copy target bank
- To cancel the store process
- Press the [STORE] key once more
- Specify the store/copy target patch number
- Changing the Way Patches Are Called Up
- Turn power to the G1/G1X on while holding down the [▲] foot switch.
- In play mode, use the [] / [] foot switches to specify the patch to use next.
- When you have specified the patch to use, press both [ ] / [ ] foot switches together.
- To return the G1/G1X to the normal patch selection method, simply turn power off and then on again.
- Using a Foot Switch or Pedal
- Using the foot switch (FS01) (G1 only)
- Play mode
- Rhythm mode
- Edit mode
- Using the expression pedal
- Store the patch as required.
- Select this patch in play mode, and operate the expression pedal.
- Effect Types and Parameters
- Linking Effects
- Explanation of symbols
- - Module selector
- Expression pedal
- - Tap
- PATCH LEVEL
- PATCH LEVEL (Prm)
- COMP/EFX (Compressor/EFX) module
- COMP/EFX (Type&Prm)
- Compressor
- Auto Wah
- Booster
- Tremolo
- Phaser
- Ring Mod (Ring Modulator)
- Slow Attack
- Vox Wah
- Cry Wah
- ■DRIVE module
- DRIVE (Type)
- FD Clean
- VX Clean
- ■ZNR/AMP (ZNR/Amp Simulator) module
- Restoring Factory Defaults
- Special Features of G1X
- [PEDAL ASSIGN] key operation
- Adjusting the expression pedal
- Specifications
- Troubleshooting
- The FCC regulation warning (for U.S.A.)
- Disposal of Old Electrical & Electronic Equipment (Applicable in European countries with separate collection systems)
- ZOOM CORPORATION
- G1/G1X Patch List
Brand : ZOOM
Model : G1X
Category : Guitar effects pedal