
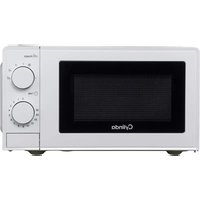
IM9141LRF - Microwave Cylinda - Free user manual and instructions
Find the device manual for free IM9141LRF Cylinda in PDF.
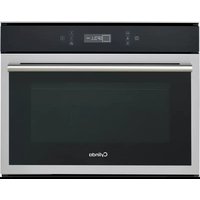


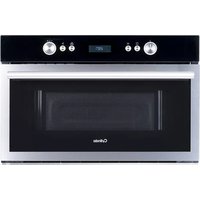
| Product type | Microwave oven |
| Brand | Cylinda |
| Model | IM9141LRF |
| Capacity | 20 liters |
| Power output | 800 W |
| Power consumption | 1200 W |
| Voltage | 230 V ~ 50 Hz |
| Dimensions (W x D x H) | 45 x 38 x 28 cm |
| Weight | 10.5 kg |
| Interior light | Yes |
| Turntable | Glass turntable, 24.5 cm diameter |
| Control type | Electronic touch and dial |
| Display | LED digital display |
| Power levels | 10 power levels including defrost |
| Defrost function | Weight defrost and time defrost |
| Auto cook menus | 8 auto cook menus (e.g., popcorn, pizza, beverage) |
| Timer | Up to 95 minutes |
| Child lock | Yes |
| Quick start | Yes, 30 seconds per press |
| Material | Stainless steel exterior, ceramic interior |
| Cleaning | Wipe interior with damp cloth, avoid abrasive cleaners |
| Spare parts availability | Contact authorized service center |
| Manufacturer | Cylinda (Sweden) |
Frequently Asked Questions - IM9141LRF Cylinda
User questions about IM9141LRF Cylinda
0 question about this device. Answer the ones you know or ask your own.
Ask a new question about this device
Download the instructions for your Microwave in PDF format for free! Find your manual IM9141LRF - Cylinda and take your electronic device back in hand. On this page are published all the documents necessary for the use of your device. IM9141LRF by Cylinda.
USER MANUAL IM9141LRF Cylinda
SVENSKA 3.
ENGLISH 16
SVENSKA
MILJÖ OCH SÄKERHET, ANVÄNDNING OCH SKÖTSEL
MAN. MANUAL FUNCTIONS (MANUELLA FUNKTIONER)


MICROWAVES (MIKROVÅGOR)
2. STÄLLA IN FUNKTIONEN
HEALTH & SAFETY, USE & CARE and INSTALLATION GUIDE
Index
Health and Safety guide
SAFETY INSTRUCTIONS . . . . . . . . . . . . . . . . . . . . . . . . . . . . . . . . . . . . . . . . . . . . . . . . . . . . . . . . . . . . . . . . . . . . . . . . . . . . . . . . . . . . . . . . 17.
Use and Care guide
PRODUCT DESCRIPTION 19.
CONTROL PANEL . . . . . . . . . . . . . . . . . . . . . . . . . . . . . . . . . . . . . . . . . . . . . . . . . . . . . . . . . . . . . . . . . . . . . . . . . . . . . . . . . . . . . . 19.
ACCESSORIES 20.
FUNCTIONS 21.
HOW TO USE THE OVEN . . . . . . . . . . . . . . . . . . . . . . . . . . . . . . . . . . . . . . . . . . . . . . . . . . . . . . . . . . . . . . . . . . . . . . . . . . . . . . . . . . . . . . . . 22.
USING THE APPLIANCE FOR THE FIRST TIME . . . . . . . . . . . . . . . . . . . . . . . . . . . . . . . . . . . . . . . . . . . . . . . . . . . . . . . . . . . . . . . . . . . . . . . . . . . . . . 22 .
DAILY USE . . . . . . . . . . . . . . . . . . . . . . . . . . . . . . . . . . . . . . . . . . . . . . . . . . . . . . . . . . . . . . . . . . . . . 23.
COOKING TABLES 24.
CLEANING 25.
TROUBLESHOOTING 25.
AFTER-SALES SERVICE 26.
Installation guide . . . . . . . . . . . . . . . . . . . . . . . . . . . . . . . . . . . . . . . . . . . . . . . . . . . . . . . . . . . . . . . . . . . . . . . . . . . . . . 27.
SAFETY INSTRUCTIONS
IMPORTANT TO BE READ AND OBSERVED
Before using the appliance, read these safety instructions. Keep them nearby for future reference. These instructions and the appliance itself provide important safety warnings, to be observed at all times. The manufacturer declines any liability for failure to observe these safety instructions, for inappropriate use of the appliance or incorrect setting of controls.
⚠️ Very young children (0-3 years) should be kept away from the appliance. Young children (3-8 years) should be kept away from the appliance unless continuously supervised. Children from 8 years old and above and persons with reduced physical, sensory or mental capabilities or lack of experience and knowledge can use this appliance only if they are supervised or have been given instructions on safe use and understand the hazards involved. Children must not play with the appliance. Cleaning and user maintenance must not be carried out by children without supervision.
⚠ WARNING: When the appliance is operated in the combination mode, children should only use the oven under adult supervision due to the temperatures generated.
⚠ WARNING: The appliance and its accessible parts become hot during use. Care should be taken to avoid touching heating elements. Children less than 8 years of age must be kept away unless continuously supervised.
⚠️ Never leave the appliance unattended during food drying. If the appliance is suitable for probe usage, only use a temperature probe recommended for this oven - risk of fire.
⚠️ Keep clothes or other flammable materials away from the appliance, until all the components have cooled down completely - risk of fire. Always be vigilant when cooking foods rich in fat, oil or when adding alcoholic beverages - risk of fire. Use oven gloves to remove pans and accessories. At the end of cooking, open the door with caution, allowing hot air or steam to escape gradually before accessing the cavity - risk of burns. Do not obstruct hot air vents at the front of the oven - risk of fire.
Exercise caution when the oven door is in the open or down position, to avoid hitting the door.
⚠ WARNING: If the door or door seals are damaged, the oven must not be operated until it has been repaired - risk of injury.
⚠ WARNING: Liquids and foods must not be heated in sealed containers - risk of explosion . Heating of beverages can result in delayed eruptive boiling, care must be taken when handling the container - risk of burns .
⚠ The microwave oven is intended for heating food
and beverages .Do not dry food or clothing or heat warming pads, slippers, sponges and similar - risk of fire . When heating food in plastic or paper containers, remain vigilant on the oven - risk of fire .
After heating baby food or liquids in a baby bottle or a safe microwave cup, always shake, stir and check the temperature before service. This will ensure that the heat is evenly distributed and avoid the risk of scalding or burns.
⚠️ Contents of feeding bottles and baby food jars must be stirred or shaken and temperature checked - risk of burns. Do not heat eggs in their shell and whole hard-boiled eggs - risk of explosion.
⚠️ Only use utensils suitable for microwave ovens. Do not use metallic containers - risk of injury.
⚠️ Only use a temperature probe recommended for this oven - risk of fire.
⚠️ If smoke is emitted, switch off or unplug the appliance and keep the door closed in order to stifle any flames.
⚠️ If appliance is installed above 850 mm height from floor, care should be taken not to displace turntable while removing container - risk of injury.
Do not use your microwave oven for deep-frying, because the oil temperature cannot be controlled.
⚠️ Metallic containers for food and beverages are not suitable during microwave cooking.
⚠ Do not remove the microwave inlet protection plates on the side of the cavity walls (certain models only). They prevent grease and food particles from entering the microwave inlet channels.
PERMITTED USE
⚠️ CAUTION: The appliance is not intended to be operated by means of an external switching device, such as a timer, or separate remote controlled system.
This appliance is intended to be used in household and similar applications such as: staff kitchen areas in shops, offices and other working environments; farm houses; by clients in hotels, motels, bed & breakfast and other residential environments.
⚠ No other use is permitted (e.g. heating rooms).
This appliance is not for professional use. Do not use the appliance outdoors.
⚠ Do not store explosive or flammable substances (e .g . gasoline or aerosol cans) inside or near the appliance - risk of fire .
INSTALLATION
The appliance must be handled and installed by two or more persons - risk of injury. Use protective gloves to unpack and install - risk of cuts.
⚠ Installation, including water supply (if any), electrical connections and repairs must be carried out by a qualified technician. Do not repair or replace any part of the appliance unless specifically stated in
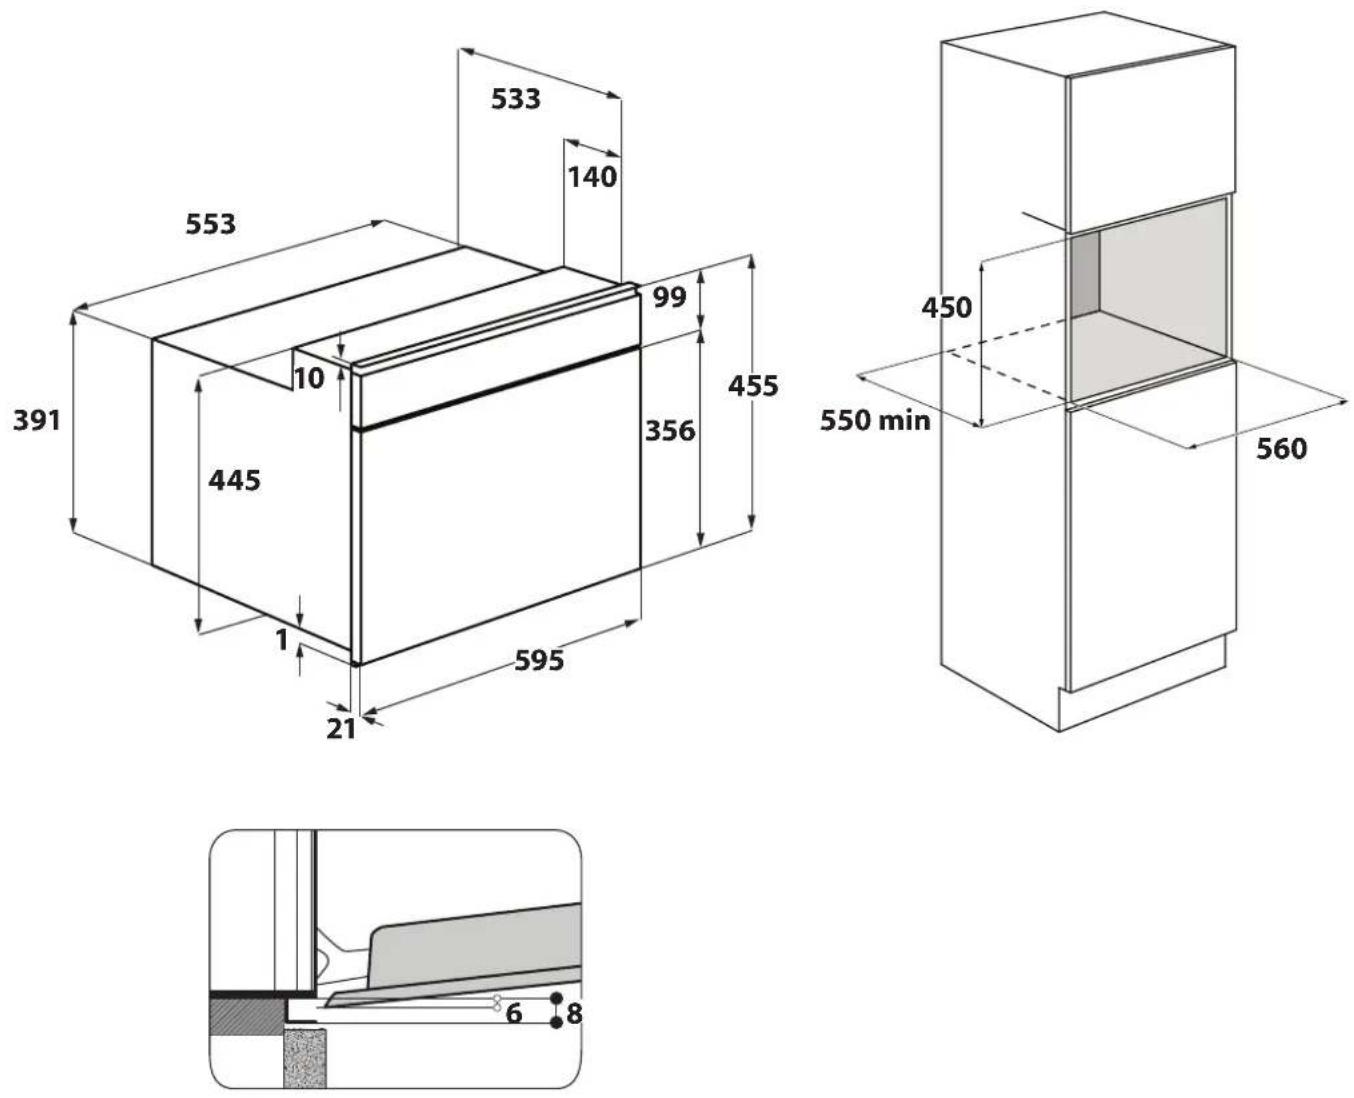
the user manual. Keep children away from the installation site. After unpacking the appliance, make sure that it has not been damaged during transport. In the event of problems, contact the dealer or your nearest After-sales Service. Once installed, packaging waste (plastic, styrofoam parts etc.) must be stored out of reach of children - risk of suffocation. The appliance must be disconnected from the power supply before any installation operation - risk of electric shock. During installation, make sure the appliance does not damage the power cable - risk of fire or electric shock. Only activate the appliance when the installation has been completed.
⚠️ Carry out all cabinet cutting operations before fitting the appliance and remove all wood chips and sawdust.
Do not obstruct the minimum gap between the worktop and the upper edge of the oven - risk of burns.
Do not remove the oven from its polystyrene foam base until the time of installation.
⚠️ After installation, the bottom of the appliance must no longer be accessible - risk of burns.
⚠️ Do not install the appliance behind a decorative door - risk of fire.
⚠️ If the appliance is installed under the worktop, do not obstruct the minimum gap between the worktop and the upper edge of the oven - risk of burns.
This appliance is intended to be used built-in. Do not use it freestanding or place into a cabinet.
After unpacking the appliance, make sure that the appliance door closes properly.
In the event of problems, contact the dealer or your nearest After-sales Service.
ELECTRICAL WARNINGS
⚠ The rating plate is on the front edge of the oven (visible when the door is open).
⚠ It must be possible to disconnect the appliance from the power supply by unplugging it if plug is accessible, or by a multi-pole switch installed upstream of the socket in accordance with the wiring rules and the appliance must be earthed in conformity with national electrical safety standards.
⚠ Do not use extension leads, multiple sockets or adapters. The electrical components must not be accessible to the user after installation. Do not use the appliance when you are wet or barefoot. Do not operate this appliance if it has a damaged power cable or plug, if it is not working properly, or if it has been damaged or dropped.
⚠️ If the supply cord is damaged, it must be replaced with an identical one by the manufacturer, its service agent or similarly qualified persons in order to avoid a hazard - risk of electric shock.
⚠ In case of replacement of power cable, contact an authorised service centre.
CLEANING AND MAINTENANCE
⚠ WARNING: It is hazardous for anyone other than a competent person to carry out any service or repair operation that involves the removal of a cover which give protection against exposure to microwave energy.
⚠️ Failure to maintain the oven in a clean condition could lead to deterioration of the surface that could adversely affect the life of the appliance and possibly result in a hazardous situation.
⚠ The oven must be cleaned regularly and any food deposits removed
⚠ WARNING: Ensure that the appliance is switched off and disconnected from the power supply before performing any maintenance operation. To avoid risk of personal injury use protective gloves (risk of laceration) and safety shoes (risk of contusion); be sure to handle by two persons (reduce load); never use steam cleaning equipment (risk of electric shock). Non-professional repairs not authorised by the manufacturer could result in a risk to health and safety, for which the manufacturer cannot be held liable. Any defect or damage caused from non-professional repairs or maintenance will not be covered by the guarantee, the terms of which are outlined in the document delivered with the unit.
⚠️ Regularly clean appliance door internal side and related gasket, without removing it. Use a soft sponge, mild water and neutral soap; dry using a neutral soft cloth. Do not use metal scrapers.
⚠ Do not use harsh abrasive cleaners or metal scrapers to clean the door glass since they can scratch the surface, which may result in shattering of the glass.
⚠ Ensure the appliance is cooled down before any cleaning or maintenance - risk of burns.
DISPOSAL OF PACKAGING MATERIALS
The packaging material is 100% recyclable and is marked with the recycle symbol 🌐.
The various parts of the packaging must therefore be disposed of responsibly and in full compliance with local authority regulations governing waste disposal.
DISPOSAL OF HOUSEHOLD APPLIANCES
This appliance is manufactured with recyclable or reusable materials. Dispose of it in accordance with local waste disposal regulations. For further information on the treatment, recovery and recycling of household electrical appliances, contact your local authority, the collection service for household waste or the store where you purchased the appliance. This appliance is marked in compliance with European Directive 2012/19/EU, Waste Electrical and Electronic Equipment (WEEE). By ensuring this product is disposed of correctly, you will help prevent negative consequences for the environment and human health.
The symbol on the product or on the accompanying documentation indicates that it should not be treated as domestic waste but must be taken to an appropriate collection centre for the recycling of electrical and electronic equipment.
DECLARATIONS OF CONFORMITY
This appliance is in compliance with the European standard EN 60705.
This product contains a light source of energy efficiency class G.
PRODUCT DESCRIPTION

- Control panel
- Circular heating element (non-visible)
- Identification plate (do not remove)
- Door
- Upper heating element/grill
- Light
- Turntable
CONTROL PANEL
![graph TD A["Timer"] --> B["AUTO"] B --> C["MAN"] C --> D["OK/SELECT"] D --> E["Select"] style A fill:#f9f,stroke:#333 style B fill:#ccf,stroke:#333 style C fill:#cfc,stroke:#333 style D fill:#fcc,stroke:#333 style E fill:#cff,stroke:#333](/content/2026/07/1518925/images/7a48eee1033888bb0da7f0f92f533eef1fb2d8f22a2b92d72bcd3e081edb3f08.jpg)
1.ON/OFF
For switching the oven on and off and for stopping an active function.
2. AUTOMATIC
For scrolling through the list of automatic functions.
3. BACK
For returning to the previous settings menu.
4. MANUAL
For scrolling through the list of manual functions.
5. DISPLAY
6. NAVIGATION BUTTONS
For changing the settings and values of a function.
7. CONFIRMATION BUTTON
For confirming a function selection or a set value.
8. START
For starting a function.
When the oven is switched off, it activates the "Jet Start" microwave function.
ACCESSORIES
TURNTABLE

Placed on its support, the glass turntable can be used with all cooking methods.
The turntable must always be used as a base for other containers or accessories, with
the exception of the rectangular baking tray.
TURNTABLE SUPPORT

Only use the support for the glass turntable. Do not rest other accessories on the support.
CRISP PLATE

Only for use with the specific "Crisp Dynamic" function.
The Crisp plate must always be placed in the centre of the glass turntable and can be pre-heated when empty, using the special
function for this purpose only. Place the food directly on the Crisp plate.
HANDLE FOR THE CRISP PLATE

Useful for removing the hot Crisp plate from the oven.
RECTANGULAR BAKING TRAY

Only use the baking tray with functions that allow for convection cooking; it must never be used in combination with microwaves. Insert the tray horizontally, resting it on the rack
in the cooking compartment.
Please note: You do not need to remove the turntable and its support when using the rectangular baking tray.
The number of accessories may vary according to which model is purchased.
Other accessories can be purchased separately from the After-sales Service.
There are a number of accessories available on the market. Before you buy, ensure they are suitable for microwave use and resistant to oven temperatures.
Metallic containers for food or drink should never be used during microwave cooking.
WIRE SHELF
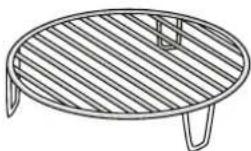
This allows you to place food closer to the grill, for perfectly browning your dish and for optimal hot air circulation. Place the wire shelf on the turntable, making sure that it does not
come into contact with other surfaces.
STEAMER

To steam foods such as fish or vegetables, place these in the basket (2) and pour drinking water (100 ml) into the bottom of the steamer (3) to achieve the right amount of steam.
To boil foods such as pasta, rice or potatoes, place these directly
on the bottom of the steamer (the basket is not required) and add an appropriate amount of drinking water for the amount you are cooking.
For best results, cover the steamer with the cover (1) provided.
Always place the steamer on the glass turntable and only use it with the appropriate cooking functions, or with microwave functions.
COVER

Useful for covering food while it is cooking or heating in the microwave.
The cover reduces splashes, keeps foods moist and can also be used to create two cooking levels.
It is not suitable for use in convection cooking or with any of the grill functions (including "Crisp Dynamic").
Always ensure that foods and accessories do not come into contact with the inside walls of the oven.
Always ensure that the turntable is able to turn freely before starting the oven. Take care not to unseat the turntable whilst inserting or removing other accessories.
MAN. MANUAL FUNCTIONS

MICROWAVES
For quickly cooking and reheating food or s.
POWER SUGGESTED USE
| 900 W | Quickly reheating drinks or other foods with a high water content |
| 750 W | Cooking vegetables |
| 650 W | Cooking meat and fish |
| 500 W | Cooking meaty sauces, or sauces containing cheese or egg. Finishing off meat pies or pasta bakes |
| 350 W | Slow, gently cooking. Perfect for melting butter or chocolate |
| 160 W | Defrosting frozen foods or softening butter and cheese |
| 90 W | Softening ice cream |
Recommended accessories: Cover

CRISP DYNAMIC
For perfectly browning a dish, both on the top
and bottom of the food. This function must only be used with the special crisp plate.
Required accessories: Crisp plate, handle for the Crisp plate

GRILL
For browning, grilling and gratins. We
recommend turning the food during cooking.
For best results, preheat the grill for 3-5 minutes.
Recommended accessories: Wire shelf

GRILL + MICROWAVES
For quickly cooking and gratinating dishes,
combining the microwave and grill functions.
Recommended accessories: Wire shelf

TURBO GRILL + MICROWAVES
For quickly cooking and browning your food,
combining the microwave, grill and convection oven functions.
Recommended accessories: Wire shelf

FORCED AIR
For cooking dishes in a way that achieves
similar results to using a conventional oven.
The baking tray or other cookware that is suitable for oven use can be used to cook certain foods.
Recommended accessories: Rectangular baking tray/wire shelf

FORCED AIR + MICROWAVES
For preparing oven-baked dishes in a short amount of time.
Recommended accessories: Wire shelf

QUICK HEAT
For quickly heating the oven before
activating a cooking cycle.
Wait for the function to finish before placing food inside the oven.

SETTINGS
For changing the oven settings
(language, Eco mode, brightness, audible signal volume, clock).
Please note: When Eco mode is active, the brightness of the display will be reduced after a few seconds to save energy. The display is reactivated automatically whenever any of the buttons are pressed, etc.
AUTO AUTOMATIC FUNCTIONS
With the automatic functions, simply select the type and weight or quantity of food to achieve the best results. The oven will automatically calculate the optimum settings and continue to change them as cooking progresses. The total time does not include preparation or preheating phases.

DEFROST DYNAMIC
For quickly defrosting various
different types of food simply by specifying their weight.
Food should be placed directly onto the glass turntable. Turn the food when prompted.
CATEGORY RECOMMENDED FOODS WEIGHT
  | MEAT (mince, cutlets, steaks, roasting joints) | 100 g - 2 kg |
 | POULTRY (whole chicken, pieces, fillets) | 100 g - 2.5 kg |
  | FISH (whole, steaks, fillets) | 100 g - 1.5 kg |
 | VEGETABLES (mixed vegetables, peas, broccoli, etc.) | 100 g - 1.5 kg |
  | BREAD (loaves, buns, rolls) | 100 g - 2 kg |


REHEA
AUTO
REHEAT DYNAMIC

For reheating ready-made food that is either frozen or at room temperature. The oven automatically calculates the settings required to achieve the best results in the shortest amount of time. Place food on a microwave-safe and heatproof dinner plate or dish.

CRISP
AUTO
CRISP DYNAMIC
For quickly reheating and cooking frozen foods and giving them a golden, crunchy top. Only use this function with the crisp plate provided. Turn the food when prompted.
CATEGORY RECOMMENDED FOODS WEIGHT
| [CSHW] | FRENCH FRIES(spread out in a single layer and sprinkle with salt before cooking) | 300 - 600 g |
| [AWT2] | PIZZA, THIN CRUST 250 - 500 g | |
| [STY4] | PIZZA, THICK CRUST 300 - 800 g | |
| [CTYS] | CHICKEN WINGS, CHICKEN PIECES(Lightly oil the plate) | 300 - 600 g |
| [RXKC] | FISH FINGERS(Crisp plate must be preheated) | 200 - 600 g |
Required accessories: Crisp plate, handle for the crisp plate


COOK
AUTO
COOK DYNAMIC
For oven-cooking foods quickly and achieving optimal results. Use cookware that is suitable for oven cooking and resistant to microwaves.
| CATEGORY | FOOD | WEIGHT |
 | ROAST CHICKEN | 800 g - 1.5 kg |
 | COOKIES | 1 batch |
 | WHOLE FISH | 600 g - 1.2 kg |
 | POTATO GRATIN | 800 g - 2 kg |
 | ROAST BEEF | 800 g - 1.5 kg |


STEAM
AUTO
STEAM DYNAMIC

For steam-cooking foods such as vegetables or fish, using the steamer provided. An initial preparation phase automatically generates steam, bringing the water poured into the bottom of the steamer to the boil. Timings for this phase may vary. The oven then proceeds with steam-cooking the food, according to the time set.
Some indicative cooking times are as follows:
• FRESH VEGETABLES (250-500 g): 4-6 minutes;
• F OZEN VEGETABLES (250-500 g): 5-7 minutes;
• FISH FILL TS (250-500 g): 4-6 minutes.
Required accessory: Steamer
USING THE APPLIANCE FOR THE FIRST TIME
1. SELECT THE LANGUAGE
You will need to set the language and the time when you switch on the appliance for the first time: "ENGLISH" will scroll along the display.

Use or to scroll through the list of available languages and select the one you require. Press OK/select to confirm your selection.
Please note: The language can subsequently be changed from the "Settings" menu.
2. SET THE TIME
After selecting the language, you will need to set the current time: The two digits for the hour will flash on the display.

Use ∧ or ∨ to set the correct hour and press OK select: The two digits for the minutes will flash on the display.

^ ∨ confirm.
OK to Use or to se select
Please note: You may need to set the time again following lengthy power outages.
DAILY USE
1. SELECT A FUNCTION
Press ⑥ switch on the oven, then use oAUTO MAN. to access the menus for the manual and automatic functions.
To scroll through the menu, keep pressing AUTO or MAN, until the function you require is shown on the display: The display will show the icon for the function and the basic settings for it that you can change.
![[〃 〃] 07:30 650=](/content/2026/07/1518925/images/5ae37b6b54dbf1e27eda17cc6cfa13bef99d568f6a1a06b44dc8116e03da0972.jpg)
2. SET THE FUNCTION
After having selected the function you require, you can change its settings.
The display will show the settings that can be changed in sequence.
![[〃 〃] 07:30 =650=](/content/2026/07/1518925/images/c205e81a7eb2f75fbdd0773986738d0a44bec123bc4137380d4839280075deb9.jpg)
When a setting is flashing on the display, use /or ∨ to change it, then press OK select to confirm and continue to alter the settings that follow (if possible).
![[〃 〃] 07:30 650w](/content/2026/07/1518925/images/125bbeae54d7d00f2e34c5c9795904a448f556b848f8a855575f32a772e9bb87.jpg)
<< allows you to change the previous setting M again.
3. ACTIVATE THE FUNCTION
Once you have applied the settings you require, press ▶ to activate the function.
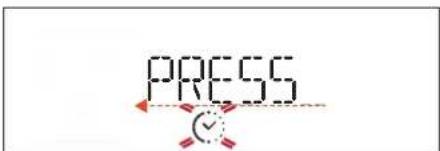
You can press @at any time to pause the function that is currently active.
.SAFETY LOCK
This function is automatically activated to prevent the oven from being switched on accidentally.
![[〃 ≡]DOOR 650_w](/content/2026/07/1518925/images/b7c4cdc9f48da37143829227224b1b464428b4d8b2c05ecd1c137e11c6c8ffed.jpg)
Open and close the door, then press ▶to start the function.
.PAUSE
To pause an active function, for example to stir or turn the food, simply open the door.
To start it up again, close the door and press
JET START
When the oven is switched off, press to activate cooking with the microwave function set at full power (900 W) for 30 seconds.
Every time the ▷ button is pressed again, the cooking time will be increased by a further 30 seconds.
. AUTOMATIC FUNCTIONS AUTO
CATEGORIES
When using certain automatic functions, you will need to select a category for the food you are cooking in order to achieve the best results.
The reference category corresponds to the number indicated at the top right of the display.
Refer to the table containing descriptions of the functions for information on all of the categories.
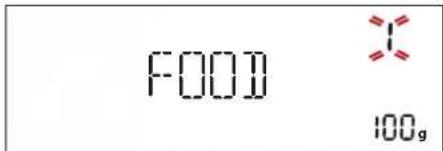
Once you have selected the category, most of the automatic functions will also require you to enter the weight of the food.
DEGREE OF DONENESS
Most of the automatic functions will prompt you to select how well done (minimum, low, medium, high, maximum) you require the food to be.
The degree of doneness can only be altered during the first 20 seconds of operation after activating the function: Activate the function and then press ∧ or ∨ to select the setting you require.
![[___]MID 0 AUTO](/content/2026/07/1518925/images/286685da50876c65d4c15fabc0b6c7dcf3ee20d39c7b56664cc2408c1763915d.jpg)
ACTIONS (STIRRING OR TURNING FOOD)
Certain automatic functions require you to turn or stir the food, for example, and will pause in order for you to do so.
![[ Turn ] AUTO](/content/2026/07/1518925/images/1db325f79dc7e7189dd194939dd15aa727bba32e359e0cd2eee61d87c5efcbc2.jpg)
Once the oven has paused cooking, open the door and carry out the action you are prompted to perform before closing the door again and pressing ▶ to continue with cooking.
Please note: When using the "Defrost Dynamic" function, the function will start again automatically after two minutes, even if you have not turned or stirred the food.
. RESIDUAL HEAT
In many cases, when food has been cooked, the oven will activate an automatic cooling process, which will be indicated on the display.

To view the clock during this process (with the oven switched off), press << .
Please note: Opening the door will temporarily interrupt the process.
.TIMER
When the oven is switched off, the display can be used as a timer. To activate the function and set the length of time you require, press ∧ or ∨.
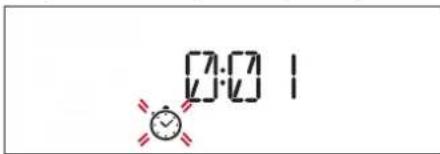
Press OK select to activate the timer: An audible signal will sound and the display will indicate once the timer has finished counting down the selected time.
Once the timer has been activated, you can activate a function as well: The timer will continue to count down the selected time automatically without having any effect on the function.
![[〃 ≡] 0:29](/content/2026/07/1518925/images/cd3a444689943ef6129bb58bb822aedebe88aa258a24d45e9712ea65c820e344.jpg)
To go back to viewing the timer, wait for the function to finish or switch off the oven by pressing ①.
Please note: The timer does not activate any of the cooking cycles.
To change the time set for the timer, press << to pause it and then press << twice to go back to viewing the current time.
. SETTINGS
To change the oven settings, keep pressingMAN. until "SETTINGS" appears on the display and then press OK select to access the menu.
Use ∧ or ∨ to scroll through the menu and press OK select to access the setting you would like to change. Use ∧ or ∨ to change the setting and press OK select to confirm.
COOKING TABLE
| FOOD FUNCTION | TEMP. (°C)/GRILL LEVEL | POWER(W) | TIME ACCESSORIES | |
| Sponge cakes | [∞] | 160-180 - 30-60 | ||
| [∞] | 160-180 90 25-50 | |||
| Filled pies(cheesecake, strudel, apple tart) | [∞] | 160-190 - 35-70 | ||
| Biscuits 170-180 - 10-20 | [∞] | |||
| Meringues 100-120 - 40-50 | [∞] | |||
| Rolls | [∞] | 210-220 | - | 10-12 |
| Loaves of bread | [∞] | 180-200 | - | 30-35 |
| Pizza/bread | [∞] | 190-220 | - | 20-40 |
| Pizza (0.4-0.5 kg) | - | - | 14-16 | |
| Quiche(vegetable tart, quiche lorraine) | [∞] | 180-190 | - | 40-55 |
| Quiche lorraine (1-1.2 kg) | - | - | 18-20 | |
| Lasagne/pasta bake | Medium | 350-500 | 15-40 | |
| FOOD FUNCTION | TEMP. (°C)/GRILL LEVEL | POWER(W) | TIME ACCESSORIES | |||
| Roast lamb/veal/roast beef(1.3-1.5 kg) | [∞] | 170-180 - 70-80* |  |  | ||
| [∞] | 160-180 160 50-70* |  |  | |||
| Roast beef – medium (1.3-1.5 kg) | [∞] | 170-180 | - | 40-60* |  |  |
| Roast chicken/rabbit/duck(whole 1-1.2 kg) | [∞] | 210-220 - 50-70* |  |  | ||
| [∞] | 210-220 350 | 45-60* |  |  | ||
| Chicken/rabbit/duck(fillets/pieces) | [∞] | Medium -High | 350-500 | 20-40* |  |  |
| Chicken pieces (0.4-1 kg) | [∞] | - | - | 12-18 |  |  |
| Baked fish (whole) | [∞] | High | 160-350 | 20-40 |  |  |
| Fish fillets/slices | [∞] | High | - | 15-30* |  |  |
| Stuffed vegetables(tomatoes, courgettes, aubergines) | [∞] | Medium | 500-650 | 25-50 |  |  |
| Toasted sandwiches | [∞] | High | - | 3-6 |  |  |
| Sausages/kebabs/spare ribs/hamburgers | [∞] | Medium -High | -20-40* |  |  | |
| Sausages/burgers (0.2-1 kg) | [∞] | - | - | 6-16** |  |  |
| Baked potatoes | [∞] | Medium | 350-500 | 20-40* |  |  |
| Potato wedges (0.3-0.8 kg) | [∞] | - | - | 10-20** |  |  |
| Baked fruit | [∞] | Medium | 160-350 | 15-25 |  |  |
| Vegetable gratin | [∞] | High -Medium | - | 15-25 |  |  |
| Fried vegetables (0.3-0.8 kg) | [∞] | - | - | 8-18 |  | > |
* Turn the food halfway through cooking
** Preheat the Crisp plate for 3-5 minutes
| FUNCTIONS | Crisp | Grill | Grill + Microwaves | Turbo Grill +Microwaves | Forced Air | Forced Air +Microwaves |
| ACCESSORIES | Heatproof plate/container suitable for use in microwaves | Wire shelf | Crisp plate | Rectangular baking tray | ||
CLEANING
Make sure that the appliance has cooled down before carrying out any maintenance or cleaning. Do not use steam cleaners.
Do not use wire wool, abrasive scourers or abrasive/corrosive cleaning agents, as these could damage the surfaces of the appliance.
INTERIOR AND EXTERIOR SURFACES
- Clean the surfaces with a damp microfibre cloth. If they are very dirty, add a few drops of pH-neutral detergent. Finish off with a dry cloth.
- Clean the door glass with a suitable liquid detergent.
- At regular intervals or in case of spills, remove the turntable and its support to clean the bottom of the oven, removing all food residue.
- The grill does not need to be cleaned as the intense heat burns away any dirt: Use this function on a regular basis.
ACCESSORIES
All accessories are dishwasher safe with the exception of the crisp plate. The crisp plate should be cleaned using water and a mild detergent. For stubborn dirt, rub gently with a cloth. Always leave the crisp plate to cool down before cleaning.
TROUBLESHOOTING
A complete product specification, including the energy efficiency ratings for this www oven, can be consulted at and downloaded from our website www.cylinda.se
| Problem Possible cause Solution | ||
| The oven is not working. | Power cut.Disconnection from the mains. | Check for the presence of mains electrical power and whether the oven is connected to the electricity supply. Turn off the oven and restart it to see if the fault persists. |
| The oven makes noises, even when it is switched off. | Cooling fan active. Open the door or wait until the cooling process has finished. | |
| The display is showing “Err”. | Software fault. Contact you nearest After-sales Service Centre and state the letter or number that follows “Err”. | |
AFTER-SALES SERVICE
BEFORE CONTACTING CYLINDA AFTER-SALES SERVICE
-
Check whether you can resolve the problem yourself using any of the measures described in the "Troubleshooting" section.
-
Turn the oven off and on again to see whether the fault persists.
IF THE FAULT PERSISTS AFTER HAVING PERFORMED ALL OF THE NECESSARY CHECKS, CONTACT YOUR NEAREST CYLINDA SERVICE CENTRE.
To receive assistance, call the number given on the warranty leaflet enclosed with the product or follow the instructions on our website. Be prepared to provide:
• A brief description of the fault
• The exact type of model of your product
- The assistance code (the number following the word SERVICE on the identification plate attached to the product; this can be seen on the left-hand edge of the cooking compartment when the oven door is open).
- Your full address
• A contact telephone number

Please note: If repairs are required, contact an authorised service centre that is guaranteed to use original spare parts and perform repairs correctly.
Please refer to the enclosed warranty leaflet for more information on the warranty.


?
service
• Vi har service | hela landet / Nationwide service
• Gå in på www.cylinda.se / Visit www.cylinda.se
• Ring 0771-25 25 00 (endast lokaltaxa) / Call 0771-25 25 00
uppge
- Maskintyp / Model code
• Serienummer / Serial number
• Inköpsdatum / Purchase date
• Problembeskrivning / Problem description


- SVENSKA
- MILJÖ OCH SÄKERHET, ANVÄNDNING OCH SKÖTSEL
- MAN. MANUAL FUNCTIONS (MANUELLA FUNKTIONER)
- MICROWAVES (MIKROVÅGOR)
- STÄLLA IN FUNKTIONEN
- HEALTH & SAFETY, USE & CARE AND INSTALLATION GUIDE
- USE AND CARE GUIDE
- SAFETY INSTRUCTIONS
- IMPORTANT TO BE READ AND OBSERVED
- PERMITTED USE
- INSTALLATION
- ELECTRICAL WARNINGS
- CLEANING AND MAINTENANCE
- DISPOSAL OF PACKAGING MATERIALS
- DISPOSAL OF HOUSEHOLD APPLIANCES
- DECLARATIONS OF CONFORMITY
- PRODUCT DESCRIPTION
- ON/OFF
- AUTOMATIC
- BACK
- MANUAL
- DISPLAY
- NAVIGATION BUTTONS
- CONFIRMATION BUTTON
- START
- ACCESSORIES
- TURNTABLE
- TURNTABLE SUPPORT
- CRISP PLATE
- HANDLE FOR THE CRISP PLATE
- RECTANGULAR BAKING TRAY
- WIRE SHELF
- STEAMER
- COVER
- MAN. MANUAL FUNCTIONS
- MICROWAVES
- CRISP DYNAMIC
- GRILL
- GRILL + MICROWAVES
- TURBO GRILL + MICROWAVES
- FORCED AIR
- FORCED AIR + MICROWAVES
- QUICK HEAT
- SETTINGS
- AUTO AUTOMATIC FUNCTIONS
- DEFROST DYNAMIC
- REHEAT DYNAMIC
- COOK DYNAMIC
- STEAM DYNAMIC
- USING THE APPLIANCE FOR THE FIRST TIME
- SELECT THE LANGUAGE
- SET THE TIME
- DAILY USE
- SELECT A FUNCTION
- SET THE FUNCTION
- ACTIVATE THE FUNCTION
- SAFETY LOCK
- PAUSE
- JET START
- AUTOMATIC FUNCTIONS AUTO
- CATEGORIES
- DEGREE OF DONENESS
- ACTIONS (STIRRING OR TURNING FOOD)
- RESIDUAL HEAT
- TIMER
- CLEANING
- INTERIOR AND EXTERIOR SURFACES
- AFTER-SALES SERVICE
- SERVICE
- UPPGE
Brand : Cylinda
Model : IM9141LRF
Category : Microwave