IM 90M RFS - Microwaves Cylinda - Free user manual and instructions
Find the device manual for free IM 90M RFS Cylinda in PDF.

User questions about IM 90M RFS Cylinda
0 question about this device. Answer the ones you know or ask your own.
Ask a new question about this device
Download the instructions for your Microwaves in PDF format for free! Find your manual IM 90M RFS - Cylinda and take your electronic device back in hand. On this page are published all the documents necessary for the use of your device. IM 90M RFS by Cylinda.
USER MANUAL IM 90M RFS Cylinda
natural_image
Product lineup of white washing machines and refrigerators against a solid pink background (no text or symbols visible)SVENSKA....3
ENGLISH 17
SVENSKA
7. KNAPP FÖR ATT ÖPPNA UGNSLUCKAN
TILLBEHÖR
natural_image
Simple line drawing of a triangular structure inside an oval frame (no text or symbols)LOCK
natural_image
Line drawing of a food display with a bowl and plate, no text or symbols presentnatural_image
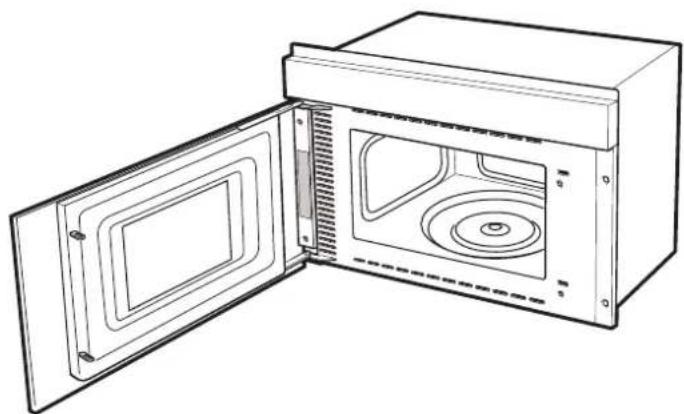
Line drawing of an open microwave oven with internal compartments and ventilation slots (no text or symbols)HEALTH & SAFETY, USE & CARE and INSTALLATION GUIDE
Index
Health and Safety guide
SAFETY INSTRUCTIONS....18
SAFEGUARDING THE ENVIRONMENT 20
PRODUCT DESCRIPTION 21
Use and Care guide
CONTROL PANEL....21
ACCESSORIES....22
FUNCTIONS....23
USING THE APPLIANCE FOR THE FIRST TIME....23
DAILY USE 24
USEFUL TIPS 25
COOKING TABLES 26
TESTED RECIPES 27
CLEANING 28
TROUBLESHOOTING....29
PRODUCT FICHE 30
AFTER-SALES SERVICE....30
Installation guide .... 31
SAFETY INSTRUCTIONS
IMPORTANT TO BE READ AND OBSERVED
Before using the appliance carefully read these safety instructions. Keep them close at hand for future reference. These instructions and the appliance itself provide important safety warnings, to be observed at all times. The manufacturer declines any liability for failure to observe these safety instructions, for inappropriate use of the appliance or incorrect setting of controls.
SAFETY WARNINGS
Very young (0-3 years) and young children (3-8 years) shall be kept away from the appliance unless continuously supervised. Children from 8 years old and above and persons with reduced physical, sensory or mental capabilities or lack of experience and knowledge can use this appliance only if they are supervised or have been given instructions on safe use and understand the hazards involved. Children must not play with the appliance. Cleaning and user maintenance must not be carried out by children without supervision.
WARNING: The appliance and its accessible parts become hot during use, children less than 8 year of age shall be kept away unless continuously supervised.
WARNING: Avoid touching heating elements or interior surface - risk of burns. Never leave the appliance unattended during food drying. If the appliance is suitable for probe usage, only use the temperature probe recommended for this oven.
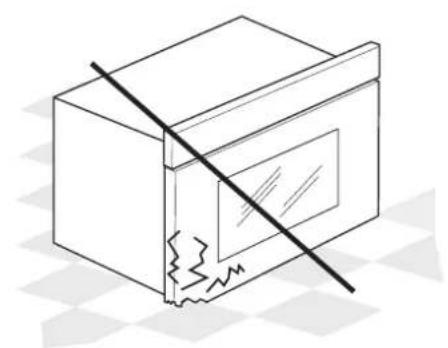
WARNING: If the door or door seals are damaged, the oven must not be operated until it has been repaired by a competent person.
WARNING: Liquids and other foods must not be heated in sealed containers since they are liable to explode.
The microwave oven is intended for heating food and beverages. Drying of food or cloathing and heating of warming pads, slippers, sponges, damp cloth and similar may lead to risk of injury, ignition or fire.
When heating food in plastic or paper containers, keep an eye on the oven due to the possibility of ignition.
Microwave heating of beverages can result in delayed eruptive boiling, therefore care must be taken when handling the container.
The contents of feeding bottels and baby food jars shall be stirred or shaken and the temperature checked before consumption, in order to avoid burns.
Eggs in their shell and shole hard-boiled eggs should not be heated in microwave ovens since they may explode even after microwave heating has ended.
Only use utensils suitable for use in a microwave oven.
If smoke is emitted switch off or unplug the appliance and keep the door closed in order to stifle any flames.
Do not use your microwave oven for deep-frying, because the oil temperature cannot be controlled.
Keep clothes or other flammable materials away from the appliance, until all the components have cooled down completely.
Overheated oils and fats catch fire easily. Always be vigilant when cooking food rich in fat, oil or when adding alcohol (e.g. rum, cognac, wine) - risk of fire. Use oven gloves to remove pans and accessories, taking care not to touch the heating elements. At the end of cooking, exercise caution when opening the door, by letting the hot air or steam exit gradually before accessing the appliance.
Do not obstruct hot air vents at the front of the oven.
PERMITTED USE
CAUTION: The appliance is not intended to be operated by means of an external timer or separate remote controlled system.
This appliance is intended to be used in household and similar applications such as:
- Staff kitchen areas in shops, offices and other working environments;
- Farm houses;
- By clients in hotels, motels and other residential environments;
- Bed and breakfast type environments.
This appliance is solely for domestic, not professional use.
Do not use the appliance outdoors.
Do not store explosive or flammable substances such as aerosol cans and do not place or use gasoline or other flammable materials in or near the appliance: a fire may break out if the appliance is inadvertently switched on.
No other use is permitted (e.g. heating rooms).
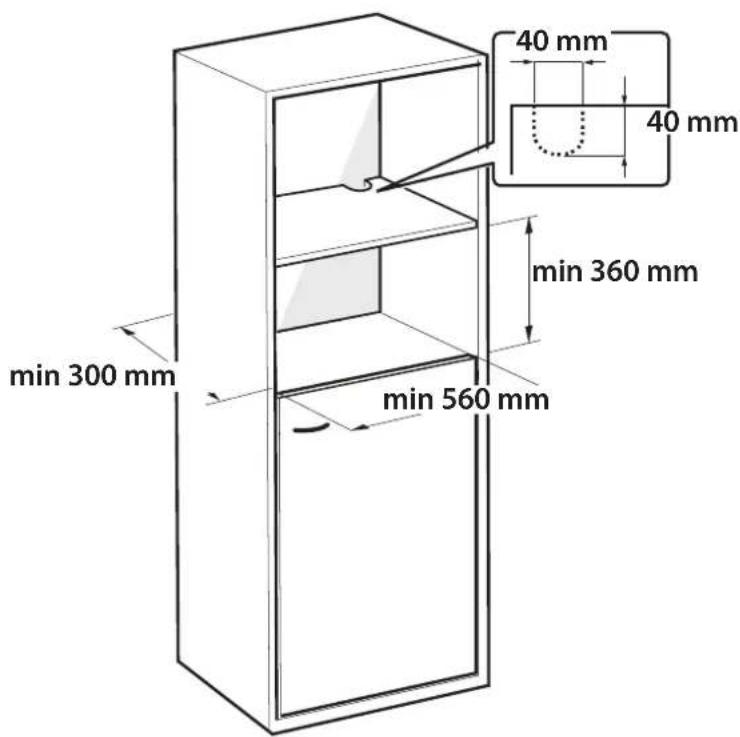
INSTALLATION
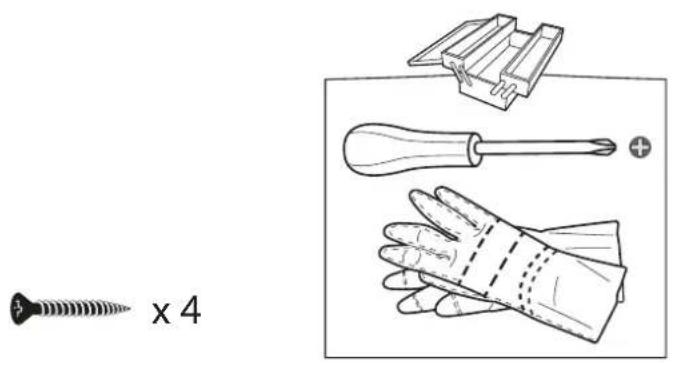
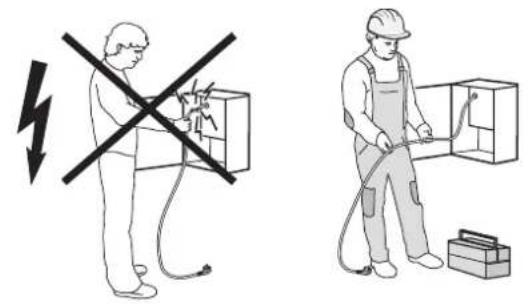
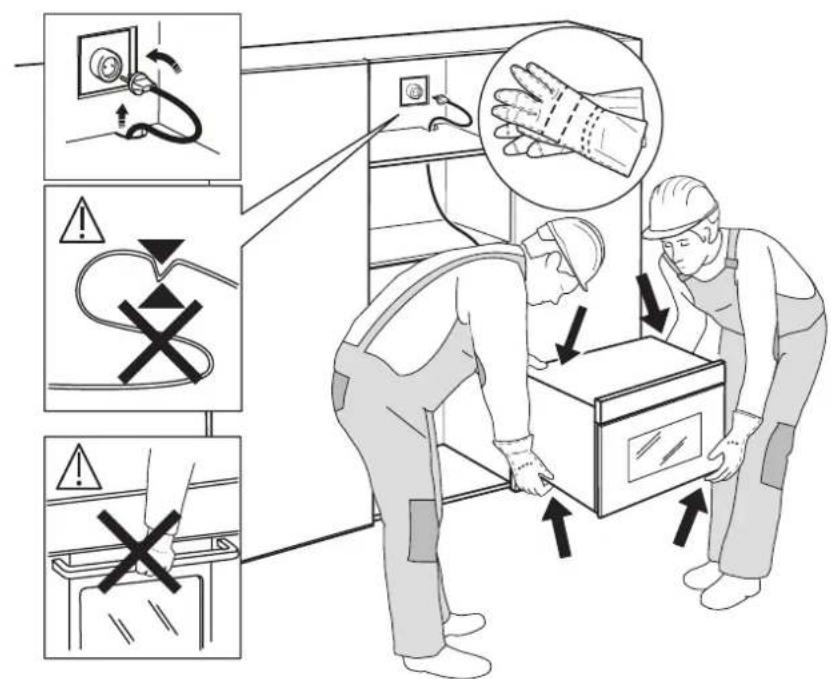
The appliance must be handled and installed by two or more persons. Use protective gloves to unpack and install the appliance.
This appliance is intended to be used built-in. Do not use it freestanding.
Installation and repairs must be carried out by a qualified technician, in compliance with the manufacturer's instructions and local safety regulations. Do not repair or replace any part of
the appliance unless specifically stated in the user manual. Children should not perform installation operations. Keep children away during installation. Keep the packaging materials (plastic bags, polystyrene parts, etc.) out of reach of children, during and after the installation.
After unpacking the appliance, make sure that it has not been damaged during transport. In the event of problems, contact the dealer or your nearest After-sales Service.
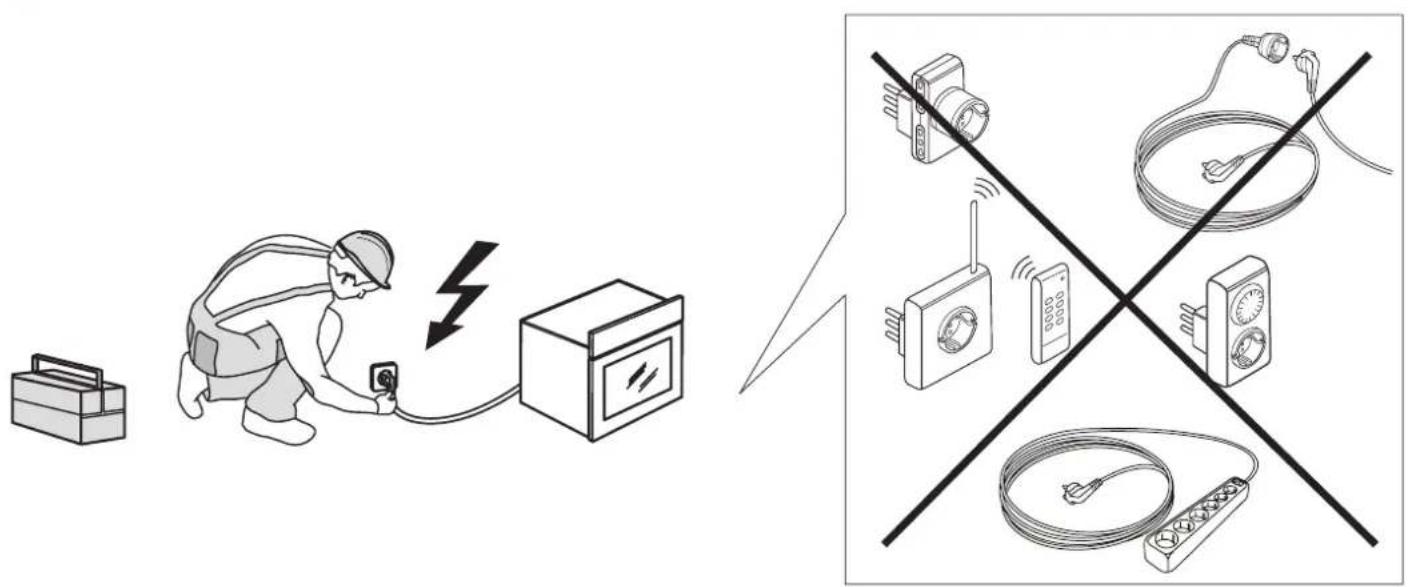
The appliance must be disconnected from the power supply before any installation operation.
During installation, make sure the appliance does not damage the power cable.
Only activate the appliance when the installation has been completed.
After installation, the bottom of the appliance must no longer be accessible.
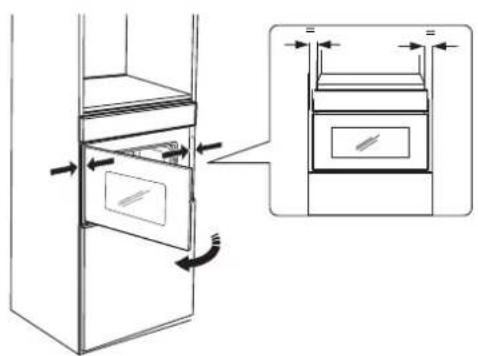
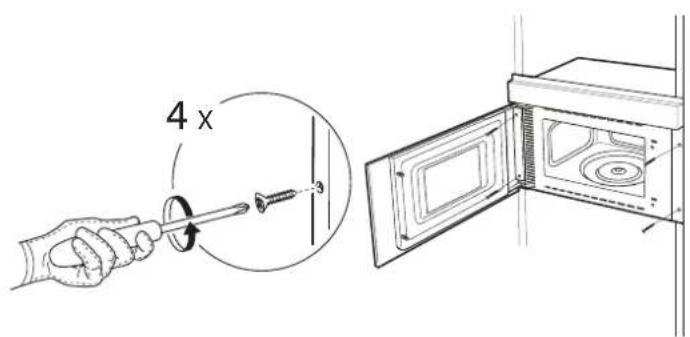
Carry out all cabinet cutting works before fitting the appliance in the furniture and carefully remove all wood chips and sawdust.
Do not obstruct the minimum gap between the worktop and the upper edge of the oven.
Only remove the oven from its polystyrene foam base at the time of installation.
Do not install the appliance behind a decorative door - Risk of fire.
After unpacking the appliance, make sure that the appliance door closes properly.
In the event of problems, contact the dealer or your nearest After-sales Service.
ELECTRICAL WARNINGS
For installation to comply with current safety regulations, an omnipolar switch with minimum contact gap of 3 mm is required and the appliance must be earthed.
If the power cable is damaged, replace with an identical one. The power cable must only be replaced by a qualified technician in compliance with the manufacturer instruction and current safety regulations. Contact an authorized service center.
It must be possible to disconnect the appliance from the power supply by unplugging it if plug is accessible, or by means of an accessible multi-pole switch installed upstream of the socket in conformity with national electrical safety standards.
The rating plate is on the front edge of the oven (visible when the door is open).
In case of replacement of power cable, contact an authorized service center.
If the fitted plug is not suitable for your socket outlet, contact a qualified technician.
The power cable must be long enough to connect the appliance, once fitted in its housing, to the main power supply. Do not pull the power supply cable.
Do not use extension leads, multiple sockets or adapters.
Do not operate this appliance if it has a damaged mains cord or plug, if it is not working properly, or if it has been damaged or dropped. Keep the cord away from hot surfaces.
The electrical components must not be accessible to the user after installation.
Do not touch the appliance with any wet part of the body and do not operate it when barefoot.
CLEANING AND MAINTENANCE
Never use steam cleaning equipment.
WARNING: Ensure that the appliance is switched off before replacing the lamp to avoid the possibility of electric shock. Do not use harsh abrasive cleaners or sharp metal scrapers to clean the appliance door glass since they can scratch the surface, which may result in shattering of the glass.
WARNING: It is hazardous for anyone other than a competent person to carry out any service or repair operation that involves the removal of a cover which give protection against exposure to microwave energy.
Failure to maintain the oven in a clean condition could lead to deterioration of the surface that could adversely affect the life of the appliance and possibly result in a hazardous situation.
The oven shall be cleaned regularly and any food deposits removed.
Wear protective gloves for cleaning and maintenance.
The appliance must be disconnected from the power supply before any maintenance operation.
Ensure the appliance is cooled down before carrying out any cleaning or maintenance operation.
SAFEGUARDING THE ENVIRONMENT
DISPOSAL OF PACKAGING MATERIALS
The packaging material is 100% recyclable and is marked with the recycle symbol 🌐.
The various parts of the packaging must therefore be disposed of responsibility and in full compliance with local authority regulations governing waste disposal.
SCRAPPING OF HOUSEHOLD APPLIANCES
When scrapping the appliance, make it unusable by cutting off the power cable and removing the doors and shelves (if present) so that children cannot easily climb inside and become trapped.
This appliance is manufactured with recyclable 🎨 or reusable materials. Dispose of it in accordance with local waste disposal regulations.
For further information on the treatment, recovery and recycling of household electrical appliances, contact your competent local authority, the collection service for household waste or the store where you purchase the appliance. This appliance is marked in compliance with European Directive 2012/19/EU,WasteElectricaland Electronic Equipment (WEEE). By ensuring this product is disposed of correctly, you will help prevent potential negative consequences for the environment and human health, which could otherwise be caused by inappropriate waste handling of this product.

The symbol ☐ on the product or on the accompanying documentation indicates that it should not be treated as domestic waste but must be taken to an appropriate collection center for the recycling of electrical and electronic equipment.
PRODUCT DESCRIPTION
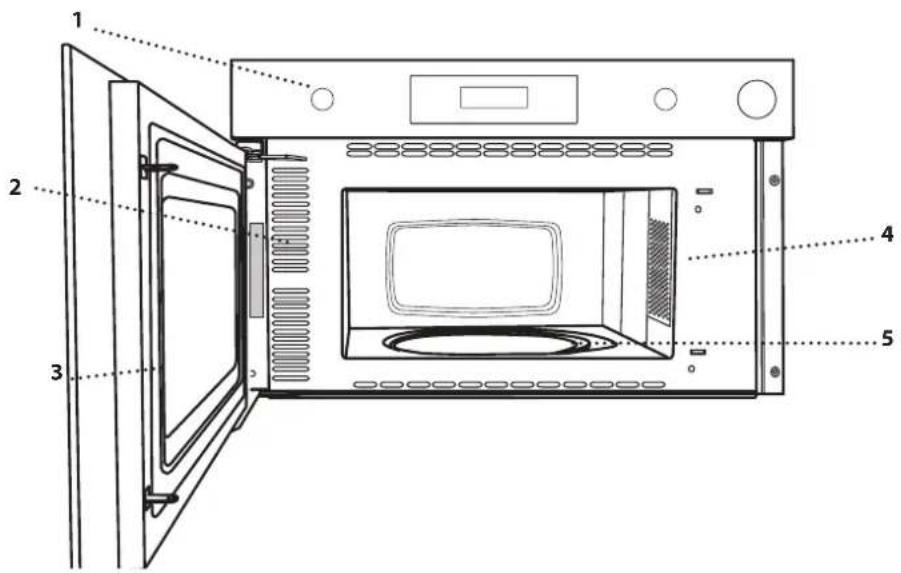
- Control panel
- Identification plate (do not remove)
- Door
- Light
- Turntable
Note: once the cooking is complete and the oven has been switched off, the cooling fan may remain in function for a certain period of time.
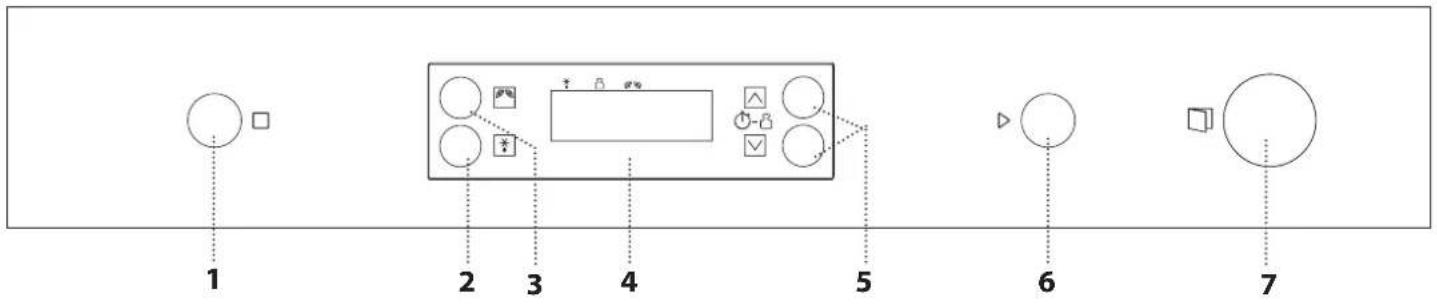
CONTROL PANEL
flowchart
graph TD
    A["Circle 1"] --> B["Box 2"]
    B --> C["Circle 3"]
    C --> D["Circle 4"]
    D --> E["Circle 5"]
    E --> F["Circle 6"]
    F --> G["Circle 7"]
1. STOP
For stopping a function or an audible signal, cancelling the settings and switching off the oven.
2. DEFROST
3. MICROWAVE / POWER FUNCTION
For selecting the microwaves function and setting the required power level.
4. DISPLAY
5. + / - BUTTONS
For adjusting the settings of a function (e.g. length, weight).
6. START
For starting a function. When the oven is switched off, it activates the "Jet Start" microwave function.
7. DOOR OPENING BUTTON
ACCESSORIES
There are a number of accessories available on the market. Before you buy, ensure they are suitable for microwave use and resistant to oven temperatures.
Metallic containers for food or drink should never be used for microwave cooking.
Always ensure that foods and accessories do not come into contact with the inside walls of the oven.
Always ensure that the turntable is able to turn freely before starting the oven. Take care not to unseat the turntable whilst inserting or removing other accessories.
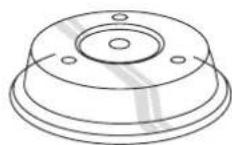
TURNTABLE
Placed on its support, the glass turntable can be used with all cooking methods.
The turntable must always be used as a base plate for other containers and accessories.
TURNTABLE SUPPORT
Only use the support for the glass turntable. Do not rest other accessories on the support.
natural_image
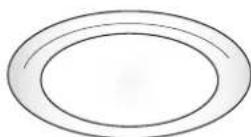
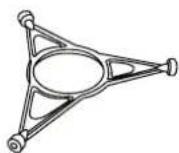
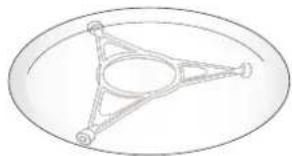
Simple line drawing of a triangular structure inside an oval frame (no text or symbols)COVER

Useful for covering food while it is cooking or heating in the microwave.
The cover reduces splashes, keeps foods moist and can also be used to create two cooking levels.
natural_image
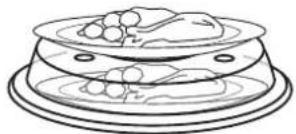
Line drawing of a food display with a bowl and plate, no text or symbols presentThe number and type of accessories may vary depending on which model is purchased.
Other accessories can be purchased separately from the After-sales Service.
FUNCTIONS

MICROWAVES
For quickly cooking and reheating food or
drinks.
POWER RECOMMENDED FOR
| 750 W | Quickly reheating drinks or other foods with a high water content or meat and vegetables |
| 500 W | Cooking fish, meaty sauces, or sauces containing cheese or egg. Finishing off meat pies or pasta bakes |
| 350 W | Slow, gently cooking. Perfect for melting butter or chocolate |
| 160 W | Defrosting frozen food or softening butter and cheese |
| 0 W | When using the timer only |

DEFROST
For quickly defrosting various different types of food simply by specifying their weight. Food should be placed directly onto the glass turntable. Turn the food when prompted. Food should be placed directly onto the glass turntable. Turn the food when prompted. A standing time after defrosting always improves the result.
Read the safety instructions carefully before using the product
USING THE APPLIANCE
FOR THE FIRST TIME
1. SETTING THE TIME

With the oven switched off, press □
until the two digits for the hour (on the
left) starting flashing.
Use △ or □ to set the correct hour and press to confirm: The minutes will flash on the display.
Use △ or □ to set the minutes and press to confirm.
Please note: You may need to set the time again following lengthy power outages.
DAILY USE
. SELECT A FUNCTION
Simply press the button for the function you require to select it.
. SET THE LENGTH
After selecting the function you require, use or to set the length for it to run.
The time can be changed during cooking by pressing △ or ▼or by increasing the length for 30 seconds each time by pressing ▷
Press as many times as required to select the power level for the microwave.
Please note: You can also change this setting during cooking by pressing 📋
. DYNAMIC DEFROST
Press ☐, then use △ or ▼ to set the weight of the food.
During defrosting, the
function will pause briefly to allow you to turn the food.
Once the operation is complete, close the door and press ▷

. ACTIVATE THE FUNCTION
Once you have applied the settings you require, press ▷ to activate the function.
You can press ☐ at any time to pause the function that is currently active.
.SAFETY LOCK
door This function is automatically activated to prevent the oven from being switched on accidentally. Open and close the door, then press ▷ to start the function.
.PAUSE
To pause an active function, for example to stir or turn the food, simply open the door.
To start it up again, close the door and press ▷
. JET START
When the oven is switched off, press ▷ to activate cooking with the microwave function set at full power (750 W) for 30 seconds.
Every time the ▷ button is pressed again, the cooking time will be increased by a further 30 seconds.
. SET THE TIME
☐ ☐:☐ ☐ With the oven switched off, press ☐ until the two digits for the hour (on the left) starting flashing.
Use △ or ▼ to set the correct hour and press ▷ to confirm: The minutes will flash on the display. Use △ or ▼ to set the minutes and press ▷ to confirm.
Please note: You may need to set the time again following lengthy power outages.
. TIMER
When the oven is switched off, the display can be used as a timer. To activate the function and set the length of time you require, use △ or ▽ press to set the power to 0 W, then press ▶ to activate the countdown.
Please note: The timer does not activate any of the cooking cycles.
To stop the timer at any time, press□
HOW TO READ THE COOKING TABLE
The table indicates the best functions to use for any given food.
The cooking times refer to the food cooking cycle inside the oven, excluding the pre-heating phase (where required).
The cooking values and times are indicative, and depend upon the amount of food and the types of accessories utilized.
Always cook food for the minimum cooking time given and check that is it cooked through. In order to obtain optimal results, carefully follow the recommendations contained in the cooking table when selecting the accessories.
Since microwaves penetrate the food to a limited depth, if there are a number of pieces to cook at once, arrange the pieces in a circle to create more outside pieces.
Small pieces cook more quickly than large pieces: in order to ensure uniform cooking, cut the food items into pieces of equal size.
Moisture evaporates during the microwave cooking process: using a microwave-resistant cover helps reduce moisture loss.
Most foods will continue to cook after microwave has finished cooking it. Therefore, always allow for standing time to complete the cooking.
It is recommended to mix the food items during the microwave cooking process. When stirring, bring the cooked portions on the outside edges towards the centre and the less-cooked centre portions towards the outside.
Place thin slices of meat one on top of another or overlapping. Thicker slices, such as meat loaf and sausage, should be placed next to one another.
CLING FILM AND PACKAGING
Remove any wire twist-ties from paper or plastic bags before placing them in the oven for microwave cooking purposes.
Plastic film should be scored or perforated with a fork in order to relieve the pressure and prevent bursting due to the steam building up during the cooking process.
LIQUIDS
Liquids may overheat beyond boiling point without visibly bubbling.
This could cause hot liquids to suddenly boil over. To prevent this possibility:
- Avoid using containers with narrow necks.
- Stir the liquid before placing the container in the microwave oven cavity and leave the teaspoon in the container.
• After heating, stir again before carefully removing the container from the microwave oven.
FROZEN FOOD
For best results, we recommend defrosting directly on the glass turntable. If needed, it is possible to use a light-plastic container that is suitable for microwave. Boiled food, stews and meat sauces defrost better if stirred during the defrosting time. Separate the food items once they begin to defrost: the separated portions will defrost more quickly.
FOOD FOR INFANTS
After heating baby food or liquids in a baby bottle or in a baby food jar, always stir and check the temperature before serving.
This will ensure that the heat is evenly distributed and avoid the risk of scalding or burns.
Ensure the lid and the teat is removed before heating.
COOKING TABLES
| FOOD QUANTITY | FUNC-TION | POWER (W) | TIME (MIN) | STANDING TIME (MIN) | ACCESSORIES | NOTES | |
| Popcorn 1 packet |  | 750 2 - 3 - | - | Fold the packet over. | |||
| Potatoes 4 | [03C6] | 500 12 - 15 * 4 | - | Prick with a fork. | |||
| Vegetables (fresh) 300 - 400 g |  | 750 4 - 7 2 | - | Cover with lid.Add water. | |||
| Vegetables (frozen) 250 - 400 g |  | 750 4 - 9 2 | - | Cover with lid. | |||
| Chicken (fillets or pieces) | 400 - 500 g | [Z6GZ] | 750 8 - 10 5 | - | Place on one level only. | ||
| Bacon 4 rashers |  | 750 3 - 5 | 1 - 2 | - | Cover with lid. | ||
| Pieces of meat | 600 - 700 g |  | 750 | 10 - 12 | 5 | - | Cover with lid. |
| Fish fillets | 400 g |  | 500 6 - 8 2 | - | Cover with lid. | ||
HEATING IN THE MICROWAVE
| FOOD QUANTITY | FUNCTION | POWER(W) | TIME(MIN) | STANDING TIME (MIN) | ACCESSORIES | NOTES | |
| Dinner Plate | 400 - 500 g |  | 500 6 - 7 1 Cover with lid. | ||||
| Hot dog | 1 - 2 Pieces |  | 750 1 - 2 2 | Prick. | |||
| Meatballs | 250 g |  | 750 2 - 3 2 | ||||
| Beverage | 2 cups 750 | 1 -  | |||||
| Soup | 1 bowl |  | 500 4 - 6 2 | Cover with lid.Stir. | |||
| Sauce | 1 bowl |  | 500 4 - 6 2 | Do not fill the bowl more than 3/4 full. Stir. | |||
* Turn the food halfway through cooking
| Legend | Microwave | Heatproof plate/container suitable for use in microwaves |
 |
TESTED RECIPES
Compiled for the certification authorities in accordance with the IEC 60705 standard.
| FOOD FUNCTION QUANTITY COOK TIME (MIN) | POWER(W) | ACCESSORIES | ||
| Beverage (reheating) |  | 2 cups 1 - 2 750 Microwave-safe container | ||
| Pastry cream |  | 750 g 10 - 11 750 | Microwave-safe container(Pyrex 3.220) | |
| Sponge cake |  | 475 g 6 - 7 750 | Microwave-safe container(Pyrex 3.827) | |
| Meat loaf |  | 900 g 13 - 15 750 | Microwave-safe container(Pyrex 3.838) | |
| Defrosting meat (turn halfway through the defrosting process) |  | 500 12 - 13 160 Turntable | ||
| Legend | Microwave Heatproof plate/container suitable for use in microwaves | ||
 |  | ||
CLEANING
Make sure that the appliance has cooled down before carrying out any maintenance or cleaning.
Do not use steam cleaners.
Do not use wire wool, abrasive scourers or abrasive/corrosive cleaning agents, as these could damage the surfaces of the appliance.
INTERIOR AND EXTERIOR SURFACES
- Clean the surfaces with a damp cloth. If they are very dirty, add a few drops of mild detergent. Finish off with a dry cloth.
- Clean the door glass with a suitable liquid detergent.
- At regular intervals or in case of spills, remove the turntable and its support to clean the bottom of the oven, removing all food residue.
- In order to remove particularly stubborn food residues, it is recommended to boil a cup of tap water by placing it in the microwave at maximum power for a few minutes: the resulting steam will soften the residues and facilitate their removal.
Please note: adding lemon juice to the water helps to eliminate cooking odours.
ACCESSORIES
All accessories are dishwasher safe.
TROUBLESHOOTING
Any problems that arise or faults that occur can often be resolved easily.
Before contacting the After-sales Service, check the following table to see whether you can resolve the problem yourself.
if the problem persists, contact your nearest After-sales Service Centre.

Read the safety instructions carefully before carrying out any of the following work
| Problem Possible cause Solution | ||
| The oven is not working. | Power cut.Disconnection from the mains.Fault. | Verify that the mains power supply is functioning and that the oven is connected to the electrical outlet.Turn the oven off and on again to see whether the fault persists. |
| The time of day is flashing. | Power cut. | You need to reset the time: Follow the instructions given in the "Using the appliance for the first time" section. |
| "Err" is shown on the display. | Software fault. | Contact you nearest After-sales Service Centre and state the letter or number that follows "Err". |
| The oven makes noise, even when it is switched off. | Cooling fan active. | Open the door or wait until the cooling process has finished. |
PRODUCT FICHE
A complete product specification, including the energy efficiency ratings for this oven, can be consulted at and downloaded from our website www.cylinda.se
AFTER-SALES SERVICE
BEFORE CONTACTING OUR AFTER-SALES SERVICE
-
Check whether you can resolve the problem yourself using any of the measures described in the "Troubleshooting" section.
-
Turn the oven off and on again to see whether the fault persists.
IF THE FAULT PERSISTS AFTER HAVING PERFORMED ALL OF THE NECESSARY CHECKS, CONTACT YOUR NEAREST AFTER-SALES SERVICE CENTRE.
To receive assistance, call the number given on the warranty leaflet enclosed with the product or follow the instructions on our website. Be prepared to provide:
• A brief description of the fault
• The exact type of model of your product
- The assistance code (the number following the word SERVICE on the identification plate attached to the product; this can be seen on the left-hand edge of the cooking compartment when the oven door is open).
- Your full address
- A contact telephone number
natural_image
Line drawing of an open microwave oven with internal compartments and ventilation slots (no text or symbols)Please note: If repairs are required, contact an authorised service centre that is guaranteed to use original spare parts and perform repairs correctly.
Please refer to the enclosed warranty leaflet for more information on the warranty.
natural_image
Illustration of four different types of tools and components: a screw, a screwdriver, a hand with gloves, and a bracket (no text or symbols present)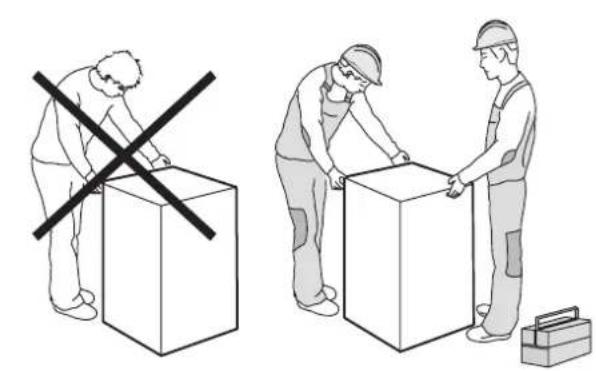
natural_image
Illustration showing two workers handling boxes with a crossed-out box, one holding a tool and the other handling a toolbox (no text or symbols present)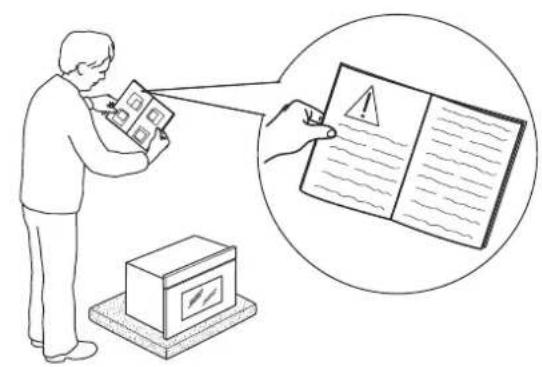
natural_image
Simple line drawing of a box with a diagonal line crossing through it, showing a crack or defect (no text or symbols)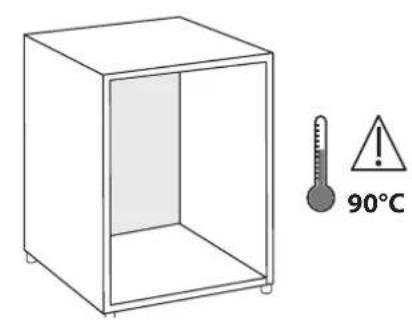
natural_image
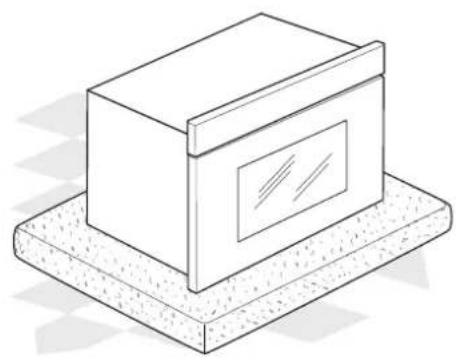
Isometric line drawing of a rectangular box mounted on a textured base (no text or symbols)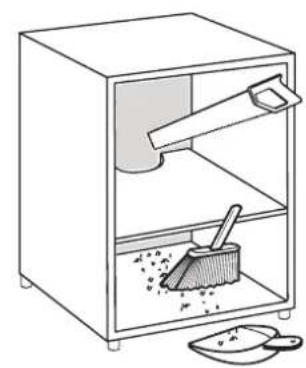
natural_image
Line drawing of a kitchen sink with a broom and spoon, no text or symbols present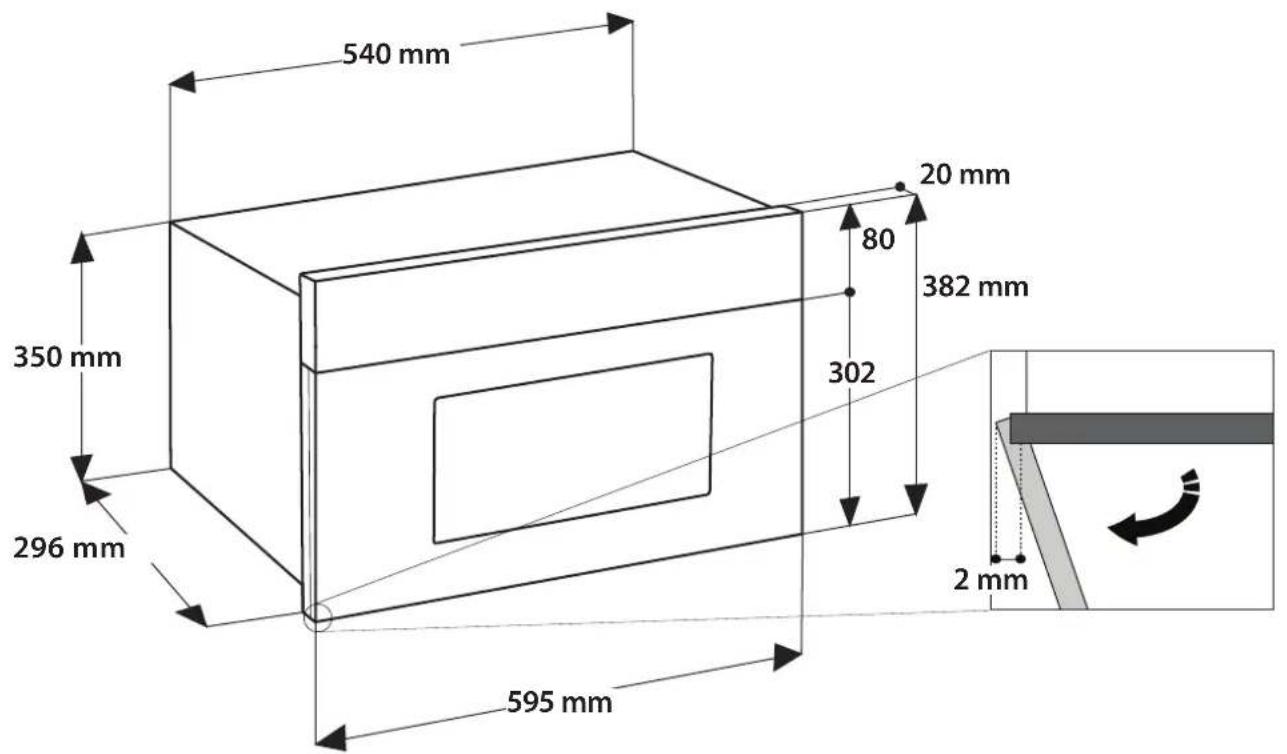
?
service
• Vi har service i hela landet / Nationwide service
• Gå in på www.cylinda.se / Visit www.cylinda.se
• Ring 0771-25 25 00 (endast lokaltaxa) / Call 0771-25 25 00
uppge
• Maskintyp / Model code
• Serienummer / Serial number
• Inköpsdatum / Purchase date
• Problembeskrivning / Problem description