
E929XDE - Hair clippers BABYLISS - Free user manual and instructions
Find the device manual for free E929XDE BABYLISS in PDF.
| Brand | BABYLISS |
| Model | E929XDE |
| Product type | Hair clipper |
| Power supply | Mains or rechargeable NiMH battery (3V/1000mA transformer included) |
| Battery life | 30 minutes after full charge |
| Initial charging time | 16 hours (for first use and every 3 months) |
| Cutting height | 3 to 30 mm (red guide: 3-15 mm, green guide: 18-30 mm) + 5-position precision guide (0.5-2.5 mm) |
| Number of cutting guides | 2 motorized guides + 1 manual precision guide |
| Blade material | Moving blade: organic CARBON HLD (Hard Like Diamond) coating; Fixed blade: titanium coating |
| Special function | Thinning (integrated thinning guide) |
| Display | Graduated LED screen: red (3-15 mm), green (18-30 mm) |
| Indicators | Charging indicator, LED cutting height display |
| Maintenance and cleaning | Removable blades for cleaning; use included brush; self-lubricating oil reservoir with Babyliss oil refill |
| Safety | Use only the supplied transformer; turn off the device before changing guides |
| Spare parts | Replacement blades available |
| Dimensions (estimated) | Approximately 15 x 5 x 5 cm |
| Weight (estimated) | Approximately 300 g |
Frequently Asked Questions - E929XDE BABYLISS
User questions about E929XDE BABYLISS
0 question about this device. Answer the ones you know or ask your own.
Ask a new question about this device
Download the instructions for your Hair clippers in PDF format for free! Find your manual E929XDE - BABYLISS and take your electronic device back in hand. On this page are published all the documents necessary for the use of your device. E929XDE by BABYLISS.
USER MANUAL E929XDE BABYLISS
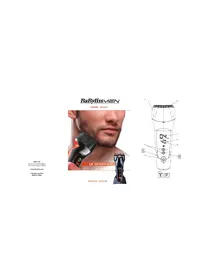
1.2 motorised cutting guides for continuous adjustment 'Red' guide = from 3 to 15mm Green' guide = from 18 to 30mm
2.1 precision guide 5 positions (0.5 to 2.5mm
3. Blades: Moveable blade:
- Sharpened using 3D etching process: for an exceptionally sharp cutting edge.
- Long-lasting organic CARBON HLD (Hard Like Diamond) coating: ultra-hardwearing and 100% stainless steel blade.
Fixed Blade:
Titanium coating: for longer life.
These two technologies provide perfect surface condition and their combination is optimal for reducing the friction coefficient.
4. Thinning function
5. ON/OFF switch
6. Cutting length adjustment
7. LED display of selected length on graduated screen:
Red LED on the left scale for the red guide (from 3 to 15mm )
Green LED on the right scale for the green guide (from 18 to 30mm
- Charging indicator light
- Plug for use on the mains and for charging
- Cleaning brush
IMPORTANT INFORMATION REGARDING THE NI-MH BATTERIES OF THIS UNIT
To obtain and maintain the longest battery autonomy possible, allow it to charge for 16 hours before using it for the first time and then approximately every three months. Full autonomy of the unit will only be obtained after three complete recharge cycles.
CHARGING THE CLIPPER
Before using the trimmer for the first time, allow it to charge for 16 hours.
- Connect the transformer to the mains and the plug into the unit. (Fig. 1)
- Check that the charging indicator light is lit and that the switch on the trimmer is in the OFF position.
- A fully charged trimmer will run for 30 minutes.
MAINSUSE
Connect the transformer into the mains, wait 1 minute and then switch into the ON position.
IMPORTANT! Use only the transformer provided with the E929XDE/E929YDE clipper Voltage = 3V - Tension = 1000mA
USING THE CUTTING GUIDES
Very practical, the cutting guide guarantees equal cutting length.
IMPORTANT: Always attach the cutting guide BEFORE turning the trimmer on, and turn it off before changing the guide.
To attach the cutting guide, first adjust the cutting length to 3mm and push on the guide until you hear a 'click' (Fig. 2)
To remove the cutting guide, first adjust the cutting length to 15mm or 30mm and push up on the guide with your thumbs holding both sides of the unit. (Fig. 3)
NOTE: The precision guide is adjusted manually and independently of the graduated screen.
TURNING ON AND USING
To adjust the trimmer's cutting length, push the button (6) up or down.
The length selected is displayed by a LED:
- Red LED for lengths between 3 and 15mm
- Green LED for lengths between 18 and 30mm
Switch the ON/OFF button.
You can change the cutting length at any time.
CUTTING TECHNIQUES AND ADVICE FROM THE EXPERTS
- Use the clipper on clean, dry hair.
-
To familiarize yourself with the clipper, begin with the cutting guide for a longer cut, then, if you want a shorter cut, adjust it by pushing the knob. You will soon know the lengths of each guide and each position.
Always move the clipper against the direction of hair growth. -
Begin at the nape. Place the guide on the scalp and move the clipper toward the crown of your head. Move your clipper slowly, pointing the teeth of the guide slightly upward. Keep the clipper in contact with your head at all times. (Fig. 4)
- For the crown of the head, move from front to back, that is, from your forehead to the crown of your head.
-
For the finishing touches, that is, around the nape and sideburns, use the clipper without a cutting guide. Turn your clipper over and move it from top to bottom. (Fig. 5)
-
If you want a length greater than 30mm , or if you are experienced, you can create 'comb' or 'finger' cuts:
- Work without a cutting guide.
- Take up a small section of hair with a comb or in your fingers.
- Move the comb or your fingers along the section of hair to the desired length.
- Cut your hair along the comb or your fingers.
- Remove the cut hair using a comb and check the evenness of the cut regularly. (Fig. 6)
Using the thinning guide
Switch the clipper to the 'THIN' position. The thinning guide is in front of the blades.
This technique allows you to thin out hair to make styling easier.
The technique is particularly good for the crown of the head where hair is usually thicker.
To thin you hair, take a section of hair (rest your little and ring fingers on your scalp, using the middle and index fingers to set the length), hold 1 to 2 cm below the cutting length. Then, using the clipper, cut the
section of hair steeply and at an angle to create a saw-toothed 'edge'.
MAINTENANCE
Remove the cutting guide after each use.
Cleaning the clipper blades regularly will maintain their optimal performance.
Removable blades
To make cleaning easier, the BaBylliss clipper blades can be removed. Make sure the clipper is turned off. Hold the clipper with the blades pointing up and remove them by pressing the top of the blade. (Fig. 7)
Brush the blades using the cleaning brush to remove any hair.
Self-lubricating blades
The blades of your clipper have a reservoir pad that dispenses the amount of oil necessary for your clipper to operate properly, every time. It is nevertheless recommended that you occasionally refill, when you notice the clipper isn't performing as well.
Remove the blades as described above.
Carefully squeeze a few drops of BaByliss oil onto the pad. (Fig. 8) Then put the blades back on the clipper.
BaBylliss oil is specially formulated for clippers, it will not evaporate or slow the blades down.
You can get new blades when these are worn or damaged.
DEUTSCH
HAARSCHERGERÄTE929XDE/E929YDE
BAXHAR INΦOPMALIURA KACAIOUAPCAR BATAPEEK NI-MH DAHHOI APINAPATA
4TObI DoCTNHy n npedoxpAHnB kAK MOxHO 6oBlyu AOYBOHOMNIO 6aTaapeK, nepej nepbIM npImeHEnHM enapapa octabte ero h3 aqrKe B TeueHne 16 cacOB nOBToprIe Tty onepauHIO np6n3ntEhBO KAcXbIe 3 MeCAu. PONNA ABTOHOMn Annapata 6ydet DOCTMHyTA ToNko NocTe 3 uKnloB nNOHO 3apKn.
3APJDAKAMAIHHKIN
Ppexde, yem Bocnobn3oBAtbca Ma mshKoN JnA CTPXnKu B nepBlb pa3, ee Heo6xoJmo 3apArntB TteHne 16 qacob.
1.BKIOUHTe TpaHcΦOpMaTOp B cetb U BCTaBtBe WTeNceBb B annapat. (Puc.1)
2.Поберьт,Загорсялдатчнарузки,ИнховпсглпимпеспгпкючateNBMaшинкBNBNOLOженOff(BblKJ).
3.ПОПНOCТБОЗAPRЯЖЕнOHМАЛINKOMKOJOHNOЛБЗOBATbCByTBeTeHNE30MHNYT.
PABOTA OT CETM
BkIIOUHTe MaunHky B cTeB, noOJXnTE OKONo 1 MmHyTbN oNctabTe nepeKIOUaTeB B nOIOxKeHne ON (BKNL.)
BHIMAHHE!ПользутсьТолькToPAHcФормATOPOM,BКЛЮЧЕнБIMKOMПлекТNOCTABM MaшинКENE929XDE/E929YEHapяженe=3V-CиаToKa=1000mA
NCHOJIb3OBAHNE HAPPABJIOU
Oench npaktnuBhe B pRnmeHEnHHnaprabNouChne rapaHTpyOT BaMpaHBOMePHyIO dINHNY CTpIKXK.
BHIMAHVE: Hanpablaiouie cneyert bcera yctahabivbta H MaunHy PEPETEM, KAK BKIOUHTb ee; ToobblcmeHbHanpabouuie, MaunHyCNEdyet BkIIOUHTb.
YtObbl yctaHOBnTb HnpaBnIooHne, CneJeT npDeBaPntEhBo OTOpeyIIpObaT bDmHy CTpNkKn Ha 3 MM 3aTeM HaeTb HnpaBnIOuOyU Ho MaMunKy, NOKa He pa3DaCTcR qeIouK. (Pnc.2)
YtOb6I ChTb HnapBnaJIOuJe, cneJy et npdBaPentBIO OtperynopoBat diny CTpNkN Ha 15/30MM n 3aTeM NoTOnKHyTb HnapBnaJIOuJO bBEpx C NOMOUbObJbXn PAnbue, ypeKJBae e c o beix CTOpOH. (Pnc. 3)
BHIMAHIVE! Perjyantop okohvatelbno DBOxDKn HACTpAnBaETCR BpyuHUYIO He3aBNCMO OT INHOpMaunu, BbIEeHNHO HA XINDKOKPnCTaJIneCekmI kpaH.
BKJIIOUeyHNE IMCNOJIb3OBAHNE
YtObbl TOpErpyNIpOBaTb DnIMHy CTpnKnn, NpeBDbHbTe KhONkY (6) BBEpxIIN BHN3.
BbIbpaHny DInHy MoKHO yBuNTeB Na 3KaPaHe 3a Cuet CBToDIOHa:
-KpaCnblcBToDIOoI npN DnHe oT 3 do15 MM
-3eHbI CBTeODIOI npN DnHe OTO 18do30MM
HakMMte Ha KONKY ON/OFF (BKJ./ BblKJ).
3atem BHOBb yctaHOBITE le3BnHa MaSHNUH.
ΦopMyna Macna Mapkn BaByliss pa3pa60Tahn CneuansHbO dny MaunHOK; OHO He nCnpaTecN H He 3atOpMaKJBAET neB3BIA.
KoJda ne3BnIaNHOCTcIINIOBpeDITCA,BO3MOKHO pIIObOpeCTNs 3a- nAChnbIe ne3BnI.
TÜRVICE
SAÇ KESME MAKINESİ E929XDE/E929YDE
- Fixed Blade:
- IMPORTANT INFORMATION REGARDING THE NI-MH BATTERIES OF THIS UNIT
- CHARGING THE CLIPPER
- MAINSUSE
- USING THE CUTTING GUIDES
- TURNING ON AND USING
- CUTTING TECHNIQUES AND ADVICE FROM THE EXPERTS
- Using the thinning guide
- MAINTENANCE
- Removable blades
- Self-lubricating blades
- DEUTSCH
- HAARSCHERGERÄTE929XDE/E929YDE
- BAXHAR INΦOPMALIURA KACAIOUAPCAR BATAPEEK NI-MH DAHHOI APINAPATA
- 3APJDAKAMAIHHKIN
- PABOTA OT CETM
- NCHOJIb3OBAHNE HAPPABJIOU
- BKJIIOUeyHNE IMCNOJIb3OBAHNE
- TÜRVICE
- SAÇ KESME MAKINESİ E929XDE/E929YDE
Brand : BABYLISS
Model : E929XDE
Category : Hair clippers