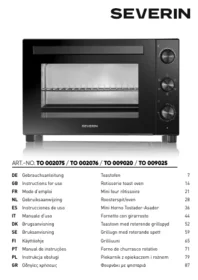
TO 002075 - Kitchen appliance SEVERIN - Free user manual and instructions
Find the device manual for free TO 002075 SEVERIN in PDF.


| Product Type | Toaster (kitchen appliance) |
| Brand | SEVERIN |
| Model | TO 002075 |
| Number of slots | 2 |
| Material | Stainless steel and plastic |
| Dimensions (L x D x H) | 30 x 20 x 25 cm |
| Weight | 1.5 kg |
| Power supply | 220-240 V, 50/60 Hz |
| Power | 900 W |
| Main functions | Toasting, reheating, defrosting, manual stop |
| Settings | 6 browning levels |
| Additional functions | High lift function, retractable cord |
| Maintenance and cleaning | Removable crumb tray, exterior cleaning with damp cloth |
| Safety | Automatic shut-off, overheat protection, non-slip feet |
| Spare parts and repairability | Available via SEVERIN after-sales service |
| Package contents | Toaster, user guide |
Frequently Asked Questions - TO 002075 SEVERIN
User questions about TO 002075 SEVERIN
0 question about this device. Answer the ones you know or ask your own.
Ask a new question about this device
Download the instructions for your Kitchen appliance in PDF format for free! Find your manual TO 002075 - SEVERIN and take your electronic device back in hand. On this page are published all the documents necessary for the use of your device. TO 002075 by SEVERIN.
USER MANUAL TO 002075 SEVERIN
ART.-NO. TO 002075 / TO 002076 / TO 009020 / TO 009025
Technical information on the operating states in accordance with ecodesign requirements (EU Regulation 2023/826) can be accessed using the QR code or at the link ‘https://severin.com/de-de/oekodesign-richtlinie’.
Toastofen
Before using the appliance, read the following instructions carefully and keep this manual for future reference. The appliance must only be used by persons familiar with these instructions.
Connection to the mains supply
The appliance should only be connected to an earthed socket installed in accordance with the regulations. Make sure that the supply voltage corresponds with the voltage marked on the rating label. This product complies with all binding CE labelling directives.
Familiarisation
- Casing
- Temperature control
- 6-position control switch
- Timer
- Indicator light
- Nameplate (appliance underside)
- Baking tray
- Wire rack
- Handle for wire rack and baking tray
- Rotisserie spit with retaining clips
- Rotisserie spit handle
- Crumb tray
- Pizza stone
- Door with handle
- Lower heating elements
- Rotisserie spit support
- Upper heating elements
No illustration:
- Oven cavity light (right-hand side of cavity)
- Rotisserie drive (right-hand side of cavity)
Important safety instructions
Warning! This symbol indicates that, during operation, the temperature of accessible surfaces may become very high. Risk of burns!
- In order to avoid hazards, repairs to this electrical appliance or its power cord must be carried out by our customer service. If repairs are needed, please contact our customer service department by phone or email (see appendix).
- Before cleaning the appliance, ensure it is disconnected from the power supply and has cooled down completely.
- To avoid any risk of electric
shock, do not clean the appliance with liquids or immerse it in a liquid.
- Always clean the appliance after use.
- Baking tray, baking rack, rotisserie and fastening clips can be cleaned using a commercially available mild washing-up liquid. Item No. 002076/009025:
Clean the pizza stone with a wooden scraper.
- For cleaning, follow the instructions in the “Cleaning and Care” section.
- This appliance is not intended to be used with an external timer or a separate remote control.
- This appliance is intended for household use and similar applications, such as:
- in staff kitchen areas in shops, offices and other
work environments,
- agricultural estates, - by customers in hotels, motels and similar establishments, - in establishments offering bed and breakfast.
- The appliance may be used by children aged 8 and above, as well as by individuals with reduced physical, sensory, or cognitive capabilities, or those with limited experience or knowledge, provided they are supervised or have been instructed in the safe use of the appliance and fully understand the associated risks.
- Children must not be permitted to play with the appliance.
- Children must not clean the appliance or carry
out general maintenance unless they are being supervised.
- The appliance and its power cord must be kept well away from children under 8 at all times.
- Caution: Keep any packaging materials well away from children – such materials are a potential source of danger, e.g. of suffocation.
- Every time the appliance is used, the main body including the power cord as well as any attachment fitted should be checked thoroughly for any defects. Should the appliance, for instance, have been dropped onto a hard surface, or if excessive force has been used to pull the power cord, it must no longer be used: even invisible damage may have adverse effects on the operational safety of the appliance.
- Do not touch the heating elements.
- Before the appliance is used, the crumb tray must be fitted in its proper position under the heating elements.
• Overheated oil or fat may ignite. Therefore, do not overfill the baking tray; this will prevent fat from dripping onto the heating elements below. - Only use original accessories supplied by the manufacturer. Use of non-approved accessories may pose a risk to the user.
-
Do not leave the appliance unattended while in use.
-
Do not operate or store the appliance outdoors.
- Do not place any objects on top of the appliance.
- Sufficient ventilation must be ensured at all times. Do not place any objects on the unit, and make sure that the following minimum distances from any wall or other object are maintained:
Side: 12 cm
Rear: 12 cm
Top: 30 cm
- The unit must not be installed inside a cupboard; when positioning the unit, also ensure that it is not placed directly underneath a shelf or any other similar object.
- The feet on the base of the unit must not be removed.
- Do not position or operate the appliance close to or underneath any wall-cupboards or hanging objects such as curtains or any inflammable materials.
- During operation, the appliance must be placed on a heat-resistant surface, impervious to splashes and stains. Do not position the appliance on or near hot surfaces, open flames or inflammable vapours.
- Do not allow the power cord to touch any hot parts of the appliance.
- Do not let the power cord hang free.
-
Always switch off and remove the plug from the wall socket
-
after use,
- in cases of malfunction, and
- during cleaning.
- When removing the plug from the wall socket, never pull on the power cord;
always grip the plug itself. Do not touch the plug with wet hands.
- No responsibility is accepted if damage results from improper use, or if these instructions are not complied with.
Item No. 002076/009025:
- Attention! Risk of burns! The pizza stone becomes extremely hot and retains heat for a prolonged period after the appliance has been switched off and unplugged. Allow the pizza stone to cool completely before removing it from the appliance.
- Do not place aluminium foil or similar materials between the wire rack and the pizza stone. Always place the pizza stone directly on the wire rack.
Before using for the first time
- Unpack the appliance and remove any remaining packaging, advertising stickers and inserts. The nameplate must not be removed.
- Clean the appliance (see Cleaning and care).
- Before using the appliance for the first time, let it heat up at maximum power for 10 minutes with both heating elements on. When the appliance is switched on for the first time, a slight smell may be emitted. This is normal and will only last for a very short time. For that reason, adequate ventilation should be ensured by opening windows or balcony doors.
Temperature control
With the temperature control knob, the temperature can be set to the desired level (100 - 230 °C).
6-position switch settings
Upper heat
☐ Upper and lower heat
Hot-air convection / Upper heat
Hot-air convection / Upper and lower heat
Rotating spit / Upper heat
Rotating spit / Upper heat / Hot-air convection
The heating elements will only be switched on after the timer is activated.
Timer
- The timer can be used for selecting a cooking time (up to 120 minutes).
- To turn the appliance off, turn the timer knob to position OFF.
- To set a time of less than 20 minutes, turn the timer to a somewhat higher setting first and then slowly turn it back to the desired time setting.
- After the pre-programmed time has elapsed, an acoustic signal indicates that the heating elements are switched off.
Indicator light
The indicator light stays on as long as the appliance is switched on. When the timer expires or is turned to the OFF position, the indicator light will switch off.
Rotating spit
- When the food to be cooked is put onto the spit, make sure that it does not come into contact with the upper or lower heating elements; ensure sufficient distance.
- When loading the rotating spit, do not exceed 3 kg.
- Pierce the food to be cooked on the spit, making sure that the spit goes through the middle. This is to ensure that the food does not go to near the interior walls or the heating elements. Use the holding clamps to secure the food in the centre of the spit.
- Any parts sticking out (e.g. wings of a chicken) should be held in with a toothpick, a piece of string or other suitable means. This ensures that no part of the food can protrude or come off during the cooking process.
- Inserting and removing the rotating spit:
- Place the loaded spit onto the handle assembly. Ensure that the spit is safely supported in the recesses in the handle.
- Insert the driven end of the rotisserie spit into the drive mechanism on the right-hand side of the oven cavity.
- Place the support end of the rotisserie spit into the support bracket on the left-hand side of the oven cavity.
- To remove the rotating spit, follow these steps in reverse order.
Pizza stone
- Always place the pizza stone on the middle of the baking rack before inserting the rack into the appliance.
- Preheat the appliance to the required temperature as described in the section Operation.
- With certain pre-baked pizzas made from especially light dough, the pre-heating phase should be shortened; this is to prevent the bottom layer of the pizza dough from browning too fast.
- After pre-heating, open the door and use a spatula to place the pizza on the centre of the stone. The pizza should be slightly smaller than the stone so that there is a clear space all round it.
- The pizza is ready once the cheese topping has melted and the bottom of the dough is slightly brown. Use a spatula for removing the pizza and serving it.
Operation
- Before each use, ensure the crumb tray is correctly positioned beneath the lower heating elements.
- Pre-heat the oven compartment for several minutes with the door closed, using both heating elements. Set the temperature control knob to the required level and use the timer control knob to select the desired pre-heating time.
- Place the food to be cooked on the baking rack. When cooking food containing fat or moisture, use the baking tray to stop any dripping into the interior of the appliance.
If the pizza stone is used, it should be
placed straight onto the baking rack.
- Close the door, set the temperature control to the required level, turn the 6-position switch to the desired function, and use the timer knob to select the desired cooking time.
- After the pre-programmed cooking time has elapsed, the timer will automatically switch off the appliance.
- To switch off the appliance earlier, set the timer to its OFF position.
- Always use the door handle to open the hot door after use.
- When removing the baking tray or rack, use the tray/rack handle. Likewise, when removing the spit, the spit handle must be used. Always place the baking tray and rack on a heat-resistant surface.
- Remove the plug from the wall socket after use.
Cooking times
The grilling/cooking times listed are approximate times only, as each food to be grilled or cooked is of a different nature and consistency; please also refer to the information contained on the food packaging.
| Food | Temperature / setting | Grilling / cooking time |
| Chicken (rotating spit) | 180 °C↔ or ▲ | 60 mins. |
| Pizza (deep-frozen) | 200 °C▲ | 9-10 mins. |
| Toast Hawaii | 220 °C▲ | 10-14 mins. |
| Baguette (deep-frozen) | 200°C▲ | 14-15 mins. |
Cleaning and care
- Before cleaning the appliance, ensure it is disconnected from the power supply and has completely cooled down.
- To avoid any risk of electric shock, do not clean the appliance with liquids or immerse it in a liquid.
- Do not use abrasives, harsh cleaning solutions or spray-type oven cleaners.
- The exterior of the housing may be cleaned with a damp, lint-free cloth.
- After cooking a chicken, ensure that any fat that may have dripped onto the lower heating elements is completely removed using a damp cloth.
- The baking tray, baking rack, spit and holding clamps may be cleaned using hot water and a mild detergent.
- The crumb tray may be taken out for cleaning. Any large accumulation of fat in the tray should first be cleaned up with a paper towel. Make sure that
the tray is refitted in its proper position under the heating elements. Item No. 002076/009025:
- Allow the pizza stone to cool down completely before cleaning. Any remaining food can be scraped off with a wooden spatula.
- Because the surface is porous, discoloration as a result of contact with food is normal.
- If necessary, clean the pizza stone under running water. Do not immerse the stone in water!
- If the stone has been rinsed in water during the cleaning process, ensure that it has dried of completely before it is used again. Only a completely dry stone ensures best baking results.
Replacing the oven cavity light
If the oven cavity light is faulty, it can be replaced. Unplug the appliance from the mains. Remove the light cover and unscrew the defective bulb. Fit a standard oven bulb with an E14 base (15–25 watts), then replace the light cover securely.
Disposal

Devices marked with this symbol must be disposed of separately from your household waste, as they contain valuable materials
which can be recycled. Proper disposal protects the environment and human health. Your local authority or retailer can provide information on the matter.
Chère cliente, Cher client,
email (ved. in appendice).
Regulator temperature

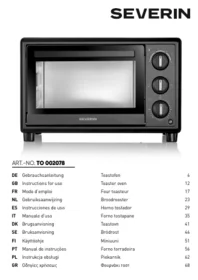
- ART.-NO. TO 002075 / TO 002076 / TO 009020 / TO 009025
- Toastofen
- Connection to the mains supply
- Familiarisation
- No illustration:
- Important safety instructions
- Before using for the first time
- Temperature control
- 6-position switch settings
- Timer
- Indicator light
- Rotating spit
- Pizza stone
- Operation
- Cooking times
- Cleaning and care
- Replacing the oven cavity light
- Disposal
- Chère cliente, Cher client,
- Regulator temperature
Brand : SEVERIN
Model : TO 002075
Category : Kitchen appliance