
CE6IMX - Cooker SMEG - Free user manual and instructions
Find the device manual for free CE6IMX SMEG in PDF.
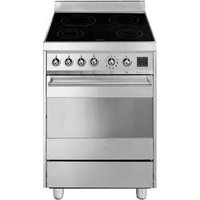


| Product Type | Freestanding Cooker |
| Brand | Smeg |
| Model | CE6IMX |
| Dimensions (HxWxD) | 90 x 90 x 60 cm |
| Weight | 70 kg |
| Power Supply | Gas (hob) and Electric (oven) |
| Hob Type | Gas burners |
| Number of Burners | 6 |
| Oven Type | Electric fan-assisted |
| Oven Capacity | 70 L |
| Oven Functions | Convection, grill, bake, defrost |
| Control Type | Knobs and electronic timer |
| Safety Features | Flame failure device on burners, cool-touch door, child lock |
| Cleaning Method | Wipe with damp cloth; oven self-cleaning function |
| Spare Parts Availability | Contact Smeg authorized service centers |
| Reparability | Modular design, professional repair recommended |
| Energy Class | A+ (oven) |
| Warranty | 2 years |
| General Information | Designed for domestic use, stainless steel finish |
Frequently Asked Questions - CE6IMX SMEG
User questions about CE6IMX SMEG
0 question about this device. Answer the ones you know or ask your own.
Ask a new question about this device
Download the instructions for your Cooker in PDF format for free! Find your manual CE6IMX - SMEG and take your electronic device back in hand. On this page are published all the documents necessary for the use of your device. CE6IMX by SMEG.
USER MANUAL CE6IMX SMEG
- PRECAUTIONS FOR USE.... 31
- RECYCLING INSTRUCTIONS - OUR ENVIRONMENT POLICY 32
- SAFETY PRECAUTIONS.... 33
- INTENDED USE 33
- GETTING TO KNOW YOUR COOKER 34
5.1.General Description 34
- BEFORE INSTALLATION 35
- AVAILABLE ACCESSORIES 35
- WARNINGS AND GENERAL ADVICE FOR USAGE 36
- DESCRIPTION OF THE CONTROLS ON THE FRONT PANEL 37
- USING THE MAIN OVEN 39
10.1. First use 39
10.2. Setting the current time 39
10.3. Selecting a function in manual cooking 39
10.4. Programmed cooking procedures 40
10.5. Cooking with selection of a recipe.... 41
10.6. Table of predefined recipes: 43
10.7. Secondary menu 44
- COOKING IN THE OVEN 45
11.1.Description of the selected functions 45
11.2. Cooking tables: 47
- USING THE HOB 48
12.1. Cooking zones 48
12.2. Heating accelerator 48
12.3. Power Function 48
12.4. Operating power settings 49
12.5. Cookware 49
- CLEANING AND MAINTENANCE.... 52
13.1. Cleaning stainless steel 52
13.2. Ordinary daily cleaning.... 52
13.3. Food stains or residues 52
13.4. Cleaning the oven 52
13.5. Cleaning the door glazing 52
- EXTRAORDINARY MAINTENANCE.... 53
14.1. Changing the light bulb 53
14.3. Removing the door seal 53
14.4. What to do if... 54
- INSTALLING THE APPLIANCE 55
15.1. Electrical connection 55
15.2. Positioning and levelling the appliance (depending on model) 56

INSTRUCTIONS FOR THE USER: these contain user advice, description of the commands and the correct procedures for cleaning and maintenance of the appliance.

INSTRUCTIONS FOR THE INSTALLER: these instructions are intended for the qualified technician who must perform the installation, put it into operation and test the appliance.

Further information about the products can be found at www.smeg.com
1. PRECAUTIONS FOR USE

THIS MANUAL IS AN INTEGRAL PART OF THE APPLIANCE. THEREFORE IT MUST BE KEPT IN ITS ENTIRETY AND IN AN ACCESSIBLE PLACE FOR THE WHOLE WORKING LIFE OF THE COOKER. WE ADVISE CAREFUL READING OF THIS MANUAL AND ALL THE INSTRUCTIONS THEREIN BEFORE USING THE APPLIANCE. ALSO KEEP ALL THE NOZZLES PROVIDED IN A SAFE PLACE. INSTALLATION MUST BE CARRIED OUT BY QUALIFIED PERSONNEL IN ACCORDANCE WITH THE REGULATIONS IN FORCE. THIS APPLIANCE IS INTENDED FOR HOUSEHOLD USE AND COMPLIES WITH THE REGULATIONS IN FORCE. THE APPLIANCE HAS BEEN BUILT TO CARRY OUT THE FOLLOWING FUNCTIONS: COOKING AND REHEATING OF FOOD; ALL OTHER USES ARE CONSIDERED IMPROPER.
THE MANUFACTURER DECLINES ALL RESPONSIBILITY FOR IMPROPER USE.
DO NOT USE THIS APPLIANCE FOR HEATING ROOMS.

NEVER LEAVE DISCARDED PACKAGING UNATTENDED IN THE HOME ENVIRONMENT. SEPARATE WASTE PACKAGING MATERIALS BY TYPE AND CONSIGN THEM TO THE NEAREST SORTED DISPOSAL CENTRE.

THIS APPLIANCE IS MARKED ACCORDING TO THE EUROPEAN DIRECTIVE 2002/96/CE ON WASTE ELECTRICAL AND ELECTRONIC EQUIPMENT (WEEE).

THIS DIRECTIVE IS THE FRAME OF A EUROPEAN-WIDE VALIDITY OF RETURN AND RECYCLING ON WASTE ELECTRICAL AND ELECTRONIC EQUIPMENT.

NEVER OBSTRUCT THE OPENINGS AND SLITS PROVIDED FOR VENTILATION AND HEAT DISPERSAL.

THE RATING PLATE WITH THE TECHNICAL DATA, SERIAL NUMBER AND MARK IS IN A VISIBLE POSITION INSIDE THE STORAGE COMPARTMENT.

THE PLATE MUST NEVER BE REMOVED.

REMOVE ALL REMOVABLE LABELS AND PROTECTIVE FILMS FROM THE INSIDE AND OUTSIDE OF THE APPLIANCE.

DO NOT USE METALLIC SPONGES OR SHARP SCRAPERS: THEY WILL DAMAGE THE SURFACE.
USE ORDINARY, NON-ABRASIVE PRODUCTS FOR STEEL, WITH THE AID OF WOODEN OR PLASTIC MATERIALS IF NECESSARY.
RINSE THOROUGHLY AND DRY WITH A SOFT CLOTH OR DEERSKIN.
DO NOT ALLOW RESIDUES OF SUGARY FOODS (SUCH AS JAM) TO SET INSIDE THE OVEN. IF LEFT TO SET FOR TOO LONG, THEY MIGHT DAMAGE THE ENAMEL LINING OF THE OVEN.


THE MANUFACTURER DECLINES ALL RESPONSIBILITY FOR DAMAGE TO PERSONS OR THINGS CAUSED BY FAILURE TO COMPLY WITH THE ABOVE REGULATIONS OR DERIVING FROM TAMPERING WITH EVEN JUST ONE PART OF THE APPLIANCE AND THE USE OF NON-ORIGINAL SPARE PARTS.
2. RECYCLING INSTRUCTIONS - OUR ENVIRONMENT POLICY
Our household appliances are only packaged using non-pollutant, environment-friendly, recyclable materials. Please help by disposing of the packaging correctly. Find the addresses of collection, recycling and disposal centres from your retailer or from the competent local organisations.
Never leave all or part of the packaging lying around. They can constitute a suffocation hazard for children, especially the plastic bags.
Your old appliance also needs to be disposed of correctly.
Important: deliver the appliance to your local organisation authorised to collect scrapped appliances.
Correct disposal means intelligent recycling of valuable materials. Refrigeration appliances contain gases which may damage the environment; it is therefore important to ensure that the refrigeration circuit pipelines are not damaged until the competent service has accepted delivery of the appliance.
Before disposing of your appliance, it is important to remove doors and leave shelves in position as for use, to ensure that children cannot accidentally become trapped inside during play. It is also necessary to cut the electric power cord and remove it along with the plug.

NEVER LEAVE PACKAGING RESIDUES UNATTENDED IN THE HOME. SEPARATE THE VARIOUS WASTE PACKAGING MATERIALS BY TYPE AND CONSIGN THEM TO THE NEAREST SEPARATED DISPOSAL CENTRE.

NOTICE TO USERS:
PURSUANT TO DIRECTIVES 2002/95/EC, 2002/96/EC, 2003/108/EC, RELATING TO THE REDUCTION OF THE USE OF HAZARDOUS SUBSTANCES IN ELECTRICAL AND ELECTRONIC EQUIPMENT, AND WASTE DISPOSAL, THE BARRED RUBBISH BIN SYMBOL ON THE APPLIANCE INDICATES THAT IT CANNOT BE DISPOSED OF AS HOUSEHOLD WASTE AT ITS END-OF-LIFE. THE USER MUST THEREFORE HAND THE PRODUCT OVER, AT ITS END-OF-LIFE, TO THE APPLICABLE COLLECTION CENTRES FOR THE RECYCLING OF ELECTRICAL AND ELECTRONIC WASTE, OR RETURN IT TO THE DEALER ON PURCHASE OF ANOTHER EQUIVALENT APPLIANCE, ON A ONE-FOR-ONE BASIS. CONSIGNING THE END-OF-LIFE APPLIANCE TO THE APPROPRIATE COLLECTION POINT FOR RECYCLING AND ECO-COMPATIBLE TREATMENT AND DISPOSAL PREVENTS POTENTIAL NEGATIVE EFFECTS ON THE ENVIRONMENT AND HUMAN HEALTH, AND HELPS ENSURE THAT THE PRODUCT'S COMPONENT MATERIALS WILL BE RECYCLED. UNLAWFUL DISPOSAL OF THE PRODUCT BY THE USER MAY LEAD TO PROSECUTION.
3. SAFETY PRECAUTIONS
IN CONFORMITY WITH THE PROVISIONS REGARDING ELECTROMAGNETIC COMPATIBILITY, THE ELECTROMAGNETIC INDUCTION COOKING HOB COMES UNDER GROUP 2 AND CLASS B (EN 55011).


THE PLUG TO BE CONNECTED TO THE POWER SUPPLY LEAD AND THE RELATIVE SOCKET MUST BE OF THE SAME TYPE AND COMPLY WITH THE REGULATIONS IN FORCE. THE SOCKET MUST BE ACCESSIBLE AFTER THE APPLIANCE IS BUILT IN. NEVER DISCONNECT THE PLUG BY PULLING ON THE CABLE.
THIS APPLIANCE MUST NEVER BE INSTALLED ON A STAND.
IT IS OBLIGATORY FOR ALL ELECTRICAL SYSTEMS TO BE GROUNDED ACCORDING TO THE METHODS REQUIRED BY SAFETY RULES.
IMMEDIATELY AFTER INSTALLATION, CARRY OUT A QUICK TEST ON THE APPLIANCE FOLLOWING THE INSTRUCTIONS PROVIDED LATER IN THIS MANUAL. SHOULD THE APPLIANCE NOT FUNCTION, DISCONNECT IT FROM THE POWER SUPPLY AND CALL THE NEAREST TECHNICAL ASSISTANCE CENTRE.
NEVER ATTEMPT TO REPAIR THE APPLIANCE YOURSELF.
AS SOON AS YOU NOTICE A FRACTURE OR A CRACK ON THE SURFACE OF THE GLASS HOB, SWITCH THE APPLIANCE OFF AND CONTACT AN AUTHORISED TECHNICAL ASSISTANCE CENTRE.
PEOPLE WHO HAVE PACEMAKERS OR OTHER SIMILAR DEVICES FITTED MUST MAKE SURE THAT THE FUNCTIONING OF THESE DEVICES IS NOT JEOPARDISED BY THE INDUCTIVE FIELD, WHOSE FREQUENCY RANGE IS BETWEEN 20 AND 50 KHZ.
NEVER PLACE FLAMMABLE OBJECTS IN THE OVEN: IF IT SHOULD ACCIDENTALLY BE SWITCHED ON, THIS MIGHT CAUSE A FIRE.
DURING USE THE APPLIANCE BECOMES VERY HOT. TAKE CARE NEVER TO TOUCH THE HEATING ELEMENTS INSIDE THE OVEN.
THE USE OF THIS APPLIANCE IS NOT PERMITTED TO PEOPLE (INCLUDING CHILDREN) OF REDUCED PHYSICAL AND MENTAL ABILITY, OR LACKING IN EXPERIENCE IN THE USE OF ELECTRICAL APPLIANCES, UNLESS THEY ARE SUPERVISED OR INSTRUCTED BY ADULTS OR PEOPLE RESPONSIBLE FOR THEIR SAFETY.
ALWAYS CHECK THAT THE CONTROL KNOBS ARE IN THE 0 (OFF) POSITION WHEN YOU FINISH USING THE OVEN.
BEFORE THE APPLIANCE IS PUT INTO OPERATION, ALL THE LABELS AND PROTECTIVE FILMS APPLIED INSIDE OR OUTSIDE MUST BE REMOVED.
4. INTENDED USE
THE APPLIANCE IS BUILT TO PERFORM THE FOLLOWING FUNCTION: COOKING AND REHEATING OF FOOD; ALL OTHER USES ARE CONSIDERED IMPROPER.

The manufacturer declines all responsibility for injury or damage caused by failure to comply with the above regulations or deriving from tampering with even just one part of the appliance and the use of non-original spare parts.
5. GETTING TO KNOW YOUR COOKER


5.1 General Description
5.1.1 Oven runners
The oven features 4 runners for positioning trays and grills at different heights. The insertions heights are numbered from the bottom upwards (see figure). (When using recipes, use the recommended runners, described in the table "10.6 Table of predefined recipes:").

5.1.2 Cooling system
The appliance is equipped with a cooling system which comes into operation as soon as a cooking function starts. The fan causes a steady outflow of air from above the door which may continue for a brief period of time even after the oven has been turned off.
5.1.3 Inside light
The oven light comes on when the door is opened or any function or recipe is selected, except for P (where present). In addition to pressing the -button, the light can be turned off or on at any moment except for when the automatic cleaning function is on P (when present).
The auxiliary oven light turns on by selecting any function or the appropriate light function indicated with the symbol 🌐
5.1.4 Dishwarming compartment (when present)
The storage compartment is in the bottom of the cooker, underneath the oven. To open it, pull on the top of the door. Never use it to store flammable materials such as rags, paper, etc.; it is intended for storing the appliance's metal accessories only.


Do not open the storage compartment when the oven is on and still hot. The temperatures inside it may be very high.
6. BEFORE INSTALLATION
The inside of the appliance should be cleaned to remove all manufacturing residues. For further information about cleaning, see "13. CLEANING AND MAINTENANCE".


Before using the oven and the grill for the first time, pre-heat it to maximum temperature long enough to burn off any manufacturing oily residues which could give the food a bad taste.
7. AVAILABLE ACCESSORIES
Oven rack: for cooking food in flat pans, small cakes or roasts or foods requiring light grilling.
Tray rack: for placing on top of a pan for cooking foods which may drip.
Oven tray: useful for collecting fat from foods placed on the rack above.
Baking tray: useful for cooking cakes, pizza and baked desserts.
Chromium-plated gripper: useful for removing hot shelves and trays.


The oven accessories intended to come into contact with food are made of materials that comply with the provisions of Directive 89/109/EEC, dated 21/12/88 and of Decree Law 108, dated 25/01/92.

Not all accessories are provided on some models.
Accessories available on request:
Original supplied and optional accessories may be ordered from any Authorised Service Centre.
8. WARNINGS AND GENERAL ADVICE FOR USAGE

The appliance becomes very hot during use. Oven gloves should always be worn.

All cooking operations must be carried out with the door closed.

During cooking, do not cover the bottom of the oven with aluminium foil, and do not place pans or trays on it; this may damage the enamel coating. If you wish to use greaseproof paper, place it so that it will not interfere with the hot air circulation inside the oven.
To prevent any steam in the oven from creating problems, open the door in two stages: half open (5 cm approx.) for 4-5 seconds and then fully open. To access food, always leave the door open as short a time as possible to prevent the temperature in the oven from falling and ruining the food. When the door is opened the oven's internal ventilation cuts out automatically; it starts up again when the door is closed.


- Grilling processes must never last more than 60 minutes.
- To prevent hazardous overheating, the appliance's glass lid (when present) must always be raised when using the oven or grill.
- Accessible parts may be very hot during and after use of the grill; keep children well away from the appliance.
- During rotisserie cooking operations, one of the pans supplied with the cooking appliance should be placed on the bottom of the oven, on the bottom runners, to collect any grease and fat produced.
- When using the oven, remove all unused pans and shelves from its interior.
9. DESCRIPTION OF THE CONTROLS ON THE FRONT PANEL
All the control and monitoring devices are clearly in view on the front panel. The symbols used are described in the table below.

1
This display shows the following information:

Indicates the current time or the cooking time.

Shows the preset temperature for the function or recipe required, or the temperature set by the user.

Recipes that can be selected.
The following symbols coming on indicate:

Clock: adjusting the cooking time.

Child lock-out function: child lock-out function mode ON (see 10.7 Secondary menu).

Bell: minute minder activated.

Cooking duration: setting the cooking time.

Door interlock indicator light: comes on when the cleaning cycle is used to indicate the door has been locked (pyrolytic models only).

Delayed start: sets a delayed start for the cooking time.
MAIN OVEN TEMPERATURE SELECTION KNOB (PT1)
PT1

This knob is used for selecting the desired temperature for the main oven. Turning it clockwise, the display shows the temperature just set, the temperature can be set between 50°C and 260°C according to the chosen function. In the case of using the “pizza” recipe, the maximum temperature allowed is 280°C.
MAIN OVEN FUNCTIONS SELECTION KNOB (PT2)
PT2

This knob is used to select the desired cooking function. By turning it clockwise or counterclockwise you can choose between the functions shown.
For increased details on the cooking mode of each function, see paragraph "11. COOKING IN THE OVEN".
HOB CONTROL KNOB


Using this knob you can control the cooking zones of the induction hob. The burner controlled is indicated above every knob. The drawing to the left refers to the knob of the front left cooking zone. Turn the knob to the right to adjust the operating power of the burner that goes from a minimum of 1 to a maximum of 9. The working power is indicated on a display positioned on the hob.
10. USING THE MAIN OVEN
10.1 First use
At first use, or after a power failure, the oven's display will show a flashing symbol. To be able to start any cooking function with the main oven, the current time must be set.
10.2 Setting the current time
To adjust the current time with the flashing display:
- Press the buttons or to decrease or increase the time shown. If the button is held down in one direction the time changes faster.
- When any button is released, after a few seconds the display will stop flashing and only the colon separating the hour and minutes will flash to indicate its correct operation (The ⏻ symbol will be shown on the display).

It might become necessary to change the current time, for example at the switch from summer to winter time.
hold down the button for a few seconds until the symbol stops flashing.
Repeat the operations described in point "10.2 Setting the current time".
10.2.1 Using the minute minder
The minute minder can be used during cooking or when the oven is turned off. The setting procedure is the same for both cases.
Press the ⏻ button briefly, the 🔊 symbol will flash and the display will show the 00:00 symbol (or the time remaining from a previously programmed count).
Press the — or + buttons to increase or decrease the minute minder time from 00:01 to 03:59 (hold the button down to go faster). After a few seconds the count will begin and the remaining time and the steady 🔒 symbol will appear on the display.

To reset the minute minder, press the — and + buttons at the same time for approximately one second.

Warning: The minute minder does not stop the cooking but rather informs the user when the set time has run out. To turn off the oven, turn the PT2 knob to the O position.
Modifying the programmed data:
Once the count has begun, the previously set data can be modified. Repeat the operations described in point "10.2.1 Using the minute minder".
10.3 Selecting a function in manual cooking
A cooking function can be selected by simply turning PT2 to the right or left to the desired function. After having selected the cooking function, use the PT1 knob to select the desired temperature.
Cooking is preceded by a preheating stage, which allows the oven to heat to the cooking temperature more quickly. The ☐ symbol flashes on the display to indicate that this stage is in progress. When the preheating stage is over, the ☐ symbol will remain on and a buzzer will sound to indicate that the food can be placed inside the oven.
10.4 Programmed cooking procedures
10.4.1 Semiautomatic cooking

Semiautomatic cooking is the function which allows a cooking operation to be started and then ended after a certain length of time set by the user.
Select a function and the temperature (see paragraph 10.3).
Press the ____ key on the display; the ____ symbol will flash and the 00.00 symbol will appear; if you do not set a time within a few seconds, the oven will return to manual mode; otherwise, you can set a cooking time (max 23.59) using the — or keys.
Once the desired cooking time value is reached, the symbol stays lit.
At the end of the cooking time, the message STOP will appear on the display, cooking will be interrupted and a buzzer will sound that can be deactivated by pressing the ⓚ key.

If you wish to continue cooking beyond the set time, press the ⏻ button again. The oven will restart normal operation with the previously selected cooking settings. To turn off the oven, turn the PT2 knob to the "O" position.

During semi-automatic cooking, the temperature values and the desired function can be modified without changing the previously set time.
Modifying the data set:
Once semiautomatic cooking has started, its duration can be changed.
When the symbol is steady and cooking is in progress, press the key.
The symbol starts flashing and it is possible to change the cooking time using the — or + keys.
A few seconds after the last change, the symbol will stop flashing, and semiautomatic cooking will restart from the new value.
10.4.2 Automatic cooking

Automatic cooking is the function which allows a cooking operation to be started at a set time and then ended after a specific length of time set by the user.
Select a function and the temperature (see paragraph 10.3).
Press the ⚪ key on the display; the ⚪ symbol will flash and the 0000 symbol will appear; if you do not set a time within a few seconds, the oven will return to manual mode; otherwise, you can set a cooking time (max 23.59) using the — or + keys.
Press the 📄 key again; the 📄 symbol will start to flash; if you do not set a time within a few seconds, the oven will return to semiautomatic mode; otherwise, you can set a cooking time (max 23.59) using the — or + keys.
A few seconds after the last change, the display will show the current time and the oven will be in standby waiting for the set start time.
At the end, the word STOP will appear on DSP1, cooking will stop and a buzzer will sound; press √ to deactivate it.

If you wish to continue cooking beyond the set time, press the √ button again. The oven will restart normal operation with the previously selected cooking settings.
Modifying the data set:
Once automatic cooking has started, its duration can be changed.
When the land symbols are steady and cooking is in progress, or the oven is in standby status waiting for cooking to start, press the key; the symbol starts to flash and it is possible to change the cooking time using the — or + keys. Press the ____ key again; the ____ symbol starts flashing. Use the — or + keys to change the cooking end time.
A few seconds after the last change, the symbol will stop flashing, and automatic cooking will restart with the new data that have been set.

Once cooking has been programmed but before it starts, the symbol of the chosen function or recipe will remain on, as will the symbols.
10.5 Cooking with selection of a recipe
The oven has 8 preset recipes (see "10.6 Table of predefined recipes:") and 2 memories. A recipe is a combination of function, temperatures and cooking times presettings.
Only when PT1 is positioned on "O" it is possible to select a recipe simply by turning PT2 onto R.
Press the — or + keys; the selected recipe will change its colour to red on the display; a few seconds later cooking will start with the preset parameters.
When the preset temperature is reached, a series of beeps will be emitted indicating that the oven is ready for use. The cooking time as specified in the table "10.6 Table of predefined recipes:" starts from this moment.
Modifying the data set (during cooking)
During cooking it is possible to manually change the temperature that was preset for the recipe by turning PT1 to the desired cooking temperature. To modify the cooking time press the ____ key; the ____ symbol flashes on the display. You can increase or decrease the cooking end time using the — or + keys.
These changes are not saved permanently.
10.5.1 Automatic cooking with selection of a recipe
Only when the PT1 knob is positioned on "O" it is possible to select a recipe, simply by turning PT2 onto R.
Press the — or + keys; the selected recipe will change its colour to red on the display. Within a few seconds press the key on the display; the symbol will flash. Press the key again; the symbol will start to flash; if you do not set a time within a few seconds, the oven returns to recipe mode and starts cooking; otherwise, you can set a cooking time (max 23.59) using the — or + keys.
A few seconds after the last change, the display will show the current time and the oven will be in standby waiting for the set start time.
At the end, the word STOP will appear on DSP1, cooking will stop and a buzzer will sound; press ⬇ to deactivate it.

Once cooking has been programmed, before it starts, the function or recipe symbol will remain on, as will the symbols 🎨. 🌐
10.5.2 Making permanent changes to a recipe
The oven has 8 preset recipes (see "10.6 Table of predefined recipes:"), and 2 to set according to your own named cooking preferences R1 R2 . In addition, you can modify the other recipes that are already preset.
To modify or set a recipe permanently:
1 With the PT1 and PT2 knobs positioned on "O" press the → key for 3 seconds.
2 Select the recipe you want to change using the — or + keys; the current settings for that recipe are shown on the display.
3 Press the -key; the display shows the preset function. (see "10.6.1 Association display icon - function") To change it, turn PT2 to the desired function.
4 When you press the → key the cooking time flashes on the display; use the — or + keys to change the value.
5 When you press the → key the preset temperature will flash on the display; turn PT1 to change the value.
6 Press the key to exit from recipe programming.
10.6 Table of predefined recipes:
| Class Type Qty. Temp. | (°C) | Cooking duration (min.) | Funct. Runner recommended | |||||
 | Beef Roast-beef | 0.7 Kg 200 30 | * |  |  | |||
| 1 Kg 200 40 | ||||||||
| 1.5 Kg 200 65 | ||||||||
 | Pork Roast | 0.5 Kg 180 50 | * |  |  | |||
| 1 Kg 190 75 | ||||||||
| 1.5 Kg 180 110 | ||||||||
 | Chicken Roast chicken | 0.5 Kg 190 40 | * |  |  | |||
| 1 Kg 190 60 | ||||||||
| 2 Kg 180 90 | ||||||||
 | Lamb | Roast leg of lamb | 1.0 Kg 190 65 | * |  |  | ||
| 1.5 Kg 190 90 | ||||||||
 | Fish | Bass baked in foil | 0.7 Kg 200 35 | * |  |  | ||
| 1.0 Kg 200 45 | ||||||||
 | Vegetables | Stuffed peppers | 1 Kg 170 45 | * |  |  | ||
| 1.5 Kg 160 50 | ||||||||
| 2 Kg 160 60 | ||||||||
 | Pizza | Stuffed Pizza | 1 pizza | 280 | 8 | * |  |  |
 | Cakes | Apple pie | 8 people | 170 | 60 | * |  |  |


The cooking times specified in the table refer to the food indicated in the recipe and may vary depending on the weight.
The table gives the factory-set data. To reset a recipe with the original settings after it has been modified, just enter the data given in the table. (*original settings).
If the energy saving mode is activated (see secondary menu) the cooking times can vary from those indicated.
10.6.1 Association display icon - function
| F0:01 | F0:02 | F0:03 | F0:04 | F0:05 | F0:06 | F0:07 | F0:08 |
 |  |  |  |  |  |  |  |
| ECO | Static | Rotisserie grill | Fan-ass. static | Fan-ass. grill | Fan-ass. bottom | Circular | Turbo |
10.7 Secondary menu
This appliance also has a concealed "secondary menu" allowing the user to:
Activate or deactivate the child safety device
Activate or deactivate the Showroom mode (which disables all the heating elements so that only the control panel works).
Select or deselect the power limiter mode.
With the PT2 knob positioned on "O", press the → and ⏻ buttons for at least 3 seconds to view the secondary menu.
With the — and + buttons, it is possible to change the status of the setting (ON / OFF) (HI / LO).
Press to move on to setting the next function.

Child lock-out mode: by activating this mode, after two minutes of operation without any intervention from the user, the controls will automatically be locked, indicated by the symbol turning on. To temporarily disconnect the lock during cooking, hold down the button for at least 3 seconds. Two minutes after the last setting the lock will become active again.

When turning the PT2 knob, the word "BLOC" is shown permanently. The word only disappears when the knob is turned back to the original start condition.
If the PT1 knob is turned, the cooking temperature will not change and the word "BLOC" will be shown.

Showroom mode: (only for showrooms) by activating this mode, the oven deactivates all the heating elements, while keeping the control panel active. To use the oven normally, set this mode to OFF. During cooking, the word SHO will be displayed (once per minute) to indicate that the showroom mode has been activated.

Power limiter mode: by selecting LO while cooking with the main oven a limited amount of power will be used, according to the model. To reset the product's normal consumption, select HI.

To save the settings, you need to exit from the secondary menu in the "power limiter mode" screen by pressing the -key, or else wait for a few seconds. If you do not do this the changes you made will not be saved.
11. COOKING IN THE OVEN
11.1 Description of the selected functions
ECO
ECO:
Using the grill and the bottom heating element is particularly suitable for cooking small quantities of food, as it provides low energy consumption.


STATIC:
As the heat comes from above and below at the same time, this system is particularly suitable for certain types of food. Traditional cooking, also known as static or thermal radiation cooking, is suitable for cooking just one dish at a time. Perfect for all types of roasts, bread, and cakes and in any case particularly suitable for fatty meats such as goose and duck.


GRILL:
The heat coming from the grill element gives perfect grilling results above all for thin and medium thickness meat and in combination with the rotisserie (when present) gives the food an even browning at the end of the cooking. Perfect for sausages, ribs and bacon. This function allows you to grill large quantities of food, particularly meat, evenly.


ROTISSERIE GRILL:
(on some models only)

The rotisserie functions in combination with the grill element to give perfect browning to food.

FAN-ASSISTED STATIC:
The operation of the fan, combined with traditional cooking, ensures uniform cooking even with complex recipes. Perfect for biscuits and cakes, even when simultaneously cooked on several levels.


FAN-ASSISTED GRILL:
The air produced by the fan softens the strong heatwave generated by the grill, giving perfect grilling even to very thick foods. Perfect for large cuts of meat (e.g. shank of pork).
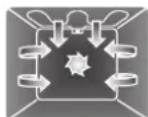

FAN-ASSISTED BOTTOM:
The combination of the fan with only the bottom heating element allows cooking to be completed more rapidly. This system is recommended for sterilising or for finishing off the cooking of foods already well-cooked on the surface, but not inside, which therefore need a little more heat. Perfect for any type of food.


CIRCULAR:
The combination of the fan and the circular element (incorporated in the rear of the oven) allows you to cook different foods on several levels, as long as they need the same temperatures and cooking time. Air circulation ensures instant and uniform distribution of heat. It will be possible, for instance, to cook fish, vegetables and biscuits simultaneously without mixing smells and flavours.


TURBO:
The combination of fan-assisted cooking and traditional cooking allows you to cook different foods on several levels extremely quickly and efficiently.

Perfect for large volumes that call for intense cooking.

THAWING:
Rapid thawing is helped by switching on the fan provided and the top heating element that ensure uniform distribution of low temperature air inside the oven. In certain models this function integrates the proving. The choice to thaw or to prove depends on the temperature selected. Set the temperature to choose the function: thawing (30°C) or proving (40°C).

11.2 COOKING HINTS AND TIPS

HINTS ON USING THE ACCESSORIES:


- Use only original SMEG trays.
- When the tray is in the oven, the handle must be facing the oven door.
- Push the trays all the way inside the oven. • Use only original SMEG racks.
- When the rack is in the oven, the contoured part must be facing downwards.
- Push the racks right inside the oven.
- For best cooking results, we recommend placing kitchenware in the centre of the rack.
GENERAL HINTS:


- We recommend preheating the oven before putting food in. Do not place foods inside the oven until the □ symbol on the display stops flashing and the beep has sounded to confirm that the programmed temperature has been reached.
- For cooking on several levels, we recommend using a fan-assisted function to achieve uniform cooking at all heights.
- In general, it is not possible to shorten the cooking times by increasing the temperature (the food could be well-cooked on the outside and undercooked on the inside).
- While cooking desserts and vegetables, dripping from the bottom of the door may occur. This is a natural physical phenomenon which mainly occurs when the food is placed in the oven before preheating. To avoid this, carefully open the door a couple of times during the cooking.
COOKING HINTS FOR MEAT:

- Cooking times, especially for meat, vary according to the thickness and quality of the food and the consumer's taste. • To save energy when roasting, we recommend putting the food in the cold oven.
- We recommend using a meat thermometer for meat when roasting it. Alternatively, simply press on the roast with a spoon: if it is hard it is ready, if not, it needs another few minutes cooking.
COOKING HINTS FOR DESSERTS AND BISCUITS:

- Use dark metal moulds for desserts: they help to absorb the heat better.
- The temperature and the cooking duration depend on the quality and consistency of the dough.
- The tables indicate the temperature ranges. Initially, try with the lowest value (the lower temperature gives a more even browning); if the dessert does not come out well, increase the temperature on the following occasions.
- Check whether the dessert is cooked right through: About 10 minutes before the end of cooking, stick a toothpick into the highest point in the dessert. If the dough does not stick to the toothpick, the dessert is cooked.
- If the dessert goes flat when it comes out of the oven, on the next occasion reduce the set temperature by about 10°C selecting a longer cooking time if necessary.
11.3 Cooking tables:
| FUNCTION LEVELFROM | BELOW | TEMP. °C TIME IN MINUTES | |||
| FIRST COURSES | |||||
| LASAGNE | (HC37) | Static | 1 | 220 - 230 | 50 - 60 |
| OVEN-BAKED PASTA | Static | 1 | 220 - 230 | 40 | |
| MEAT | |||||
| ROAST VEAL | (VWHZ) | Fan-ass. static | 2 | 180 - 190 | 70 - 80 |
| LOIN OF PORK | Fan-ass. static | 2 | 180 - 190 | 70 - 80 | |
| SHOULDER OF PORK | (B870) | Turbo | 2 | 180 - 190 | 90 - 100 |
| ROAST RABBIT | Circular | 2 | 180 - 190 | 70 - 80 | |
| TURKEY BREAST | (C887) | Fan-ass. static | 2 | 180 - 190 | 110 - 120 |
| ROAST NECK OF PORK | Turbo | 2 | 180 - 190 | 190 - 210 | |
| ROAST CHICKEN | (C903) | Turbo | 2 | 180 - 190 | 60 - 70 |
| GRILLED MEATS | 1 SURF 2 SURF | ||||
| PORK CHOPS | (A4HB) | Fan-ass. grill | 4 | 260 | 7 - 9 5 - 7 |
| FILLET OF PORK | Grill | 3 | 260 | 9 - 11 5 - 9 | |
| FILLET OF BEEF | (A5X8) | Grill | 3 | 260 | 9 - 11 9 - 11 |
| LIVER | Fan-ass. grill | 4 | 260 | 2 - 3 2 - 3 | |
| SAUSAGES | (A4A24) | Fan-ass. grill | 3 | 260 | 7 - 9 5 - 6 |
| MEAT-BALLS | Grill | 3 | 260 | 7 - 9 5 - 6 | |
| ROTISSERIE MEATS | |||||
| CHICKEN | (T6A8) | Rotisserie grill | On a spit | 250 - 260 | 60 - 70 |
| FISH | |||||
| SALMON TROUT | (B1AW) | Bottom fan-ass.circ. | 2 150 - 160 35 - 40 | ||
| PIZZA | (S832) | Fan-ass. static | 1 | 250 - 280 | 6 - 10 |
| BREAD | Circular | 2 | 190 - 200 | 25 - 30 | |
| MUFFINS | (E209) | Turbo | 2 | 180 - 190 | 15 - 20 |
| DESSERTS | |||||
| DOUGHNUT | (YHTT) | Fan-ass. static | 2 | 160 | 55 - 60 |
| FRUIT TART | Fan-ass. static | 2 | 160 | 30 - 35 | |
| SHORT PASTRY | (X388) | Bottom + fan-ass.circ. | 2 160 - 170 20 - 25 | ||
| JAM TARTS | Turbo | 2 | 160 | 20 - 25 | |
| PARADISE CAKE | (A280) | Fan-ass. static | 2 | 160 | 55 - 60 |
| ECLAIR | Turbo | 2 | 150 - 160 | 40 - 50 | |
| LIGHT SPONGE CAKE | (B45C) | Circular | 2 | 150 - 160 | 45 - 50 |
| CROISSANTS | Circular | 2 | 160 | 25 - 30 | |

12. USING THE HOB

Metal objects such as silverware or lids must not be placed on the hob surface as they can become very hot.

Before using the oven for the first time, pre-heat it to maximum temperature long enough to burn any manufacturing oily residues which could give the food a bad taste.
12.1 Cooking zones
The device has 4 cooking zones of various powers and diameters. Their position is clearly indicated with circles and the heat is limited to within the diameters traced on the glass. Under each cooking zone there is a coil called an inductor which is powered by an electronic system and which creates a variable magnetic field. When a pan is positioned within this magnetic field, the high frequency currents are concentrated directly onto the pan producing the heat required for cooking the food.


Each cooking zone has an inner circle. This printed circle indicates the minimum permissible diameter on that cooking zone. Pans with smaller diameters risk not being detected and therefore not activating the inductor.
12.2 Heating accelerator
Each cooking zone has a heating accelerator. This system lets the burner operate at maximum power for a time that is proportional to the selected power. To start the heating accelerator, turn the knob to the left, select the "A" position and release. The letter "A" appears on the cooking hob display. At this point you have 3 seconds to choose the desired heating position. Once the position has been adjusted between 1 and 9, "A" and the selected position will blink on the display. During the heating accelerator's operation it is possible to increase the heating intensity at any time. The "full power" period will consequently be modified.
On the other hand, if the power is reduced, turn the knob counterclockwise. The "A" option is automatically disabled.
12.3 Power Function
The power function can be used to cause each heating zone to operate continuously at maximum power for a maximum period of 10 minutes. Said function, for example, can be used to bring a large quantity of water to a boil rapidly or to broil meat.
Turn the knob clockwise and set the heating intensity on position 9. Select the position "P" with the knob and release. "P" appears on the hob display of the corresponding zone. After 10 minutes the power will be reduced automatically, returning to position 9 and the "P" disappears. It is however possible to interrupt the power function by decreasing at any time the heating intensity. When the power option is selected on a burner (ex. the front left), the power absorbed by the second burner (back left) could be reduced to provide the maximum energy available to the first. For the same reason the power function has priority over the heating accelerator. If a recipient is removed from the cooking zone while the power function is turned on, the function stops.
12.4 Operating power settings
Below is provided a table with the maximum power consumptions of the burners.
Zone number: Zone Diameter Power consumed
| 1 145 mm | Normal operation: 1400 W | |
| With power function: 1800 W | ||
| 2 180 mm | Normal operation: 1850 W | |
| With power function: 2500 W | ||
| 3 210 mm | Normal operation: 2300 W | |
| With power function: 3200 W | ||
| 4 145 mm | Normal operation: 1400 W | |
| With power function: 1800 W | ||
| Total power consumed 7400 W |
12.5 Cookware
Appliances of this type require special cookware to be able to work. In fact, the cookware must have an iron or steel/iron bottom to generate the magnetic field necessary for it to be heated up. Recipients made of the following are not suitable:
- glass;
- ceramic:
- terracotta;
- steel, aluminium or copper without a magnetic bottom;
To see whether the pan is suitable, bring a magnet close to the bottom: if it is attracted, the pan is suitable for induction cooking. If you do not have a magnet, you can put a small amount of water in the recipient, place it on a cooking zone and start the burner. If, instead of the power symbol, the symbol appears, it means the pan is not suitable. The pans used for cooking must have a minimum diameter to guarantee proper functioning. Below is a table with the minimum diameters for pans according to the cooking zone.
| Zone number | Minimum cookware diameter |
| 1 90 mm | |
| 2 145 mm | |
| 3 170 mm | |
| 4 90 mm |
Cookware that is larger than the cooking zones can also be used, but care must be taken that the bottom of the pan does not come into contact with other cooking zones and that it is always centered on the cooking zone perimeter.


Make sure you only use containers intended for induction cooking, with a thick and completely flat bottom or, if not available, containers without a curved bottom (concave or convex).

12.5.1 Cookware detector signal
Every cooking zone has a "cookware detector" that only starts the cooking if there is a well positioned recipient with the suitable characteristics present on the burner. If the container is not well positioned or is not made of the correct material and still tries to activate the burner, after a few seconds from the burner's activation, the Symbol will appear on the display.
12.5.2 Residual heat
Each cooking zone is equipped with a residual heat warning device. After any burner is switched off, a flashing H may appear on the front zone. This warns that the cooking zone concerned is still very hot.
Cooking can be restarted even while the #1s flashing.
12.5.3 Cooking hob lock-out
When not in use, the hob can be "locked" from being accidentally turned on by children. With the burners switched off turn the burner knobs 2 and 3 completely to the left until 4 L appears on the display. Then release the knobs. To unlock it repeat the same operation: The burners' displays will show a 0 that will indicate that the burners' lock has been deactivated.
12.5.4 Circuit board thermal protection
The appliance is provided with a device that constantly measures the temperature of the electronic circuit board.
If the temperature surpasses certain values, the device will activate certain functions to lower the temperature and allow the glass-ceramic hob to continue to work correctly.
Below is a table with the operations that are activated automatically and the relative start temperature:
Operation Activating temperature
| Fan turns on at low speed 50 °C |
| Fan turns on at high speed 60 °C |
| Fan returns to low speed 55 °C |
| Fan turns off 45 °C |
| Operating power reduced from Power to 9 76 °C |
| Reduction of power of a point for every cooking zone 85 °C |
| Turning off all the cooking zones 90 °C |
| Switching on again of the cooking zones at reduced power 85 °C |
| Normal operation of all the cooking zones 80 °C |
Every intervention of this type will be identified on the cooking hob with a light on the power display.
12.5.5 Thermal protection glass-ceramic hob
Every cooking zone has a device that constantly measures the temperature. If the temperature surpasses certain values, the device will activate certain functions to lower the temperature and allow the glass-ceramic hob to continue to work correctly. Below is a table with the operations that are activated automatically and the relative start temperature:
Operation Activating temperature
| Operating power reduced from Power to 9 250 °C | |
| Reduction of the power of a point 280 °C | |
| Switching off the cooking zone | 300 °C |
| Return of the power to the set value | 250 °C |
Every intervention of this type will be identified on the cooking hob with a light on the power display.

Take care not to spill sugar or sweet mixtures on to the hob when hot. Never place materials or substances which may melt (plastic or aluminium foil) on the hob. If this occurs, promptly switch off and remove the molten material with the scraper provided while the cooking zone is still warm to prevent it from being damaged. Failure to instantly clean the glass-ceramic hob could lead to encrustations which are impossible to remove once the hob has cooled down.


Important! Beware of children as the residual heat indicator lights are out of sight to them. In fact, even after having been turned off, the cooking zones remains hot for a certain period of time. Make sure that children never touch the hob.


Do not leave metal objects on the hob: they could get very hot.
12.5.6 Keep Warm Function
The purpose of the keep warm function is to regulate the temperature of the bottom of the cookware to approximately 65° C. This allows for keeping food warm at the ideal power level, as well as heating slowly. The maximum duration of the keep warm function is limited to 2 hours. The keep warm function is between [0] and [1] and is indicated with appropriate symbols on the cooking zones.
13.CLEANING AND MAINTENANCE

Before performing any operations requiring access to powered parts, switch off the power supply to the appliance.

Never use a jet of steam for cleaning the appliance.
13.1 Cleaning stainless steel

To keep stainless steel in good condition, it must be cleaned regularly when you are done using the cooker, after it has cooled.
13.2 Ordinary daily cleaning
To clean and preserve the stainless steel surfaces, always use only specific products that do not contain abrasives or chlorine-based acids.
How to use: pour the product on a damp cloth and wipe the surface, rinse thoroughly and dry with a soft cloth or deerskin.
13.3 Food stains or residues
Do not use metallic sponges or sharp scrapers: they will damage the surface.
Use ordinary non-abrasive products for steel, with the aid of wooden or plastic materials if necessary. Rinse thoroughly and dry with a soft cloth or deerskin. Do not allow residues of sugary foods (such as jam) to set inside the oven. If left to set for too long, they might damage the enamel lining of the oven.


13.4 Cleaning the oven

For best oven upkeep clean regularly after having allowed to cool. Take out all removable parts.
- Clean the oven racks and side guides with hot water and non-abrasive detergent. Rinse and dry.
- For easier cleaning, the door can be removed (see point "14.2 Removing the door").


The oven should be operated at the maximum heat setting for 15/20 minutes after use of specific products, to burn off the residues left inside the oven.
13.5 Cleaning the door glazing
The glass in the door should always be kept thoroughly clean. Use absorbent paper towels, remove stubborn dirt with a damp sponge and ordinary detergent.

When cleaning, dry the appliance thoroughly to prevent water or detergent drips from interfering with its operation or creating unsightly marks.

Do not use abrasive or corrosive cleaners for cleaning the door glazing. (e.g., powder products, oven-cleaner sprays, stain removers and metal scouring pads). Do not use rough or abrasive materials or sharp metal scrapers to clean the oven's glass doors since they may scratch the surface and cause the glass to shatter.
14. EXTRAORDINARY MAINTENANCE
The oven may require extraordinary maintenance or replacement of parts subject to wear such as seals, bulbs, and so on. The following instructions describe how to carry out these minor maintenance operations.

Before performing any operations requiring access to powered parts, switch off the power supply to the appliance.
14.1 Changing the light bulb
Remove the protective cover A by unscrewing it counterclockwise; replace the bulb B with another of the same type (25 W). Re-fit the bulb protector A.


Use only oven bulbs (T 300°C).
14.2 Removing the door
Open the door completely, raise the lever B and take hold of the two sides with both hands near the hinges A. Lift the door up forming an angle of approximately 45° and remove it. To reassemble, fit the hinges A into their grooves, then lower the door into place and release the levers B.

14.3 Removing the door seal
To permit thorough cleaning of the oven, the seal may be removed.
Before removing the seal, take off the door as described above. Once the door has been taken off, lift the tabs at the corners as shown in the figure.

14.4 What to do if...
The oven display is completely off: • Check the mains power supply.
- Check whether an omnipolar switch upstream from the oven feed line is in the "ON" position.
The oven does not heat up: • Check whether the "showroom" mode has been
set, for further details see point "10.7 Secondary menu".
The controls do not respond: • Check whether the “child lock-out function”
mode has been set, for further details see point "10.7 Secondary menu".
The cooking times are longer than those indicated in the table.
Check whether the "power limiter" mode has been set, for further details see point "10.7 Secondary menu".
After the automatic "pyrolysis" cleaning cycle • (only on some models) it is not possible to select a function:
Verify whether the interlock device has been switched off. If it has not, the oven has a protection device that does not allow functions to be selected while the interlock device is active.
The display shows ERR 4 (on pyrolytic models only):
- The interlock device has not hooked up to the door properly. This might be because the door was accidentally opened during its activation. Switch off the oven and switch it on again waiting a few minutes before selecting a new cleaning cycle.
If the door is opened during a fan-assisted function, the fan stops:
This is not a fault. It is a normal operation of the appliance, useful when cooking foods in order to avoid excessive heat escaping. When the door is closed, the oven will return to normal operation.

If the problem has not been resolved or there are other types of faults, contact your local technical assistance centre.
15.INSTALLING THE APPLIANCE

The appliance must be installed by a qualified technician and according to the regulations in force. This appliance may be installed next to a wall which is higher than the appliance, with a minimum distance of 5 cm from the side of the appliance, as shown in drawings A and B showing the correct installation conditions. Any wall cupboards or shelves must be at a distance of at least 75 cm above the work surface.
Built-in appliance Free-standing appliance
15.1 Electrical connection

Make sure the voltage and the cross-section of the power cord match the specifications indicated on the rating plate positioned in the storage compartment. Do not remove this plate for any reason.

If the appliance is connected to the supply by means of a fixed connection, install a multipolar cut-out device on the line, with contact opening distance equal to or greater than 3 mm, located near the appliance and in an easily reachable position.

Connection to the supply may be fixed or with plug and socket. In the latter case the plug and socket must be suitable for the cable employed and conform with the regulations in force. Regardless of the type of connection, it is compulsory that the appliance be earthed. Before connection make sure that the supply line is suitably earthed. Avoid the use of reducers, adapters or shunts which may cause overheating.

For operation on 380-415V 3N~: use an H05V2V2-F type five-core cable (5 x 4 mm²).
For operation on 380-415V 2N~: use an H05V2V2-F type four-core cable (4 x 6 mm²).
For operation on 220-240V~: use an H05V2V2-F type three-core cable (3 x 4 mm²).
The earth wire (yellow-green) must be at least 20 mm longer than the other wires at the end for connection to the appliance.


WARNING: The values indicated above refer to the cross-section of the internal conductor.

THE MANUFACTURER DECLINES ALL RESPONSIBILITY FOR DAMAGE TO PERSONS OR THINGS CAUSED BY NON-OBSERVANCE OF THE ABOVE PRESCRIPTIONS.

15.2 Positioning and levelling the appliance (depending on model)
After making the electrical connections, level the appliance on the ground by means of its four adjustable feet. For good cooking results, the appliance must be properly levelled. Depending on the model you have purchased, the foot height adjustment range may vary from 70 to 95 mm and from 110 to 160 mm. These heights refer to the distance between the highest point of the foot (fixed part) and the lowest point (movable part which rests on the floor).


- PRECAUTIONS FOR USE
- RECYCLING INSTRUCTIONS - OUR ENVIRONMENT POLICY
- NOTICE TO USERS
- SAFETY PRECAUTIONS
- INTENDED USE
- GETTING TO KNOW YOUR COOKER
- GENERAL DESCRIPTION
- OVEN RUNNERS
- COOLING SYSTEM
- INSIDE LIGHT
- DISHWARMING COMPARTMENT (WHEN PRESENT)
- BEFORE INSTALLATION
- AVAILABLE ACCESSORIES
- ACCESSORIES AVAILABLE ON REQUEST
- WARNINGS AND GENERAL ADVICE FOR USAGE
- DESCRIPTION OF THE CONTROLS ON THE FRONT PANEL
- MAIN OVEN TEMPERATURE SELECTION KNOB (PT1)
- MAIN OVEN FUNCTIONS SELECTION KNOB (PT2)
- HOB CONTROL KNOB
- USING THE MAIN OVEN
- FIRST USE
- SETTING THE CURRENT TIME
- USING THE MINUTE MINDER
- MODIFYING THE PROGRAMMED DATA
- SELECTING A FUNCTION IN MANUAL COOKING
- PROGRAMMED COOKING PROCEDURES
- SEMIAUTOMATIC COOKING
- MODIFYING THE DATA SET
- AUTOMATIC COOKING
- COOKING WITH SELECTION OF A RECIPE
- MODIFYING THE DATA SET (DURING COOKING)
- AUTOMATIC COOKING WITH SELECTION OF A RECIPE
- MAKING PERMANENT CHANGES TO A RECIPE
- SECONDARY MENU
- COOKING IN THE OVEN
- DESCRIPTION OF THE SELECTED FUNCTIONS
- ECO
- STATIC
- GRILL
- ROTISSERIE GRILL
- FAN-ASSISTED STATIC
- FAN-ASSISTED GRILL
- FAN-ASSISTED BOTTOM
- CIRCULAR
- TURBO
- THAWING
- COOKING HINTS AND TIPS
- HINTS ON USING THE ACCESSORIES
- GENERAL HINTS
- COOKING HINTS FOR MEAT
- COOKING HINTS FOR DESSERTS AND BISCUITS
- USING THE HOB
- COOKING ZONES
- HEATING ACCELERATOR
- POWER FUNCTION
- OPERATING POWER SETTINGS
- COOKWARE
- COOKWARE DETECTOR SIGNAL
- RESIDUAL HEAT
- COOKING HOB LOCK-OUT
- CIRCUIT BOARD THERMAL PROTECTION
- THERMAL PROTECTION GLASS-CERAMIC HOB
- KEEP WARM FUNCTION
- CLEANING AND MAINTENANCE
- CLEANING STAINLESS STEEL
- ORDINARY DAILY CLEANING
- FOOD STAINS OR RESIDUES
- CLEANING THE OVEN
- CLEANING THE DOOR GLAZING
- EXTRAORDINARY MAINTENANCE
- CHANGING THE LIGHT BULB
- REMOVING THE DOOR
- REMOVING THE DOOR SEAL
- WHAT TO DO IF
- INSTALLING THE APPLIANCE
- ELECTRICAL CONNECTION
- POSITIONING AND LEVELLING THE APPLIANCE (DEPENDING ON MODEL)
Brand : SMEG
Model : CE6IMX
Category : Cooker