
DS920X - Sander SCHEPPACH - Free user manual and instructions
Find the device manual for free DS920X SCHEPPACH in PDF.


| Product Type | Combined Belt and Disc Sander |
| Brand | Scheppach |
| Model | DS920X |
| Power | 500 W |
| Voltage | 230 V ~ 50 Hz |
| No-load Speed (Disc) | 2950 rpm |
| No-load Speed (Belt) | 1500 rpm |
| Abrasive Belt Dimensions | 100 x 920 mm |
| Abrasive Disc Diameter | 200 mm |
| Work Table Dimensions | 200 x 200 mm |
| Weight | 18 kg |
| Sound Power Level (LWA) | 95 dB(A) |
| Sound Pressure Level (LpA) | 84 dB(A) |
| Vibration (RMS value) | < 2.5 m/s² |
| Protection Class | II (Double Insulation) |
| Safety Device | Anti-restart safety switch, thermal protection |
| Main Functions | Belt and disc sanding, tilting table from -45° to +45°, integrated dust extraction |
| Maintenance and Cleaning | Clean ventilation slots, replace worn abrasives, lubricate bearings |
| Available Spare Parts | Abrasive belts, abrasive discs, brake pads, belts, switch |
| Repairability | Repairability index not provided by the manufacturer |
| General Information | 2-year warranty, German manufacturing, CE standards |
Frequently Asked Questions - DS920X SCHEPPACH
User questions about DS920X SCHEPPACH
0 question about this device. Answer the ones you know or ask your own.
Ask a new question about this device
Download the instructions for your Sander in PDF format for free! Find your manual DS920X - SCHEPPACH and take your electronic device back in hand. On this page are published all the documents necessary for the use of your device. DS920X by SCHEPPACH.
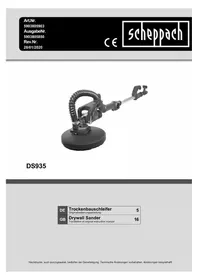
USER MANUAL DS920X SCHEPPACH

Made in P.R.C.
IX-WS925
DWS90X
DS920X
| DE | TrockenbauschleiferOriginalbetriebsanleitung | 4 |
| GB | Drywall grinderTranslation of original instruction manual | 19 |
| FR | Ponceuse de cloisons sèchesTraduction des instructions d'origine | 31 |
| IT | Levigatrice a seccoLa traduzione dal manuale di istruzioni originale | 44 |
| NL | DroogslijpmachineVertaling van de originele gebruikshandleiding | 57 |
| ES | Lijadora para paneles de yesoTraducción del manual de instrucciones original | 70 |
| PT | Lixadeira para gesso cartonadoTradução do manual de operação original | 83 |
| CZ | Bruska na suché stavbyPřeklad originálního návodu k obsluze | 96 |
| SK | Brúska pre suché stavbyPreklad originálneho návodu na obsluhu | 108 |
| HU | Szárazépítési csiszológépEredeti használati utasítás fordítása | 120 |
| PL | Szlifierka do suchej zabudowyTłumaczenie oryginalnej instrukcji obsługi | 133 |
| HR | Brusilica za gipsane pločePrijevod originalnog priručnika za uporabu | 146 |
| SI | Brusilnik za suhomontažne materialePrevod originalnih navodil za uporabo | 158 |
| EE | ViimistluslihvijaOriginaalkältusjuhendi tõlge | 170 |
| LT | Gipskartonio šlifuoklisOriginalios naudojimo instrukcijos vertimas | 182 |
| LV | Slipmašina sausiem apdares darbiemOriginālas lietošanas instrukcijas tulkojums | 194 |
| SE | Slip för gipsskivorÖversättning av original-bruksanvisning | 206 |
| FI | Kipsilevyn hiomakoneKäännös alkuperäisestä käyttöohjeesta | 218 |
| DK | Gipsvægs-slibemaskineOversættelse fra den oprindelige betjeningsvejledning | 230 |
| NO | GipsslipemaskinOversettelse av den originale brukerveiledningen | 242 |
| BG | Шлайфмашина за сухо строителствоПревод на оригиналното ръководство заексплоатация | 254 |
| GR | Трібєю γυψοσανίδαςМетафраση του πρωτοτύπου των οδηγιών χρήσης | 268 |
| RO | Şlefuitor pentru zidărie uscatăTraducere din manualul de exploatare original | 282 |
| RS | Brusilica za suve zidovePrevod originalnog uputstva za upotrebu | 295 |
| TR | Kuru malzeme zimpara makinesiOrijinal kullanım talimatı çevirisi | 307 |



Günzburger Straße 69
D-89335 Ichenhausen
Dear Customer,
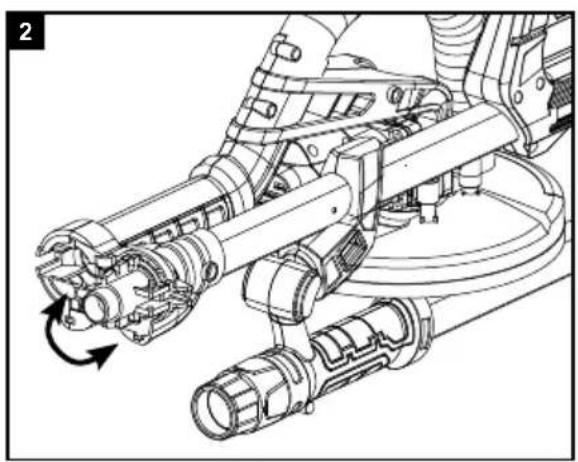
Installation (Fig. 2-3)
Homepage: https://www.scheppach.com/de/service
Explanation of the symbols on the device
 | Warning! Disregard results in a risk of death or injury, or damage to the tool! |
 | Before commissioning, read and observe the operating manual and safety instructions! |
 | Wear safety goggles! |
 | Wear hearing protection! |
 | If dust builds up, wear respiratory protection! |
 | Protection class II |
 | The product complies with the applicable European directives. |
 | The product complies with the applicable Serbian directives. |
Table of contents: Page:
- Introduction....21
- Device description 21
- Scope of delivery (Fig. 1)....21
- Proper use 21
- Safety instructions 22
- Technical data....25
- Before commissioning 26
- Assembly and operation....26
- Cleaning, maintenance and repair 28
- Electrical connection 28
- Storage and transport....29
- Disposal and recycling.... 29
- Trouble shooting 30
- Declaration of conformity 321
1. Introduction
Manufacturer:
Scheppach GmbH
Günzburger Straße 69
D-89335 Ichenhausen
Dear Customer,
we wish you much pleasure and success in working with your new device.
Note:
In accordance with the applicable product liability laws, the manufacturer of this device assumes no liability for damage to the device or caused by the device arising from:
- Improper handling
- Failure to comply with the operating instructions. • Repairs carried out by third parties, unauthorised specialists • Installing and replacing non-original spare parts
- Improper use
- Failure of the electrical system in the event of the electrical regulations and VDE provisions 0100, DIN 57113 / VDE 0113 not being observed
Note:
Read the whole text of the operating manual before assembly and commissioning.
This operating manual should help you to familiarise yourself with your device and to use it for its intended purpose.
The operating manual includes important instructions for safe, proper and economic operation of the device, for avoiding danger, for minimising repair costs and downtimes, and for increasing the reliability and extending the service life of the device.
In addition to the safety instructions in this operating manual, you must also observe the regulations applicable to the operation of the device in your country.
Keep the operating manual at the device, in a plastic sleeve, protected from dirt and moisture. They must be read and carefully observed by all operating personnel before starting the work.
The device may only be used by personnel who have been trained to use it and who have been instructed with respect to the associated hazards. The required minimum age must be observed.
In addition to the safety instructions in this operating manual and the separate regulations of your country, the generally recognized technical rules relating to the operation of such machines must also be observed.
We accept no liability for accidents or damage that occur due to a failure to observe this manual and the safety instructions.
2. Device description
- Grinding plate
- Front handle
- Locking screw
- LED light
- Speed setting
- Locking knob
- Main handle
- Mains cable
- Additional handle
- Connection for dust extraction
- Suction pipe extension
- Suction pipe extension connection
- ON/OFF switch
- Flexible vacuum hose
- Hose adapter
- Sandpaper
- Allen key
- Carbon brushes
- Split pin
- ON/OFF switch LED
3. Scope of delivery (Fig. 1)
1 Drywall grinder, 1 Vacuum hose (11), 2 Hose adapters (12), 6 Sanding sheets (16) (various grains), 2 Spare carbon brushes (18), 1 Allen key (17), 1 Split pin (19)
4. Proper use
The intended use of this power tool is the sanding of large areas of drywalls with suitable sanding sheets as a preparation before painting or wallpapering.
This power tool is neither suited for the preparation of small areas, corners and edges, nor for the removal of wallpaper and the grinding of ceilings and wet grinding.
Do not use the power tool for cutting or roughing or polishing. Do not use it together with wire brushes. Do not treat asbestos containing materials with this power tool.
This power tool is intended exclusively for private household use and may only be used in accordance with its intended purpose.
Any use beyond this is improper. The user, not the manufacturer, is responsible for damages or injuries of any type resulting from this.
Please note that our products were not designed with the intention of use for commercial or industrial purposes. We assume no guarantee if the product is used in commercial or industrial applications, or for equivalent work.
5. Safety instructions
⚠ WARNING
Read all safety warnings, instructions, illustrations and specifications provided with this electric tool. Failure to follow all instructions listed below may result in electric shock, fire and/or serious injury.
Save all warnings and instructions for future reference.
The term “electric tool” used in the safety instructions refers to mains-powered electrical tools (with a mains cable) and battery-powered electrical tools (without a mains cable).
1) Workplace safety
a) Keep your work area clean and well-lit. Disorganised and unlit work areas can result in accidents.
b) Do not operate power tools in explosive atmospheres, such as in the presence of flammable liquids, gases or dust. Power tools create sparks which may ignite the dust or fumes.
c) Keep children and bystanders away while operating a power tool. Distractions may cause you to lose control of the device.
2) Electrical safety
a) Power tool plugs must match the outlet. Never modify the plug in any way. Do not use any adapter plugs with earthed (grounded) power tools. Unmodified plugs and matching outlets will reduce risk of electric shock.
b) Avoid body contact with earthed or grounded surfaces, such as pipes, radiators, ranges and refrigerators. There is an increased risk of electric shock if your body is earthed or grounded.
c) Do not expose power tools to rain or wet conditions. Water penetrating an electric device increases the risk of an electric shock.
d) Do not use the cable for another purpose, for example, carrying or hanging the power tool or pulling the plug out of the socket. Keep the cable away from heat, oil, sharp edges or moving device parts. Damaged or coiled cables increase the risk of an electric shock.
e) If you work with an electric tool outdoors, only use extension cables that are also permitted for outdoor use. Use of a cord suitable for outdoor use reduces the risk of electric shock.
f) If operating a power tool in a damp location is unavoidable, use a residual current device (RCD) protected supply. Use of an RCD reduces the risk of electric shock.
3) Personal safety
a) Always remain attentive, pay attention to what you are doing and be sensible when working with electric tools. Do not use a power tool while you are tired or under the influence of drugs, alcohol or medication. A moment of carelessness when using electrical tools can result in serious injuries.
b) Wear personal protective equipment and always safety goggles. Wearing personal protective equipment, such as dust masks, anti-slip safety shoes, safety helmet or hearing protection, depending on the type and use of the electric tool, reduces the risk of injuries.
c) Prevent unintentional starting. Make sure the switch is in the off-position before connecting to the power supply, picking up or carrying the electric tool. Keeping your finger on the switch when carrying the electric tool or having the device already switched on when connecting it to the power supply may result in accidents.
d) Remove any adjusting tools or spanners/keys before turning the power tool on. A tool or spanner that is located in a rotating device part may result in injuries.
e) Avoid abnormal postures. Keep proper footing and balance at all times. This enables better control of the power tool in unexpected situations.
f) Wear suitable clothing. Do not wear loose clothing or jewellery. Keep hair, clothing and gloves away from moving parts. Loose clothes, jewellery or long hair can be caught in moving parts.
g) If dust extraction and collection devices can be mounted, make sure that they are connected and used properly. Using a dust extraction unit can reduce hazards caused by dust.
h) Do not allow yourself to be lulled into a false sense of security and do not ignore the safety rules for electric tools, even when you have used it many times and have become familiar with it. A careless action can cause severe injury within a fraction of a second.
4) Power tool use and care
a) Do not force the power tool. Use the correct power tool for your application. The correct power tool will do the job better and safer at the rate for which it was designed.
b) Do not use the power tool if the switch does not turn it on and off. Any power tool that cannot be controlled with the switch is dangerous and must be repaired.
c) Disconnect the plug from the power source and/or the battery pack from the power tool before making any adjustments, changing accessories, or storing power tools. Such preventive safety measures reduce the risk of starting the power tool accidentally.
d) Store idle power tools out of the reach of children and do not allow people who are not familiar with the tool or these instructions to operate it. Power tools are dangerous in the hands of untrained users.
e) Maintain power tools. Check for misalignment or binding of moving parts, breakage of parts, and any other condition that may affect the power tool's operation. If damaged, have the power tool repaired before use. Many accidents are caused by poorly maintained power tools.
f) Keep cutting tools sharp and clean. Properly maintained cutting tools with sharp cutting edges are less likely to bind and are easier to control.
g) Use the power tool, accessories and tool bits, etc., in accordance with these instructions, taking into account the working conditions and the work to be performed. Use of the power tool for operations different from those intended could result in a hazardous situation.
h) Keep the gripping surfaces dry, clean and free of oil and grease. Slippery handles and grasping surfaces do not allow for safe handling and control of the tool in unexpected situations.
5) Service
a) Have your power tool serviced by a qualified repair person using only identical replacement parts. This will ensure that the safety of the power tool is maintained.
Common safety instructions for grinding, sanding, wire brushing, polishing or cutting-off:
a) This power tool is intended to function as a sander. Read all safety warnings, instructions, illustrations and specifications provided with this power tool. Failure to follow all instructions listed below may result in electric shock, fire and/or serious injury.
b) Operations such as grinding, wire brushing, polishing, hole-cutting or cutting-off are not recommended to be performed with this power tool. Operations for which the power tool was not designed may create a hazard and cause personal injury.
c) Do not use this power tool for any purpose not expressly intended and specified by the manufacturer. Such misuse may result in loss of control and serious personal injury.
d) Do not use any accessory that has not been specifically designed and recommended by the manufacturer for this power tool. Just because an accessory can be attached to the power tool does not ensure safe operation.
e) The rated speed of the accessory must be at least equal to the maximum speed marked on the power tool. Accessories running faster than their rated speed can break and fly apart.
f) The external diameter and thickness of the tool attachment used must comply with the dimensions of the power tool. Incorrectly dimensioned accessory tools cannot be sufficiently shielded or controlled.
g) The dimensions for fastening the tool attachment must match the dimensions of the fasteners of the power tool. Tool attachments which are not precisely attached to the electric tool rotate unevenly, vibrate very strongly and can cause a loss of control.
h) Never use damaged tool attachments. Before each use inspect the tool attachment such as grinding discs for chips and cracks, grinding wheel for cracks, tear or excess wear, wire brush for loose or cracked wires.
i) If the power tool or the accessory tool in use is dropped, check to see if it is damaged or use an undamaged accessory tool. When you have checked and inserted the tool attachment, ensure that you and any other people in the vicinity remain outside of the level of the rotating attachment and allow the tool to rotate at maximum speed for one minute. Damaged tool attachments normally break during this test period.
j) Wear personal protective equipment. Depending on application, use face shield, safety goggles or safety glasses. Where appropriate, wear a dust mask, hearing protection, protective gloves or a special apron that will keep small grinding and material particles away from you. The eye protection must be capable of stopping flying debris generated by various operations. Dust or breathing masks must filter the dust generated during use. Prolonged exposure to high intensity noise may cause hearing loss.
k) Ensure that other people remain at a safe distance from your workspace. Anyone who enters the workspace must wear personal protective equipment. Fragments of workpiece or of a broken tool attachment may fly away and cause injury beyond immediate area of operation.
I) When performing work during which the tool attachment can meet with concealed power lines or its own mains cable, only hold the electric tool by the insulated gripping surfaces. Contact with a live wire may make exposed metal parts of the power tool live and could give the operator an electric shock.
m) Keep the power cord away from any rotating tool attachments. If you lose control, the cord may be cut or snagged and your hand or arm may be pulled into the spinning tool attachment.
n) Never put the power tool down until the tool attachment being used has come to a complete standstill. The rotating tool attachment can come into contact with the surface and cause you to lose control of the power tool.
o) Do not run the power tool while carrying it at your side. Accidental contact of your clothing with the rotating tool attachment could lead to an injury.
p) Clean the ventilation slits of your power tool regularly. The engine fan draws dust into the housing and a strong accumulation of metal dust can cause electrical hazards.
q) Never use the power tool in the vicinity of inflammable materials. Sparks could ignite these materials.
r) Do not use any tool attachments which require liquid coolant. The use of water or other liquid coolants may lead to an electric shock.
Further safety instructions for all operations - Kickback and related warnings
Kickback is the sudden reaction resulting from a caught or jammed rotating insert tool, such as a grinding disc, grinding wheel, wire brush, etc. Catching or jamming results in the rotating insert tool stopping abruptly.
As a result, an uncontrolled electric tool is accelerated against the direction of rotation of the tool attachment at the blocking point.
For example, if a grinding disc is snagged or pinched by the workpiece, the edge of the grinding disc that is entering into the pinch point can dig into the surface of the material causing the disc to climb out or kick out. The grinding disc may either jump toward or away from the operator, depending on direction of the wheel's movement at the point of pinching. Abrasive wheels may also break under these conditions.
Kickback is the result of incorrect or deficient use of the power tool.
It can be prevented by suitable precautionary measures, as described in the following.
a) Hold the power tool firmly in both hands and position your body and arms so they can absorb the force of a kickback. Always use the additional handle, if available, so that you have the maximum possible control over the kickback force or reaction forces at full speed. By taking adequate precautions, the operator can stay in control of the kickback and reaction forces.
b) Never hold your hand close to a rotating tool attachment. The tool attachment could jump out of your hand if there is a kickback.
c) Avoid having any part of your body in the region in which the power tool is likely to move in event of a kickback. The kickback will force the power tool in the opposite direction to the direction of rotation of the grinding disc at the blockage.
d) Be particularly careful when working in the area of the corners, sharp edges etc. Prevent insert tools from bouncing against the workpiece and getting caught. The rotating tool attachment tends to jam at corners, sharp edges or when it gets caught. This causes a loss of control or kickback.
e) Do not use the chainsaw blade to cut wood, a segmented diamond cutting wheel with a segment gap over 10 mm or a toothed saw blade. Such tool attachments frequently cause kickback and loss of control.
Additional safety instructions for sanding operations - Safety warnings specific for sanding operations
a) Use sanding sheets of the correct size and follow the manufacturer's instructions for the selection of the sanding sheets. Larger sanding sheets extending beyond the sanding pad present a laceration hazard and may cause snagging, tearing of the sheet or kickback.
Additional safety instructions
a) Connect a vacuum cleaner to the supplied adapter before starting your operations.
b) Attention! Keep sanding dust away from open fire. Dust may be explosive.
c) Always wear safety glasses and a dust protection mask when sanding, in particular during overhead work and when processing critical materials! When sanding certain materials (e.g. lead paint, certain types of wood and metal) harmful or noxious dust may be generated.
Touching or breathing in such dust may imply risks for the operator or bystanders.
Notes regarding vibration and noise emissions
Keep the noise level and vibration to a minimum!
- Only use power tools which are free of defects.
- Maintain and clean the power tool on a regular basis.
- Adjust your way of working to the power tool.
- Do not force the power tool.
- Have your power tool checked if necessary.
- Switch off the power tool if it is not in use.
Residual risks
Even when this electric tool is operated properly, residual risks still remain. The following hazards may arise in connection with the design and construction of this power tool:
a) Damage to health resulting from hand/arm vibration if the device is used over an extended period of time or if it is not properly operated and maintained.
b) Injury and property damage caused by insert tools being flung around and unexpectedly out of/from the electric tool due to sudden damage, wear or improper attachment.
c) Burns and cuts if the accessories are touched directly after use and/or with your bare skin.
⚠ WARNING
This power tool generates an electromagnetic field during operation. This field can impair active or passive medical implants under certain circumstances. In order to prevent the risk of serious or deadly injuries, we recommend that persons with medical implants consult with their physician and the manufacturer of the medical implant prior to operating the power tool.
6. Technical data
Rated voltage 220-240 V~
Nominal frequency 50 Hz
Power consumption 710 W
Nominal speed (oscillation rate) n 800 - 1800 rpm
Spindle size M14
Sandpaper diameter 215 mm
Protection class II
Weight 4.9 kg
Sound levels
Sound pressure level LPA 94.2 dB
Sound power level LWA 105.2 dB
Uncertainty K 3 dB
Hand-arm vibration
when grinding with sanding sheet ah 5.848 m/s 2
Uncertainty K 1.5 m/s 2
The hand-arm vibration value given is based on grinding with sanding sheets. Other applications may result in different values.
The noise and vibration levels have been determined in accordance with EN 60745-1 and EN 60745-2-3.
The specified vibration value has been measured in accordance with a standardised test procedure and can be used for comparison of one electric tool with another.
The specified vibration value can also be used for an initial estimation of the exposure.
Warning! Depending on how you use the electric tool, the actual vibration values may differ from those given!
Implement measures to protect against vibration loads! In doing so, take into account the complete working process, including the times when the electric tool is working without load or switched off!
Suitable measures include regular maintenance and care of the electric tool and the tool attachments, keeping hands warm, and regular breaks as well as proper planning of the working process!
Wear hearing protection.
Excessive noise can result in a loss of hearing.
7. Before commissioning
Open the packaging and carefully remove the device. Remove the packaging material, as well as the packaging and transport safety devices (if present).
Check whether the scope of delivery is complete.
Check the device and accessory parts for transport damage.
If possible, keep the packaging until the expiry of the warranty period.
ATTENTION
The device and the packaging are not children's toys! Do not let children play with plastic bags, films, or small parts! There is a danger of choking or suffocating!
Before connecting the machine, make certain that the data on the type plate matches with the mains power data.
- Immediately report any damage to the transport company that delivered the electrical tool.
- Long supply cables (extension cables) should be avoided.
- Do not operate the electrical tool in damp or wet areas.
- Operate the electrical tool only in suitable areas (well ventilated).
8. Assembly and operation
Attention! Always make sure the product is fully assembled before commissioning!
Assembly (Fig. 2 - 3)
- Fold the front sections together and tighten the locking screw (3).
Assembling the suction pipe extension (Fig. 4)
Insert the suction pipe extension (11) into the connection for the suction tube extension (12) and lock it as shown in Fig. 4.
Note: Adjust the wall and ceiling sander with the suction pipe extension (11) so that you can work with it comfortably. The machine can also be used without the suction pipe extension.
Sandpaper
Selection
- The grain of the sandpaper is indicated on the back. The smaller the number indicated, the coarser the grain.
- Use coarse grain sandpaper for rough sanding and fine grain sandpaper for finishing. Sandpapers with aluminium oxide, silicon carbide or other synthetic abrasives are recommended.
- Start with a coarse grain and finish with the finest grain if you have sandpaper with different grains to choose from to achieve a good, smooth sanding result.
Attachment and replacement
- Secure the sandpaper (16) to the grinding plate (1) with the Velcro backing.
- Align the sandpaper (16) with the grinding plate (1) and press it on evenly.
- Pull the sandpaper (16) off the grinding plate (1) to replace it with a new/different one (Fig. 7).
Dust extraction
Warning! When working on lead-based paint for example, harmful/toxic gases may be produced. These pose a danger both to the user and to persons in the vicinity!
Therefore, only use this electric tool with a dust extraction device and additionally protect yourself and other persons in the working area with suitable personal protective equipment!
A large amount of dust is generated when working with this electric tool. Dust extraction is very useful to keep your work area clean.
A chip extraction system or a hoover can be connected to the suction hose (14), which is connected to the
connection for dust extraction.
Insert the hose adapter (15) into the dust extraction connection (10 or 12) and lock it as shown in Fig. 5 and 6.
Note: Connect your tool to an extraction unit or a vacuum cleaner. This enables excellent extraction of dust and debris.
⚠ Attention! Always use a dust separator.
Note: Make sure that the vacuum cleaner is suitable for use with an electric tool.
Brush edge
The grinding head of this electric tool is surrounded by a brush edge. This offers two advantages:
a) The brush edge protrudes beyond the grinding plate (1) and rests first on the surface to be worked on. As a result, the grinding plate is brought parallel to the working surface before the tool attachment comes into contact with the surface to be sanded. This prevents crescent-shaped indentations caused by the edge of the grinding wheel.
b) In addition, the brush edge prevents excessive dust formation. The bristles help to contain the dust produced during grinding enabling it to be disposed of by the suction system. Make sure that the brush edge is intact each time before starting work with this electric tool. Have it replaced if you notice any damage or wear.
Connection to the power supply
- Ensure that the electric tool is switched off. Always switch the on/off switch (13) in the off position first before connecting it to the power supply.
- Insert the mains plug into a properly installed socket that meets the appropriate requirements per the technical data.
- Your electric tool is now ready for use.
Switching on/off
Switching on:
Press the ON/OFF switch (13)
Continuous operation: (Fig. 9)
Secure the ON/OFF switch (13) with the locking knob (6).
Switching off:
Press in the ON/OFF switch (13) briefly.
Setting the speed (Fig. 8)
Before starting work, set the speed to suit the application. Use a low speed for coarse grinding work, increase the speed for fine work.
Adjust the speed by pressing the buttons (5).
- Press the button to increase the speed (Fig. 8).
- Press the button to reduce the speed (Fig. 8).
Note: The tool attachment continues to rotate a little after it has been switched off. Wait until the tool attachment has come to a standstill before putting the electric tool down.
Sanding
- Attach a suitable sanding sheet (16) and select a suitable speed.
- Hold the electric tool securely by the gripping surfaces (2, 7) and switch it on as described.
- Wait until the tool attachment has reached its full working speed.
- Guide the grinding plate (1) as parallel as possible to the wall and place it with the brush edge first on the surface to be worked on.
- Apply some pressure on the grinding head (1) to bring the tool attachment into contact with the surface to be worked.
- Move the electric tool over the surface with even movements.
Note: Do not hold the electric tool in one place for too long to avoid uneven sanding results.
- Lift the grinding plate (1) from the surface to be worked on before switching off the electric tool.
- Wait until the tool attachment has come to a standstill before putting the electric tool down.
Sanding a ceiling (Fig. 11)
When working on a ceiling area, fix the grinding head in place using the split pin (19) (included in the scope of delivery) as shown in Figure 11.
LED light (Fig. 10)
Use the LED light (4) if necessary to ensure a well-lit workplace.
Press the switch (20) to turn the LED light (4) on/off.
After use
- Switch off the electric tool as described, disconnect it from the power supply and allow it to cool down.
- Clean and maintain the electric tool as described below and then store it carefully.
9. Cleaning, maintenance and repair
Warning! Remove the mains plug from the socket before working on the electric tool itself (e.g. transport, set up, modification, cleaning and maintenance work)!
Cleaning
a) Keep protective devices, ventilation openings and the motor housing as free of dust and dirt as possible. b) Wipe the electric tool clean with a clean cloth or blow it off with compressed air at low pressure (max. 3 bar). c) Clean the electric tool immediately after each use. d) Do not use any cleaning products or solvents as they could attack the plastic parts of the device. Make sure that no water can penetrate the device interior.
Maintenance
Before and after each use, check the electric tool and accessories (e.g. tool attachments) for wear and damage.
If necessary, replace them with new ones as described in this operating manual. When doing so, observe the technical requirements.
Grinding plate, brush edge
If the grinding plate (1) and the brush edge are damaged or badly worn, have them replaced by a qualified specialist with new ones of the same type.
Replacing the mains connection cable
Have a damaged mains connection cable of the electric tool replaced by the manufacturer or its after-sales service or a similarly qualified person in order to avoid hazards.
Service information
With this product, it is necessary to note that the following parts are subject to natural or usage-related wear, or that the following parts are required as consumables.
Wearing parts*: Carbon brushes, grinding plate, brush head, sandpaper.
* may not be included in the scope of delivery!
Spare parts and accessories can be obtained from our Service Centre. To do this, scan the QR code on the front page.
Warning! There are no parts which can be serviced by the user within the electric tool! Do not open the electric tool! Take it to a qualified specialist for further maintenance work!
10. Electrical connection
The electrical motor installed is connected and ready for operation. The connection complies with the applicable VDE and DIN provisions. The customer's mains connection as well as the extension cable used must also comply with these regulations.
Damaged electrical connection cable
The insulation on electrical connection cables is often damaged.
This may have the following causes:
- Pressure points, where connection cables are passed through windows or doors.
- Kinks where the connection cable has been improperly fastened or routed.
- Places where the connection cables have been cut due to being driven over.
- Insulation damage due to being ripped out of the wall outlet.
- Cracks due to the insulation ageing.
Such damaged electrical connection cables must not be used and are life-threatening due to the insulation damage.
Check the electrical connection cables for damage regularly. Ensure that the connection cables are disconnected from electrical power when checking for damage.
Electrical connection cables must comply with the applicable VDE and DIN provisions. Only use connection cables with the designation H05VV-F.
The printing of the type designation on the connection cable is mandatory.
AC motor
- The mains voltage must be 220-240 V~.
- Extension cables up to 25 m long must have a cross-section of 1.5 mm².
Connection type Y
If the mains connection cable needs to be replaced, this must be done by the manufacturer or their representative to avoid safety hazards.
Connections and repair work on the electrical equipment may only be carried out by electricians.
Please provide the following information in the event of any enquiries:
• Type of current for the motor
• Machine data - type plate
- Motor data - type plate
11. Storage and transport
- When not in use, store the power tool in a dry, well-ventilated location out of the reach of children, e.g., on top of a high cupboard or in a locked place.
- If possible, keep the power tool, operating manual, and tool attachments, if any, together in the original packaging. In this way, you will have all information and parts readily to hand.
- Always hold the power tool at its gripping surfaces.
- To avoid transport damage, pack the power tool or use the original packaging.
- Protect the power tool against vibrations and shocks, in particular during vehicular transport.
12. Disposal and recycling
Notes for packaging


The packaging materials are recyclable. Please dispose of packaging in an environmentally friendly manner.
Notes on the electrical and electronic equipment act (ElektroG)
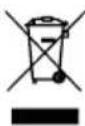
Waste electrical and electronic equipment does not belong in household waste, but must be collected and disposed of separately!
• Used batteries or rechargeable batteries that are not installed permanently in the old device must be removed non-destructively before disposal! Their disposal is regulated by the battery act.
- Owners or users of electrical and electronic devices are legally obliged to return them after use.
- The end user is responsible for deleting their personal data from the old device being disposed of!
- The symbol of the crossed-out dustbin means that waste electrical and electronic equipment must not be disposed of with household waste.
- Waste electrical and electronic equipment can be handed in free of charge at the following places:
- Public disposal or collection points (e.g. municipal works yards).
- Points of sale of electrical appliances (stationary and online), provided that dealers are obliged to take them back or offer to do so voluntarily.
- Up to three waste electrical devices per type of device, with an edge length of no more than 25 centimetres, can be returned free of charge to the manufacturer without prior purchase of a new device from the manufacturer or taken to another authorised collection point in your vicinity.
- Further supplementary take-back conditions of the manufacturers and distributors can be obtained from the respective customer service.
- If the manufacturer delivers a new electrical device to a private household, the manufacturer can arrange for the free collection of the old electrical device upon request from the end user. Please contact the manufacturer's customer service for this.
- These statements only apply to devices installed and sold in the countries of the European Union and which are subject to the European Directive 2012/19/EU. In countries outside the European Union, different regulations may apply to the disposal of waste electrical and electronic equipment.
13. Troubleshooting
The following table shows fault symptoms and describes remedial measures in the event of your product failing to work properly. If you cannot localise and rectify the problem with this, please contact your service workshop.
| Fault Possible cause Remedy | ||
| Power tool does not start | Power supply interrupted Check power supply by connecting another power tool | |
| Power cord or plug defective Have an electrician check the tool | ||
| Other electrical defect of the electric tool | Have an electrician check the tool | |
| Power tool does not operate with full power | Extension cable too long and/or cross-section too small | Use extension cable with permissible length and/or adequate cross-section |
| Power supply (e.g. generator) voltage is too low | Connect power tool to an appropriate power supply | |
| Poor operation results Accessory worn out Have accessory replaced | ||
| Grinding plate worn out Have grinding plate replaced | ||
| Considerable dust formation | Brush edge worn out Have brush edge replaced | |
| Dust extraction not connected/ switched on | Connect / switch on dust extraction | |
Günzburger Straße 69
D-89335 Ichenhausen
Dear customer,
Günzburger Straße 69
D-89335 Ichenhausen, Germany
Dear Customer,
Günzburger Straße 69
D-89335 Ichenhausen
Dear customer,
Günzburger Straße 69
Günzburger Straße 69
Günzburger Straße 69
D-89335 Ichenhausen
Dear customer,
Installation (Fig. 2-3)
Günzburger Straße 69
D-89335 Ichenhausen
Dear customer,
Günzburger Straße 69
D-89335 Ichenhausen
Dear customer,
Günzburger Straße 69
D-89335 Ichenhausen
Dear customer,
Günzburger Straße 69
D-89335 Ichenhausen
Dear customers,
Günzburger Straße 69
D-89335 Ichenhausen
Dear customer,
Günzburger Straße 69
D-89335 Ichenhausen
Dear customer,
Günzburger Straße 69
D-89335 Ichenhausen
Dear customer,
Günzburger Straße 69
Günzburger Straße 69
D-89335 Ichenhausen
Dear customer,
Günzburger Straße 69
D-89335 Ichenhausen
Dear customer,
Günzburger Straße 69
D-89335 Ichenhausen, Germany
Dear customer,
Günzburger Straße 69
D-89335 Ichenhausen
Dear customer,
Günzburger Straße 69
D-89335 Ichenhausen, Germany
Dear customers,
Günzburger Straße 69
D-89335 Ichenhausen
Dear customer,
Günzburger Straße 69
D-89335 Ichenhausen
Dear customer,
Günzburger Straße 69
D-89335 Ichenhausen
Dear customer,
Günzburger Straße 69
D-89335 Ichenhausen
Importer:

EU Declaration of Conformity
SCHEPPACH, WOODSTER, IXES
DRYWALL SANDER - DS920X, DWS90X, IX-WS925
DRYWALL SANDER - DS920X, DWS90X, IX-WS925
| 2000/14/EG_2005/88/EG | |
| Noise: measured LWA= xx dB; guaranteed LWA= xx dB | |
| Annex V | |
| Annex VI | |
| x 2006/42/EG | |
| Annex IV Notified Body: Notified Body No.: Certificate No.: | |
| 2016/1628/EU | |
| Emission. No: |
Standard references:
EN 62841-1:2015/A11:2022; EN IEC 62841-2-3:2021/A11:2021; EN IEC 55014-1:2021; EN IEC 55014-2:2021; EN IEC 61000-3-2:2019/A1:2021; EN 61000-3-3:2013/A2:2021
This declaration of conformity is issued under the sole responsibility of the manufacturer.
The object of the declaration described above fulfils the regulations of the directive 2011/65/EU of the European Parliament and Council from 8th June 2011, on the restriction of the use of certain hazardous substances in electrical and electronic equipment.
Subject to change without notice
Documents registrar: Ann-Katrin Bloching
Günzburger Str. 69, D-89335 Ichenhausen
EU Declaration of Conformity
SCHEPPACH, WOODSTER, IXES
TROCKENBAUSCHLEIFER - DS920X, DWS90X, IX-WS925
DRYWALL SANDER - DS920X, DWS90X, IX-WS925
| 2000/14/EG_2005/88/EG | |
| Noise: measured LWA= xx dB; guaranteed LWA= xx dB | |
| Annex V | |
| Annex VI | |

Annex IV
Notified Body:
Notified Body No.:
Certificate No.:
| 2016/1628/EU | |
| Emission. No: |
Standard references:
EN 62841-1:2015/A11:2022; EN IEC 62841-2-3:2021/A11:2021; EN IEC 55014-1:2021; EN IEC 55014-2:2021; EN IEC 61000-3-2:2019/A1:2021; EN 61000-3-3:2013/A2:2021
This declaration of conformity is issued under the sole responsibility of the manufacturer.
The object of the declaration described above fulfils the regulations of the directive 2011/65/EU of the European Parliament and Council from 8th June 2011, on the restriction of the use of certain hazardous substances in electrical and electronic equipment.
Subject to change without notice
Documents registrar: Ann-Katrin Bloching
Günzburger Str. 69, D-89335 Ichenhausen
EU Declaration of Conformity
SCHEPPACH, WOODSTER, IXES
TROCKENBAUSCHLEIFER - DS920X, DWS90X, IX-WS925
DRYWALL SANDER - DS920X, DWS90X, IX-WS925
Standard references:
EN 62841-1:2015/A11:2022; EN IEC 62841-2-3:2021/A11:2021; EN IEC 55014-1:2021; EN IEC 55014-2:2021;
EN IEC 61000-3-2:2019/A1:2021; EN 61000-3-3:2013/A2:2021
This declaration of conformity is issued under the sole responsibility of the manufacturer.
The object of the declaration described above fulfils the regulations of the directive 2011/65/EU of the European Parliament and Council from 8th June 2011, on the restriction of the use of certain hazardous substances in electrical and electronic equipment.
Subject to change without notice
Documents registrar: Ann-Katrin Bloching
Günzburger Str. 69, D-89335 Ichenhausen
EU Declaration of Conformity
EU Declaration of Conformity
CE
Scheppach GmbH, Günzburger Str. 69, D-89335 Ichenhausen
| DE | erklärt folgende Konformität gemäß EU-Richtlinien und Normen für den Artikel | RO | declară următoarea conformitate corespunzător directivelor și normelor UE pentru articolul |
| GB | hereby declares the following conformity under the EU Directive and standards for the following article | GR | δηλώνει την ακόλουθη συμμόρφωση σύμφωνα με την Οδηγία ΕΕ και τα πρότυπα για το προϊόν |
| BG | декларира съответното съответствие съгласно Дирек-тива на ЕС и норми за артикул | TR | Burada açıklanan ürünün geçerli yönetmeliklere ve standartlara uygun olduğunu tamamen kendi sorumluluğumuz altında beyan ediyoruz. |
| RS | potvrđuje sledeću usklađenost prema smernicama EZ i normama za artikal |
Marke / Brand / Marka: SCHEPPACH, WOODSTER, IXES

| 2016/1628/EU | |
| Emission. No: |
Standard references:
EN 62841-1:2015/A11:2022; EN IEC 62841-2-3:2021/A11:2021; EN IEC 55014-1:2021; EN IEC 55014-2:2021;
EN IEC 61000-3-2:2019/A1:2021; EN 61000-3-3:2013/A2:2021
This declaration of conformity is issued under the sole responsibility of the manufacturer.
The object of the declaration described above fulfils the regulations of the directive 2011/65/EU of the European Parliament and Council from 8th June 2011, on the restriction of the use of certain hazardous substances in electrical and electronic equipment.
Subject to change without notice
Documents registrar: Ann-Katrin Bloching Günzburger Str. 69, D-89335 Ichenhausen
Garantie DE
Apparent defects must be notified within 8 days from the receipt of the goods. Otherwise, the buyer loses its rights of claim due to such defects are invalidated. We guarantee for our machines in case of proper treatment for the time of the statutory warranty period from delivery in such a way that we replace any machine part free of charge which provably becomes unusable due to faulty material or defects of fabrication within such period of time. With respect to parts not manufactured by us we only warrant insofar as we are entitled to warranty claims against the upstream suppliers. The costs for the installation of the new parts shall be borne by the buyer. The cancellation of sale or the reduction of purchase price as well as any other claims for damages shall be excluded.
Garantie FR
Apparent defects must be notified within 8 days from the receipt of the goods. Otherwise, the buyer's rights of claim due to such defects are invalidated. We guarantee for our machines in case of proper treatment for the time of the statutory warranty period from delivery in such a way that we replace any machine part free of charge which provably becomes unusable due to faulty material or defects of fabrication within such period of time. With respect to parts not manufactured by us we only warrant insofar as we are entitled to warranty claims against the upstream suppliers. The costs for the installation of the new parts shall be borne by the buyer. The cancellation of sale or the reduction of purchase price as well as any other claims for damages shall be excluded.
Záruka CZ
Apparent defects must be notified within 8 days from the receipt of the goods. Otherwise, the buyer's rights of claim due to such defects are invalidated. We guarantee for our machines in case of proper treatment for the time of the statutory warranty period from delivery in such a way that we replace any machine part free of charge which provably becomes unusable due to faulty material or defects of fabrication within such period of time. With respect to parts not manufactured by us we only warrant insofar as we are entitled to warranty claims against the upstream suppliers. The costs for the installation of the new parts shall be borne by the buyer. The cancellation of sale or the reduction of purchase price as well as any other claims for damages shall be excluded.
Warranty EE
Apparent defects must be notified within 8 days from the receipt of the goods. Otherwise, the buyer's rights of claim due to such defects are invalidated. We guarantee for our machines in case of proper treatment for the time of the statutory warranty period from delivery in such a way that we replace any machine part free of charge which provably becomes unusable due to faulty material or defects of fabrication within such period of time. With respect to parts not manufactured by us we only warrant insofar as we are entitled to warranty claims against the upstream suppliers. The costs for the installation of the new parts shall be borne by the buyer. The cancellation of sale or the reduction of purchase price as well as any other claims for damages shall be excluded.
Warranty BG



- IX-WS
- DWS90X
- DS920X
- DEAR CUSTOMER
- INSTALLATION (FIG. 2-3)
- EXPLANATION OF THE SYMBOLS ON THE DEVICE
- TABLE OF CONTENTS: PAGE
- INTRODUCTION
- MANUFACTURER
- SCHEPPACH GMBH
- NOTE
- DEVICE DESCRIPTION
- SCOPE OF DELIVERY (FIG. 1)
- PROPER USE
- SAFETY INSTRUCTIONS
- ⚠ WARNING
- FURTHER SAFETY INSTRUCTIONS FOR ALL OPERATIONS - KICKBACK AND RELATED WARNINGS
- ADDITIONAL SAFETY INSTRUCTIONS FOR SANDING OPERATIONS - SAFETY WARNINGS SPECIFIC FOR SANDING OPERATIONS
- ADDITIONAL SAFETY INSTRUCTIONS
- NOTES REGARDING VIBRATION AND NOISE EMISSIONS
- RESIDUAL RISKS
- TECHNICAL DATA
- BEFORE COMMISSIONING
- ATTENTION
- ASSEMBLY AND OPERATION
- ATTENTION! ALWAYS MAKE SURE THE PRODUCT IS FULLY ASSEMBLED BEFORE COMMISSIONING
- ASSEMBLY (FIG. 2 - 3)
- ASSEMBLING THE SUCTION PIPE EXTENSION (FIG. 4)
- SANDPAPER
- SELECTION
- ATTACHMENT AND REPLACEMENT
- DUST EXTRACTION
- BRUSH EDGE
- CONNECTION TO THE POWER SUPPLY
- SWITCHING ON/OFF
- SWITCHING ON
- CONTINUOUS OPERATION: (FIG. 9)
- SWITCHING OFF
- SETTING THE SPEED (FIG. 8)
- SANDING
- SANDING A CEILING (FIG. 11)
- LED LIGHT (FIG. 10)
- AFTER USE
- CLEANING, MAINTENANCE AND REPAIR
- CLEANING
- MAINTENANCE
- GRINDING PLATE, BRUSH EDGE
- REPLACING THE MAINS CONNECTION CABLE
- SERVICE INFORMATION
- ELECTRICAL CONNECTION
- DAMAGED ELECTRICAL CONNECTION CABLE
- THIS MAY HAVE THE FOLLOWING CAUSES
- AC MOTOR
- CONNECTION TYPE Y
- STORAGE AND TRANSPORT
- DISPOSAL AND RECYCLING
- NOTES FOR PACKAGING
- NOTES ON THE ELECTRICAL AND ELECTRONIC EQUIPMENT ACT (ELEKTROG)
- TROUBLESHOOTING
- DEAR CUSTOMERS
- IMPORTER
- EU DECLARATION OF CONFORMITY
- SCHEPPACH, WOODSTER, IXES
- STANDARD REFERENCES
- GARANTIE DE
- GARANTIE FR
- ZÁRUKA CZ
- WARRANTY EE
- WARRANTY BG
Brand : SCHEPPACH
Model : DS920X
Category : Sander