USER MANUAL FA210 KAWASAKI
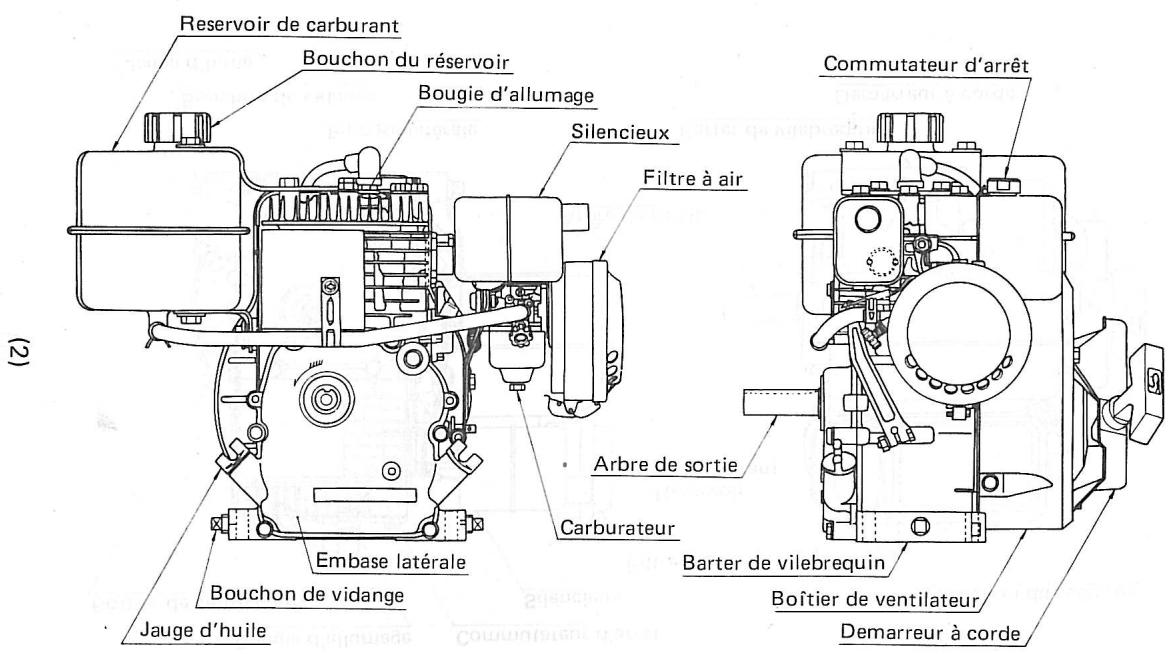
(Float type carburetor)
ENGINE PROFILE
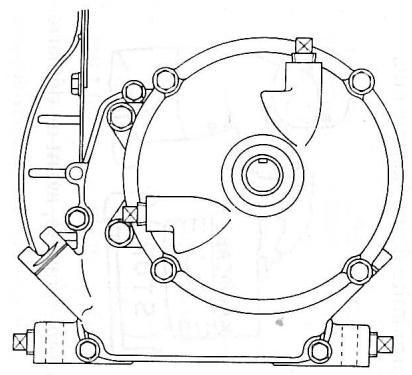
(3)
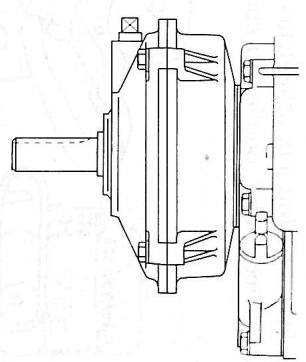
1/6 Reduction Gear
FOR SAFE OPERATION
- For safety, all rotating parts as well as the muffler.
For safety, all rotating parts as well as the engine muffler are covered. When it is attached to equipment, we nevertheless recommend users to cover the rotating parts such as belts, pulleys or couplings, using protective guards.

- Wipe up spilled fuel before starting the engine using cloths.
-
Do not touch the engine body or muffler when the engine is hot.
-
Do not touch the high-tension wire or spark plug cap when the engine is running.
- Do not use the engine indoors or in a poorly ventilated area.
CHARACTERISTICS
- Specifications are subject to change without notice.
★ Supplied with 1/6 reduction gear.
| Model | FA76 | FA130 | FA210 |
| Type | Single-cylinder, 4-stroke, air-cooled gasoline engine |
| Carburetor Type | Float type carburetor
Impulse pump type carburetor |
| Bore x Stroke | 52 x 36mm
(2.05 x 1.42 inches) | 62 x 43mm
(2.44 x 1.69 inches) | 72 x 51mm
(2.83 x 2.01 inches) |
| Piston Displacement | 76cc
(4.66 cu inches) | 129cc
(7.92 cu inches) | 207cc
(12.67 cu inches) |
| Maximum Power | 1.7HP/
4000RPM | 3.1HP/
4000RPM | ★3.1HP/
666RPM | 5.2HP/
4000RPM | ★5.2HP/
666RPM |
| Rated Power | 1.25HP/
3600RPM | 2.3HP/
3600RPM | ★2.3HP/
600RPM | 4.0HP/
3600RPM | ★4.0HP/
600RPM |
| Starting System | Rope Starter |
| Spark Plug | NGK BM-6A |
| Dry Weight (STD Mounted) | 7.3kg
(16.1 lbs.) | 10kg
(22 lbs.) | ★12.9kg
(28.4
lbs.) | 13kg
(28.7
lbs.) | ★15.9kg
(35 lbs.) |
1.1. Fill with engine oil
When the engine is used for the first time. Check
the engine oil before daily use of the engine, otherwise,
lack of oil can cause serious damage to the
motor such as seizing.
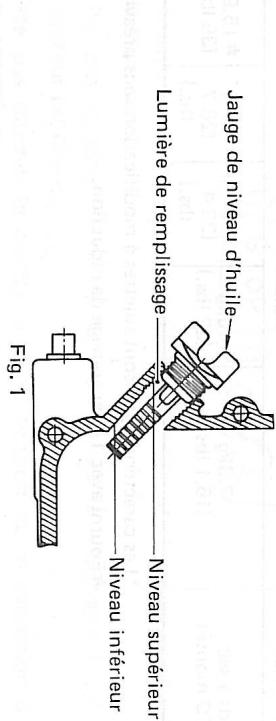
To check the oil level, place the engine level and
insert the level gauge into the fill hole
as shown below. Do not screw in the gauge. If the oil level is low, do not force it.
is low, refill the engine oil to the upper level. (See Fig. 1.)
upper. (See Fig. 1.)
Engine Type E76 FA130 FA210
Volume of water
in liters Max. 0.32 (0.34) 0.50 (0.53) 0.60 (0.64)
Use high-quality engine oil of SC category
according to the following temperature.
| Temperature | Up to 10°C | Normal | 35°C and above |
| Oil Viscosity | SAE10W30 | SAE30 | SAE40 |
If it is insufficient, refill with regular gasoline in the fuel tank. Do not refill while the engine is running.
(6)
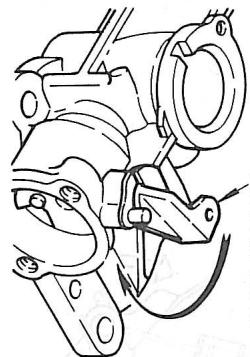
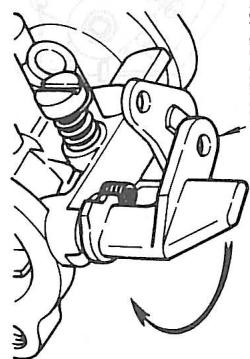
- Before pulling the rope starter
Before pulling the rope starter, set the choke lever to the closed position when the engine is cold or set the choke lever to the half-open position when the engine is
Choke lever Choke lever
cold
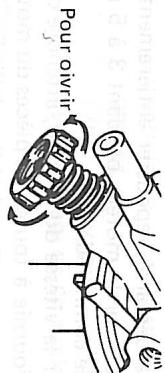
Fig. 2
- Turn the fuel valve completely to the right and then turn left one and a half turns. (See Fig. 3) (Float carburetor only)
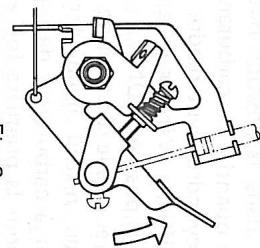
(See Fig. 2)
and set the control lever to the "START" position.
and set the control lever to the "START" position. (See: Fig. 2)
- Set the engine stop switch to the "ON" position
[IV] Stopping
1. Normal Stop
let the engine idle for a moment and turn off the
amount of residual fuel in the carburetor and cylinder to make starting difficult again. Check if the stop switch
is in the "ON" position.
b) Make sure the fuel tank is filled safely and correctly when starting the engine
To the maximum level: when starting the engine
for the first time after purchase or after
repair.
Caution: Do not leave gasoline in the fuel tank
for a long time or in the carburetor
because gasoline will oxidize and cause
will result in a loss of power or other
will cause a loss of power or other
problems.
(See the storage procedure explained on the
last page of this manual.)
lubrication is provided to all engine parts and the piston clearance is properly set or the engine could be damaged.
After warming up the engine, the engine speed can be
controlled by the control lever. Move the control lever to the desired position and the engine will run at
constant speed (See Fig. 6).
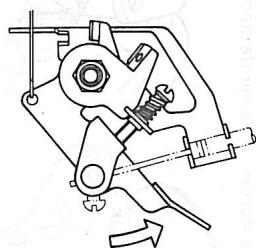
Fig.6
(8)
(8)
[V] Periodic Maintenance
1. Engine oil check, refill See section (1)-1
- Engine oil drain
(1) When the engine is warm after operation, unscrew the
drain plug
(2) Screw in the drain plug. Leave the engine horizontal,
refill to the upper level lip as
Dispose of drain oil in a public drain to avoid
any pollution
3. Cleaning of the air filter element
2) Soak the element in kerosene and leave it.
Soak the element in kerosene and let it soak for a while.
Soak the element in clean engine oil and squeeze it out properly then install it in the filter housing
air.
Caution: Make sure to install the element correctly.
The surface marked "INSIDE" should be facing
toward the carburetor. (See Fig. 7).
| Intervals
Check Points | Before
Each Use | Every 20
hours | Every 50
hours | Every 100
hours |
| 1. Engine oil check,
refill | ○ | | | |
| 2. Fuel filter
check | ○ | | | |
| 3. Cleaning of the
fuel filter bowl | | | ○ | |
| 4. Engine oil
drain | | For the
1st time
only | | ○ |
| 5. Washing of
the air filter element | | | ○*1 | |
| 6. Spark plug cleaning
and gap adjustment | | | | ○ |
| 7. Contact point gap
adjustment (except for TC1
model) | | | | ○*2 |
| 8. Valve tappet
adjustment | | | | ○*2 |
| 9. Carbon removal
from cylinder, cylinder head
and piston | | | | ○*2 |
| 10. Valve lapping | | | | ○*2 |
1.. If the engine is used in a very dusty location, clean the air filter once a day or every ten hours of operation.
2.. Have these services performed by the dealer.
[VII] 1/6 Reduction Gear
1. Oil filling
Oil cap
If not enough, remove the oil cap and
the oil level cap, then
pour engine oil (see page
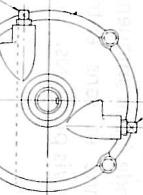
Oil level cap
external electrode (Negative). (See Fig. 8).
Electrode gap 0.6-0.7 mm
1 + u1 - 1 = ( 1 + u) u1 < 1 = u
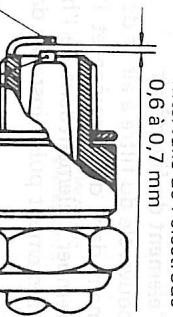
Negative electrode
Electrode
[VII] Storage
for a long time.
- Fill the oil
fill hole.
- Drain all
fuel, from the fuel filter and carburetor by removing the
plug from the base of the filter chamber. Reinstall these parts.
parts.
- Pour about 10cc of engine oil through the spark plug hole
and screw the spark plug back in after turning
the crankshaft several times. Slowly pull the
starter handle until you feel compression and leave it.
-
Clean the engine body with oily cloths.
-
Wrap the engine in a plastic sheet and store it
in a dry location.
OPTIONAL ELECTRONIC IGNITION
-
Features
-
Precautions
1) Visually check the wires before installation.
2) Make sure to connect the wires by matching the colors after
repair work.
3) To check the spark condition, turn the crankshaft by pulling
the rope starter.
- Contact the dealer in case of ignition system (TIC) failure.