
ST 8450 - Steam cleaner GRUNDIG - Free user manual and instructions
Find the device manual for free ST 8450 GRUNDIG in PDF.


| Product Type | Steam Cleaner |
| Brand | Grundig |
| Model | ST 8450 |
| Dimensions (L x W x H) | 30 x 20 x 25 cm |
| Weight | 2.0 kg |
| Power Supply | 220-240 V, 50-60 Hz |
| Power Consumption | 1500 W |
| Water Tank Capacity | 0.5 L |
| Heating Time | Approx. 30 seconds |
| Steam Pressure | 3 bar |
| Steam Flow Rate | Continuous steam up to 30 g/min |
| Accessories Included | Floor nozzle, detail nozzle, extension tube, measuring cup, funnel |
| Cord Length | 4 m |
| Safety Features | Overheat protection, pressure relief valve |
| Maintenance | Descaling with vinegar solution recommended every 3 months |
| Cleaning Surfaces | Hard floors, tiles, windows, kitchen surfaces, upholstery |
| Repairability | User-replaceable seals and nozzles; contact service center for other parts |
| EAN/UPC | 4013833069371 |
Frequently Asked Questions - ST 8450 GRUNDIG
User questions about ST 8450 GRUNDIG
0 question about this device. Answer the ones you know or ask your own.
Ask a new question about this device
Download the instructions for your Steam cleaner in PDF format for free! Find your manual ST 8450 - GRUNDIG and take your electronic device back in hand. On this page are published all the documents necessary for the use of your device. ST 8450 by GRUNDIG.
USER MANUAL ST 8450 GRUNDIG
ST 8450
DE - EN - TR - NO
CONTENTS
| DEUTSCH | 3-22 |
| ENGLISH | 23-34 |
| TÜRKÇE | 35-50 |
| NORSK | 51-63 |

 |  | |
| DE | BETRIEB REINIGUNG | UND PFLEGE |
| EN | OPERATION CLEANING | AND CARE |
| TR | KULLANIM TEMİZLİK | VE BAKIM |
| NO | OPERASJON RENGJ∅ | RING OG PLEIE |




Please read this user manual first!
Dear Customers,
Thank you for selecting a Grundig product. We hope that you get the best results from your product which has been manufactured with high quality and state-of-the-art technology. Therefore, please read this entire user manual and all other accompanying documents carefully before using the product and keep it as a reference for future use. If you handover the product to someone else, give the user manual as well. Follow all warnings and information in the user manual.
Meanings of the symbols
Following symbols are used in the various section of this manual:

Important information and useful hints about usage.

WARNING: Warnings for dangerous situations concerning the safety of life and property.

WARNING: Warning for hot surfaces.
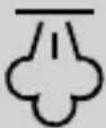
Risk or burning and scalding due to steam.
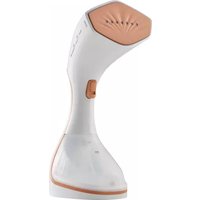
- Hidden display
- Soleplate
- Steam button
- Water tank lid
- Water tank
- Beaker
- Protective gloves
- Net brush
- Fabric brush
- On-off / mode button
- CalcGuard auto calc clean button
Display screen
 | No water in the tank |
 | Auto shut off indicator |
 | Maximum level of steam |
 | Energy saving steam level |
 | CalcGuard auto calc clean indicator |
Technical data
Power supply: 220-240 V~, 50-60 Hz
Power: 1920-2280 W
Technical and design modification rights are reserved.
The values declared on the markings affixed to your appliance or in the other printed documents supplied with it represent the values obtained in laboratories pursuant to the relevant standards. These values may vary depending on the usage of the appliance and ambient conditions.
1 Important safety and environmental instructions
This section contains safety instructions that will help protect you from the risk of personal injury or material damage.
Failure to follow these instructions invalidates the granted warranty.
1.1 General safety
- This appliance complies with international safety standards. - It is not intended for industrial use.
- This appliance can be used by children aged 8 years and above and by persons with reduced physical, sensory, or mental capabilities, or lack of experience and knowledge, if they have been given supervision or instruction concerning use of the appliance in a safe way and understand the hazards involved. Children shall not play with the appliance. Cleaning and user maintenance shall not be performed by children without supervision.
- This appliance is not intended for use by persons (including children) with reduced physical, sensory, or mental capabilities, or lack of experience and knowledge, unless they have been given supervision or instruction concerning use of the appliance by a person responsible for their safety. Children should be supervised to ensure that they do not play with the appliance.
- Unplug the appliance and wait for it to cool before removing or reinstalling the brush accessory.
- Do not place the appliance on its head piece when it is in use or plugged in. Place the appliance on a stable and flat surface.
- Care should be taken when using the appliance due to the emission of steam.
- The appliance may become hot due to the emission of hot steam, and this may cause burns if you come into contact with it.
- If the appliance is dropped, leaks water, or has other failures, contact the authorized service. Do not use the appliance until it is repaired.
- The fabric steamer is not to be used if it has been dropped, if there are visible signs of damage, or if it is leaking.
- The appliance is not suitable for outdoor use.
- Keep the fabric steamer and its cord out of reach of children less than 8 years of age when it is energized or cooling down.
1 Important safety and environmental instructions
- Only use the original parts or parts recommended by the manufacturer.
- Do not attempt to dismantle the appliance.
- Your mains power supply should comply with the information given on the rating plate of the appliance.
- The mains supply of the appliance should be secured with a 30 mA fuse minimum.
- Use the appliance with a grounded outlet.
- Do not use the appliance with an extension cable.
- Do not pull the power cable when unplugging the appliance.
- Unplug the appliance during filling and cleaning.
- Do not wrap the cable around the appliance.
- Do not touch the appliance or its plug with damp or wet hands when the appliance is plugged in.
- Do not use the appliance in or near areas where combustible or flammable places and materials exist.
- If you keep the packaging materials, store them out of the reach of children.
- Do not leave the appliance unattended while it is plugged in.
- The fabric steamer must not be left unattended while it is connected to the supply mains.
Perform water filling according to the instructions.
- If the supply cord is damaged, it must be replaced by the manufacturer, its service agent, or similarly qualified persons in order to avoid a hazard.
- Unplug the appliance during water filling or draining, or when not in use.
- Do not direct steam at parts containing electrical components, such as the inside of furnaces.
1 Important safety and environmental instructions
1.2 Compliance with the WEEE Directive and Disposing of the Waste Product
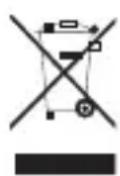
This product complies with EU WEEE Directive (2012/19/EU). This product bears a classification symbol for waste electrical and electronic equipment (WEEE).
This symbol indicates that this product shall not be disposed of with other household wastes at the end of its service life. Used devices must be returned to an official collection point for recycling of electrical and electronic devices. To find these collection systems, please contact your local authorities or the retailer where the product was purchased. Each household plays an important role in recovering and recycling old appliances. Appropriate disposal of used appliances helps prevent potential negative consequences for the environment and human health.
1.3 Compliance with RoHS Directive
The product you have purchased complies with EU RoHS Directive (2011/65/EU). It does not contain harmful and prohibited materials specified in the Directive.
1.4 Package Information

Packaging materials of the product are manufactured from recyclable materials in accordance with our National Environment Regulations. Do not dispose of the packaging materials together with the domestic or other wastes. Take them to the packaging material collection points designated by the local authorities.
2 Operation
2.1 Intended use
This appliance is intended only for household use, removing the creases on your clothes and for various textile products including curtains; it is not suitable for professional use.
2.2 Before first use
- Remove any sticker or protective cover from the steam head.
- Unwind and straighten the cord before use.
- When operating the garment steamer for the first time, allow it to steam for a few minutes. This will remove any impurities and odours that might have been left by the manufacturing process.
- When operating the garment steamer for the first time, you may want to try the steamer on an old piece of fabric before steaming your garment.

WARNING: To avoid an electrical circuit overload, it is recommended that no other appliances are plugged into the same circuit as your garment steamer when it is in use.

When unpacking the garment steamer, check to see you have received all the items listed in the parts list, before discarding the packaging.
2 Operation
2.3 Assembling/operating your garment steamer

- Do not exceed the MAXIMUM level when filling the water tank.
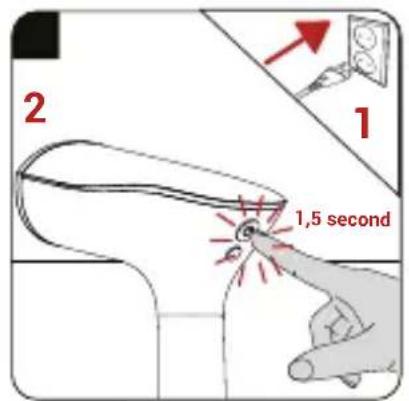
- Press the power button, the display screen icons will blink for once, and then only the steam level icon will blink indicating that the device is heating up. Allow the device to preheat before use. The device is ready for use when the steam icon is lit continuously.
- You may switch between steam levels by pressing the power button.
- The garment steamer has an intelligent automatic power off function. When the user stops operating this product for more than 8 minutes of time, the internal control circuit will cut off power supply, and the product will enter standby mode to ensure safety and to save energy. At the same time, the “auto shut off indicator” blinks.

The pump will automatically stop working within 45s. Finally, "No water in the tank" icon blinks.
2.4 How to steam your garment

When there is not enough water in the tank, the pump will automatically stop working within 45 seconds (Noise is normal during this process). Finally, "No water in the tank" icon blinks.
It can be used on most fabrics as long as the fabric is hanging or where the garment steamer can be easily used in an upright position moving over the fabric in an up and down motion.
If you press the steam button continuously, the device will start to emit steam as long as you press it.
If you press the steam button twice, you will no longer need to keep pressing the steam button with your finger. The device will start to emit steam automatically.
2 Operation

- The garment steamer is designed to be used in an upright position on hanging garments.
- Check garment pockets are empty and turn-ups, such as cuffs and hems, are down.
- We recommend you do not steam over metal accessories. Be cautious and steam around the metal accessories.
- You will feel vibrations and hear a subtle humming sound while steaming; this is normal. Keep the steam facing away from you and in an upright position.
- Ensure that the fabric to be steamed is being stretched whilst steaming for best results.

WARNINGS:
- The garment steamer generates high temperatures of steam. Do not touch the steam head. Make sure the steamer is facing away from you in an upright position.
- For better results, use the fabric brush attachment. However, for delicate fabrics, use the net brush to prevent pilling.
2.5 To steam curtains
- Wash and dry curtains as directed, according to the fabric type.
- Hang the curtains and steam them when they are hanging in place.
2.6 To steam upholstery
- The garment steamer can be used to help freshen up upholstery, slipcovers, and cushions. Before steaming, always test on a small area of the subject that is not visible.
2 Operation

- For better results when removing stubborn creases, continuously steam over the selected area until creases are removed.
- Only use attachments or accessories provided.
- If the unit becomes noisy with a loud humming sound and no steam is being generated, check the water level in the water tank. This may indicate that the garment steamer is out of water, and it needs to be refilled.

WARNINGS:
- If the garment has metal accessories, be cautious and do not direct the garment steamer directly over the metal, as this may discolor it.
- Always unplug the garment steamer before attaching or detaching the brush.
- Do not use the garment steamer directly on the body, on animals, or while wearing the garments.

- The device produces high-temperature steam. Do not touch the surface; hold the device in an upright position, pointing away from you.
- Keep a distance of at least 5 cm between the surface and the garment.

3 Cleaning and maintenance
3.1 Cleaning and care

- Never use gasoline, solvents, abrasive cleaning agents, or hard brushes to clean this appliance.
- Do not immerse the garment steamer in water or any other liquid.
- Do not drop, throw, or attempt to bend the steamer.
- Do not attempt to disassemble the appliance.
- The garment steamer is designed for household use only and to be used with normal tap water. Do not put perfume, vinegar, or other chemicals in the tank. The appliance is not designed to work with these chemicals.

- Always empty the water tank after each use and rinse it with clean water.
- Wipe the outer surfaces with a damp cloth.
- Avoid operating the appliance in humid or moist places.
- Do not locate the appliance near a heat source or direct sunlight.
- Always ensure the steam outlet hole is clean and free from scaling and not blocked.

This garment steamer is designed to use normal tap water.
3 Cleaning and maintenance
3.2 Using Auto Calc Clean Function
- After using steam for 1 hour, the display will show the clean icon. The user can press the CalcGuard calc clean button to start cleaning, or press any other button to cancel cleaning.
- Please add water to the max position in the tank, then press the CalcGuard auto calc clean button for 3 seconds to start cleaning.
- The product is preheating, and the icon will blink.
- After preheating, the product will release steam for about 1 minute.
- After 1 minute, the product will reheat again to dry the steam inside. Pay attention during reheating, as there may also be water coming out.
- The icon will light off and keep the last stage (MAX or ECO) after calc clean is finished.
| Technical information on the operating Low Power Modes pursuant to EU Regulation 2023/826 | ||
| Mode | POWER CONSUMPTION(WATT) | PERIOD(MINUTES)* |
| Off 0.3 8 | ||
| Standby - - | ||
| Standby Mode with information or status display | - | - |
| Networked Standby - - | ||
| *:The period after which the equipment reaches automatically standby mode, off mode or networked standby in minutes and rounded to the nearest minute. | ||

For commissioning, general use, and cleaning, please observe the instructions on pages 5-6 of this operating manual.
4 Troubleshooting
| Problem Possible solution | |
| The steamer does not heat up • Check main plug is inserted correctly.• Check power supply.• Check power button. | |
| The steamer does not produce steam | • Check the water level and the water tank inlet cover is properly covered.• Press the steam activation button harder.• Hold the steamer in an upright position. |
| Water spills from the water tank | • Make sure water is not over the MAXIMUM level.• Make sure water tank inlet cover is properly closed. |
| The steamer is producing a loud humming or pumping sound | • Check water level; if there is no water or it is low, refill the water tank. |
| The steamer does not seem to be removing creases easily | • Hold the steamer in an upright position and stretch the fabric downward to ensure best results. |
| Unsure when to use the brush • Use net brush on delicate fabrics and fabric brush on other subjects for better results. | |
| Avoiding discoloring of metal accessories on the garment | • Do not directly hover the garment steamer over the metal accessories.• Be cautious and steam around the metal accessories. |

- CONTENTS
- PLEASE READ THIS USER MANUAL FIRST
- MEANINGS OF THE SYMBOLS
- TECHNICAL DATA
- IMPORTANT SAFETY AND ENVIRONMENTAL INSTRUCTIONS
- GENERAL SAFETY
- COMPLIANCE WITH THE WEEE DIRECTIVE AND DISPOSING OF THE WASTE PRODUCT
- COMPLIANCE WITH ROHS DIRECTIVE
- PACKAGE INFORMATION
- OPERATION
- INTENDED USE
- BEFORE FIRST USE
- ASSEMBLING/OPERATING YOUR GARMENT STEAMER
- HOW TO STEAM YOUR GARMENT
- WARNINGS
- TO STEAM CURTAINS
- TO STEAM UPHOLSTERY
- CLEANING AND MAINTENANCE
- CLEANING AND CARE
- USING AUTO CALC CLEAN FUNCTION
- TROUBLESHOOTING
Brand : GRUNDIG
Model : ST 8450
Category : Steam cleaner