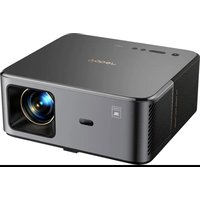
K300s - Projector Yaber - Free user manual and instructions
Find the device manual for free K300s Yaber in PDF.


| Product type | Portable projector |
| Brand | Yaber |
| Model | K300s |
| Display technology | LCD |
| Native resolution | 1920 x 1080 pixels (Full HD) |
| Brightness | 300 ANSI lumens |
| Contrast ratio | 2000:1 |
| Lamp life | Up to 30,000 hours |
| Keystone correction | ±15° (vertical) |
| Projection distance | 1.5 m to 5 m |
| Projected image size | 50 to 120 inches |
| Connectivity | HDMI, USB, AV, 3.5 mm audio output |
| Power supply | 100-240 V AC, 50/60 Hz |
| Power consumption | 70 W |
| Dimensions (L x W x H) | 200 x 150 x 80 mm |
| Weight | 1.2 kg |
| Main functions | Projection, manual focus, digital zoom |
| Maintenance and cleaning | Clean the lens with a soft dry cloth; keep the ventilation slots clear |
| Safety | Do not look directly at the light beam; do not expose to moisture |
| Spare parts and repairability | Lamp, remote control, power cord available |
| General information | User manual available for download in PDF format |
Frequently Asked Questions - K300s Yaber
User questions about K300s Yaber
0 question about this device. Answer the ones you know or ask your own.
Ask a new question about this device
Download the instructions for your Projector in PDF format for free! Find your manual K300s - Yaber and take your electronic device back in hand. On this page are published all the documents necessary for the use of your device. K300s by Yaber.
USER MANUAL K300s Yaber
- Yaber Lifetime Professional Support 1
- Warranty 2
- Important Precautions 2
- What's included 3
- Specification 4
- Product Overview 5
- Installation 6
- How to use the Dongle 8
- Projection Settings 9
- Connectivity 14
- Bluetooth Settings 16
- Game Mode 17
- Motion Estimation and Motion Compensation 17
- System Upgrade 18
1. Yaber Lifetime Professional Support
Dear Valued Customer,
Thank you for choosing the Yaber K300s Projector. Please read the User Manual carefully before using your K300s Projector.
We understand that you may encounter various questions and issues while using the projector. However, leaving a review on the product page may not improve your experience. (Please let us help you! We truly appreciate your feedback and will promptly provide a satisfying solution.)
If you encounter any issues, feel free to send your order number and the problems to us at service@yaber.com. (Title: US+K300s+000-0000000-0000000+Issues) Rest assured, our service team will offer a solution to you within 24 hours.
Your satisfaction is our top priority. If you encounter any problems, we sincerely hope that you will give us the opportunity to resolve them.
We are dedicated to offering you the best possible solution. We appreciate your understanding and patience in advance.
Yaber Projector Customer Service Team
2. Warranty
Thank you for your purchase and support. We offer a 3-year warranty for Yaber K300s Projector.
If you have any questions, please feel free to contact us.

service@yaber.com
3. Important Precautions
For safe and optimal use of the device, please follow these guidelines:
- Do not face the lens towards eyes because the strong projector light may cause injury to the eyes.
- Do not block the air inlet or outlet of the device to prevent overheating, which could damage internal components.
- Do not wipe the lens directly with cleaning tools such as paper or cloth. Instead, remove dust from the lens using clean air blowing.
- Do not wash the device with chemicals, detergents, or any liquid as they may corrode the circuit board.
- Keep the device and its components and accessories out of reach of children.
- Make sure that the device is used in a dry, well-ventilated environment.
- Do not store the device in excessively hot or cold places, as this can reduce the lifespan of electronic components. Use and store it within a temperature range of 0°C - 40°C .
- Do not put the device into any heating equipment (e.g., dryer or microwave) for drying.
- Do not press down firmly on the device or place objects on top or behind it to avoid damage to the device.
- Do not throw, drop, or strongly shake the device to protect its internal circuit board.
- Make sure to clean the dust filter every six months to a year to keep the machine running cool.
4. What's Included

Attention: The Dongle is already built into the projector.

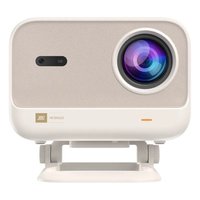
K300s Projector

TV Dongle

Remote Control

Cleaning Cloth

QSG & FAQ

K300s Power adapter

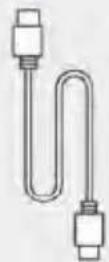
HDMI Cable
5. Specification
| Model No. K300s | |||
| Native Resolution | 1920*1080 | Light Source | LED |
| Focus | Auto/Eletric | Keystone Correction | Auto/Manual |
| Interface | USB×2HDMI×1Audio Out×1RJ45×1 | Unit Dimension | 29×22.3×8.3 cm11.4×8.8×3.3 inches |
| Projection Ratio | 0.18:1 | Projection Distance | Min 5cm~ Max 110cmMin 40~Max 120 inches |
| Power Voltage | AC 100-240V / 50-60Hz | Power Consumption | 100W |
| Projector Weight | 1.8 kg3.97 lbs | Projection Method | Front/Rear on DeskFront/Rear on Ceiling |
| Aspect Ratio | 16:9 | Projection Zoom | 50% - 100% |
| Picture Format | JPG, PNG, BMP, JPEG | ||
| Audio Format | MP3, WAV, MKA, OGG, FLAC | ||
| Video Format | TS, MPEG, MP4, MOV, M2TS, FLV, VOB, DAT, M4V, F4V, 3GP, 3G2, TP, TRP | ||
| USB Format | FAT 32, NTFS, exFAT | ||
6. Product Overview


6.1 Remote Contol


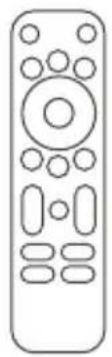
Notice: Please ensure the area in front of the [Focus Receiver] is unobstructed, as any blockage may affect the focus function.
7. Installation
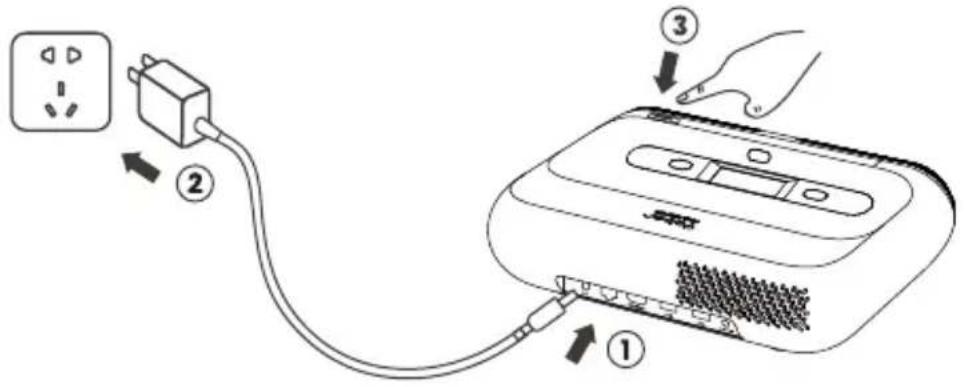
Connecting the Power Cable
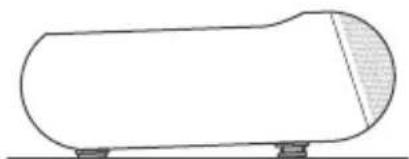
You can adjust the image by 50% using the [Projector Settings] - [Zoom]. If needed, rotate these screws to slightly adjust the projection angle max degree: 2°

∴ m - 1 ≠ 0 ;
Max degree: 2°
7.1 Ceiling Mounting
Step 1: Make sure you have a universal mounting bracket that can fit the projector.
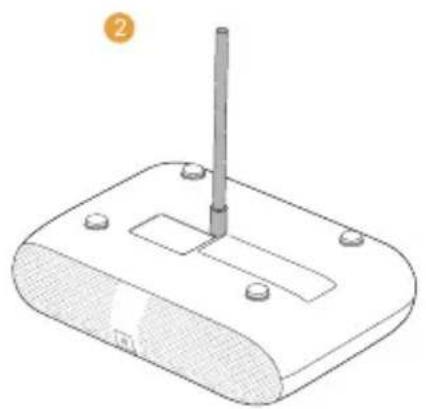
Step 2: There is a BSP 1/4 inch screw hole in the middle of the bottom of the projector. Please use this screw hole to install the bracket.


Notice: K300s does not support four-corner mount installation.
7.2 Installation Method
K300s supports four projection modes, you can choose the preferred way.

If choosing ceiling mounting or rear projection, please go to homepage -> select the [Projection Settings] -> select [Projection Mode] -> press [OK] to switch projection mode.

8. How to Use the Dongle

Attention: The Dongle is already built into the machine!
How to Use TV
Click on TV to enter the system on the home page.


Attention: When using TV for the first time, follow the screen prompts for remote control pairing and other settings.
To pair, hold down the pairing button

and

for a longer duration.
If the remote is lost:
- You can use the remote control function of the Google TV app on your smartphone as a temporary solution to control the TV interface.
- You can use the remote control function of the Yaber app on your smartphone as a temporary solution to control the TV interface.
- Contact the after-sales team to obtain a new remote control.
How to Remove the Dongle
-
Use a screwdriver to remove the screws on the cover of the Dongle compartment. (Screw size: ST2.3×6mm)
-
Install the Dongle into its compartment (make sure the dongle is firmly inserted to ensure it is recognized)


-
Insert the Dongle into its compartment. (Make sure the Dongle is firmly inserted to be recognized.)
-
Restore the cover of the Dongle compartment.


9. Projection Settings
9.1 Projection Distance
For optimal image quality, place the projector on a flat and stable surface. To adjust the vertical angle, use the adjustable foot screw at the bottom of the projector.


Tip: The recommended Screen size is 80 inches.
9.2 Auto Focus
When the projector is moved, the picture will be automatically corrected.
If the focus of the picture is not clear enough, you can make subtle adjustments through the buttons on the remote control.

9.3 Auto Keystone Correction
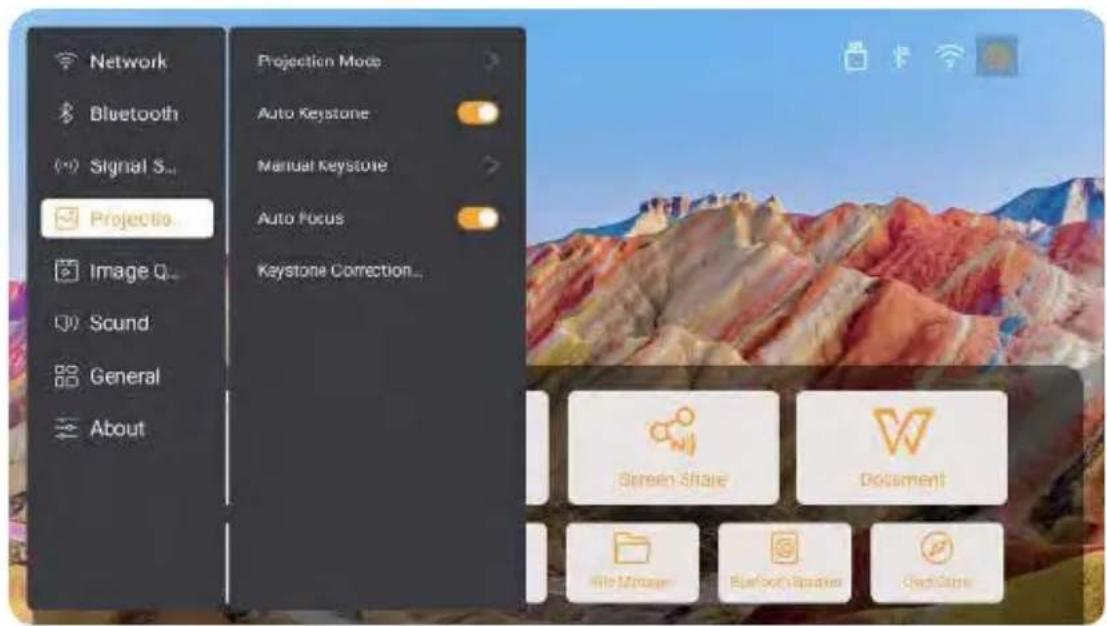
If the projector is turned on or moved, it will automatically focus and keystone correction. You can turn it on/off via setting -- projection -- auto focus/auto keystone
9.4 Manual Keystone Correction

Attention: ALR (Ambient Light Rejecting) screen may cause auto focus/keystone fail. When using ALR screen, please close auto focus/keystone function and adjust screen manually, or project the image to a white wall or other non-ALR screens.
If further screen adjustments are needed, please select [Manual Keystone] in [Projection Mode] and adjust the screen by dragging the arrows.


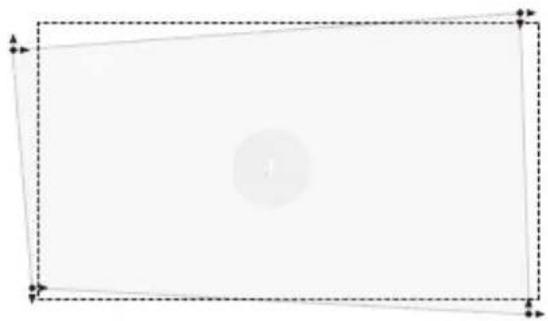

Attention: The range for auto keystone correction is ±35° degrees horizontally and vertically.
9.5 Projection Zoom
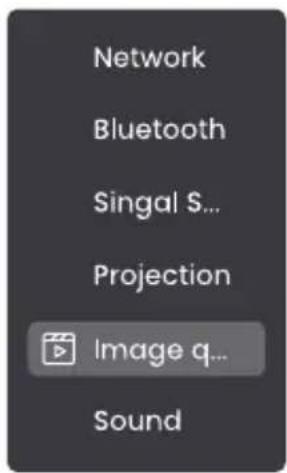
If you want to change the picture size, please go to homepage -> select the Setting [Image Quality] -> select the Setting [Zoom Scale] -> clicking [Arrow key] to adjust the screen size.

9.6 Image Color Settings
Image Brightness Settings
Adjust the screen brightness through [Home] - [Settings] - [Image Quality] - [Brightness Setting].
Image Color
Adjust the image color through [Home] - [Settings] - [Image Quality] - [Picture Mode].
Attention: The Image color setting will only take effect when playing pictures or videos.
9.7 Screen Mirroring
9.7.1 WiFi Settings
Wi-Fi:
Attention: The projector and Dongle need to be connected to Wi-Fi separately.
- Projector connection steps: [Settings] - [Wi-Fi], connect to the desired Wi-Fi.
- Dongle connection steps: Go to [TV] on the home page, then [Settings] - [Wi-Fi] to connect to the desired Wi-Fi.

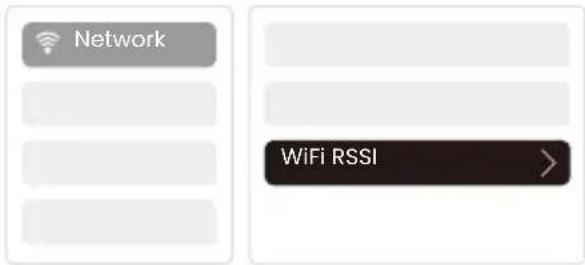
Tip: If you experience network lag, check the stability of the network signal first through [Settings] - [Connected Wi-Fi] - [RSSI].
Wired Network:

Attention: The projector and Dongle need to be connected to Wi-Fi separately.
If the projector is connected to a wired network, and your phone is on the same local network, you can share your phone screen. Read the next section for sharing instructions.
9.7.2 Screen Share

Tip: To enhance your experience during screen sharing, download the [Yaber] app from the Apple App Store or Google Play Store.
- Ensure your phone and the projector are connected to the same Wi-Fi network.
- In the Yaber app, tap [Connect Device] and select the device named [Yaber_K300series_xxxx] to connect.
- Once connected, select the screen mirroring option in the Yaber app to share your phone screen with the projector.
- When you wish to end the screen share, go to your phone's control center, select the device, and stop sharing.

Attention: If you need to share the screen from streaming apps like Netflix, Disney, or Prime Video, enter the Dongle system to share.

Tip: If you prefer not to use the Yaber APP, please follow these steps: (Only the step 2 is different)
- Ensure your phone and the projector are connected to the same Wi-Fi network.
- In the screen mirroring settings on your smartphone, select the device named [Yaber_K300series_xxxx] to connect.
- When you wish to end the screen share, go to your phone's control center, select the device, and stop sharing.
10. Connectivity
10.1 HDMI, USB, 3.5mm Audio out, RJ45
Yaber K300s projector has 5 interfaces, HDMI port×1/ USB port×2/ 3.5mm audio port/RJ45×1. Please select the right one to connect your device (PC, Phone, DVD Player, Soundbar, USB, PS5, etc.)

10.2 HDMI
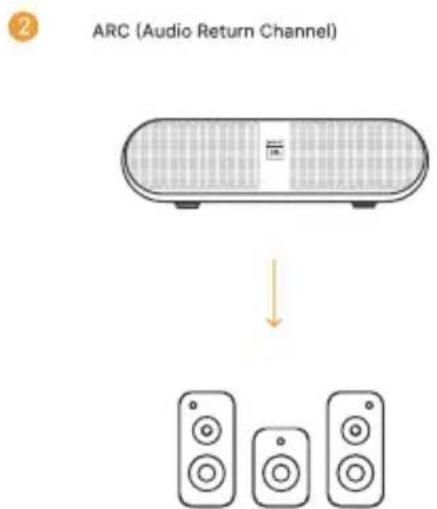
The HDMI Ports of K300s supports CEC and ARC functions
CEC: You need to turn it on the settings page
ARC: turned on by default at all times


If you're meet some troubles while using HDMI, please try these solutions below:
Method 1. Switch HDMI EDID version in settings
Method 2. Try changing the HDMI cable
Method 3. Try to replace other external devices with HDMI function and check whether the HDMI interface is working.


10.3 Audio Out

Note: If you experience stuttering or delay when using a Bluetooth speaker connection, you can use devices that support 3.5mm audio cable to play audio.
10.4 RJ45

Notice: You can use RJ45 port to connect to the network.
11. Bluetooth Settings
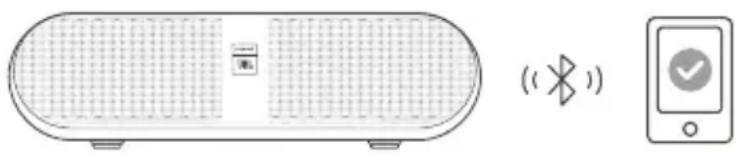
Connecting External Devices to the Projector (Using the Projector as a Bluetooth Speaker)
Find the projector named [Yaber_K300series_xxxx] in the Bluetooth list of your external device and connect.
Connecting the Projector to External Speakers/Headphones
Navigate through [Home] - [Settings] - [Bluetooth] on the projector, find your device, and connect.
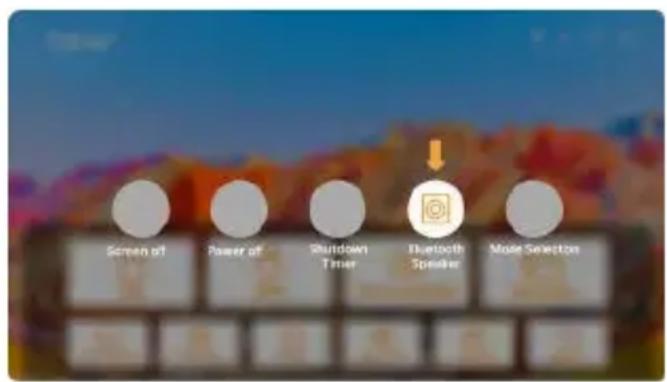
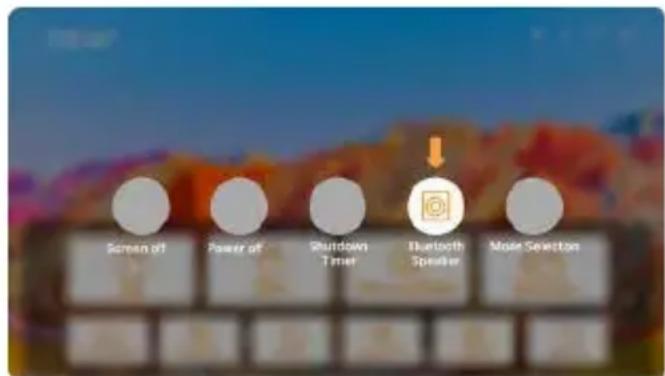
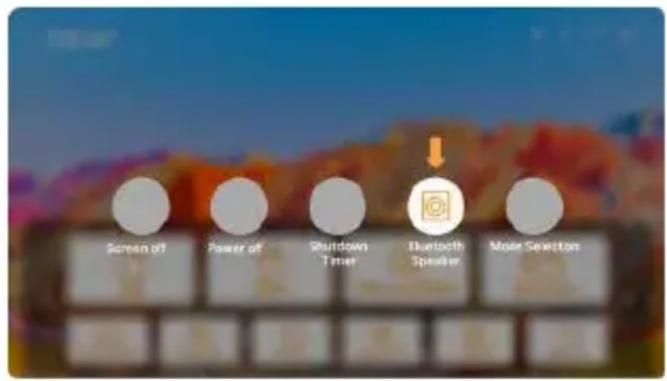
11.1 Bluetooth Speakers
Click the button on the homage to enter Bluetooth speaker mode.
Click the button on the shutdown page to enter Bluetooth speaker mode.

12. Game Mode
In game mode, the projector will reduce hdmi latency time to bring you a more comfortable gaming experience.

Attention: After switching to the game mode, the screen will return to its default shape. You can manually move the projector to the proper shape. Also, adjusting the screen size, shape, position is not supported.

13. Motion Estimation and Motion Compensation
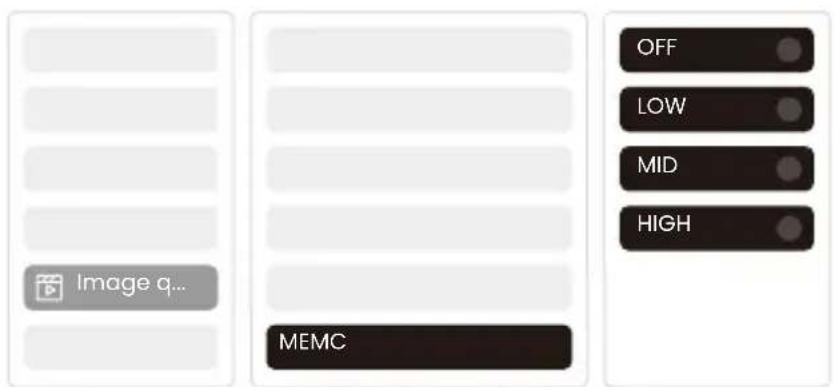
K300s support MEMC(Motion Estimation and Motion Compensation)feature, this feature can make fast-moving images smoother without dragging shadows. Click on Settings - Image Quality - MEMC to open.
14. System Upgrade
You can check the system status of your device in [Settings]-[Online upgrade].
![graph LR A["Uber"] --> B["Settings"] B --> C["Security"] C --> D["Online Upgrade"] D --> E["New version"]](/content/2026/07/1452522/images/22946ebfa0587d9677893e4cbfaed509c606c97e07c6dbd26bf4975e6d7e1d2c.jpg)
Dolby
AUDIO
Manufactured under license from Dolby Laboratories. Dolby, Dolby Audio, and the double-D symbol are trademarks of Dolby Laboratories Licensing Corporation.
We offer a 3-year warranty for Yaber K300s Projector. If you have any questions, please feel free to contact us.

service@yaber.com
Yaber
PROJECTOR

Benutzerhandbuch
Projektor K300s
DE
Katalog
K300s Projektor

TV Dongle

Fernbedienung

Reinigungstuch

QSG & FAQ

K300s Netzteil
HDMI Kabel
5. Spezifikation


10.3 Audio-Ausgang

11.1 Bluetooth-Lautsprecher

12. Spielmodus
Proyector K300s

Dongle de TV

Control Remoto

Paño de limpieza

QSG & FAQ


Red de cable:




10.3 Salida de Audio

11.1 Altavoces Bluetooth
12. Modo de Juego
Projet K300s

Dongle TV
Contrôle à distance

GSG & FAQ







10.3 Sortie audio

12. Mode Jeu

- YABER LIFETIME PROFESSIONAL SUPPORT
- WARRANTY
- IMPORTANT PRECAUTIONS
- FOR SAFE AND OPTIMAL USE OF THE DEVICE, PLEASE FOLLOW THESE GUIDELINES
- WHAT'S INCLUDED
- SPECIFICATION
- PRODUCT OVERVIEW
- 6.1 REMOTE CONTOL
- INSTALLATION
- 7.1 CEILING MOUNTING
- 7.2 INSTALLATION METHOD
- HOW TO USE THE DONGLE
- HOW TO USE TV
- IF THE REMOTE IS LOST
- HOW TO REMOVE THE DONGLE
- PROJECTION SETTINGS
- 9.1 PROJECTION DISTANCE
- 9.2 AUTO FOCUS
- 9.3 AUTO KEYSTONE CORRECTION
- 9.4 MANUAL KEYSTONE CORRECTION
- 9.5 PROJECTION ZOOM
- 9.6 IMAGE COLOR SETTINGS
- IMAGE BRIGHTNESS SETTINGS
- IMAGE COLOR
- 9.7 SCREEN MIRRORING
- 9.7.1 WIFI SETTINGS
- WIRED NETWORK
- 9.7.2 SCREEN SHARE
- CONNECTIVITY
- 10.1 HDMI, USB, 3.5MM AUDIO OUT, RJ45
- 10.2 HDMI
- THE HDMI PORTS OF K300S SUPPORTS CEC AND ARC FUNCTIONS
- 10.3 AUDIO OUT
- 10.4 RJ45
- BLUETOOTH SETTINGS
- 11.1 BLUETOOTH SPEAKERS
- GAME MODE
- MOTION ESTIMATION AND MOTION COMPENSATION
- SYSTEM UPGRADE
- DOLBY
- YABER
- PROJECTOR
- BENUTZERHANDBUCH
- PROJEKTOR K300S
- KATALOG
- SPEZIFIKATION
- 10.3 AUDIO-AUSGANG
- 11.1 BLUETOOTH-LAUTSPRECHER
- SPIELMODUS
- RED DE CABLE
- 10.3 SALIDA DE AUDIO
- 11.1 ALTAVOCES BLUETOOTH
- MODO DE JUEGO
- 10.3 SORTIE AUDIO
- MODE JEU
Brand : Yaber
Model : K300s
Category : Projector