
RCD10SP - Mp3 player LEXIBOOK - Free user manual and instructions
Find the device manual for free RCD10SP LEXIBOOK in PDF.

| Product type | Boombox with CD player, FM/AM radio, AUX input, microphone jack |
| Brand and model | LEXIBOOK RCD10SP |
| Power supply | AC 230V ~ 50Hz or 8 LR14/C batteries (1.5V each, not included) |
| Output power | 1 W + 1 W (stereo) |
| Speaker impedance | 8 ohms |
| FM band | 88 – 108 MHz |
| AM band | 540 – 1650 kHz |
| Compatible audio formats | Audio CD (standard compact discs) |
| Dimensions (approx.) | 35 × 20 × 20 cm |
| Weight (approx.) | 1.5 kg |
| Main functions | CD playback, FM/AM stereo/mono radio, track programming, repeat, AUX input, LINE output, microphone |
| Display | LED: power indicators, FM stereo radio, repeat, playback, radio frequency |
| Connectors | 3.5 mm headphone jack, 3.5 mm AUX input, LINE output, 3.5 mm microphone input, telescopic FM antenna |
| Included accessories | AC cable, user manual |
| Maintenance and cleaning | Unplug the device before cleaning. Use a soft dry cloth; for the front panel, a damp cloth with mild soap. Do not use solvents. |
| Environmental protection | Do not dispose of with household waste. Take to a collection point for recycling. |
| Warranty | 2 years (excluding normal wear, failure to follow instructions, unauthorized intervention) |
Frequently Asked Questions - RCD10SP LEXIBOOK
User questions about RCD10SP LEXIBOOK
0 question about this device. Answer the ones you know or ask your own.
Ask a new question about this device
Download the instructions for your Mp3 player in PDF format for free! Find your manual RCD10SP - LEXIBOOK and take your electronic device back in hand. On this page are published all the documents necessary for the use of your device. RCD10SP by LEXIBOOK.
USER MANUAL RCD10SP LEXIBOOK
MISE EN GARDE RISQUE D'LECTROCUTION NE PAS OUVRIR

MISE EN GARDE : AFIN DE RÉDUIRE LES RISQUES D'ÉLECTROCUTION, NE PAS ENLEVER LE COUVERCLE (NI L'ARRÊRE). NE CONTIENT AUCUNE PIECE POUVANT ÉTRÉ RÉPARÉE NI REMPLACÉE PAR L'UTILISATEUR. CONFIER TOUTE RÉPARATION À UN TECHNICIEN QUALIFIÉ.

TENSION DANGEREUSE :
CLASSE 1 - PRODUIT LASER
CE PRODUIT LASER EST DE CLASSE 1. L'UTILISATION DE COMMANDES OU DE REGLAGES AINSI QUE L'EXECUTION DE PROCEDURES AUTRES QUE CELLES SPECIFIÉES DANS CE DOCUMENT PEUVENT ENTRainer UNE EXPOSITION A DES RADIATIONS DANGEREUSES.
INSTRUCTIONS RELATIVES A LA SECURITE
LIRE LES INSTRUCTIONS SUIVANTES AVANT TOUTE UTILISATION DE L'APPAREIL.
EMPLACEMENT DES TOUCHES
©2008 Marvel Characters, Inc.
LEXIBOOK S.A,
2, avenue de Scandinavie,
91953 Courtaboeuf Cedex France
Assistance technique: 0892 23 27 26 (0,34 € TTC/Min), http://www.lexibook.com
Safety precautions 12
Safety instructions 13
Unpacking the device 13
Power sources 13
AC operation 13
Battery installation 14
Care and maintenance 14
Caring for discs 14
Cleaning the unit 14
Location of controls 15
Headphones connection 15
Radio operation 16
CD operation 16
Play a CD 17
F.FWD button/REW 17
Repeat 17
CD programmed play 17
AUX IN operation 17
LINE OUT operation 18
Microphone connection 18
Specifications 18
Maintenance 18
Warranty 18
SAFETY PRECAUTIONS

CAUTION RISK OF ELECTRIC SHOCK DO NOT OPEN

CAUTION: TO REDUCE THE RISK OF ELECTRIC SHOCK, DO NOT REMOVE COVER (OR BACK). NO USER-SERVICEABLE PARTS INSIDE. REFER SERVICING TO QUALIFIED SERVICE PERSONNEL.

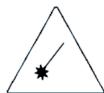
The lightning flash with arrowhead symbol within an equilateral triangle is intended to alert the user to the presence of uninsulated "dangerous voltage" within the product's enclosure that may be of sufficient magnitude to constitute a risk of electric shock to persons.

The exclamation point within an equilateral triangle is intended to alert the user to the presence of important operating and maintenance (servicing) instructions in the literature accompanying the appliance.
DANGER:
Invisible and hazardous laser radiation when open and interlock failed or defeated.
Avoid direct exposure to beam.
WARNING:
To reduce the risk of fire or electric shock, do not expose this appliance to rain or moisture. The apparatus shall not be exposed to dripping or splashing and no objects filled with liquids, such as vases, shall be placed on the apparatus. The mains plug is used as the disconnect device, the disconnect device shall remain readily operable. In order to disconnect the apparatus from the mains completely, the mains plug should be disconnected from the mains socket outlet completely.
SURGE PROTECTORS
It is recommended to use a surge protector for AC connection. Lightning and power surges ARE NOT covered under warranty for this product.
LASER SAFETY
This unit employs an optical laser beam system in the CD mechanism, designed with built in safeguards. Do not attempt to disassemble, refer to qualified service personnel. Exposure to this invisible laser light beam may be harmful to the human eye.

THIS IS A CLASS-1 LASER PRODUCT. USE OF CONTROLS, OR ADJUSTMENTS OR PROCEDURES OTHER THAN THOSE SPECIFIED HEREIN, MAY RESULT IN HAZARDOUS LASER LIGHT BEAM EXPOSURE.
SAFETY INSTRUCTIONS
PLEASE READ BEFORE OPERATING THIS EQUIPMENT.
Before using the unit, be sure to read all operating instructions carefully. Please note that these are general precautions and may not pertain to your unit.
- Read these instructions.
- Keep these instructions.
- Heed all warnings.
- Follow all instructions
- Do not use this product near water and moisture, for example: near a bathtub, washbowl, kitchen sink or laundry tub; in a wet basement; or near a swimming pool.
- Unplug this product from the wall outlet before cleaning. Do not use liquid cleaners or aerosol cleaners. It may damage the screen. Use a dry cloth for cleaning only.
- Slots and openings in the cabinet and in the back or bottom are provided for ventilation, to ensure reliable operation of the product and to protect it from overheating. These openings must not be blocked or covered. The openings should never be blocked by placing the product on a bed, sofa, rug or other similar surface. This product should never be placed near or over a radiator or heat source. This product should not be placed in a built-in installation such as a bookcase or rack unless proper ventilation is provided or the manufacturer's instructions have been adhered to.
- Do not install near any heat sources such as radiators, heat registers, stoves, or other apparatus (including amplifiers) that produce heat.
- Do not defeat the safety purpose of the polarized or grounding type plug. A polarized plug has two blades with one wider than the other. A grounding type plug has two blades and a third grounding prong. The wide blade or the third prong is provided for your safety. If the provided plug does not fit into your outlet, consult an electrician for replacement of the obsolete outlet.
- Protect the power cord from being walked on or pinched particularly at plugs, convenience receptacles, and the point where they exit from the apparatus.
- Only use attachments/accessories specified by the manufacturer.
- Unplug this apparatus during lightning storms or when unused for long periods of time.
- Refer all servicing to qualified service personnel. Servicing is required when the apparatus has been damaged in any way, such as power-supply cord or plug is damaged, liquid has been spilled or objects have fallen into the apparatus, the apparatus has been exposed to rain or moisture does not operate normally, or has been dropped.
- This product should be operated only from the type of power source indicated on the marking label. If you are not sure of the type of power supply to your home, consult your appliance dealer or local power company. For products intended to operate from battery power, or other sources, refer to the operating instructions.
- Do not overload wall outlets and extension cords as this can result in a risk of fire or electric shock.
- Never push objects of any kind into this product through openings as they may touch dangerous voltage points or short out parts that could result in fire or electric shock. Never spill or spray any type of liquid on the product.
- Do not attempt to service this product yourself as opening or removing covers may expose you to dangerous voltage or other hazards. Refer all servicing to qualified service personnel.
- Upon completion of any service or repairs to this product, ask the service technician to perform safety checks to determine that the product is in proper operating condition.
UNPACKING THE DEVICE
When unpacking, ensure that the following elements are included:
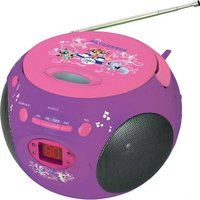
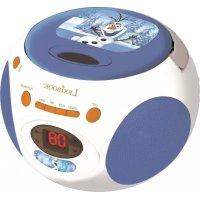
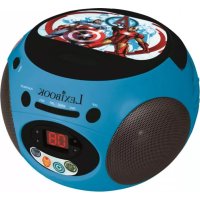
1 x Spider-Man CD Boombox
1 x AC cord
1 x instruction manual
WARNING: All packaging materials, such as tape, plastic sheets, wire ties and tags are not part of this CD Boombox and should be discarded.
POWER SOURCES
The Spider-Man CD Boombox operates on AC 230V - 50Hz or with 8 x C size --- batteries (not included).
AC operation
- Check that the unit is switched off.
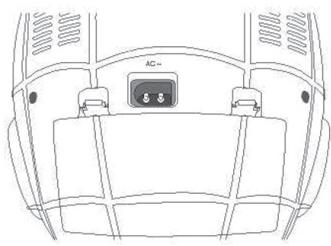
- Insert the small end of the AC cord into the AC socket at the back of the unit.
- Plug the other end of the AC cord into any convenient AC 230V - 50Hz power outlet.
Battery installation
- To install the batteries, open the battery compartment located at the back of the unit by pressing in on the tabs, then lifting it off.
- Insert 8 × C size batteries (not included) observing the polarity indicated in the compartment, and as per the diagram shown below.
- Close the battery compartment.
Note: The AC power cord must be disconnected from the AC socket on the rear of the unit in order for the product to operate on battery power.

WARNING: If the unit malfunctions or receives an electrostatic shock, turn the unit off and on again. If this proves to be ineffective, remove the batteries and insert them again.
Non-rechargeable batteries are not to be recharged. Rechargeable batteries are to be removed from the toy before being charged. Rechargeable batteries are only to be charged under adult supervision. Different types of batteries or new and used batteries are not to be mixed. Only batteries of the same or equivalent type as recommended are to be used. Batteries are to be inserted with the correct polarity. Exhausted batteries are to be removed from the toy. The supply terminals are not to be short circuited. Do not throw batteries into a fire. Remove the batteries if you are not going to use the game for a long period of time.
CARE AND MAINTENANCE
Caring for discs
- Treat the disc carefully. Handle the disc only by its edges. Never allow your fingers to come in contact with the shiny, unprinted side of the disc.

- Do not attach adhesive tape, stickers, etc. to the disc label.
- Clean the disc periodically with a soft, lint-free, dry cloth. Never use detergents or abrasive cleaners to clean the disc. If necessary, use a CD cleaning kit.
-
If a disc skips or gets stuck on a section of the disc, it is probably dirty or damaged (scratched).
-
When cleaning the disc, wipe in straight lines from the centre of the disc to the outer edge of the disc. Never wipe in circular motions.

- This unit is designed to play only compact discs bearing the identification logo as shown here. Other discs may not conform to the CD standard and may not play properly.

- Discs should be stored in their cases after each use to avoid damage.
- Do not expose discs to direct sunlight, high temperatures or dust, etc.
- Prolonged exposure or extreme temperatures can warp the disc.
- Do not stick or write anything on either side of the disc. Sharp writing instruments, or ink, may damage the surface.
Cleaning the unit
- To prevent fire or shock hazard, disconnect your unit from the AC power source when cleaning.
- The finish on your unit may be cleaned with a dust cloth and cared for as other furniture. Use caution when cleaning and wiping the plastic parts.
- Mild soap and a damp cloth may be used on the front panel.
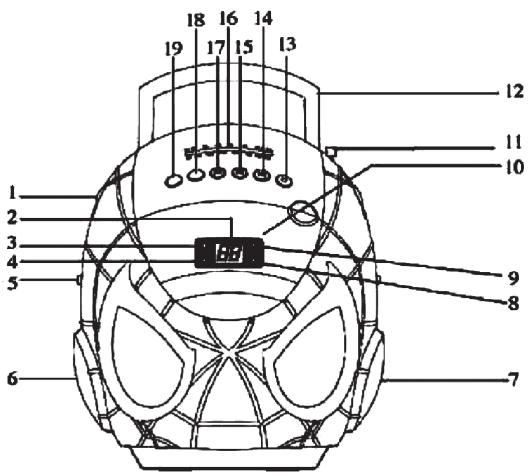
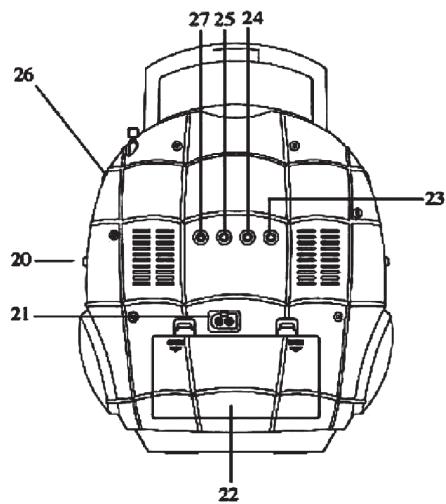
LOCATION OF CONTROLS

English
-
Function selector (CD/ RADIO/ AUX/ POWER OFF)
-
Volume control
- LED display
- Power indicator
- FM Stereo indicator
6.Left speaker - Right speaker
- Repeat indicator
- Play indicator
- CD door
- FM antenna
- Carrying handle
- Stop button
14.F.FWD button - PLAY/PAUSE button
- Radio scale
- REW button
- Program button
- Repeat button
- Band selector (AM/FM ST. /FM MONO)
- AC jack
- Battery compartment
- Headphones jack
- LINE OUT jack
- AUX IN jack
- Tuning control
- Microphone jack
HEADPHONES CONNECTION
Plug any normal headphones (not included) with a 3.5mm jack plug into the headphones jack located at the back of the unit. When the headphones are in use, the speakers are turned off.
CAUTION: Too high volume, especially when using headphones, can damage your hearing. For this reason, please turn the volume down before connecting the headphones.
RADIO OPERATION
- Slide the function selector to the radio position to turn the unit on.
- Slide the band selector to select AM, FM ST (stereo) or FM Mono for the desired radio band.
- Use the tuning control to select the desired radio station.
- Adjust the volume control.
- To switch off the radio, slide the function selector to the POWER OFF position.
Note: To ensure maximum FM tuner sensitivity, the FM wire antenna should be fully extended to obtain the best possible reception. Avoid close proximity to the speakers and other electrical appliance. For FM stereo reception, the FM stereo indicator will light steadily when a stereo program is being received. When tuning in AM reception, to ensure best AM sensitivity, try repositioning the unit until the best reception is obtained.
CD OPERATION
Play a CD
- To play a CD, pull open the CD door, and carefully place a disc on the centre spindle with the printed label side facing up.
- Close the CD door and slide the function selection button to the CD position to turn the unit on. The LED display will show the total number of tracks on the disc.
- Press the PLAY/PAUSE button . The PLAY indicator will light and the CD will start playing from the first track.
- Adjust the volume control to set the sound level.
- To suspend playing, press the PLAY/PAUSE button again. The track number will flash and the PLAY indicator will go off. To resume playing, press the PLAY/PAUSE button once again.
- To stop playing, press the Stop button.
F.FWD▶I button/REW I按钮
- When the CD is stopped, to play your favourite track directly, locate the desired track using the F.FWD or the REW buttons and press the PLAY/PAUSE button
- When listening to a CD, press the F.FWD button to play the next track, and press the REW button to play the previous track.
- To search forward or backward through the playing track, press and hold the F.FWD or the REW I buttons to locate a specific musical passage. The player will move forward or backward at high speed as long as the button is pressed. Stop pressing the button to return to normal playback.
Note:
- If a disc is installed incorrectly, dirty or damaged, it will not play.
- As each track is played, the track number is shown on the display.
- To prevent damage to the disc, never open the CD door while the disc is rotating. Wait for the disc to stop before opening the CD door. Never touch the lens when the CD door is open.
- Do not use the carrying handle when playing CD. The CD should only be used on a steady surface.
Repeat
- To repeat continuously a single track, press the repeat button once while in play mode. The repeat indicator will flash.
- To repeat all the tracks, press the repeat button twice while in play mode. The repeat indicator lights steadily.
- To cancel the repeat function, repeatedly press the repeat button until the repeat indication goes off.
CD PROGRAMED PLAY
Use the program function to preselect the order in which a sequence of tracks will be played.
- Slide the function selector to the CD position.
- Press the program button, "01" will blink on the display.
- Use the F.FWD or REW buttons to select the first track to include in the programmed sequence.
- Press the program button again to confirm and store the track.
- Repeat steps 3 and 4 to program the other desired tracks.
- Press to begin playback. The tracks will be played in the programmed order.
Note:
- To cancel the program function, press the stop button twice while in play mode.
- During program setting, press the stop button or open the CD door.
AUX IN OPERATION
You can play music through the speakers of this CD Boombox by connecting its AUX IN jack to your MP3 or other digital audio player.
- Plug one end of an audio cable (not included) into the AUX IN jack located at the back of the unit, and the other end of the cable to the line out jack of the device you want to connect.
- Slide the function selector to the AUX position.
- Adjust volume control to your desired listening level.
LINE OUT OPERATION
- Slide the function selector to the CD or the radio position.
- Plug in a connection cable in the Line Out jack located at the back of the unit to connect it to other amplifiers.
MICROPHONE CONNECTION
To use a microphone:
- Connect the microphone (not included) to the microphone jack located at the back of the unit.
- You can now use the microphone to sing your favourite tunes.
Note: To avoid feedback noise, keep the microphone away from the speaker or reduce the volume level until the noise disappear.
SPECIFICATIONS
AUDIO
Output power 1W+1W
Frequency range (AM) 540 - 1650KHZ
Frequency range (FM) 88 - 108.MHz
Speaker Impedance 8 Ohms
GENERAL
Power Supply. AC - 230V, 50Hz, or DC = 12V (1.5V "C" size batteries x 8, not included)
MAINTENANCE
To prevent fire or shock hazard, disconnect your unit from the AC power source when cleaning. The finish on your unit may be cleaned with a dust cloth and cared for as other furniture. Use a soft, clean cloth moistened with plain, lukewarm water to clean the exterior of the unit. Use caution when cleaning and wiping the plastic parts. Mild soap and a damp cloth may be used on the front panel.
WARRANTY
This product is covered by our 2-year warranty. For any claim under the warranty or after sale service, please contact your distributor and present a valid proof of purchase. Our warranty covers any manufacturing material and workmanship defect, with the exception of any deterioration arising from the non-observance of the instruction manual or from any careless action implemented on this item (such as dismantling, exposition to heat and humidity, etc.). It is recommended to keep the packaging for any further reference. In a bid to keep improving our services, we could implement modification on the colours and the details of the product shown on the packaging.
NOTE: Please keep this instruction manual, it contains important information.
©2008 LEXIBOOK®
©2008 Marvel Characters, Inc.
LEXIBOOK UK Ltd,
Unit 10 Petersfield Industrial Estate,
Bedford Road, Petersfield, Hampshire,
GU32 3QA, United Kingdom,
Helpline: 0808 100 3015, http://www.lexibook.com
Environmental Protection
Unwanted electrical appliances can be recycled and should not be discarded along with regular household waste! Please actively support the conservation of resources and help protect the environment by returning this appliance to a collection centre (if available).

Espanol
INDICE
©2008 Marvel Characters, Inc.
Lexibook Ibérica S.L.
©2008 Marvel Characters, Inc.
Lexibook Electrónica Lda,
Quinta dos loios,
Praceta José Domingos dos Santos, 6B-8A,
2835-343 Lavradio-Barreiro, Portugal.
©2008 Marvel Characters, Inc.
Lexibook Italia S.r.l.
Via Eustachi, 45,
©2008 Marvel Characters, Inc.
"hat is your overall
What is your overall
Very satisfactory/Tres
Disapponting/Decovery
Disappointing/Deceval
Please feel free to le
#
#
#
#
Find all our new products / Retrouvez toute notreactualite: http://www.lexibook.com
- MISE EN GARDE RISQUE D'LECTROCUTION NE PAS OUVRIR
- TENSION DANGEREUSE :
- CLASSE 1 - PRODUIT LASER
- INSTRUCTIONS RELATIVES A LA SECURITE
- LIRE LES INSTRUCTIONS SUIVANTES AVANT TOUTE UTILISATION DE L'APPAREIL.
- EMPLACEMENT DES TOUCHES
- SAFETY PRECAUTIONS
- DANGER:
- WARNING:
- SURGE PROTECTORS
- LASER SAFETY
- SAFETY INSTRUCTIONS
- PLEASE READ BEFORE OPERATING THIS EQUIPMENT.
- UNPACKING THE DEVICE
- POWER SOURCES
- AC operation
- Battery installation
- CARE AND MAINTENANCE
- Caring for discs
- Cleaning the unit
- LOCATION OF CONTROLS
- English
- HEADPHONES CONNECTION
- RADIO OPERATION
- CD OPERATION
- Play a CD
- F.FWD▶I button/REW I按钮
- Note:
- Repeat
- CD PROGRAMED PLAY
- AUX IN OPERATION
- LINE OUT OPERATION
- MICROPHONE CONNECTION
- SPECIFICATIONS
- AUDIO
- GENERAL
- MAINTENANCE
- WARRANTY
- Espanol
- INDICE
- "hat is your overall
- What is your overall
- Very satisfactory/Tres
- Disapponting/Decovery
- Disappointing/Deceval
- Please feel free to le
- #
Brand : LEXIBOOK
Model : RCD10SP
Category : Mp3 player